manuals.online logo
Brands
  1. Home
  2. •
  3. Brands
  4. •
  5. Crystal Quest
  6. •
  7. Water Filtration System
  8. •
  9. Crystal Quest Thunder CQE-CT-00142 User manual

Crystal Quest Thunder CQE-CT-00142 User manual

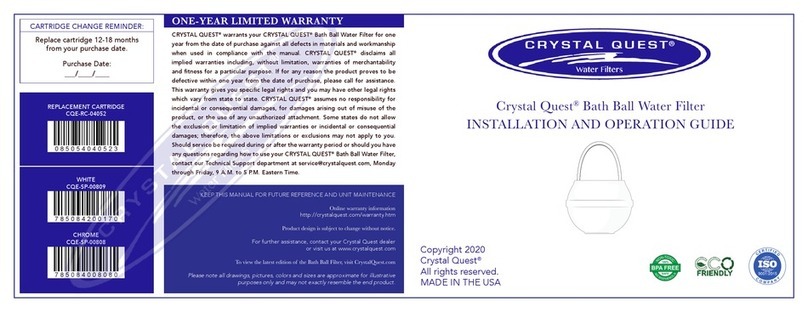
Crystal Quest®Countertop Thunder® Reverse Osmosis System
INSTALLATION AND OPERATION GUIDE
ONLINE WARRANTY INFORMATION
CrystalQuest.com/warranty.html
Copyright 2020
Crystal Quest®
All rights reserved
MADE IN THE USA
2
INSTALLATION INSTRUCTIONS
CARE AND OPTIMUM USE
TROUBLESHOOTING
Remove red cap. Follow the instructions below to install your countertop system.
1. Use COLD water only. Do not use on hot water. This may damage the cartridges.
2. The contaminants or other substances removed or reduced by this water lter are not
necessarily in all users’ area.
3. Soak the diverter in a vinegar and water solution once a month. This will clean deposits that
form from feed water and help prevent corrosion of internal diverter mechanisms
1. Low water pressure or no water ow. Very low water temperatures may cause water ow
through membrane to slow or stop. Wait for temperature to rise.
2. High levels of hardness in feed water. A crystallized layer may form around membrane in feed
water with high levels of hardness, causing water to ow improperly. Soak membrane in
vinegar and water solution for 2 to 3 hours to clean membrane. Rinse thoroughly before using.
3. Exhausted lter cartridges. Exhausted cartridges may clog. If steps above do not bring
results, lters should be changed.
OPERATING SPECIFICATIONS:
Pressure Range: 45 psi and up
Temperate Range: 40°-85° F (4.4-29.4°C)
Optimum Service Flow: 0.30 gpm at 60 psi
Diverter
Diverter
Gasket
Outside
threads on
faucet
WaterFilters
CRYSTALQUEST
®
®
®
1. Remove the aerator from faucet. 2. Determine the need for an adapter.
Choose correct adapter as needed.
3. Attach the diverter to the faucet and
turn until tight.
Place the water filter in desired
location on the countertop.
Insert spout into spout
housing and push
it down firmly.
4. Use the large clamp to tighten unit
hose to the faucet.
GASKET Adapters
(use size as needed)
OUTSIDE
threads
INSIDE
threads
Aerator
®
®
®
Fig 1
1
293
6
7
8
4
5
Countertop Thunder® RO Syste m
1-Diverte r
2-Tubing
3-Pre-tr eatment cartridge (activated cartridge )
4-Auto shut-o ff valve
5-Membrane
6-Post-tr eatment cartridg e
7-Spou t
8-Drain line/flow restrictor
9-Pre-filter (optional )
Countertop Thunder® RO System
1-Diverter
2-Tubing
3-Pre-treatment cartridge (activated cartridge)
4-Auto shut-off valve
5-Membrane
6-Post-treatment cartridge
7-Spout
8-Drain line/ow restrictor
9-Pre-lter (optional)
3
IMPORTANT INFORMATION
CHANGING MEMBRANE
PRE-FILTER INSTALLATION
QUICK-FITTING
Your Countertop Thunder™Reverse Osmosis Water Filter
system cartridges must be replaced at regular intervals to
maintain proper performance.
• The lter cartridges have a limited service life.* Use
only factory approved cartridges.
• Changes in taste, odor, and ow of the water being
ltered indicate that cartridges should be replaced.
• Do not use non-Crystal Quest®replacement cartridges.
• Do not use non-Crystal Quest®parts or modify/tamper
with unit.
*Life of the cartridge varies with water consumption and water condition
1. Remove the water inlet elbow from pre-treatment cartridge by
turning counterclockwise (Fig 2).
2. Thread male end of pre-lter (Fig 1, #9) into pre-treatment cartridge
(Fig 1, #3) and tighten clockwise. You may need to use thread seal
tape.
3. Thread previous elbow (Fig 2, #3). Thread tape may be needed.
4. Turn on water supply and run for 2 minutes prior to rst use.
1. Remove security lock from quick tting (Fig A).
2. Push and hold collect against body while pulling tube out (Fig B).
3. Remove and throw away the used cartridge.
4. Insert the new lter cartridge in the clips.
5. Push the tubing through collet until it seals rmly at bottom of
quick tting (Fig C).
6. Put the quick tting security lock back.
7. Turn on water and check for leaks.
8. Flush 4-5 gallons of water through lter before use.
1. Loosen the connector
fitting counterclockwise.
Pull the filter out of the main fold.
2. Wrap the connector fittin g
with thr ead seal tape
and connect it to a ne w
cartridge .
1. Loosen the
connector fitting
counterclockwise.
2. Remove the membrane
housing cap
counterclockwise.
3. Remove the
membrane with
a pincer.
4. Insert the membrane by
carefully pushing the
spigot end into the
socket at the far end of
the housing until
completely sealed. ®
5. Wrap the connector fitting
with thread seal tape and
connect it to a new cartridge.
Fig 2
1 2 3
Fig
C
Fig
B
Fig
A
Quick fitting
security
lock
4
CRYSTAL QUEST®warrants your CRYSTAL QUEST®Thunder™Countertop Reverse Osmosis Water Filter
for one year from the date of purchase against all defects in materials and workmanship when used in
compliance with the manual. CRYSTAL QUEST®disclaims all implied warranties including, without limitation,
warranties of merchantability and tness for a particular purpose. If for any reason the product proves to be
defective within one year from the date of purchase (90 days for lter cartridges), please call for assistance.
This warranty gives you specic legal rights and you may have other legal rights which vary from state to
state. CRYSTAL QUEST®assumes no responsibility for incidental or consequential damages, for damages
arising out of misuse of the product, or the use of any unauthorized attachment. Some states do not allow
the exclusion or limitation of implied warranties or incidental or consequential damages; therefore, the
above limitations of exclusions may not apply to you. Should service be required during or after the warranty
period or should you have any questions regarding how to use your CRYSTAL QUEST®Thunder™Countertop
Reverse Osmosis Water Filter, contact our Technical Support Department at [email protected],
Monday through Friday, 9 A.M. to 5 P.M. Eastern Time.
KEEP THIS MANUAL FOR FUTURE REFERENCE AND UNIT MAINTENANCE
Online warranty information
http://crystalquest.com/warranty.htm
Product design is subject to change without notice.
For further assistance, contact your Crystal Quest dealer
or visit us at www.crystalquest.com
To view the latest edition of the Countertop Thunder® Reverse Osmosis System Guide, visit CrystalQuest.com
Please note all drawings, pictures, colors and sizes are approximate for illustrative purposes only and may
not exactly resemble the end product.
ONE-YEAR LIMITED WARRANTY
CQE-CT-00142

This manual suits for next models

1

Other Crystal Quest Water Filtration System manuals
Crystal Quest 1,000 C Operating instructions

Crystal Quest

Crystal Quest 1,000 C Operating instructions

Crystal Quest 200 User manual

Crystal Quest

Crystal Quest 200 User manual

Crystal Quest CQE-WH-01103 Operating instructions

Crystal Quest

Crystal Quest CQE-WH-01103 Operating instructions

Crystal Quest Thunder Series User manual

Crystal Quest

Crystal Quest Thunder Series User manual

Crystal Quest CQE-SP-00809 Operating instructions

Crystal Quest

Crystal Quest CQE-SP-00809 Operating instructions

Crystal Quest Thunder Reverse Osmosis User manual

Crystal Quest

Crystal Quest Thunder Reverse Osmosis User manual

Crystal Quest CQE-WH-01101 Operating instructions

Crystal Quest

Crystal Quest CQE-WH-01101 Operating instructions

Crystal Quest CQE-RC-00808 Operating instructions

Crystal Quest

Crystal Quest CQE-RC-00808 Operating instructions

Crystal Quest Whole House Operating instructions

Crystal Quest

Crystal Quest Whole House Operating instructions

Crystal Quest CQE-PI-00601 Operating instructions

Crystal Quest

Crystal Quest CQE-PI-00601 Operating instructions

Crystal Quest 5600 Operating instructions

Crystal Quest

Crystal Quest 5600 Operating instructions

Crystal Quest Mega 1000 Operating instructions

Crystal Quest

Crystal Quest Mega 1000 Operating instructions

Crystal Quest Voyager Series Operating instructions

Crystal Quest

Crystal Quest Voyager Series Operating instructions

Popular Water Filtration System manuals by other brands
Hydac OLF-5/Z Installation and maintenance instructions

Hydac

Hydac OLF-5/Z Installation and maintenance instructions

Filtration Group Pi 210 Series manual

Filtration Group

Filtration Group Pi 210 Series manual

Philips WP4161/90 user manual

Philips

Philips WP4161/90 user manual

Vivreau PURITY 450 Quell ST manual

Vivreau

Vivreau PURITY 450 Quell ST manual

DRYDEN AQUA DA-GEN TOUCH 90-RX user manual

DRYDEN AQUA

DRYDEN AQUA DA-GEN TOUCH 90-RX user manual

Simpex Electronic Fandis FF Series Technical description

Simpex Electronic

Simpex Electronic Fandis FF Series Technical description

Graf Optimax-Pro Instruction for installation and maintenance

Graf

Graf Optimax-Pro Instruction for installation and maintenance

IDEAL H2O 100 GPD Setup and maintenance guide

IDEAL H2O

IDEAL H2O 100 GPD Setup and maintenance guide

Xtant CM12L Installation

Xtant

Xtant CM12L Installation

Clean Water Living Water VORTEXer user guide

Clean Water

Clean Water Living Water VORTEXer user guide

PristineHydro WRS-UC3 installation manual

PristineHydro

PristineHydro WRS-UC3 installation manual

Klingenburg AS2 manual

Klingenburg

Klingenburg AS2 manual

Anchor AF-6001 Quick setup guide

Anchor

Anchor AF-6001 Quick setup guide

Acuva Eco installation instructions

Acuva

Acuva Eco installation instructions

Pentair FULLFLOXF C Series Installation and user guide

Pentair

Pentair FULLFLOXF C Series Installation and user guide

Deltec FR 509 Operating instructions and spare parts lists

Deltec

Deltec FR 509 Operating instructions and spare parts lists

Pentair EVERPURE H Series installation instructions

Pentair

Pentair EVERPURE H Series installation instructions

Fahl LARYVOX TOUCH HME Instructions for use

Fahl

Fahl LARYVOX TOUCH HME Instructions for use

manuals.online logo
manuals.online logoBrands
  • About & Mission
  • Contact us
  • Privacy Policy
  • Terms and Conditions

Copyright 2025 Manuals.Online. All Rights Reserved.