manuals.online logo
Brands
  1. Home
  2. •
  3. Brands
  4. •
  5. Cuisinart
  6. •
  7. Oven
  8. •
  9. Cuisinart BRK Series User manual

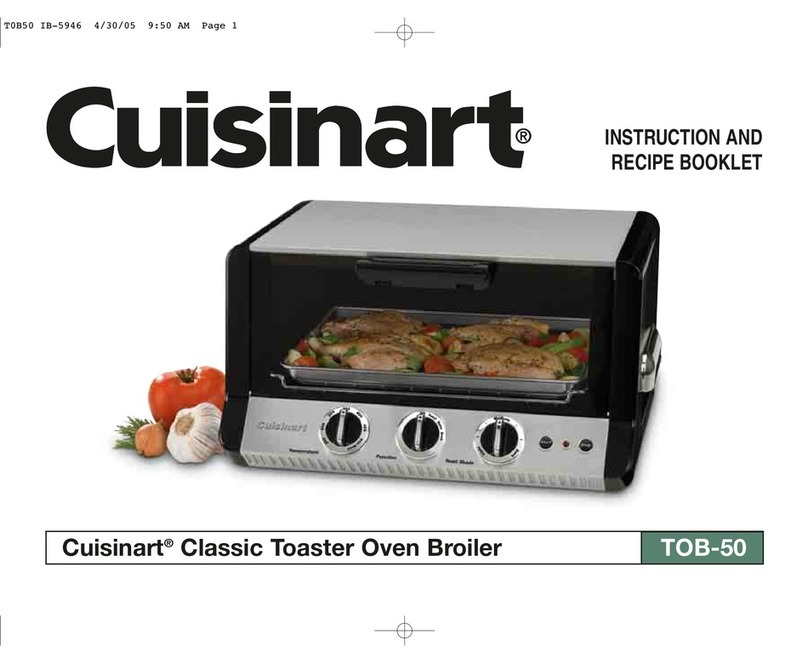
Cuisinart BRK Series User manual

For your safety and continued enjoyment of this product, always read the instruction book carefully before using.
Cuisinart
™
Brick Oven
BRK-Series
INSTRUCTION
BOOKLET
AND RECIPE
BOOKLET
IB-7244-CAN
23
IMPORTANT
SAFEGUARDS
When using electrical appliances, basic
safety precautions should always be
followed including the following:
1. Read all instructions before using the
appliance.
2. Do not touch hot surfaces.
Use handles.
3. To protect against electrical shock, do
not place any part of the Cuisinart™
Brick Oven in water or other liquid.
See instructions for cleaning.
4. This appliance should not be used by
or near children, or individuals with
certain disabilities.
5. Unplug from outlet when not in use
and before cleaning. Allow to cool
before cleaning or handling.
6. Do not operate any appliance with a
damaged cord or plug or after the
appliance has malfunctioned or has
been dropped or damaged in any way
or is not operating properly. Return
the brick oven to the store or retailer
where purchased for examination
or repair.
7. The use of accessory attachments not
recommended by Cuisinart may
cause injury.
8. Do not use outdoors.
9. Do not let cord hang over the edge of
the table or countertop where it could
be pulled on inadvertently by children
or pets, or touch hot surfaces, which
could damage the cord.
10. Do not place brick oven on or near
a hot gas or electric burner or in a
heated oven.
11. Do not use this brick oven for
anything other than its intended
purpose.
12. Extreme caution should be exercised
when using containers constructed of
materials other than metal or glass in
the brick oven.
13. To avoid burns, use extreme caution
when removing the tray or disposing
of hot grease.
14. When not in use, always unplug the
unit. Do not store any materials other
than manufacturer’s recommended
accessories in this oven.
15. Do not place any of the following
materials in the oven: paper,
cardboard, plastic and similar
products.
16. Do not cover crumb tray or any part
of the oven with metal foil. This will
cause overheating of the oven.
17. Oversize foods, metal foil packages
and utensils must not be inserted in
the brick oven as they may involve a
risk of fire or electric shock.
18. A fire may occur if the brick oven is
covered or touching flammable
materials such as curtains, draperies
and walls when in operation. Do not
store any items on top of the
appliance when in operation. Do not
operate under wall cabinets.
19. Do not clean with metal scouring
pads. Pieces can break off the pad
and touch electrical parts, involving a
risk of electric shock.
20. Do not attempt to dislodge food when
the brick oven is plugged into an
electrical outlet.
21. Warning: To avoid possibility of fire,
NEVER leave the brick oven
unattended during use.
22. Use recommended temperature
settings for baking and roasting.
23. Do not rest cooking utensils or
baking dishes on glass door.
24. Turn the function dial to the off
position to turn off brick oven.
SAVE THESE
INSTRUCTIONS
FOR HOUSEHOLD
USE ONLY
SPECIAL CORD SET
INSTRUCTIONS
A short power supply cord is provided to
reduce the risks resulting from becoming
entangled in or tripping over a longer
cord.
Longer extension cords are available and
may be used if care is exercised in their
use.
If a long extension cord is used, the
marked electrical rating of the extension
cord must be at least as great as the
electrical rating of the appliance, and the
longer cord should be arranged so that it
will not drape over the counter top or
tabletop where it can be tripped over or
pulled on by children.
NOTICE
This appliance has a polarized plug (one
blade is wider that the other). As a safety
feature, this plug will fit in a polarized
outlet only one way. If the plug does not
fit fully in the outlet, reverse the plug. If it
still does not fit, contact a qualified
electrician. Do not attempt to defeat this
safety feature.
CONTENTS
Important Safeguards........................... 2
Special Cord Set Instructions .............. 3
Introduction .......................................... 3
Parts and Features............................... 4
Before First Use ................................... 5
Use and Care ....................................... 5
Oven Rack Positions............................ 5
General Guidelines ............................... 5
Cleaning and Maintenance .................. 6
Recipes................................................. 8
Warranty ............................................. 27
INTRODUCTION
Get ready to enjoy all the benefits of a
real brick oven right at home! Bread and
pizza crusts will be lighter and crispier,
chickens will roast to a perfect golden
brown, and your pies will be the talk of
the town! Cuisinart lets you decide which
method to use in cooking family
favourites or company cuisine. We’ve
even included some of our favourite brick
oven recipes in case you run out of your
own. Have fun savoring even more of the
good life, with Cuisinart!
Position A
Position B
Position C
12345
6
11 7
12
45
PARTS AND FEATURES
1. Temperature Dial
Select desired temperature for
baking, broiling, or convection bake
(select models).
2. Function Dial
Select cooking method – Toast, Bake,
Broil, Convection Bake (select
models).
3. Toast Shade Dial
Select the desired toast shade – light,
medium or dark.
4. Toasting Start Button
Push button to start toasting.
5. Toasting Stop Button
Push button to stop toasting in mid-
cycle and shut off oven.
6. Oven On Indicator
Indicator light will remain lit when
oven is in use.
7. Oven Racks (only one is shown)
There are two oven racks and two
different levels for each rack.
Select the best position for the food
in relation to the heating element.
The top rack has a 50% stop feature
so the rack stops halfway out of the
oven. It can be removed by lifting the
front of the rack and sliding it out.
8. Slide-out Crumb Tray (not shown)
Slides out from back of the brick
oven for easy cleaning.
9. Cord Storage (not shown)
Takes up excess cord and keeps
countertop neat.
10. Easy-Clean Interior (not shown)
To clean the bricks lining the sides of
the oven, use a clean, damp cloth.
Over time the stone will darken,
which is part of its natural seasoning
process. It will not affect cooking
performance nor taste of food. Where
there are no bricks, the walls are
coated with a nonstick interior.
11. Baking/Broiling Pan with Drip Tray
A baking/broiling pan is included for
your convenience. A drip tray is also
included for use when broiling. The
drip tray has two positions to accom-
modate a variety of meats, poultry,
fish and baked goods.
12. Baking Stone
To achieve best results when baking
bread, pizza and pie crusts, a baking
stone is included. The stone absorbs
excess moisture and distributes heat
evenly while it helps to make the
crust light and crispy. It fits on the
rack to slide in and out of the oven
easily.
BEFORE THE FIRST USE
Place your oven on a flat surface.
Before using your oven, move it two to
four inches away from the wall and from
any objects on the countertop. Do not
use on heat-sensitive surface.
DO NOT STORE OBJECTS ON THE
TOP OF THE OVEN. IF YOU DO,
REMOVE ALL OBJECTS BEFORE YOU
TURN ON YOUR OVEN. THE EXTERIOR
WALLS GET VERY HOT WHEN IN USE.
KEEP OUT OF REACH OF CHILDREN.
USE AND CARE
Unwind the power cord. Check that the
crumb tray is in place and that there is
nothing in the oven. Plug power cord into
the wall outlet.
OVEN RACK POSITIONS
GENERAL GUIDELINES
Baking: The baking function can be used
as you would normally use your kitchen
oven for roasting meats, including chick-
en, or baking cakes, cookies and more.
Broiling:
The broiling function can be
used for beef, chicken, pork, fish and
more. It also can be used to top-brown
casseroles and gratins. Use caution while
broiling: Aluminum foil is not recommend-
ed for covering the drip tray when broiling,
because it will cover the holes in the drip
tray. When broiling fatty foods, grease will
accumulate and may cause a fire.
Convection/Bake (selected models):
The convection/bake function can be
used for all the same functions as
conventional bake or roast, but will
cook faster and more efficiently. With
convection baking the key is the airflow,
so it is important to use the right cooking
pan and place it in the oven as directed in
the rack position diagram above.
Toasting: For even toasting, always have
the rack in rack position B, indicated in
the rack position diagram above. Always
centre your item/items in the middle of
the rack.
WARNING: Placing the rack in the
bottom position or in the top position with
the rack upward while toasting may result
in a fire. Refer to rack position diagram
for proper use.
Turning off the brick oven: Turn the
function dial to off. The indicator light will
turn off.
Broil
There are two positions for the broiling
pan and drip tray to accommodate a
variety of thicknesses of foods to be
broiled (position A and B). Also, the oven
rack can be turned up or down (position
C) depending on the thickness of the food
being broiled. In most cases the oven
rack should be in the higher position.
To broil, set temperature and function
dials to broil. Preheat oven for five
minutes with door closed. After the five
minute preheat period, place the broiling
pan in the oven. Always leave the door
ajar when broiling.
To stop broil operation, turn function dial
to off position.
NOTE: Never use glass oven dishes to broil.
Bake
Your brick oven is equipped with two
oven racks and two rack positions. The
racks can be easily removed and
arranged at various levels. For best
results with conventional baking, do no
use more than one rack at a time.
67
To bake, turn the temperature dial to the
desired temperature and turn function dial
to bake position. Make sure oven rack is
in position B – see rack position diagram
above. The oven indicator light will turn
on. Preheat oven for five to ten minutes
(time will vary depending upon desired
temperature): then begin to bake.
Baking Stone
To bake with the baking stone, preheat
the oven with the stone for 30 minutes.
Use the baking stone when baking bread,
pizza dough, pies and tarts; use
whenever you want a firm, crispy bottom
on your baked goods.
Convection Bake (select models)
Convection baking/roasting uses a fan
circulate heated air around food as it
cooks. For best results use cookie sheets
with no sides and baking dishes and
roasting pans with very low sides to let
maximum airflow reach food. For the
same reason, do not cover foods while
cooking.
Most baking recipes recommend
reducing temperatures by 25 degrees
when using the convection feature.
Always check 10 minutes before
suggested cooking time.
For roasting larger items such as poultry
or roasts, use the recommended
temperature but reduced cooking time.
Start checking progress 20 to 30 minutes
before end-cook time.
To bake: Turn the temperature dial to
desired temperature and turn function dial
to convection/bake position.
If food might drip, place the baking tray
on the rack below the rack that the food
is on. Tray will catch drips and more
airflow will reach food.
When using the baking tray in the bottom
rack position, center it so air flows in
back, as well as front of oven.
Toast
To toast, make sure the oven rack is in
position B as indicated in the diagram on
page 5. If toasting two items centre them
in the middle of the rack. Four items
should be evenly spaced – two in front,
two in back. Six items – three in front,
three in back. Door should be closed.
Browning Selection
Set function dial to toast. Turn toast
shade dial to desired browning setting.
Press start button to begin toasting.
Stop Toasting
When the toasting cycle is finished, the
oven will beep and turn off. If you wish
to stop the toasting cycle before it is
finished, simply press the stop button.
The toaster oven broiler will cancel your
toast cycle.
Important Notes on Toasting
The oven rack must be in position B as
indicated in the rack position diagram on
page 5.
CLEANING AND
MAINTENANCE
1. Always allow the oven to cool com-
pletely before cleaning.
2. Always unplug the oven from the
electrical outlet before cleaning.
3. Do not use abrasive cleansers, as
they will damage the finish. Simply
wipe the exterior with a clean damp
cloth and dry thoroughly. Apply the
cleansing agent to a cloth, not to the
toaster oven, before cleaning.
4. To clean interior walls, use a damp
cloth and a mild liquid soap solution
or a spray solution on a sponge.
Where there are no bricks, the walls
are coated with a nonstick interior.
Never use harsh abrasives or corro-
sive products. These could damage
the oven surface. Never use metal
scouring pads etc. on interior of
oven. DO NOT USE A SOAP
SOLUTION TO CLEAN THE BRICKS
ATTACHED TO THE SIDES.
5. To remove crumbs, slide out the
crumb tray and discard crumbs.
Wipe clean and replace. Crumb tray
is dishwasher-safe. To remove baked-
on grease, soak the tray in hot sudsy
water or use nonabrasive cleaners.
Never operate the oven without the
crumb tray in place.
6. Wire rack, broiling pan and drip tray
are dishwasher-safe. If heavily soiled,
soak in hot sudsy water or use a
nylon scouring pad or nylon brush.
Never wrap the cord around the outside
of the oven. Use the cord storage cleats
on the back of the oven.
To clean the baking stone
The baking stone is oven and freezer safe;
however, to prevent cracking it, do not
subject the stone to extreme temperature
such as freezer directly to oven, or from
oven to cold water.
Do not use the stone on an open flame.
Allow the stone to cool before cleaning.
To remove baked-on foods, scrape with a
spatula and rinse in warm water. Do not
soak or clean in dishwasher or wash with
detergent or soapy water; the stone may
absorb the taste and smell of the
detergent. Let the stone air-dry
completely before your next use.
Your baking stone will darken and retain
some staining with continued use over
time. This is normal and part of the
stone’s natural seasoning process; it will
not affect its cooking performance nor
affect the taste of the food.
Important
After cooking greasy foods and after your
oven has cooled, always clean top interior
of oven. If this is done on a regular basis,
your oven will perform like new.
All of our recipes have been tested in our
kitchen and especially developed to work
in the Cuisinart™Brick Oven. These
mouth-watering recipes are just a
sampling of what the Cuisinart™Brick
Oven can do.
89
RECIPES
Appetizers & Breads
Banana Pecan Crumb Muffins ............ 9
Orange-Anise Scones ......................... 9
Buttermilk Blueberry Crumb Cake .... 10
Roasted Eggplant and
Sweet Pepper Crostini ...................... 10
Spinach, Gorgonzola &
Artichoke Dip..................................... 11
Gougères........................................... 12
Asparagus, Mushroom &
Fontina Quiche .................................. 13
Popovers ........................................... 13
French Boule ..................................... 14
Walnut Rosemary Bread
with Raisins ....................................... 14
Pumpernickel Raisin Bread............... 15
Buttery Dinner Rolls .......................... 16
Focaccia Romana ............................. 16
Side Dishes
Pizza Dough ........................................ 17
Grape Tomato Margherita ................... 17
Roasted Asparagus............................. 18
Butternut Squash and
Potato Gratin....................................... 18
Entrées
Roasted Stuffed Peppers................... 19
Herb Roasted Chicken....................... 19
Hoisin Glazed Cornish Hens .............. 20
Standing Rib Roast ............................ 20
Rack of Lamb with Parmesan
and Herb Crust .................................. 21
Herb Roasted Leg of Lamb................ 22
Rosemary Sage Pork Roast............... 22
Simply Roasted Salmon
and Fennel.......................................... 23
Desserts
Pâte Sucrée........................................ 23
Fresh Berry Tart.................................. 24
Pâte Brisée......................................... 24
Classic Apple Pie ............................... 25
Chocolate Soufflé Cake ..................... 25
Mascarpone Lemon Squares............. 26
Please see Instruction Booklet, page 5,
for information about oven rack posi-
tions, as referred to in recipes that
follow.
Banana Pecan
Crumb Muffins
These muffins are a great way
to use over-ripe bananas.
Makes 6 large muffins
cooking spray
Crumb topping:
¼ cup (50 ml) unbleached,
all-purpose flour
3 tablespoons (45 ml) light brown
sugar
2 tablespoons (30 ml) unsalted
butter, cold and cubed
½ teaspoon (2 ml) ground
cinnamon
¼ cup (50 ml) pecans, toasted and
chopped
1 pinch table salt
Muffin batter:
1 cup (250 ml) unbleached,
all-purpose flour
1½ teaspoons (7 ml) baking powder
¼ teaspoon (1 ml) table salt
¼ teaspoon (1 ml) ground
cinnamon
1 small, ripe banana, mashed
¼ cup (50 ml) packed light brown
sugar
¼ cup (50 ml) whole milk
¼ cup (50 ml) vegetable oil
1 large egg, slightly beaten
¼ cup (50 ml) pecans, toasted
and chopped
Preheat Cuisinart
™
Brick oven to 400°F
(200°C) on the bake setting with the rack
in position A. Lightly coat a 6-cup (1.5 L)
regular muffin pan with nonstick cooking
spray.
Prepare the crumb topping. In a small
bowl, mix the first 6 ingredients together
with a fork, and reserve.
In a small bowl, mix the flour, baking
powder, salt, and cinnamon; reserve.
In a large bowl, mix the banana, brown
sugar, milk, oil and egg using a Cuisinart
®
Hand Mixer. Mix on medium speed until
well blended. Add the flour mixture and
nuts and mix with a fork until just mixed.
Spoon evenly into prepared muffin cups
and top with the reserved crumb topping.
Bake in the preheated oven for about 15
to 20 minutes, or until a cake tester
inserted comes out clean. To ensure even
colour, turn muffin pan halfway through
baking.
Nutritional information per muffin:
Calories 364 (50% from fat) • carb. 41g •
pro. 5g • fat 21g • sat. fat 4g • chol. 47mg •
sod. 274mg • calc. 42mg • fiber 2g
Orange-Anise
Scones
High in calcium, these scones are a
perfect way to jump start the day.
Makes 8 scones
2½ cups (625 ml) unbleached,
all-purpose flour
4 tablespoons (60 ml) granulated
sugar, divided
2 teaspoons (10 ml) baking
powder
2 teaspoons (10 ml) freshly
ground star anise (4 pods)*
1 teaspoon (5 ml) table salt
1 tablespoon (15 ml) orange zest
(1 orange)
6 tablespoons (90 ml) unsalted
butter, cold and cubed
1⁄3 cup (75 ml) fresh or frozen
blueberries (optional)
2⁄3 cup (150 ml) buttermilk
1 large egg
2 tablespoons (30 ml) heavy
cream
Preheat the Cuisinart
™
Brick Oven to
350°F (180°C) on the bake setting with the
rack in position A. Line the baking tray
with parchment paper.
Place the flour, 3 tablespoons (45 ml) of
sugar, baking powder, star anise, salt, and
zest in the work bowl of a Cuisinart
®
Food
Processor fitted with the metal chopping
blade. Process 10 seconds. Add the
butter to the work bowl and pulse until the
mixture resembles coarse crumbs.
Pour the mixture onto a clean counter/
large cutting board and add the
blueberries. Make a well in the centre of
10 11
the dry mixture. Whisk the buttermilk and
egg together and slowly pour the mixture,
¼ at a time, into the well of the dry
ingredients. After each addition use a
pastry cutter to mix the dough together.
Continue to slowly add the liquids to the
dough and mix until the mixture is moist,
but not a wet dough.
Form the dough into a 10-inch (25 cm)
long cylinder. Using a sharp knife, cut into
8 even pieces. Place on prepared baking
sheet. Brush each scone with heavy
cream and the reserved sugar. Bake in
preheated oven for about 20 minutes or
until golden brown. To ensure even colour,
turn baking tray halfway through baking.
Let cool before serving.
*May substitute allspice if star anise is
unavailable.
Nutritional information per scone:
Calories 278 (36% from fat) • carb. 39g •
pro. 6g • fat 11g • sat. fat 7g • chol. 56mg •
sod. 448mg • calc. 110mg • fiber 1g
Buttermilk
Blueberry
Crumb Cake
Makes one 8-inch (20 cm) cake,
or 12 servings
cooking spray
Crumb topping:
½ cup (125 ml) unbleached,
all-purpose flour
¼ cup (50 ml) packed light brown
sugar
¼ cup (50 ml) granulated sugar
1 teaspoon (5 ml) ground
cinnamon
1 pinch table salt
½ teaspoon (2 ml) vanilla extract
4 tablespoons (60 ml) unsalted
butter, cold and cubed
Muffin Batter:
11⁄3cups (325 ml) unbleached,
all-purpose flour
¾ teaspoon (3.75 ml) baking soda
¼ teaspoon (1 ml) table salt
1⁄3cup (75 ml) unsalted butter, cut
into 5 pieces
½ cup + 3 tablespoons (170 ml)
granulated sugar
1 large egg
½ teaspoon (2 ml) vanilla extract
1⁄3cup (75 ml) buttermilk
1¼ cups (300 ml) fresh blueberries
Preheat the Cuisinart
™
Brick Oven to
350°F (180°C) on the bake setting with the
rack in position A. Lightly coat an 8-inch
(20 cm) square baking pan with nonstick
cooking spray. Reserve.
Combine the first 7 ingredients in the
work bowl of a Cuisinart
®
Food Processor
fitted with the metal chopping blade.
Pulse 3 to 4 times, until the mixture is just
combined. Reserve.
In a small bowl, mix together the flour,
baking soda, and salt. Reserve.
Place the butter and sugar in a medium
bowl and mix with a Cuisinart
®
Hand
Mixer until light and fluffy, about 1 minute.
Add the egg and vanilla and beat until
fully combined. Add the reserved dry
ingredients,
1
/
3
at a time, and the
buttermilk,
1
/
3
at time, alternating the two
starting with the buttermilk and ending
with the dry ingredients. Pour the batter
into the prepared pan. Make a layer of the
blueberries on top of the batter, slightly
pressing them down. Cover evenly with
the reserved crumb topping.
Bake in preheated oven for 50 to 60
minutes, or until a cake tester inserted
into the cake comes out clean.
Nutritional information per serving:
Calories 243 (35% from fat) • carb. 37g •
pro. 3g • fat 10g • sat. fat • 6g • chol. 42mg •
sod. 182mg • calc. 23mg • fiber 1g
Roasted Eggplant
and Sweet Pepper
Crostini
Makes 12 crostini
4 tablespoons (60 ml) extra virgin
olive oil, divided
1 small Italian eggplant, about 8
ounces (226 g), cut into ½-inch
(1.25 cm) dice
½ large red bell pepper (about 3 to
4 ounces [85 to 115g]), cut into
½-inch (1.25 cm) dice
½ large yellow bell pepper (about 3
to 4 ounces [85 to 115g]), cut
into ½-inch (1.25cm) dice
2 ounces (60 g) sweet onion, cut
into ½- inch (1.25 cm) dice
3 garlic cloves, divided and
smashed
½ teaspoon (2 ml) kosher salt
¼ teaspoon (1 ml) freshly ground
pepper
1 tablespoon (15 ml) basil, very
thinly sliced (or chiffonade)
12 ½-inch (1.25 cm) slices of rustic
Italian bread with a tight crumb
Preheat Cuisinart
™
Brick Oven to 375°F
(190°C) on bake with rack in position B.
Line the baking tray with aluminum foil
and coat with 2 teaspoons (10 ml) of olive
oil.
Toss the eggplant, red pepper, yellow
pepper, onion, and 2 of the garlic cloves
in a mixing bowl with 2½ tablespoons
(13 ml) of olive oil, salt, and pepper. Pour
out onto prepared baking sheet. Bake for
about 40 to 50 minutes, tossing
vegetables every 10 to 15 minutes.
Vegetables should be very soft and
slightly browned.
Once vegetables are done cooking toss
with chopped basil in mixing bowl. Taste
and adjust seasonings accordingly.
Rub bread slices with remaining garlic
clove and brush with remaining olive oil.
Toast slices in oven-flipping bread once
so that the crostini are an even golden
brown on both sides, approximately 3 to 4
minutes per side.
Top crostini with warm eggplant and
pepper topping and serve immediately.
Note: Eggplant can be made ahead and
stored in refrigerator tightly sealed. For
best results, bring eggplant to room
temperature before serving.
Nutritional information per 2 crostini:
Calories 255 (57% from fat) • carb. 21g •
pro. 7g • fat 16g • sat. fat 3g • chol. 7mg •
sod 384mg • calc. 125mg • fiber 2g
Spinach,
Gorgonzola,
Artichoke Dip
Our French Boule (recipe on page 14) is
a perfect match for this delicious dip.
Makes 2 quarts (2.2 L), approximately
32 servings
cooking spray
2 ounces (60 g) Parmesan, cut
into ½-inch (1.25 cm) cubes
1 clove garlic
1 ounce (30 g) shallots
16 ounces (480 g) cream cheese,
room temperature, cut into
1-inch (2.5 cm) pieces
¼ cup (50 ml) evaporated milk
16 ounces (480 g) frozen spinach,
thawed and dried thoroughly
3 ounces (85 g) Gorgonzola,
crumbled
2 cans (15 ounces [425 g] each)
artichoke hearts, drained and
dried thoroughly
½ teaspoon (2 ml) red pepper
flakes
Preheat the Cuisinart
™
Brick Oven to
375°F (190°C) on the bake setting with the
rack in position A. Lightly coat a 2-quart
(2.2 L) ceramic soufflé/baking dish with
non-stick cooking spray. Reserve.
Assemble a Cuisinart
®
Food Processor
with the metal chopping blade. With the
machine running, drop the parmesan
through the feed tube and process until
finely chopped; place in small bowl and
reserve. With the food processor running,
add the garlic and shallot through the
feed tube; process until chopped. Add the
cream cheese and evaporated milk;
process until creamy and smooth.
Crumble the spinach over the cream
cheese. Add the reserved gorgonzola and
2
⁄
3
of the parmesan; pulse about 10 times,
or until well blended. Scrape the work
bowl. Add the reserved artichoke hearts
and red pepper flakes; pulse another 10
times.
Transfer the mixture to the prepared dish;
sprinkle with the remaining parmesan.
Place in the preheated oven and bake for
12 13
about 20 to 30 minutes, or until just
browned on top and heated through.
Nutritional information per serving:
Calories 61 (56% from fat) • carb. 3g •
pro. 4g • fat 4g • sat. fat 2g • chol. 9mg •
sod. 231mg • calc. 86mg • fiber 1g
Gougères
Although Gruyère is the classic
ingredient for gougères, you may
substitute your favourite cheese.
Makes one hundred 1-inch (2.5 cm)
gougères
½ cup (125 ml) water
4 tablespoons (60 ml) unsalted
butter
¼ teaspoon (1 ml) fine sea salt or
table salt
½ teaspoon (2 ml) sugar
½ cup + 2 tablespoons (155 ml)
unbleached, all-purpose flour
2 large eggs, + 2 more if
necessary
1 cup (2250 ml) Gruyère cheese,
shredded and divided
¼ teaspoon (1 ml) fine sea salt or
table salt
½ teaspoon (2 ml) black pepper
½ teaspoon (2 ml) cayenne
¼ teaspoon (1 ml) paprika
Preheat the Cuisinart
®
Brick Oven to
500°F (260°C) on the convection bake
setting with the baking stone on the
bottom rack in position A. Preheat baking
stone for at least 30 minutes. Line the
baking tray with parchment paper.
Place the water, butter, salt and sugar in a
medium saucepan and set over medium
heat. Once the mixture comes to a boil,
remove from heat and stir in all of the
flour. Return to the burner and raise the
heat to medium-high. Using a wooden
spoon, continuously stir the mixture until
it dries out. You will know it is done when
the dough leaves a thick hard film on the
bottom of the pot.
Remove from heat and put mixture into a
medium-large mixing bowl. Beat the
dough with a Cuisinart
®
Hand Mixer on a
low speed to release steam and cool.
Once the dough has cooled, after about 2
to 3 minutes, start adding the eggs, one
at a time, mixing each until fully
incorporated before adding the next. The
dough is ready when it becomes a pale
yellow color, and will drop from the beater
in a slow and steady stream. If the dough
is too thick, beat the remaining two eggs
together and slowly begin to add them
with the beaters running. Be sure not to
make the dough too runny or it will not
hold its shape.
Stir in ½ cup (125 ml) of Gruyère and the
spices. Pour the batter into a large pastry
bag fitted with a small to medium sized
round tip. Pipe the gougère dough into
1-inch (2.5 cm) rounds, leaving ½-inch
(1.25 cm) around each one on the
prepared baking sheet. Top each one with
a pinch of the reserved Gruyère. Place the
tray on the preheated stone in the oven,
and turn the oven off. Let the gougères sit
in the oven for 10 minutes. Lower the heat
to 300°F (150°C) and turn the oven back
on. Let bake for 20 to 25 minutes, or until
the gougères are hollow and nicely
browned, and not wet inside. To ensure
even color, turn baking sheet halfway
through baking.
Serve immediately.
Nutritional information per serving
(five, 1-inch [2.5 cm] gourgès):
Calories 82 (66% from fat) • carb. 3g •
pro. 4g • fat 6g • sat. fat 4g • chol. 19mg •
sod. 97mg • calc. 116mg • fiber 0g
Asparagus,
Mushroom &
Fontina Quiche
Great for a Sunday brunch,
this quiche will please any crowd.
Makes one 9-inch (23 cm) deep-dish
quiche, 8-12 servings
½ recipe pâte brisée dough
(page 24)
2 tablespoons (30 ml) unsalted
butter,
or olive oil
1 cup (250 ml) asparagus, cut into
½-inch (1.25 cm) pieces
1 cup (250 ml) mushrooms,
halved and sliced
1¼ cup (300 ml) whole milk
1¼ cup (300 ml) heavy cream
4 large eggs
½ teaspoon (2 ml) table salt
½ teaspoon (2 ml) black pepper
3 ounces (85 g) fontina
Preheat Cuisinart
™
Brick Oven to 350°F
(180°C) on the bake setting fitted with the
baking stone on a rack in position A.
Preheat stone for at least 30 minutes. Roll
out the dough into a 10-inch (25 cm) disc
that is about
1
⁄
8
inch (0.3 cm) thick. Fit into
an ungreased 9-inch (23 cm), 1½ quart,
ceramic pie baker. Chill in refrigerator for
about 20 minutes. Using a fork, prick the
dough evenly all over but make sure not
to go entirely through the dough. Line the
shell with parchment and weigh down
with dried beans or rice. Bake in
preheated oven for 15 to 20 minutes, or
until the dough underneath the parchment
is no longer wet. Remove the beans/rice
and parchment and continue baking until
the shell is golden brown. Remove; chill;
reserve.
While the shell is baking, place the butter/
olive oil in a skillet over medium heat. Add
the asparagus and mushrooms and sauté
over medium-high heat for 4 to 5 minutes,
or until the asparagus is bright and just
softened. Reserve.
In a medium bowl, mix the milk, cream,
eggs, salt and pepper. Using a Cuisinart
®
Hand Mixer fitted with the whisk
attachment, whip the mixture on high for
30 seconds to 1 minute. Spread the
asparagus and mushrooms evenly on the
bottom of the cooled tart shell. Pour in
the liquid mixture and top with the fontina.
Bake on the preheated baking stone for
40 to 60 minutes, or until the quiche has
browned on top and is just set.
Nutritional information per serving
(based on 12 servings):
Calories 215 (68% from fat) • carb. 11g •
pro. 7g • fat 16g • sat. fat 8g • chol. 115mg •
sod. 233mg • calc. 106mg • fiber 1g
Popovers
Pair this easy side dish with our
Standing Rib Roast (page 20),
using the roast’s fat drippings
instead of butter.
Makes 6 popovers
¾ cup (175 ml) unbleached,
all-purpose flour
¾ cup (175 ml) evaporated fat-free
milk, or reduced fat milk
2 large eggs
1 tablespoon (15 ml) butter,
melted (may substitute with fat
from rib roast)
½ teaspoon (2 ml) of salt
Place all ingredients into a medium-sized
bowl. Using a Cuisinart
®
Hand Mixer, mix
on low for about 10 seconds. Increase the
speed to high and beat until the batter is
smooth. Cover; let sit for 30 to 40
minutes.
Preheat the Cuisinart
™
Brick Oven to
450°F (230°C) on the convection bake or
bake setting fitted with the baking stone
on a rack in position A. Preheat stone for
at least 30 minutes. Heavily butter, or coat
with nonstick cooking spray, six 5-ounce
(145 g) ramekins. Fill each ramekin with
about
1
⁄
3
cup (75 ml) of batter. Place in the
oven directly on the stone and bake for 30
minutes. Lower the heat to 350°F (180°C)
and bake an additional 20 minutes.
Remove from oven and carefully unmold
from ramekins. Serve immediately.
Nutritional information per popover:
Calories 124 (28% from fat) • carb. 16g •
pro. 6g • fat 4g • sat. fat 2g • chol. 76mg •
sod. 170mg • calc. 104mg • fiber 0g
14 15
French Boule
Makes 1 large round loaf, approximately
12 servings
2½ teaspoons (13 ml) active dry
yeast
1⁄3cup (75 ml) warm (105°-110°F
[40°C - 43°C]) water
4 cups (1 L) unbleached,
all-purpose flour
2 teaspoons (10 ml) fine sea salt
or table salt
1 cup (250 ml) cold water
cornmeal for dusting
Dissolve the yeast in the
1
⁄
3
cup (75 ml) of
warm water. Let stand 3 to 5 minutes, or
until mixture is foamy. Add the flour and
salt to the work bowl of the Cuisinart
®
Food Processor fitted with the dough
blade. Process for 10 seconds. With the
machine running, add the warm water
with yeast and then the cold water in a
slow stream and process until a dough
ball forms. Continue processing for
1 to 2 minutes to knead the dough.
Lightly flour the top of the dough and
remove from bowl. Shape it into a smooth
ball and place in a lightly floured 1-gallon
(4.4 L) sealable plastic bag. Squeeze the
air out and seal the bag. Let rise in a
warm place until it has doubled, about 1
to 1½ hours.
Put the dough on a lightly floured table
and punch it down to release air. Let it
rest 5 minutes. Shape into a round loaf
and place on a cornmeal-dusted baking
sheet or peel. Cover lightly with oiled
plastic wrap and allow to rise until
doubled, about 30 to 40 minutes.
Preheat the Cuisinart
®
Brick oven to
400°F (200°C) on the convection bake or
bake setting fitted with the baking stone
on a rack in position A. Preheat the
baking stone for at least 30 minutes.
Using a serrated knife, cut a cross ¼-inch
(0.6 cm) deep on the top of the loaf.
Bake for 40 to 50 minutes, or until nicely
browned and sounds hollow when tapped.
Let cool completely before serving.
Nutritional information per serving:
Calories 153 (3% from fat) • carb. 32g •
pro. 5g • fat 0g • sat. fat 0g • chol. 0mg •
sod. 224mg • calc. 7mg • fiber 1g
Walnut Rosemary
Bread with Raisins
Makes 1 small round loaf, approximately
16 servings
½ teaspoon (2 ml) active dry yeast
½ cup + 2 tablespoons (130 ml)
warm water
1¼ cups (300 ml) unbleached, bread
flour, plus more for dusting
½ cup (125 ml) whole wheat flour
2 tablespoons (30 ml) rye flour
1 teaspoon (5 ml) fine sea salt or
table salt
½ teaspoon (2 ml) extra-virgin
olive oil
¼ cup (50 ml) golden raisins,
or any similar dried fruit
¼ cup (50 ml) chopped walnuts
1 tablespoon (15 ml) chopped
fresh rosemary
cornmeal for dusting
Dissolve the yeast in the warm water. Let
stand 3 to 5 minutes, or until mixture is
foamy. Add the flours, salt, and olive oil to
the work bowl of the Cuisinart
®
Food
Processor fitted with the dough blade.
Process for 10 seconds. With the machine
running, slowly add the water and yeast
mixture through the feed tube and
process until it forms a dough ball.
Continue processing for 1 to 2 minutes to
knead the dough.
Lightly flour the top of the dough and
remove from bowl. Shape it into a smooth
ball and place in a lightly floured 1-gallon
(4.4 L) sealable plastic bag. Squeeze the
air out and seal the bag. Let rise in a
warm place until it has doubled, about 1
to 1½ hours.
Put the dough on a lightly floured table
and punch it down to release air. Let it
rest 5 minutes. Stretch the dough into an
8-inch (20 cm) square. Place the raisins
and walnuts on top and knead until fully
incorporated, 2 to 4 minutes. Shape into a
round loaf and place on a cornmeal-
dusted baking sheet or peel. Cover lightly
with oiled plastic wrap and allow to rise
until doubled, about 30 to 40 minutes.
Preheat the Cuisinart
™
Brick Oven to
450°F (230°C) on the convection bake or
bake setting fitted with the baking stone
on a rack in position A. Preheat stone for
at least 30 minutes. Using a serrated knife
cut a star, ¼-inch (0.6 cm) deep, on the
top of the loaf. Bake on the preheated
stone for 30 minutes. Reduce the
temperature to 425°F (220°C) and
continue to bake for an additional 15 to
20 minutes, or until the loaf sounds hollow
when tapped and the internal temperature
reads 205°F (96°C) on an instant-read
thermometer.
Let bread fully cool before serving.
Nutritional information per serving:
Calories 73 (18% from fat) • carb. 13g •
pro. 2g • fat 1g • sat. fat 0g • chol. 0mg •
sod. 147mg • calc. 9mg • fiber 1g
Pumpernickel
Raisin Bread
Makes 1 large loaf, approximately
24 servings
2¼ teaspoons (11.25 ml) active dry
yeast
1¼ cups (300 ml) warm (105°-110°F
[40°C to 43°C]) water
¼ cup (50 ml) molasses
2¾ cups (675 ml) unbleached bread
flour
½ cup (125 ml) whole wheat flour
½ cup (125 ml) rye flour
1⁄3cup (75 ml) cornmeal
2 tablespoons (30 ml)
unsweetened cocoa powder
1 teaspoon (5 ml) instant espresso
powder
2 tablespoons (30 ml) vital wheat
gluten
1½ teaspoons (7 ml) fine sea salt,
or table salt
2 tablespoons (30 ml)
vegetable oil
¾ cup (75 ml) raisins
2 teaspoons (10 ml) caraway
seeds
Dissolve the yeast in the warm water with
the molasses. Let stand 3 to 5 minutes,
or until mixture is foamy. Add the flours,
cornmeal, cocoa and espresso powders,
wheat gluten, salt, and vegetable oil to the
work bowl of the Cuisinart
®
Food
Processor fitted with the dough blade.
Process for 10 seconds. With the machine
running, slowly add the water and yeast
mixture through the feed tube and
process until a dough ball forms.
Continue processing for 1 to 2 minutes to
knead the dough.
Lightly flour the top of the dough and
remove from bowl. Shape it into a smooth
ball and place in a 1-gallon (4.4 L)
sealable plastic bag. Squeeze the air out
and seal the bag. Let rise in a warm place
until it has doubled, about 1 to 2 hours.
Put the dough on a lightly floured table
and punch it down to release air. Let it
rest 5 minutes. Stretch the dough into a
large square. Place the raisins and
walnuts on top and knead until fully
incorporated, 2 to 4 minutes. Shape into a
round loaf and place on a cornmeal-
dusted baking sheet or peel. Cover lightly
with oiled plastic wrap and allow to rise
until doubled, about 30 to 40 minutes.
Preheat the Cuisinart
™
Brick Oven to
350°F (180°C) on the convection bake or
bake setting fitted with the baking stone
on a rack in position A. Preheat stone for
at least 30 minutes. Using a serrated knife
cut a star, ¼-inch (0.6 cm) deep, on the
top of the loaf. Bake for 50 to 60 minutes,
until bread sounds hollow when tapped
and measures 205°F (96°C) when tested
with an instant read thermometer. Transfer
to a rack to cool.
Nutritional information per serving:
Calories 105 (12% from fat) • carb. 21g •
pro. 3g • fat 1g • sat. fat 0g • chol. 0g •
sod. 589 • calc. 15mg • fiber 1g
16 17
Buttery
Dinner Rolls
Makes 16 rolls
¾ cup (175 ml) whole milk, plus
1 tablespoon (15 ml) for
brushing
½ cup (125 ml) unsalted butter,
plus 2 tablespoons (30 ml) for
brushing
¼ cup (50 ml) granulated sugar
1 teaspoon (5 ml) fine sea salt,
or table salt
2¼ teaspoons (11.25 ml) active dry
yeast
¼ cup warm (105°-110°F
[40°- 43°C]) water
4¾ cups (1 L) unbleached bread
flour
1 large egg
In a microwave-safe container, scald the
milk in the microwave; stir in the ½ cup
(125 ml) butter, sugar and salt; reserve.
Dissolve the yeast in the warm water. Let
stand 3 to 5 minutes, or until mixture is
foamy. Add the flour to the work bowl of
the Cuisinart
®
Food Processor fitted with
the dough blade and process for 10
seconds. With the machine running,
slowly add the liquids through the feed
tube and process until a dough ball forms.
Continue processing for 1 to 2 minutes to
knead the dough. Shape it into a smooth
ball and place in a 1-gallon (4.4 L)
sealable plastic bag. Squeeze the air out
and seal the bag. Let rise in a warm place
until it has doubled, about 45 to 60
minutes.
Preheat the Cuisinart
™
Brick Oven to
450°F (230°C) on the convection bake or
bake setting fitted with the baking stone
on a rack in position A. Preheat the stone
for at least 30 minutes. Lightly butter a
10-inch (25 cm) round baking pan. Divide
the dough into 16 equal pieces, about
2¼ ounces (65 g) each. Roll into smooth
rounds and arrange in the prepared pan.
Cover with plastic wrap and let rise until
about doubled, about 30 to 40 minutes.
Combine remaining tablespoon of milk
and butter and heat until the butter has
melted. Just before baking, gently brush
the rolls with the butter/milk mixture.
Place in preheated oven and bake until
golden brown, about 25 to 30 minutes.
Remove from pan and let cool on a rack
for about 10 minutes for serving.
For a softer roll, brush each with melted
butter just after removing from oven.
Nutritional information per serving (1 roll):
Calories 209 (38% from fat) • carb. 28g •
pro. 5g • fat 9g • sat. fat 5g • chol. 34mg •
sod. 160mg • calc. 23mg • fiber 1g
Focaccia Romana
For another version of this Italian staple,
throw on some chopped kalamata olives.
Makes 18 servings
2½ teaspoons (10 ml) active dry
yeast
1⁄8teaspoon (0.5 ml) granulated
sugar
1⁄3cup (75 ml) warm (105°-110°F
[40° - 43°C]) water
4 cups (1 L) unbleached,
all-purpose flour
3 teaspoons (15 ml) kosher salt,
divided
1 cup (250 ml) cold water
4 tablespoons (60 ml) extra virgin
olive oil, divided
2 tablespoons (30 ml) fresh
rosemary
Dissolve the yeast and sugar in the warm
water. Let stand 3 to 5 minutes, or until
mixture is foamy.
Place flour and 1 teaspoon (5 ml) of salt in
the work bowl of a Cuisinart
®
Food
Processor fitted with the dough blade;
process 10 seconds to combine. Add cold
water and 2 tablespoons (30 ml) of oil to
the yeast mixture.
With the machine running, slowly pour the
liquid through the feed tube. Process until
a dough ball forms. Continue to let the
machine run another minute to knead.
Place the dough in a lightly floured
sealable plastic bag. Let rise in a warm
place until
doubled in size, about 45
minutes to 1 hour.
Preheat Cuisinart
™
Brick Oven to 400°F
(200°C) on the convection bake or bake
setting fitted with the baking stone on a
rack in position A. Lightly coat the baking
sheet with a non-stick cooking spray.
Turn the dough out onto a floured surface.
Roll out into a rectangle and then fit onto
the prepared pan, stretching the ends of
the dough to meet the edges of the
baking tray. Using your fingers, make
indentations in the dough over the entire
surface. Brush the dough with the
remaining olive oil, and sprinkle the salt
and rosemary to cover. Cover with plastic
wrap and let rise until puffy, about 20
minutes
Bake until golden and crisp, about 20 to
25 minutes. Let cool slightly on wire rack.
Nutritional information per serving:
Calories 131 (23% from fat) • carb. 22g •
pro. 3g • fat 3g • sat. fat 0g • chol. 0mg •
sod. 224mg • calc. 10mg • fiber 1g
Pizza Dough
This dough freezes very well.
Makes three 12-inch (30 cm) pizzas -
24 servings
2¼ teaspoons (11.25 ml) active dry
yeast
1 teaspoon (5 ml) granulated
sugar
½ cup warm (105°-110°
[40°C - 43°C]) water
4 cups (1 L) unbleached,
all-purpose flour, plus more for
dusting
1½ teaspoons (7 ml) kosher salt
1 tablespoon (15 ml) extra virgin
olive oil
1 cup (250 ml) cold water
Dissolve the yeast and sugar in the warm
water. Let stand 3 to 5 minutes, or until
the mixture gets foamy.
Place the flour, salt and olive oil in the
work bowl of a Cuisinart
®
Food Processor
fitted with the dough blade. Pulse about 5
times to mix; scrape down the sides of
the bowl.
Add the cold water to the yeast mixture.
With the motor running, slowly pour the
liquid yeast mixture through the feed tube.
Process until a dough ball forms.
Continue to let the machine run for an
additional minute to knead. Dough will be
slightly sticky.
Lightly dust a sealable plastic bag with
flour. Dust dough with flour. Place the
dough into the floured bag; squeeze out
all of the air and seal. Let rise in a warm
place for 45 minutes to 1 hour.
Nutritional information per serving
(based on 1 slice pizza assuming 8 slices per pie):
Calories 228 (9% from fat) • carb. 44g •
pro. 7g • fat 2g • sat. fat 0g • chol. 0mg •
sod. 253mg • calc. 12mg • fiber 2g
Grape Tomato
Margherita
So easy to prepare – let the kids help out
with putting on the toppings.
Makes three 12-inch (30 cm) pizzas, or
eight 4-inch (10 cm) pizzas
1 recipe pizza dough
¼ cup (50 ml) extra virgin olive oil
22⁄3cups (650 ml) grape/cherry
tomatoes, halved
½ cup (125 ml) fresh basil, torn
into pieces
6 ounces (170 g) fresh mozzarella,
torn into pieces
Preheat Cuisinart
™
Brick Oven to 425°F
(220°C) on the convection bake or bake
setting fitted with the baking stone on a
rack in position A. Preheat stone for at
least 30 minutes.
Roll and stretch dough to desired shape
to fit baking tray. Brush liberally with olive
oil. Place baking tray on top of preheated
stone and bake for about 10 minutes, or
until dough is lightly golden.
Remove dough from oven. Brush dough
with olive oil. Arrange tomatoes and basil
evenly around the dough. Top with the
mozzarella. Return to preheated oven and
bake an additional 15 to 20 minutes, or
until desired doneness has been
achieved.
Nutritional information per serving:
Calories 355 (32% from fat) • carb. 48mg •
pro. 12g • fat 13g • sat. fat 3g • chol. 12mg •
sod. 357mg • calc. 157mg • fiber 2g
18 19
Roasted
Asparagus
Asparagus is delicious roasted,
plus it is very simple to prepare.
Makes 4 servings
1 pound (500 g) asparagus
1 teaspoon (5 ml) olive oil
¼ teaspoon (1 ml) kosher salt
¼ teaspoon (1 ml) crushed black
pepper
Preheat Cuisinart
™
Brick Oven to 425°F
(220°C) on the convection bake or bake
setting with rack in position B.
Wash and thoroughly dry asparagus. Trim
the rough ends off of the asparagus.
Place asparagus in a mixing bowl and
toss with the teaspoon of olive oil, salt
and pepper.
Line asparagus on the baking sheet and
bake on the upper rack for 10 to 15
minutes, until the asparagus is tender.
Serve immediately.
Nutritional information per serving:
Calories 36 (28% from fat) • carb. 5g •
pro. 3g • fat 1g • sat. fat 0g • chol. 0mg •
sod. 86mg • calc. 24mg • fiber 2g
Butternut Squash
and Potato Gratin
A nice twist to a great
traditional side dish.
Makes 6 to 8 servings
cooking spray
1 cup (250 ml) heavy cream
2 cloves garlic, crushed and
peeled
1 branch fresh rosemary
4 ounces (115 g) Gruyère cheese
¾ pound (375 g) butternut squash,
peeled
1 pound (500 g) Yukon Gold
potatoes
1 teaspoon (5 ml) kosher salt
½ teaspoon (2 ml) freshly ground
pepper
Lightly coat a 9½-inch (24 cm)
(1¼ quart) Open Oval Baker with cooking
spray. Place the baking tray lined with
aluminum foil on a rack in position A.
Preheat the Cuisinart
™
Brick Oven to
350°F (177°C) on the bake setting.
Place the heavy cream, crushed garlic,
and rosemary branch in a small saucepan.
Bring the cream to almost a boil and
reduce the heat to maintain a low simmer.
Simmer cream for about 15 to 20 minutes.
Using the shredding disc in the Cuisinart
®
food processor, shred the Gruyère.
Remove and reserve. Insert the medium
(4-mm) slicing disc. Slice the butternut
squash using medium-hard pressure.
Remove and reserve. Slice the potatoes
as well using medium pressure.
Arrange a layer of the potatoes in
concentric circles in the prepared baking
dish followed by a similar layer of the
butternut squash. Sprinkle with some salt,
a pinch of pepper and some of the
Gruyère. Repeat layers of sliced potatoes
and squash with seasonings and cheese,
finishing with a top layer of neatly
arranged butternut squash, seasoned with
the remaining cheese scattered on top. If
there is any salt left over, stir into the
warm cream. Discard the rosemary and
garlic and carefully pour the cream over
the top of the potatoes. Cover the baker
tightly with aluminum foil that has been
sprayed with cooking spray and set on
the prepared baking tray. Bake for 1 to 1½
hours, until the potatoes are tender when
pierced with a knife. Uncover, and broil
until browned and bubbly, about 5 to 7
minutes. Remove from the oven and let
stand for 10 minutes before serving.
Nutritional information per serving
(based on 8 servings):
Calories 223 (61% from fat) • carb. 16g •
pro. 7g • fat 16g • sat. fat 10g • chol. 56mg •
sod. 231mg • calc. 190mg • fiber 2g
Roasted Stuffed
Peppers
Makes 4 servings
5 medium-large red bell peppers,
divided
1 small eggplant, peeled and cut
into ½-inch (1.25 cm) dice
1 cup (250 ml) grape tomatoes
4 cloves garlic
1 teaspoon (5 ml) fine sea salt, or
table salt
½ teaspoon (2 ml) freshly ground
black pepper
2 tablespoons (30 ml) extra virgin
olive oil
1½ teaspoons (7 ml) dried basil
2 cups (500 ml) couscous, cooked
2 tablespoons (30 ml) chopped
fresh parsley
1½ cups (375 ml) crumbled feta,
divided
Line the Cuisinart
™
Brick Oven’s baking
tray with foil.
Cut one of the peppers into 1-inch
(2.5 cm) strips. Toss pepper strips,
eggplant, tomatoes, garlic in a mixing
bowl with salt, pepper, and olive oil.
Arrange vegetables in one layer on the
prepared baking tray. Place in oven on a
rack in position A and turn on the broil
function to roast vegetables for about 40
minutes, tossing a few times, or until
vegetables are soft and the skin on the
peppers begins to peel off. Remove from
oven and reserve in a medium-sized bowl.
While the vegetables are roasting, cut the
tops off of the remaining peppers, and
clean out the seeds. Trim the bottom of
the peppers if necessary, so that each
one stands evenly on a plate. Place
peppers lying down on the baking sheet.
Once roasted vegetables are finished,
broil peppers in brick oven for about 10 to
15 minutes, until slightly blackened but
not too soft.
While the peppers are roasting, toss the
reserved vegetables with the basil,
couscous, and 1 cup (250 ml) of feta.
Remove peppers from oven and evenly
divide the couscous/vegetable mixture
among the peppers. Top each stuffed
pepper with 2 tablespoons (30 ml) of feta.
Return to brick oven and broil for 10
minutes, or until feta has browned slightly.
Serve immediately.
Nutritional information per serving:
Calories 432 (52% from fat) • carb. 36g •
pro. 17g • fat 25g • sat. fat 14g •
chol. 76mg • sod. 1548mg • calc. 459mg •
fiber 5g
Herb Roasted
Chicken
Serves 4 to 6
1 tablespoon (15 ml) olive oil
1 teaspoon (5 ml) dried basil
1 teaspoon (5 ml) dried thyme
1 tablespoon (15 m) fresh
chopped rosemary
1 teaspoon (5 ml) kosher salt
1 teaspoon (5 ml) freshly ground
black pepper
1 lemon, cut in half
1 4 to 4½ pound (1.8 - 2 kg)
chicken, rinsed and patted dry
2 cloves garlic, smashed
Make a paste with the olive oil, dried and
fresh herbs, salt, and pepper by mixing
ingredients together in a small bowl.
Squeeze lemon all over outside and inside
chicken. Stuff the chicken with the lemon
halves and garlic cloves. Rub the herb
paste all over the skin of the chicken.
Preheat Cuisinart
®
Brick Oven to 375˚F
(190°C) on convection bake or bake
setting with a rack in position A.
Place prepared chicken on baking sheet
lined with parchment paper. Roast for
1 hour 15 minutes to 1 hour 25 minutes in
preheated oven, until the juices run clear
when the thigh is pierced.
Nutritional information per serving
(based on 6 servings):
Calories 232 • (61% from fat) • Carb. 3g •
pro. 31g • fat 10g • sat. fat 3g • chol. 96mg •
sod. 316mg • calc. 42mg • fiber 0g
20 21
Hoisin Glazed
Cornish Hens
This marinade is very versatile.
Try it brushed on salmon or chicken
pieces and simply roast in the oven.
Makes 2-4 servings
Glaze:
½ cup (125 ml) hoisin sauce
2 tablespoon (30 ml) honey
2 tablespoon (30 ml) soy sauce
1 tablespoon(15 ml) fresh ginger,
finely chopped
2 cloves fresh garlic, finely
chopped
2 cornish game hens, 1- 1¼
pounds (500 - 635 g) each,
rinsed and patted dry
In a mixing bowl stir together, the hoisin,
honey, soy, ginger, and garlic.
Place the hens in a sealable plastic bag.
Pour the marinade into the bag and
refrigerate for at least an hour up to
overnight.
Preheat brick oven to 400°F (200°C) on
the convection bake or bake setting with a
rack in position A.
Place hens on the baking tray lined with
aluminum foil. Roast for 35 to 45 minutes,
or until juices run clear when thigh is
pierced with the tip of a knife.
Serve with steamed rice.
Nutritional information per serving
( based on 4 servings):
Calories 408 (35% from fat) • carb. 7g •
pro. 57g • fat 16g • sat. fat 4g •
chol. 178mg • sod. 776mg • calc. 37mg
Standing
Rib Roast
This dish is a real treat. Be sure to serve
it with popovers (page 13).
Makes 6 to 10 servings
1 5 to 6 pound (2 - 2.7 kg) standing
rib roast (2 to 3 ribs),
butcher’s cut*
3 cloves garlic, peeled
1 tablespoon (15 ml) coarsely
ground or cracked black pepper
1 tablespoon (15 ml) kosher or
coarse sea salt
2 tablespoons (30 ml) fresh thyme
leaves
1 tablespoon (15 ml) fresh
rosemary leaves
1 tablespoon (15 ml) extra virgin
olive oil
2 large onions, roughly chopped
2 large carrots, peeled and
roughly chopped
Remove roast from refrigerator 1 hour
before roasting. Thirty minutes before
roasting, preheat oven to 450°F (230 °C).
Insert the metal chopping blade into the
Cuisinart
®
Food Processor. With the
machine running, drop the garlic through
the feed tube and process to chop, about
5 seconds. Scrape the work bowl and add
the pepper, salt, fresh herbs and olive oil.
Process for 10 seconds. Rub this mixture
all over the exterior of the meat and let
stand. (This may be done ahead and
rubbed on the meat. Cover and refrigerate
until 1 hour prior to roasting.)
Preheat Cuisinart
™
Brick Oven to 400°F
(200°C) on convection bake or bake
setting with a rack in position A.
Scatter the chopped onion and carrot on
the baking sheet lined with aluminum foil.
Arrange roast, bone side down, fat side
up, on top of the vegetables on the baking
sheet. Roast in preheated for 30 minutes
and then reduce heat to 350°F (180°C)
and roast for 13 minutes per pound. The
total time is about 1 hour 20 minutes to 1
hour and 40 minutes. Internal
temperature when checked with a
thermometer should be about 120-125°F
(48-52°C). Meat will continue to cook as
it rests, and the internal temperature will
go up another 5 to 10 degrees. Let roast
rest at least 10 to 20 minutes before
carving.
*A “butcher’s cut” standing rib roast is the
easiest to carve. The butcher removes the
chine bone and separate the meat from
the bones to create a boneless rib roast.
Then the meat is tied onto the bone cradle
with butcher’s twine for roasting. This
allows for the flavour from the bones, and
keeps the meat moist. Fat should be
trimmed to a ¼-inch (0.6 cm) thickness.
Nutritional information per serving
(based on 10 servings):
Calories 560 (75% from fat) • carb. 2g •
pro. 32g • fat 46g • sat. fat 18g • chol. 123mg •
sod. 492mg • calc. 33mg • fiber 0g
Rack of Lamb with
Parmesan and
Herb Crust
An impressive special occasion meal.
Serves 2
1 rack of lamb, frenched to the
bone** (approximately 1.5
pounds [750 g])
½ ounce (15 g) Parmesan cheese
1 tablespoon (15 ml) fresh
rosemary leaves
½ tablespoon (15 ml) fresh thyme
leaves
½ cup (250 ml) Japanese bread
crumbs (panko)
1 teaspoon (5 ml) roasted garlic
purée***
¾ teaspoon (2.6 ml) kosher salt
½ teaspoon (2 ml) freshly ground
pepper
2 tablespoons (30 ml) extra virgin
olive oil
1 tablespoon (15 ml) Dijon
mustard
Preheat Cuisinart
™
Brick Oven to 425°F
(220°C) on convection bake or bake
setting with a rack in position A. Line the
baking tray with aluminum foil.
Insert metal chopping blade in Cuisinart
®
Food Processor. With the machine
running, drop the Parmesan through the
feed tube until finely chopped. Add the
rosemary and thyme. Turn machine on for
about 30 to 45 seconds until the herbs
are finely chopped. Add the garlic purée,
salt, pepper, and panko and pulse so that
ingredients are incorporated. With the
machine running, add the the olive oil in a
slow stream so that crumb mixture is
moistened and comes together
somewhat. Reserve.
Apply an even coating of Dijon mustard all
over the meat of the lamb. Press the
crumb mixture onto the mustard-coated
portion of lamb so it adheres evenly on
both sides.
Place lamb rack on foil-lined baking tray
fat side up. Roast for 15 to 20 minutes.
Lamb is medium rare when an instant
read thermometer reads 130˚F (54°C).
Remember, lamb will continue to cook
about 5 extra degrees once removed from
oven.
Allow lamb to rest 5 minutes before slicing
and serving.
** Any butcher can prepare lamb this way.
*** To roast whole head of garlic: cut top
off, drizzle lightly with olive oil and loosely
wrap bulb in foil. Place in a 400˚F (200°C)
oven for 45 minutes. Once cool, squeeze
the roasted cloves out and purée in
blender.
Nutritional information per serving:
Calories 683 ( 40% from fat) • carb. 54g •
pro. 47g
• fat 30g • sat. fat 8g • chol. 133mg •
sod. 1160mg
• calc. 194mg • fiber 3g
22 23
Herb Roasted
Leg of Lamb
Serves 8 to 12
2 to 3 cloves garlic
1 tablespoon (15 ml) fresh
rosemary
2 tablespoons (30 ml) fresh
parsley
1 tablespoon (15 ml) fresh thyme
½ ounce (15 g) Parmesan cheese
½ cup (125 ml) panko (Japanese
breadcrumbs)
¾ teaspoon (3.75 ml) kosher salt,
divided
¾ teaspoon (3.75 ml) freshly
ground pepper, divided
2 tablespoons (30 ml) olive oil
1 small boneless leg of lamb,
butterflied, approximately 3½
pounds (1.6 kg)
Place garlic cloves, rosemary, parsley,
and thyme in the workbowl of a Cuisinart
®
Food Processor fitted with the metal
chopping blade. Pulse until all is finely
chopped. Add the Parmesan and pulse
again until the cheese is chopped. Pulse
in the breadcrumbs and ¼ teaspoon (1 ml)
of salt and ¼ teaspoon (1 ml) of pepper.
With the machine running, add the olive
oil through the feed tube until the mixture
comes together.
Lay the lamb cut side up; evenly spread
the stuffing over the surface of the lamb.
Fold the sides of the lamb in and then roll
the lamb. Secure well with butcher’s twine
and tie in 1 to 2 inch (2.5 -5 cm) intervals.
Salt and pepper the outside of the lamb.
Preheat Cuisinart
™
Brick Oven to 375°F
(190°C) on the convection bake or bake
setting with a rack in position A. Line the
baking tray with aluminum. Place the
prepared lamb on tray and roast for 45 to
55 minutes until thermometer reads 130°F
(54°C) for medium rare.
Nutritional information per serving
(based on 12 servings):
Calories 175 (39% from fat) • carb. 8g •
pro. 18g • fat 7g • sat. fat 2g • chol. 54mg •
sod. 156mg • calc 29mg • fiber 0g
Rosemary Sage
Pork Roast
This delicious pork roast is a great and
easy main dish for entertaining.
Serves 6 to 10
1 cup (250 ml) kosher salt
1 cup (250 ml) granulated sugar
3 quarts (3.3 L) water
1 3 to 4 pound (1.5 - 1.8 kg)
pork roast
3 garlic cloves
1 tablespoon (15 ml) fresh
rosemary
1 tablespoon (15 ml) fresh sage
1 tablespoon (15 ml) Dijon
mustard
1 teaspoon (5 ml) kosher salt
1 teaspoon (5 ml) freshly ground
pepper
2 tablespoons (30 ml) extra virgin
olive oil
Dissolve salt and sugar with the water in
a large mixing bowl that will fit into your
refrigerator. Submerge the roast in the
brine solution and refrigerate up to 4
hours.
While roast is soaking, prepare the
marinade. Place the metal chopping blade
into the Cuisinart
®
food processor. With
the machine running, drop the cloves of
garlic through the feed tube and run until
finely chopped. Add the fresh rosemary
and sage and pulse until chopped. Add
the Dijon mustard, salt and pepper. Turn
the processor on and with it running, pour
the olive oil through the feed tube.
Preheat brick oven to 400°F (200°C) and
turn to convection bake or regular bake
setting with a rack in position A.
Once the roast has soaked, run it well
under cold water and dry thoroughly.
Sprinkle the roast all over with kosher salt
and freshly ground pepper. Slather the
marinade all over the roast and let stand
at room temperature for ½ hour.
Tie the roast evenly with butcher’s twine
for even roasting.
Place tied roast on baking tray and place
in preheated oven.
Begin checking the pork roast at about 50
minutes with a meat thermometer to
achieve desired doneness. The internal
temperature should be 145°F (63°C) for
medium. Allow to rest 5 minutes before
carving.
For all roast methods, baste roast during
cook time.
Nutritional information per serving
(based on 10 servings):
Calories 389 (46% from fat) • carb. 1g •
pro. 50g • fat 19g • sat. fat 6g • chol. 143mg •
sod. 289mg • calc. 51mg • fiber 0g
Simply Roasted
Salmon and Fennel
Don’t let the simple preparation of the
salmon fool you – it is really delicious!
Serves 4
10 ounces (284 ml) fennel bulb
1 teaspoon (5 ml) olive oil
1 pinch kosher salt
1½ pounds (750 g) fresh salmon,
preferably wild, skin removed
(one whole piece or cut into
individual fillets)
1 teaspoon (5 ml) olive oil
¼ teaspoon (1 ml) kosher salt
¼ teaspoon (1 ml) freshly ground
pepper
Preheat Cuisinart
™
Brick Oven to 425°F
(220°C) on convection or regular bake
setting with a rack in position A. Line the
baking tray with parchment paper.
Slice the fennel bulb into ¼-inch (0.6 cm)
lengthwise strips. Toss fennel with olive
oil and salt in a mixing bowl.
Place fennel on prepared baking tray and
place into oven. Roast for 10 to 15
minutes, flipping vegetables once half way
through roasting time.
While fennel is roasting, prepare the
salmon. Rub the olive oil, salt and pepper
all over the flesh of the salmon.
Once fennel has roasted, remove, and
place salmon on top of fennel.
Switch rack to position B and return to the
oven. Roast salmon for an additional 18 to
20 minutes until desired doneness has
been achieved.
Serve immediately.
Nutritional information per serving:
Calories 223 (61% from fat) • carb. 16g •
pro. 7g • fat 16g • sat. fat 10g • chol. 56mg •
sod. 231mg • calc. 190mg • fiber 2g
Pâte Sucrée
Have leftover dough? Use this sweet
dough for simple cookies. Just roll and
cut into your favourite shapes.
Makes two 9-inch (23 cm) single tarts/
pies, or one double-crusted pie
2 cups (500 ml) unbleached,
all-purpose flour
2 tablespoons (15 ml) granulated
sugar
½ teaspoon (2 ml) table salt
¾ cup (12 tablespoons [180 ml])
unsalted butter, room
temperature
2 large egg yolks
1 tablespoon (15 ml) cold water
1 teaspoon (5 ml) lemon zest
(optional)
½ teaspoon (2 ml) vanilla extract
In the work bowl of a Cuisinart
®
Food
Processor fitted with the metal chopping
blade, process the flour, sugar and salt
for 10 seconds. Add the butter and
process until combined. With the machine
running, add the yolks, one at a time, and
process until incorporated. Add the water,
zest and vanilla; pulse 3 to 4 times, until
combined.
Form dough into 2 flat discs. Wrap in
plastic; chill in refrigerator until ready to
use.
Nutritional information per serving:
Calories 47 (10% from fat) • carb. 9g •
pro. 1g • fat 1g • sat. fat 0g • chol. 18mg •
sod. 50mg • calc. 4mg • fiber 0g
24 25
Fresh Berry Tart
Use one, or a mix of all four berries,
for this delicious summer treat.
Makes one 9-inch (23 cm) tart,
8-12 servings
½ recipe Pâte Sucrée
4 ounces (115 g) bitter/semisweet
chocolate, chopped
4 ounces (115 g) cream cheese,
room temperature, cut into
4 pieces
1⁄3cup + 1 tablespoon (90 ml)
granulated sugar
1 pinch table salt
8 ounces (227 ml) mascarpone,
room temperature
1 teaspoon (5 ml) vanilla paste or
½ vanilla bean, scraped
1 cup (250 ml) heavy cream
3-4 cups (750 ml) mixed berries
(raspberries, strawberries,
blueberries, blackberries)
Preheat Cuisinart
™
Brick Oven to 350°F
(180°C) on the bake setting fitted with the
baking stone on a rack in position A.
Preheat stone for at least 30 minutes.
Roll out the sucrée dough into a 10-inch
(25 cm) disc. Fit into an un-greased tart
ring. Chill for about 20 minutes. Using a
fork, prick the dough evenly all over but
make sure not to go entirely through the
dough. Line the shell with parchment and
weigh down with dried beans or rice.
Bake at 350°F (180°C) for about 15 to 20
minutes, or until the dough is dry
underneath the parchment. Remove the
beans/rice and parchment, and bake the
tart shell for an additional 5 to 10 minutes,
or until the shell is nicely browned.
Remove from oven, cool and reserve.
In a heatproof bowl over a pot of
simmering water, melt the chocolate. Pour
into reserved tart shell and smooth with a
rubber spatula. Chill tart shell in freezer
for about 5 minutes, or until hardened.
Reserve.
Cream the cream cheese, sugar and salt
with a Cuisinart
®
Hand Mixer until light
and fluffy, about 30 seconds. Add the
mascarpone and beat until combined. If
the mixture is lumpy, beat on high until it
is smoothed out. Add the vanilla and mix
to combine. Add the heavy cream
1
⁄
3
cup
(75 ml) at a time, mixing well between
additions.
Pour the mascarpone mixture into the
prepared shell. Smooth the top, making a
small dome in the centre, using a small
offset spatula. Arrange berries in any
desired fashion.
Nutritional information per serving:
Calories 330 (63% from fat) • carb. 27g •
pro. 5g • fat 24g • sat. fat 13g • chol. 78mg •
sod. 151 mg • calc. 65mg • fiber 3g
Pâte Brisée
This versatile dough can be used for
sweet or savoury treats. Makes two
single crust 9-inch (23 cm) tart/pie, or
one double-crust pie
2 cups (500 ml) unbleached,
all-purpose flour
1 teaspoon (5 ml) table salt
½ pound (250 g) unsalted butter,
cold and cubed
4 tablespoons (60 ml) ice water
Place flour and salt in a Cuisinart
®
Food
Processor fitted with the chopping blade.
Process for 10 seconds. Add butter to
work bowl and pulse until the mixture
resembles coarse crumbs. Pour in water,
1 tablespoon (15 ml) at a time, and pulse
until a dough is just forms. Form dough
into 2 flat discs; wrap in plastic and
refrigerate until ready to use.
Nutritional information per serving:
Calories 39 (6% from fat) • carb. 8g •
pro. 1g • fat 0g • sat. fat 0g • chol. 0mg •
sod. 98mg • calc. 2mg • fiber 0g
*For a sweet Pâte Brisée, follow the same
recipe as above except add ¼ cup (50 ml)
of granulated sugar to the dry ingredients
in the work bowl.
Nutritional information per serving:
Calories 47 (5% from fat) • carb. 10g •
pro. 1g • fat 0g • sat. fat 0g • chol. 0mg •
sod. 98mg • calc. 2mg • fiber 0g
Classic Apple Pie
Makes one 10-inch (25 cm) deep-dish
pie, 8-12 servings
1 recipe sweet brisée dough
5 large apples (Golden Delicious,
Ginger Gold, or other similar
apples), peeled, cored, halved
and very thinly sliced
juice of 2 lemons
1 teaspoon (5 ml) vanilla paste
½ cup (125 ml) granulated sugar
1 large egg
1 large egg yolk
1 pinch table salt
Preheat Cuisinart
™
Brick Oven to 350°F
(180°C) on the bake setting fitted with the
baking stone on a rack in position A. Roll
out ½ of the dough into a 10-inch (25 cm)
disc. Fit into an ungreased, 9-inch (23
cm), 1½-quart ceramic pie shell. Chill in
refrigerator for about 20 minutes. Roll out
remaining half of dough into a 10-inch (25
cm) disc on a piece of parchment. Cut
into ¼ to ½-inch (0.6 - 1.25 cm)strips.
Chill in refrigerator until needed.
In a large bowl, toss the apples, lemon
juice, vanilla, and sugar together. Fan the
apples in the reserved pie baker in layers.
Make an egg wash by mixing the egg,
yolk, and salt together with a fork. Brush
on the outer rim of the pie shell. Using
reserved brisée strips, weave the strips
into a lattice-work design over the apples.
Brush lattice with egg wash. Bake directly
on the baking stone at 350°F (180°C) for
40-50 minutes, or until the top of the pie
is a dark golden brown.
Nutritional information per serving
(based on 12 servings):
Calories 166 (8% from fat) • carb. 36g •
pro. 3g • fat 1g • sat. fat 0g • chol. 36mg •
sod. 225mg • calc. 10mg • fiber 2g
Chocolate
Soufflé Cake
This rich cake is best served right
out of the oven. Top with freshly
whipped cream and sliced strawberries
for an elegant addition.
Makes one 10-inch (25 cm) cake,
12-16 servings
8 ounces (236 ml) bittersweet
chocolate, chopped
2 tablespoons (30 ml) unsalted
butter, chopped, plus more to
dust the cake pan
9 large eggs, separated
1¼ cup (300 ml) granulated sugar,
divided, plus more to dust cake
pan
2 large egg whites
1 tablespoon (30 ml) water
1 pinch table salt
1⁄3cup (75 ml) unbleached,
all-purpose flour
whipped cream (optional)
fresh strawberries, hulled and
sliced (optional)
Preheat Cuisinart
™
Brick Oven to 375°F
(190°C) on the convection bake or bake
setting with a rack in position A.
Butter a 10x3-inch (25x6 cm) round cake
pan. Cut a circle of parchment paper to
line the bottom of the pan; butter the
parchment; dust entire pan with sugar.
Clean the lip of the pan so no butter or
sugar is on it. Reserve.
In a heat-proof bowl over a pot of
simmering water, melt the chocolate and
butter. Keep warm; reserve.
In a large bowl, mix the egg yolks and
¾ cup (175 ml) of sugar, using a Cuisinart
®
Hand Mixer fitted with the whisk
attachment, until pale and thickened.
Whisk in the cooled chocolate mixture.
Reserve.
Wash and dry the whisk attachment well
and whip all of the egg whites, water and
salt until foamy, about 1 to 2 minutes.
Slowly add the remaining sugar and
whip to a medium-stiff peak, about
3 to 4 minutes.
26 27
Stir a very small amount of the egg whites
into the chocolate/yolk mixture. Gently
fold ¾ of the whites into the lightened
chocolate/yolk mixture using a large
rubber spatula until the ingredients are
incorporated. Sift in the flour and gently
fold into mixture. Gently fold the
remaining whites.
Pour into prepared pan and bake in the
preheated oven for 35 to 45 minutes until
cake has puffed and appears dry, but still
soft to the touch.
Turn cake out onto serving plate and
remove pan and parchment. Top with
whipped cream and strawberries, if
desired. Serve immediately.
Nutritional information per serving:
Calories 194 (43% from fat) • carb. 25g •
pro. 5g • fat 10g • sat. fat 5g • chol. 123mg •
sod. 43mg • calc. 23mg • fiber 1g
Mascarpone
Lemon Squares
A twist on a classic, these lemon
squares will disappear fast!
Makes 16 servings
½ cup (125 ml) pine nuts, toasted
1¼ cup (300 ml)unbleached,
all-purpose flour, divided
1⁄3cup (75 ml) confectioners’
sugar, plus more for finishing
1 teaspoon (5 ml) salt, divided
2 teaspoons (10 ml) lemon zest,
divided (1 lemon)
4 large eggs
¾ cup (175 ml) granulated sugar
½ cup (125 ml) freshly squeezed
lemon juice (about 3 medium
lemons)
½ teaspoon (2 ml) vanilla extract
½ teaspoon (2 ml) baking powder
¼ cup (50 ml) mascarpone,
room temperature
Preheat Cuisinart
™
Brick Oven to 350°F
(180°C) on the bake setting with a rack in
position A. Coat a 9-inch (23 cm) square
baking dish with non-stick cooking spray;
line with 2 pieces of parchment, leaving a
1 to 2-inch (2.5-5 cm) overhang on each
side. Reserve.
Pulse pine nuts in a Cuisinart
®
Food
Processor fitted with the metal chopping
blade until ground. Add 1 cup (250 ml)
flour, confectioners’ sugar, ½ teaspoon
(2 ml) salt and 1 teaspoon (15 ml) zest.
Pulse until mixture resembles coarse
crumbs. Press into prepared baking dish.
Bake at 350°F (180°C) for about 20
minutes, or until lightly browned. Remove
and reserve.
In a medium bowl, beat eggs with a
Cuisinart
®
Hand Mixer until lightened,
about 30 seconds. Add the sugar and
beat until light and thickened, another 30
seconds to 1 minute. Add lemon juice,
vanilla and remaining zest and mix to
incorporate. Add baking powder,
remaining salt, and remaining ¼ cup (50
ml) of flour and mix to incorporate. Gently
beat in the mascarpone. Pour on top of
prepared crust. Bake at 300°F (148°C) for
25 to 30 minutes, or until set.
Dust with confectioners’ sugar before
serving.
Nutritional information per serving:
Calories 178 (49% from fat) • carb. 19g •
pro. 4g • fat 10g • sat. fat 4g • chol. 70mg •
sod. 182mg • calc. 29mg • fiber 0g
WARRANTY
LIMITED THREE-YEAR
WARRANTY
This warranty supersedes all previous
warranties on this Cuisinart®product.
This warranty is available to consum-
ers only. You are a consumer if you
own a Cuisinart®product that was
purchased at retail for personal,
family or household use. This
warranty is not available to retailers
or other commercial purchasers or
owners.
We warrant that this Cuisinart®
product will be free of defects in
material or workmanship under
normal home use for three years from
the date of original purchase.
For warranty purposes, we would
like to suggest that you register your
product on-line at www.cuisinart.ca
to facilitate verication of the date of
original purchase. However, should
you not wish to register on-line we
recommend the consumer to main-
tain original receipt indicating proof
of purchase. In the event that you do
not have proof of purchase date, the
purchase date for purposes of this
warranty will be the date of manufac-
ture.
When calling our Authorized Service
Centre for in warranty service please
make reference to your model number
and the manufacturing date code.
This information can be found in the
rating area on the body or underneath
the base of your unit. The model
number will follow the word Model:
BRK-Series. The manufacturing date
code is a 4 or 5 digit number.
Example, 70630 would designate
year, month & day (2007, June 30th).
If your Cuisinart®product should
prove to be defective within the war-
ranty period, we will repair it or, if
we think it necessary, replace it. To
obtain warranty service, please call
our Consumer Service Centre toll-free
at 1-800-472-7606 or write to:
Cuisinart Canada
100 Conair Parkway
Woodbridge, Ont.
L4H 0L2
To facilitate the speed and accuracy
of your return, please also enclose
$10.00 for shipping and handling of
the product. Please also be sure to
include a return address, description
of the product defect, product serial
number, and any other information
pertinent to the product’s return.
Please pay by cheque or money
order.
NOTE: For added protection and
secure handling of any Cuisinart®
product that is being returned, we
recommend you use a traceable,
insured delivery service.
Cuisinart cannot be held responsible
for in transit damage or for packages
that are not delivered to us. Lost and/
or damaged products are not covered
under warranty.
Your Cuisinart® product has been
manufactured to strict specica-
tions and has been designed for use
with Cuisinart® authorized acces-
sories and replacement parts for your
model.
These warranties expressly exclude
any defects or damages caused by
accessories, replacement parts or
repair service other than those that
have been authorized by Cuisinart.
These warranties exclude all inciden-
tal or consequential damages.
BEFORE RETURNING YOUR
CUISINART PRODUCT
Important: If the nonconforming
product is to be serviced by someone
other than Cuisinart’s Authorized
Service Centre, please remind the
servicer to call our Consumer Service
Centre to ensure that the problem is
properly diagnosed, the product
serviced with the correct parts, and
to ensure that the product is still
under warranty.
28
IB-7244-CAN
©2007 Cuisinart
Cuisinart®is a registered trademark of Cuisinart
100 Conair Parkway,
Woodbridge, Ont L4H 0L2
Consumer Call Centre E-mail:
Consumer_Canada@Conair.com
Printed in China
07CC25009
Cuisinart offers an extensive assortment of top quality products to make life in the kitchen easier than ever.
Try some of our other countertop appliances and cookware, and Savor the Good Life™.
www.cuisinart.ca
Food
Processors
Toaster Ovens Blenders Cookware Ice Cream
Makers
Coffeemakers
Any trademarks or service marks
of third parties used herein are the
trademarks or service marks of their
respective owners.
NOTES

Other Cuisinart Oven manuals

Cuisinart Convection Toaster Oven Broiler TOB-60N Service manual

Cuisinart

Cuisinart Convection Toaster Oven Broiler TOB-60N Service manual

Cuisinart TOB-195BCC - Convection Toaster Oven/Broiler User manual

Cuisinart

Cuisinart TOB-195BCC - Convection Toaster Oven/Broiler User manual

Cuisinart TOB-60N2 Service manual

Cuisinart

Cuisinart TOB-60N2 Service manual

Cuisinart TOB-135 Service manual

Cuisinart

Cuisinart TOB-135 Service manual

Cuisinart TOB-60N2 User manual

Cuisinart

Cuisinart TOB-60N2 User manual

Cuisinart TOB-195 Series Service manual

Cuisinart

Cuisinart TOB-195 Series Service manual

Cuisinart TOA-60 Service manual

Cuisinart

Cuisinart TOA-60 Service manual

Cuisinart TOB-60N1 User manual

Cuisinart

Cuisinart TOB-60N1 User manual

Cuisinart TOA-28C Service manual

Cuisinart

Cuisinart TOA-28C Service manual

Cuisinart TOB Series User manual

Cuisinart

Cuisinart TOB Series User manual

Cuisinart TOA-28 Service manual

Cuisinart

Cuisinart TOA-28 Service manual

Cuisinart Gourmet Pro User manual

Cuisinart

Cuisinart Gourmet Pro User manual

Cuisinart CSO-300 Service manual

Cuisinart

Cuisinart CSO-300 Service manual

Cuisinart TOB-60C Series Service manual

Cuisinart

Cuisinart TOB-60C Series Service manual

Cuisinart TOB-130 Service manual

Cuisinart

Cuisinart TOB-130 Service manual

Cuisinart CSO-300NXA Service manual

Cuisinart

Cuisinart CSO-300NXA Service manual

Cuisinart TOB-135C User manual

Cuisinart

Cuisinart TOB-135C User manual

Cuisinart TOA-26C Series Service manual

Cuisinart

Cuisinart TOA-26C Series Service manual

Cuisinart CUSTOM CLASSIC TOB-40 User manual

Cuisinart

Cuisinart CUSTOM CLASSIC TOB-40 User manual

Cuisinart Compact Digital Toaster Oven Broiler TOB-100 User manual

Cuisinart

Cuisinart Compact Digital Toaster Oven Broiler TOB-100 User manual

Cuisinart CUSTOM CLASSIC TOB-40 Service manual

Cuisinart

Cuisinart CUSTOM CLASSIC TOB-40 Service manual

Cuisinart TOA-70 Series Service manual

Cuisinart

Cuisinart TOA-70 Series Service manual

Cuisinart TOA-65 User manual

Cuisinart

Cuisinart TOA-65 User manual

Cuisinart TOA-65C Service manual

Cuisinart

Cuisinart TOA-65C Service manual

Popular Oven manuals by other brands

Zanussi ZOU 592 user manual

Zanussi

Zanussi ZOU 592 user manual

GE Profile PVM1790 installation instructions

GE

GE Profile PVM1790 installation instructions

Oster TSSTTVMAF1 user manual

Oster

Oster TSSTTVMAF1 user manual

Haier HWO60SM4FE9XHP manual

Haier

Haier HWO60SM4FE9XHP manual

Candy FPE6096X User instructions

Candy

Candy FPE6096X User instructions

Sears Kenmore ELITE 911.49002 Use & care guide

Sears

Sears Kenmore ELITE 911.49002 Use & care guide

Blomberg BEO 1680 user guide

Blomberg

Blomberg BEO 1680 user guide

ETNA OM865RVS Instructions for use

ETNA

ETNA OM865RVS Instructions for use

Robam KQWS-4800-R330 user manual

Robam

Robam KQWS-4800-R330 user manual

Westinghouse WVEP6717 user manual

Westinghouse

Westinghouse WVEP6717 user manual

AEG BEE431011M user manual

AEG

AEG BEE431011M user manual

davoline BO 6341 R user manual

davoline

davoline BO 6341 R user manual

NutriMill SMART AIR user manual

NutriMill

NutriMill SMART AIR user manual

Lamona LAM3208 user manual

Lamona

Lamona LAM3208 user manual

Doyon JA14G user guide

Doyon

Doyon JA14G user guide

Weber POULTRY ROASTER 178760 user manual

Weber

Weber POULTRY ROASTER 178760 user manual

Advantium PSB2200NBB Service manual

Advantium

Advantium PSB2200NBB Service manual

Jenn-Air JJW8330DDB Installation & use manual

Jenn-Air

Jenn-Air JJW8330DDB Installation & use manual

manuals.online logo
manuals.online logoBrands
  • About & Mission
  • Contact us
  • Privacy Policy
  • Terms and Conditions

Copyright 2025 Manuals.Online. All Rights Reserved.