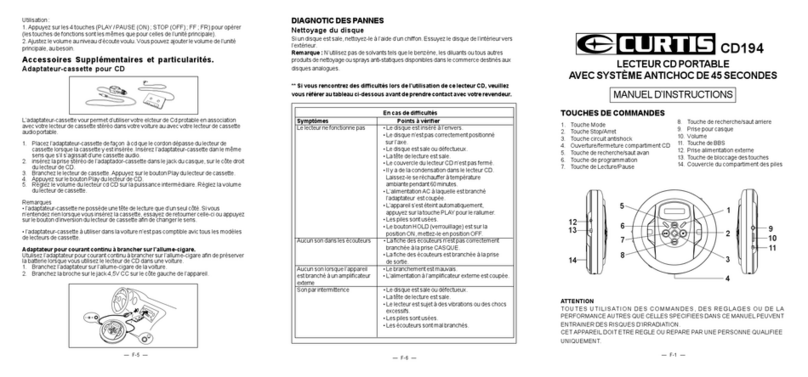
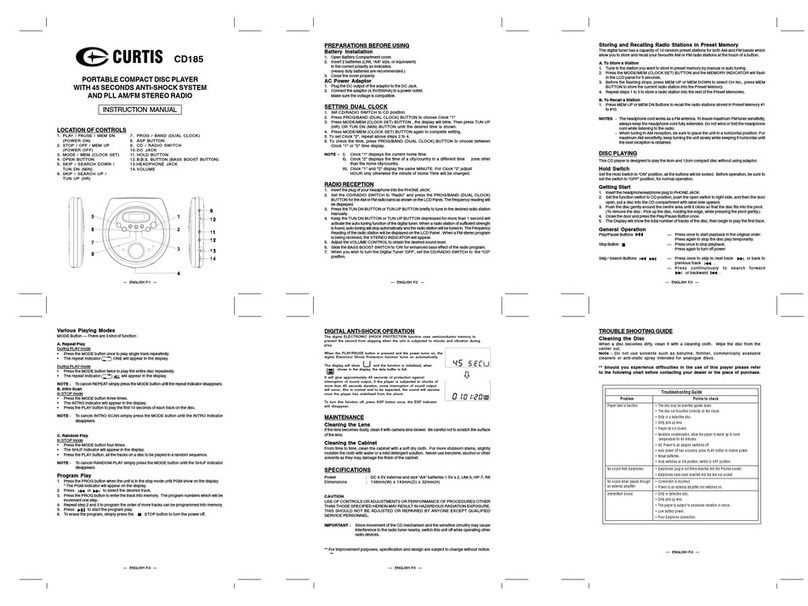
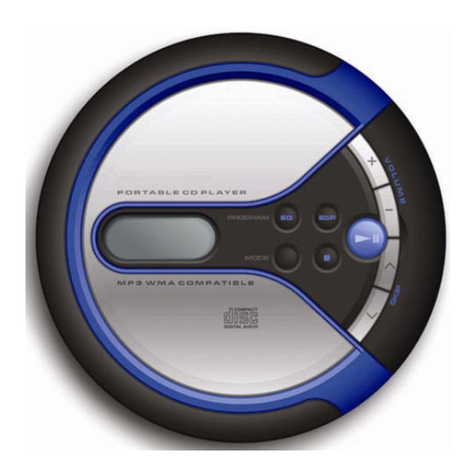
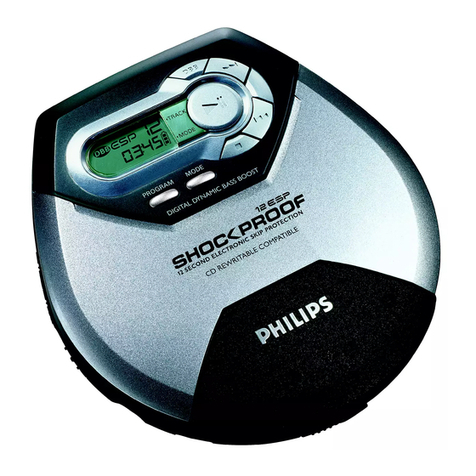
EMPLACEMENT DES COMMANDES
1. AFFICHEUR ÀCRISTAUXLIQUIDES
2. SAUT / RECHERCHEVERS LE BAS
3. SAUT / RECHERCHEVERS LE HAUT
4. MODE / PROGRAMME
5. BOUTON EQ
6. BOUTON D’OUVERTURE
7. BOUTON ASP/DIR VERSLE HAUT
8. ARRÊT DE LALECTURE / ARRÊT
(MISE ÀL’ARRÊT)
56 72
14
4
15
12
11
10 13
893
1
6. Répétezles étapes2 à5 pour programmerles fichiers (maximum 60fichiers) dans l’ordre de
votrechoix.
7. Appuyez sur pourlancer la lecture du programme.
8. Poureffacerle programme,il suffit d’appuyersur lebouton d’arrêt pouréteindre l’appareilou
d’ouvrirle couvercle puis dele refermer.
SYSTÈMEANTICHOC NUMÉRIQUE
LaPROTECTIONANTICHOC ÉLECTRONIQUE utilise une mémoireàsemi-conducteursafin
d’empêcherles sauts de lecturelorsque l’appareil subit deschocs ou des vibrationsen cours de
lecture.
Lafonction numériqueassociée àlaprotection antichoc électroniqueest activéeautomatiquement
lorsd’une pression surle bouton de LECTURE/PAUSE, àlamise en marchedel’appareil.
L’indicateurESPclignote surl’afficheur pourindiquer quelafonction esten coursd’initialisation. Dès
quela mémoire tamponde donnéesest remplie, l’indicateurs’affiche demanière permanente.
Ledispositif accorde uneprotection d’environ 40secondes contre l’interruptiondu son.Lorsque le
lecteursubit deschocspendantplusde 40secondes, desinterruptions sontpossibles. Cephénomène
esttout àfait normal.Dèsla stabilisationdel’appareil, le sonreprend normalement.
•Pourdésactiver lafonction de protection,appuyez une foissur le boutonASP.L’indicateurESP
disparaît.
•Sivous appuyezsurle boutonASP pendantune lecturenormale, lemessage d’indicationdetemps
ASP«40 SEC »apparaîtpendant1 secondeenviron.
•Avecundisque MP3,la fonctionESPest toujoursactivéeet procureuneprotection de120 secondes
pourun débitde 128 kb/s.
SYSTÈMEDE RENFORCEMENT DES GRAVES
L’effetdesbasses fréquencespeut êtrerenforcéen activantla fonction derenforcement desgraves
BBS(Bass Boost System). Ilsuffit pour celaderégler le commutateurBBS àON.
Bouton EQ
Appuyezsur lebouton pour sélectionnerl’effetsonore : POP,CLASSIC, ROCK,JAZZ ouFLAT(pas
d’égalisation).
ENTRETIEN
Nettoyagede la lentille
Si la lentille devient sale, il convient de la nettoyer àl’aide d’un gaz dépoussiérant pour objectif
d’appareilphoto oudecaméra. Veillezànepas rayer lasurface de lalentille.
Nettoyage du boîtier
Ilconvient denettoyerle boîtierde tempsàautre àl’aided’untissu douxet sec.Pourles tachesplus
récalcitrantes,humectez légèrementletissuavec de l’eauou unesolution contenant undétergent
doux.N’utilisez jamais de benzène, d’alcoolou d’autres solvants. Ilspourraient endommager la
finitiondu boîtier.
CARACTÉRISTIQUESTECHNIQUES
Puissance desortie : 20 mW (32 )
Réponseenfréquence : 100 ~ 20 000 Hz
Sourced’alimentation : 2 pilesUM-3 ou AA
Adaptateur CA-CC4,5 V (500 mA)
Dimensions : 142 x142 x33 mm (Lx P xH) **Les caractéristiquestechniques etgénéralesdecet appareilpeuvent êtremodifiéesou améliorées
sanspréavis. **
—FRENCH - 5 — — FRENCH - 6 —
Boutonsde sautet de recherche —Appuyezune foissur unde cesboutons pourpasser àla
plage suivante ou précédente .
—Poureffectuer une rechercheen avantouen arrière,
exercez une pression prolongée sur ou .
Modes de lecture
Bouton MODE – Il existe 3 modes de lecture : (CD)
A. Répétition
Pendantla lecture
•Unepression unique surle bouton MODE/PROGpermet de répéteruneseule plage.
L’indicateur de répétition s’affiche.
Pendantla lecture
•Unedouble pression surle mode MODE/PROG permetde répéterl’intégralitédu disque.
•L’indicateur de répétition s’affiche.
NOTE–Pour annuler larépétition, ilsuffit d’appuyersuccessivement sur leboutonMODE jusqu’à
ceque l’indicateur derépétitiondisparaisse.
B.Lecture aléatoire
Pendantla lecture
•Appuyezquatre fois surle bouton MODE/PROG
•L’indicateurde lecturealéatoireRAND s’affiche.
•Appuyezensuitesur le bouton de lecture.L’appareillira les plages du disquedans un ordre
déterminéauhasard.
NOTE–Pour annuler la lecturealéatoire, il suffitd’appuyer successivement surle bouton MODE
jusqu’àce que l’indicateurde lecture aléatoireRAND disparaisse.
C. Lecture des intros
Pendantla lecture
•Appuyeztrois fois surlebouton MODE/PROG
•L’indicateurINTRO s’affiche.
•Appuyezensuite sur lebouton de lecture.L’appareil lira les10 premières secondesde chaque
plagedu disque.
NOTE–Pour annuler lalecture des intros,il suffit d’appuyersuccessivement sur lebouton MODE
jusqu’àce que l’indicateurINTRO disparaisse.
Modes de lecture
Bouton MODE – Il existe 3 modes de lecture : (MP3)
A. Répétition
Pendantla lecture
•Unepression unique surle bouton MODE/PROGpermet de répéteruneseule plage.
•L’indicateurderépétition s’affiche.
—FRENCH - 3 —
ATTENTION
TOUTE UTILISATION IMPROPRE DES COMMANDES ET TOUT RÉGLAGE OU TOUTE
OPÉRATION NON PRÉCISÉS DANS LA PRÉSENTE DOCUMENTATION PEUVENT
ENTRAÎNERUNE EXPOSITION DANGEREUSE AUXRAYONNEMENTS.
CETAPPAREIL DOIT ÊTRERÉGLÉOU RÉPARÉEXCLUSIVEMENTPARUN TECHNICIEN
QUALIFIÉ.
PRÉPARATION
Installationdes piles
1. Ouvrez lecouvercledu compartiment despiles.
2. Introduisez2piles (LR6, AAou équivalentes)en respectant lesmarques de polaritéindiquées.
(Pilespour usage intensifrecommandées.)(Pilesnon fournies)
3. Fermez le couvercle.
Adaptateur d’alimentation secteur
1. Branchez lasortieCC de l’adaptateursur la prised’alimentationen CC.
2. Raccordez l’adaptateur (4,5 V / 500 mA) àune prise de courant. Veillez àce que la tension
correspondeàcelle requise parl’appareil.(Adaptateur non fournies)
LECTUREDEDISQUE
Celecteur de CDest conçu pourlireles disquescompacts de8 cm etde 12 cmsans adaptateurde
disque.
Commutateur de verrouillage
Pourverrouiller tous lesboutons, faites glisserle commutateurdeverrouillage dansla position ON.
Avantl’utilisation, n’oubliezpas de remettrele commutateur dansla position OFF.
Préparation
1. Insérez lafiche du casquedans la PRISECASQUE.
2. Appuyezsurle boutond’ouverture surla droite.Le couvercles’ouvre. Introduisezun disquedans
lecompartiment, la face impriméeorientée vers lehaut.
3. Exercezunelégèrepression autour ducentre du disque,jusqu’à cequece dernierseplace sur
lepivot.
(Pourretirer le disque,prenez le disqueen letenantpas sesbords et appuyezdélicatement sur
lepivot.)
4. Fermezlecouvercle et appuyezune seule foissur le boutonde lecture/pause.
5. L’afficheurindique lenombre total deplages du disque etcommence la lecturedela première
plage.
Utilisationgénérale
Boutonde lecture/pause —Appuyezune foissur ceboutonpour lancerla lecturedes
plagesdans l’ordre originaldu disque.
Poursuspendre lalecturedu disque,appuyez une
nouvellefois sur cebouton.
Boutond’arrêt—Appuyezune fois surce bouton pourarrêter la lecture.
Pouréteindre l’appareil,appuyez une nouvellefois sur
cebouton.
—FRENCH - 2 —
Pendantla lecture
•Unedouble pression surle mode MODE/PROG permetde répéterl’intégralitédu disque.
•L’indicateur de répétition s’affiche.
Pendantla lecture
•Unetripple pression surlemode MODE/PROG permetde répéterl’intégralitédu disque.
•L’indicateur de répétition s’affiche.
NOTE–Pour annuler larépétition, ilsuffit d’appuyersuccessivement sur lebouton MODE jusqu’à
ceque l’indicateur derépétitiondisparaisse.
B.Lecture aléatoire
Pendantla lecture
•Appuyezquatre fois surle bouton MODE/PROG
•L’indicateurde lecturealéatoireRAND s’affiche.
•Appuyezensuitesur le bouton de lecture.L’appareil lira les plages du disquedans un ordre
déterminéauhasard.
NOTE–Pour annuler la lecturealéatoire, il suffitd’appuyer successivement surle bouton MODE
jusqu’àce que l’indicateurde lecture aléatoireRAND disparaisse.
C. Lecture des intros
Pendantla lecture
•Appuyeztrois fois surlebouton MODE/PROG
•L’indicateurINTRO s’affiche.
•Appuyezensuite sur lebouton de lecture.L’appareil lira les10 premièressecondes de chaque
plagedu disque.
NOTE–Pour annuler lalecture des intros,il suffit d’appuyersuccessivement sur lebouton MODE
jusqu’àce que l’indicateurINTRO disparaisse.
Lecture de programme
(Disque CD)
1. Appuyezsurle boutonMODE/PROG lorsquel’appareilest enmode delecture ouàl’arrêt,jusqu’à
ceque PGM CD 00 P01 apparaissesurl’afficheur.
2. Appuyez sur ou poursélectionner la plagesouhaitée.
3. Appuyezunenouvelle foissur le boutonPROG pourmettre la plageen mémoire.Le numérode
programmationest augmentéd’uneunité.
*Le numérodeprogrammation «P-01 »devient«P-02 »surl’afficheur.
4. Répétez lesétapes2 et3 pour programmer lesplages dans l’ordrede votre choix.
5. Appuyez sur pour lancerla lecture du programme.
6. Pour effacerleprogramme, il suffitd’appuyersur le boutond’arrêt pour éteindrel’appareil
oud’ouvrir le couvercle puisde le refermer.
(Disque MP3)
1. Appuyezsurle boutonPROG lorsquel’appareilest en modede lectureou àl’arrêt,jusqu’à ceque
PGM 00000 P01 apparaissesurl’afficheur.
2. AppuyezsurASP/DIR pour sélectionnerle directionsouhaité.
3. Appuyez sur ou pour sélectionner le fichier souhaité
4. Appuyez surlebouton MODE/PROG pourmettre le direction etle fichier enmémoire.
5. *Lenuméro deprogrammation «P-01 »devient «P-02 »surl’afficheur.
—FRENCH - 4 —
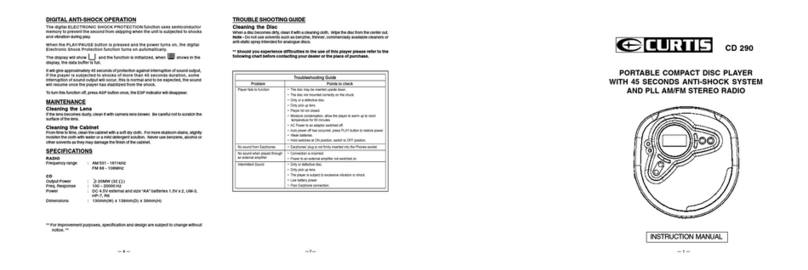
LECTEUR DE DISQUE CD/MP3 PORTABLE
AVEC SYSTÈME ANTICHOC DE 40 SECONDES
GUIDEDEDÉPANNAGE
Nettoyagedes disques
Lorsqu’undisque devientsale, nettoyez-le àl’aide d’untissu de nettoyage.Essuyez ledisquedu
centrevers les bords.
Note –N’utilisez pas desolvants tels quele benzine, un diluant(thinner), des produitsde
nettoyagedisponibles dans lecommerce ou desaérosols antistatiques pourmicrosillons.
** Si vous rencontrez des difficultés pendant l’utilisation de cet appareil, nous vous
recommandonsde consulter ce guidede dépannage avant decontacter votre revendeur.
Guide de dépannage
Problème
Lelecteur nefonctionne pas.
Aucunson neparvient dans
lecasque.
Aucunson n’estdiffusépar
l’amplificateurexterne.
Leson est intermittent.
Élémentsà contrôler
•Ledisque est placéàl’envers.
•Ledisque n’est pasinstallécorrectement sur le
plateau.
•Ledisque est saleou ilestdéfectueux.
•Lalentille de lectureest sale.
•Lecouvercle du lecteurn’est pas fermé.
•Dela condensation s’estformée dansl’appareil.
Laissez-lese réchauffer àlatempérature ambiante
pendant60 minutesenviron.
•L’adaptateurn’estpas branchésur uneprise de
courant.
•L’appareils’estéteint automatiquement.Appuyezsur le
boutonde lecture pourle rallumer.
•Lespiles sontdéchargées.
•Lecommutateur de verrouillage estsur ON.
Faites-leglisser en position d’arrêtOFF.
•Lafiche ducasque n’estpas enfoncéeconvenablement
dansla prise casque.
•Lafiche du casquea étéintroduitedans laprisede
sortieligne.
•Leraccordement n’est pascorrect.
•L’amplificateurn’estpas branché.
•Ledisque est saleou ilestdéfectueux.
•Lalentille de lectureest sale.
•Lelecteur subit desvibrations ou deschocsexcessifs.
•Lespiles sontpresque déchargées.
•Leraccordement du casqueest demauvaise qualité.
—FRENCH - 1 —
MODED’EMPLOI
9. LECTURE / PAUSE(MISE ENMARCHE)
10. PRISED’ALIMENTATIONCC
11. BOUTONDE VERROUILLAGE
12. COUVERCLEDU COMPARTIMENTDES
PILES
13. PRISECASQUE
14. VOLUME
15. BOUTON DE RENFORCEMENT DES
GRAVES
CDMP366
