10
old and new batteries.
Do not mix alkaline, standard (carbon-zinc) or rechargeable
(nickel-cadmium) batteries. Do not dispose of batteries in re.
Batteries may explode or leak. If the remote control is not be
used for a certain length of time, remove the batteries.
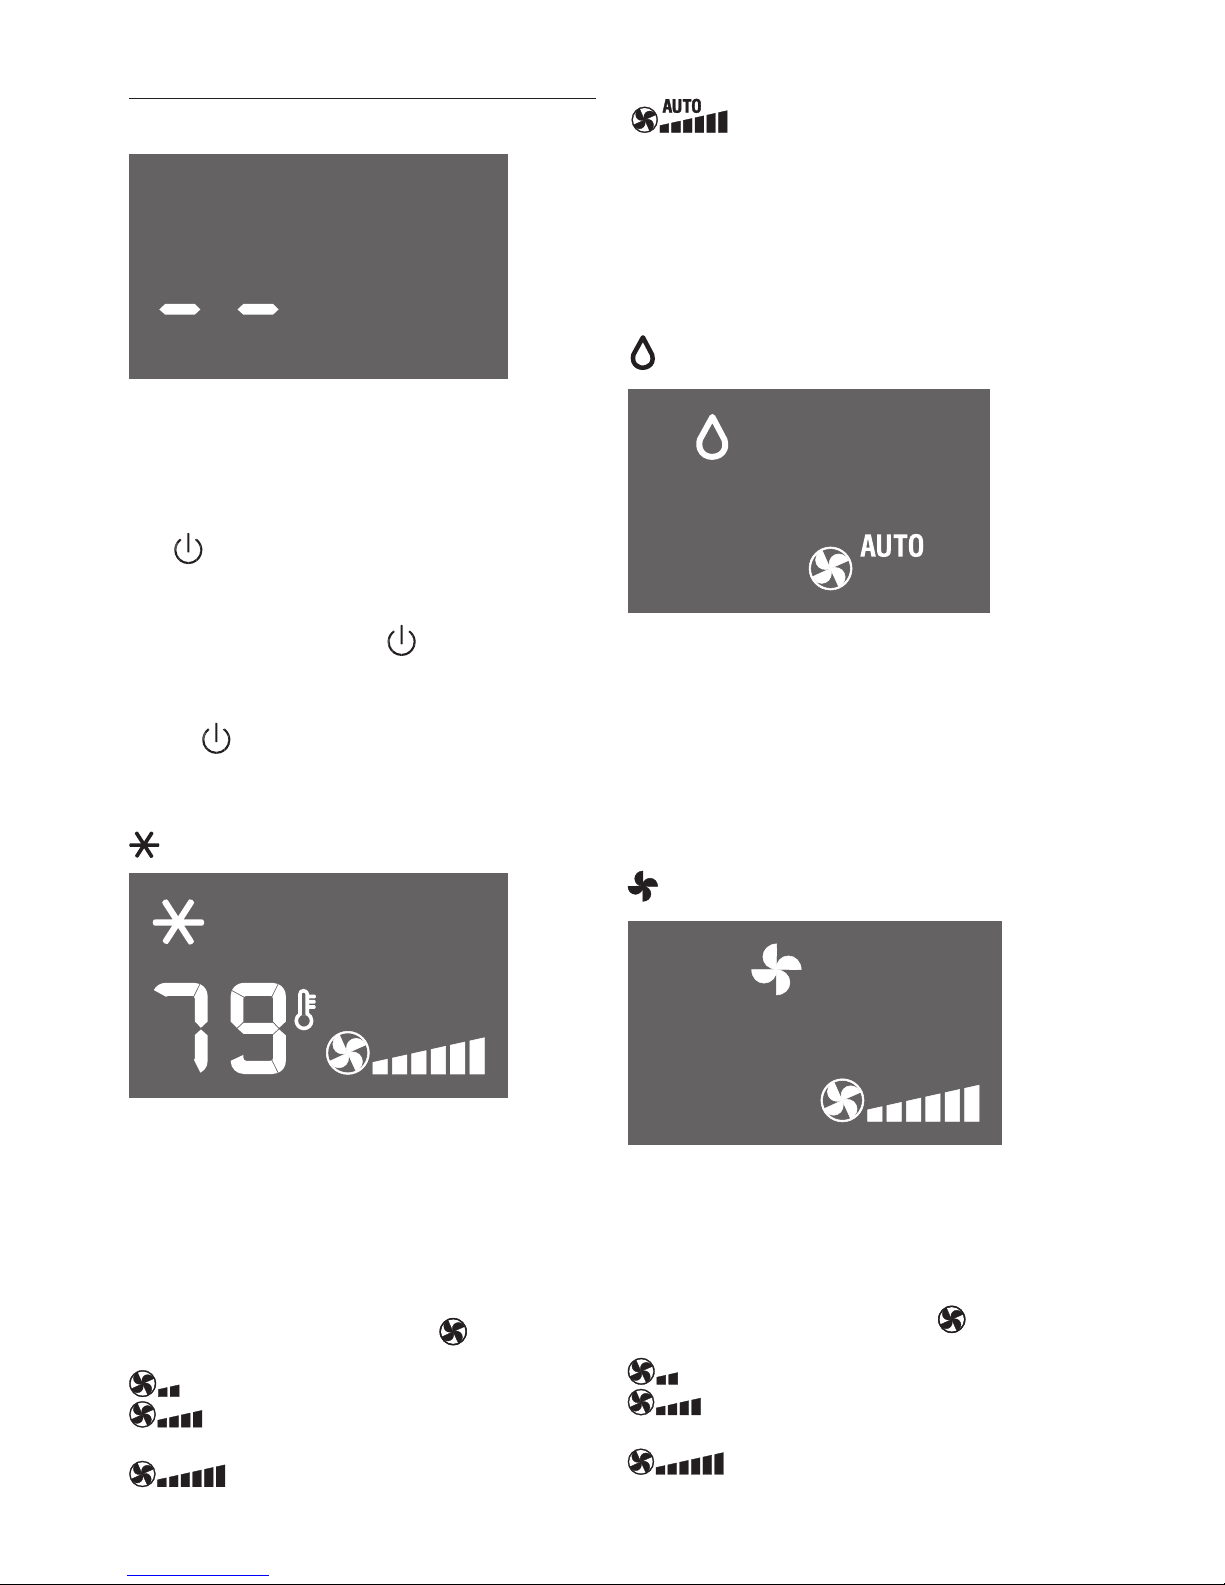
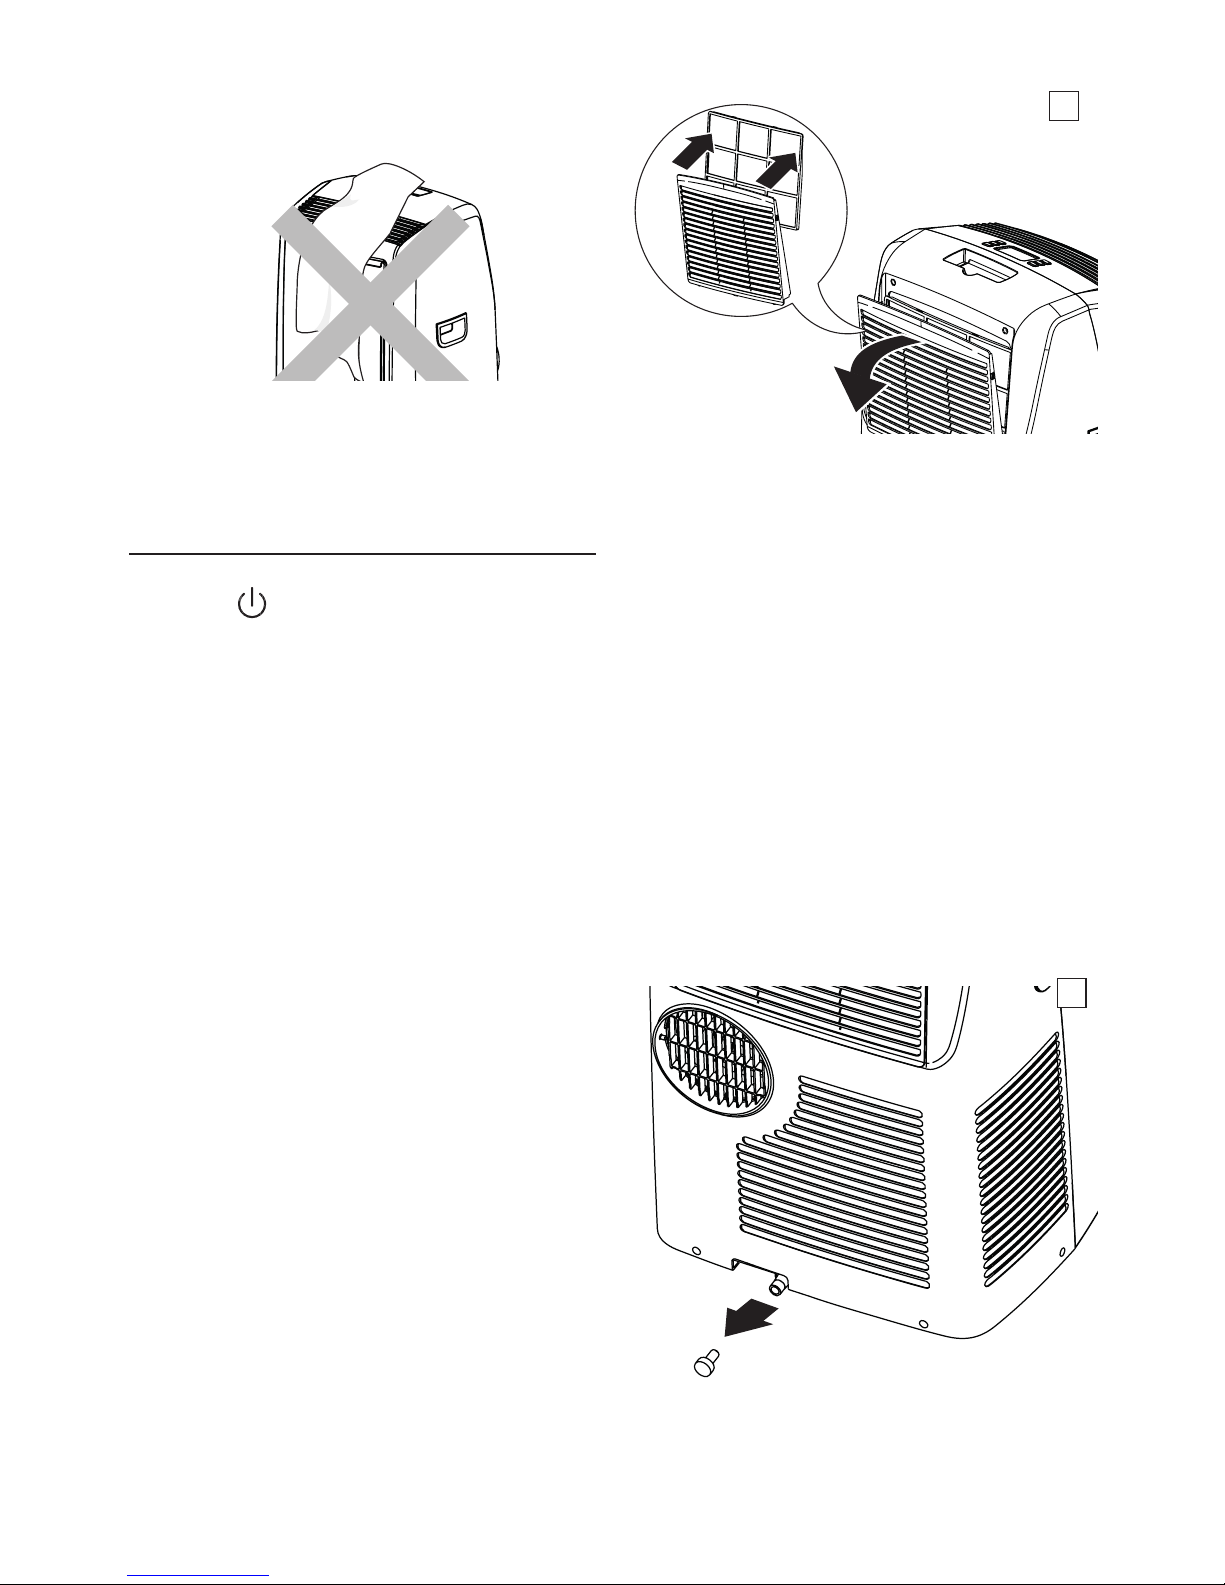
TURNING THE APPLIANCE ON
• Plugintotheelectricalreceptacle.
• Pressthe button(D1)(whenturnedon,theaircon-
ditionerstartsoperatinginthesamemodeaswhenitwas
turnedo).
• Toswitchtheapplianceo,pressbutton (D1),then
removetheplug.
NOTE: Neverswitchthe applianceobyremovingtheplug.
Alwaysswitchitobypushingonthe buttonand
waitingfewminutesbeforeremovingtheplug.Onlyinthis
waytheappliancewillperformthestandardcheckings.
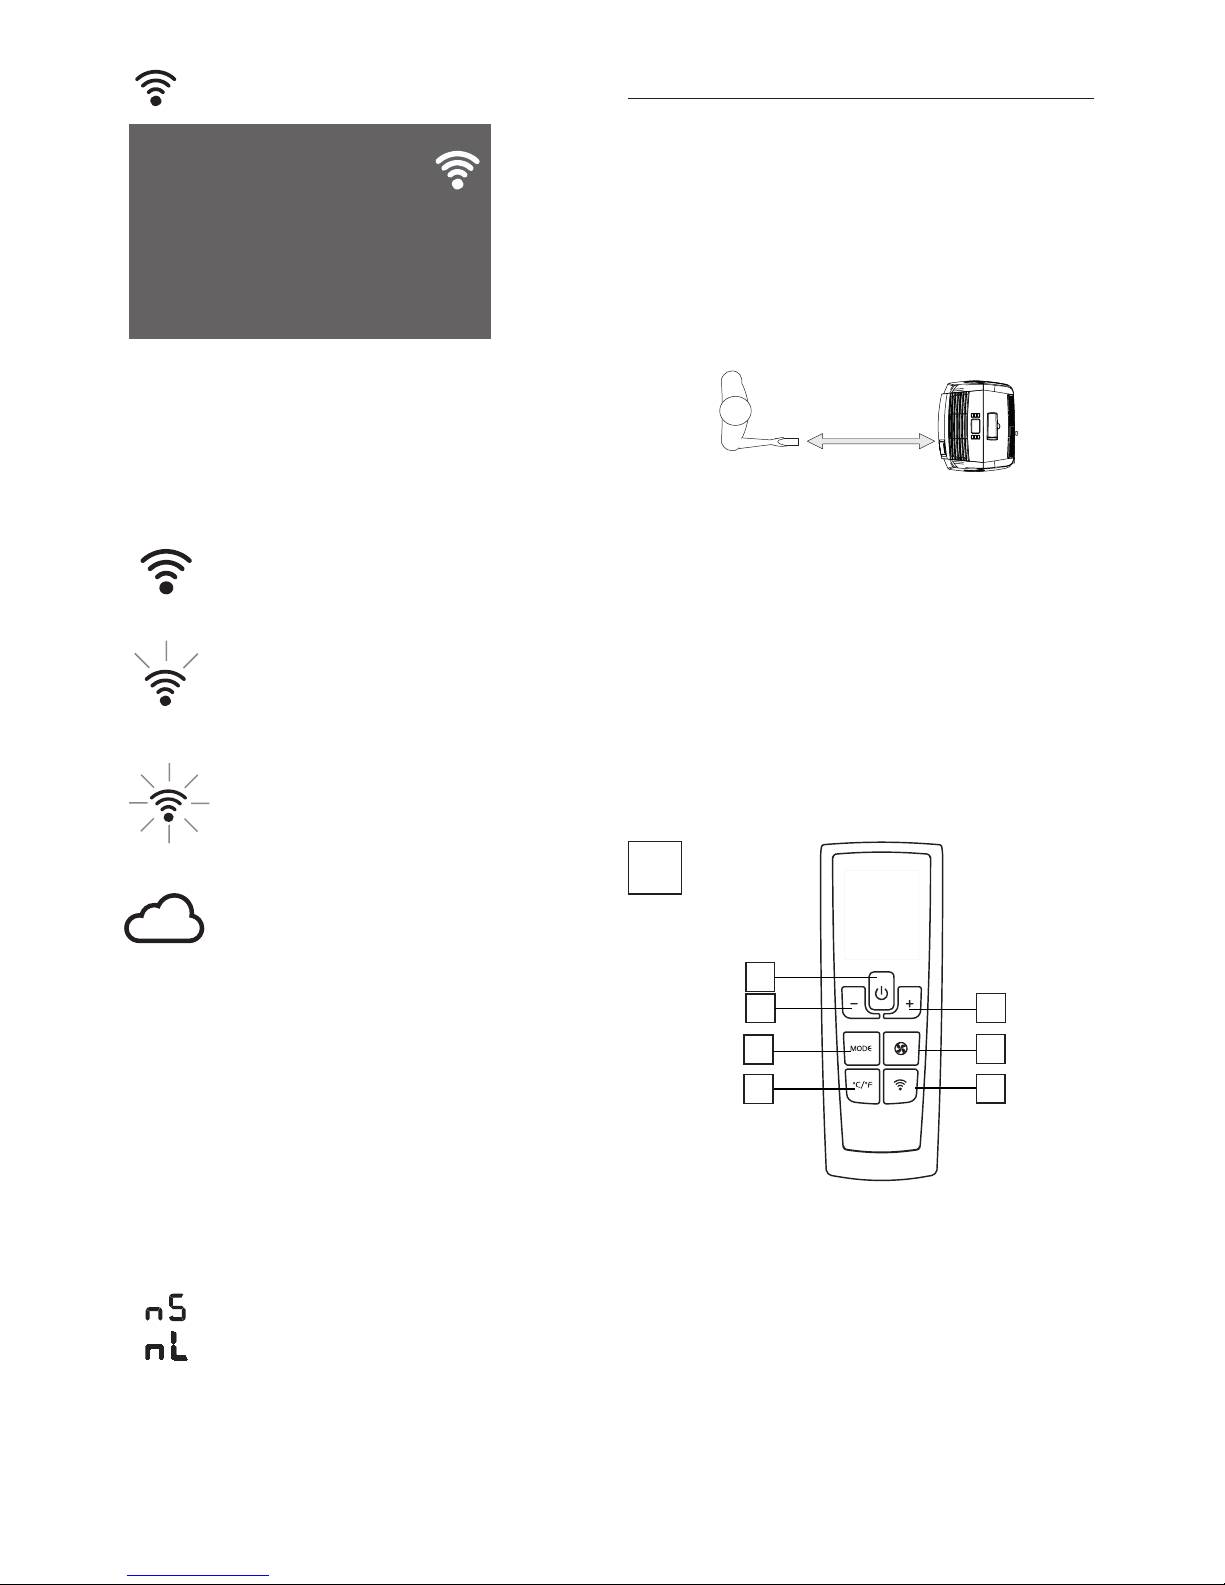
FUNCTIONS SELECTION
Thecontrolsontheremotecontrolarethesameasthoseonthe
controlpaneloftheappliance(C).Youshouldthereforereferto
the instructions in the chapter“OPERATING FROMTHE CON-
TROLPANEL”toselectthedesiredfunctions.PressbuttonD5
toswitchthetemperaturedisplayfrom°Cto°Fandviceversa.
FCC AND CANADA EMC COMPLIANCE INFORMATION
ThisdevicecomplieswithPart15oftheFCCRules.Operationis
subjecttothefollowingtwoconditions:
(1) Thisdevicemaynotcauseharmfulinterference,and
(2) Thisdevicemustacceptanyinterferencereceived,includ-
inginterferencethatmaycauseundesiredoperation.
NOTE:This equipment has been tested and found to comply
withthelimitsforaClassBdigitaldevice,pursuanttopart
15oftheFCCRules.Theselimitsaredesignedtoprovide
reasonable protection against harmful interference in a
residential installation. This equipment generates, uses
andcanradiateradiofrequencyenergyand,ifnotinstalled
andusedinaccordancewiththeinstructions,maycause
harmfulinterferenceto radio communications.However,
thereisnoguaranteethatinterferencewillnotoccurina
particularinstallation.Ifthisequipmentdoescauseharm-
fulinterferencetoradioortelevisionreception,whichcan
bedeterminedbyturningtheequipmentoandon,the
userisencouragedtotrytocorrecttheinterferencebyone
ormoreofthefollowingmeasures:
• Reorientorrelocatethereceivingantenna.
• Increasethe separationbetweenthe equipmentand re-
ceiver.
• Connecttheequipmentintoanoutletonacircuitdierent
fromthattowhichthereceiverisconnected.
• Consultthedealeroranexperiencedradio/TVtechnician
forhelp.
ApprovedunderthecerticationprovisionofFCCPart15asa
ClassBDigitalDevice.
Caution:Changesormodicationsnotexpresslyapprovedby
themanufacturercouldvoidtheuser’sauthoritytooperate
thisdevice.
Caution: TocomplywiththelimitsoftheClassBdigitaldevice,
pursuanttoPart15oftheFCCRules,thisdeviceistocom-
ply with Class B limits. All peripherals must be shielded
and grounded. Operation with non-certied peripherals
ornonshieldedcablesmyresultininterferencetoradioor
reception.
ThisClassBdigitalapparatuscomplieswithCanadianICES-003.
CANICES-3(B)/NMB-3(B)
Cet appareil numérique de la classe B est conforme à la norme
NMB-003 du Canada.
WIRELESS TRANSMITTER COMPLIANCE INFORMATION
Theterm“IC:”beforetheradiocerticationnumberonlysigni-
esthatIndustryCanadatechnicalspecicationsweremet.
Le terme «IC:» avant le numéro de certication radio signie seule-
ment que les spécications techniques d’Industrie Canada ont été
respectées.
This device complies with Industry Canada’s licence-exempt
RSSs.Operationissubjecttothefollowingtwoconditions:
(1) Thisdevicemaynotcauseinterference;and
(2) Thisdevicemustacceptanyinterference,includinginter-
ferencethatmaycauseundesiredoperationofthedevice.
Le présent appareil est conforme aux CNR d’Industrie Canada ap-
plicables aux appareils radio exempts de licence. L’exploitation est
autorisée aux deux conditions suivantes :
(1) l’appareil ne doit pas produire de brouillage;
(2) l’utilisateur de l’appareil doit accepter tout brouillage ra-
dioélectrique subi, même si le brouillage est susceptible d’en
compromettre le fonctionnement.
This equipment complies with FCC and IC radiation exposure
limitssetforthforanuncontrolledenvironment.Thisequipment
shouldbeinstalledandoperatedwithminimumdistance20cm
betweentheradiatorandyourbody.Thistransmittermustnot
beco-locatedoroperatingin conjunctionwith anyother an-
tennaortransmitter.
Cet appareil est conforme à FCC et IC l’exposition aux rayonne-
ments limites xées pour un environnement non contrôlé. Cet ap-
pareil doit être installé et utilisé avec une distance minimale de 20
cm entre le radiateur et votre corps.


 instruction manual")


