Daewoo DLMJ1500E User manual

DLMJ1500E
Electric lawn mowers / Elektromos fűnyírók
Manufactured under license of Daewoo International Corporation, Korea /
A koreai Daewoo International Corporation gyártási engedélye alapján gyártott készülék
www.daewoopowerproducts.com
USER'S MANUAL/ HASZNÁLATI UTASÍTÁS
1. SAFETY INSTRUCTIONS
GENERAL SAFETY INSTRUCTIONS
WARNING! Read all instructions failure to follow all instructions listed below may result in electric
shock, fire and /or serious injury. The term “power tool” in all of the warnings listed below refers to
your mains operated (corded) power tools or battery operated (cordless) power tool.
SAVE THESE INSTRUCTIONS
1) WORK AREA
a) Keep the work area clean and well lit. Cluttered and dark areas invite accidents.
b) Do not operate power tools in explosive atmospheres, such as in the presence of flammable
liquids, gases or dust. Power tools create sparks, which may ignite the dust or fumes.
c) Keep children and bystanders away while operating a power tool. Distractions can cause you to
lose control.
2) ELECTRICAL SAFETY
a) Power tool plugs must match the outlet. Never modify the plug in any way. Do not use any adap-
ter plugs with earthed (grounded) power tools. Unmodified plugs and matching outlets will reduce
risk of electric shock.
b) Avoid body contact with earthed or grounded surfaces such as pipes, radiators, ranges and
refrigerators. There is an increased risk of electric shock if your body is earthed or grounded.
c) Do not expose power tools to rain or wet conditions. Water entering a power tool will increase the
risk of electric shock.
d) Do not abuse the cord. Never use the cord for carrying, pulling or unplugging the power tool.
Keep the cord away from heat, oil and sharp edges or moving parts. Damaged or entangled cords
increase the risk of electric shock.
e) When operating a power tool outdoors, use an extension cord suitable for outdoor use. Use of a
cord suitable for outdoor use reduces the risk of electric shock.
3) PERSONAL SAFETY
a) Stay alert. Watch what you are doing and use common sense when operating a power tool. Do
not operate tool when you are tired or under the influence of drugs, alcohol or medication. A
moment of inattention while operating power tools may result in serious personal injury.
b) Use safety equipment. Always wear eye protection. Safety equipment such as dust mask, no
-skid safety shoes, hard hat, or hearing protection used for appropriate conditions will reduce
personal injuries.
c) Avoid accidental starting. Ensure the switch is in the off position before plugging in. Carrying
power tools with your finger on the switch or plugging in power tools that have the switch on invites
accidents.
d) Remove any adjusting key or wrench before turning the power tool on. A wrench or a key left
attached to a rotating part of the power tool may result in personal injury.
e) Do not overreach. Keep proper footing and balance at all times. This enables better control of the
power tool in unexpected situations.
f) Dress properly. Do not wear loose clothing or jewellery; Keep your hair, clothing and gloves away
from moving parts. Loose clothes, jewellery or long hair can be caught in moving parts.
4) POWER TOOL USE AND CARE
a) Do not force the tool. Use the correct power tool for your application, The correct power tools will
do the job better and safer at the rate for which it was designed.
b) Do not use the power tool if the switch does not turn it on and off. Any power tool that cannot be
controlled with the switch is dangerous and must be repaired.
c) Disconnect the plug from the power source before making any adjustments, changing acces-
sories, or storing power tools. Such preventive safety measures reduce the risk of starting the
power tool accidentally.
d) Store idle power tools out of the reach of children and do not allow persons unfamiliar with the
power tool or these instructions to operate the power tool. Power tools are dangerous in the hands
of untrained users.
e) Maintain power tools, Check for misalignment or binding of moving parts, breakage of parts and
any other condition that may affect the power tools operation. If damaged, have the power tool
repaired before use. Many accidents are caused by poorly maintained power tools.
f) Keep cutting tools sharp and clean. Properly maintained cutting tools with sharp cutting edges
are less likely to bind and are easier to control.
g) Use the power tool, accessories and tool bits etc., in accordance with these instructions and in
the manner intended for particular type of power tool, taking into account the working conditions
and the work to be performed. Use of the power tool for operations different from intended could
result in a hazardous situation.
5) SERVICE
a) Have your power tool serviced by a qualified repair person using only identical replacement parts.
This will ensure that the safety of the power tool is maintained.
ADDITIONAL SAFETY RULES FOR LAWN MOWER
Read the instructions carefully. Be familiar with the controls and the proper use of the appliance.
Never allow children to use the appliance.
Never allow people unfamiliar with these instructions to use the appliance. Local regulations may
restrict the age of the operator.
Never operate the appliance with people, especially children, or pets are nearby.
The operator or user is responsible for accidents or hazards occurring to other people or their
property.
While operating the appliance, always wear substantial footwear and long trousers. Do not operate
the appliance when barefoot or wearing open sandals.
Thoroughly inspect the area where the appliance is to be used and remove all stones, sticks, wires,
bones, and other foreign objects.
Before using, always visually inspect to see that the rotating parts and cutter assembly are not worn
or damaged. Replace worn or damaged parts in sets to preserve balance.
Operate the appliance only in daylight or in good artificial light. Avoid operating the appliance in wet
grass, where feasible. Always be sure of your footing on slopes. Walk, never run. Always work
across the face of slopes, never up and down.
Exercise extreme caution when reversing or pulling the appliance towards to you.
Do not operate the appliance on excessively steep slopes.
Use extreme caution when reversing or pulling appliance towards you.
Stop the rotating parts if appliance has to be tilted for transportation. Do not operate the cutting
means when crossing surfaces other than grass, and when transporting the appliance to and from
the working area.
Never operate the appliance with defective guards or shields, or without safety devices, for example
deflectors and/or catchers in place.
Switch on the motor according to instructions and with feet well away from rotating parts.
Do not tilt appliance when switching on the motor, expect if the appliance has to be tilted for star-
ting. In this case, do not tilt it more than absolutely necessary and lift only the part, which is away
from the operator. Always ensure that both hands are in the operating position before returning the
appliance to the ground. Do not put hands or feet near or under rotating parts.
Never pick up or carry an appliance while the motor is running.
Pull the plug from the socket:
•Whenever you leave the machine.
• Before clearing a blockage.
• After striking a foreign object. Inspect the appliance for damage and make repairs as necessary.
• If the appliance starts to vibrate abnormally, check immediately.
When the machine is at work in the thick bushes or runs into obstacles it can’t cut down, the blade
will be stalled so that the machine temperature and current will increase. When the temperature is
too high or the current is too large, the overload protection device installed inside the machine will
automatically shut off the power to stop the machine ( main purpose is to protect motor and prolong
motor life ). At this moment, let go of the trigger and disconnect power supply of the machine, let the
machine cool in some time ( 1~2 mins) and then restart switch, the machine can rework.
Symbols
The rating plate on your tool may show symbols. These represent important information about the
product or instructions on its use
Waste electrical products should not be disposed of with household waste. Please
recycle where facilities exist. Check with your Local Authority or retailer for recycling advice.
Denotes risk of personal injury, loss of life, or damage to the tool in case of non-ob
servance
Use eye protection
Use ear protection
Conforms to all regulatory standards in the country in the EU where the products is
purchased
Wear sturdy, non-slip footwear
Read the user manual
Use protective gloves
Do not expose to rain
Keep children at a distance of no less than 10m from the work area
Debris may be ejected from the discharge chute
The tines will continue to rotate for a short while after the rake has been switched
off.Do not pick up or carry the rake until the tines has stopped rotating
This product is double insulated electrically
The tines will continue to rotate for a short while after the rake has been switched
off.Do not pick up or carry the rake until the tines has stopped rotating
Disconnect from mains power immediately if the power cord becomes damaged.
Beware of sharp blades. Blades continue to rotate after the motor is switched off-
Remove plug from mains before maintenance or if cord is damaged.
Keep supply flexible cord away from cutting mains
2.ASSEMBLY INSTRUCTIONS
Preparation:
1. Put the cable hook on upper handle.(Fig.1a)
2. Connect upper and lower handles with supplied screws and knobes.(Fig.1b)
3. Insert the handles into the mower body.(Fig.1c)
4. Fit each wheels over the axles, secure in place with the “R” pins (Fig.1d)
5. Fix the cable holders.(Fig.1e)
6. Grass collecton box assembly. Assemble two halves and fix them together.(Fig.1f)
7. Lift the flap and place the grass box over the lugs.(Fig.1g)
8. Press the wheel covers into place. (Fig.1h)

1
INDEX
1
. SAFETY INSTRUCTIONS ........................................................................................................................ 2
2. ASSEMBLY INSTRUCTIONS ................................................................................................................... 5
3. OPERATING ............................................................................................................................................. 7
4. MAINTENANCE ........................................................................................................................................ 9
5. TECHNICAL SPECIFICATIONS .............................................................................................................. 9
TARTALOM
1
. BIZTONSÁGI UTASÍTÁSOK ................................................................................................................... 10
2. ÖSSZESZERELÉSI ÚTMUTATÓ ............................................................................................................ 13
3. MŰKÖDÉS .............................................................................................................................................. 15
4. KARBANTARTÁS ................................................................................................................................... 17
5. MŰSZAKI ADATOK ............................................................................................................................... 18
GARANCIA ..................................................................................................................................................19
EN
HU
1. SAFETY INSTRUCTIONS
GENERAL SAFETY INSTRUCTIONS
WARNING! Read all instructions failure to follow all instructions listed below may result in electric
shock, fire and /or serious injury. The term “power tool” in all of the warnings listed below refers to
your mains operated (corded) power tools or battery operated (cordless) power tool.
SAVE THESE INSTRUCTIONS
1) WORK AREA
a) Keep the work area clean and well lit. Cluttered and dark areas invite accidents.
b) Do not operate power tools in explosive atmospheres, such as in the presence of flammable
liquids, gases or dust. Power tools create sparks, which may ignite the dust or fumes.
c) Keep children and bystanders away while operating a power tool. Distractions can cause you to
lose control.
2) ELECTRICAL SAFETY
a) Power tool plugs must match the outlet. Never modify the plug in any way. Do not use any adap-
ter plugs with earthed (grounded) power tools. Unmodified plugs and matching outlets will reduce
risk of electric shock.
b) Avoid body contact with earthed or grounded surfaces such as pipes, radiators, ranges and
refrigerators. There is an increased risk of electric shock if your body is earthed or grounded.
c) Do not expose power tools to rain or wet conditions. Water entering a power tool will increase the
risk of electric shock.
d) Do not abuse the cord. Never use the cord for carrying, pulling or unplugging the power tool.
Keep the cord away from heat, oil and sharp edges or moving parts. Damaged or entangled cords
increase the risk of electric shock.
e) When operating a power tool outdoors, use an extension cord suitable for outdoor use. Use of a
cord suitable for outdoor use reduces the risk of electric shock.
3) PERSONAL SAFETY
a) Stay alert. Watch what you are doing and use common sense when operating a power tool. Do
not operate tool when you are tired or under the influence of drugs, alcohol or medication. A
moment of inattention while operating power tools may result in serious personal injury.
b) Use safety equipment. Always wear eye protection. Safety equipment such as dust mask, no
-skid safety shoes, hard hat, or hearing protection used for appropriate conditions will reduce
personal injuries.
c) Avoid accidental starting. Ensure the switch is in the off position before plugging in. Carrying
power tools with your finger on the switch or plugging in power tools that have the switch on invites
accidents.
d) Remove any adjusting key or wrench before turning the power tool on. A wrench or a key left
attached to a rotating part of the power tool may result in personal injury.
e) Do not overreach. Keep proper footing and balance at all times. This enables better control of the
power tool in unexpected situations.
f) Dress properly. Do not wear loose clothing or jewellery; Keep your hair, clothing and gloves away
from moving parts. Loose clothes, jewellery or long hair can be caught in moving parts.
4) POWER TOOL USE AND CARE
a) Do not force the tool. Use the correct power tool for your application, The correct power tools will
do the job better and safer at the rate for which it was designed.
b) Do not use the power tool if the switch does not turn it on and off. Any power tool that cannot be
controlled with the switch is dangerous and must be repaired.
c) Disconnect the plug from the power source before making any adjustments, changing acces-
sories, or storing power tools. Such preventive safety measures reduce the risk of starting the
power tool accidentally.
d) Store idle power tools out of the reach of children and do not allow persons unfamiliar with the
power tool or these instructions to operate the power tool. Power tools are dangerous in the hands
of untrained users.
e) Maintain power tools, Check for misalignment or binding of moving parts, breakage of parts and
any other condition that may affect the power tools operation. If damaged, have the power tool
repaired before use. Many accidents are caused by poorly maintained power tools.
f) Keep cutting tools sharp and clean. Properly maintained cutting tools with sharp cutting edges
are less likely to bind and are easier to control.
g) Use the power tool, accessories and tool bits etc., in accordance with these instructions and in
the manner intended for particular type of power tool, taking into account the working conditions
and the work to be performed. Use of the power tool for operations different from intended could
result in a hazardous situation.
5) SERVICE
a) Have your power tool serviced by a qualified repair person using only identical replacement parts.
This will ensure that the safety of the power tool is maintained.
ADDITIONAL SAFETY RULES FOR LAWN MOWER
Read the instructions carefully. Be familiar with the controls and the proper use of the appliance.
Never allow children to use the appliance.
Never allow people unfamiliar with these instructions to use the appliance. Local regulations may
restrict the age of the operator.
Never operate the appliance with people, especially children, or pets are nearby.
The operator or user is responsible for accidents or hazards occurring to other people or their
property.
While operating the appliance, always wear substantial footwear and long trousers. Do not operate
the appliance when barefoot or wearing open sandals.
Thoroughly inspect the area where the appliance is to be used and remove all stones, sticks, wires,
bones, and other foreign objects.
Before using, always visually inspect to see that the rotating parts and cutter assembly are not worn
or damaged. Replace worn or damaged parts in sets to preserve balance.
Operate the appliance only in daylight or in good artificial light. Avoid operating the appliance in wet
grass, where feasible. Always be sure of your footing on slopes. Walk, never run. Always work
across the face of slopes, never up and down.
Exercise extreme caution when reversing or pulling the appliance towards to you.
Do not operate the appliance on excessively steep slopes.
Use extreme caution when reversing or pulling appliance towards you.
Stop the rotating parts if appliance has to be tilted for transportation. Do not operate the cutting
means when crossing surfaces other than grass, and when transporting the appliance to and from
the working area.
Never operate the appliance with defective guards or shields, or without safety devices, for example
deflectors and/or catchers in place.
Switch on the motor according to instructions and with feet well away from rotating parts.
Do not tilt appliance when switching on the motor, expect if the appliance has to be tilted for star-
ting. In this case, do not tilt it more than absolutely necessary and lift only the part, which is away
from the operator. Always ensure that both hands are in the operating position before returning the
appliance to the ground. Do not put hands or feet near or under rotating parts.
Never pick up or carry an appliance while the motor is running.
Pull the plug from the socket:
•Whenever you leave the machine.
• Before clearing a blockage.
• After striking a foreign object. Inspect the appliance for damage and make repairs as necessary.
• If the appliance starts to vibrate abnormally, check immediately.
When the machine is at work in the thick bushes or runs into obstacles it can’t cut down, the blade
will be stalled so that the machine temperature and current will increase. When the temperature is
too high or the current is too large, the overload protection device installed inside the machine will
automatically shut off the power to stop the machine ( main purpose is to protect motor and prolong
motor life ). At this moment, let go of the trigger and disconnect power supply of the machine, let the
machine cool in some time ( 1~2 mins) and then restart switch, the machine can rework.
Symbols
The rating plate on your tool may show symbols. These represent important information about the
product or instructions on its use
Waste electrical products should not be disposed of with household waste. Please
recycle where facilities exist. Check with your Local Authority or retailer for recycling advice.
Denotes risk of personal injury, loss of life, or damage to the tool in case of non-ob
servance
Use eye protection
Use ear protection
Conforms to all regulatory standards in the country in the EU where the products is
purchased
Wear sturdy, non-slip footwear
Read the user manual
Use protective gloves
Do not expose to rain
Keep children at a distance of no less than 10m from the work area
Debris may be ejected from the discharge chute
The tines will continue to rotate for a short while after the rake has been switched
off.Do not pick up or carry the rake until the tines has stopped rotating
This product is double insulated electrically
The tines will continue to rotate for a short while after the rake has been switched
off.Do not pick up or carry the rake until the tines has stopped rotating
Disconnect from mains power immediately if the power cord becomes damaged.
Beware of sharp blades. Blades continue to rotate after the motor is switched off-
Remove plug from mains before maintenance or if cord is damaged.
Keep supply flexible cord away from cutting mains
2.ASSEMBLY INSTRUCTIONS
Preparation:
1. Put the cable hook on upper handle.(Fig.1a)
2. Connect upper and lower handles with supplied screws and knobes.(Fig.1b)
3. Insert the handles into the mower body.(Fig.1c)
4. Fit each wheels over the axles, secure in place with the “R” pins (Fig.1d)
5. Fix the cable holders.(Fig.1e)
6. Grass collecton box assembly. Assemble two halves and fix them together.(Fig.1f)
7. Lift the flap and place the grass box over the lugs.(Fig.1g)
8. Press the wheel covers into place. (Fig.1h)

2
EN
1. SAFETY INSTRUCTIONS
GENERAL SAFETY INSTRUCTIONS
WARNING! Read all instructions failure to follow all instructions listed below may result in electric
shock, fire and /or serious injury. The term “power tool” in all of the warnings listed below refers to
your mains operated (corded) power tools or battery operated (cordless) power tool.
SAVE THESE INSTRUCTIONS
1) WORK AREA
a) Keep the work area clean and well lit. Cluttered and dark areas invite accidents.
b) Do not operate power tools in explosive atmospheres, such as in the presence of flammable
liquids, gases or dust. Power tools create sparks, which may ignite the dust or fumes.
c) Keep children and bystanders away while operating a power tool. Distractions can cause you to
lose control.
2) ELECTRICAL SAFETY
a) Power tool plugs must match the outlet. Never modify the plug in any way. Do not use any adap-
ter plugs with earthed (grounded) power tools. Unmodified plugs and matching outlets will reduce
risk of electric shock.
b) Avoid body contact with earthed or grounded surfaces such as pipes, radiators, ranges and
refrigerators. There is an increased risk of electric shock if your body is earthed or grounded.
c) Do not expose power tools to rain or wet conditions. Water entering a power tool will increase the
risk of electric shock.
d) Do not abuse the cord. Never use the cord for carrying, pulling or unplugging the power tool.
Keep the cord away from heat, oil and sharp edges or moving parts. Damaged or entangled cords
increase the risk of electric shock.
e) When operating a power tool outdoors, use an extension cord suitable for outdoor use. Use of a
cord suitable for outdoor use reduces the risk of electric shock.
3) PERSONAL SAFETY
a) Stay alert. Watch what you are doing and use common sense when operating a power tool. Do
not operate tool when you are tired or under the influence of drugs, alcohol or medication. A
moment of inattention while operating power tools may result in serious personal injury.
b) Use safety equipment. Always wear eye protection. Safety equipment such as dust mask, no
-skid safety shoes, hard hat, or hearing protection used for appropriate conditions will reduce
personal injuries.
c) Avoid accidental starting. Ensure the switch is in the off position before plugging in. Carrying
power tools with your finger on the switch or plugging in power tools that have the switch on invites
accidents.
d) Remove any adjusting key or wrench before turning the power tool on. A wrench or a key left
attached to a rotating part of the power tool may result in personal injury.
e) Do not overreach. Keep proper footing and balance at all times. This enables better control of the
power tool in unexpected situations.
f) Dress properly. Do not wear loose clothing or jewellery; Keep your hair, clothing and gloves away
from moving parts. Loose clothes, jewellery or long hair can be caught in moving parts.
4) POWER TOOL USE AND CARE
a) Do not force the tool. Use the correct power tool for your application, The correct power tools will
do the job better and safer at the rate for which it was designed.
b) Do not use the power tool if the switch does not turn it on and off. Any power tool that cannot be
controlled with the switch is dangerous and must be repaired.
c) Disconnect the plug from the power source before making any adjustments, changing acces-
sories, or storing power tools. Such preventive safety measures reduce the risk of starting the
power tool accidentally.
d) Store idle power tools out of the reach of children and do not allow persons unfamiliar with the
power tool or these instructions to operate the power tool. Power tools are dangerous in the hands
of untrained users.
e) Maintain power tools, Check for misalignment or binding of moving parts, breakage of parts and
any other condition that may affect the power tools operation. If damaged, have the power tool
repaired before use. Many accidents are caused by poorly maintained power tools.
f) Keep cutting tools sharp and clean. Properly maintained cutting tools with sharp cutting edges
are less likely to bind and are easier to control.
g) Use the power tool, accessories and tool bits etc., in accordance with these instructions and in
the manner intended for particular type of power tool, taking into account the working conditions
and the work to be performed. Use of the power tool for operations different from intended could
result in a hazardous situation.
5) SERVICE
a) Have your power tool serviced by a qualified repair person using only identical replacement parts.
This will ensure that the safety of the power tool is maintained.
ADDITIONAL SAFETY RULES FOR LAWN MOWER
Read the instructions carefully. Be familiar with the controls and the proper use of the appliance.
Never allow children to use the appliance.
Never allow people unfamiliar with these instructions to use the appliance. Local regulations may
restrict the age of the operator.
Never operate the appliance with people, especially children, or pets are nearby.
The operator or user is responsible for accidents or hazards occurring to other people or their
property.
While operating the appliance, always wear substantial footwear and long trousers. Do not operate
the appliance when barefoot or wearing open sandals.
Thoroughly inspect the area where the appliance is to be used and remove all stones, sticks, wires,
bones, and other foreign objects.
Before using, always visually inspect to see that the rotating parts and cutter assembly are not worn
or damaged. Replace worn or damaged parts in sets to preserve balance.
Operate the appliance only in daylight or in good artificial light. Avoid operating the appliance in wet
grass, where feasible. Always be sure of your footing on slopes. Walk, never run. Always work
across the face of slopes, never up and down.
Exercise extreme caution when reversing or pulling the appliance towards to you.
Do not operate the appliance on excessively steep slopes.
Use extreme caution when reversing or pulling appliance towards you.
Stop the rotating parts if appliance has to be tilted for transportation. Do not operate the cutting
means when crossing surfaces other than grass, and when transporting the appliance to and from
the working area.
Never operate the appliance with defective guards or shields, or without safety devices, for example
deflectors and/or catchers in place.
Switch on the motor according to instructions and with feet well away from rotating parts.
Do not tilt appliance when switching on the motor, expect if the appliance has to be tilted for star-
ting. In this case, do not tilt it more than absolutely necessary and lift only the part, which is away
from the operator. Always ensure that both hands are in the operating position before returning the
appliance to the ground. Do not put hands or feet near or under rotating parts.
Never pick up or carry an appliance while the motor is running.
Pull the plug from the socket:
•Whenever you leave the machine.
• Before clearing a blockage.
• After striking a foreign object. Inspect the appliance for damage and make repairs as necessary.
• If the appliance starts to vibrate abnormally, check immediately.
When the machine is at work in the thick bushes or runs into obstacles it can’t cut down, the blade
will be stalled so that the machine temperature and current will increase. When the temperature is
too high or the current is too large, the overload protection device installed inside the machine will
automatically shut off the power to stop the machine ( main purpose is to protect motor and prolong
motor life ). At this moment, let go of the trigger and disconnect power supply of the machine, let the
machine cool in some time ( 1~2 mins) and then restart switch, the machine can rework.
Symbols
The rating plate on your tool may show symbols. These represent important information about the
product or instructions on its use
Waste electrical products should not be disposed of with household waste. Please
recycle where facilities exist. Check with your Local Authority or retailer for recycling advice.
Denotes risk of personal injury, loss of life, or damage to the tool in case of non-ob
servance
Use eye protection
Use ear protection
Conforms to all regulatory standards in the country in the EU where the products is
purchased
Wear sturdy, non-slip footwear
Read the user manual
Use protective gloves
Do not expose to rain
Keep children at a distance of no less than 10m from the work area
Debris may be ejected from the discharge chute
The tines will continue to rotate for a short while after the rake has been switched
off.Do not pick up or carry the rake until the tines has stopped rotating
This product is double insulated electrically
The tines will continue to rotate for a short while after the rake has been switched
off.Do not pick up or carry the rake until the tines has stopped rotating
Disconnect from mains power immediately if the power cord becomes damaged.
Beware of sharp blades. Blades continue to rotate after the motor is switched off-
Remove plug from mains before maintenance or if cord is damaged.
Keep supply flexible cord away from cutting mains
2.ASSEMBLY INSTRUCTIONS
Preparation:
1. Put the cable hook on upper handle.(Fig.1a)
2. Connect upper and lower handles with supplied screws and knobes.(Fig.1b)
3. Insert the handles into the mower body.(Fig.1c)
4. Fit each wheels over the axles, secure in place with the “R” pins (Fig.1d)
5. Fix the cable holders.(Fig.1e)
6. Grass collecton box assembly. Assemble two halves and fix them together.(Fig.1f)
7. Lift the flap and place the grass box over the lugs.(Fig.1g)
8. Press the wheel covers into place. (Fig.1h)

3
1. SAFETY INSTRUCTIONS
GENERAL SAFETY INSTRUCTIONS
WARNING! Read all instructions failure to follow all instructions listed below may result in electric
shock, fire and /or serious injury. The term “power tool” in all of the warnings listed below refers to
your mains operated (corded) power tools or battery operated (cordless) power tool.
SAVE THESE INSTRUCTIONS
1) WORK AREA
a) Keep the work area clean and well lit. Cluttered and dark areas invite accidents.
b) Do not operate power tools in explosive atmospheres, such as in the presence of flammable
liquids, gases or dust. Power tools create sparks, which may ignite the dust or fumes.
c) Keep children and bystanders away while operating a power tool. Distractions can cause you to
lose control.
2) ELECTRICAL SAFETY
a) Power tool plugs must match the outlet. Never modify the plug in any way. Do not use any adap-
ter plugs with earthed (grounded) power tools. Unmodified plugs and matching outlets will reduce
risk of electric shock.
b) Avoid body contact with earthed or grounded surfaces such as pipes, radiators, ranges and
refrigerators. There is an increased risk of electric shock if your body is earthed or grounded.
c) Do not expose power tools to rain or wet conditions. Water entering a power tool will increase the
risk of electric shock.
d) Do not abuse the cord. Never use the cord for carrying, pulling or unplugging the power tool.
Keep the cord away from heat, oil and sharp edges or moving parts. Damaged or entangled cords
increase the risk of electric shock.
e) When operating a power tool outdoors, use an extension cord suitable for outdoor use. Use of a
cord suitable for outdoor use reduces the risk of electric shock.
3) PERSONAL SAFETY
a) Stay alert. Watch what you are doing and use common sense when operating a power tool. Do
not operate tool when you are tired or under the influence of drugs, alcohol or medication. A
moment of inattention while operating power tools may result in serious personal injury.
b) Use safety equipment. Always wear eye protection. Safety equipment such as dust mask, no
-skid safety shoes, hard hat, or hearing protection used for appropriate conditions will reduce
personal injuries.
c) Avoid accidental starting. Ensure the switch is in the off position before plugging in. Carrying
power tools with your finger on the switch or plugging in power tools that have the switch on invites
accidents.
d) Remove any adjusting key or wrench before turning the power tool on. A wrench or a key left
attached to a rotating part of the power tool may result in personal injury.
e) Do not overreach. Keep proper footing and balance at all times. This enables better control of the
power tool in unexpected situations.
f) Dress properly. Do not wear loose clothing or jewellery; Keep your hair, clothing and gloves away
from moving parts. Loose clothes, jewellery or long hair can be caught in moving parts.
4) POWER TOOL USE AND CARE
a) Do not force the tool. Use the correct power tool for your application, The correct power tools will
do the job better and safer at the rate for which it was designed.
b) Do not use the power tool if the switch does not turn it on and off. Any power tool that cannot be
controlled with the switch is dangerous and must be repaired.
c) Disconnect the plug from the power source before making any adjustments, changing acces-
sories, or storing power tools. Such preventive safety measures reduce the risk of starting the
power tool accidentally.
d) Store idle power tools out of the reach of children and do not allow persons unfamiliar with the
power tool or these instructions to operate the power tool. Power tools are dangerous in the hands
of untrained users.
e) Maintain power tools, Check for misalignment or binding of moving parts, breakage of parts and
any other condition that may affect the power tools operation. If damaged, have the power tool
repaired before use. Many accidents are caused by poorly maintained power tools.
f) Keep cutting tools sharp and clean. Properly maintained cutting tools with sharp cutting edges
are less likely to bind and are easier to control.
g) Use the power tool, accessories and tool bits etc., in accordance with these instructions and in
the manner intended for particular type of power tool, taking into account the working conditions
and the work to be performed. Use of the power tool for operations different from intended could
result in a hazardous situation.
5) SERVICE
a) Have your power tool serviced by a qualified repair person using only identical replacement parts.
This will ensure that the safety of the power tool is maintained.
ADDITIONAL SAFETY RULES FOR LAWN MOWER
Read the instructions carefully. Be familiar with the controls and the proper use of the appliance.
Never allow children to use the appliance.
Never allow people unfamiliar with these instructions to use the appliance. Local regulations may
restrict the age of the operator.
Never operate the appliance with people, especially children, or pets are nearby.
The operator or user is responsible for accidents or hazards occurring to other people or their
property.
While operating the appliance, always wear substantial footwear and long trousers. Do not operate
the appliance when barefoot or wearing open sandals.
Thoroughly inspect the area where the appliance is to be used and remove all stones, sticks, wires,
bones, and other foreign objects.
Before using, always visually inspect to see that the rotating parts and cutter assembly are not worn
or damaged. Replace worn or damaged parts in sets to preserve balance.
Operate the appliance only in daylight or in good artificial light. Avoid operating the appliance in wet
grass, where feasible. Always be sure of your footing on slopes. Walk, never run. Always work
across the face of slopes, never up and down.
Exercise extreme caution when reversing or pulling the appliance towards to you.
Do not operate the appliance on excessively steep slopes.
Use extreme caution when reversing or pulling appliance towards you.
Stop the rotating parts if appliance has to be tilted for transportation. Do not operate the cutting
means when crossing surfaces other than grass, and when transporting the appliance to and from
the working area.
Never operate the appliance with defective guards or shields, or without safety devices, for example
deflectors and/or catchers in place.
Switch on the motor according to instructions and with feet well away from rotating parts.
Do not tilt appliance when switching on the motor, expect if the appliance has to be tilted for star-
ting. In this case, do not tilt it more than absolutely necessary and lift only the part, which is away
from the operator. Always ensure that both hands are in the operating position before returning the
appliance to the ground. Do not put hands or feet near or under rotating parts.
Never pick up or carry an appliance while the motor is running.
Pull the plug from the socket:
•Whenever you leave the machine.
• Before clearing a blockage.
• After striking a foreign object. Inspect the appliance for damage and make repairs as necessary.
• If the appliance starts to vibrate abnormally, check immediately.
When the machine is at work in the thick bushes or runs into obstacles it can’t cut down, the blade
will be stalled so that the machine temperature and current will increase. When the temperature is
too high or the current is too large, the overload protection device installed inside the machine will
automatically shut off the power to stop the machine ( main purpose is to protect motor and prolong
motor life ). At this moment, let go of the trigger and disconnect power supply of the machine, let the
machine cool in some time ( 1~2 mins) and then restart switch, the machine can rework.
Symbols
The rating plate on your tool may show symbols. These represent important information about the
product or instructions on its use
Waste electrical products should not be disposed of with household waste. Please
recycle where facilities exist. Check with your Local Authority or retailer for recycling advice.
Denotes risk of personal injury, loss of life, or damage to the tool in case of non-ob
servance
Use eye protection
Use ear protection
Conforms to all regulatory standards in the country in the EU where the products is
purchased
Wear sturdy, non-slip footwear
Read the user manual
Use protective gloves
Do not expose to rain
Keep children at a distance of no less than 10m from the work area
Debris may be ejected from the discharge chute
The tines will continue to rotate for a short while after the rake has been switched
off.Do not pick up or carry the rake until the tines has stopped rotating
This product is double insulated electrically
The tines will continue to rotate for a short while after the rake has been switched
off.Do not pick up or carry the rake until the tines has stopped rotating
Disconnect from mains power immediately if the power cord becomes damaged.
Beware of sharp blades. Blades continue to rotate after the motor is switched off-
Remove plug from mains before maintenance or if cord is damaged.
Keep supply flexible cord away from cutting mains
2.ASSEMBLY INSTRUCTIONS
Preparation:
1. Put the cable hook on upper handle.(Fig.1a)
2. Connect upper and lower handles with supplied screws and knobes.(Fig.1b)
3. Insert the handles into the mower body.(Fig.1c)
4. Fit each wheels over the axles, secure in place with the “R” pins (Fig.1d)
5. Fix the cable holders.(Fig.1e)
6. Grass collecton box assembly. Assemble two halves and fix them together.(Fig.1f)
7. Lift the flap and place the grass box over the lugs.(Fig.1g)
8. Press the wheel covers into place. (Fig.1h)

4
EN
1. SAFETY INSTRUCTIONS
GENERAL SAFETY INSTRUCTIONS
WARNING! Read all instructions failure to follow all instructions listed below may result in electric
shock, fire and /or serious injury. The term “power tool” in all of the warnings listed below refers to
your mains operated (corded) power tools or battery operated (cordless) power tool.
SAVE THESE INSTRUCTIONS
1) WORK AREA
a) Keep the work area clean and well lit. Cluttered and dark areas invite accidents.
b) Do not operate power tools in explosive atmospheres, such as in the presence of flammable
liquids, gases or dust. Power tools create sparks, which may ignite the dust or fumes.
c) Keep children and bystanders away while operating a power tool. Distractions can cause you to
lose control.
2) ELECTRICAL SAFETY
a) Power tool plugs must match the outlet. Never modify the plug in any way. Do not use any adap-
ter plugs with earthed (grounded) power tools. Unmodified plugs and matching outlets will reduce
risk of electric shock.
b) Avoid body contact with earthed or grounded surfaces such as pipes, radiators, ranges and
refrigerators. There is an increased risk of electric shock if your body is earthed or grounded.
c) Do not expose power tools to rain or wet conditions. Water entering a power tool will increase the
risk of electric shock.
d) Do not abuse the cord. Never use the cord for carrying, pulling or unplugging the power tool.
Keep the cord away from heat, oil and sharp edges or moving parts. Damaged or entangled cords
increase the risk of electric shock.
e) When operating a power tool outdoors, use an extension cord suitable for outdoor use. Use of a
cord suitable for outdoor use reduces the risk of electric shock.
3) PERSONAL SAFETY
a) Stay alert. Watch what you are doing and use common sense when operating a power tool. Do
not operate tool when you are tired or under the influence of drugs, alcohol or medication. A
moment of inattention while operating power tools may result in serious personal injury.
b) Use safety equipment. Always wear eye protection. Safety equipment such as dust mask, no
-skid safety shoes, hard hat, or hearing protection used for appropriate conditions will reduce
personal injuries.
c) Avoid accidental starting. Ensure the switch is in the off position before plugging in. Carrying
power tools with your finger on the switch or plugging in power tools that have the switch on invites
accidents.
d) Remove any adjusting key or wrench before turning the power tool on. A wrench or a key left
attached to a rotating part of the power tool may result in personal injury.
e) Do not overreach. Keep proper footing and balance at all times. This enables better control of the
power tool in unexpected situations.
f) Dress properly. Do not wear loose clothing or jewellery; Keep your hair, clothing and gloves away
from moving parts. Loose clothes, jewellery or long hair can be caught in moving parts.
4) POWER TOOL USE AND CARE
a) Do not force the tool. Use the correct power tool for your application, The correct power tools will
do the job better and safer at the rate for which it was designed.
b) Do not use the power tool if the switch does not turn it on and off. Any power tool that cannot be
controlled with the switch is dangerous and must be repaired.
c) Disconnect the plug from the power source before making any adjustments, changing acces-
sories, or storing power tools. Such preventive safety measures reduce the risk of starting the
power tool accidentally.
d) Store idle power tools out of the reach of children and do not allow persons unfamiliar with the
power tool or these instructions to operate the power tool. Power tools are dangerous in the hands
of untrained users.
e) Maintain power tools, Check for misalignment or binding of moving parts, breakage of parts and
any other condition that may affect the power tools operation. If damaged, have the power tool
repaired before use. Many accidents are caused by poorly maintained power tools.
f) Keep cutting tools sharp and clean. Properly maintained cutting tools with sharp cutting edges
are less likely to bind and are easier to control.
g) Use the power tool, accessories and tool bits etc., in accordance with these instructions and in
the manner intended for particular type of power tool, taking into account the working conditions
and the work to be performed. Use of the power tool for operations different from intended could
result in a hazardous situation.
5) SERVICE
a) Have your power tool serviced by a qualified repair person using only identical replacement parts.
This will ensure that the safety of the power tool is maintained.
ADDITIONAL SAFETY RULES FOR LAWN MOWER
Read the instructions carefully. Be familiar with the controls and the proper use of the appliance.
Never allow children to use the appliance.
Never allow people unfamiliar with these instructions to use the appliance. Local regulations may
restrict the age of the operator.
Never operate the appliance with people, especially children, or pets are nearby.
The operator or user is responsible for accidents or hazards occurring to other people or their
property.
While operating the appliance, always wear substantial footwear and long trousers. Do not operate
the appliance when barefoot or wearing open sandals.
Thoroughly inspect the area where the appliance is to be used and remove all stones, sticks, wires,
bones, and other foreign objects.
Before using, always visually inspect to see that the rotating parts and cutter assembly are not worn
or damaged. Replace worn or damaged parts in sets to preserve balance.
Operate the appliance only in daylight or in good artificial light. Avoid operating the appliance in wet
grass, where feasible. Always be sure of your footing on slopes. Walk, never run. Always work
across the face of slopes, never up and down.
Exercise extreme caution when reversing or pulling the appliance towards to you.
Do not operate the appliance on excessively steep slopes.
Use extreme caution when reversing or pulling appliance towards you.
Stop the rotating parts if appliance has to be tilted for transportation. Do not operate the cutting
means when crossing surfaces other than grass, and when transporting the appliance to and from
the working area.
Never operate the appliance with defective guards or shields, or without safety devices, for example
deflectors and/or catchers in place.
Switch on the motor according to instructions and with feet well away from rotating parts.
Do not tilt appliance when switching on the motor, expect if the appliance has to be tilted for star-
ting. In this case, do not tilt it more than absolutely necessary and lift only the part, which is away
from the operator. Always ensure that both hands are in the operating position before returning the
appliance to the ground. Do not put hands or feet near or under rotating parts.
Never pick up or carry an appliance while the motor is running.
Pull the plug from the socket:
•Whenever you leave the machine.
• Before clearing a blockage.
• After striking a foreign object. Inspect the appliance for damage and make repairs as necessary.
• If the appliance starts to vibrate abnormally, check immediately.
When the machine is at work in the thick bushes or runs into obstacles it can’t cut down, the blade
will be stalled so that the machine temperature and current will increase. When the temperature is
too high or the current is too large, the overload protection device installed inside the machine will
automatically shut off the power to stop the machine ( main purpose is to protect motor and prolong
motor life ). At this moment, let go of the trigger and disconnect power supply of the machine, let the
machine cool in some time ( 1~2 mins) and then restart switch, the machine can rework.
Symbols
The rating plate on your tool may show symbols. These represent important information about the
product or instructions on its use
Waste electrical products should not be disposed of with household waste. Please
recycle where facilities exist. Check with your Local Authority or retailer for recycling advice.
Denotes risk of personal injury, loss of life, or damage to the tool in case of non-ob
servance
Use eye protection
Use ear protection
Conforms to all regulatory standards in the country in the EU where the products is
purchased
Wear sturdy, non-slip footwear
Read the user manual
Use protective gloves
Do not expose to rain
Keep children at a distance of no less than 10m from the work area
Debris may be ejected from the discharge chute
The tines will continue to rotate for a short while after the rake has been switched
off.Do not pick up or carry the rake until the tines has stopped rotating
This product is double insulated electrically
The tines will continue to rotate for a short while after the rake has been switched
off.Do not pick up or carry the rake until the tines has stopped rotating
Disconnect from mains power immediately if the power cord becomes damaged.
Beware of sharp blades. Blades continue to rotate after the motor is switched off-
Remove plug from mains before maintenance or if cord is damaged.
Keep supply flexible cord away from cutting mains
2.ASSEMBLY INSTRUCTIONS
Preparation:
1. Put the cable hook on upper handle.(Fig.1a)
2. Connect upper and lower handles with supplied screws and knobes.(Fig.1b)
3. Insert the handles into the mower body.(Fig.1c)
4. Fit each wheels over the axles, secure in place with the “R” pins (Fig.1d)
5. Fix the cable holders.(Fig.1e)
6. Grass collecton box assembly. Assemble two halves and fix them together.(Fig.1f)
7. Lift the flap and place the grass box over the lugs.(Fig.1g)
8. Press the wheel covers into place. (Fig.1h)
CUTTING HEIGHT ADJUSTMENT
To obtain the desired cutting height, the front and rear axles are repositioned on the underside of
the mower housing.
Warning! Disconnect the mower from the power supply and ensure the blade has stopped coasting
before adjusting the height.
1. To adjust the front wheel cutting height position (fig. 2a)
1) Turn the mower upside down.
2) Pull the wheel axle towards the front of the mower.
3) Locate the wheel axle into the desired cutting height adjustment position.
Note: Make sure that both front right and left wheels are located in the same cutting height adjust-
ment position.
2. To adjust the rear wheel cutting height position (fig. 2b)
1) Turn the mower on its side.
2) Pull the rear wheel axle towards the mower’s catcher flap.
3) Locate the wheel axle into the desire cutting height adjustment position.
Note: Make sure that both rear right and left wheel are located in the same cutting height adjustment
position.
3. Cutting height positions (fig.2c)
1) 25mm (lowest cutting height position)
2) 40mm
3) 55mm(highest cutting height position)
3. OPERATING
Connect to power supply
Warning! Before connecting to the mains supply, always check the switch is in off position. Connect
the plug into the RCD protected power supply.
Starting
On/Off switch fig.3)
Caution! Do not start the mower if it is standing in long grass. Press the safety button (A) of the
switch assembly and then pull the switch lever (B) against the bar. Keep the switch lever held whilst
releasing the safety button. To stop the mower release the switch lever and it automatically returns
to its off position.
Mowing (fig.4)
We recommend to use your mower as outlined in this section in order to achieve optimum results
and to reduce the risk of cutting the mains cable.
• Place the bulk of the mains cable on the close to the starting point.
• Switch the mower on as described above.
• Proceed as shown in fig.4
• Move from position 1 to position 2
• Turn right and proceed towards position 3
• Turn left and move towards position 4
• Repeat the above procedures as required.
Warning! Do not work towards the cable.
Blade maintenance(fig.5)
• Regularly remove grass and dirt from the blade.
• At the beginning of the gardening season, carefully examine the condition of the blade.
•If the blade is very blunt, sharpen or replace the blade.
• If the blade is damaged or worn, fit a new blade.
If the blade is slipping, put the screwdriver into the location hole, tighten the blade by wrench. see
fig.6 and fig.7
Warning! Observe the following precautions:
• Disconnect the mower from the mains and wait until the blade has stopped rotating before proce-
eding.
• Be careful not to cut yourself. Use heavy-duty gloves or a cloth to grip the blade.
•Only use the specified replacement blade.
• Do not remove the impeller (A)for any reason.
To replace the blade:
• Turn the mower onto its side.
• Place bushing into shaft of motor
• Place blade screw into the holes
• Tighten blade screw with sleeve.
4. MAINTENANCE
1. Keep all nuts, bolts and screws tight to be sure the lawn mower is in a safe working condition.
2. Check the catcher frequently for wear or deterioration.
3. Replace worn or damaged parts for safety.
4. Only use the replacement blade, blade bolt and impeller specified for this product.
5. Be careful during adjustments of the lawn mower to prevent entrapment of the fingers between
moving blade and fixed parts of the machine.
6. Oil the wheel pins.
7. Store the lawn mower in a dry place.
5. TECHNICAL SPECIFICATIONS
DLMJ1500E
Voltage: 230 V~ 50Hz
Power rating: 1500 W
No load speed: 3500 rpm
Cutting height: 3 height positions 20/40/60 mm
Max cutting width: 360 mm
Grass collection bag: 50 L fabric
Motor type: Brush motor
Wheels: front 5" / rear 7"
Noise level: 96 dB

5
1. SAFETY INSTRUCTIONS
GENERAL SAFETY INSTRUCTIONS
WARNING! Read all instructions failure to follow all instructions listed below may result in electric
shock, fire and /or serious injury. The term “power tool” in all of the warnings listed below refers to
your mains operated (corded) power tools or battery operated (cordless) power tool.
SAVE THESE INSTRUCTIONS
1) WORK AREA
a) Keep the work area clean and well lit. Cluttered and dark areas invite accidents.
b) Do not operate power tools in explosive atmospheres, such as in the presence of flammable
liquids, gases or dust. Power tools create sparks, which may ignite the dust or fumes.
c) Keep children and bystanders away while operating a power tool. Distractions can cause you to
lose control.
2) ELECTRICAL SAFETY
a) Power tool plugs must match the outlet. Never modify the plug in any way. Do not use any adap-
ter plugs with earthed (grounded) power tools. Unmodified plugs and matching outlets will reduce
risk of electric shock.
b) Avoid body contact with earthed or grounded surfaces such as pipes, radiators, ranges and
refrigerators. There is an increased risk of electric shock if your body is earthed or grounded.
c) Do not expose power tools to rain or wet conditions. Water entering a power tool will increase the
risk of electric shock.
d) Do not abuse the cord. Never use the cord for carrying, pulling or unplugging the power tool.
Keep the cord away from heat, oil and sharp edges or moving parts. Damaged or entangled cords
increase the risk of electric shock.
e) When operating a power tool outdoors, use an extension cord suitable for outdoor use. Use of a
cord suitable for outdoor use reduces the risk of electric shock.
3) PERSONAL SAFETY
a) Stay alert. Watch what you are doing and use common sense when operating a power tool. Do
not operate tool when you are tired or under the influence of drugs, alcohol or medication. A
moment of inattention while operating power tools may result in serious personal injury.
b) Use safety equipment. Always wear eye protection. Safety equipment such as dust mask, no
-skid safety shoes, hard hat, or hearing protection used for appropriate conditions will reduce
personal injuries.
c) Avoid accidental starting. Ensure the switch is in the off position before plugging in. Carrying
power tools with your finger on the switch or plugging in power tools that have the switch on invites
accidents.
d) Remove any adjusting key or wrench before turning the power tool on. A wrench or a key left
attached to a rotating part of the power tool may result in personal injury.
e) Do not overreach. Keep proper footing and balance at all times. This enables better control of the
power tool in unexpected situations.
f) Dress properly. Do not wear loose clothing or jewellery; Keep your hair, clothing and gloves away
from moving parts. Loose clothes, jewellery or long hair can be caught in moving parts.
4) POWER TOOL USE AND CARE
a) Do not force the tool. Use the correct power tool for your application, The correct power tools will
do the job better and safer at the rate for which it was designed.
b) Do not use the power tool if the switch does not turn it on and off. Any power tool that cannot be
controlled with the switch is dangerous and must be repaired.
c) Disconnect the plug from the power source before making any adjustments, changing acces-
sories, or storing power tools. Such preventive safety measures reduce the risk of starting the
power tool accidentally.
d) Store idle power tools out of the reach of children and do not allow persons unfamiliar with the
power tool or these instructions to operate the power tool. Power tools are dangerous in the hands
of untrained users.
e) Maintain power tools, Check for misalignment or binding of moving parts, breakage of parts and
any other condition that may affect the power tools operation. If damaged, have the power tool
repaired before use. Many accidents are caused by poorly maintained power tools.
f) Keep cutting tools sharp and clean. Properly maintained cutting tools with sharp cutting edges
are less likely to bind and are easier to control.
g) Use the power tool, accessories and tool bits etc., in accordance with these instructions and in
the manner intended for particular type of power tool, taking into account the working conditions
and the work to be performed. Use of the power tool for operations different from intended could
result in a hazardous situation.
5) SERVICE
a) Have your power tool serviced by a qualified repair person using only identical replacement parts.
This will ensure that the safety of the power tool is maintained.
ADDITIONAL SAFETY RULES FOR LAWN MOWER
Read the instructions carefully. Be familiar with the controls and the proper use of the appliance.
Never allow children to use the appliance.
Never allow people unfamiliar with these instructions to use the appliance. Local regulations may
restrict the age of the operator.
Never operate the appliance with people, especially children, or pets are nearby.
The operator or user is responsible for accidents or hazards occurring to other people or their
property.
While operating the appliance, always wear substantial footwear and long trousers. Do not operate
the appliance when barefoot or wearing open sandals.
Thoroughly inspect the area where the appliance is to be used and remove all stones, sticks, wires,
bones, and other foreign objects.
Before using, always visually inspect to see that the rotating parts and cutter assembly are not worn
or damaged. Replace worn or damaged parts in sets to preserve balance.
Operate the appliance only in daylight or in good artificial light. Avoid operating the appliance in wet
grass, where feasible. Always be sure of your footing on slopes. Walk, never run. Always work
across the face of slopes, never up and down.
Exercise extreme caution when reversing or pulling the appliance towards to you.
Do not operate the appliance on excessively steep slopes.
Use extreme caution when reversing or pulling appliance towards you.
Stop the rotating parts if appliance has to be tilted for transportation. Do not operate the cutting
means when crossing surfaces other than grass, and when transporting the appliance to and from
the working area.
Never operate the appliance with defective guards or shields, or without safety devices, for example
deflectors and/or catchers in place.
Switch on the motor according to instructions and with feet well away from rotating parts.
Do not tilt appliance when switching on the motor, expect if the appliance has to be tilted for star-
ting. In this case, do not tilt it more than absolutely necessary and lift only the part, which is away
from the operator. Always ensure that both hands are in the operating position before returning the
appliance to the ground. Do not put hands or feet near or under rotating parts.
Never pick up or carry an appliance while the motor is running.
Pull the plug from the socket:
•Whenever you leave the machine.
• Before clearing a blockage.
• After striking a foreign object. Inspect the appliance for damage and make repairs as necessary.
• If the appliance starts to vibrate abnormally, check immediately.
When the machine is at work in the thick bushes or runs into obstacles it can’t cut down, the blade
will be stalled so that the machine temperature and current will increase. When the temperature is
too high or the current is too large, the overload protection device installed inside the machine will
automatically shut off the power to stop the machine ( main purpose is to protect motor and prolong
motor life ). At this moment, let go of the trigger and disconnect power supply of the machine, let the
machine cool in some time ( 1~2 mins) and then restart switch, the machine can rework.
Symbols
The rating plate on your tool may show symbols. These represent important information about the
product or instructions on its use
Waste electrical products should not be disposed of with household waste. Please
recycle where facilities exist. Check with your Local Authority or retailer for recycling advice.
Denotes risk of personal injury, loss of life, or damage to the tool in case of non-ob
servance
Use eye protection
Use ear protection
Conforms to all regulatory standards in the country in the EU where the products is
purchased
Wear sturdy, non-slip footwear
Read the user manual
Use protective gloves
Do not expose to rain
Keep children at a distance of no less than 10m from the work area
Debris may be ejected from the discharge chute
The tines will continue to rotate for a short while after the rake has been switched
off.Do not pick up or carry the rake until the tines has stopped rotating
This product is double insulated electrically
The tines will continue to rotate for a short while after the rake has been switched
off.Do not pick up or carry the rake until the tines has stopped rotating
Disconnect from mains power immediately if the power cord becomes damaged.
Beware of sharp blades. Blades continue to rotate after the motor is switched off-
Remove plug from mains before maintenance or if cord is damaged.
Keep supply flexible cord away from cutting mains
2.ASSEMBLY INSTRUCTIONS
Preparation:
1. Put the cable hook on upper handle.(Fig.1a)
2. Connect upper and lower handles with supplied screws and knobes.(Fig.1b)
3. Insert the handles into the mower body.(Fig.1c)
4. Fit each wheels over the axles, secure in place with the “R” pins (Fig.1d)
5. Fix the cable holders.(Fig.1e)
6. Grass collecton box assembly. Assemble two halves and fix them together.(Fig.1f)
7. Lift the flap and place the grass box over the lugs.(Fig.1g)
8. Press the wheel covers into place. (Fig.1h)
CUTTING HEIGHT ADJUSTMENT
To obtain the desired cutting height, the front and rear axles are repositioned on the underside of
the mower housing.
Warning! Disconnect the mower from the power supply and ensure the blade has stopped coasting
before adjusting the height.
1. To adjust the front wheel cutting height position (fig. 2a)
1) Turn the mower upside down.
2) Pull the wheel axle towards the front of the mower.
3) Locate the wheel axle into the desired cutting height adjustment position.
Note: Make sure that both front right and left wheels are located in the same cutting height adjust-
ment position.
2. To adjust the rear wheel cutting height position (fig. 2b)
1) Turn the mower on its side.
2) Pull the rear wheel axle towards the mower’s catcher flap.
3) Locate the wheel axle into the desire cutting height adjustment position.
Note: Make sure that both rear right and left wheel are located in the same cutting height adjustment
position.
3. Cutting height positions (fig.2c)
1) 25mm (lowest cutting height position)
2) 40mm
3) 55mm(highest cutting height position)
3. OPERATING
Connect to power supply
Warning! Before connecting to the mains supply, always check the switch is in off position. Connect
the plug into the RCD protected power supply.
Starting
On/Off switch fig.3)
Caution! Do not start the mower if it is standing in long grass. Press the safety button (A) of the
switch assembly and then pull the switch lever (B) against the bar. Keep the switch lever held whilst
releasing the safety button. To stop the mower release the switch lever and it automatically returns
to its off position.
Mowing (fig.4)
We recommend to use your mower as outlined in this section in order to achieve optimum results
and to reduce the risk of cutting the mains cable.
• Place the bulk of the mains cable on the close to the starting point.
• Switch the mower on as described above.
• Proceed as shown in fig.4
• Move from position 1 to position 2
• Turn right and proceed towards position 3
• Turn left and move towards position 4
• Repeat the above procedures as required.
Warning! Do not work towards the cable.
Blade maintenance(fig.5)
• Regularly remove grass and dirt from the blade.
• At the beginning of the gardening season, carefully examine the condition of the blade.
•If the blade is very blunt, sharpen or replace the blade.
• If the blade is damaged or worn, fit a new blade.
If the blade is slipping, put the screwdriver into the location hole, tighten the blade by wrench. see
fig.6 and fig.7
Warning! Observe the following precautions:
• Disconnect the mower from the mains and wait until the blade has stopped rotating before proce-
eding.
• Be careful not to cut yourself. Use heavy-duty gloves or a cloth to grip the blade.
•Only use the specified replacement blade.
• Do not remove the impeller (A)for any reason.
To replace the blade:
• Turn the mower onto its side.
• Place bushing into shaft of motor
• Place blade screw into the holes
• Tighten blade screw with sleeve.
4. MAINTENANCE
1. Keep all nuts, bolts and screws tight to be sure the lawn mower is in a safe working condition.
2. Check the catcher frequently for wear or deterioration.
3. Replace worn or damaged parts for safety.
4. Only use the replacement blade, blade bolt and impeller specified for this product.
5. Be careful during adjustments of the lawn mower to prevent entrapment of the fingers between
moving blade and fixed parts of the machine.
6. Oil the wheel pins.
7. Store the lawn mower in a dry place.
5. TECHNICAL SPECIFICATIONS
DLMJ1500E
Voltage: 230 V~ 50Hz
Power rating: 1500 W
No load speed: 3500 rpm
Cutting height: 3 height positions 20/40/60 mm
Max cutting width: 360 mm
Grass collection bag: 50 L fabric
Motor type: Brush motor
Wheels: front 5" / rear 7"
Noise level: 96 dB
a1
b
c
d
e
f
g
h

6
EN
1. SAFETY INSTRUCTIONS
GENERAL SAFETY INSTRUCTIONS
WARNING! Read all instructions failure to follow all instructions listed below may result in electric
shock, fire and /or serious injury. The term “power tool” in all of the warnings listed below refers to
your mains operated (corded) power tools or battery operated (cordless) power tool.
SAVE THESE INSTRUCTIONS
1)WORK AREA
a) Keep the work area clean and well lit. Cluttered and dark areas invite accidents.
b) Do not operate power tools in explosive atmospheres, such as in the presence of flammable
liquids, gases or dust. Power tools create sparks, which may ignite the dust or fumes.
c) Keep children and bystanders away while operating a power tool. Distractions can cause you to
lose control.
2) ELECTRICAL SAFETY
a) Power tool plugs must match the outlet. Never modify the plug in any way. Do not use any adap-
ter plugs with earthed (grounded) power tools. Unmodified plugs and matching outlets will reduce
risk of electric shock.
b) Avoid body contact with earthed or grounded surfaces such as pipes, radiators, ranges and
refrigerators. There is an increased risk of electric shock if your body is earthed or grounded.
c) Do not expose power tools to rain or wet conditions. Water entering a power tool will increase the
risk of electric shock.
d) Do not abuse the cord. Never use the cord for carrying, pulling or unplugging the power tool.
Keep the cord away from heat, oil and sharp edges or moving parts. Damaged or entangled cords
increase the risk of electric shock.
e) When operating a power tool outdoors, use an extension cord suitable for outdoor use. Use of a
cord suitable for outdoor use reduces the risk of electric shock.
3) PERSONAL SAFETY
a) Stay alert. Watch what you are doing and use common sense when operating a power tool. Do
not operate tool when you are tired or under the influence of drugs, alcohol or medication. A
moment of inattention while operating power tools may result in serious personal injury.
b) Use safety equipment. Always wear eye protection. Safety equipment such as dust mask, no
-skid safety shoes, hard hat, or hearing protection used for appropriate conditions will reduce
personal injuries.
c) Avoid accidental starting. Ensure the switch is in the off position before plugging in. Carrying
power tools with your finger on the switch or plugging in power tools that have the switch on invites
accidents.
d) Remove any adjusting key or wrench before turning the power tool on. A wrench or a key left
attached to a rotating part of the power tool may result in personal injury.
e) Do not overreach. Keep proper footing and balance at all times. This enables better control of the
power tool in unexpected situations.
f) Dress properly. Do not wear loose clothing or jewellery; Keep your hair, clothing and gloves away
from moving parts. Loose clothes, jewellery or long hair can be caught in moving parts.
4) POWER TOOL USE AND CARE
a) Do not force the tool. Use the correct power tool for your application, The correct power tools will
do the job better and safer at the rate for which it was designed.
b) Do not use the power tool if the switch does not turn it on and off. Any power tool that cannot be
controlledwith the switchisdangerousandmustberepaired.
c) Disconnect the plug from the power source before making any adjustments, changing acces-
sories, or storing power tools. Such preventive safety measures reduce the risk of starting the
power tool accidentally.
d) Store idle power tools out of the reach of children and do not allow persons unfamiliar with the
power tool or these instructions to operate the power tool. Power tools are dangerous in the hands
of untrained users.
e) Maintain power tools, Check for misalignment or binding of moving parts, breakage of parts and
any other condition that may affect the power tools operation. If damaged, have the power tool
repaired before use. Many accidents are caused by poorly maintained power tools.
f) Keep cutting tools sharp and clean. Properly maintained cutting tools with sharp cutting edges
are less likely to bind and are easier to control.
g) Use the power tool, accessories and tool bits etc., in accordance with these instructions and in
the manner intended for particular type of power tool, taking into account the working conditions
and the work to be performed. Use of the power tool for operations different from intended could
result in ahazardous situation.
5) SERVICE
a) Have your power tool serviced by a qualified repair person using only identical replacement parts.
This will ensure that the safety of the power tool is maintained.
ADDITIONAL SAFETY RULES FOR LAWN MOWER
Readthe instructionscarefully.Befamiliarwith the controlsandthe properuseofthe appliance.
Never allow children to use the appliance.
Neverallowpeopleunfamiliarwith theseinstructionstousethe appliance.Localregulationsmay
restrictthe ageofthe operator.
Never operate the appliance with people, especially children, or pets are nearby.
The operator or user is responsible for accidents or hazards occurring to other people or their
property.
While operating the appliance, always wear substantial footwear and long trousers. Do not operate
the appliance when barefoot or wearing open sandals.
Thoroughly inspect the area where the appliance is to be used and remove all stones, sticks, wires,
bones, and other foreign objects.
Before using, always visually inspect to see that the rotating parts and cutter assembly are not worn
or damaged. Replace worn or damaged parts in sets to preserve balance.
Operate the appliance only in daylight or in good artificial light. Avoid operating the appliance in wet
grass, where feasible. Always be sure of your footing on slopes. Walk, never run. Always work
across the face of slopes, never up and down.
Exercise extreme caution when reversing or pulling the appliance towards to you.
Do not operate the appliance on excessively steep slopes.
Use extreme caution when reversing or pulling appliance towards you.
Stop the rotating partsif appliancehastobetiltedfortransportation.Donotoperatethe cutting
means when crossing surfaces other than grass, and when transporting the appliance to and from
the working area.
Never operate the appliance with defective guards or shields, or without safety devices, for example
deflectors and/or catchers in place.
Switch on the motor according to instructions and with feet well away from rotating parts.
Do not tilt appliance when switching on the motor, expect if the appliance has to be tilted for star-
ting. In this case, do not tilt it more than absolutely necessary and lift only the part, which is away
from the operator. Always ensure that both hands are in the operating position before returning the
appliance to the ground. Do not put hands or feet near or under rotating parts.
Never pick up or carry an appliance while the motor is running.
Pull the plug from the socket:
•Wheneveryouleavethe machine.
• Before clearing a blockage.
• After striking a foreign object. Inspect the appliance for damage and make repairs as necessary.
• If the appliance starts to vibrate abnormally, check immediately.
When the machine is at work in the thick bushes or runs into obstacles it can’t cut down, the blade
will be stalled so that the machine temperature and current will increase. When the temperature is
too high or the current is too large, the overload protection device installed inside the machine will
automatically shut off the power to stop the machine ( main purpose is to protect motor and prolong
motor life ). At this moment, let go of the trigger and disconnect power supply of the machine, let the
machine cool in some time ( 1~2 mins) and then restart switch, the machine can rework.
Symbols
The rating plate on your tool may show symbols. These represent important information about the
productor instructions on itsuse
Waste electrical products should not be disposed of with household waste. Please
recyclewherefacilitiesexist.Checkwith yourLocalAuthorityorretailerforrecycling advice.
Denotes risk of personal injury, loss of life, or damage to the tool in case of non-ob
servance
Use eye protection
Useear protection
Conforms to all regulatory standards in the country in the EU where the products is
purchased
Wear sturdy, non-slip footwear
Read the user manual
Use protective gloves
Do not expose to rain
Keep children at a distance of no less than 10m from the work area
Debris may be ejected from the discharge chute
The tines will continue to rotate for a short while after the rake has been switched
off.Do not pick up or carry the rake until the tines has stopped rotating
This product is double insulated electrically
The tines will continue to rotate for a short while after the rake has been switched
off.Do not pick up or carry the rake until the tines has stopped rotating
Disconnect from mains power immediately if the power cord becomes damaged.
Beware of sharp blades. Blades continue to rotate after the motor is switched off-
Remove plug from mains before maintenance or if cord is damaged.
Keep supply flexible cord away from cutting mains
2.ASSEMBLY INSTRUCTIONS
Preparation:
1. Put the cable hook on upper handle.(Fig.1a)
2. Connect upper and lower handles with supplied screws and knobes.(Fig.1b)
3. Insert the handles into the mower body.(Fig.1c)
4. Fit each wheels over the axles, secure in place with the “R” pins (Fig.1d)
5. Fix the cable holders.(Fig.1e)
6. Grass collecton box assembly. Assemble two halves and fix them together.(Fig.1f)
7. Lift the flap and place the grass box over the lugs.(Fig.1g)
8. Press the wheel covers into place. (Fig.1h)
CUTTING HEIGHT ADJUSTMENT
To obtain the desired cutting height, the front and rear axles are repositioned on the underside of
the mower housing.
Warning! Disconnect the mower from the power supply and ensure the blade has stopped coasting
beforeadjustingthe height.
1. To adjust the front wheel cutting height position (fig. 2a)
1) Turn the mower upside down.
2) Pull the wheel axle towards the front of the mower.
3) Locate the wheel axle into the desired cutting height adjustment position.
Note: Make sure that both front right and left wheels are located in the same cutting height adjust-
ment position.
2. To adjust the rear wheel cutting height position (fig. 2b)
1) Turn the mower on its side.
2) Pull the rear wheel axle towards the mower’s catcher flap.
3) Locate the wheel axle into the desire cutting height adjustment position.
Note: Make sure that both rear right and left wheel are located in the same cutting height adjustment
position.
3.Cutting heightpositions(fig.2c)
1) 20mm (lowest cutting height position)
2) 40mm
3) 60mm(highest cutting height position)
3. OPERATING
Connect to power supply
Warning! Before connecting to the mains supply, always check the switch is in off position. Connect
the plug into the RCD protected power supply.
Starting
On/Off switch fig.3)
Caution! Do not start the mower if it is standing in long grass. Press the safety button (A) of the
switch assembly and then pull the switch lever (B) against the bar. Keep the switch lever held whilst
releasing the safety button. To stop the mower release the switch lever and it automatically returns
to its off position.
Mowing (fig.4)
We recommend to use your mower as outlined in this section in order to achieve optimum results
and to reduce the risk of cutting the mains cable.
• Place the bulk of the mains cable on the close to the starting point.
• Switch the mower on as described above.
• Proceed as shown in fig.4
• Move from position 1 to position 2
• Turn right and proceed towards position 3
• Turn left and move towards position 4
• Repeat the above procedures as required.
Warning! Do not work towards the cable.
Blade maintenance(fig.5)
• Regularly remove grass and dirt from the blade.
• At the beginning of the gardening season, carefully examine the condition of the blade.
•If the blade is very blunt, sharpen or replace the blade.
• If the blade is damaged or worn, fit a new blade.
If the blade is slipping, put the screwdriver into the location hole, tighten the blade by wrench. see
fig.6 and fig.7
Warning!Observethe following precautions:
• Disconnect the mower from the mains and wait until the blade has stopped rotating before proce-
eding.
• Be careful not to cut yourself. Use heavy-duty gloves or a cloth to grip the blade.
•Onlyusethespecifiedreplacementblade.
• Do not remove the impeller (A)for any reason.
To replace the blade:
• Turn the mower onto its side.
• Place bushing into shaft of motor
• Place blade screw into the holes
• Tighten blade screw with sleeve.
4. MAINTENANCE
1. Keep all nuts, bolts and screws tight to be sure the lawn mower is in a safe working condition.
2. Check the catcher frequently for wear or deterioration.
3. Replace worn or damaged parts for safety.
4.Onlyusethereplacementblade,bladebolt and impellerspecifiedfor thisproduct.
5. Be careful during adjustments of the lawn mower to prevent entrapment of the fingers between
moving blade and fixed parts of the machine.
6. Oil the wheel pins.
7. Store the lawn mower in a dry place.
5. TECHNICAL SPECIFICATIONS
DLMJ1500E
Voltage: 230 V~ 50Hz
Power rating: 1500 W
No load speed: 3500 rpm
Cutting height: 3 height positions 20/40/60 mm
Max cutting width: 360 mm
Grass collection bag: 50 L fabric
Motor type: Brush motor
Wheels: front 5" / rear 7"
Noise level: 96 dB

2a
2b
2c

7
1. SAFETY INSTRUCTIONS
GENERAL SAFETY INSTRUCTIONS
WARNING! Read all instructions failure to follow all instructions listed below may result in electric
shock, fire and /or serious injury. The term “power tool” in all of the warnings listed below refers to
your mains operated (corded) power tools or battery operated (cordless) power tool.
SAVE THESE INSTRUCTIONS
1) WORK AREA
a) Keep the work area clean and well lit. Cluttered and dark areas invite accidents.
b) Do not operate power tools in explosive atmospheres, such as in the presence of flammable
liquids, gases or dust. Power tools create sparks, which may ignite the dust or fumes.
c) Keep children and bystanders away while operating a power tool. Distractions can cause you to
lose control.
2) ELECTRICAL SAFETY
a) Power tool plugs must match the outlet. Never modify the plug in any way. Do not use any adap-
ter plugs with earthed (grounded) power tools. Unmodified plugs and matching outlets will reduce
risk of electric shock.
b) Avoid body contact with earthed or grounded surfaces such as pipes, radiators, ranges and
refrigerators. There is an increased risk of electric shock if your body is earthed or grounded.
c) Do not expose power tools to rain or wet conditions. Water entering a power tool will increase the
risk of electric shock.
d) Do not abuse the cord. Never use the cord for carrying, pulling or unplugging the power tool.
Keep the cord away from heat, oil and sharp edges or moving parts. Damaged or entangled cords
increase the risk of electric shock.
e) When operating a power tool outdoors, use an extension cord suitable for outdoor use. Use of a
cord suitable for outdoor use reduces the risk of electric shock.
3) PERSONAL SAFETY
a) Stay alert. Watch what you are doing and use common sense when operating a power tool. Do
not operate tool when you are tired or under the influence of drugs, alcohol or medication. A
moment of inattention while operating power tools may result in serious personal injury.
b) Use safety equipment. Always wear eye protection. Safety equipment such as dust mask, no
-skid safety shoes, hard hat, or hearing protection used for appropriate conditions will reduce
personal injuries.
c) Avoid accidental starting. Ensure the switch is in the off position before plugging in. Carrying
power tools with your finger on the switch or plugging in power tools that have the switch on invites
accidents.
d) Remove any adjusting key or wrench before turning the power tool on. A wrench or a key left
attached to a rotating part of the power tool may result in personal injury.
e) Do not overreach. Keep proper footing and balance at all times. This enables better control of the
power tool in unexpected situations.
f) Dress properly. Do not wear loose clothing or jewellery; Keep your hair, clothing and gloves away
from moving parts. Loose clothes, jewellery or long hair can be caught in moving parts.
4) POWER TOOL USE AND CARE
a) Do not force the tool. Use the correct power tool for your application, The correct power tools will
do the job better and safer at the rate for which it was designed.
b) Do not use the power tool if the switch does not turn it on and off. Any power tool that cannot be
controlled with the switch is dangerous and must be repaired.
c) Disconnect the plug from the power source before making any adjustments, changing acces-
sories, or storing power tools. Such preventive safety measures reduce the risk of starting the
power tool accidentally.
d) Store idle power tools out of the reach of children and do not allow persons unfamiliar with the
power tool or these instructions to operate the power tool. Power tools are dangerous in the hands
of untrained users.
e) Maintain power tools, Check for misalignment or binding of moving parts, breakage of parts and
any other condition that may affect the power tools operation. If damaged, have the power tool
repaired before use. Many accidents are caused by poorly maintained power tools.
f) Keep cutting tools sharp and clean. Properly maintained cutting tools with sharp cutting edges
are less likely to bind and are easier to control.
g) Use the power tool, accessories and tool bits etc., in accordance with these instructions and in
the manner intended for particular type of power tool, taking into account the working conditions
and the work to be performed. Use of the power tool for operations different from intended could
result in a hazardous situation.
5) SERVICE
a) Have your power tool serviced by a qualified repair person using only identical replacement parts.
This will ensure that the safety of the power tool is maintained.
ADDITIONAL SAFETY RULES FOR LAWN MOWER
Read the instructions carefully. Be familiar with the controls and the proper use of the appliance.
Never allow children to use the appliance.
Never allow people unfamiliar with these instructions to use the appliance. Local regulations may
restrict the age of the operator.
Never operate the appliance with people, especially children, or pets are nearby.
The operator or user is responsible for accidents or hazards occurring to other people or their
property.
While operating the appliance, always wear substantial footwear and long trousers. Do not operate
the appliance when barefoot or wearing open sandals.
Thoroughly inspect the area where the appliance is to be used and remove all stones, sticks, wires,
bones, and other foreign objects.
Before using, always visually inspect to see that the rotating parts and cutter assembly are not worn
or damaged. Replace worn or damaged parts in sets to preserve balance.
Operate the appliance only in daylight or in good artificial light. Avoid operating the appliance in wet
grass, where feasible. Always be sure of your footing on slopes. Walk, never run. Always work
across the face of slopes, never up and down.
Exercise extreme caution when reversing or pulling the appliance towards to you.
Do not operate the appliance on excessively steep slopes.
Use extreme caution when reversing or pulling appliance towards you.
Stop the rotating parts if appliance has to be tilted for transportation. Do not operate the cutting
means when crossing surfaces other than grass, and when transporting the appliance to and from
the working area.
Never operate the appliance with defective guards or shields, or without safety devices, for example
deflectors and/or catchers in place.
Switch on the motor according to instructions and with feet well away from rotating parts.
Do not tilt appliance when switching on the motor, expect if the appliance has to be tilted for star-
ting. In this case, do not tilt it more than absolutely necessary and lift only the part, which is away
from the operator. Always ensure that both hands are in the operating position before returning the
appliance to the ground. Do not put hands or feet near or under rotating parts.
Never pick up or carry an appliance while the motor is running.
Pull the plug from the socket:
•Whenever you leave the machine.
• Before clearing a blockage.
• After striking a foreign object. Inspect the appliance for damage and make repairs as necessary.
• If the appliance starts to vibrate abnormally, check immediately.
When the machine is at work in the thick bushes or runs into obstacles it can’t cut down, the blade
will be stalled so that the machine temperature and current will increase. When the temperature is
too high or the current is too large, the overload protection device installed inside the machine will
automatically shut off the power to stop the machine ( main purpose is to protect motor and prolong
motor life ). At this moment, let go of the trigger and disconnect power supply of the machine, let the
machine cool in some time ( 1~2 mins) and then restart switch, the machine can rework.
Symbols
The rating plate on your tool may show symbols. These represent important information about the
product or instructions on its use
Waste electrical products should not be disposed of with household waste. Please
recycle where facilities exist. Check with your Local Authority or retailer for recycling advice.
Denotes risk of personal injury, loss of life, or damage to the tool in case of non-ob
servance
Use eye protection
Use ear protection
Conforms to all regulatory standards in the country in the EU where the products is
purchased
Wear sturdy, non-slip footwear
Read the user manual
Use protective gloves
Do not expose to rain
Keep children at a distance of no less than 10m from the work area
Debris may be ejected from the discharge chute
The tines will continue to rotate for a short while after the rake has been switched
off.Do not pick up or carry the rake until the tines has stopped rotating
This product is double insulated electrically
The tines will continue to rotate for a short while after the rake has been switched
off.Do not pick up or carry the rake until the tines has stopped rotating
Disconnect from mains power immediately if the power cord becomes damaged.
Beware of sharp blades. Blades continue to rotate after the motor is switched off-
Remove plug from mains before maintenance or if cord is damaged.
Keep supply flexible cord away from cutting mains
2.ASSEMBLY INSTRUCTIONS
Preparation:
1. Put the cable hook on upper handle.(Fig.1a)
2. Connect upper and lower handles with supplied screws and knobes.(Fig.1b)
3. Insert the handles into the mower body.(Fig.1c)
4. Fit each wheels over the axles, secure in place with the “R” pins (Fig.1d)
5. Fix the cable holders.(Fig.1e)
6. Grass collecton box assembly. Assemble two halves and fix them together.(Fig.1f)
7. Lift the flap and place the grass box over the lugs.(Fig.1g)
8. Press the wheel covers into place. (Fig.1h)
CUTTING HEIGHT ADJUSTMENT
To obtain the desired cutting height, the front and rear axles are repositioned on the underside of
the mower housing.
Warning! Disconnect the mower from the power supply and ensure the blade has stopped coasting
before adjusting the height.
1. To adjust the front wheel cutting height position (fig. 2a)
1) Turn the mower upside down.
2) Pull the wheel axle towards the front of the mower.
3) Locate the wheel axle into the desired cutting height adjustment position.
Note: Make sure that both front right and left wheels are located in the same cutting height adjust-
ment position.
2. To adjust the rear wheel cutting height position (fig. 2b)
1) Turn the mower on its side.
2) Pull the rear wheel axle towards the mower’s catcher flap.
3) Locate the wheel axle into the desire cutting height adjustment position.
Note: Make sure that both rear right and left wheel are located in the same cutting height adjustment
position.
3. Cutting height positions (fig.2c)
1) 25mm (lowest cutting height position)
2) 40mm
3) 55mm(highest cutting height position)
3. OPERATING
Connect to power supply
Warning! Before connecting to the mains supply, always check the switch is in off position. Connect
the plug into the RCD protected power supply.
Starting
On/Off switch fig.3)
Caution! Do not start the mower if it is standing in long grass. Press the safety button (A) of the
switch assembly and then pull the switch lever (B) against the bar. Keep the switch lever held whilst
releasing the safety button. To stop the mower release the switch lever and it automatically returns
to its off position.
Mowing (fig.4)
We recommend to use your mower as outlined in this section in order to achieve optimum results
and to reduce the risk of cutting the mains cable.
• Place the bulk of the mains cable on the close to the starting point.
• Switch the mower on as described above.
• Proceed as shown in fig.4
• Move from position 1 to position 2
• Turn right and proceed towards position 3
• Turn left and move towards position 4
• Repeat the above procedures as required.
Warning! Do not work towards the cable.
Blade maintenance(fig.5)
• Regularly remove grass and dirt from the blade.
• At the beginning of the gardening season, carefully examine the condition of the blade.
•If the blade is very blunt, sharpen or replace the blade.
• If the blade is damaged or worn, fit a new blade.
If the blade is slipping, put the screwdriver into the location hole, tighten the blade by wrench. see
fig.6 and fig.7
Warning! Observe the following precautions:
• Disconnect the mower from the mains and wait until the blade has stopped rotating before proce-
eding.
• Be careful not to cut yourself. Use heavy-duty gloves or a cloth to grip the blade.
•Only use the specified replacement blade.
• Do not remove the impeller (A)for any reason.
To replace the blade:
• Turn the mower onto its side.
• Place bushing into shaft of motor
• Place blade screw into the holes
• Tighten blade screw with sleeve.
4. MAINTENANCE
1. Keep all nuts, bolts and screws tight to be sure the lawn mower is in a safe working condition.
2. Check the catcher frequently for wear or deterioration.
3. Replace worn or damaged parts for safety.
4. Only use the replacement blade, blade bolt and impeller specified for this product.
5. Be careful during adjustments of the lawn mower to prevent entrapment of the fingers between
moving blade and fixed parts of the machine.
6. Oil the wheel pins.
7. Store the lawn mower in a dry place.
5. TECHNICAL SPECIFICATIONS
DLMJ1500E
Voltage: 230 V~ 50Hz
Power rating: 1500 W
No load speed: 3500 rpm
Cutting height: 3 height positions 20/40/60 mm
Max cutting width: 360 mm
Grass collection bag: 50 L fabric
Motor type: Brush motor
Wheels: front 5" / rear 7"
Noise level: 96 dB

4
6

8
EN
CUTTING HEIGHT ADJUSTMENT
To obtain the desired cutting height, the front and rear axles are repositioned on the underside of
the mower housing.
Warning! Disconnect the mower from the power supply and ensure the blade has stopped coasting
before adjusting the height.
1. To adjust the front wheel cutting height position (fig. 2a)
1) Turn the mower upside down.
2) Pull the wheel axle towards the front of the mower.
3) Locate the wheel axle into the desired cutting height adjustment position.
Note: Make sure that both front right and left wheels are located in the same cutting height adjust-
ment position.
2. To adjust the rear wheel cutting height position (fig. 2b)
1) Turn the mower on its side.
2) Pull the rear wheel axle towards the mower’s catcher flap.
3) Locate the wheel axle into the desire cutting height adjustment position.
Note: Make sure that both rear right and left wheel are located in the same cutting height adjustment
position.
3. Cutting height positions (fig.2c)
1) 25mm (lowest cutting height position)
2) 40mm
3) 55mm(highest cutting height position)
3. OPERATING
Connect to power supply
Warning! Before connecting to the mains supply, always check the switch is in off position. Connect
the plug into the RCD protected power supply.
Starting
On/Off switch fig.3)
Caution! Do not start the mower if it is standing in long grass. Press the safety button (A) of the
switch assembly and then pull the switch lever (B) against the bar. Keep the switch lever held whilst
releasing the safety button. To stop the mower release the switch lever and it automatically returns
to its off position.
Mowing (fig.4)
We recommend to use your mower as outlined in this section in order to achieve optimum results
and to reduce the risk of cutting the mains cable.
• Place the bulk of the mains cable on the close to the starting point.
• Switch the mower on as described above.
• Proceed as shown in fig.4
• Move from position 1 to position 2
• Turn right and proceed towards position 3
• Turn left and move towards position 4
• Repeat the above procedures as required.
Warning! Do not work towards the cable.
Blade maintenance(fig.5)
• Regularly remove grass and dirt from the blade.
• At the beginning of the gardening season, carefully examine the condition of the blade.
•If the blade is very blunt, sharpen or replace the blade.
• If the blade is damaged or worn, fit a new blade.
If the blade is slipping, put the screwdriver into the location hole, tighten the blade by wrench. see
fig.6 and fig.7
Warning! Observe the following precautions:
• Disconnect the mower from the mains and wait until the blade has stopped rotating before proce-
eding.
• Be careful not to cut yourself. Use heavy-duty gloves or a cloth to grip the blade.
•Only use the specified replacement blade.
• Do not remove the impeller (A)for any reason.
To replace the blade:
• Turn the mower onto its side.
• Place bushing into shaft of motor
• Place blade screw into the holes
• Tighten blade screw with sleeve.
4. MAINTENANCE
1. Keep all nuts, bolts and screws tight to be sure the lawn mower is in a safe working condition.
2. Check the catcher frequently for wear or deterioration.
3. Replace worn or damaged parts for safety.
4. Only use the replacement blade, blade bolt and impeller specified for this product.
5. Be careful during adjustments of the lawn mower to prevent entrapment of the fingers between
moving blade and fixed parts of the machine.
6. Oil the wheel pins.
7. Store the lawn mower in a dry place.
5. TECHNICAL SPECIFICATIONS
DLMJ1500E
Voltage: 230 V~ 50Hz
Power rating: 1500 W
No load speed: 3500 rpm
Cutting height: 3 height positions 20/40/60 mm
Max cutting width: 360 mm
Grass collection bag: 50 L fabric
Motor type: Brush motor
Wheels: front 5" / rear 7"
Noise level: 96 dB

Voltage: 230-240V~ 50Hz
Power: 1500 W
Cutting width: 360 mm
No-load speed: 3500 rpm
Adjustable 3 height position:
20/40/60mm
Collection bag: 50 L fabric
Motor type: Brush motor
Wheels: front 5" / rear 7"
G.W./N.W.: 11.3/10.1 kgs 5

9
CUTTING HEIGHT ADJUSTMENT
To obtain the desired cutting height, the front and rear axles are repositioned on the underside of
the mower housing.
Warning! Disconnect the mower from the power supply and ensure the blade has stopped coasting
before adjusting the height.
1. To adjust the front wheel cutting height position (fig. 2a)
1) Turn the mower upside down.
2) Pull the wheel axle towards the front of the mower.
3) Locate the wheel axle into the desired cutting height adjustment position.
Note: Make sure that both front right and left wheels are located in the same cutting height adjust-
ment position.
2. To adjust the rear wheel cutting height position (fig. 2b)
1) Turn the mower on its side.
2) Pull the rear wheel axle towards the mower’s catcher flap.
3) Locate the wheel axle into the desire cutting height adjustment position.
Note: Make sure that both rear right and left wheel are located in the same cutting height adjustment
position.
3. Cutting height positions (fig.2c)
1) 25mm (lowest cutting height position)
2) 40mm
3) 55mm(highest cutting height position)
3. OPERATING
Connect to power supply
Warning! Before connecting to the mains supply, always check the switch is in off position. Connect
the plug into the RCD protected power supply.
Starting
On/Off switch fig.3)
Caution! Do not start the mower if it is standing in long grass. Press the safety button (A) of the
switch assembly and then pull the switch lever (B) against the bar. Keep the switch lever held whilst
releasing the safety button. To stop the mower release the switch lever and it automatically returns
to its off position.
Mowing (fig.4)
We recommend to use your mower as outlined in this section in order to achieve optimum results
and to reduce the risk of cutting the mains cable.
• Place the bulk of the mains cable on the close to the starting point.
• Switch the mower on as described above.
• Proceed as shown in fig.4
• Move from position 1 to position 2
• Turn right and proceed towards position 3
• Turn left and move towards position 4
• Repeat the above procedures as required.
Warning! Do not work towards the cable.
Blade maintenance(fig.5)
• Regularly remove grass and dirt from the blade.
• At the beginning of the gardening season, carefully examine the condition of the blade.
•If the blade is very blunt, sharpen or replace the blade.
• If the blade is damaged or worn, fit a new blade.
If the blade is slipping, put the screwdriver into the location hole, tighten the blade by wrench. see
fig.6 and fig.7
Warning! Observe the following precautions:
• Disconnect the mower from the mains and wait until the blade has stopped rotating before proce-
eding.
• Be careful not to cut yourself. Use heavy-duty gloves or a cloth to grip the blade.
•Only use the specified replacement blade.
• Do not remove the impeller (A)for any reason.
To replace the blade:
• Turn the mower onto its side.
• Place bushing into shaft of motor
• Place blade screw into the holes
• Tighten blade screw with sleeve.
4. MAINTENANCE
1. Keep all nuts, bolts and screws tight to be sure the lawn mower is in a safe working condition.
2. Check the catcher frequently for wear or deterioration.
3. Replace worn or damaged parts for safety.
4. Only use the replacement blade, blade bolt and impeller specified for this product.
5. Be careful during adjustments of the lawn mower to prevent entrapment of the fingers between
moving blade and fixed parts of the machine.
6. Oil the wheel pins.
7. Store the lawn mower in a dry place.
5. TECHNICAL SPECIFICATIONS
DLMJ1500E
Voltage: 230 V~ 50Hz
Power rating: 1500 W
No load speed: 3500 rpm
Cutting height: 3 height positions 20/40/60 mm
Max cutting width: 360 mm
Grass collection bag: 50 L fabric
Motor type: Brush motor
Wheels: front 5" / rear 7"
Noise level: 96 dB
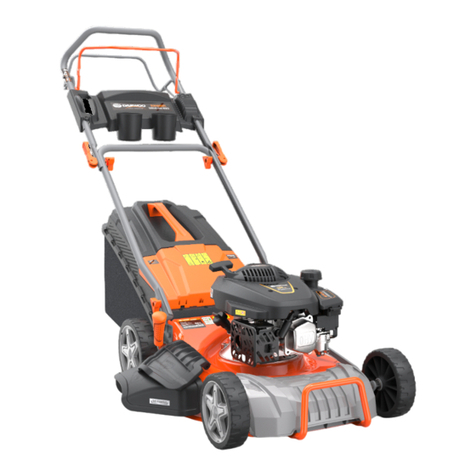
76

10
HU
1. BIZTONSÁGI UTASÍTÁSOK
ÁLTALÁNOS BIZTONSÁGI UTASÍTÁSOK
FIGYELMEZTETÉS! Olvassa el a teljes használati utasítást. Az alábbiakban felsorolt utasítások
figyelmen kívül hagyása áramütést, tüzet vagy súlyos sérülést okozhat. A „szerszámgép” kifejezés
az alábbi összes figyelmeztetésben az Ön hálózatról (vezetékes) gépi szerszámára vagy akkumulá-
toros (vezeték nélküli) elektromos szerszámokra vonatkozik.
ŐRIZZE MEG EZEKET AZ UTASÍTÁSOKAT
1) A MUNKATERÜLET
a) Tartsa a munkaterületet tisztán és rendezetten. A zsúfolt és sötét területeken gyakrabban fordul
előbaleset.
b) Ne működtessen elektromos készüléket robbanásveszélyes környezetben, például gyúlékony
folyadékok, gázok vagy por jelenlétében. Az elektromos szerszámok szikrát generálnak, ami meg-
gyújthatja a port vagy a füstöt.
c) Az elektromos kéziszerszám használata közben tartsa távol a gyermekeket és a járókelőket. A
figyelemelterelés miatt elveszítheti a készülék felett az irányítást.
2) ELEKTROMOS BIZTONSÁGI ELŐÍRÁSOK
a) A csatlakozódugónak illeszkednie kell a tápaljzatba. A csatlakozódugót semmiképpen ne alakítsa
át. Ne használjon adaptercsatlakozót más földelt (testelt) eszközökkel. Az eredeti csatlakozódugók
és a megfelelőtápaljzatok révén csökkenthetőaz elektromos áramütés veszélye.
b) Kerülje a test érintkezését földelt és testelt felületekkel, például csövekkel, radiátorokkal, tűzhel-
yekkel és hűtőszekrényekkel. A test földelése vagy testelése fokozott áramütésveszélyt jelent.
c) Ne használjon elektromos készüléket esős és nedves környezetben. Az elektromos készülékbe
jutó víz növeli az áramütés kockázatát.
d) Ne használja a vezetéket rendeltetésellenes célra. Ne a kábelt használja az eszköz szállításához,
vontatásához vagy a csatlakozó tápaljzatból történőeltávolításához. A kábel forró felületektől,
olajtól, éles és mozgó tárgyaktól távol tartandó. A sérült vagy összecsomózott kábelek növelik az
áramütés kockázatát.
e) Ha kültéren használja az elektromos készüléket, kizárólag kültéri használatra jóváhagyott hossza-
bbító kábeleket használjon. A kültéri használatra alkalmas kábel használata csökkenti az áramütés
kockázatát.
3) SZEMÉLYI BIZTONSÁG
a) Járjon el körültekintően. A készülék használata közben irányítsa figyelmét a munkaterületre és a
készülék észszerűműködtetésére. Ne használja a készüléket, ha fáradt, illetve, ha drog, alkohol vagy
gyógyszerek hatása alatt áll. A készülék használata során pillanatnyi figyelmetlenség is súlyos
személyi sérülést okozhat.
b) Használjon védőeszközöket. Mindig használjon védőszemüveget. A megfelelőkörülményekhez
alkalmas biztonsági felszerelések, például porvédőmaszk, csúszásmentes védőcipő, védősisak
vagy hallásvédőcsökkenti a személyi sérüléseket.
c) Kerülje el a véletlen indítást. Ellenőrizze le, hogy a kapcsoló „OFF” állásban van, mielőtt csat-
lakoztatná a tápellátáshoz. Miközben az ujját a kapcsolón tartja, ne mozgassa az elektromos
kéziszerszámot és ne dugja be a dugaljba, mert ez fokozottan balesetveszélyes.
d) A készülék bekapcsolása előtt távolítson el minden állítókulcsot vagy csavarkulcsot. A készülék
forgó részén található csavarkulcs vagy állítókulcs személyi sérüléseket okozhat.
e) Ne becsülje túl képességeit. Ellenőrizze, hogy lábtartása biztonságos-e, és mindig tartsa meg az
egyensúlyát. Így jobban ellenőrzése alatt tarthatja a készüléket váratlan helyzetekben.
f) Viseljen megfelelőruházatot. Ne viseljen laza ruhát vagy ékszereket; A haját, a ruháját és a kesz-
tyűjét tartsa távol a mozgó részektől. A mozgó alkatrészek becsíphetik a laza ruhát, az ékszereket
vagy a hosszú hajat.
4) ELEKTROMOS SZERSZÁMOK HASZNÁLATA ÁS ÁPOLÁSA
a) Ne terhelje túl a készüléket. Használjon a célnak megfelelőkészüléket. A célnak megfelelőelek-
tromos készülékek segítségével nagyobb hatékonysággal és biztonságosabban végezheti el a
munkát.
b) Ne használja az elektromos készüléket, ha a be-/kikapcsológomb nem működik. A be-/kikapcso-
lógombbal nem vezérelhetőelektromos készülék veszélyes és javítást igényel.
c) Bármely beállítás végrehajtása, a tartozékok cseréje vagy a szerszámok tárolása előtt húzza ki a
dugvillát az aljzatból. Ezek a biztonsági intézkedések megakadályozzák a készülék véletlenszerű
beindítását.
d) A nem használt elektromos szerszámokat gyermekektől elzárva tárolja, és ne engedje be azokat,
akik nem ismerik az elektromos szerszámokat, illetve nincsenek tisztában a szerszám működtetésé-
vel. Az elektromos készülékek megfelelőismeretekkel nem rendelkezőfelhasználók kezében veszél-
yesek lehetnek.
e) Gondoskodjon a gépi szerszámok karbantartásáról. Ellenőrizze a rosszul beállított vagy szoruló
mozgó alkatrészeket, töréseket és minden olyan körülményt, amely befolyásolhatja a gépi szerszám
működését. Ha sérülést észlel, akkor használat előtt gondoskodni kell annak kijavításáról. A balese-
tek többségét a rosszul karbantartott elektromos szerszám okozza.
f) A vágószerszámokat tartsa megélezett és tiszta állapotban. A megfelelően karbantartott, éles
vágóélek kevésbé valószínű, hogy megakadnak, illetve a művelet irányítása is egyszerűbbé válik.
g) Az elektromos készüléket, a tartozékokat és a kiegészítőket stb. a jelen használati utasításnak
megfelelően, rendeltetésszerűen használja, a munkakörülmények és az elvégzendőmunka figyelem-
bevételével. Az elektromos készülékek nem rendeltetésszerűhasználata veszélyes helyzetet ered-
ményezhet.
5) SZERVIZ
a) Az elektromos készüléket szakemberrel javíttassa, kizárólag azonos pótalkatrészekkel. Ez biztosí-
tja az elektromos készülék biztonságát.
KIEGÉSZÍTŐBIZTONSÁGI SZABÁLYOK A FŰNYÍRÓRA
Olvassa el figyelmesen az utasításokat. Sajátítsa el a kezelőszervek működtetését és gép helyes
használatát. Soha ne engedje, hogy gyermekek használják a készüléket.
Soha ne engedje olyan embereknek használni, akik a készülék használatára vonatkozó jelen utasítá-
sokat. A helyi előírások korlátozhatják a kezelőéletkorát.
Soha ne üzemeltesse a készüléket emberek, különösen gyerekek vagy háziállatok közelében.
Az üzemeltetővagy a felhasználó felelős a más személynek okozott vagy tulajdont érintőbalesete-
kért vagy veszélyekért.
A készülék használata közben mindig viseljen zárt cipőt és hosszú nadrágot. Ne használja a
készüléket mezítláb vagy nyitott szandálban.
Alaposan vizsgálja meg a készülék működési területét, és távolítson el minden követ, botot, veze-
téket, csontot és egyéb idegen tárgyat.
Használat előtt mindig ellenőrizze szemrevételezéssel, hogy a forgó alkatrészek és a vágószerkezet
nem kopottak-e vagy sérültek-e. Az egyensúly megőrzése érdekében cserélje ki a kopott vagy sérült
alkatrészeket.
A készüléket csak nappali fényben vagy kielégítőmesterséges fényben használja. Kerülje a készülék
nedves fűben történőüzemeltetését, ha lehetséges. Lejtőn való fűnyíráskor mindig bizonyosodjon
meg lába kellőmegtámasztásáról. Sétáljon, soha ne fusson. Lejtőn mindig keresztben dolgozzon,
soha ne felfelé vagy lefelé.
Legyen rendkívül óvatos, amikor a készüléket hátrafelé mozgatja vagy maga felé húzza.
Ne használja a készüléket túl meredek lejtőkön.
Nagyon óvatosan járjon el a készülék hátrafelé mozgatásakor vagy maga felé húzásakor.
Állítsa le a forgó alkatrészeket, ha a készüléket meg kell dönteni szállításhoz. Ne használja a
vágóeszközt, ha fűtől eltérőfelületen halad keresztül, és amikor a készüléket a munkaterületre és a
munkaterületről szállítja.
Soha ne működtesse a készüléket hibás védőburkolattal vagy biztonsági berendezések, például
terelők és/vagy gyűjtők nélkül.
Az utasításoknak megfelelően indítsa el a motort, és lábait tartsa megfelelőtávolságban a forgó
alkatrészektől.
A motor bekapcsolásakor ne döntse meg a készüléket, kivéve, ha a készüléket indításhoz meg kell
billenteni. Ebben az esetben ne billentse a gépet a szükségesnél nagyobb mértékben, és csak azt a
részt emelje fel, amely távol van az üzemeltetőtől. Mindig ellenőrizze, hogy mindkét keze működtető
helyzetben van-e, mielőtt visszahelyezi a gépet a talajra. Ne közelítse kezét és lábát forgó alka-
trészekhez, illetve ne tartsa azokat az alkatrészek alá.
Soha ne emelje fel és ne szállítsa a gépet, ha a motorja jár. Húzza ki a csatlakozót a hálózati aljzat-
ból:
• Minden olyan esetben, amikor felügyelet nélkül hagyja a gépet.
• Mielőtt megszüntetné az elakadást.
• Idegen tárgyba való ütközés után. Ellenőrizze a készüléket, hogy nincs-e rajta sérülés, és végezze
el a szükséges javításokat.
• Ha a készülék rendellenesen rezegni kezd, azonnal ellenőrizze.
Amikor a géppel a vastag bokrokban dolgozik, vagy olyan akadályokba ütközik, amelyeket nem tud
levágni, a kés megszorul, így a gép hőmérséklete és áramerőssége megnő. Ha a hőmérséklet túl
magas vagy az áram túl nagy, a gépbe épített túlterhelés-védelmi készülék automatikusan kikapc-
solja az áramot a gép leállítása érdekében (ennek főcélja a motor védelme és a motor élettartamá-
nak meghosszabbítása). Ekkor engedje el a ravaszt, és húzza ki a gép tápellátását, hagyja a gépet
hűlni egy ideig (1–2 percig), majd a kapcsolóval indítsa újra, és a gép működni fog.
Jelmagyarázat
A szerszám típustáblája szimbólumokat tartalmazhat. Ezek fontos információkat jelölnek a
termékkel, vagy a használati utasítással kapcsolatosan.
2. SZERELÉSI UTASÍTÁSOK
Előkészületek:
1. Helyezze a kábeltartót a felsőfogantyúra. (1a. ábra)
2. Csatlakoztassa a felsőés az alsó fogantyút a mellékelt csavarokkal és gombok használatával. (1b.
ábra)
3. Helyezze be a fogantyúkat a fűnyíró házába. (1c. ábra)
4. Szerelje fel az összes kereket a tengelyekre, rögzítse a helyükre az „R” csapokkal. (1d. ábra)
5. Rögzítse a kábeltartókat. (1e. ábra)
6. Fűgyűjtődoboz összeállítása. Szerelje össze a két felet és rögzítse azokat. (1f. ábra)
7. Emelje fel a fedelet, és helyezze a fűgyűjtődobozt a fülekre. (1g. ábra)
8. Nyomja a kerékfedeleket a helyükre. (1h. ábra)

11
1. BIZTONSÁGI UTASÍTÁSOK
ÁLTALÁNOS BIZTONSÁGI UTASÍTÁSOK
FIGYELMEZTETÉS! Olvassa el a teljes használati utasítást. Az alábbiakban felsorolt utasítások
figyelmen kívül hagyása áramütést, tüzet vagy súlyos sérülést okozhat. A „szerszámgép” kifejezés
az alábbi összes figyelmeztetésben az Ön hálózatról (vezetékes) gépi szerszámára vagy akkumulá-
toros (vezeték nélküli) elektromos szerszámokra vonatkozik.
ŐRIZZE MEG EZEKET AZ UTASÍTÁSOKAT
1) A MUNKATERÜLET
a) Tartsa a munkaterületet tisztán és rendezetten. A zsúfolt és sötét területeken gyakrabban fordul
előbaleset.
b) Ne működtessen elektromos készüléket robbanásveszélyes környezetben, például gyúlékony
folyadékok, gázok vagy por jelenlétében. Az elektromos szerszámok szikrát generálnak, ami meg-
gyújthatja a port vagy a füstöt.
c) Az elektromos kéziszerszám használata közben tartsa távol a gyermekeket és a járókelőket. A
figyelemelterelés miatt elveszítheti a készülék felett az irányítást.
2) ELEKTROMOS BIZTONSÁGI ELŐÍRÁSOK
a) A csatlakozódugónak illeszkednie kell a tápaljzatba. A csatlakozódugót semmiképpen ne alakítsa
át. Ne használjon adaptercsatlakozót más földelt (testelt) eszközökkel. Az eredeti csatlakozódugók
és a megfelelőtápaljzatok révén csökkenthetőaz elektromos áramütés veszélye.
b) Kerülje a test érintkezését földelt és testelt felületekkel, például csövekkel, radiátorokkal, tűzhel-
yekkel és hűtőszekrényekkel. A test földelése vagy testelése fokozott áramütésveszélyt jelent.
c) Ne használjon elektromos készüléket esős és nedves környezetben. Az elektromos készülékbe
jutó víz növeli az áramütés kockázatát.
d) Ne használja a vezetéket rendeltetésellenes célra. Ne a kábelt használja az eszköz szállításához,
vontatásához vagy a csatlakozó tápaljzatból történőeltávolításához. A kábel forró felületektől,
olajtól, éles és mozgó tárgyaktól távol tartandó. A sérült vagy összecsomózott kábelek növelik az
áramütés kockázatát.
e) Ha kültéren használja az elektromos készüléket, kizárólag kültéri használatra jóváhagyott hossza-
bbító kábeleket használjon. A kültéri használatra alkalmas kábel használata csökkenti az áramütés
kockázatát.
3) SZEMÉLYI BIZTONSÁG
a) Járjon el körültekintően. A készülék használata közben irányítsa figyelmét a munkaterületre és a
készülék észszerűműködtetésére. Ne használja a készüléket, ha fáradt, illetve, ha drog, alkohol vagy
gyógyszerek hatása alatt áll. A készülék használata során pillanatnyi figyelmetlenség is súlyos
személyi sérülést okozhat.
b) Használjon védőeszközöket. Mindig használjon védőszemüveget. A megfelelőkörülményekhez
alkalmas biztonsági felszerelések, például porvédőmaszk, csúszásmentes védőcipő, védősisak
vagy hallásvédőcsökkenti a személyi sérüléseket.
c) Kerülje el a véletlen indítást. Ellenőrizze le, hogy a kapcsoló „OFF” állásban van, mielőtt csat-
lakoztatná a tápellátáshoz. Miközben az ujját a kapcsolón tartja, ne mozgassa az elektromos
kéziszerszámot és ne dugja be a dugaljba, mert ez fokozottan balesetveszélyes.
d) A készülék bekapcsolása előtt távolítson el minden állítókulcsot vagy csavarkulcsot. A készülék
forgó részén található csavarkulcs vagy állítókulcs személyi sérüléseket okozhat.
e) Ne becsülje túl képességeit. Ellenőrizze, hogy lábtartása biztonságos-e, és mindig tartsa meg az
egyensúlyát. Így jobban ellenőrzése alatt tarthatja a készüléket váratlan helyzetekben.
f) Viseljen megfelelőruházatot. Ne viseljen laza ruhát vagy ékszereket; A haját, a ruháját és a kesz-
tyűjét tartsa távol a mozgó részektől. A mozgó alkatrészek becsíphetik a laza ruhát, az ékszereket
vagy a hosszú hajat.
4) ELEKTROMOS SZERSZÁMOK HASZNÁLATA ÁS ÁPOLÁSA
a) Ne terhelje túl a készüléket. Használjon a célnak megfelelőkészüléket. A célnak megfelelőelek-
tromos készülékek segítségével nagyobb hatékonysággal és biztonságosabban végezheti el a
munkát.
b) Ne használja az elektromos készüléket, ha a be-/kikapcsológomb nem működik. A be-/kikapcso-
lógombbal nem vezérelhetőelektromos készülék veszélyes és javítást igényel.
c) Bármely beállítás végrehajtása, a tartozékok cseréje vagy a szerszámok tárolása előtt húzza ki a
dugvillát az aljzatból. Ezek a biztonsági intézkedések megakadályozzák a készülék véletlenszerű
beindítását.
d) A nem használt elektromos szerszámokat gyermekektől elzárva tárolja, és ne engedje be azokat,
akik nem ismerik az elektromos szerszámokat, illetve nincsenek tisztában a szerszám működtetésé-
vel. Az elektromos készülékek megfelelőismeretekkel nem rendelkezőfelhasználók kezében veszél-
yesek lehetnek.
e) Gondoskodjon a gépi szerszámok karbantartásáról. Ellenőrizze a rosszul beállított vagy szoruló
mozgó alkatrészeket, töréseket és minden olyan körülményt, amely befolyásolhatja a gépi szerszám
működését. Ha sérülést észlel, akkor használat előtt gondoskodni kell annak kijavításáról. A balese-
tek többségét a rosszul karbantartott elektromos szerszám okozza.
f) A vágószerszámokat tartsa megélezett és tiszta állapotban. A megfelelően karbantartott, éles
vágóélek kevésbé valószínű, hogy megakadnak, illetve a művelet irányítása is egyszerűbbé válik.
g) Az elektromos készüléket, a tartozékokat és a kiegészítőket stb. a jelen használati utasításnak
megfelelően, rendeltetésszerűen használja, a munkakörülmények és az elvégzendőmunka figyelem-
bevételével. Az elektromos készülékek nem rendeltetésszerűhasználata veszélyes helyzetet ered-
ményezhet.
5) SZERVIZ
a) Az elektromos készüléket szakemberrel javíttassa, kizárólag azonos pótalkatrészekkel. Ez biztosí-
tja az elektromos készülék biztonságát.
KIEGÉSZÍTŐBIZTONSÁGI SZABÁLYOK A FŰNYÍRÓRA
Olvassa el figyelmesen az utasításokat. Sajátítsa el a kezelőszervek működtetését és gép helyes
használatát. Soha ne engedje, hogy gyermekek használják a készüléket.
Soha ne engedje olyan embereknek használni, akik a készülék használatára vonatkozó jelen utasítá-
sokat. A helyi előírások korlátozhatják a kezelőéletkorát.
Soha ne üzemeltesse a készüléket emberek, különösen gyerekek vagy háziállatok közelében.
Az üzemeltetővagy a felhasználó felelős a más személynek okozott vagy tulajdont érintőbalesete-
kért vagy veszélyekért.
A készülék használata közben mindig viseljen zárt cipőt és hosszú nadrágot. Ne használja a
készüléket mezítláb vagy nyitott szandálban.
Alaposan vizsgálja meg a készülék működési területét, és távolítson el minden követ, botot, veze-
téket, csontot és egyéb idegen tárgyat.
Használat előtt mindig ellenőrizze szemrevételezéssel, hogy a forgó alkatrészek és a vágószerkezet
nem kopottak-e vagy sérültek-e. Az egyensúly megőrzése érdekében cserélje ki a kopott vagy sérült
alkatrészeket.
A készüléket csak nappali fényben vagy kielégítőmesterséges fényben használja. Kerülje a készülék
nedves fűben történőüzemeltetését, ha lehetséges. Lejtőn való fűnyíráskor mindig bizonyosodjon
meg lába kellőmegtámasztásáról. Sétáljon, soha ne fusson. Lejtőn mindig keresztben dolgozzon,
soha ne felfelé vagy lefelé.
Legyen rendkívül óvatos, amikor a készüléket hátrafelé mozgatja vagy maga felé húzza.
Ne használja a készüléket túl meredek lejtőkön.
Nagyon óvatosan járjon el a készülék hátrafelé mozgatásakor vagy maga felé húzásakor.
Állítsa le a forgó alkatrészeket, ha a készüléket meg kell dönteni szállításhoz. Ne használja a
vágóeszközt, ha fűtől eltérőfelületen halad keresztül, és amikor a készüléket a munkaterületre és a
munkaterületről szállítja.
Soha ne működtesse a készüléket hibás védőburkolattal vagy biztonsági berendezések, például
terelők és/vagy gyűjtők nélkül.
Az utasításoknak megfelelően indítsa el a motort, és lábait tartsa megfelelőtávolságban a forgó
alkatrészektől.
A motor bekapcsolásakor ne döntse meg a készüléket, kivéve, ha a készüléket indításhoz meg kell
billenteni. Ebben az esetben ne billentse a gépet a szükségesnél nagyobb mértékben, és csak azt a
részt emelje fel, amely távol van az üzemeltetőtől. Mindig ellenőrizze, hogy mindkét keze működtető
helyzetben van-e, mielőtt visszahelyezi a gépet a talajra. Ne közelítse kezét és lábát forgó alka-
trészekhez, illetve ne tartsa azokat az alkatrészek alá.
Soha ne emelje fel és ne szállítsa a gépet, ha a motorja jár. Húzza ki a csatlakozót a hálózati aljzat-
ból:
• Minden olyan esetben, amikor felügyelet nélkül hagyja a gépet.
• Mielőtt megszüntetné az elakadást.
• Idegen tárgyba való ütközés után. Ellenőrizze a készüléket, hogy nincs-e rajta sérülés, és végezze
el a szükséges javításokat.
• Ha a készülék rendellenesen rezegni kezd, azonnal ellenőrizze.
Amikor a géppel a vastag bokrokban dolgozik, vagy olyan akadályokba ütközik, amelyeket nem tud
levágni, a kés megszorul, így a gép hőmérséklete és áramerőssége megnő. Ha a hőmérséklet túl
magas vagy az áram túl nagy, a gépbe épített túlterhelés-védelmi készülék automatikusan kikapc-
solja az áramot a gép leállítása érdekében (ennek főcélja a motor védelme és a motor élettartamá-
nak meghosszabbítása). Ekkor engedje el a ravaszt, és húzza ki a gép tápellátását, hagyja a gépet
hűlni egy ideig (1–2 percig), majd a kapcsolóval indítsa újra, és a gép működni fog.
Jelmagyarázat
A szerszám típustáblája szimbólumokat tartalmazhat. Ezek fontos információkat jelölnek a
termékkel, vagy a használati utasítással kapcsolatosan.
2. SZERELÉSI UTASÍTÁSOK
Előkészületek:
1. Helyezze a kábeltartót a felsőfogantyúra. (1a. ábra)
2. Csatlakoztassa a felsőés az alsó fogantyút a mellékelt csavarokkal és gombok használatával. (1b.
ábra)
3. Helyezze be a fogantyúkat a fűnyíró házába. (1c. ábra)
4. Szerelje fel az összes kereket a tengelyekre, rögzítse a helyükre az „R” csapokkal. (1d. ábra)
5. Rögzítse a kábeltartókat. (1e. ábra)
6. Fűgyűjtődoboz összeállítása. Szerelje össze a két felet és rögzítse azokat. (1f. ábra)
7. Emelje fel a fedelet, és helyezze a fűgyűjtődobozt a fülekre. (1g. ábra)
8. Nyomja a kerékfedeleket a helyükre. (1h. ábra)

12
HU
1. BIZTONSÁGI UTASÍTÁSOK
ÁLTALÁNOS BIZTONSÁGI UTASÍTÁSOK
FIGYELMEZTETÉS! Olvassa el a teljes használati utasítást. Az alábbiakban felsorolt utasítások
figyelmen kívül hagyása áramütést, tüzet vagy súlyos sérülést okozhat. A „szerszámgép” kifejezés
az alábbi összes figyelmeztetésben az Ön hálózatról (vezetékes) gépi szerszámára vagy akkumulá-
toros (vezeték nélküli) elektromos szerszámokra vonatkozik.
ŐRIZZE MEG EZEKET AZ UTASÍTÁSOKAT
1) A MUNKATERÜLET
a) Tartsa a munkaterületet tisztán és rendezetten. A zsúfolt és sötét területeken gyakrabban fordul
előbaleset.
b) Ne működtessen elektromos készüléket robbanásveszélyes környezetben, például gyúlékony
folyadékok, gázok vagy por jelenlétében. Az elektromos szerszámok szikrát generálnak, ami meg-
gyújthatja a port vagy a füstöt.
c) Az elektromos kéziszerszám használata közben tartsa távol a gyermekeket és a járókelőket. A
figyelemelterelés miatt elveszítheti a készülék felett az irányítást.
2) ELEKTROMOS BIZTONSÁGI ELŐÍRÁSOK
a) A csatlakozódugónak illeszkednie kell a tápaljzatba. A csatlakozódugót semmiképpen ne alakítsa
át. Ne használjon adaptercsatlakozót más földelt (testelt) eszközökkel. Az eredeti csatlakozódugók
és a megfelelőtápaljzatok révén csökkenthetőaz elektromos áramütés veszélye.
b) Kerülje a test érintkezését földelt és testelt felületekkel, például csövekkel, radiátorokkal, tűzhel-
yekkel és hűtőszekrényekkel. A test földelése vagy testelése fokozott áramütésveszélyt jelent.
c) Ne használjon elektromos készüléket esős és nedves környezetben. Az elektromos készülékbe
jutó víz növeli az áramütés kockázatát.
d) Ne használja a vezetéket rendeltetésellenes célra. Ne a kábelt használja az eszköz szállításához,
vontatásához vagy a csatlakozó tápaljzatból történőeltávolításához. A kábel forró felületektől,
olajtól, éles és mozgó tárgyaktól távol tartandó. A sérült vagy összecsomózott kábelek növelik az
áramütés kockázatát.
e) Ha kültéren használja az elektromos készüléket, kizárólag kültéri használatra jóváhagyott hossza-
bbító kábeleket használjon. A kültéri használatra alkalmas kábel használata csökkenti az áramütés
kockázatát.
3) SZEMÉLYI BIZTONSÁG
a) Járjon el körültekintően. A készülék használata közben irányítsa figyelmét a munkaterületre és a
készülék észszerűműködtetésére. Ne használja a készüléket, ha fáradt, illetve, ha drog, alkohol vagy
gyógyszerek hatása alatt áll. A készülék használata során pillanatnyi figyelmetlenség is súlyos
személyi sérülést okozhat.
b) Használjon védőeszközöket. Mindig használjon védőszemüveget. A megfelelőkörülményekhez
alkalmas biztonsági felszerelések, például porvédőmaszk, csúszásmentes védőcipő, védősisak
vagy hallásvédőcsökkenti a személyi sérüléseket.
c) Kerülje el a véletlen indítást. Ellenőrizze le, hogy a kapcsoló „OFF” állásban van, mielőtt csat-
lakoztatná a tápellátáshoz. Miközben az ujját a kapcsolón tartja, ne mozgassa az elektromos
kéziszerszámot és ne dugja be a dugaljba, mert ez fokozottan balesetveszélyes.
d) A készülék bekapcsolása előtt távolítson el minden állítókulcsot vagy csavarkulcsot. A készülék
forgó részén található csavarkulcs vagy állítókulcs személyi sérüléseket okozhat.
e) Ne becsülje túl képességeit. Ellenőrizze, hogy lábtartása biztonságos-e, és mindig tartsa meg az
egyensúlyát. Így jobban ellenőrzése alatt tarthatja a készüléket váratlan helyzetekben.
f) Viseljen megfelelőruházatot. Ne viseljen laza ruhát vagy ékszereket; A haját, a ruháját és a kesz-
tyűjét tartsa távol a mozgó részektől. A mozgó alkatrészek becsíphetik a laza ruhát, az ékszereket
vagy a hosszú hajat.
4) ELEKTROMOS SZERSZÁMOK HASZNÁLATA ÁS ÁPOLÁSA
a) Ne terhelje túl a készüléket. Használjon a célnak megfelelőkészüléket. A célnak megfelelőelek-
tromos készülékek segítségével nagyobb hatékonysággal és biztonságosabban végezheti el a
munkát.
b) Ne használja az elektromos készüléket, ha a be-/kikapcsológomb nem működik. A be-/kikapcso-
lógombbal nem vezérelhetőelektromos készülék veszélyes és javítást igényel.
c) Bármely beállítás végrehajtása, a tartozékok cseréje vagy a szerszámok tárolása előtt húzza ki a
dugvillát az aljzatból. Ezek a biztonsági intézkedések megakadályozzák a készülék véletlenszerű
beindítását.
d) A nem használt elektromos szerszámokat gyermekektől elzárva tárolja, és ne engedje be azokat,
akik nem ismerik az elektromos szerszámokat, illetve nincsenek tisztában a szerszám működtetésé-
vel. Az elektromos készülékek megfelelőismeretekkel nem rendelkezőfelhasználók kezében veszél-
yesek lehetnek.
e) Gondoskodjon a gépi szerszámok karbantartásáról. Ellenőrizze a rosszul beállított vagy szoruló
mozgó alkatrészeket, töréseket és minden olyan körülményt, amely befolyásolhatja a gépi szerszám
működését. Ha sérülést észlel, akkor használat előtt gondoskodni kell annak kijavításáról. A balese-
tek többségét a rosszul karbantartott elektromos szerszám okozza.
f) A vágószerszámokat tartsa megélezett és tiszta állapotban. A megfelelően karbantartott, éles
vágóélek kevésbé valószínű, hogy megakadnak, illetve a művelet irányítása is egyszerűbbé válik.
g) Az elektromos készüléket, a tartozékokat és a kiegészítőket stb. a jelen használati utasításnak
megfelelően, rendeltetésszerűen használja, a munkakörülmények és az elvégzendőmunka figyelem-
bevételével. Az elektromos készülékek nem rendeltetésszerűhasználata veszélyes helyzetet ered-
ményezhet.
5) SZERVIZ
a) Az elektromos készüléket szakemberrel javíttassa, kizárólag azonos pótalkatrészekkel. Ez biztosí-
tja az elektromos készülék biztonságát.
KIEGÉSZÍTŐBIZTONSÁGI SZABÁLYOK A FŰNYÍRÓRA
Olvassa el figyelmesen az utasításokat. Sajátítsa el a kezelőszervek működtetését és gép helyes
használatát. Soha ne engedje, hogy gyermekek használják a készüléket.
Soha ne engedje olyan embereknek használni, akik a készülék használatára vonatkozó jelen utasítá-
sokat. A helyi előírások korlátozhatják a kezelőéletkorát.
Soha ne üzemeltesse a készüléket emberek, különösen gyerekek vagy háziállatok közelében.
Az üzemeltetővagy a felhasználó felelős a más személynek okozott vagy tulajdont érintőbalesete-
kért vagy veszélyekért.
A készülék használata közben mindig viseljen zárt cipőt és hosszú nadrágot. Ne használja a
készüléket mezítláb vagy nyitott szandálban.
Alaposan vizsgálja meg a készülék működési területét, és távolítson el minden követ, botot, veze-
téket, csontot és egyéb idegen tárgyat.
Használat előtt mindig ellenőrizze szemrevételezéssel, hogy a forgó alkatrészek és a vágószerkezet
nem kopottak-e vagy sérültek-e. Az egyensúly megőrzése érdekében cserélje ki a kopott vagy sérült
alkatrészeket.
A készüléket csak nappali fényben vagy kielégítőmesterséges fényben használja. Kerülje a készülék
nedves fűben történőüzemeltetését, ha lehetséges. Lejtőn való fűnyíráskor mindig bizonyosodjon
meg lába kellőmegtámasztásáról. Sétáljon, soha ne fusson. Lejtőn mindig keresztben dolgozzon,
soha ne felfelé vagy lefelé.
Legyen rendkívül óvatos, amikor a készüléket hátrafelé mozgatja vagy maga felé húzza.
Ne használja a készüléket túl meredek lejtőkön.
Nagyon óvatosan járjon el a készülék hátrafelé mozgatásakor vagy maga felé húzásakor.
Állítsa le a forgó alkatrészeket, ha a készüléket meg kell dönteni szállításhoz. Ne használja a
vágóeszközt, ha fűtől eltérőfelületen halad keresztül, és amikor a készüléket a munkaterületre és a
munkaterületről szállítja.
Soha ne működtesse a készüléket hibás védőburkolattal vagy biztonsági berendezések, például
terelők és/vagy gyűjtők nélkül.
Az utasításoknak megfelelően indítsa el a motort, és lábait tartsa megfelelőtávolságban a forgó
alkatrészektől.
A motor bekapcsolásakor ne döntse meg a készüléket, kivéve, ha a készüléket indításhoz meg kell
billenteni. Ebben az esetben ne billentse a gépet a szükségesnél nagyobb mértékben, és csak azt a
részt emelje fel, amely távol van az üzemeltetőtől. Mindig ellenőrizze, hogy mindkét keze működtető
helyzetben van-e, mielőtt visszahelyezi a gépet a talajra. Ne közelítse kezét és lábát forgó alka-
trészekhez, illetve ne tartsa azokat az alkatrészek alá.
Soha ne emelje fel és ne szállítsa a gépet, ha a motorja jár. Húzza ki a csatlakozót a hálózati aljzat-
ból:
• Minden olyan esetben, amikor felügyelet nélkül hagyja a gépet.
• Mielőtt megszüntetné az elakadást.
• Idegen tárgyba való ütközés után. Ellenőrizze a készüléket, hogy nincs-e rajta sérülés, és végezze
el a szükséges javításokat.
• Ha a készülék rendellenesen rezegni kezd, azonnal ellenőrizze.
Amikor a géppel a vastag bokrokban dolgozik, vagy olyan akadályokba ütközik, amelyeket nem tud
levágni, a kés megszorul, így a gép hőmérséklete és áramerőssége megnő. Ha a hőmérséklet túl
magas vagy az áram túl nagy, a gépbe épített túlterhelés-védelmi készülék automatikusan kikapc-
solja az áramot a gép leállítása érdekében (ennek főcélja a motor védelme és a motor élettartamá-
nak meghosszabbítása). Ekkor engedje el a ravaszt, és húzza ki a gép tápellátását, hagyja a gépet
hűlni egy ideig (1–2 percig), majd a kapcsolóval indítsa újra, és a gép működni fog.
Jelmagyarázat
A szerszám típustáblája szimbólumokat tartalmazhat. Ezek fontos információkat jelölnek a
termékkel, vagy a használati utasítással kapcsolatosan.
2. SZERELÉSI UTASÍTÁSOK
Előkészületek:
1. Helyezze a kábeltartót a felsőfogantyúra. (1a. ábra)
2. Csatlakoztassa a felsőés az alsó fogantyút a mellékelt csavarokkal és gombok használatával. (1b.
ábra)
3. Helyezze be a fogantyúkat a fűnyíró házába. (1c. ábra)
4. Szerelje fel az összes kereket a tengelyekre, rögzítse a helyükre az „R” csapokkal. (1d. ábra)
5. Rögzítse a kábeltartókat. (1e. ábra)
6. Fűgyűjtődoboz összeállítása. Szerelje össze a két felet és rögzítse azokat. (1f. ábra)
7. Emelje fel a fedelet, és helyezze a fűgyűjtődobozt a fülekre. (1g. ábra)
8. Nyomja a kerékfedeleket a helyükre. (1h. ábra)
VÁGÁSI MAGASSÁG BEÁLLÍTÁSA
A kívánt vágási magasság elérése érdekében az elsőés a hátsó tengelyt áthelyezték a fűnyíró
házának alsó oldalára.
Figyelem! Válassza le a kaszát az áramforrásról, és a magasság beállítása előtt győződjön meg róla,
hogy a kés leállt.
1. Az elsőkerék vágási magasságának beállítása. (2a. ábra)
1) Fordítsa meg a fűnyírót.
2) Húzza a kerék tengelyét a fűnyíró eleje felé.
3) Helyezze a kerék tengelyét a kívánt vágási magasságba.
Megjegyzés: Győződjön meg arról, hogy a jobb és bal elsőkerék egyaránt a vágási magasságba van
állítva.
2. A hátsó kerék vágási magasságának beállítása (2b. ábra)
1) Fordítsa a fűnyírót az oldalára.
2) Húzza a hátsó kerék tengelyét a fűnyíró gyűjtőfedele felé.
3) Helyezze a kerék tengelyét a kívánt vágási magasságba.
Megjegyzés: Győződjön meg arról, hogy a jobb és a bal hátsó kerék is ugyanabban a vágási magas-
ságban van.
3. Vágási magasság pozíciók (2c. ábra)
1) 25 mm (legalacsonyabb vágási magasság)
2) 40 mm
3) 55 mm (legmagasabb vágási magasság)
3. MŰKÖDÉS
Helyezze áram alá a készüléket.
Figyelem! A hálózati csatlakozás előtt mindig ellenőrizze, hogy a kapcsoló ki van-e kapcsolva.
Csatlakoztassa a dugót az RCD-vel védett tápegységhez.
Indítás
Be-/kikapcsológomb (3. ábra)
Figyelem! Ne indítsa el a fűnyírót, ha hosszú fűben áll. Nyomja meg a kapcsolószerkezet biztonsági
gombját (A), majd húzza a kapcsolókart (B) a rúdhoz. Tartsa a kapcsolókart tartva, miközben elen-
gedi a biztonsági gombot. A fűnyíróleállításához engedje fel a kapcsolókart, az pedig automatikusan
visszatér kikapcsolt helyzetbe.
Fűnyírás (4. ábra)
Javasoljuk, hogy az optimális eredmény elérése és a hálózati kábel vágási kockázatának csökkenté-
se érdekében használja az ebben a szakaszban leírtak szerint használja a fűnyírót.
• Helyezze a hálózati kábel nagy részét a kiindulási pont közelébe.
• Kapcsolja be a fűnyírót a fent leírtak szerint.
• Járjon el a 4. ábra szerint.
• Haladjon az 1-es helyzetből a 2-es helyzetbe.
• Forduljon jobbra és haladjon a 3-as helyzet felé.
• Forduljon balra és haladjon a 4-es helyzet felé.
• Szükség esetén ismételje meg a fenti lépéseket.
Figyelem! Ne dolgozzon a kábel irányában.
Kés karbantartása (5. ábra)
• Rendszeresen távolítsa el a füvet és a szennyeződéseket a késről.
• A kertészeti idény kezdetén gondosan vizsgálja meg a kés állapotát.
• Ha a kés nagyon tompa, élezze meg vagy cserélje ki azt.
• Ha a kés sérült vagy kopott, helyezzen be újat.
Ha a kés megcsúszik, tegye a csavarhúzót a pozicionálási furatba, húzza meg a kést csavarkulccsal.
Lásd a 6. és a 7. ábrát.
Figyelem! Tartsa be a következőóvintézkedéseket:
• Válassza le a fűnyírót az elektromos hálózatról és a folytatás előtt várja meg, amíg a kés forgása
leáll.
• Vigyázzon, hogy ne vágja meg magát. Használjon nagy teherbírású kesztyűt vagy ruhát a kés
megfogásához.
• Csak a megadott cserekést használja.
• Semmilyen okból ne távolítsa el a járókereket (A).
4. KARBANTARTÁS
1. Tartsa meghúzva az összes anyát, csavart és csavart, hogy megbizonyosodjon arról, hogy a
fűnyíró biztonságos állapotban van.
2. Gyakran ellenőrizze a gyűjtőt kopás vagy deformálódás szempontjából.
3. A kopott vagy sérült alkatrészeket biztonság érdekében cserélje ki.
4. Kizárólag a termékhez előírt cserekést, késcsavart és járókereket használja.
5. A fűnyíró beállításakor ügyeljen arra, hogy megakadályozza az ujjak beragadását a mozgó kés és
a gép rögzített részei közé.
6. Olajozza meg a kerék csapszegeit.
7. A fűnyírót száraz helyen tárolja.
Az elektromos hulladékot nem szabad a háztartási hulladékkal együtt ártalmatlanítani.
Kérjük, hasznosítsa újra hulladékait, amennyiben az Ön közelében megfelelőlétesítmén-
yek találhatók. Az újrahasznosítással kapcsolatos további tudnivalókhoz forduljon a helyi
hatósághoz vagy a termék értékesítőjéhez.
A használati utasításban foglaltak be nem tartása személyi sérülést, halálos balesetet,
illetve a termék károsodását okozhatja.
Használjon szemvédőt Használjon fülvédőt.
Megfelel az EU összes országában érvényes szabványnak, ahol a termékeket vásárolták.
Viseljen erős, nem csúszó lábbelit.
5. MŰSZAKI ADATOK
DLMJ1500E
Feszültség: 230 V ~ 50 Hz
Teljesítmény: 1500 W
Terhelés nélküli fordulatszám: 3500 ford./perc
Vágási magasság: 3 magassági fokozat 20/40/60 mm
Maximális vágási szélesség: 360 mm
Fűgyűjtőzsák: 50 l műanyag
Motortípus: Kefés motor
Kerekek: elöl 5" / hátul 7"
Zajszint: 96 dB

13
1. BIZTONSÁGI UTASÍTÁSOK
ÁLTALÁNOS BIZTONSÁGI UTASÍTÁSOK
FIGYELMEZTETÉS! Olvassa el a teljes használati utasítást. Az alábbiakban felsorolt utasítások
figyelmen kívül hagyása áramütést, tüzet vagy súlyos sérülést okozhat. A „szerszámgép” kifejezés
az alábbi összes figyelmeztetésben az Ön hálózatról (vezetékes) gépi szerszámára vagy akkumulá-
toros (vezeték nélküli) elektromos szerszámokra vonatkozik.
ŐRIZZE MEG EZEKET AZ UTASÍTÁSOKAT
1) A MUNKATERÜLET
a) Tartsa a munkaterületet tisztán és rendezetten. A zsúfolt és sötét területeken gyakrabban fordul
előbaleset.
b) Ne működtessen elektromos készüléket robbanásveszélyes környezetben, például gyúlékony
folyadékok, gázok vagy por jelenlétében. Az elektromos szerszámok szikrát generálnak, ami meg-
gyújthatja a port vagy a füstöt.
c) Az elektromos kéziszerszám használata közben tartsa távol a gyermekeket és a járókelőket. A
figyelemelterelés miatt elveszítheti a készülék felett az irányítást.
2) ELEKTROMOS BIZTONSÁGI ELŐÍRÁSOK
a) A csatlakozódugónak illeszkednie kell a tápaljzatba. A csatlakozódugót semmiképpen ne alakítsa
át. Ne használjon adaptercsatlakozót más földelt (testelt) eszközökkel. Az eredeti csatlakozódugók
és a megfelelőtápaljzatok révén csökkenthetőaz elektromos áramütés veszélye.
b) Kerülje a test érintkezését földelt és testelt felületekkel, például csövekkel, radiátorokkal, tűzhel-
yekkel és hűtőszekrényekkel. A test földelése vagy testelése fokozott áramütésveszélyt jelent.
c) Ne használjon elektromos készüléket esős és nedves környezetben. Az elektromos készülékbe
jutó víz növeli az áramütés kockázatát.
d) Ne használja a vezetéket rendeltetésellenes célra. Ne a kábelt használja az eszköz szállításához,
vontatásához vagy a csatlakozó tápaljzatból történőeltávolításához. A kábel forró felületektől,
olajtól, éles és mozgó tárgyaktól távol tartandó. A sérült vagy összecsomózott kábelek növelik az
áramütés kockázatát.
e) Ha kültéren használja az elektromos készüléket, kizárólag kültéri használatra jóváhagyott hossza-
bbító kábeleket használjon. A kültéri használatra alkalmas kábel használata csökkenti az áramütés
kockázatát.
3) SZEMÉLYI BIZTONSÁG
a) Járjon el körültekintően. A készülék használata közben irányítsa figyelmét a munkaterületre és a
készülék észszerűműködtetésére. Ne használja a készüléket, ha fáradt, illetve, ha drog, alkohol vagy
gyógyszerek hatása alatt áll. A készülék használata során pillanatnyi figyelmetlenség is súlyos
személyi sérülést okozhat.
b) Használjon védőeszközöket. Mindig használjon védőszemüveget. A megfelelőkörülményekhez
alkalmas biztonsági felszerelések, például porvédőmaszk, csúszásmentes védőcipő, védősisak
vagy hallásvédőcsökkenti a személyi sérüléseket.
c) Kerülje el a véletlen indítást. Ellenőrizze le, hogy a kapcsoló „OFF” állásban van, mielőtt csat-
lakoztatná a tápellátáshoz. Miközben az ujját a kapcsolón tartja, ne mozgassa az elektromos
kéziszerszámot és ne dugja be a dugaljba, mert ez fokozottan balesetveszélyes.
d) A készülék bekapcsolása előtt távolítson el minden állítókulcsot vagy csavarkulcsot. A készülék
forgó részén található csavarkulcs vagy állítókulcs személyi sérüléseket okozhat.
e) Ne becsülje túl képességeit. Ellenőrizze, hogy lábtartása biztonságos-e, és mindig tartsa meg az
egyensúlyát. Így jobban ellenőrzése alatt tarthatja a készüléket váratlan helyzetekben.
f) Viseljen megfelelőruházatot. Ne viseljen laza ruhát vagy ékszereket; A haját, a ruháját és a kesz-
tyűjét tartsa távol a mozgó részektől. A mozgó alkatrészek becsíphetik a laza ruhát, az ékszereket
vagy a hosszú hajat.
4) ELEKTROMOS SZERSZÁMOK HASZNÁLATA ÁS ÁPOLÁSA
a) Ne terhelje túl a készüléket. Használjon a célnak megfelelőkészüléket. A célnak megfelelőelek-
tromos készülékek segítségével nagyobb hatékonysággal és biztonságosabban végezheti el a
munkát.
b) Ne használja az elektromos készüléket, ha a be-/kikapcsológomb nem működik. A be-/kikapcso-
lógombbal nem vezérelhetőelektromos készülék veszélyes és javítást igényel.
c) Bármely beállítás végrehajtása, a tartozékok cseréje vagy a szerszámok tárolása előtt húzza ki a
dugvillát az aljzatból. Ezek a biztonsági intézkedések megakadályozzák a készülék véletlenszerű
beindítását.
d) A nem használt elektromos szerszámokat gyermekektől elzárva tárolja, és ne engedje be azokat,
akik nem ismerik az elektromos szerszámokat, illetve nincsenek tisztában a szerszám működtetésé-
vel. Az elektromos készülékek megfelelőismeretekkel nem rendelkezőfelhasználók kezében veszél-
yesek lehetnek.
e) Gondoskodjon a gépi szerszámok karbantartásáról. Ellenőrizze a rosszul beállított vagy szoruló
mozgó alkatrészeket, töréseket és minden olyan körülményt, amely befolyásolhatja a gépi szerszám
működését. Ha sérülést észlel, akkor használat előtt gondoskodni kell annak kijavításáról. A balese-
tek többségét a rosszul karbantartott elektromos szerszám okozza.
f) A vágószerszámokat tartsa megélezett és tiszta állapotban. A megfelelően karbantartott, éles
vágóélek kevésbé valószínű, hogy megakadnak, illetve a művelet irányítása is egyszerűbbé válik.
g) Az elektromos készüléket, a tartozékokat és a kiegészítőket stb. a jelen használati utasításnak
megfelelően, rendeltetésszerűen használja, a munkakörülmények és az elvégzendőmunka figyelem-
bevételével. Az elektromos készülékek nem rendeltetésszerűhasználata veszélyes helyzetet ered-
ményezhet.
5) SZERVIZ
a) Az elektromos készüléket szakemberrel javíttassa, kizárólag azonos pótalkatrészekkel. Ez biztosí-
tja az elektromos készülék biztonságát.
KIEGÉSZÍTŐBIZTONSÁGI SZABÁLYOK A FŰNYÍRÓRA
Olvassa el figyelmesen az utasításokat. Sajátítsa el a kezelőszervek működtetését és gép helyes
használatát. Soha ne engedje, hogy gyermekek használják a készüléket.
Soha ne engedje olyan embereknek használni, akik a készülék használatára vonatkozó jelen utasítá-
sokat. A helyi előírások korlátozhatják a kezelőéletkorát.
Soha ne üzemeltesse a készüléket emberek, különösen gyerekek vagy háziállatok közelében.
Az üzemeltetővagy a felhasználó felelős a más személynek okozott vagy tulajdont érintőbalesete-
kért vagy veszélyekért.
A készülék használata közben mindig viseljen zárt cipőt és hosszú nadrágot. Ne használja a
készüléket mezítláb vagy nyitott szandálban.
Alaposan vizsgálja meg a készülék működési területét, és távolítson el minden követ, botot, veze-
téket, csontot és egyéb idegen tárgyat.
Használat előtt mindig ellenőrizze szemrevételezéssel, hogy a forgó alkatrészek és a vágószerkezet
nem kopottak-e vagy sérültek-e. Az egyensúly megőrzése érdekében cserélje ki a kopott vagy sérült
alkatrészeket.
A készüléket csak nappali fényben vagy kielégítőmesterséges fényben használja. Kerülje a készülék
nedves fűben történőüzemeltetését, ha lehetséges. Lejtőn való fűnyíráskor mindig bizonyosodjon
meg lába kellőmegtámasztásáról. Sétáljon, soha ne fusson. Lejtőn mindig keresztben dolgozzon,
soha ne felfelé vagy lefelé.
Legyen rendkívül óvatos, amikor a készüléket hátrafelé mozgatja vagy maga felé húzza.
Ne használja a készüléket túl meredek lejtőkön.
Nagyon óvatosan járjon el a készülék hátrafelé mozgatásakor vagy maga felé húzásakor.
Állítsa le a forgó alkatrészeket, ha a készüléket meg kell dönteni szállításhoz. Ne használja a
vágóeszközt, ha fűtől eltérőfelületen halad keresztül, és amikor a készüléket a munkaterületre és a
munkaterületről szállítja.
Soha ne működtesse a készüléket hibás védőburkolattal vagy biztonsági berendezések, például
terelők és/vagy gyűjtők nélkül.
Az utasításoknak megfelelően indítsa el a motort, és lábait tartsa megfelelőtávolságban a forgó
alkatrészektől.
A motor bekapcsolásakor ne döntse meg a készüléket, kivéve, ha a készüléket indításhoz meg kell
billenteni. Ebben az esetben ne billentse a gépet a szükségesnél nagyobb mértékben, és csak azt a
részt emelje fel, amely távol van az üzemeltetőtől. Mindig ellenőrizze, hogy mindkét keze működtető
helyzetben van-e, mielőtt visszahelyezi a gépet a talajra. Ne közelítse kezét és lábát forgó alka-
trészekhez, illetve ne tartsa azokat az alkatrészek alá.
Soha ne emelje fel és ne szállítsa a gépet, ha a motorja jár. Húzza ki a csatlakozót a hálózati aljzat-
ból:
• Minden olyan esetben, amikor felügyelet nélkül hagyja a gépet.
• Mielőtt megszüntetné az elakadást.
• Idegen tárgyba való ütközés után. Ellenőrizze a készüléket, hogy nincs-e rajta sérülés, és végezze
el a szükséges javításokat.
• Ha a készülék rendellenesen rezegni kezd, azonnal ellenőrizze.
Amikor a géppel a vastag bokrokban dolgozik, vagy olyan akadályokba ütközik, amelyeket nem tud
levágni, a kés megszorul, így a gép hőmérséklete és áramerőssége megnő. Ha a hőmérséklet túl
magas vagy az áram túl nagy, a gépbe épített túlterhelés-védelmi készülék automatikusan kikapc-
solja az áramot a gép leállítása érdekében (ennek főcélja a motor védelme és a motor élettartamá-
nak meghosszabbítása). Ekkor engedje el a ravaszt, és húzza ki a gép tápellátását, hagyja a gépet
hűlni egy ideig (1–2 percig), majd a kapcsolóval indítsa újra, és a gép működni fog.
Jelmagyarázat
A szerszám típustáblája szimbólumokat tartalmazhat. Ezek fontos információkat jelölnek a
termékkel, vagy a használati utasítással kapcsolatosan.
2. SZERELÉSI UTASÍTÁSOK
Előkészületek:
1. Helyezze a kábeltartót a felsőfogantyúra. (1a. ábra)
2. Csatlakoztassa a felsőés az alsó fogantyút a mellékelt csavarokkal és gombok használatával. (1b.
ábra)
3. Helyezze be a fogantyúkat a fűnyíró házába. (1c. ábra)
4. Szerelje fel az összes kereket a tengelyekre, rögzítse a helyükre az „R” csapokkal. (1d. ábra)
5. Rögzítse a kábeltartókat. (1e. ábra)
6. Fűgyűjtődoboz összeállítása. Szerelje össze a két felet és rögzítse azokat. (1f. ábra)
7. Emelje fel a fedelet, és helyezze a fűgyűjtődobozt a fülekre. (1g. ábra)
8. Nyomja a kerékfedeleket a helyükre. (1h. ábra)
VÁGÁSI MAGASSÁG BEÁLLÍTÁSA
A kívánt vágási magasság elérése érdekében az elsőés a hátsó tengelyt áthelyezték a fűnyíró
házának alsó oldalára.
Figyelem! Válassza le a kaszát az áramforrásról, és a magasság beállítása előtt győződjön meg róla,
hogy a kés leállt.
1. Az elsőkerék vágási magasságának beállítása. (2a. ábra)
1) Fordítsa meg a fűnyírót.
2) Húzza a kerék tengelyét a fűnyíró eleje felé.
3) Helyezze a kerék tengelyét a kívánt vágási magasságba.
Megjegyzés: Győződjön meg arról, hogy a jobb és bal elsőkerék egyaránt a vágási magasságba van
állítva.
2. A hátsó kerék vágási magasságának beállítása (2b. ábra)
1) Fordítsa a fűnyírót az oldalára.
2) Húzza a hátsó kerék tengelyét a fűnyíró gyűjtőfedele felé.
3) Helyezze a kerék tengelyét a kívánt vágási magasságba.
Megjegyzés: Győződjön meg arról, hogy a jobb és a bal hátsó kerék is ugyanabban a vágási magas-
ságban van.
3. Vágási magasság pozíciók (2c. ábra)
1) 25 mm (legalacsonyabb vágási magasság)
2) 40 mm
3) 55 mm (legmagasabb vágási magasság)
3. MŰKÖDÉS
Helyezze áram alá a készüléket.
Figyelem! A hálózati csatlakozás előtt mindig ellenőrizze, hogy a kapcsoló ki van-e kapcsolva.
Csatlakoztassa a dugót az RCD-vel védett tápegységhez.
Indítás
Be-/kikapcsológomb (3. ábra)
Figyelem! Ne indítsa el a fűnyírót, ha hosszú fűben áll. Nyomja meg a kapcsolószerkezet biztonsági
gombját (A), majd húzza a kapcsolókart (B) a rúdhoz. Tartsa a kapcsolókart tartva, miközben elen-
gedi a biztonsági gombot. A fűnyíróleállításához engedje fel a kapcsolókart, az pedig automatikusan
visszatér kikapcsolt helyzetbe.
Fűnyírás (4. ábra)
Javasoljuk, hogy az optimális eredmény elérése és a hálózati kábel vágási kockázatának csökkenté-
se érdekében használja az ebben a szakaszban leírtak szerint használja a fűnyírót.
• Helyezze a hálózati kábel nagy részét a kiindulási pont közelébe.
• Kapcsolja be a fűnyírót a fent leírtak szerint.
• Járjon el a 4. ábra szerint.
• Haladjon az 1-es helyzetből a 2-es helyzetbe.
• Forduljon jobbra és haladjon a 3-as helyzet felé.
• Forduljon balra és haladjon a 4-es helyzet felé.
• Szükség esetén ismételje meg a fenti lépéseket.
Figyelem! Ne dolgozzon a kábel irányában.
Kés karbantartása (5. ábra)
• Rendszeresen távolítsa el a füvet és a szennyeződéseket a késről.
• A kertészeti idény kezdetén gondosan vizsgálja meg a kés állapotát.
• Ha a kés nagyon tompa, élezze meg vagy cserélje ki azt.
• Ha a kés sérült vagy kopott, helyezzen be újat.
Ha a kés megcsúszik, tegye a csavarhúzót a pozicionálási furatba, húzza meg a kést csavarkulccsal.
Lásd a 6. és a 7. ábrát.
Figyelem! Tartsa be a következőóvintézkedéseket:
• Válassza le a fűnyírót az elektromos hálózatról és a folytatás előtt várja meg, amíg a kés forgása
leáll.
• Vigyázzon, hogy ne vágja meg magát. Használjon nagy teherbírású kesztyűt vagy ruhát a kés
megfogásához.
• Csak a megadott cserekést használja.
• Semmilyen okból ne távolítsa el a járókereket (A).
4. KARBANTARTÁS
1. Tartsa meghúzva az összes anyát, csavart és csavart, hogy megbizonyosodjon arról, hogy a
fűnyíró biztonságos állapotban van.
2. Gyakran ellenőrizze a gyűjtőt kopás vagy deformálódás szempontjából.
3. A kopott vagy sérült alkatrészeket biztonság érdekében cserélje ki.
4. Kizárólag a termékhez előírt cserekést, késcsavart és járókereket használja.
5. A fűnyíró beállításakor ügyeljen arra, hogy megakadályozza az ujjak beragadását a mozgó kés és
a gép rögzített részei közé.
6. Olajozza meg a kerék csapszegeit.
7. A fűnyírót száraz helyen tárolja.
Olvassa el a használati utasítást.
Viseljen védőkesztyűt.
Ne tegye ki esőnek.
Tartsa a gyerekeket legalább 10 m távolságban a munkaterülettől
A törmelék kivetődhet a kiáramló csonkon.
A kések rövid ideig még forognak a fűnyíró kikapcsolása után. Ne emelje fel és ne mozgas-
sa a fűnyírót, amíg a kések le nem állnak.
A termék kettős elektromos szigeteléssel rendelkezik.
A kések rövid ideig még forognak a fűnyíró kikapcsolása után. Ne emelje fel és ne mozgas-
sa a fűnyírót, amíg a kések le nem állnak.
Ha a tápkábel megsérül, azonnal húzza ki a hálózati csatlakozóaljzatból.
Ügyeljen az éles késekre. A kések a motor kikapcsolása után is forognak.
Karbantartás előtt, vagy ha a vezeték megsérült, húzza ki a csatlakozót a hálózat ból.
Tartsa a rugalmas kábelt a vágókéstől távol.
5. MŰSZAKI ADATOK
DLMJ1500E
Feszültség: 230 V ~ 50 Hz
Teljesítmény: 1500 W
Terhelés nélküli fordulatszám: 3500 ford./perc
Vágási magasság: 3 magassági fokozat 20/40/60 mm
Maximális vágási szélesség: 360 mm
Fűgyűjtőzsák: 50 l műanyag
Motortípus: Kefés motor
Kerekek: elöl 5" / hátul 7"
Zajszint: 96 dB

14
HU
1. BIZTONSÁGI UTASÍTÁSOK
ÁLTALÁNOS BIZTONSÁGI UTASÍTÁSOK
FIGYELMEZTETÉS! Olvassa el a teljes használati utasítást. Az alábbiakban felsorolt utasítások
figyelmen kívül hagyása áramütést, tüzet vagy súlyos sérülést okozhat. A „szerszámgép” kifejezés
az alábbi összes figyelmeztetésben az Ön hálózatról (vezetékes) gépi szerszámára vagy akkumulá-
toros (vezeték nélküli) elektromos szerszámokra vonatkozik.
ŐRIZZE MEG EZEKET AZ UTASÍTÁSOKAT
1) A MUNKATERÜLET
a) Tartsa a munkaterületet tisztán és rendezetten. A zsúfolt és sötét területeken gyakrabban fordul
előbaleset.
b) Ne működtessen elektromos készüléket robbanásveszélyes környezetben, például gyúlékony
folyadékok, gázok vagy por jelenlétében. Az elektromos szerszámok szikrát generálnak, ami meg-
gyújthatja a port vagy a füstöt.
c) Az elektromos kéziszerszám használata közben tartsa távol a gyermekeket és a járókelőket. A
figyelemelterelés miatt elveszítheti a készülék felett az irányítást.
2) ELEKTROMOS BIZTONSÁGI ELŐÍRÁSOK
a) A csatlakozódugónak illeszkednie kell a tápaljzatba. A csatlakozódugót semmiképpen ne alakítsa
át. Ne használjon adaptercsatlakozót más földelt (testelt) eszközökkel. Az eredeti csatlakozódugók
és a megfelelőtápaljzatok révén csökkenthetőaz elektromos áramütés veszélye.
b) Kerülje a test érintkezését földelt és testelt felületekkel, például csövekkel, radiátorokkal, tűzhel-
yekkel és hűtőszekrényekkel. A test földelése vagy testelése fokozott áramütésveszélyt jelent.
c) Ne használjon elektromos készüléket esős és nedves környezetben. Az elektromos készülékbe
jutó víz növeli az áramütés kockázatát.
d) Ne használja a vezetéket rendeltetésellenes célra. Ne a kábelt használja az eszköz szállításához,
vontatásához vagy a csatlakozó tápaljzatból történőeltávolításához. A kábel forró felületektől,
olajtól, éles és mozgó tárgyaktól távol tartandó. A sérült vagy összecsomózott kábelek növelik az
áramütés kockázatát.
e) Ha kültéren használja az elektromos készüléket, kizárólag kültéri használatra jóváhagyott hossza-
bbító kábeleket használjon. A kültéri használatra alkalmas kábel használata csökkenti az áramütés
kockázatát.
3) SZEMÉLYI BIZTONSÁG
a) Járjon el körültekintően. A készülék használata közben irányítsa figyelmét a munkaterületre és a
készülék észszerűműködtetésére. Ne használja a készüléket, ha fáradt, illetve, ha drog, alkohol vagy
gyógyszerek hatása alatt áll. A készülék használata során pillanatnyi figyelmetlenség is súlyos
személyi sérülést okozhat.
b) Használjon védőeszközöket. Mindig használjon védőszemüveget. A megfelelőkörülményekhez
alkalmas biztonsági felszerelések, például porvédőmaszk, csúszásmentes védőcipő, védősisak
vagy hallásvédőcsökkenti a személyi sérüléseket.
c) Kerülje el a véletlen indítást. Ellenőrizze le, hogy a kapcsoló „OFF” állásban van, mielőtt csat-
lakoztatná a tápellátáshoz. Miközben az ujját a kapcsolón tartja, ne mozgassa az elektromos
kéziszerszámot és ne dugja be a dugaljba, mert ez fokozottan balesetveszélyes.
d) A készülék bekapcsolása előtt távolítson el minden állítókulcsot vagy csavarkulcsot. A készülék
forgó részén található csavarkulcs vagy állítókulcs személyi sérüléseket okozhat.
e) Ne becsülje túl képességeit. Ellenőrizze, hogy lábtartása biztonságos-e, és mindig tartsa meg az
egyensúlyát. Így jobban ellenőrzése alatt tarthatja a készüléket váratlan helyzetekben.
f) Viseljen megfelelőruházatot. Ne viseljen laza ruhát vagy ékszereket; A haját, a ruháját és a kesz-
tyűjét tartsa távol a mozgó részektől. A mozgó alkatrészek becsíphetik a laza ruhát, az ékszereket
vagy a hosszú hajat.
4) ELEKTROMOS SZERSZÁMOK HASZNÁLATA ÁS ÁPOLÁSA
a) Ne terhelje túl a készüléket. Használjon a célnak megfelelőkészüléket. A célnak megfelelőelek-
tromos készülékek segítségével nagyobb hatékonysággal és biztonságosabban végezheti el a
munkát.
b) Ne használja az elektromos készüléket, ha a be-/kikapcsológomb nem működik. A be-/kikapcso-
lógombbal nem vezérelhetőelektromos készülék veszélyes és javítást igényel.
c) Bármely beállítás végrehajtása, a tartozékok cseréje vagy a szerszámok tárolása előtt húzza ki a
dugvillát az aljzatból. Ezek a biztonsági intézkedések megakadályozzák a készülék véletlenszerű
beindítását.
d) A nem használt elektromos szerszámokat gyermekektől elzárva tárolja, és ne engedje be azokat,
akik nem ismerik az elektromos szerszámokat, illetve nincsenek tisztában a szerszám működtetésé-
vel. Az elektromos készülékek megfelelőismeretekkel nem rendelkezőfelhasználók kezében veszél-
yesek lehetnek.
e) Gondoskodjon a gépi szerszámok karbantartásáról. Ellenőrizze a rosszul beállított vagy szoruló
mozgó alkatrészeket, töréseket és minden olyan körülményt, amely befolyásolhatja a gépi szerszám
működését. Ha sérülést észlel, akkor használat előtt gondoskodni kell annak kijavításáról. A balese-
tek többségét a rosszul karbantartott elektromos szerszám okozza.
f) A vágószerszámokat tartsa megélezett és tiszta állapotban. A megfelelően karbantartott, éles
vágóélek kevésbé valószínű, hogy megakadnak, illetve a művelet irányítása is egyszerűbbé válik.
g) Az elektromos készüléket, a tartozékokat és a kiegészítőket stb. a jelen használati utasításnak
megfelelően, rendeltetésszerűen használja, a munkakörülmények és az elvégzendőmunka figyelem-
bevételével. Az elektromos készülékek nem rendeltetésszerűhasználata veszélyes helyzetet ered-
ményezhet.
5) SZERVIZ
a) Az elektromos készüléket szakemberrel javíttassa, kizárólag azonos pótalkatrészekkel. Ez biztosí-
tja az elektromos készülék biztonságát.
KIEGÉSZÍTŐBIZTONSÁGI SZABÁLYOK A FŰNYÍRÓRA
Olvassa el figyelmesen az utasításokat. Sajátítsa el a kezelőszervek működtetését és gép helyes
használatát. Soha ne engedje, hogy gyermekek használják a készüléket.
Soha ne engedje olyan embereknek használni, akik a készülék használatára vonatkozó jelen utasítá-
sokat. A helyi előírások korlátozhatják a kezelőéletkorát.
Soha ne üzemeltesse a készüléket emberek, különösen gyerekek vagy háziállatok közelében.
Az üzemeltetővagy a felhasználó felelős a más személynek okozott vagy tulajdont érintőbalesete-
kért vagy veszélyekért.
A készülék használata közben mindig viseljen zárt cipőt és hosszú nadrágot. Ne használja a
készüléket mezítláb vagy nyitott szandálban.
Alaposan vizsgálja meg a készülék működési területét, és távolítson el minden követ, botot, veze-
téket, csontot és egyéb idegen tárgyat.
Használat előtt mindig ellenőrizze szemrevételezéssel, hogy a forgó alkatrészek és a vágószerkezet
nem kopottak-e vagy sérültek-e. Az egyensúly megőrzése érdekében cserélje ki a kopott vagy sérült
alkatrészeket.
A készüléket csak nappali fényben vagy kielégítőmesterséges fényben használja. Kerülje a készülék
nedves fűben történőüzemeltetését, ha lehetséges. Lejtőn való fűnyíráskor mindig bizonyosodjon
meg lába kellőmegtámasztásáról. Sétáljon, soha ne fusson. Lejtőn mindig keresztben dolgozzon,
soha ne felfelé vagy lefelé.
Legyen rendkívül óvatos, amikor a készüléket hátrafelé mozgatja vagy maga felé húzza.
Ne használja a készüléket túl meredek lejtőkön.
Nagyon óvatosan járjon el a készülék hátrafelé mozgatásakor vagy maga felé húzásakor.
Állítsa le a forgó alkatrészeket, ha a készüléket meg kell dönteni szállításhoz. Ne használja a
vágóeszközt, ha fűtől eltérőfelületen halad keresztül, és amikor a készüléket a munkaterületre és a
munkaterületről szállítja.
Soha ne működtesse a készüléket hibás védőburkolattal vagy biztonsági berendezések, például
terelők és/vagy gyűjtők nélkül.
Az utasításoknak megfelelően indítsa el a motort, és lábait tartsa megfelelőtávolságban a forgó
alkatrészektől.
A motor bekapcsolásakor ne döntse meg a készüléket, kivéve, ha a készüléket indításhoz meg kell
billenteni. Ebben az esetben ne billentse a gépet a szükségesnél nagyobb mértékben, és csak azt a
részt emelje fel, amely távol van az üzemeltetőtől. Mindig ellenőrizze, hogy mindkét keze működtető
helyzetben van-e, mielőtt visszahelyezi a gépet a talajra. Ne közelítse kezét és lábát forgó alka-
trészekhez, illetve ne tartsa azokat az alkatrészek alá.
Soha ne emelje fel és ne szállítsa a gépet, ha a motorja jár. Húzza ki a csatlakozót a hálózati aljzat-
ból:
• Minden olyan esetben, amikor felügyelet nélkül hagyja a gépet.
• Mielőtt megszüntetné az elakadást.
• Idegen tárgyba való ütközés után. Ellenőrizze a készüléket, hogy nincs-e rajta sérülés, és végezze
el a szükséges javításokat.
• Ha a készülék rendellenesen rezegni kezd, azonnal ellenőrizze.
Amikor a géppel a vastag bokrokban dolgozik, vagy olyan akadályokba ütközik, amelyeket nem tud
levágni, a kés megszorul, így a gép hőmérséklete és áramerőssége megnő. Ha a hőmérséklet túl
magas vagy az áram túl nagy, a gépbe épített túlterhelés-védelmi készülék automatikusan kikapc-
solja az áramot a gép leállítása érdekében (ennek főcélja a motor védelme és a motor élettartamá-
nak meghosszabbítása). Ekkor engedje el a ravaszt, és húzza ki a gép tápellátását, hagyja a gépet
hűlni egy ideig (1–2 percig), majd a kapcsolóval indítsa újra, és a gép működni fog.
Jelmagyarázat
A szerszám típustáblája szimbólumokat tartalmazhat. Ezek fontos információkat jelölnek a
termékkel, vagy a használati utasítással kapcsolatosan.
2. SZERELÉSI UTASÍTÁSOK
Előkészületek:
1. Helyezze a kábeltartót a felsőfogantyúra. (1a. ábra)
2. Csatlakoztassa a felsőés az alsó fogantyút a mellékelt csavarokkal és gombok használatával. (1b.
ábra)
3. Helyezze be a fogantyúkat a fűnyíró házába. (1c. ábra)
4. Szerelje fel az összes kereket a tengelyekre, rögzítse a helyükre az „R” csapokkal. (1d. ábra)
5. Rögzítse a kábeltartókat. (1e. ábra)
6. Fűgyűjtődoboz összeállítása. Szerelje össze a két felet és rögzítse azokat. (1f. ábra)
7. Emelje fel a fedelet, és helyezze a fűgyűjtődobozt a fülekre. (1g. ábra)
8. Nyomja a kerékfedeleket a helyükre. (1h. ábra)
VÁGÁSI MAGASSÁG BEÁLLÍTÁSA
A kívánt vágási magasság elérése érdekében az elsőés a hátsó tengelyt áthelyezték a fűnyíró
házának alsó oldalára.
Figyelem! Válassza le a kaszát az áramforrásról, és a magasság beállítása előtt győződjön meg róla,
hogy a kés leállt.
1. Az elsőkerék vágási magasságának beállítása. (2a. ábra)
1) Fordítsa meg a fűnyírót.
2) Húzza a kerék tengelyét a fűnyíró eleje felé.
3) Helyezze a kerék tengelyét a kívánt vágási magasságba.
Megjegyzés: Győződjön meg arról, hogy a jobb és bal elsőkerék egyaránt a vágási magasságba van
állítva.
2. A hátsó kerék vágási magasságának beállítása (2b. ábra)
1) Fordítsa a fűnyírót az oldalára.
2) Húzza a hátsó kerék tengelyét a fűnyíró gyűjtőfedele felé.
3) Helyezze a kerék tengelyét a kívánt vágási magasságba.
Megjegyzés: Győződjön meg arról, hogy a jobb és a bal hátsó kerék is ugyanabban a vágási magas-
ságban van.
3. Vágási magasság pozíciók (2c. ábra)
1) 25 mm (legalacsonyabb vágási magasság)
2) 40 mm
3) 55 mm (legmagasabb vágási magasság)
3. MŰKÖDÉS
Helyezze áram alá a készüléket.
Figyelem! A hálózati csatlakozás előtt mindig ellenőrizze, hogy a kapcsoló ki van-e kapcsolva.
Csatlakoztassa a dugót az RCD-vel védett tápegységhez.
Indítás
Be-/kikapcsológomb (3. ábra)
Figyelem! Ne indítsa el a fűnyírót, ha hosszú fűben áll. Nyomja meg a kapcsolószerkezet biztonsági
gombját (A), majd húzza a kapcsolókart (B) a rúdhoz. Tartsa a kapcsolókart tartva, miközben elen-
gedi a biztonsági gombot. A fűnyíróleállításához engedje fel a kapcsolókart, az pedig automatikusan
visszatér kikapcsolt helyzetbe.
Fűnyírás (4. ábra)
Javasoljuk, hogy az optimális eredmény elérése és a hálózati kábel vágási kockázatának csökkenté-
se érdekében használja az ebben a szakaszban leírtak szerint használja a fűnyírót.
• Helyezze a hálózati kábel nagy részét a kiindulási pont közelébe.
• Kapcsolja be a fűnyírót a fent leírtak szerint.
• Járjon el a 4. ábra szerint.
• Haladjon az 1-es helyzetből a 2-es helyzetbe.
• Forduljon jobbra és haladjon a 3-as helyzet felé.
• Forduljon balra és haladjon a 4-es helyzet felé.
• Szükség esetén ismételje meg a fenti lépéseket.
Figyelem! Ne dolgozzon a kábel irányában.
Kés karbantartása (5. ábra)
• Rendszeresen távolítsa el a füvet és a szennyeződéseket a késről.
• A kertészeti idény kezdetén gondosan vizsgálja meg a kés állapotát.
• Ha a kés nagyon tompa, élezze meg vagy cserélje ki azt.
• Ha a kés sérült vagy kopott, helyezzen be újat.
Ha a kés megcsúszik, tegye a csavarhúzót a pozicionálási furatba, húzza meg a kést csavarkulccsal.
Lásd a 6. és a 7. ábrát.
Figyelem! Tartsa be a következőóvintézkedéseket:
• Válassza le a fűnyírót az elektromos hálózatról és a folytatás előtt várja meg, amíg a kés forgása
leáll.
• Vigyázzon, hogy ne vágja meg magát. Használjon nagy teherbírású kesztyűt vagy ruhát a kés
megfogásához.
• Csak a megadott cserekést használja.
• Semmilyen okból ne távolítsa el a járókereket (A).
4. KARBANTARTÁS
1. Tartsa meghúzva az összes anyát, csavart és csavart, hogy megbizonyosodjon arról, hogy a
fűnyíró biztonságos állapotban van.
2. Gyakran ellenőrizze a gyűjtőt kopás vagy deformálódás szempontjából.
3. A kopott vagy sérült alkatrészeket biztonság érdekében cserélje ki.
4. Kizárólag a termékhez előírt cserekést, késcsavart és járókereket használja.
5. A fűnyíró beállításakor ügyeljen arra, hogy megakadályozza az ujjak beragadását a mozgó kés és
a gép rögzített részei közé.
6. Olajozza meg a kerék csapszegeit.
7. A fűnyírót száraz helyen tárolja.
5. MŰSZAKI ADATOK
DLMJ1500E
Feszültség: 230 V ~ 50 Hz
Teljesítmény: 1500 W
Terhelés nélküli fordulatszám: 3500 ford./perc
Vágási magasság: 3 magassági fokozat 20/40/60 mm
Maximális vágási szélesség: 360 mm
Fűgyűjtőzsák: 50 l műanyag
Motortípus: Kefés motor
Kerekek: elöl 5" / hátul 7"
Zajszint: 96 dB
a1
b
c
d
e
f
g
h
2a

15
1. BIZTONSÁGI UTASÍTÁSOK
ÁLTALÁNOS BIZTONSÁGI UTASÍTÁSOK
FIGYELMEZTETÉS! Olvassa el a teljes használati utasítást. Az alábbiakban felsorolt utasítások
figyelmen kívül hagyása áramütést, tüzet vagy súlyos sérülést okozhat. A „szerszámgép” kifejezés
az alábbi összes figyelmeztetésben az Ön hálózatról (vezetékes) gépi szerszámára vagy akkumulá-
toros(vezetéknélküli)elektromosszerszámokravonatkozik.
ŐRIZZE MEG EZEKET AZ UTASÍTÁSOKAT
1) A MUNKATERÜLET
a) Tartsa amunkaterületet tisztán és rendezetten. Azsúfolt és sötét területeken gyakrabban fordul
előbaleset.
b) Ne működtessen elektromos készüléket robbanásveszélyes környezetben, például gyúlékony
folyadékok, gázok vagy por jelenlétében. Az elektromos szerszámok szikrát generálnak, ami meg-
gyújthatja a port vagy a füstöt.
c) Az elektromos kéziszerszám használata közben tartsa távol a gyermekeket és a járókelőket. A
figyelemelterelés miatt elveszítheti akészülék felett az irányítást.
2) ELEKTROMOS BIZTONSÁGI ELŐÍRÁSOK
a) A csatlakozódugónak illeszkednie kell a tápaljzatba. A csatlakozódugót semmiképpen ne alakítsa
át. Ne használjon adaptercsatlakozót más földelt (testelt) eszközökkel. Az eredeti csatlakozódugók
és a megfelelőtápaljzatok révéncsökkenthetőazelektromosáramütésveszélye.
b) Kerülje a test érintkezését földelt és testelt felületekkel, például csövekkel, radiátorokkal, tűzhel-
yekkel és hűtőszekrényekkel.Atestföldelése vagytestelése fokozottáramütésveszélytjelent.
c) Ne használjon elektromos készüléket esős és nedves környezetben. Az elektromos készülékbe
jutó víz növeli az áramütés kockázatát.
d) Ne használja a vezetéket rendeltetésellenes célra. Ne a kábelt használja az eszköz szállításához,
vontatásához vagy a csatlakozó tápaljzatból történőeltávolításához. Akábel forró felületektől,
olajtól, éles és mozgó tárgyaktól távol tartandó. A sérült vagy összecsomózott kábelek növelik az
áramütés kockázatát.
e) Ha kültéren használja az elektromos készüléket, kizárólag kültéri használatra jóváhagyott hossza-
bbító kábeleket használjon. A kültéri használatra alkalmas kábel használata csökkenti az áramütés
kockázatát.
3)SZEMÉLYI BIZTONSÁG
a) Járjon el körültekintően. A készülék használata közben irányítsa figyelmét a munkaterületre és a
készülékészszerűműködtetésére. Ne használja a készüléket, ha fáradt, illetve, ha drog, alkohol vagy
gyógyszerek hatása alatt áll. A készülék használata során pillanatnyi figyelmetlenség is súlyos
személyi sérülést okozhat.
b) Használjon védőeszközöket. Mindig használjon védőszemüveget. Amegfelelőkörülményekhez
alkalmas biztonsági felszerelések, például porvédőmaszk, csúszásmentes védőcipő,védősisak
vagy hallásvédőcsökkenti aszemélyi sérüléseket.
c) Kerülje el a véletlen indítást. Ellenőrizze le, hogy a kapcsoló „OFF” állásban van, mielőtt csat-
lakoztatná a tápellátáshoz. Miközben az ujját a kapcsolón tartja, ne mozgassa az elektromos
kéziszerszámot és ne dugja be a dugaljba, mert ez fokozottan balesetveszélyes.
d) Akészülék bekapcsolása előtt távolítson el minden állítókulcsot vagy csavarkulcsot. A készülék
forgó részén található csavarkulcs vagy állítókulcs személyi sérüléseket okozhat.
e) Ne becsülje túl képességeit. Ellenőrizze, hogy lábtartása biztonságos-e, és mindig tartsa meg az
egyensúlyát. Így jobban ellenőrzésealatttarthatja akészüléket váratlanhelyzetekben.
f)Viseljen megfelelőruházatot. Ne viseljen laza ruhát vagy ékszereket; A haját, a ruháját és a kesz-
tyűjét tartsa távol a mozgó részektől. A mozgó alkatrészek becsíphetik a laza ruhát, az ékszereket
vagy a hosszú hajat.
4) ELEKTROMOS SZERSZÁMOK HASZNÁLATA ÁS ÁPOLÁSA
a) Ne terhelje túl a készüléket. Használjon a célnak megfelelőkészüléket. A célnak megfelelőelek-
tromos készülékek segítségével nagyobb hatékonysággal és biztonságosabban végezheti el a
munkát.
b) Ne használja az elektromos készüléket, ha a be-/kikapcsológomb nem működik.Abe-/kikapcso-
lógombbal nem vezérelhetőelektromos készülék veszélyes és javítást igényel.
c) Bármely beállítás végrehajtása, a tartozékok cseréje vagy a szerszámok tárolása előtt húzza ki a
dugvillát az aljzatból. Ezek a biztonsági intézkedések megakadályozzák a készülék véletlenszerű
beindítását.
d) Anem használt elektromos szerszámokat gyermekektől elzárva tárolja, és ne engedje be azokat,
akik nem ismerik az elektromos szerszámokat, illetve nincsenek tisztában a szerszám működtetésé-
vel. Az elektromos készülékek megfelelőismeretekkel nem rendelkezőfelhasználók kezében veszél-
yesek lehetnek.
e) Gondoskodjon a gépi szerszámok karbantartásáról. Ellenőrizze a rosszul beállított vagy szoruló
mozgó alkatrészeket, töréseket és minden olyan körülményt, amely befolyásolhatja a gépi szerszám
működését. Ha sérülést észlel, akkor használat előtt gondoskodni kell annak kijavításáról. A balese-
tektöbbségét arosszul karbantartottelektromosszerszámokozza.
f) A vágószerszámokat tartsa megélezett és tiszta állapotban. A megfelelően karbantartott, éles
vágóélek kevésbé valószínű, hogy megakadnak, illetve a művelet irányítása is egyszerűbbéválik.
g) Az elektromos készüléket, atartozékokat és akiegészítőket stb. a jelen használati utasításnak
megfelelően, rendeltetésszerűen használja, a munkakörülmények és az elvégzendőmunka figyelem-
bevételével. Az elektromos készülékek nem rendeltetésszerűhasználata veszélyes helyzetet ered-
ményezhet.
5)SZERVIZ
a) Az elektromos készüléket szakemberrel javíttassa, kizárólag azonos pótalkatrészekkel. Ez biztosí-
tja az elektromos készülék biztonságát.
KIEGÉSZÍTŐBIZTONSÁGI SZABÁLYOK A FŰNYÍRÓRA
Olvassa el figyelmesen az utasításokat. Sajátítsa el a kezelőszervekműködtetését és gép helyes
használatát. Soha ne engedje, hogy gyermekek használják a készüléket.
Soha ne engedje olyan embereknek használni, akik a készülék használatára vonatkozó jelen utasítá-
sokat.Ahelyielőírások korlátozhatjákakezelőéletkorát.
Soha ne üzemeltesse a készüléket emberek, különösen gyerekek vagy háziállatok közelében.
Az üzemeltetővagy a felhasználó felelős a más személynek okozott vagy tulajdont érintőbalesete-
kért vagy veszélyekért.
A készülék használata közben mindig viseljen zárt cipőt és hosszú nadrágot. Ne használja a
készüléket mezítláb vagy nyitott szandálban.
Alaposan vizsgálja meg a készülék működési területét, és távolítson el minden követ, botot, veze-
téket, csontot és egyéb idegen tárgyat.
Használatelőtt mindig ellenőrizze szemrevételezéssel, hogy a forgó alkatrészek és a vágószerkezet
nem kopottak-e vagy sérültek-e. Az egyensúly megőrzése érdekében cserélje ki a kopott vagy sérült
alkatrészeket.
A készüléket csak nappali fényben vagy kielégítőmesterséges fényben használja. Kerülje a készülék
nedves fűben történőüzemeltetését, ha lehetséges. Lejtőn való fűnyíráskor mindig bizonyosodjon
meg lába kellőmegtámasztásáról. Sétáljon, soha ne fusson. Lejtőn mindig keresztben dolgozzon,
soha ne felfelé vagy lefelé.
Legyen rendkívül óvatos, amikor a készüléket hátrafelé mozgatja vagy maga felé húzza.
Ne használja a készüléket túl meredek lejtőkön.
Nagyon óvatosan járjon el a készülék hátrafelé mozgatásakor vagy maga felé húzásakor.
Állítsa le a forgó alkatrészeket, ha a készüléket meg kell dönteni szállításhoz. Ne használja a
vágóeszközt, ha fűtőleltérőfelületen halad keresztül, és amikor akészüléket amunkaterületre és a
munkaterületrőlszállítja.
Soha ne működtesse a készüléket hibás védőburkolattal vagy biztonsági berendezések, például
terelők és/vagy gyűjtőknélkül.
Azutasításoknakmegfelelően indítsa el a motort, és lábait tartsa megfelelőtávolságban a forgó
alkatrészektől.
A motor bekapcsolásakor ne döntse meg a készüléket, kivéve, ha a készüléket indításhoz meg kell
billenteni. Ebben az esetben ne billentse a gépet a szükségesnél nagyobb mértékben, és csak azt a
részt emelje fel, amely távol van az üzemeltetőtől. Mindig ellenőrizze, hogy mindkét keze működtető
helyzetben van-e,mielőtt visszahelyezi a gépet a talajra. Ne közelítse kezét és lábát forgó alka-
trészekhez,illetvene tartsaazokat azalkatrészekalá.
Soha ne emelje fel és ne szállítsa a gépet, ha a motorja jár. Húzza ki a csatlakozót a hálózati aljzat-
ból:
• Minden olyan esetben, amikor felügyelet nélkül hagyja a gépet.
• Mielőttmegszüntetnéazelakadást.
• Idegen tárgyba való ütközés után. Ellenőrizze a készüléket, hogy nincs-e rajta sérülés, és végezze
el aszükséges javításokat.
• Ha a készülék rendellenesen rezegni kezd, azonnal ellenőrizze.
Amikor a géppel a vastag bokrokban dolgozik, vagy olyan akadályokba ütközik, amelyeket nem tud
levágni, a kés megszorul, így a gép hőmérsékleteésáramerősségemegnő. Ha a hőmérséklet túl
magas vagy az áram túl nagy, a gépbe épített túlterhelés-védelmi készülék automatikusan kikapc-
solja az áramot a gép leállítása érdekében (ennek főcélja a motor védelme és a motor élettartamá-
nak meghosszabbítása). Ekkor engedje el a ravaszt, és húzza ki a gép tápellátását, hagyja a gépet
hűlni egy ideig (1–2 percig), majd a kapcsolóval indítsa újra, és a gép működnifog.
Jelmagyarázat
A szerszám típustáblája szimbólumokat tartalmazhat. Ezek fontos információkat jelölnek a
termékkel,vagy ahasználatiutasítással kapcsolatosan.
2.SZERELÉSIUTASÍTÁSOK
Előkészületek:
1. Helyezze a kábeltartót a felsőfogantyúra. (1a. ábra)
2. Csatlakoztassa afelsőés az alsó fogantyút a mellékelt csavarokkal és gombok használatával. (1b.
ábra)
3. Helyezze be a fogantyúkat a fűnyíró házába. (1c. ábra)
4. Szerelje fel az összes kereket a tengelyekre, rögzítse a helyükre az „R” csapokkal. (1d. ábra)
5. Rögzítseakábeltartókat.(1e. ábra)
6. Fűgyűjtődoboz összeállítása. Szerelje össze a két felet és rögzítse azokat. (1f. ábra)
7. Emelje fel a fedelet, és helyezze a fűgyűjtődobozt a fülekre. (1g. ábra)
8. Nyomja a kerékfedeleket a helyükre. (1h. ábra)
VÁGÁSIMAGASSÁG BEÁLLÍTÁSA
A kívánt vágási magasság elérése érdekében az elsőés a hátsó tengelyt áthelyezték a fűnyíró
házának alsó oldalára.
Figyelem! Válassza le a kaszát az áramforrásról, és a magasság beállítása előtt győződjön meg róla,
hogy a kés leállt.
1. Az elsőkerék vágási magasságának beállítása. (2a. ábra)
1) Fordítsa meg a fűnyírót.
2) Húzza a kerék tengelyét a fűnyíró eleje felé.
3) Helyezze a kerék tengelyét a kívánt vágási magasságba.
Megjegyzés: Győződjön meg arról, hogy a jobb és bal elsőkerék egyaránt a vágási magasságba van
állítva.
2. A hátsó kerék vágási magasságának beállítása (2b. ábra)
1) Fordítsa a fűnyírót az oldalára.
2) Húzza a hátsó kerék tengelyét a fűnyíró gyűjtőfedele felé.
3) Helyezze a kerék tengelyét a kívánt vágási magasságba.
Megjegyzés: Győződjön meg arról, hogy a jobb és a bal hátsó kerék is ugyanabban a vágási magas-
ságban van.
3. Vágási magasság pozíciók (2c. ábra)
1) 20mm (legalacsonyabb vágási magasság)
2) 40 mm
3) 60 mm (legmagasabb vágási magasság)
3. MŰKÖDÉS
Helyezze áram alá a készüléket.
Figyelem! A hálózati csatlakozás előtt mindig ellenőrizze, hogy a kapcsoló ki van-e kapcsolva.
Csatlakoztassa adugót az RCD-vel védett tápegységhez.
Indítás
Be-/kikapcsológomb (3. ábra)
Figyelem! Ne indítsa el a fűnyírót, ha hosszú fűben áll. Nyomja meg a kapcsolószerkezet biztonsági
gombját (A), majd húzza a kapcsolókart (B) a rúdhoz. Tartsa a kapcsolókart tartva, miközben elen-
gedi a biztonsági gombot. A fűnyíróleállításához engedje fel a kapcsolókart, az pedig automatikusan
visszatérkikapcsolthelyzetbe.
Fűnyírás (4. ábra)
Javasoljuk, hogy az optimális eredmény elérése és a hálózati kábel vágási kockázatának csökkenté-
se érdekében használja az ebben a szakaszban leírtak szerint használja a fűnyírót.
• Helyezze a hálózati kábel nagy részét a kiindulási pont közelébe.
• Kapcsolja be a fűnyírót a fent leírtak szerint.
• Járjon el a 4. ábra szerint.
• Haladjon az 1-es helyzetből a 2-es helyzetbe.
• Forduljon jobbra és haladjon a 3-as helyzet felé.
• Forduljon balra és haladjon a 4-es helyzet felé.
• Szükség esetén ismételje meg a fenti lépéseket.
Figyelem! Ne dolgozzon a kábel irányában.
Kés karbantartása (5. ábra)
• Rendszeresen távolítsa el a füvet és a szennyeződéseket a késről.
• A kertészeti idény kezdetén gondosan vizsgálja meg a kés állapotát.
• Ha a kés nagyon tompa, élezze meg vagy cserélje ki azt.
• Ha a kés sérült vagy kopott, helyezzen be újat.
Ha a kés megcsúszik, tegye a csavarhúzót a pozicionálási furatba, húzza meg a kést csavarkulccsal.
Lásd a 6. és a 7. ábrát.
Figyelem! Tartsa be a következőóvintézkedéseket:
• Válassza le a fűnyírót az elektromos hálózatról és a folytatás előtt várja meg, amíg a kés forgása
leáll.
• Vigyázzon, hogy ne vágja meg magát. Használjon nagy teherbírású kesztyűt vagy ruhát a kés
megfogásához.
• Csak a megadott cserekést használja.
• Semmilyen okból ne távolítsa el a járókereket (A).
4. KARBANTARTÁS
1. Tartsa meghúzva az összes anyát, csavart és csavart, hogy megbizonyosodjon arról, hogy a
fűnyíró biztonságos állapotban van.
2. Gyakran ellenőrizze a gyűjtőt kopás vagy deformálódás szempontjából.
3. A kopott vagy sérült alkatrészeket biztonság érdekében cserélje ki.
4. Kizárólag a termékhez előírt cserekést, késcsavart és járókereket használja.
5. A fűnyíró beállításakor ügyeljen arra, hogy megakadályozza az ujjak beragadását a mozgó kés és
a gép rögzített részei közé.
6. Olajozza meg a kerék csapszegeit.
7. A fűnyírót száraz helyen tárolja.
5. MŰSZAKI ADATOK
DLMJ1500E
Feszültség: 230 V ~ 50 Hz
Teljesítmény: 1500 W
Terhelésnélkülifordulatszám:3500ford./perc
Vágási magasság: 3 magassági fokozat 20/40/60 mm
Maximális vágási szélesség: 360 mm
Fűgyűjtőzsák: 50 l műanyag
Motortípus: Kefés motor
Kerekek: elöl 5" / hátul 7"
Zajszint: 96 dB
2b
2c
4

16
HU
VÁGÁSI MAGASSÁG BEÁLLÍTÁSA
A kívánt vágási magasság elérése érdekében az elsőés a hátsó tengelyt áthelyezték a fűnyíró
házának alsó oldalára.
Figyelem! Válassza le a kaszát az áramforrásról, és a magasság beállítása előtt győződjön meg róla,
hogy a kés leállt.
1. Az elsőkerék vágási magasságának beállítása. (2a. ábra)
1) Fordítsa meg a fűnyírót.
2) Húzza a kerék tengelyét a fűnyíró eleje felé.
3) Helyezze a kerék tengelyét a kívánt vágási magasságba.
Megjegyzés: Győződjön meg arról, hogy a jobb és bal elsőkerék egyaránt a vágási magasságba van
állítva.
2. A hátsó kerék vágási magasságának beállítása (2b. ábra)
1) Fordítsa a fűnyírót az oldalára.
2) Húzza a hátsó kerék tengelyét a fűnyíró gyűjtőfedele felé.
3) Helyezze a kerék tengelyét a kívánt vágási magasságba.
Megjegyzés: Győződjön meg arról, hogy a jobb és a bal hátsó kerék is ugyanabban a vágási magas-
ságban van.
3. Vágási magasság pozíciók (2c. ábra)
1) 25 mm (legalacsonyabb vágási magasság)
2) 40 mm
3) 55 mm (legmagasabb vágási magasság)
3. MŰKÖDÉS
Helyezze áram alá a készüléket.
Figyelem! A hálózati csatlakozás előtt mindig ellenőrizze, hogy a kapcsoló ki van-e kapcsolva.
Csatlakoztassa a dugót az RCD-vel védett tápegységhez.
Indítás
Be-/kikapcsológomb (3. ábra)
Figyelem! Ne indítsa el a fűnyírót, ha hosszú fűben áll. Nyomja meg a kapcsolószerkezet biztonsági
gombját (A), majd húzza a kapcsolókart (B) a rúdhoz. Tartsa a kapcsolókart tartva, miközben elen-
gedi a biztonsági gombot. A fűnyíróleállításához engedje fel a kapcsolókart, az pedig automatikusan
visszatér kikapcsolt helyzetbe.
Fűnyírás (4. ábra)
Javasoljuk, hogy az optimális eredmény elérése és a hálózati kábel vágási kockázatának csökkenté-
se érdekében használja az ebben a szakaszban leírtak szerint használja a fűnyírót.
• Helyezze a hálózati kábel nagy részét a kiindulási pont közelébe.
• Kapcsolja be a fűnyírót a fent leírtak szerint.
• Járjon el a 4. ábra szerint.
• Haladjon az 1-es helyzetből a 2-es helyzetbe.
• Forduljon jobbra és haladjon a 3-as helyzet felé.
• Forduljon balra és haladjon a 4-es helyzet felé.
• Szükség esetén ismételje meg a fenti lépéseket.
Figyelem! Ne dolgozzon a kábel irányában.
Kés karbantartása (5. ábra)
• Rendszeresen távolítsa el a füvet és a szennyeződéseket a késről.
• A kertészeti idény kezdetén gondosan vizsgálja meg a kés állapotát.
• Ha a kés nagyon tompa, élezze meg vagy cserélje ki azt.
• Ha a kés sérült vagy kopott, helyezzen be újat.
Ha a kés megcsúszik, tegye a csavarhúzót a pozicionálási furatba, húzza meg a kést csavarkulccsal.
Lásd a 6. és a 7. ábrát.
Figyelem! Tartsa be a következőóvintézkedéseket:
• Válassza le a fűnyírót az elektromos hálózatról és a folytatás előtt várja meg, amíg a kés forgása
leáll.
• Vigyázzon, hogy ne vágja meg magát. Használjon nagy teherbírású kesztyűt vagy ruhát a kés
megfogásához.
• Csak a megadott cserekést használja.
• Semmilyen okból ne távolítsa el a járókereket (A).
4. KARBANTARTÁS
1. Tartsa meghúzva az összes anyát, csavart és csavart, hogy megbizonyosodjon arról, hogy a
fűnyíró biztonságos állapotban van.
2. Gyakran ellenőrizze a gyűjtőt kopás vagy deformálódás szempontjából.
3. A kopott vagy sérült alkatrészeket biztonság érdekében cserélje ki.
4. Kizárólag a termékhez előírt cserekést, késcsavart és járókereket használja.
5. A fűnyíró beállításakor ügyeljen arra, hogy megakadályozza az ujjak beragadását a mozgó kés és
a gép rögzített részei közé.
6. Olajozza meg a kerék csapszegeit.
7. A fűnyírót száraz helyen tárolja.
5. MŰSZAKI ADATOK
DLMJ1500E
Feszültség: 230 V ~ 50 Hz
Teljesítmény: 1500 W
Terhelés nélküli fordulatszám: 3500 ford./perc
Vágási magasság: 3 magassági fokozat 20/40/60 mm
Maximális vágási szélesség: 360 mm
Fűgyűjtőzsák: 50 l műanyag
Motortípus: Kefés motor
Kerekek: elöl 5" / hátul 7"
Zajszint: 96 dB
6

17
VÁGÁSI MAGASSÁG BEÁLLÍTÁSA
A kívánt vágási magasság elérése érdekében az elsőés a hátsó tengelyt áthelyezték a fűnyíró
házának alsó oldalára.
Figyelem! Válassza le a kaszát az áramforrásról, és a magasság beállítása előtt győződjön meg róla,
hogy a kés leállt.
1. Az elsőkerék vágási magasságának beállítása. (2a. ábra)
1) Fordítsa meg a fűnyírót.
2) Húzza a kerék tengelyét a fűnyíró eleje felé.
3) Helyezze a kerék tengelyét a kívánt vágási magasságba.
Megjegyzés: Győződjön meg arról, hogy a jobb és bal elsőkerék egyaránt a vágási magasságba van
állítva.
2. A hátsó kerék vágási magasságának beállítása (2b. ábra)
1) Fordítsa a fűnyírót az oldalára.
2) Húzza a hátsó kerék tengelyét a fűnyíró gyűjtőfedele felé.
3) Helyezze a kerék tengelyét a kívánt vágási magasságba.
Megjegyzés: Győződjön meg arról, hogy a jobb és a bal hátsó kerék is ugyanabban a vágási magas-
ságban van.
3. Vágási magasság pozíciók (2c. ábra)
1) 25 mm (legalacsonyabb vágási magasság)
2) 40 mm
3) 55 mm (legmagasabb vágási magasság)
3. MŰKÖDÉS
Helyezze áram alá a készüléket.
Figyelem! A hálózati csatlakozás előtt mindig ellenőrizze, hogy a kapcsoló ki van-e kapcsolva.
Csatlakoztassa a dugót az RCD-vel védett tápegységhez.
Indítás
Be-/kikapcsológomb (3. ábra)
Figyelem! Ne indítsa el a fűnyírót, ha hosszú fűben áll. Nyomja meg a kapcsolószerkezet biztonsági
gombját (A), majd húzza a kapcsolókart (B) a rúdhoz. Tartsa a kapcsolókart tartva, miközben elen-
gedi a biztonsági gombot. A fűnyíróleállításához engedje fel a kapcsolókart, az pedig automatikusan
visszatér kikapcsolt helyzetbe.
Fűnyírás (4. ábra)
Javasoljuk, hogy az optimális eredmény elérése és a hálózati kábel vágási kockázatának csökkenté-
se érdekében használja az ebben a szakaszban leírtak szerint használja a fűnyírót.
• Helyezze a hálózati kábel nagy részét a kiindulási pont közelébe.
• Kapcsolja be a fűnyírót a fent leírtak szerint.
• Járjon el a 4. ábra szerint.
• Haladjon az 1-es helyzetből a 2-es helyzetbe.
• Forduljon jobbra és haladjon a 3-as helyzet felé.
• Forduljon balra és haladjon a 4-es helyzet felé.
• Szükség esetén ismételje meg a fenti lépéseket.
Figyelem! Ne dolgozzon a kábel irányában.
Kés karbantartása (5. ábra)
• Rendszeresen távolítsa el a füvet és a szennyeződéseket a késről.
• A kertészeti idény kezdetén gondosan vizsgálja meg a kés állapotát.
• Ha a kés nagyon tompa, élezze meg vagy cserélje ki azt.
• Ha a kés sérült vagy kopott, helyezzen be újat.
Ha a kés megcsúszik, tegye a csavarhúzót a pozicionálási furatba, húzza meg a kést csavarkulccsal.
Lásd a 6. és a 7. ábrát.
Figyelem! Tartsa be a következőóvintézkedéseket:
• Válassza le a fűnyírót az elektromos hálózatról és a folytatás előtt várja meg, amíg a kés forgása
leáll.
• Vigyázzon, hogy ne vágja meg magát. Használjon nagy teherbírású kesztyűt vagy ruhát a kés
megfogásához.
• Csak a megadott cserekést használja.
• Semmilyen okból ne távolítsa el a járókereket (A).
4. KARBANTARTÁS
1. Tartsa meghúzva az összes anyát, csavart és csavart, hogy megbizonyosodjon arról, hogy a
fűnyíró biztonságos állapotban van.
2. Gyakran ellenőrizze a gyűjtőt kopás vagy deformálódás szempontjából.
3. A kopott vagy sérült alkatrészeket biztonság érdekében cserélje ki.
4. Kizárólag a termékhez előírt cserekést, késcsavart és járókereket használja.
5. A fűnyíró beállításakor ügyeljen arra, hogy megakadályozza az ujjak beragadását a mozgó kés és
a gép rögzített részei közé.
6. Olajozza meg a kerék csapszegeit.
7. A fűnyírót száraz helyen tárolja.
5. MŰSZAKI ADATOK
DLMJ1500E
Feszültség: 230 V ~ 50 Hz
Teljesítmény: 1500 W
Terhelés nélküli fordulatszám: 3500 ford./perc
Vágási magasság: 3 magassági fokozat 20/40/60 mm
Maximális vágási szélesség: 360 mm
Fűgyűjtőzsák: 50 l műanyag
Motortípus: Kefés motor
Kerekek: elöl 5" / hátul 7"
Zajszint: 96 dB
76
5

18
HU
VÁGÁSI MAGASSÁG BEÁLLÍTÁSA
A kívánt vágási magasság elérése érdekében az elsőés a hátsó tengelyt áthelyezték a fűnyíró
házának alsó oldalára.
Figyelem! Válassza le a kaszát az áramforrásról, és a magasság beállítása előtt győződjön meg róla,
hogy a kés leállt.
1. Az elsőkerék vágási magasságának beállítása. (2a. ábra)
1) Fordítsa meg a fűnyírót.
2) Húzza a kerék tengelyét a fűnyíró eleje felé.
3) Helyezze a kerék tengelyét a kívánt vágási magasságba.
Megjegyzés: Győződjön meg arról, hogy a jobb és bal elsőkerék egyaránt a vágási magasságba van
állítva.
2. A hátsó kerék vágási magasságának beállítása (2b. ábra)
1) Fordítsa a fűnyírót az oldalára.
2) Húzza a hátsó kerék tengelyét a fűnyíró gyűjtőfedele felé.
3) Helyezze a kerék tengelyét a kívánt vágási magasságba.
Megjegyzés: Győződjön meg arról, hogy a jobb és a bal hátsó kerék is ugyanabban a vágási magas-
ságban van.
3. Vágási magasság pozíciók (2c. ábra)
1) 25 mm (legalacsonyabb vágási magasság)
2) 40 mm
3) 55 mm (legmagasabb vágási magasság)
3. MŰKÖDÉS
Helyezze áram alá a készüléket.
Figyelem! A hálózati csatlakozás előtt mindig ellenőrizze, hogy a kapcsoló ki van-e kapcsolva.
Csatlakoztassa a dugót az RCD-vel védett tápegységhez.
Indítás
Be-/kikapcsológomb (3. ábra)
Figyelem! Ne indítsa el a fűnyírót, ha hosszú fűben áll. Nyomja meg a kapcsolószerkezet biztonsági
gombját (A), majd húzza a kapcsolókart (B) a rúdhoz. Tartsa a kapcsolókart tartva, miközben elen-
gedi a biztonsági gombot. A fűnyíróleállításához engedje fel a kapcsolókart, az pedig automatikusan
visszatér kikapcsolt helyzetbe.
Fűnyírás (4. ábra)
Javasoljuk, hogy az optimális eredmény elérése és a hálózati kábel vágási kockázatának csökkenté-
se érdekében használja az ebben a szakaszban leírtak szerint használja a fűnyírót.
• Helyezze a hálózati kábel nagy részét a kiindulási pont közelébe.
• Kapcsolja be a fűnyírót a fent leírtak szerint.
• Járjon el a 4. ábra szerint.
• Haladjon az 1-es helyzetből a 2-es helyzetbe.
• Forduljon jobbra és haladjon a 3-as helyzet felé.
• Forduljon balra és haladjon a 4-es helyzet felé.
• Szükség esetén ismételje meg a fenti lépéseket.
Figyelem! Ne dolgozzon a kábel irányában.
Kés karbantartása (5. ábra)
• Rendszeresen távolítsa el a füvet és a szennyeződéseket a késről.
• A kertészeti idény kezdetén gondosan vizsgálja meg a kés állapotát.
• Ha a kés nagyon tompa, élezze meg vagy cserélje ki azt.
• Ha a kés sérült vagy kopott, helyezzen be újat.
Ha a kés megcsúszik, tegye a csavarhúzót a pozicionálási furatba, húzza meg a kést csavarkulccsal.
Lásd a 6. és a 7. ábrát.
Figyelem! Tartsa be a következőóvintézkedéseket:
• Válassza le a fűnyírót az elektromos hálózatról és a folytatás előtt várja meg, amíg a kés forgása
leáll.
• Vigyázzon, hogy ne vágja meg magát. Használjon nagy teherbírású kesztyűt vagy ruhát a kés
megfogásához.
• Csak a megadott cserekést használja.
• Semmilyen okból ne távolítsa el a járókereket (A).
4. KARBANTARTÁS
1. Tartsa meghúzva az összes anyát, csavart és csavart, hogy megbizonyosodjon arról, hogy a
fűnyíró biztonságos állapotban van.
2. Gyakran ellenőrizze a gyűjtőt kopás vagy deformálódás szempontjából.
3. A kopott vagy sérült alkatrészeket biztonság érdekében cserélje ki.
4. Kizárólag a termékhez előírt cserekést, késcsavart és járókereket használja.
5. A fűnyíró beállításakor ügyeljen arra, hogy megakadályozza az ujjak beragadását a mozgó kés és
a gép rögzített részei közé.
6. Olajozza meg a kerék csapszegeit.
7. A fűnyírót száraz helyen tárolja.
5. MŰSZAKI ADATOK
DLMJ1500E
Feszültség: 230 V ~ 50 Hz
Teljesítmény: 1500 W
Terhelés nélküli fordulatszám: 3500 ford./perc
Vágási magasság: 3 magassági fokozat 20/40/60 mm
Maximális vágási szélesség: 360 mm
Fűgyűjtőzsák: 50 l műanyag
Motortípus: Kefés motor
Kerekek: elöl 5" / hátul 7"
Zajszint: 96 dB

Megfelelőségi Nyilatkozat
1.A. Gyártó neve és címe:
Julvon Power Machinery (Ningde) Co.,Ltd.
GANTANG INDUSTRY & TRADE DISTRICT , FUAN CITY,FUJIAN,CHINA 355000
1.B.: Importőr neve és címe:
ELECTRO SOLUTION HUNGARY KFT.
Ferenc Korut 44. FSZT. 6.
Budapest, 1092
2. Termékcikkek azonosítása: Daewoo DLMJ1500E elektromos fűnyíró
3. Bevallás kelte Magyarországon: 2020. augusztus 30
Ezzel a megfelelőségi nyilatkozattal igazoljuk, hogy a következő cikkek: Az elektromos
fűnyíró megfelel a gépekről szóló 2006/42/EK irányelv szabályainak és a következő
harmonizált szabványnak megfelelnek az EN 60335-1:2012/A13:2017, EN 60335- 2-
77:2010 és EN 62233:2008.
Elektromos fűnyíró,
Modellszám: DLMJ1500E, DAEWOO márka
EAN kód: 7799034124624
Névleges teljesítmény: 1500W
Üresjárati fordulatszám: 3500 ford/perc
Vágási szélesség: 360 mm
Gyűjtőzsák: 50L
Egység
nettó
tömege
Egység
bruttó
tömege
Szélesség
mm
Hossz mm
Magasság
mm
9.0 kg
10.2 kg
400mm
660 mm
330 mm
Az Electro Solution Hungary Kft, a DAEWOO Products meghatalmazott képviselője
kijelenti, hogy a "Műszaki adatok" alatt felsorolt termékek megfelelnek a következőknek:
A gépekről szóló irányelv (2006/42/EK), az elektromágneses összeférhetőségről szóló
irányelv (2014/30/EU), az EN 60335-1:2012/A13:2017, az EN 60335-2-77:2010, az EN
62233:2008, az EN55014-1 2017, 55014-2:2015, EN61000-3-2:2014, EN 61000-3-
3:2013.
Ezennel megerősítjük, hogy teljesíti az összes vonatkozó rendelkezést - A kültéri
használatra szánt berendezések zajkibocsátására vonatkozó irányelv (2000/14/EK +
2005/88/EK) és megfelelőségértékelési eljárás: 2000/14/EK, módosított a 2005/88/EK-
VI. melléklet
- Mért hangteljesítmény szint –LwA: —— 95dB(A)
- Garantált hangteljesítmény –LwA: —— 96dB(A)
Name: Janos Mag
Az Electro Solution Hungary Kft. ügyvezetője
DAEWOO Products hivatalos képviselője
Table of contents
Languages:
Other Daewoo Lawn Mower manuals

Daewoo
Daewoo DLM4040Li User manual

Daewoo
Daewoo DLM3900-150 User manual

Daewoo
Daewoo DLM4600-149SP User manual

Daewoo
Daewoo DLM Series User manual

Daewoo
Daewoo DLM1200E User manual

Daewoo
Daewoo DLM4340Li User manual

Daewoo
Daewoo DALLM18-320-1 User manual

Daewoo
Daewoo DLM4600SPL User manual

Daewoo
Daewoo DLMJ1300E User manual
Popular Lawn Mower manuals by other brands

MTD
MTD 111-150 owner's guide

GreenWorks
GreenWorks MO48L4214 Operator's manual

Craftsman
Craftsman 917.275751 owner's manual

Mountfield
Mountfield 297411048/MC operating instructions

Benassi
Benassi FT 155 Operation and maintenance manual

Textron
Textron Bunton BZT 2200D Series Setup, parts & maintenance manual