Dakota Grills Metro User manual

Metro: Packing Slip & Assembly Instructions
Tools Needed
Philips screwdrivers (small,
medium & large)
Note: you may use a Philips bit on an
adjustable-torque, variable-speed
drill. This will save time, but extra
care is required.
*5/16” nut driver (optional)
*7/16” wrench
eedle-nose pliers or 5/16”
wrench (regular pliers can work)
*May use included “wrench” tool.
(605) 847-4713
(605) 847-4713 44136 200th St.
44136 200th St.
1/8 www.dakotagrills.com
www.dakotagrills.com Lake reston, SD 57249
Lake reston, SD 57249
Dakota Grills,
Dakota Grills, LLC
LLC FAST.
FAST.
flavorful.
flavorful.
SIMPLE.
SIMPLE.

Packing Slip
Package A (large)
Grill Body and Lid
Package B (oblong)
1 “Wrench” tool
2 Lid Stop Brackets (one each R & L)
1 Lid Handle
1 L (left) Handle
1 R (right) Handle with Controls
2 L (left) Legs, front & back (long, without wheel holes)
2 R (right) Leg Sets including:
R (right) Legs, front & back (short, with wheel holes)
Wheels
Wheel “Hubcaps”
Wheel Bolts (1/ ” by ½” hex head)
4 Leg Triangle Brackets
2 Hinges
24 Philips #10 Self-Tapping Screws (Note: if you strip any of these screws, use a #12 instead.)
2 #12 Self-Tapping Screws (extras, in case #10 screws become stripped).
8 Philips #14 Self-Tapping Screws (for hinges)
4 Hex-Head ¼” Bolts (2 for each handle)
4 #6 uts (2 per handle)
A Few Extra Fasteners
2 Stainless Steel Cooking Grates (bottom)
1 Lid-Lifted Stainless Steel Grate (top)
1 Smoker Tray
1 Drip Pan
1 Clip-on Drip Jar Holder
1 Owner's Kit (not shown) containing:
1 Assembly Instructions
1 Owner’s Manual
1 Quick Start Guide (laminated)
1 Invoice
1 Temperature Probe
1 Magnetic Meat Temperature Guide
Brochure
Seasonings
Wood Chip Packets
(605) 847-4713
(605) 847-4713 44136 200th St.
44136 200th St.
2/8 www.dakotagrills.com
www.dakotagrills.com Lake reston, SD 57249
Lake reston, SD 57249

Step – by – Step Instructions
1. Locate all tools & unpack all parts. Be careful when unpacking the large box; the Lid
is not attached to the Grill Body. Find a soft surface to work on to avoid scratching
the parts (carpet or towels work well).
2. ext, locate the four legs and pair each with its corresponding corner (each leg is
different). The legs will not fit straight in; you need to angle them horizontally and
start the tab first. Once the tab is through, straighten the leg back to vertical. ow
slowly and carefully push it all the way down. Try to keep it in the corner (against the
sides) as much as possible to avoid pushing insulation out of place. Repeat for all
four legs. Note: the Grill Body is upside-down, so front/back or left/right are
reversed. The Front-Left Leg is shown in the pictures below.
Note: the tab on each leg will be against the front or back of the grill (not against the
sides).
Orientation: The side with the wires coming out of it is the Right-hand side (when
grill is upright and facing you). The legs with wheels go on this side.
(605) 847-4713
(605) 847-4713 44136 200th St.
44136 200th St.
3/8 www.dakotagrills.com
www.dakotagrills.com Lake reston, SD 57249
Lake reston, SD 57249
(Front)
(Left)

3. ow it is time to attach the legs. First, attach the bottom of the two Front Legs, as
shown below, with a self-tapping screw. You may use the leg as a lever to hold it in
place while starting the screw. If this is a struggle, you may use a 1/4” hex-head bolt
(use a 7/16” wrench) with the included washer to hold the leg in place while attaching
the screw; remove the hex-head bolt when done. The Front-Left Leg is shown.
4. Second, attach the middles of the two Back Legs, as shown below, with three self-
tapping screws apiece. Do not put screws in the bottom two holes at this point. Again,
you may need to “lever” each leg as you attach the screws. Note: Once the first screw
is in, you may tighten it to hold the leg in place. The Back-Left Leg is shown.
5. Third, attach the triangle pieces of all four legs, as
shown at right, each with two self-tapping screws.
Make sure all screws are snug, then flip the Grill
Body upright so it stands on its legs. The Front-Left
Leg is shown.
(605) 847-4713
(605) 847-4713 44136 200th St.
44136 200th St.
4/8 www.dakotagrills.com
www.dakotagrills.com Lake reston, SD 57249
Lake reston, SD 57249
(Left)
(Front)
(Front) (Left)
(Back)
(Left)
(Right
)
(Back)
(Left)
(Left)
(Front
)

6. Align the Lid with the Grill Body and set it in place. It should rest on the silicone-
rubber gasket. The angled part of the Lid should be at the front of the Grill Body,
hinges in back.
7. Attach the hinges to the Lid and Grill Body, as
shown. Using the large #14 self-tapping screws,
tighten the bottom of the hinges first, keeping the
hinges square. ow tighten the tops of the hinges,
holding the Lid still (do not push it down while
tightening – this compresses the gasket unevenly and
is undesirable). DO NOT OPEN LID AT THI POINT!
8. Connect the L and R Lid top Brackets to the back of
the Grill Body, as shown at right, using two self-
tapping screws each. (The L Lid- top Bracket is
pictured.) ow when the lid is opened, it should rest
on the rubber grommets attached to the lid stops.
Note: The flange on the lid stop brackets will extend
past the side of the grill. (If not, you have them
reversed.)
9. Open the Lid and attach the Lid Handle, as
shown at right, using four self-tapping screws.
Note: The handle angles down and towards
you. Close the Lid.
(605) 847-4713
(605) 847-4713 44136 200th St.
44136 200th St.
5/8 www.dakotagrills.com
www.dakotagrills.com Lake reston, SD 57249
Lake reston, SD 57249
(Back) (Left)

10. Attach the L Handle. First, slide the back of the handle into the L Lid- top Bracket.
Line up the two threaded studs with the slots on the lid-stop bracket and slid the
handle back. Attach the front of the handle to the front of the Grill Body using two
hex-head bolts, as shown. Tip: you may want a second person to line everything up
while you start the two bolts; they can be a bit tricky to start otherwise. You might
also find it easier to tip the grill onto its Right Side. Tighten both bolts. ow start a
#6 nut on each of the studs on the back of the handle, as shown. Finger tighten as
much as possible, then snug the nuts a bit more with the included wrench tool (5/16”)
or a pair of needle-nose pliers. Caution: do not over tighten!
11. Finally, you can attach the R Handle. This one requires a few more steps, as
follows:
12. Make sure the Rubber Grommet is in place and that the bundled wires are protected
by the grommet. Slide grommet into slot on R-handle's electronics cover. ow
gently put R-handle into position, align back studs into slots on bracket. Make sure
grommet is still in position before proceeding.
(605) 847-4713
(605) 847-4713 44136 200th St.
44136 200th St.
6/8 www.dakotagrills.com
www.dakotagrills.com Lake reston, SD 57249
Lake reston, SD 57249
(Hex Head
Bolts)
(Front
)
(Left) (Back)
(Left)

13. Next, while holding onto the R Handle, start the
two hex-head bolts in front (repeat tep 10). Tip:
a second person may be helpful for aligning and
holding the handle while you start the two bolts.
Tighten with 7/16” wrench.
14. Attach #6 nuts on back. (Same as Step 10). Finger
tighten.
15.Attach wire connector to power-supply circuit board.
Make sure the Connector is lined up correctly – it will
only go in one way. Push it all the way in – make
sure both side-tabs are “clicked” in place. Gently pull
on it to verify it is locked, then gently push it back
down to ensure a good connection.
16. Attach S/ Cover using 2 #6 Self-Tapping Screws.
17.Make sure all fasteners are tight. (Careful not to over tighten the #6 nuts!)
(605) 847-4713
(605) 847-4713 44136 200th St.
44136 200th St.
7/8 www.dakotagrills.com
www.dakotagrills.com Lake reston, SD 57249
Lake reston, SD 57249

18. Congratulations! Your grill is assembled. It is almost ready for use.
19.Plug the grill into a GFCI-protected outlet and turn it on. Make sure everything is
working correctly. After the grill starts heating, place your hand near the elements
(don't touch!) – you should feel heat radiating from each. Turn grill off.
20. If something is not working correctly, use caution and unplug it immediately. Call
us right away at (605) 847-4713. If there is no answer, you can also try calling
Adam's cell phone at (605) 695-0069.
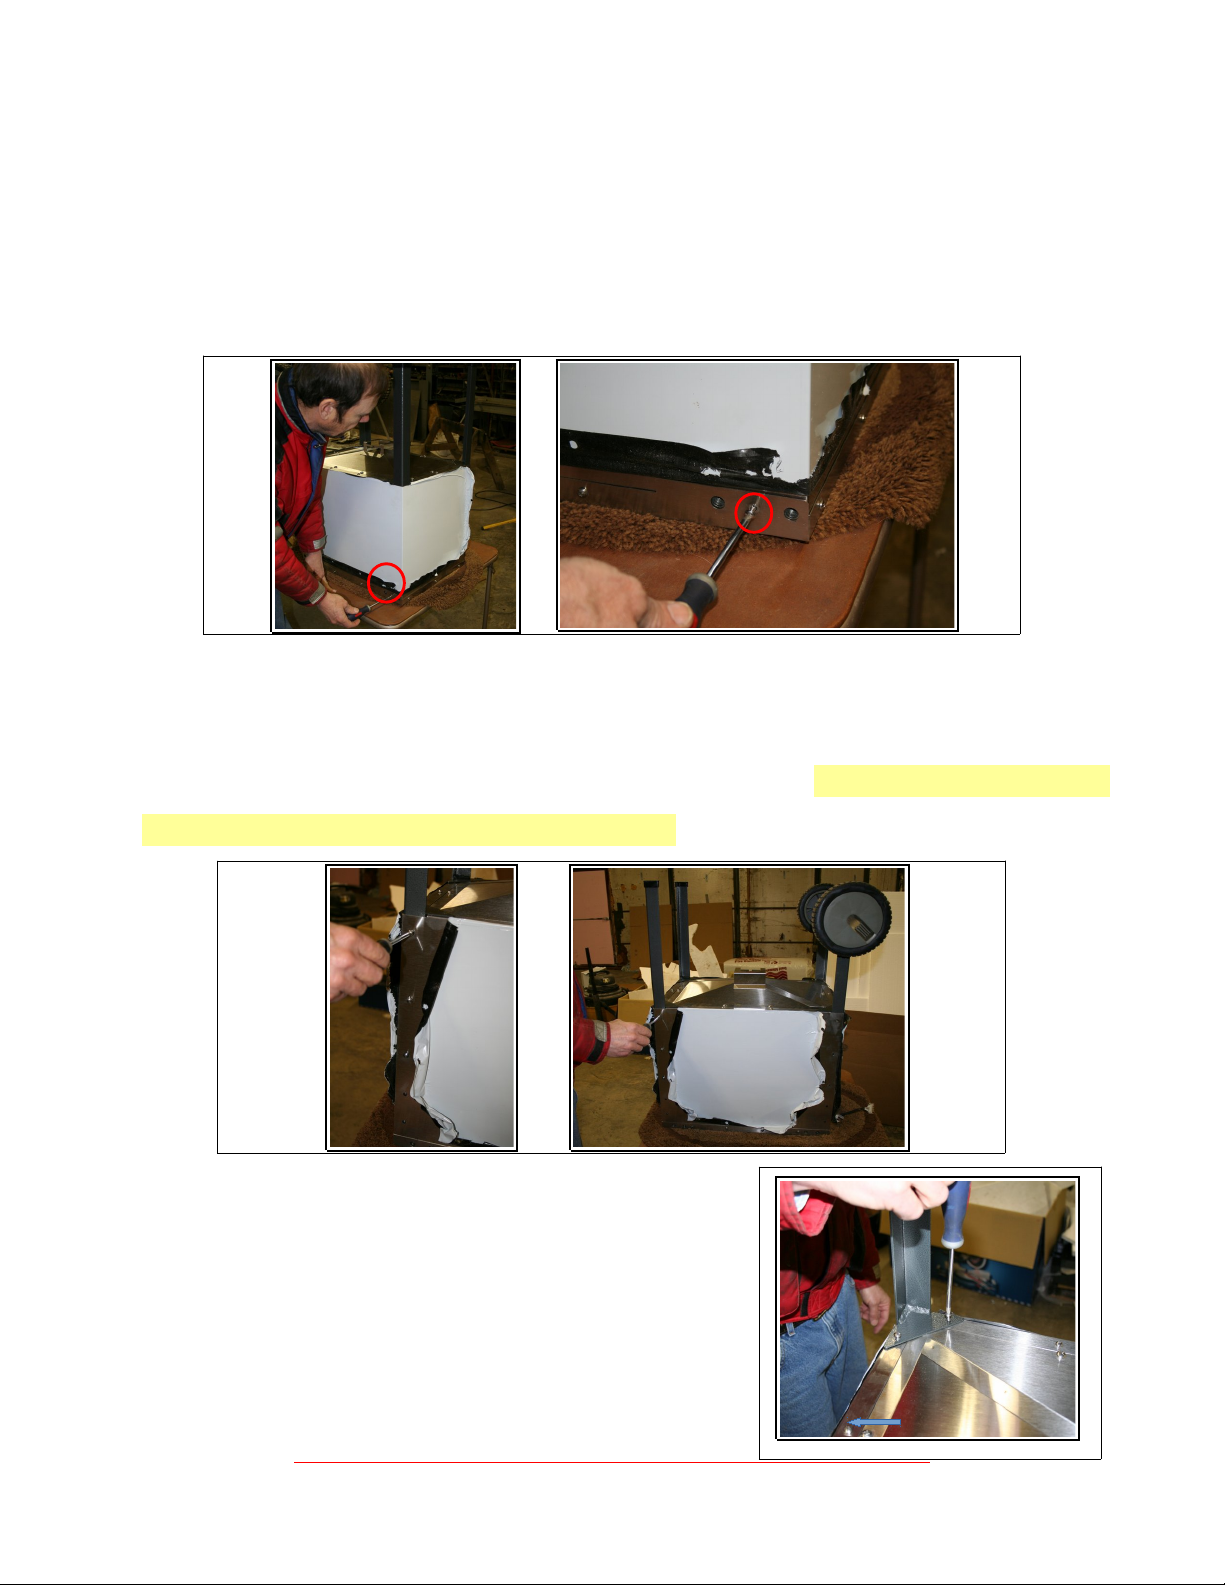
21. Open the lid and insert the drip pan, smoker tray, and cooking grates. Note: The
drip pan goes in the very bottom of the grill, beneath the heating elements. The
smoker tray attaches between the tubes of the back element. We recommend that you
leave the smoker tray out until you wish to smoke meats. [Refer to Owner's Manual
for pictures.]
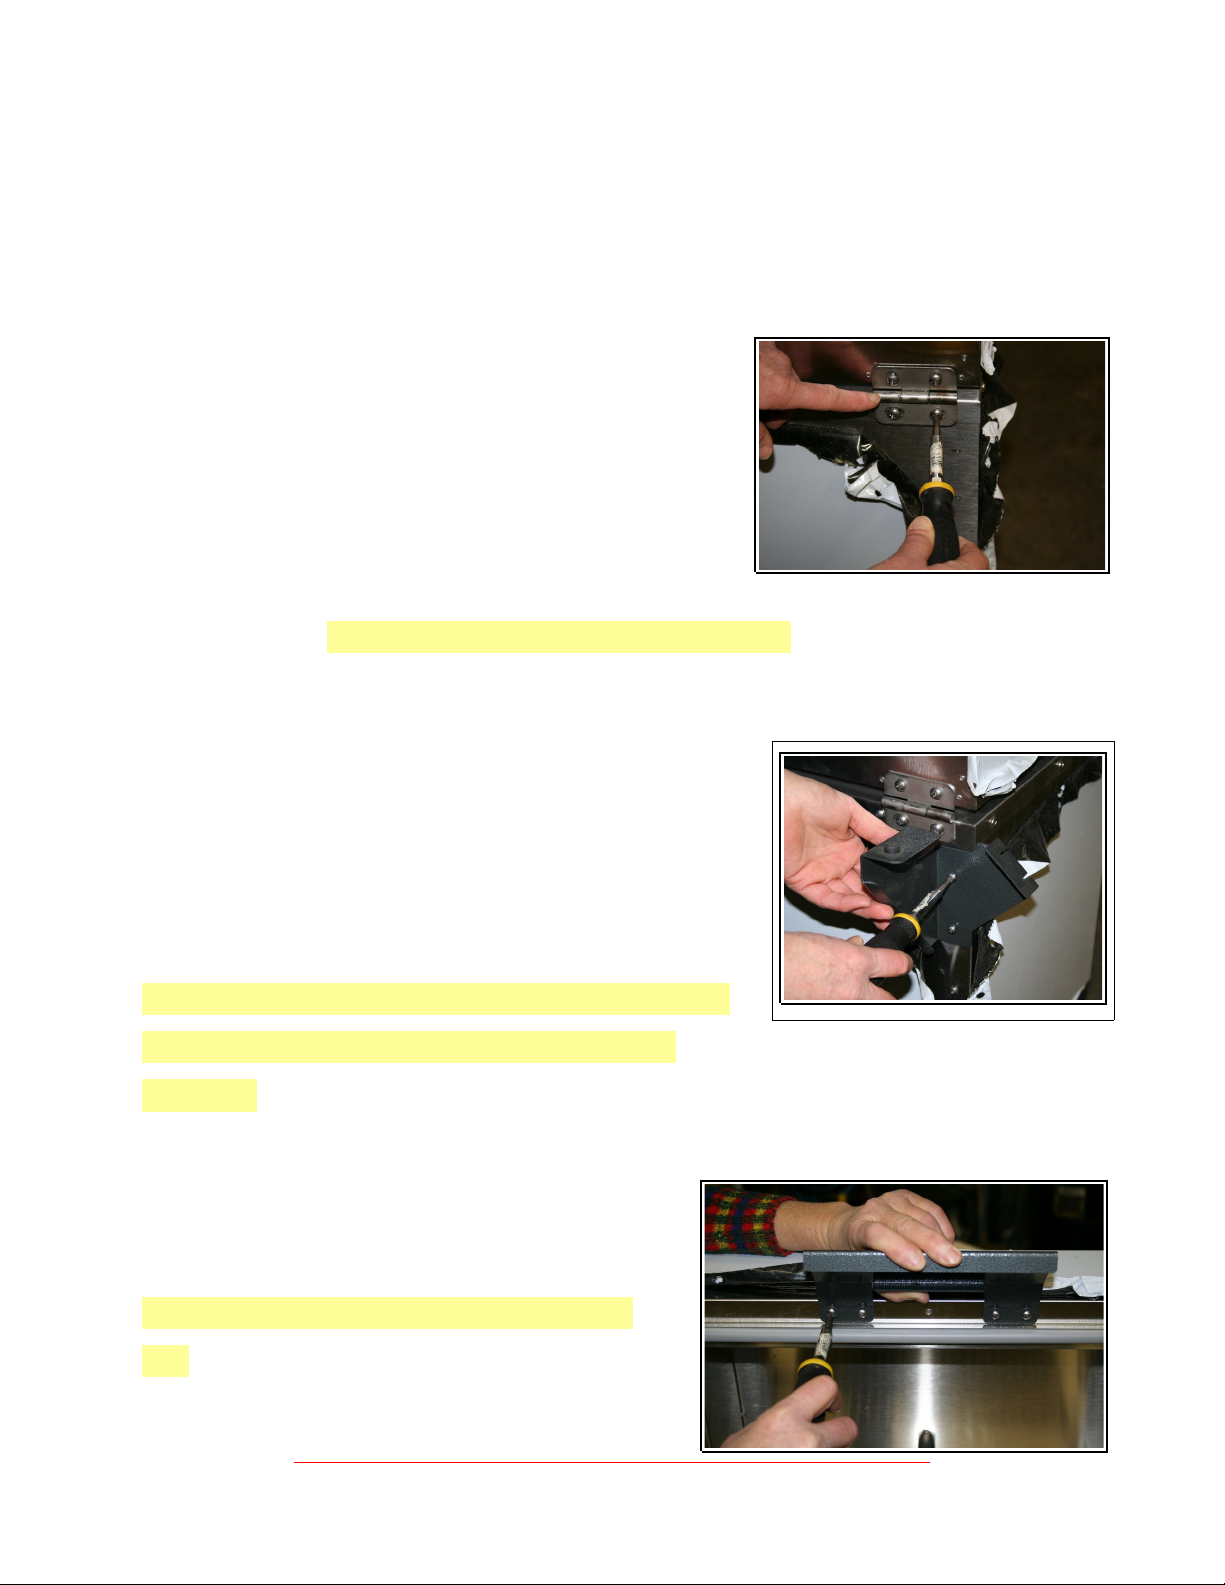
22. Peel the plastic off.
23. Turn the grill on, set its temperature to 425 degrees Fahrenheit (refer to the Owner’s
Manual or Quick Start Guide), and make sure it is heating. Close the lid. Note: After
a few minutes of heating, the display should show a gradually-increasing grill
temperature. Before using, let it cook outside for several hours to eliminate oil
smells. Note: The grill automatically shuts off after six hours. [ o Picture]
24.Cosmetic: Apply stainless steel cleaner (Rubbermaid brand works well and can be
purchased at Menard's) and polish with the grain (not against it). A paper towel or
soft cloth works well.
25. Enjoy your grill! If you have any questions, comments, or problems, please call us
at (605) 847-4713 or send an email to [email protected].
(605) 847-4713
(605) 847-4713 44136 200th St.
44136 200th St.
8/8 www.dakotagrills.com
www.dakotagrills.com Lake reston, SD 57249
Lake reston, SD 57249
Table of contents
Other Dakota Grills Grill manuals