Danbit ACK-540 RF+ User manual


Version 1.2 (2010/11/09) ●© 2010 by MaxPoint Handelsges. mbH - 1 -
1. Einleitung ACK-540 RF+
1.1 Besondere Eigenschaften
•Kabellose Mini-Tastatur mit integriertem und verbesserten Smart-Touchpad
•Weitreichende und zuverlässige 2,4 GHz Funkübertragung bis ca. 10 m Entfernung zum PC
•Neuartige, bidirektionale Funktechnologie für eine optimale Funkverbindung –
Dadurch vereinfachte One-Way-Synchronisierung nur von der Tastatur aus möglich
•Neuartiges Smart-Touchpad mit erweiterten Finger-Funktionen:
2 Finger = Bildauf-/abscrollen ähnlich einem Mausrad
3 Finger = Menüaufruf wie bei rechter Maustaste
•Modernes Design in edler, matt-schwarzer SoftSkin-Beschichtung mit eingearbeiteter Handballenauflage
für ermüdungsfreies Arbeiten
•Volle Funktionalität einer Tastatur mit Full-Size-Layout durch integriertem Nummernblock und 12
Funktionstasten
•Besonders leiser und spürbarer Anschlag durch hochwertige Soft-Touch-Membrantechnologie
•Klappfüße mit speziellen Gummi-Inlays zur Verstellung des Anstellwinkels für eine absolut rutschfeste
und ergonomische Arbeitsweise
•Dezent blau leuchtende Status-LEDs für Pairing, Transmitting & Low Battery im neuen Light-Stripe-
Design
•Ein/Aus-Schalter zur Schonung der Batteriekapazität
•Plug & Play-Installation ohne speziellen Treiber
•Optimal für Digital Living Rooms (HTPC) sowie für Schulungs-, Konferenz- & Präsentationsräume etc.
1.2 Technische Daten
Anzahl Tasten: 89
Bauart: Soft-Touch-Membrantechnologie
Zu erwartende Lebensdauer: ca. 5 Mio. Anschläge / Taste
Betätigung / Druckpunkt: 3,0 ±0,5 mm (Gesamtweg) / 55 ±15 g
Funkübertragung: 2,4 – 2,4835 GHz, GFSK,
1.048.576 IDs (mögliche Anzahl mehrerer Tastaturen im Raum)
Effektive Funkreichweite: ca. 10 m
Batterietyp: 2× AAA 1,5 V
Spannungsversorgung: Tastatur: +2,4 VDC bis 3,2 VDC Receiver: +5 VDC ±5 %
Stromaufnahme max.: Tastatur: 17 mA Receiver: 100 mA
Tastatur Standby: 14 mA
Tastatur Sleep-Mode: 30 μA (nach 30 Min.)
Temperatur: Betrieb: -5 °C bis +40 °C
Lagerung: -20 °C bis +65 °C
Feuchtigkeit: Betrieb und Lagerung: 10 % bis 85 % rel.
Abmessungen / Gewicht ca.: Tastatur: 291 x 29 x 197 mm 657 g (ohne Batterien)
Schnittstelle: USB (Empfangsstecker)
Lieferumfang: Tastatur, USB-Empfangsstecker, 1 Satz Batterien, Bedienungsanleitung
Zertifiziert: CE, FCC, BSMI, WEEE/RoHS, REACH
Kompatibilität: Win 98SE / ME / 2000 / XP / Vista / Windows7

Bedienungsanweisung ACK-540 RF+
Irrtümer und Auslassungen vorbehalten
- 2 -
2. Installation
2.1 System-Voraussetzungen
Diese Tastatur erfordert einen PC mit USB-Anschluss und einem der folgenden Betriebssysteme:
Windows 98SE / ME / 2000 / XP / Vista / Windows7
Für die Installation der Tastatur unter den o. g. Betriebssystemen benötigen Sie KEINEN speziellen Treiber!
2.2 Installation des USB-Receivers
Um Ihre Tastatur zu installieren, führen Sie bitte folgende Schritte aus:
•Stecken Sie den im Lieferumfang enthaltenen USB-Receiver
(Empfangsstecker) an eine freie USB-Buchse Ihres Rechners.
Hinweis: Bitte gewährleisten Sie, dass der USB-Receiver einen
Mindestabstand von 20 cm zu metallischen Trennwänden, anderen
Computergehäusen, Monitoren, ZIP-Laufwerken, Lautsprechern und
Schaltnetzteilen einhält.
•Alle o. g. aktuellen Betriebssysteme mit Unterstützung für Plug & Play werden Ihren USB-Receiver nun
automatisch erkennen und die erforderlichen Treiber laden. Während der Installationsphase informiert Sie
Ihr Betriebssystem mit Hilfe wechselnder Pop-up-Informationsfenster an der Task-Leiste über den
aktuellen Installationsstatus. Bitte haben Sie etwas Geduld, bis Sie das System abschließend über die
erfolgreiche Installation informiert. Der USB-Receiver ist nun einsatzbereit.
Ältere Betriebssysteme unterstützen nicht immer das automatische Erkennen von USB-Geräten. Haben Sie
den USB-Receiver angeschlossen und macht sich genau dieser Fehler bei Ihnen bemerkbar, so haben Sie
folgende Möglichkeiten zur Lösung dieses Problems:
•Machen Sie ein Update Ihres Betriebssystems und beginnen wieder mit Schritt 2.2
•In manchen Fällen ist gemäß den Bildschirmanweisungen die Installations-CD Ihres Betriebssystems
erforderlich. Unter diesen Umständen folgen Sie bitte diesen Anweisungen*.
•Kontrollieren Sie, ob Ihr BIOS-System USB-Tastaturen unterstützt*. Manche Hersteller bieten BIOS-
Updates im Internet zum Downloaden an.
•Stellen Sie in Ihren Systemeinstellungen sicher, dass der verwendete USB-Anschluss nicht im
Betriebssystem deaktiviert wurde*.
•Sollten System-Updates erfolglos bleiben, so empfiehlt es sich, die Tastatur mal an einen anderen PC mit
gleichem Betriebssystem zu testen, um ein Hardware-Defekt des USB-Receivers auszuschließen.
*Einzelheiten entnehmen Sie der Dokumentation Ihres PCs.

Version 1.2 (2010/11/09) ●© 2010 by MaxPoint Handelsges. mbH - 3 -
2.3 Installation der Tastatur
Empfohlene Voraussetzung dazu ist die erfolgreiche Installation des USB-Receivers unter Punkt 2.2.
•Falls noch nicht geschehen, entfernen Sie die Abdeckung
des Batteriefaches auf der Unterseite der Tastatur und
installieren Sie die mitgelieferten Batterien des Typs AAA
1,5 V unter Beachtung der richtigen Polarität in das
Batteriefach (wie im Bild dargestellt).
•Schalten Sie den Ein/Aus-Schiebeschalter auf ON!
Hinweis:
Der USB-Receiver und die Tastatur sind fabrikseitig bereits auf den gleichen Kanal synchronisiert.
In der Regel müssen Sie also keine Neu-Synchronisierung (wie unter 2.4 beschrieben) vornehmen. Die
Tastatur ist sofort funktionsfähig.
•Nun testen Sie die Funktionsweise, indem Sie
eine beliebige Taste auf Ihrer Tastatur betätigen.
Beim Drücken der Windows-Taste müsste sich
beispielsweise also unten links auf Ihrem Bildschirm
das Windows Pop-up-Menü öffnen. Wenn ja, dann
arbeitet Ihre Funktastatur nun einwandfrei.
Wenn nicht, dann synchronisieren Sie den USB-
Receiver und die Tastatur wie unter 2.4 beschrieben erneut.
Hinweis:
Sollte die Funktionsweise durch andere Benutzer, die ebenfalls eine Funktastatur in näherer Umgebung
verwenden, beeinflusst werden, führen Sie bitte eine Neu-Synchronisation, wie unter 2.4 beschrieben,
durch.

Bedienungsanweisung ACK-540 RF+
Irrtümer und Auslassungen vorbehalten
- 4 -
2.4 Neu-Synchronisierung des Funkkanals
Die ACK-540 RF+ ist mit der neuesten Funktechnologie ausgestattet, welche es auf einfachste Weise
ermöglicht, eine Neu-Synchronisierung vorzunehmen.
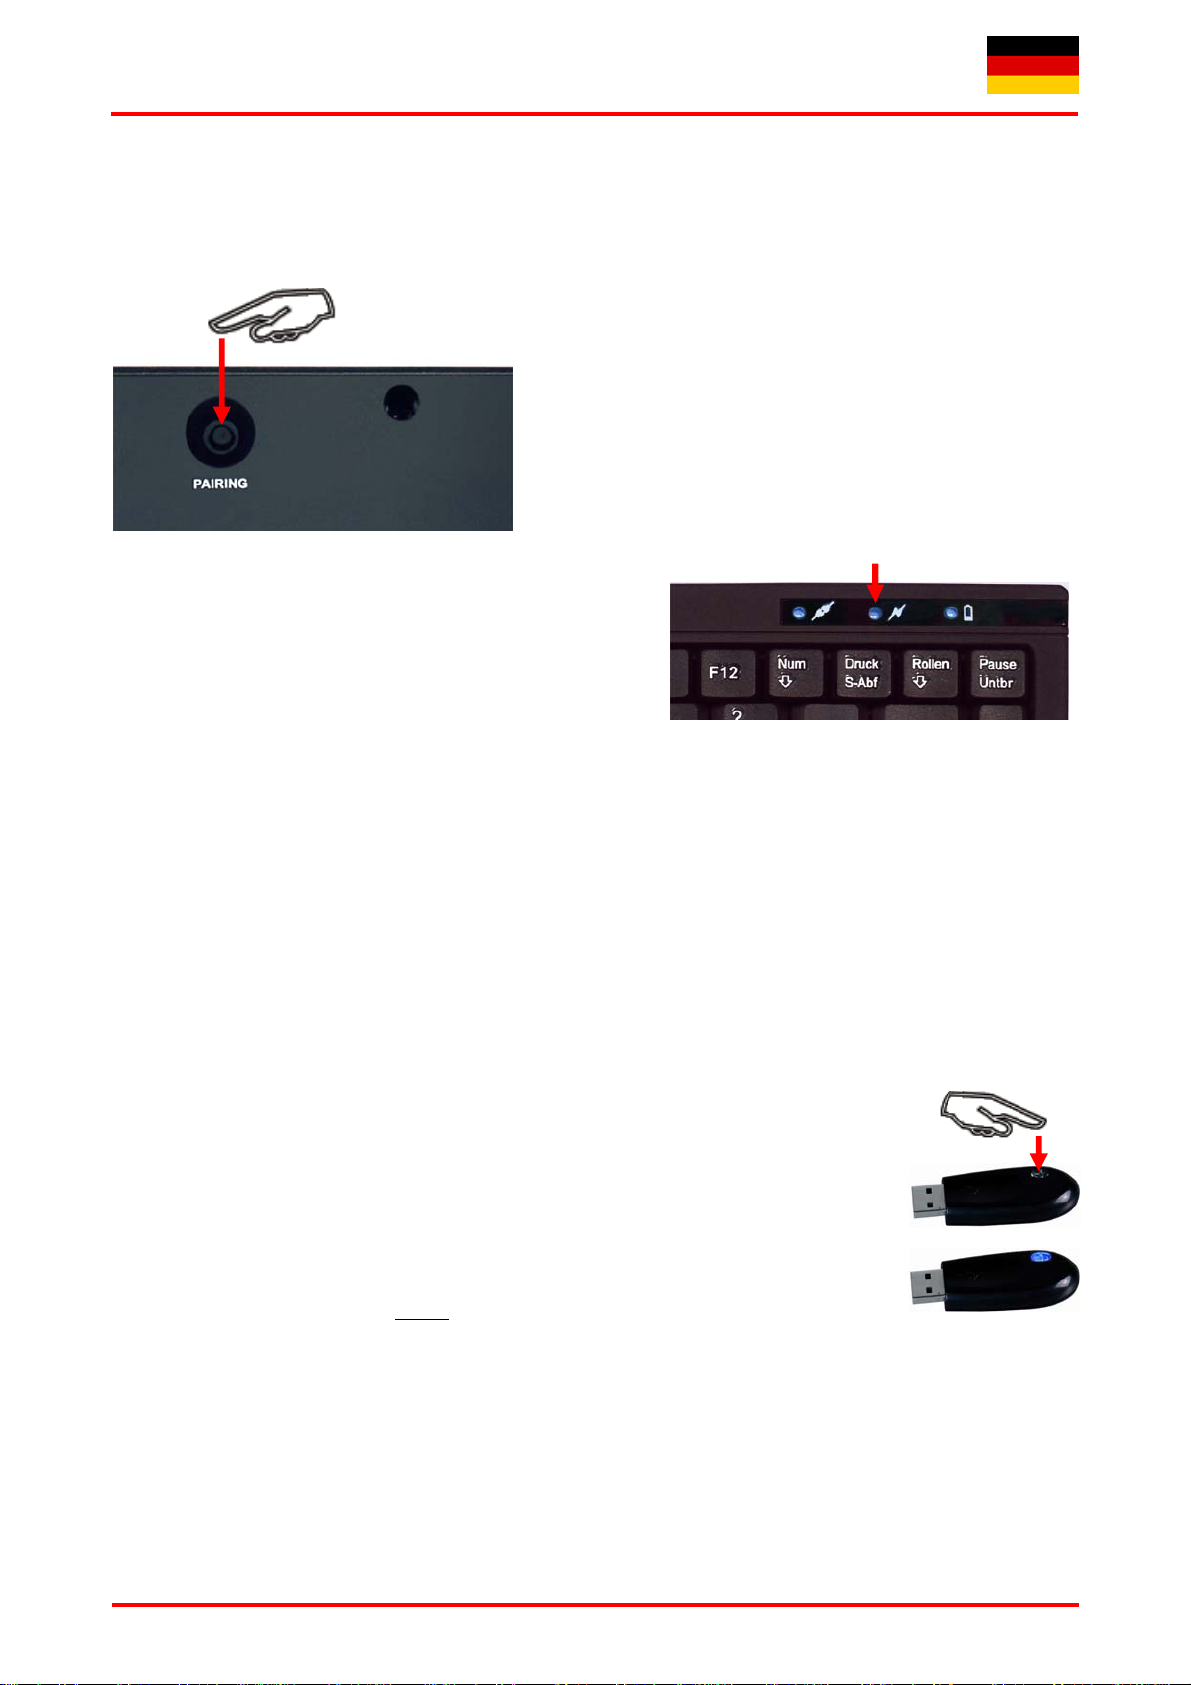
•Im Gegensatz zu herkömmlichen oder älteren
Funktastaturen auf dem Markt ist hier lediglich nur 1 mal
die PAIRING-Taste auf der Rückseite der Tastatur zu
drücken, wodurch das neue Synchronisations-Signal an
den USB-Receiver gesendet wird. Dadurch ist eine
vollständige, überaus komfortable Bedienung vom
Anwender-Standort (z. B. einem Sofa) aus möglich, ohne
aufstehen zu müssen, um den Synchronisationsknopf des
Receivers zu drücken, welcher sich üblicherweise im
USB-Port des PCs befindet.
•Der Synchronisationsvorgang kann bis zu 10 Sekunden
benötigen und wird durch das Leuchten der PAIRING-
LED (mittlere LED auf der Vorderseite der Tastatur)
signalisiert, welche nach erfolgreicher Prozedur erlischt.
Die Tastatur ist nun re-synchronisiert.
•Testen Sie nun die Funktionsweise der Tastatur wie unter 2.3 beschrieben.
Hinweis:
Ein weiterer Vorteil dieser neuesten Funktechnologie ist die Bereitstellung einer sehr große Anzahl der
möglichen, voneinander unabhängigen „Funkkanäle“ (16 Kanäle *216 Bit = 1.048.576 mögliche
Verbindungen oder auch IDs), um einen störungsfreien und gesicherten Betrieb von mehreren
Funktastaturen in einem Raum bzw. im Sende-/Empfangsradius von ca. 10 m sicherzustellen.
Sollte die Tastatur im unwahrscheinlichen Fall auch nach der Neu-Synchronisierung immer noch nicht
funktionieren, so haben Sie folgende Möglichkeiten zur Lösung dieses Problems:
•Wiederholen Sie die Prozedur einschließlich Hardware-Reset des USB-Receivers
(konventionelle Synchronisierung), indem Sie zunächst die LED-Taste auf dem
USB-Receiver drücken (blaue LED des USB-Receivers blinkt 3 Mal hintereinander)
und dann erst die PAIRING-Taste auf der Rückseite der Tastatur wie oben
beschrieben. In äußerst seltenen Fällen ist es erforderlich, die Routine
mehrmals zu wiederholen, bis der richtige „Funkkanal“ gefunden wurde.
•Falls Sie den USB-Receiver an einen USB-Hub angeschlossen haben,
sollten Sie diesen bitte direkt an einem USB-Anschluss Ihres Notebooks
bzw. Desktops installieren.
•Während des Synchronisationsvorgangs sollte sich die Tastatur in dichter Nähe zum USB-Receiver
befinden, um sicher zu stellen, dass die unmittelbare Umgebung keine Einflüsse auf die Funkübertragung
ausübt (z.B. Funksignalabschwächung/Interferenzen durch Metallgehäuse, andere Funkstörquellen etc.).
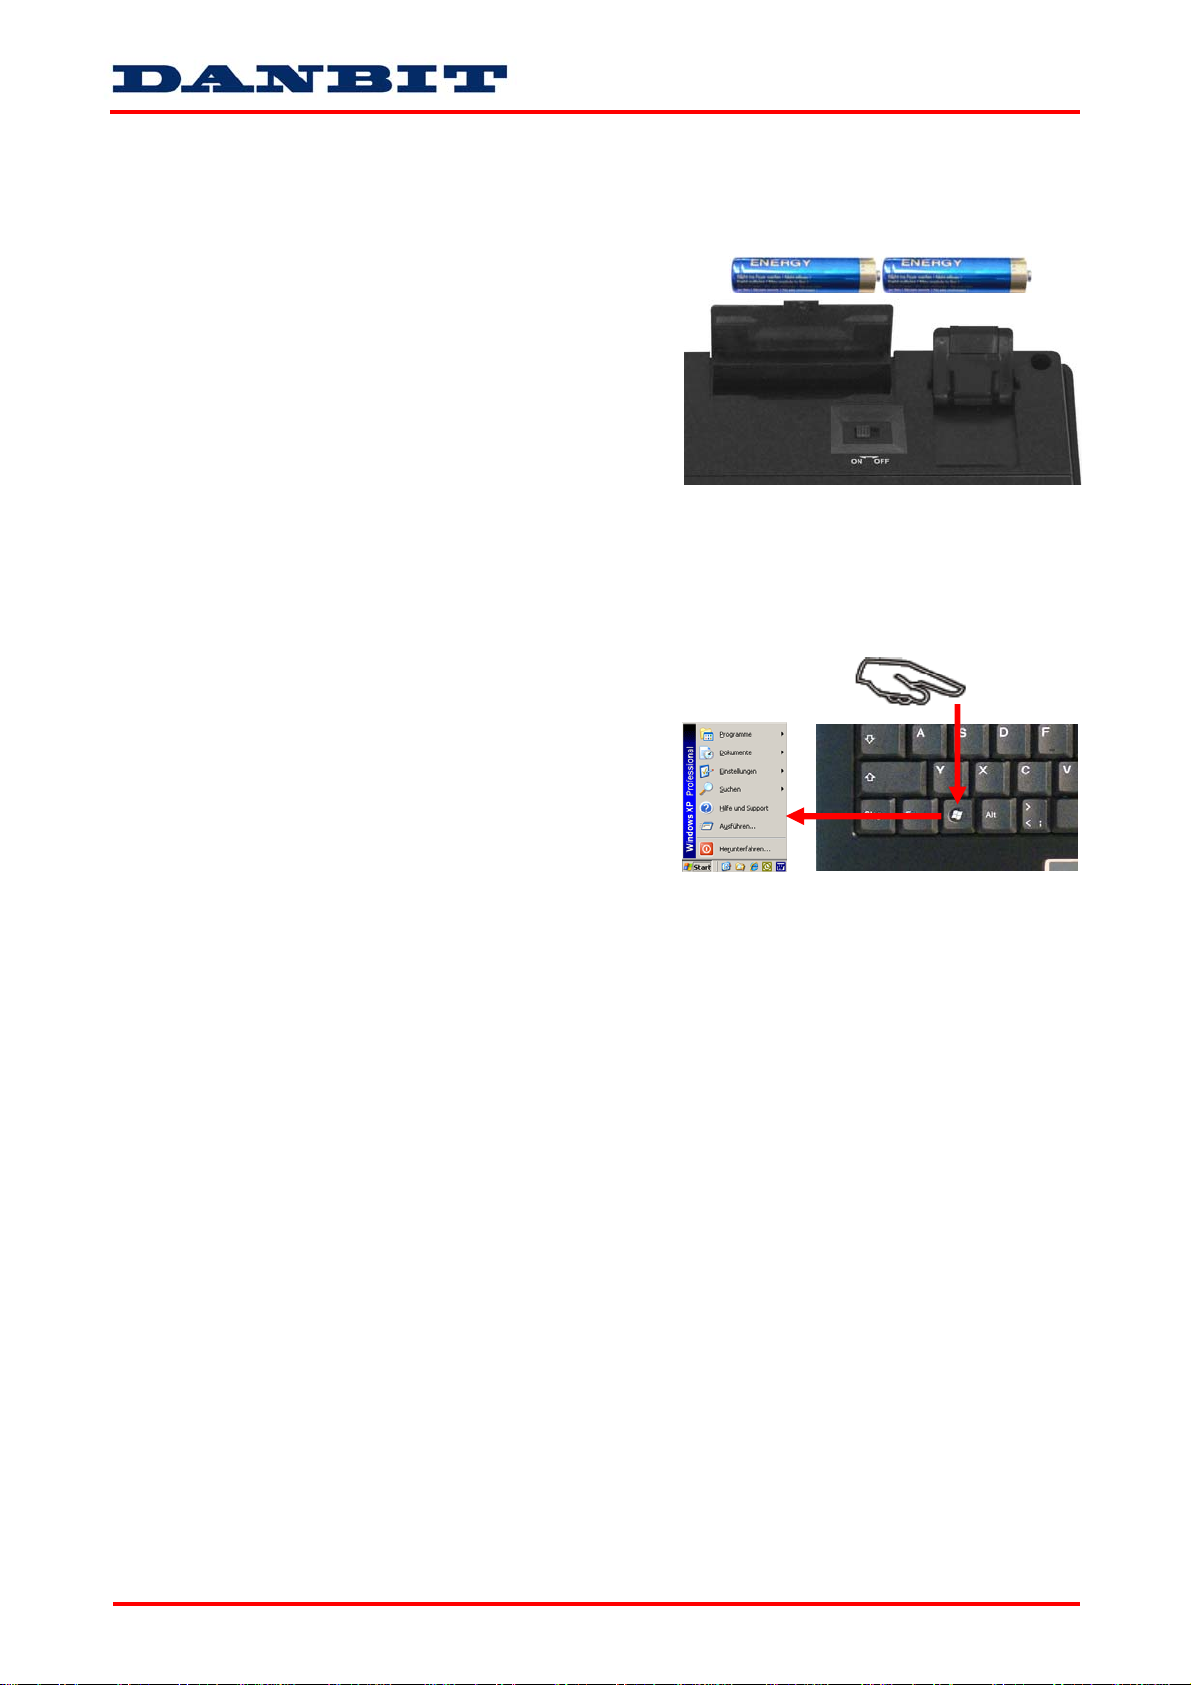
•Stellen Sie sicher, dass Sie nur Batterien mit voller Ladekapazität verwenden. Im Zweifelsfalle tauschen
Sie die Batterien vor der nächsten Synchronisierung sicherheitshalber einmal gegen Neue aus.

Version 1.2 (2010/11/09) ●© 2010 by MaxPoint Handelsges. mbH - 5 -
3. Bedienung der Tastatur
Nach erfolgreicher Inbetriebnahme genießen Sie nun bei der Bedienung eine freie und unabhängige
Standortwahl bis ca. 10 m Entfernung zum PC. Mehr- oder Minderabstand können, wie bereits erwähnt,
durch metallische Trennwände, Computergehäuse, Monitore, ZIP-Laufwerke, Lautsprecher, Schaltnetzteile
u. v. m., aber auch durch eine unterschiedliche Ladekapazität der Batterien verursacht werden. Hierzu
geben Ihnen die Status-LEDs auf der Vorderseite der Tastatur Aufschluss über den aktuellen
Betriebszustand.
3.1 Bedeutung der Status-LEDs
•Pairing-LED
Sie zeigt an, dass sich die Tastatur und der USB-Receiver gerade im Pairing-Modus
befindet, d. h. während der manuellen Einleitung der Neu-Synchronisierung auf einen
gemeinsamen „Funkkanal“ (ID). Sie erlischt nach erfolgreicher Synchronisierung.
•Transmitting-LED
Sie zeigt während der Tasten-Betätigung bzw. der Touchpad-Bedienung an, dass die
Eingabeinformationen von der Tastatur erfolgreich per Funk gesendet wurden.
.
•Batterie Low-LED
Sie zeigt an, dass der Ladezustand der Batterie unter 2,4 Volt liegt. Sie leuchtet, bis
eine neue Batterie eingesetzt oder die Batterie völlig aufgebraucht wird. Auch leuchtet
sie nur, wenn sich die Tastatur nicht im Sleep-Modus (Ruhezustand) befindet.
3.2 Spezielle Betriebs-Modi der Tastatur
•Sleep-Modus
Wenn 30 Minuten lang keine Eingabe über die Tastatur bzw. das Touchpad erfolgt, geht die Tastatur
automatisch in den Sleep-Modus (Ruhezustand) über, um die Batteriekapazität zu schonen.
•Wake up-Modus
Um die Tastatur aus dem Ruhezustand wieder zu aktivieren, drücken Sie eine beliebige Taste auf dem
Tastaturfeld (nicht die linke oder rechte Mausfunktionstaste des Touchpads bzw. das Touchpad selbst!).
•Reconnect-Modus
Nach der Wiederaktivierung verbindet sich die Tastatur automatisch erneut mit dem USB-Receiver.
Abhängig von den Umgebungsbedingungen für die Funkverbindung benötigt sie dafür zwischen weniger
als eine Sekunde bis hin zu einigen Minuten.

Bedienungsanweisung ACK-540 RF+
Irrtümer und Auslassungen vorbehalten
- 6 -
3.3 Touchpad
Als Mausersatz ist diese Tastatur mit einem verbesserten Smart-Touchpad einschließlich zwei
Mausfunktionstasten ausgestattet, welches eine komfortable und ergonomische Bedienung des
PCs von z. B. einem Sofa aus gestattet. Dabei ist die Bedienung des Touchpads so einfach wie genial.
•Gleiten Sie mit dem Finger sanft über die Oberfläche
des Touchpads, um den Cursor zu bewegen und
tippen Sie darauf, um zu „klicken“.
•Klick-, Doppelklick-, Markier- und Ziehfunktionen
können direkt durch das Tippen auf die Oberfläche
des Touchpads ausgeführt werden. Sie brauchen dabei
keine große Kraft auszuüben. Das beste Ansprech-
verhalten erzielt man durch leichtes und schnelles Klicken
(wahlweise können Sie dafür natürlich auch die Maus-
Funktionstasten verwenden)
•Um zu „ziehen“, zeichnen oder zu markieren, müssen Sie
einen Doppelklick auf das Touchpad ausüben, wobei der
Finger nach dem zweiten Klick auf dem Touchpad
verbleibt.
Dann gleiten Sie mit dem Finger über das Touchpad, um die Bewegung zu vollziehen.
•Legen Sie zwei Finger auf das Touchpad und gleiten Sie darüber, um in Ihrer Anwendung auf- und
abzuscrollen (identisch einem Maus-Scrollrad).
•Tippen Sie mit drei Finger auf die Oberfläche des Touchpads, um an entsprechender Stelle des Cursors
das Kontextmenü aufzurufen (identisch der rechten Maus-Taste).
•Bei Notebooks mit bereits integriertem Touchpad und Mausfunktionstasten, müssen Sie bei der
Verwendung der Tastatur diese internen Steuergeräte deaktivieren, falls es zu Fehlermeldungen oder
Funktionsstörungen kommt*.
•Um die Doppelklick-Geschwindigkeit und die Geschwindigkeit der Mauszeigerbewegungen langsamer
oder schneller zu machen, verändern Sie die Einstellungen der Maus-Optionen in Ihrer Systemsteuerung
unter Windows*.
Hinweis:
Die Sensitivität (Empfindlichkeit) sowie das Deaktivieren der Klick-Funktion des Touchpads lässt sich
nicht verändern. Auch gibt es hierfür keinen separaten Treiber, der diese Einstellungen unterstützt!
*Einzelheiten entnehmen Sie der Dokumentation Ihres PCs.
Touchpad
Maus-Funktionstasten

Version 1.2 (2010/11/09) ●© 2010 by MaxPoint Handelsges. mbH - 7 -
3.4 Tasten mit doppelten Funktionen
Beim Layout der Tastatur handelt es sich um ein spezielles Platz sparendes Layout mit dem von Notebooks
her bekannten virtuellen Ziffernblock.
•Drücken Sie die Taste Num in der obersten Tastenreihe, um den virtuellen Ziffernblock ein- bzw.
auszuschalten. (Die Doppel-Funktionstasten erhalten die blau aufgedruckten Bedeutungen: Numeric
keypad locked)
•Bei aktivierter Num Lock-Funktion können Sie auch die Taste Fn in der linken unteren Ecke gedrückt
halten, um den virtuellen Ziffernblock temporär zu deaktivieren. Das ist besonders praktisch, wenn Sie
neben den vielen Zahlen zwischendurch auch Buchstaben schnell eingeben möchten.
•Ohne vorher aktivierter Num Lock-Funktion steuert die gedrückt
gehaltene Fn-Taste die integrierten Positionstasten genau wie
bei einem externen Ziffernblock (siehe Bild):
Pos1 (Home)
Bild
(PgUp)
Ende (End)
Bild
(PgDn)
Einfg (Ins) Entf (Del)
Hinweis:
Beim Starten des PCs ist zu beachten, dass im BIOS bzw. Betriebssystem eingestellt wird, ob die
Num Lock-Funktion automatisch im aktivierten oder deaktivierten Status mit hochgefahren wird.
Dieses kann damit Einfluss auf die Eingabe eines möglichen Passwortes beim Starten des
Betriebssystems haben. Meldet Ihr System nach der Eingabe also ein unkorrektes Passwort, so ist
möglicherweise nur die Num Lock-Funktion aktiv.
Virtueller Ziffernblock

Bedienungsanweisung ACK-540 RF+
Irrtümer und Auslassungen vorbehalten
- 8 -
3.5 Aufstellfüße
Die ACK-540 RF+ besitzt unter der Tastatur zwei
Aufstellfüße, welche das Anstellen der Tastatur für eine
ergonomische und ermüdungsfreie Schreibweise
ermöglichen. Die Füße sind speziell so konzipiert
worden, dass die Tastatur, auch bei ausgeklappten
Stellfüßen, nicht auf dem Tisch verrutschen kann, wie
man es von herkömmlichen Tastaturen kennt.
4. Reinigung der Tastatur
•Staub entfernen Sie mit einem Pinsel, mit sanfter Druckluft oder mit einem Staubsauger mit
Bürstenkopfdüse.
•Feinen Schmutz entfernen Sie mit einem nicht allzu feuchten Lappen.
•Verwenden Sie KEINE scharfen Putzmittel, Lösungsmittel oder Benzin zur Reinigung der Tastatur!
Information zur Altbatterie-Entsorgung (Batterieverordnung)
Die neue Batterieverordnung verpflichtet Hersteller und Importeure, alle Altbatterien zurückzunehmen, zu sortieren und zu entsorgen. Der Verbraucher ist verpflichtet, verbrauchte
Batterien im Handel oder bei einer kommunalen Sammelstelle abzugeben. Die Entsorgung im Hausmüll ist laut Batterieverordnung ausdrücklich verboten. Von uns erhaltene
Batterien können Sie auch nach Gebrauch zu uns unter der nachstehenden Adresse ausreichend frankiert per Post zurücksenden:
MaxPoint Handelsgesellschaft mbH, Kurt-Fischer-Straße 50, D-22926 Ahrensburg
Batterien, die Schadstoffe enthalten, sind mit dem Symbol einer durchgekreuzten Mülltonne gekennzeichnet, ähnlich dem Symbol in der Abbildung. Unter dem Mülltonnen-Symbol
befindet sich die chemische Bezeichnung des Schadstoffes - "Cd" für Cadmium. "Pb" steht für Blei, "Hg" für Quecksilber.
Haftungsausschlusserklärung des Herstellers
Für Informationen in diesem Dokument behält sich der Hersteller Änderungen ohne Mitteilung vor und geht keinerlei Verpflichtungen ein. Durch dieses Dokument wird, weder
ausgedrückt noch angedeutet, keinerlei Garantie oder Erklärung in Bezug auf Qualität, Genauigkeit oder Eignung für einen bestimmten Zweck übernommen. Der Hersteller behält
sich das Recht vor, jederzeit Änderungen zum Inhalt dieses Dokumentes zu machen und/ oder die dazugehörigen Produkte unverbindlich zu ändern ohne Verpflichtung, Personen
oder Organisationen über derartige Änderungen in Kenntnis zu setzen. Unter keinen Umständen ist der Hersteller haftbar für direkte, indirekte, spezielle, zufällige oder
Folgeschäden, die durch die Nutzung oder Unmöglichkeit der Nutzung des Produktes oder der Dokumentation entstehen, selbst wenn auf die Möglichkeit solcher Schäden
hingewiesen wurde. Dieses Dokument enthält Materialien, die durch Copyright geschützt sind. Alle Rechte sind vorbehalten. Es ist untersagt, diese Bedienungsanleitung oder Teile
daraus ohne die schriftliche Einwilligung der Autoren in irgendeiner Form zu vervielfältigen oder zu verbreiten, in welcher Form, zu welchem Zweck und mit welchen Mitteln auch
immer. Produktnamen, die in diesem Dokument erwähnt werden, dienen ausschließlich als Verkaufsbezeichnung. Alle Handelsmarken, Produktnamen oder Markennamen, die in
diesem Dokument erwähnt werden, sind eingetragenes Eigentum des jeweiligen Inhabers.

Version 1.2 (2010/11/09) ●© 2010 by MaxPoint Handelsges. mbH - 9 -
1. Introduction ACK-540 RF+
1.1 SPECIAL FEATURES
•Wireless mini keyboard with built-in and improved Smart-Touchpad
•Far-ranging and reliable radio-frequency transmission at 2.4 GHz up to approx. 10 m away from the PC
•Novel bidirectional radio technology for an optimal radio link –
Thereby a simplified one-way-synchronisation from the keyboard only is possible
•Novel Smart-Touchpad with extended “finger functions”:
2 finger = page-up/-down scrolling like mouse wheel
3 finger = menu pop-up like right mouse button
•Modern design in noble, matt black SoftSkin coating with built-in hand cushion for non-fatiguing work
•Full functionality of a full-size layout keyboard due to built in numeric keypad and 12 function keys
•Extremely silent stroke and tactile feedback due to high-quality Soft-Touch membrane technology
•Tilt feet with special rubber inlays for adjustment of the tilt angle for an absolute skid-proof and ergonomic
operation
•Appealing blue status LEDs for pairing, transmitting and low battery with new light-stripe design
•Power on/off switch to save battery
•Plug & Play installation without any special driver
•Optimal for Digital Living Rooms (HTPC) as well as for training, conference & presentation rooms etc.
1.2 Technical data:
Key count: 89
Construction Soft-Touch-Membrantechnologie
Life expectancy: approx. 5 million strokes per key
Switch travel / Pressure point: 3.0 ±0.5 mm (total run) / 55 ±15 g
Radio transmission: 2.4 – 2.4835 GHz, GFSK,
1,048,576 IDs (number of several keyboards in one room)
Effective operation distance: approx. 10 m
Battery type: 2× AAA 1.5 V
Power supply: Keyboard: +2.4 VDC to +3.2 VDC Receiver: +5 VDC ±5 %
Power consumption maximal: Keyboard: 17 mA Receiver: 100 mA
Keyboard Standby: 14 mA
Keyboard Sleep-Mode: 30 μA (after 30 min.)
Temperature: Operating: -5 °C up to +40 °C
Storage: -20 °C up to +65 °C
Humidity: Operating and storage: 10 % up to 85 % RH
Dimensions / Weight approx.: Keyboard: 291 x 29 x 197 mm / 657 g (incl. batteries)
Interface: USB (dongle receiver)
Scope of delivery: Keyboard, USB dongle receiver, 1 set of batteries, user manual
Certificated: CE, FCC, BSMI, WEEE/RoHS, REACH
Compatibility: Win 98SE / ME / 2000 / XP / Vista / Windows7

Operation Manual ACK-540 RF+
E&OE
- 10 -
2. Installation
2.1 System Requirements
This keyboard requires a PC with USB connection and one of the following operating systems:
Windows 98SE / ME / 2000 / XP / Vista / Windows7
For the installation of the keyboard under the mentioned above operating systems you need NO special
driver!
2.2 Installation of the USB receiver
In order to install your keyboard, please perform the following steps:
•Connect the included USB receiver (dongle receiver) to a free USB port
on your computer.
Advise:
Please ensure, that the USB receiver has a minimal distance
of 20 cm to metallic dividing walls, other computer cases,
monitors, ZIP drives, loudspeakers and switching power supplies.
•All above mentioned state-of-the-art operating systems which support the Plug & Play functionality of
Windows will recognize your keyboard automatically and load the required drivers. During the installation
phase, your operating system will inform you on your current status of installation through alternating pop-
up information windows on your task bar. Please be patient, until the system informs you finally about the
successful installation. The USB receiver is now ready for operation.
•Older operating systems not always support automatic recognition of USB devices. If you have attached
your USB receiver and exactly this error occurs on your system, you have the following alternatives to
solve the problem:
•Perform an update of your operating system and return to Step 2.2.
•In some cases the installation CD of your operating system is necessary according to the instructions on
your screen. In this circumstance please follow these instructions*.
•Check whether your BIOS system supports USB keyboards*. Some main board manufacturers offer
BIOS up-dates to download over the Internet.
•Ensure in your system settings, that the used USB connection is not deactivated in your operating
system*.
•Should your system updates still be unsuccessful, it is then recommendable to test the keyboard with
another PC with the same operating system to rule out a hardware damage of the USB receiver.
* Refer to the documentation of your PC for details.

Version 1.2 (2010/11/09) ●© 2010 by MaxPoint Handelsges. mbH - 11 -
2.3 Installation of the keyboard
Recommended requirement for that is the successful installation of the USB receiver under point 2.2.
•If you have not yet removed the covering of the battery
case on the bottom of your keyboard, please do so now.
Insert the included batteries of type AAA 1.5 V
considering the right polarity in the battery case
(see picture).
•Switch the I/O sliding switch to ON position!
Advice:
The USB receiver and the keyboard are already factory-set to the same radio channel. Normally you do
not have to re-synchronise (as described under point 2.4). The keyboard is immediately functional.
•You can now check the functionality by pressing any
key of your keyboard. If you, for example, press the
Windows key, the Windows pop-up menu should open
up at the bottom left hand side of your screen. If so,
your wireless keyboard is working correctly now. If not,
please re-synchronise the USB receiver and the
keyboard like described under point 2.4.
Advise:
Should the functionality be influenced by other users applying their wireless keyboard close-by, make a
new-synchronisation as described under point 2.4.

Operation Manual ACK-540 RF+
E&OE
- 12 -
2.4 New-synchronisation of the radio channel
The ACK-540 RF+ is equipped with the newest radio technology allowing in the easiest manner to make a
new-synchronisation.
•In contrast to conventional or older wireless keyboards on
the market this keyboard only requires you to press the
PAIRING key on the back side only 1 time, whereby the
new synchronisation signal is transmitted to the USB
receiver. Thereby a complete, extremely comfortable
handling from the user’s location (e.g. a sofa) is possible
without the need to stand up for pressing the
synchronisation key of the receiver, which is usually
located in the USB port of the PC.
•The process of synchronisation can take up to 10 seconds
and is signalised by the flashing of the PAIRING-LED
(middle LED on front side of the keyboard),
which turns off after successful synchronisation.
The keyboard is now ready for use and functional.
•Check now the functionality of the keyboard as described under point 2.3.
Advise:
One further benefit of this newest radio technology is the availability of a large number of possible,
independent from each other „radio channels“ (16 channels *216 Bit = 1.048.576 possible radio
connections or even IDs) to ensure a trouble-free and secured operation of several wireless keyboards in
one room respectively in a transmitting/receiving sector of approx. 10 m.
If the keyboard does not work even after new-synchronisation, you have the following options to solve this
problem:
•Repeat the process including the hardware reset of the USB receiver (conventional
synchronisation) by pressing at first the LED key on the USB receiver (blue LED of
the USB receiver flashes 3 times in a row) and then the PAIRING key on the back
side like mentioned above. In very rare cases it is necessary to repeat this routine
several times until the right „radio channel“ is found.
•In case your USB receiver is attached to an USB hub, you should
install it directly on the USB connector of your notebook or desktop.
•During the procedure of synchronisation the keyboard should be located close to the USB receiver to
make sure, that the immediate environment has no harmful influence on the radio transmission (for
instance reduction/interferences due to metal cases, other sources of interferences etc.).
•Ensure that you only use batteries with full loading capacity. In case of doubt, as a precaution change the
old batteries to new ones before next synchronisation.

Version 1.2 (2010/11/09) ●© 2010 by MaxPoint Handelsges. mbH - 13 -
3. How to use the keyboard
After successful installation of the keyboard you can now enjoy the freedom of choosing a location of up to
approx. 10 m distance from the PC. A deviation in operating range can be caused, as mentioned earlier, by
metallic dividing walls, other computer cases, monitors, ZIP drives, loudspeakers, switching power supplies
etc., but also by different loading capacity of the batteries. For this issue the status LEDs on the top side of
the keyboard shows you information about the current operating condition.
3.1 Meaning of status LEDs
•Pairing-LED
Indicates that the keyboard is in Pairing-Mode with the USB receiver, in other words
the manual implementation of a new synchronisation to achieve a shared “radio
channel” (ID). The light goes out after successful synchronisation.
•Transmitting-LED
Indicates that during keyboard or touchpad operation all input information have been
sent out successfully per radio transmission from the keyboard.
•Battery Low-LED
Indicates that the load condition of the batteries is below 2.4 Volt. It flashes until a new
battery has been inserted or until the battery has been completely used up. Besides
that it flashes only when the keyboard is not in Sleep-Modus (idle state).
3.2 Special operation modes of the keyboard
•Sleep-Mode
When there is no input on your keyboard or touchpad for over 30 min, the keyboard automatically turns
into Sleep Mode (idle state) to save battery capacity.
•Wake up-Mode
To activate the keyboard from Sleep-Mode press any key on your keypad (not the left or right mouse
function key of the touchpad or the touchpad itself!).
•Reconnect-Mode
The keyboard automatically connects to the USB receiver after being reactivated. Depending on the
environmental conditions the radio transmission for reconnecting needs between less than 1 second to up
to a few minutes.

Operation Manual ACK-540 RF+
E&OE
- 14 -
3.3 Touchpad
As an alternative to a mouse, this keyboard is equipped with an improved Smart-Touchpad with two
integrated mouse function keys allowing comfortable and ergonomic handling of the PC, for instance from a
sofa. The operation of the touchpad is simple and brilliant.
•Gently glide over the touchpad surface with your finger in
order to move the cursor, and tap on the surface in order
to "click".
•Click, double-click, marking, and drag functions can
be performed directly by tapping on the surface of the
touchpad. You do not need to apply a lot of pressure
for this. Actually, you will get the best reaction by
clicking gently and rapidly (alternatively you can use the
mouse function keys).
•In order to "drag", to draw, or to mark, you must apply a double-click on the touchpad making sure the
fingers remains on the touchpad after the second click. Then, glide over the touchpad with your finger in
order to complete the movement.
•Put two fingers on the Touchpad and glide over it to scroll up and down in your application
(identical to a mouse scroll wheel).
•Tap with three fingers on the surface of the touchpad to retrieve the context menu at the related position
of the cursor (identical to a right mouse button).
•When using notebooks with already integrated touchpad and mouse function keys you must de-activate
these internal control devices in case of error messages or malfunctions*.
•In order to increase or decrease the speed of the cursor movements, change the settings of the mouse
options in your system control under Windows*.
Advice:
The sensitivity and the deactivation of the click-function of the touchpad cannot be changed.
There is also no separate driver supporting these settings.
* Refer to the documentation of your PC for details.
Touchpad
Mouse function keys

Version 1.2 (2010/11/09) ●© 2010 by MaxPoint Handelsges. mbH - 15 -
3.4 Keys with double functions
The layout of this keyboard is a special space-saving design with the same virtual numeric keypad as used
by notebooks.
•Press the NumLk key in the top key row to switch on the virtual numeric keypad function (keys are
defined with blue imprints: Numeric keypad locked)
•During active Num Lock function, you may keep the Fn key pressed, in order to temporarily de-activate
the virtual numeric keypad. This is particularly convenient when wanting to enter an occasional letter
amongst the many numbers.
Without previously activating the NumLk key, the holding down
of the Fn key will control the integrated position keys in the same
way as an external keypad (please refer to the picture).
Home
PgUp
End
PgDn
Ins Del
Note:
When starting the PC it should be noted that in the BIOS or in the operation system it is already defined
whether the Num Lock function will be booted up automatically in an activated or deactivated status. This
can influence the input of a possible password when starting the operating system. So if your system
reports after input an incorrect password, perhaps only the Num Lock function is active.
Virtual numeric keypad

Operation Manual ACK-540 RF+
E&OE
- 16 -
3.5 Tilt-feet
The ACK-540 RF+ has got two tilt- feet below the
keyboard allowing a slope position of the keyboard for
an ergonomic and non-fatiguing work. The feet are
specially conceived, that the keyboard cannot slip on
the table, also with tilted feet, like it is well-known from
conventional keyboards.
4. How to clean the keyboard
•Remove dust either with a brush, or with soft compressed air, or with a vacuum cleaner with brush head
nozzle.
•Remove fine dirt with a not-too-damp cloth.
•DO NOT use any aggressive detergents, solvents or gasoline to clean the keyboard.
Information on disposal of old batteries (Battery Regulation)
The new Regulation obliges battery manufacturers and importers to take back, sort and dispose all old batteries. The consumer is obliged to give back used batteries in retail stores
or in municipal collection points. The disposal in municipal waste is explicitly prohibited according to Battery Regulation. You can send batteries purchased from us after consumption
to the following address via sufficient stamped mail:
MaxPoint Handelsgesellschaft mbH, Kurt-Fischer-Straße 50, D-22926 Ahrensburg
Batteries, which contain pollutants, are marked with the symbol of a crossed-out dustbin, similar to the symbol in the illustration. The chemical description of the pollutant is situated
below the symbol of the dustbin. “Cd” stands for Cadmium, “Pb” for Lead, “Hg” for Mercury.
Manufacturer's Disclaimer Statement
The information in this document is subject to change without notice and does not represent a commitment on the part of the vendor. No warranty or representation, either expressed
or implied, is made with respect to the quality, accuracy or fitness for any particular purpose of this document. The manufacturer reserves the right to make changes to the content of
this document and/or the products associated with it at any time without obligation to notify any person or organization of such changes. In no event will the manufacturer be liable for
direct, indirect, special, incidental or consequential damages arising out of the use or inability to use this product or documentation, even if advised of the possibility of such damages.
This document contains materials protected by copyright. All rights are reserved. No part of this manual may be reproduced or transmitted in any form, by any means or for any
purpose without expressed written consent of its authors. Product names appearing in this document are mentioned for identification purchases only. All trademarks, product names
or brand names appearing in this document are registered property of their respective owner.

Version 1.2 (2010/11/09) ●© 2010 by MaxPoint Handelsges. mbH - 17 -
1. Introduction ACK-540 RF+
1.1 Caractéristiques
•Mini-clavier sans fil avec un Smart-Touchpad intelligent amélioré
•Transmission radio puissante et fiable à 2,4 GHz jusqu’à env. 10 m éloigné de l’ordinateur
•Nouvelle liaison radio bidirectionnelle encore plus performante - Synchronisation radio du clavier
améliorée
•Nouvelle Smart-Touchpad avec des « fonction doigts » amélioré :
2 doigts = page-up/-down défilement comme la molette de la souris
3 doigts = menu pop-up comme le clic du bouton droit de la souris
•Design moderne et élégant, avec un revêtement SoftSkin noir mat unique et un repose poignet intégré
pour ne pas se fatiguer
•Plein fonctionnement d’un clavier à disposition standard à cause d’un intégré bloc numérique et de 12
touches de fonction
•Frappe extrêmement silencieuse et feed-back tactile grâce à la technologie de membranes SoftTouch de
haute qualité
•Pieds escamotables avec des incrustations en caoutchouc pour l'ajustement de l'inclinaison, pour une
adhérence absolue de la preuve et ergonomique opération
•Diodes bleues indiquant le branchement, débranchement et la batterie faible grâce au nouveau design
light-stripe
•Bouton marche / arrêt pour sauver la batterie
•Installation Plug & Play sans pilote spécial
•Idéale pour salles de formation, de conférence & de présentation, cinéma de maison etc.
1.2 Information Technique
Nombre des touches : 89
Construction : Soft-Touch membrane technologie
Durée de vie : Env. 5 million frappes par touche
Actionnement / Point de poussée : 3,0 ±0,5 mm (chemin total) / 55 ±15 g
Fréquence de transmission radio : 2,4 – 2,4835 GHz, GFSK,
1.048.576 IDs (le nombre de plusieurs claviers dans la chambre)
Distance effective : env. 10 m
Type de pile : 2× AAA 1,5 V
Alimentation : Clavier : +2,4 VDC – 3,2 VDC Récepteur USB : +5 VDC ±5 %
Courant absorbé max. : Clavier : 17 mA Récepteur USB : 100 mA
En stand-by : 14 mA En veille : 30 μA (après 30 min.)
Température : Exploitation : -5 °C jusqu’à +40 °C Entrepôt : -20 °C jusqu’à +65 °C
Humidité : Exploitation et entrepôt : 10 % jusqu’à 85 % rel.
Dimension / Poids env. : Clavier : 291 x 29 x 197 mm / 657 g (sans piles)
Interface: USB (récepteur USB)
Contenu : Clavier, récepteur USB, 1 set des batteries, Manuel d’Utilisation
Certifié : CE, FCC, BSMI, WEEE/RoHS, REACH
Compatibilité : Win 98SE / ME / 2000 / XP / Vista / Windows7

Manuel d’Utilisation ACK-540 RF+
Sous réserve d’erreurs ou d’omissions
- 18 -
2. Installation du clavier
2.1 Demandes au Système
Ce clavier demande un PC avec connexion USB et un des systèmes d’exploitation suivants:
Windows 98SE / ME / 2000 / XP / Vista / Windows7
Pour l'installation du clavier sous les systèmes d'exploitation mentionné au-dessus vous n'avez besoin
d'AUCUN pilote spécial!
2.2 Installation de receveur USB
Pour installer votre clavier, exécutez les opérations suivants :
•Connectez le receveur USB inclut (dongle) à un port USB libre de
votre ordinateur.
Conseils :
assurez-vous que le receveur USB soit à une distance
minimale de 200 mm de murs métalliques, d’autres ordinateurs,
écrans, disques ZIP, haut-parleur, ou alimentations.
•Tous les systèmes d’exploitation indiqués au dessus supportent le « Plug & Play » ; Ils reconnaîtront
votre clavier automatiquement et lanceront les pilotes nécessaires. Pendant la phase d’installation, votre
ordinateur vous indiquera l’état d’avancement de l’installation de votre récepteur USB. Veuillez patienter,
jusqu'à la fin de l’installation signalé par votre ordinateur. Le recepteur USB est maintenant prêt à
fonctionner.
•Les systèmes d’exploitation de génération plus ancienne ne détectent pas toujours de manière
automatique la connexion d’un périphérique USB. Si vous avez connecté votre récepteur USB et que
celui-ci n’est pas détecté automatiquement, voici les solutions alternatives pour résoudre le problème :
•Mettez votre système d’exploitation à jour er retournez à Pas 2.2
•Dans certains cas, le CD d'installation de votre système d'exploitation est nécessaire et vous sera
demandé à l’écran. Dans cette circonstance, veuillez suivre les instructions.
•Vérifier si votre BIOS supporte bien les périphériques USB*. Certains fabricants de cartes mères offrent
les mises à jour du BIOS par téléchargement en ligne.
•Vérifier dans les options de votre système que les ports USB utilisés ne soient pas désactivés sur votre
ordinateur *.
•Si votre système mis à jour n'arrive toujours pas à installer le récepteur USB, nous vous conseillons de
tester le clavier sur un autre PC avec le même système d'exploitation pour exclure tout dommage lié au
récepteur USB.
*Consultez la documentation de votre PC pour plus de détails.

Version 1.2 (2010/11/09) ●© 2010 by MaxPoint Handelsges. mbH - 19 -
2.3 Installation du clavier
La condition recommandée est celle d'une installation réussie du récepteur USB (partie 2.2).
•Si vous ne l’avez pas encore fait, enlever le
cache de la batterie à la base de votre clavier.
Installer les batteries incluses du type AAA 1,5 V
dans le bon sens (voir l'image).
•Mettre l’interrupteur sur ON.
Conseil :
Le récepteur USB et le clavier sont synchronisés sur le même canal à l'usine. Normalement, il n’est pas
nécessaire de refaire la synchronisation (comme décrit au chapitre 2.4). Le clavier est utilisable
immédiatement.
•Vous pouvez vérifier en appuyant sur n'importe quelle
touche de votre clavier. Si vous appuyez sur la touche
Windows, celle-ci doit ouvrir par exemple le menu
instantané de Windows en bas à gauche de votre
écran. Si oui, votre clavier sans fil fonctionne
correctement immédiatement. Sinon, veuillez
synchroniser le récepteur USB et le clavier encore une
fois comme décrit sous le chapitre 2.4.
Conseil :
Si le fonctionnement de votre clavier est perturbé par d’autres utilisateurs proches de vous utilisant
également un clavier sans fil, il est conseillé de synchroniser de nouveau celui-ci comme expliqué au
chapitre 2.4.
Table of contents
Languages: