Dark Matter 42892 User manual

DM 27” IPS (SHARP) 180Hz Flat QHD
Gaming Monitor
P/N 42892
User's Manual

1
Thank you for purchasing this product
To ensure optimum performance and safety, read the following
instructions before connecting, operating, or adjusting the product.
Keep this manual for future reference.
Table of Contents
Safety Warnings and Guidelines.......................................................................................2
Introduction......................................................................................................................................4
Features................................................................................................................................................4
Package Contents.........................................................................................................................5
Product Overview.........................................................................................................................6
Installing the Stand......................................................................................................................8
Mount Installation......................................................................................................................10
Indicator Light................................................................................................................................ 11
OSD Menu Map ........................................................................................................................... 12
Troubleshooting............................................................................................................................17
Specifications................................................................................................................................. 19

2
Safety Warnings and Guidelines
Please read this entire manual before using this device, paying extra
attention to these safety warnings and guidelines. Please keep this
manual in a safe place for future reference.
•This device is intended for indoor use only.
•Do not expose this device to water or moisture of any kind. Do not
place drinks or other containers with moisture on or near the
device. If moisture does get in or on the device, immediately
remove it from its power source and allow it to fully dry before
reapplying power.
•Do not place the monitor on an unstable surface where it could fall
and cause either personal injury or damage to the monitor and/or
other equipment.
•Do not expose this device to excessive vibration or extreme force,
shock, or fluctuations in temperature or humidity.
•Do not expose this device to excessively high temperatures. Do not
place it in, on, or near a heat source, such as a fireplace, stove,
radiator, etc. Do not leave it in direct sunlight.
•This device ventilates excessive heat through the slots and
openings in the case. Do not block or cover these openings. Ensure
that the device is in an open area where it can get sufficient airflow
to keep from overheating.
•Do not place or install this device in an area where it can be
exposed to excessive amounts of dust, humidity, oil, smoke, or
combustible vapors.
•Prior to operation, check the unit and power cord for physical
damage. Do not use it if physical damage has occurred.
•Before plugging the unit into a power outlet, ensure that the outlet
provides the same type and level of power required by the device.

3
•This device uses a grounded power cord and requires a ground
connection for safe operation. Ensure that the power source has a
proper ground connection. Do not modify the plug or use a
"cheater" plug to bypass the ground connection.
•Unplug this device from the power source when not in use.
•Take care to prevent damage to the power cord. Do not allow it to
become crimped, pinched, walked on, or become tangled with
other cords. Ensure that the power cord does not present a tripping
hazard.
•Never unplug the unit by pulling on the power cord. Always grasp
the connector head or adapter body.
•Ensure that power is turned off and disconnected before making
any electrical connections.
•Clean using a soft, dry cloth only. Do not use chemical cleaners,
solvents, or detergents. For stubborn deposits, moisten the cloth
with warm water.
•This device has no user-serviceable parts. Do not attempt to open,
service, or modify this device.
•Do not leave a single image on the display for a long period of time.
Doing so could cause a "burn-in" of the image. It is recommended to
use a variable desktop background and to use a screen saver to
prevent "burn-in". Alternatively, ensure that the monitor is powered
off for at least 2 hours out of every 12.
•Keep the original foam packaging material for use when installing or
removing the included stand.

4
Introduction
The Dark Matter™ 27" Gaming Monitor with 2560x1440p (QHD)
resolution provides stunning detail, while IGZO panel technology
ensures rich, accurate color reproduction and an ultrafast 1ms
response time. The 180Hz refresh rate drives precise and fluid gaming
performance, while Adaptive-Sync technology eliminates choppy
gameplay and broken frames. The monitor also features HDR 400,
the display industry's standard for true 8‑bit image quality, peak
luminance of 400cd/m2, higher contrast ratio, and a wider color
gamut. Our Dark Matter 27" Gaming Monitor features an A+ grade
panel and, as with all our monitors, is backed by our 1 Year
PixelPerfect™ guarantee.
Features
•3 HDMI® 2.0 and DisplayPort® 1.4a video inputs
•2560x1440p@180Hz maximum video resolution
•16:9 aspect ratio
•1ms response time (OD)
•1000:1 contrast ratio
•Max 400 cd/m² brightness
•Adaptive-Sync Technology supported
•75x75 VESA® mounting pattern

5
Package Contents
Please take an inventory of the package contents to ensure you
have all the items listed below. If anything is missing or damaged,
please contact Monoprice™ Customer Service for a replacement.
•1x 29" Monitor
•1x DisplayPort® Cable
•1x Stand Stem
•1x Stand Base
•4x P-Head Screws (M5x11)
•4x Wall Mount Screws
•1x Power Cable
•1x Power Adapter
•1x Type-C Cable
•1x Warranty Card
•1x User's Manual
6
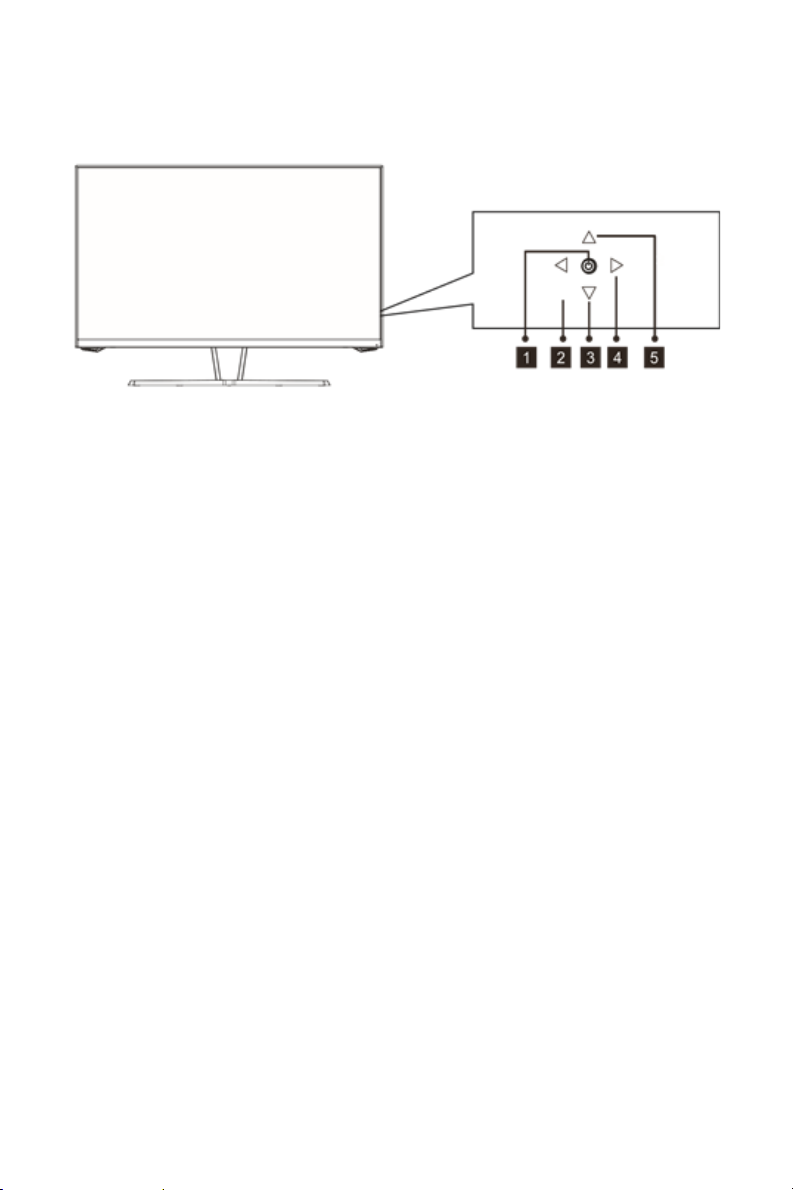
Product Overview
Controls
1. CONTROL PAD
Press the control pad to turn the display
on/off. (Press for 5 sec for non-sleep)
2. LEFT
Exit/RGB Ranges.
(When the vertical screen is connected to
the type-C device, long press the pop-up
port to select the pop-up window)
3. DOWN
Scene mode shortcuts/select menu.
4. RIGHT
Main Menu/OK.
5. UP
Display GamePlus/Select Menu.
7
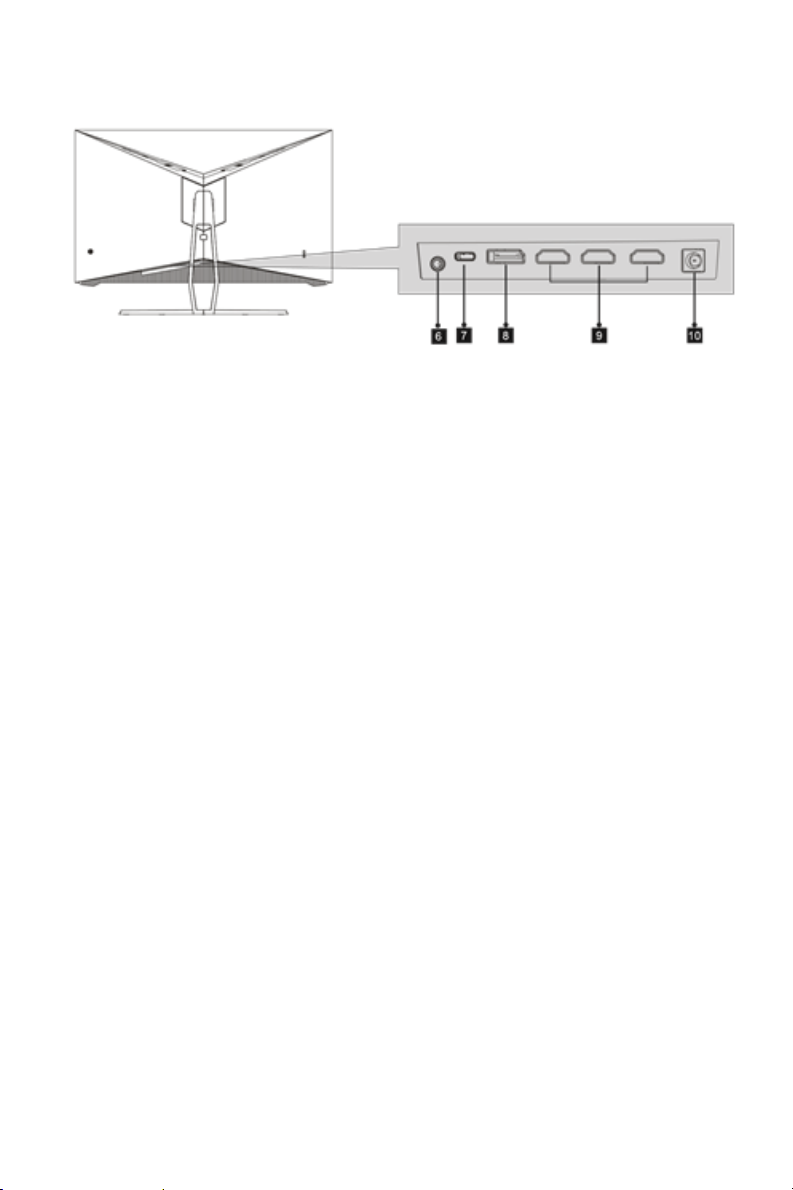
Connections
6. AUDIO
Insert the audio cable for the output of
audio signals.
7. Type-C
Insert one end of the Type-C cable into
the computer’s Type-C output and
connect the other end to the monitor’s
Type-C port.
8. DP CONNECTORS
Insert one end of the DP cable into the
computer’s DP output and connect the
other end to the monitor’s DP port.
9. HDMI CONNECTORS
Insert one end of the HDMI cable into
the computer’s HDMI output and
connect the other end to the monitor’s
HDMI port.
10. POWER
CONNECTOR
Insert the power cable supply power to
the monitor.
8
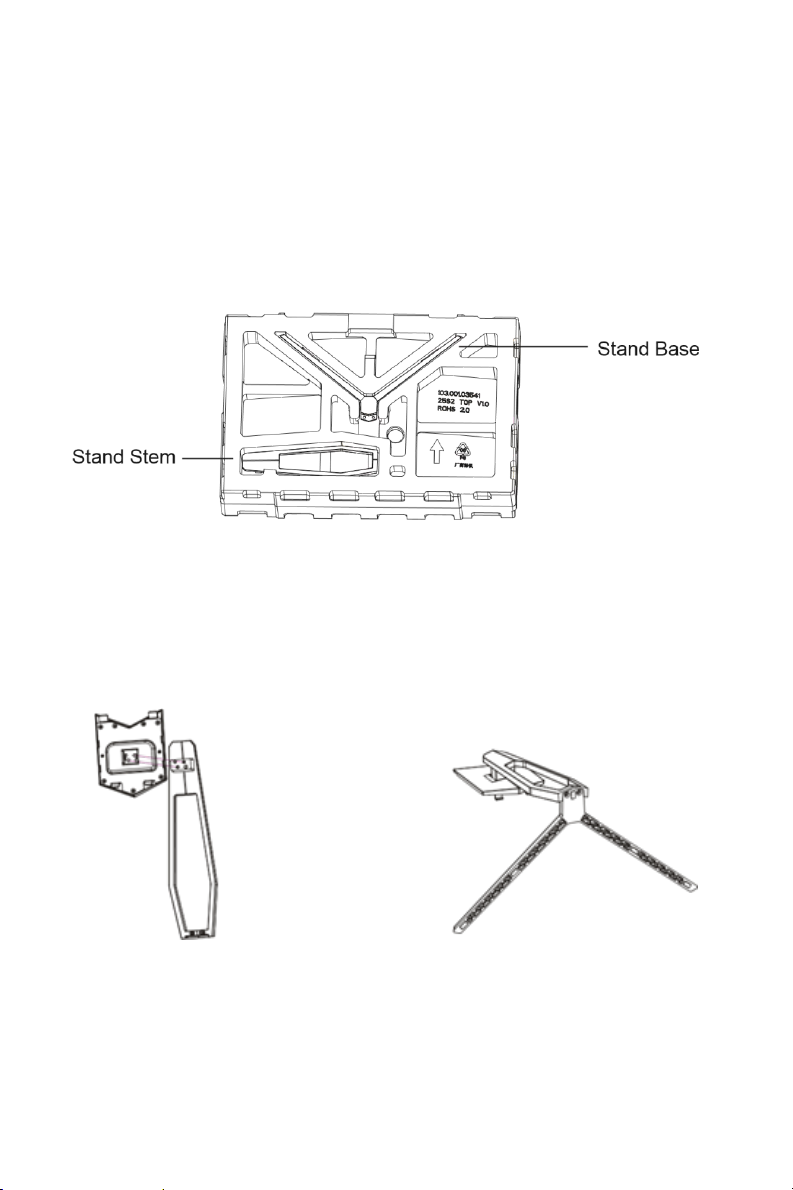
Installing The Stand
Perform the following steps to assemble the stand and attach it to
the monitor.
1. Open the package, take out the product with the foam still
attached, and gently place it on a desktop or table.
2. Take out the shaft assembly, bracket, and base. Use two (2)
PM4x8 blue zinc-plated screws to lock the shaft assembly and
bracket, and then use two (2) KM4x8 black zinc-plated screws to
lock the bracket and base.

9
3. Buckle the assembled bracket chassis on the whole machine
(insert the upper part and press down). If you want to remove
the bracket chassis, pull down the button on the rear shell to
remove the bracket chassis.
4. Place the monitor on the desktop or table after completing the
installation.
Table of contents
Other Dark Matter Monitor manuals


