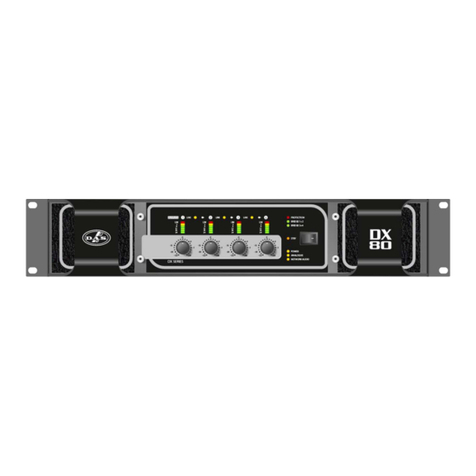
DAS AUDIO E11EVEN SOUND D Series User manual

User's Manual
D Series - Amplifiers
Before operating the device, please read the “Safety precautions” section of this manual.
www.11sound.com
Deliver the Nightclub Sound Experience we all Deserve

CONTENTS
SAFETY PRECAUTIONS
DECLARATION OF CONFORMITY
WARRANTY
INTRODUCTION, UNPACKING THE UNIT, INSTALLATION
FRONT PANEL
REAR PANEL
CONNECTIONS
SPECIFICATIONS
APPENDIX I
APPENDIX II
APPENDIX III
E11EVEN SOUND \ D series amplifiers \ User’s Manual
3
4
5
6
7
8
11
12
13
9 - 11
14

3
Terminals marked with the lightning symbol carry electrical current of sufficient magnitude to constitute risk of electric
shock. Use only high quality cables with plugs pre-installed. All other installation or modification should be performed
only by qualified personnel. This symbol, wherever it appears, alerts you to the presence of un-insulated dangerous
voltage inside the enclosure - voltage that may be sufficient to constitute a risk of shock. This symbol, wherever it
appears, alerts you to important operating and maintenance instructions in the accompanying literature.
Please read the manual.
Caution:
To reduce the risk of electric shock, do not remove the top cover (or the rear section). No user serviceable parts inside.
Refer servicing to qualified personnel.
Caution: To reduce the risk of fire or electric shock, do not expose this appliance to rain and moisture. The apparatus
shall not be exposed to dripping or splashing liquids and no objects filled with liquids, such as vases, shall be placed on
the apparatus.
Caution: These service instructions are for use by qualified service personnel only. To reduce the risk of electric shock do
not perform any servicing other than that contained in the operation instructions. Repairs have to be performed by
qualified service personnel.
1. Read these instructions.
2. Keep these instructions.
3. Heed all warnings.
4. Follow all instructions.
5. Do not use this apparatus near water.
6. Clean only with dry cloth.
7. Do not block any ventilation openings. Install in accordance with the manufacturer’s instructions.
8. Do not install near any heat sources such as radiators, heat registers, stoves, or other apparatus that produce
heat.
9. Do not defeat the safety purpose of the polarized or grounding-type plug. A polarized plug has two blades with
one wider than the other. A grounding-type plug has two blades and a third grounding prong. The wide blade or the
third prong are provided for your safety. If the provided plug does not fit into your outlet, consult an electrician for
replacement of the obsolete outlet.
10. Protect the power cord from being walked on or pinched particularly at plugs, convenience receptacles, and
the point where they exit from the apparatus.
11. Use only attachments/accessories specified by the manufacturer.
12 . Use only with the cart, stand, tripod, bracket, or table specified by the manufacturer, or sold with the apparatus.
When a cart is used, use caution when moving the cart/apparatus combination to avoid injury from tip-over.
13. Unplug this apparatus during lightning storms or when unused for long periods of time.
14. Refer all servicing to qualified service personnel. Servicing is required when the apparatus has been damaged
in any way, such as power supply cord or plug is damaged, liquid has been spilled or objects have fallen into the
apparatus, the apparatus has been exposed to rain or moisture, does not operate normally, or has been dropped.
15. The apparatus shall be connected to a MAINS socket outlet with a protective earthing connection.
16. Where the MAINS plug or an appliance coupler is used as the disconnect device, the disconnect device shall
remain readily operable.
17. Correct disposal of this product: The wheeled bin symbol indicates that this product must not be disposed of
with household waste. Please refer to the WEEE page of this manual.
SAFETY PRECAUTIONS
E11EVEN SOUND \ D series amplifiers \ User’s Manual

4
DECLARATION OF CONFORMITY
:
D10, D20 & D100
E11EVEN SOUND \ D series amplifiers \ User’s Manual

5
WARRANTY
All our products are warrantied against any manufacturing defect for a period of 36 months from date of
purchase. The warranty excludes damage from incorrect use of the product.
All warranty repairs must be exclusively undertaken by the factory or any of its authorised service centers.
To claim a warranty repair, do not open or intend to repair the product.
All the details related to the warranty (such as extended warranties) can be found in the SUPPORT section
on our website: www.11sound.com
E11EVEN SOUND \ D series amplifiers \ User’s Manual

6
INTRODUCTION
Thank you for choosing an E11EVEN Sound product for your application. Please spend a little
time reading through this manual so that you can obtain the best possible performance from
the unit. All E11EVEN products are carefully designed and engineered for cutting-edge
performance and world-class reliability. If you would like further information about this, or
any other E11EVEN product, please do not hesitate to contact us.
UNPACKING THE UNIT
After unpacking, please check the unit carefully for any damage. If any is found, immediately
notify the carrier concerned - you, the consignee, must instigate any claim. Please retain all
packaging, in case of future re-shipment.
INSTALLATION
-Electrical Considerations:
The D10, D20 and D100 devices have been manufactured to comply with your local power
supply requirements, but before connecting the unit to the supply, ensure that the voltage
(printed on the rear panel) is correct, and that a main fuse of the correct type and rating has
been fitted. Make sure power outlets conform to the power requirements listed on the back
of the unit. Damage caused by connecting to incorrect AC voltage is not covered by the
warranty.
-Mechanical Considerations:
To ensure that this equipment performs to specification, it should be mounted in a suitable
rack or enclosure. When mounting the unit in a rack or enclosure, ensure that there is
adequate ventilation. The cooling fan sucks cool air in through the right side and blows warm
air out of the left side of the unit through the ventilating grills. Take care when mounting
other equipment in the same rack.
-Operation:
Read all documentation before operating your equipment and retain all documentation for
future reference. Do not spill water or other liquids into or on the unit and do not operate the
unit while standing in liquid. Do not block the fan intake or operate the unit in an
environment that could impede the free flow of air around the unit. If the unit is used in an
extremely dusty or smoky environment, it should be cleaned of any collected debris at
regular intervals.
E11EVEN SOUND \ D series amplifiers \ User’s Manual

13
3
4
4
7
7
6
6
5
5
1
2
2
D-10
D-20
7
FRONT PANEL
3
4
5
76
8
9
2
1
D-100
1: Power Switch: This single pole switch turns the amplifier fully off (but does NOT isolate it from the mains
supply).
2: Power LED: This indicates when the amplifier is active. This does NOT indicate the presence of a mains
supply when the power switch is OFF.
3: Attenuation Controls: These are analogue controls allowing precise level settings. Note that in bridged
(mono) mode some controls may be inactive.
4: A/P (Auto Protect) LED: If a condition exists, either internally or externally, that could cause damage to either
the amplifier or the speakers, the protection circuit will disengage the outputs and the A/P LED will illuminate.
The amplifier will continue to be monitored and depending on the type of fault, will either reset after the fault
has cleared or require manual resetting by switching off at the mains switch and then on again after a few
seconds. If the outputs are shorted or if DC is present, the protection circuit will disengage the outputs and the
A/P LED will illuminate. Temperature related faults will reset if the unit has cooled sufficiently. Output short
circuits will require manual reset after clearing the fault.
5: Bridge LED: This illuminates when a channel pair have been switched into bridged (mono) mode (channel A
+B or C+D). Note that the partner channel’s LEDs and controls are disabled when a pair of channels are
bridged. Bridge switches are on the rear panel.
6: The D-10 and D-20 have Signal LEDs that are active from a minimum output level of approximately 10 Watts
and are an indication only of signal presence. The D-100 has Signal Meter and OCM indicators: LED bar graphs
show instantaneous level on each channel to indicate proximity to the limiter threshold. Note that if the PRC
system is in operation on any channel, this will affect the readout shown on the respective meter. The red LED
in the meter will illuminate when the limiter threshold has been reached and limiting is occurring. The output
current monitor (OCM) may activate to limit the output current of the amplifier channel - this can occur even if
the amplifier has not reached clipping point. The OCM indicator can operate independently of the bar graph
meter. Typical conditions that may trigger the OCM circuitry would be very low load impedance, or high
subsonic or VHF levels.
7: Limit LEDs: The amplifiers incorporate signal limiters, which are preset to prevent clipping with high levels of
drive. The amber LEDs on the front panel illuminate to indicate operation of the limiters.
8: Link LED: This indicates if the channel is linked to its immediate neighbour. If this is illuminated, the
attenuation control of the channel to the immediate right will not function as both channels are being fed
from the left hand channel. The link switches are on the rear panel.
9: PRC LED: This illuminates if the Power Reduction Control has been enabled on the respective channel. PRC
switches are on the rear panel.
E11EVEN SOUND \ D series amplifiers \ User’s Manual

REAR PANEL
E11EVEN SOUND \ D series amplifiers \ User’s Manual
8
1: Input XLR sockets: Connect signal inputs to these sockets, wired pin 2 hot, 3 cold, 1 ground. For
sensitivity and impedance of these inputs, please see the specifications on page 11. When running in
bridged (mono) mode, only input A is used (except D-100).
2: D-10 & D-20
Channel A output Speakon socket: Normal output is on pins 1+ hot, 1- cold. Channel B's output is also
wired to this socket to enable a single NL4 to provide both channels and to facilitate easier wiring in bridged
mode. Channel B is wired pins 2+ hot, 2- cold. Channel B output Speakon socket: Normal output is on
pins 1+ hot, 1- cold.
D-100
Channel A output Speakon socket: Normal output is on pins 1+ hot, 1- cold. Channel B's output is also
wired to this socket to enable a single NL4 to provide both channels and to facilitate easier wiring in bridged
mode. Channel B is wired pins 2+ hot, 2- cold. Similarly channel C's output Speakon socket carries Channel
D's output. Check the table on the rear panel for details.
3: D-10 & D-20
Bridged (Mono) switch: Depress this switch to run the amplifier in bridged mode. Note that the output must
be taken from channel A's output Speakon connector, on pins 2+ hot, 1- cold.
D-100
Bridged (mono) switch (A+B): Press this switch to run this pair of amplifier channels in bridged mode. To run
C+D bridged, press the switch on the far left of the panel, beside channel D's input XLR.
4: Mains inlet (only D-10) & Power Cord.
5: Fan outlet: The variable speed fans suck air in through the front vents and out through the back of the
amplifier.
6: Link out XLR sockets: These are passively connected directly to their respective inputs to allow for parallel
input connections to other amplifiers. As such, they will function even if the amplifier is turned off.
7: Mains Fuse (only D-10).
4
98
7
6
6
5
5
5
5
4
4
3
3
3
2
2
2
1
1
1D-10
D-100
D-20

CONNECTIONS
INPUTS
The inputs are made via 3-pin XLR connectors, which are electronically balanced and should be connected via a
high grade twin core screened cable, as follows:
PIN2 - Hot (signal +). Signal Hot.
PIN3 - Cold (signal -). Signal Cold.
PIN1 - Screen (see note).
Connected to the chassis of the unbalanced equipment or left disconnected at the unbalanced end.
The amplifier is designed to operate with fully balanced equipment and ground loops or loss of performance
may be experienced if connected to unbalanced sources.
NOTE: This amplifier is wired to the latest industry recommendations. PIN1 is connected directly to the chassis/-
mains earth. If ground loops (mains hum) are encountered remove the screen connection from the other end of
the cable and leave it open circuit. If problems persist, consult your dealer/supplier.
DO NOT TAMPER WITH OR ALTER ANY GROUND (EARTH) CONNECTIONS INSIDE THE AMPLIFIER.
D-10 & D-20: For bridged operation input should be made to channel A only and the rear panel switch set for
bridged mode. Channel B will then be fed out of phase with channel A.
D-100: For bridged operation input should be made to channel A (or C) only and the rear panel switch set for
bridged mode for the appropiate pair of channels.
OUTPUTS
The speaker outputs are via Neutrik Speakon connectors. Only 2 of the 4 poles are used. 2 pole (NL2FC) or 4 pole
(NL4FC) connectors can be used. Terminations are as follows :
HOT Pin +1
COLD Pin -1
Additionally Channel A Speakon connector carries Channel B output on Pins +2 & -2 to allow easy bi-amping or
bridged operation.
HOT Pin +2
COLD Pin -2
NOTE: 1.- Although the "cold" output terminals are nominally at 0V., they should not be joined together,
otherwi-se cross-talk may be introduced. 2.- Because the currents involved are very high, the speaker cables
should conform to the following minimum requirements, otherwise the losses will cause the cables to get hot
and audio power will be reduced: D10 - 12A, D20 - 16A, D100 -20A - all into 4ohm speaker loads.
NOTE: Do not connect the inputs/outputs to any other voltage source such as a battery, mains source or power
supply, regardless of whether the amplifier is turned on or off. Do not run the output of any amplifier channel
back into another channel's input and do not parallel or series-connect an amplifier output with any other
amplifier output.
LINK SOCKET
Each channel is provided with a 3-pin XLR connector marked 'LINK' which allows the input signal to be linked to
further amplifiers etc. The connections are the same as for the input XLR.
BRIDGED (MONO) OPERATION
Use centre Speakon connector marked 'BRIDGED' and connect as follows:
HOT Pin +1 (Channel A - IN PHASE)
COLD Pin -1 (Channel B - OUT OF PHASE)
When operating in bridged mode, the minimum impedances are doubled. The minimum load in bridged mode
is: D-10: 4 ohms, D-20: 4 ohms, D-100: 4 ohms
E11EVEN SOUND \ D series amplifiers \ User’s Manual 9

Only D-100:
Additionally Channel A Speakon connector carries Channel B output on Pins +2 & -2 to allow easy bi-amping
or bridged operation using a single NL4 connector. Similarly, Channel C's Speakon connector also carries
Channel D output.
Output Connector A Output Connector C
Pin 2+: Hot Ch.B Pin 2+: Hot Ch.D
Pin 2-: Cold Ch. B Pin 2-: Cold Ch. D
For bi-amped operation, connect as above.
There must be no shared connections between channels.
Negative output terminals must not be joined together as they are not both at ground potential.
Connecting them together will damage the amplifier and void the warranty!
As the currents involved are very high, and to ensure best performance, the speaker cables should be kept
as short as possible and conform to the following minimum requirements (D-100, 20A into 4 Ohm speaker
loads).
When operating the amplifier into loads of less than 4 Ohms, be aware that the current capacity of the
speaker cables will need to be increased above the values quoted here.
Do not connect the inputs/outputs to any other voltage source such as a battery, mains source or power
supply, regardless of whether the amplifier is turned on or off.
Do not run the output of any amplifier channel back into another channel's input and do not
parallel or series-connect an amplifier output with any other amplifier output.
Pairs of channels may be independently bridged – channel pair A&B, and/or channel pair C&D.
The method is the same for both channel pairs:
Supply signal to Channel A or C input only and push in the appropriate rear panel switch marked “BRG A&B”
or “BRG C&D”.
Use Channel A or C's Output Speakon connector and connect as follows:
Pin 2+: Hot
Pin 1-: Cold
When operating in bridged mode, the minimum impedances are doubled. The minimum load in bridged
mode is 4 ohms.
Changing the Gain of Your Amplifier: Internal Adjustments!
These instructions are for use by qualified personnel only. Before any routine maintenance, please ensure
that your amplifier is disconnected from the mains supply!
Gain/Sensitivity Settings (D-100)
Adjustment is by moving a link on the input PCB (PCB741) – one link for each channel. Channel A's link is
number 1, channel B's is number 2 and so on. The gain may be set to 26, 32 or 36dB (factory setting).
10

Remember, setting higher gain does not change the maximum available power but changes the level of
signal input to achieve maximum power. In any case, provided that the input signal is less than 20dBu/7.7V,
the built in limiter circuit will prevent distortion within the amplifier.
The gain should be set to match the signal level from the source – mixer, equaliser etc.
Note: The gain of D-10 is fixed to 32dB. The gain of D-20 is 32dB (factory setting) or 36 dB by internal link.
E11EVEN SOUND \ D series amplifiers \ User’s Manual
Parameter (Units) D-100 D-10 D-20
8 ohms 1400 450 625
4 ohms 2800 750 1150
2 ohms 3700 1150 2100
8 ohms 5300 1500 2300
4 ohms 7400 2300 4200
Additional Specifications
THD+N:(%)(4 ohms)@1kHz (@1dB below max output power) < 0,08 0,008 0,008
THD+N:(%)(4 ohms)@20Hz to 20kHz (@3dB below max output power) < 0,15 0,03 0,03
Gain Options (dB): 26/32/36 32 32/36
Sensitivity Options (for maximum power) (dBu): 16/10/6 3,5 7.5/3.5
Sensitivity Options (for maximum power) (Volts): 4.9/2.5/1.5 1,2 1.8/1.2
Frequency Response - 20Hz to 20kHz (dB): ±0.5 +0 / -0.5 +0 / -0.5
Input Impedance - Active balanced (k ohms):
Input CMRR (dB):
Hum & Noise (dB below max output): -105 -104 -106
Damping Factor: into 8 ohms:
Output Circuitry: D AB AB
Power Consumption: Nominal @ 240v (4 ohms)(A): 7 1,9 2,8
Power Consumption: Nominal @ 120v (4 ohms)(A): 14 3,8 5,6
Dimensions (mm): H x W x D: 88x482x460
Dimensions (in): H x W x D: 3,5x19x18,2
Weight: (Kg): 12 13,8 20,42
Weight: (lb):
Output Power (per channel) (Watts) (Crest Factor of 4.8)
26,4 30,36 44,92
Output Power (bridged) ( Watts)
20
>60
>400 @1kHz>200 @100Hz
3,5x19x16,9
88x482x428
SPECIFICATIONS
11

APPENDIX I
T LINE - OPERATING INSTRUCTIONS (Only D-10)
The T Line chassis can be configured with up to 4 transformers of 500W at 100V output, 4 ohms input.
Other specifications (70V/50V) are available to special order.
The power rating of each channel is printed on the rear panel.
The connections are via 4-pole SPEAKON connectors (NL4FC).
INPUTS (4 ohms) are: +1 = HOT, -1 = COLD
OUTPUTS (100V) are: +2 = HOT, -2 = COLD
THERE ARE NO USER-SERVICEABLE PARTS INSIDE AND NO MAINTENANCE IS REQUIRED.
IN THE EVENT OF A FAILURE, REFER TO A QUALIFIED SERVICE ENGINEER.
Parts are available from DAS Audio Group S.L.
TECHNICAL SPECIFICATION
LINET
Rated power handling
@ input impedance - 4 Ohms
Output Impedance rated
Frequency response
Distor (tion THD)
Weight (each)
Dimensions (mm) -2U
500W
@ 100V (Standard)
70@ V (Special)
50@ V (Only)
50Hz - 16kHz
50Hz 16kHz-
Chassis only
500 trW ansformer
20.0 Ohms
9.8 Ohms
5.0 Ohms
± 1dB
<0,03%
12 Kg
2. Kgs8
88 x 482 x 428 mm
When mounting the amplifier in a rack or enclosure, ensure that the rear of the unit is adequately
supported. The brackets which are supplied fit standard 19 inch (483mm) rack mounting systems.
THE FRONT PANEL IS NOT CAPABLE OF SUPPORTING THE UNIT ON ITS OWN.
(The general D-10 safety warnings, precautions and service advice also apply to the T LINE)
E11EVEN SOUND \ D series amplifiers \ User’s Manual 12

APPENDIX II
INSTRUCTIONS FOR USING D-10 AMPLIFIERS WITH 100V/70V LINE TRANSFORMERS
Frequency response
It is necessary to provide some low frequency roll off to prevent the possibility of the line
transformer saturating.
On the D-10 the roll off is included on the main board as standard. To bring the 63 Hz roll off
into circuit, remove the 4 jumper links at 'hpf'.
The response must be at least -3dB at 70 Hz and roll off at minimum 12dB per octave.
LINE TRANSFORMER LEAD OUTS
500W single 100V winding:
Primary: Orange = +ve, Black = -ve (4 ohms)
Secondary: Yellow = +ve, Grey = -ve (100V)
Blue = centre tap, for monitoring purposes only
Note:
D-100 will give you 100V line out at the terminals.
D-20 will give you 70V line out at the terminals.
E11EVEN SOUND \ D series amplifiers \ User’s Manual
13

Power Consumption and Thermal Emissions: D-100
PRC Settings and Maximum Output: D-100
Mains
(V)
Load
(R)
Current Draw
(A)
Thermal Emissions
(W)
No Sig’l Light Average Heavy No Sig’l Light Average Heavy
240 8 2.1 3.0 4.5 8.3 504 528 566 660
240 4 2.1 3.9 7.0 14.4 504 551 628 816
240 2 2.1 4.5 8.6 19.1 504 564 668 936
120 8 4.2 6.0 9.0 16.6 504 528 566 660
120 4 4.2 7.8 14.0 28.8 504 551 628 816
120 2 4.2 9.0 17.2 38.2 504 564 668 936
Power Reduction Control Setting Per Channel Bridged Pair
Maximum Power into 8 ohms (W) 1400 5300
-2dB PRC 980 3700
-4dB PRC 560 2100
-6dB PRC 310 1175
Maximum Power into 4 ohms (W) 2800 7400
-2dB PRC 1950 5160
-4dB PRC 1110 2940
-6dB PRC 620 1640
Maximum Power into 2 ohms (W) 3700 N/A
-2dB PRC 2580 N/A
-4dB PRC 1470 N/A
-6dB PRC 820 N/A
APPENDIX III
No Sig'l = Quiescent, Light = Crest Factor of 7.8(18dB),
Average = Crest Factor of 4.8(14dB), Heavy = Crest Factor of 2.8(9dB)
For details of measurement methods please refer to the Technical Support area of our websit
14
E11EVEN SOUND \ D series amplifiers \ User’s Manual

www.11sound.com
This manual suits for next models
3
Table of contents
Other DAS AUDIO Amplifier manuals
