Bricasti Design M25 User manual

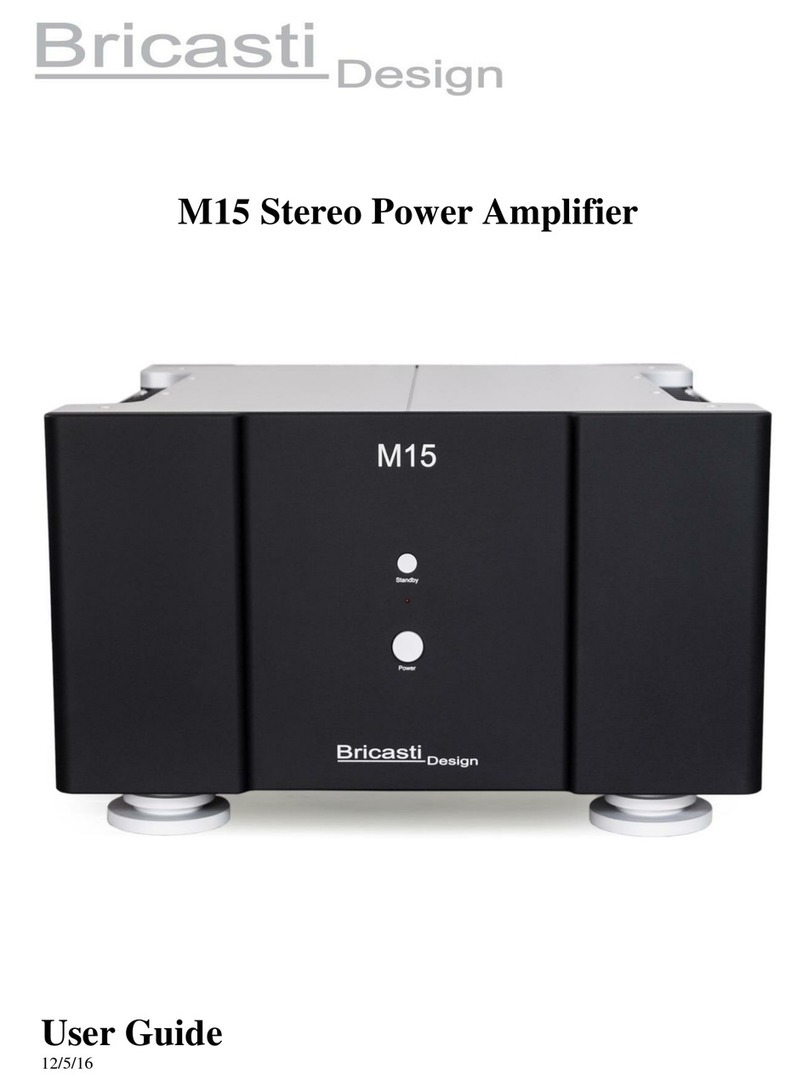
M15 Stereo Power Amplifier
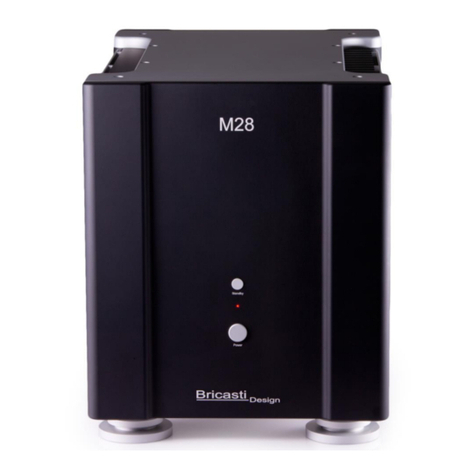
M25 Dual Mono Power Amplifier
Combined User Guide
1/2/19


Conformity
EMC / EMI
This equipment has been tested and found to comply with the limits for a Class B digital device, pursuant
to part 15 of the FCC rules. These limits are designed to provide reasonable protection against harmful
interference in residential installations.
Canadian Customers
This Class B digital apparatus complies with Canadian ICES-003.
Cet appareil numerous de la classe B est conforme a la norme NMB-003 du Canada.
Certificate Of Conformity
Bricasti Design, 123 Fells Ave., Medford MA, USA, hereby
declares on its own responsibility the following products:
M15/M25
-that is covered by this certificate and marked with the CE-label
conforms to the following standards:
EN 60065 Safety requirements for mains operated electronic
and related apparatus for household and general
use
EN 55103-1 Product family standard for audio, video,
audiovisual and entertainment lighting control
apparatus for professional use. Part 1: Emission
EN 55103-2 Product family standard for audio, video,
audiovisual and entertainment lighting control
apparatus for professional use. Part 2: Immunity
With reference to the regulations in the following directives:
73/23/EEC, 89/336/EEC
January 2019
Brian S Zolner
President
i

Introduction
This is a combined M15 and M25 user guide covering theory of design and setup and use. In the future
you can always find the latest version available at our web site www.bricasti.com.
Congratulations on the purchase of your new power amplifier. We at Bricasti Design have set out to design
the world’s finest audio products made for the professional and consumer audio markets. The M15 is a
stereo power amplifier and the M25 is a dual mono version of it, this manual will cover operation of both
products.
Balanced Topology
The M15/M25 power amplifiers are a true reference design in analog power amplification, an
uncompromising design based on our M28 mono blocks, offering extremely low distortion with moderate
power and a unique truly balanced topology rarely seen in the industry. When combined with our M1 DAC
or M12 Source Controller driving the M15/M25 one can achieve a fully differential signal path, from the
converter to the loudspeaker.
Build Quality
The M15/M25 is robustly constructed of milled and CNC machined aluminum sections. There is no typical
bent metal chassis and top cover found on most products. All sections of the construction, the front and rear
panels, the sides and even the bottom and top plates start out as solid blocks of aluminum which are
precision machined to shape, with exact tolerances for a perfect fit. These parts are then anodized and the
text and markings are laser etched for a clean and enduring look.
The Sound
The intention of the M15/M25 is to provide state of the art analog power amplification, utilizing the best
designs and materials that can be found today. The power amplifier is a very critical part of audio chain, it
has to take the incoming signal and amplify it and most important to deal with the load of the loudspeaker
and control its back EMF with precise control. The sound of the amplifier is intended to be transparent and
revealing, and fully dynamic with no sense of limits and compression in the reproduction, on any
loudspeaker.
Many hours of listening were done to tune the product to an exacting sound, with all types of music, and
with extensive testing done in the studio and in the home. We hope you find the M15/M25 to be pleasing
and enjoyable to hear and use in the home, or as a precision tool for high level reference monitoring for the
professional.
ii

Unpacking and Inspection
After unpacking save all packing materials in the event you ever need to ship the unit. Thoroughly inspect
the product and packing materials for any signs of damage in shipment. Report any damage to the carrier
at once.
Precautions
The Bricasti Design M15/M25 is a rugged device with extensive electrical protection. However,
reasonable precautions applicable to any piece of audio equipment should be observed.
Always use the correct AC line voltage as set by the manufacturer. Refer to the power requirements
section of the manual and adhere to any power indications on the rear or bottom of the chassis. Using
the incorrect AC line voltage can cause damage to your M15/M25, so please check this carefully
before applying power.
Do not install the M15/M25 in an unventilated rack or directly above any heat-producing equipment.
Maximum ambient operating temperature is 40 C. Exceeding the maximum ambient temperature may
cause the amplifier to enter thermal shutdown as a safety precaution.
To prevent fire or shock hazard, do not expose the product to rain or moisture.
Notices
In the interest of continued product development, Bricasti Design reserves the right to make improvements
to this manual and the product it describes at any time and without notice.
Copyright 2019
Bricasti Design LTD
2 Shaker Rd
Shirley MA
+1 978 -25-5349
bricasti.com
All Rights Reserved
This publication is protected by copyright and all rights are reserved.
1

Important Safety Instructions:
Notice!
Read these instructions.
Keep these instructions.
Heed all warnings.
Follow these instructions.
Do not use this apparatus near water.
Clean only with dry cloth.
Do not block ventilation openings; install
in accordance with manufacturer’s
instructions.
Do not install near any heat sources such
as radiators, heat registers, stoves, or other
apparatus (including amplifiers, pre amps)
that produce heat.
Do not defeat the safety purpose of the
polarized or grounded type plug. A
polarized plug has two blades with one
wider than the other. A grounding type
plug has two blades and a third grounding
prong. The wide blade and prong are for
your safety. If the provided plug does not
fit in your outlet, consult an electrician for
replacement of the obsolete outlet.
Protect power cord from being walked on
or pinched.
Use only attachments/accessories
specified by the manufacturer.
Unplug this apparatus during lightning
storms or when unused for long periods of
time.
Refer all servicing to qualified service
personnel. Service is required when the
apparatus has been damaged in any way,
such as by being dropped, exposed to rain,
liquid being spilled on it, or otherwise
does not operate normally.
Service
There are no user serviceable parts inside.
All service must be performed by
qualified personnel.
Warning!
To reduce the risk of fire or electrical
shock do not expose this equipment to
dripping or splashing water and ensure
that no objects such as vases are placed on
the equipment.
This apparatus must be earthed.
This equipment requires the correct AC
line voltage as set by the manufacture
and is not auto sensing or scaling.
Use a three-wire grounding-type line cord
like the one supplied with this product.
Be aware that different operating voltages
require the use of different types of line
cords and attachment plugs.
Check the voltage in your area and use the
correct type. See table below:
Voltage
Line plug standard
110-125V
UL817 and CSA C22.2 no 42
220-230V
CEE 7 page VII, SR section 107-
2-D1/IEC 83 pg C4
240V
BS 1363 of 1984
Specification for 13A fused
plugs and switched and
unswitched outlet plugs
This equipment should be installed near
the socket outlet and disconnection of the
device should be easily accessible.
To completely disconnect from AC mains,
disconnect the power supply cord from
the AC receptacle.
Do not install in a confined space.
Do not open the unit -risk of electrical
shock inside.
Caution
You are cautioned that any change or
modification not expressly approved in
this manual could void your authority to
operate this equipment.
2

M15/M25 Operational Overview
Front Panel
The front panel has 2 buttons and an LED. The larger lower button is the primary power on/off pushbutton
switch, above this is a red LED power on and status indicator, and at the top a momentary stand-by switch
that will set the amplifier in to an idle mode with low power consumption and then to standby with full
power.
Rear Panel
At the rear there are 3 sections, at the top you will find the analog audio inputs, XLR connector for
balanced and RCA connectors for unbalanced. In the center section are the speaker output terminals, and
the lower section with the trigger in/out, RS422 port, input trim control and AC inlet connectors.

3
Setup and Operation
Important Safety Note about AC power and the M15/M25
The AC power is connected at the rear of the unit IEC type 15A AC inlet and the mains power switch is
located at the front panel. This is a filtered inlet and helps provide clean AC power to the amplifiers power
supplies and will prevent any RF and noise from entering M15/M25 power grid. Take note that because
the M15/M25 is a fully analog amplifier it utilizes linear power supplies and care should be taken to use
only the power range indicated on the unit, otherwise damage may occur to the power supplies and other
circuits in the amplifier. Please note and adhere to any voltage indications on the outer box, rear panel or
chassis all of which will indicate how the product is set at manufacture. As added protection the M15/M25
power supply will sense the AC power range and if the applied power is not within + 10 or –15% of the
factory set voltage the amplifier’s power supply will not allow for power up operation and will not enter
into full standby mode.
Making Connections to the M15/M25
Speaker Cables
Install the speaker cables first. We recommend the use of high quality speaker cables with spade or ring
lugs that will fit the M15/M25s binding posts. These are set 2x standard spacing and can easily accept
most connector types and accept banana type connectors as well. Note that the polarity is marked on the
rear panel and use the thumb screws to apply a firm connection, taking care not to over tighten them.
Interconnect Cables
We recommend the use of high quality balanced XLR cables with M15/M25 when using the balanced input
or an unbalanced RCA cable when using the unbalanced input. The amplifier is a true balanced amplifier
and best performance can be realized if using the amplifier with a balanced source. For convenience we
also provide unbalanced RCA inputs, but when using the unbalanced inputs it is recommended that a XLR
shorting plug be used on the balanced input, this will correctly terminate the balanced input for best
performance. This plug connects pin 1 to 3 in the XLR connector and is supplied with the product ship kit.
AC power cord
The product is supplied with a high quality power AC cord tipped with a 15-amp IEC connector that meets
all safety requirements. You may use different power cord providing it meet or exceeds all safety
requirements noted elsewhere in this manual.
4

Power Up/Power Down
Once all your cables are connected to the M15/M25 it is time to power up.
Power Up Sequence
Stage 1 System Idle Mode:
The M15/M25 has a dedicated front panel AC mains power switch, this is a latching push button type
switch and pressing it in will connect AC power to the first stage of the power supply. This stage senses
the AC inlet power voltage and if within the + 10% or -20% range of rated operation will allow for the next
stage of power up.
To operate, press the switch to the inward or on position and the LED will light up and flash at a rate of
about 1 per sec, the ampfiers now in idle and will consume about 2W of power. You will hear the power
relays click when this state is activated.
Stage 2 System Standby Mode:
Next, a quick press of the momentary stand by button and you will hear a relay click when the button is
pressed and in a few moments you will hear the relays again as the M15/M25 enters standby. Once engaged
into standby mode the LED should start to blink at 1/3 the idle rate, so a faster blinking of the LED than
idle. The amplifier is now fully powered up but the inputs are muted. This state can be used for pre
heating the amplifier before use, in this state it will consume about 60W. If in the event there is a fault
found in the initial power on and idle mode then the M15/M25 will not enter into standby.
Stage 3 System ON Mode:
A quick press of the standby key again and the inputs will be unmuted and the amplifier will be ready for
play. You will now see the LED as solid and hear a click of the input relays and audio can now pass.
Recommended Power Down Sequence
It is recommended that you first put the M15/M25 into standby before initiating a hard power off from the large
front panel AC power switch. We have taken great care in the way the amplifier behaves on power down to
eliminate the possibly of noise at the outputs when power is suddenly removed but there may be a possibly that this
could happen. So if possible place the amplifier into standby first as this will mute all inputs and outputs and insure
a clean safe power off.
Placing the M15/M25 Back to Standby
A quick press of the standby key from the running state will set the amplifier into STANDBY mode, you
will hear the relays click and the front panel LED will be flashing at the 1/3 speed. It is now safe to power
off the M15/M25 by either the front panel power switch or and external one.
Back to Idle Mode
A long press of about 2 seconds on the standby key from either the on and running state or from standby
state will place the amplifier in IDLE mode. As described in the power up sequence a quick press on the
button again will put the amplifier back in standby, and press again to go back to run mode.
5

Additional Features of the M15/M25
Trigger In:
On the lower section of rear panel the M15/M25 has a stereo connector (Tip/Ring/Sleeve) for triggering the
amplifier into standby mode from an external device like a preamp or other external remote control. Sleeve
is connected to chassis ground, Tip/Ring is the input +/-. The amplifier will go in and out of standby when
it has a positive 5V or 12V DC voltage between tip/ring, this system is implemented on our M12 source
controller.
RS422 Port
On the lower section of rear panel the M15/M25 the rear panel you will find a DB9 connector for a RS422
serial port. This is currently only used for system diagnostic monitoring and has no use for the user.
Trim Control
A unique feature of the M15/M25 is an input trim control. This can be used to lower the input sensitivity of
the amp to better match the outputs of a pre amp or more importantly the outputs our M1 DAC when using
it to drive the amplifier directly with no preamp. This attenuator is set by a logic controlled relay switch
and is adjustable in 6 db steps. The M15/M25 is shipped with no attenuation or the switch set full
clockwise. The switch is stepped with detents; by using a small screwdriver and turning the switch
counterclockwise, will add more attenuation from the factory default position of no attenuation. There are
4 steps of 6 db each so a full 18db of attenuation can be applied to the input.
Using the trim control
This stepped analog attenuator is of great use when using the outputs of the Bricasti M1 or other DAC to
directly drive the M15/M25. In this case the M1 has a digital level attenuator and use of such an attenuator
can be done with exceptional results provided there is good analog gain matching with the power amplifier
and this will vary with the combination of DAC/power amp/speaker setup. This means using the digital
attenuator to the minimal amount needed to have good range level control range, and least loss of low level
bit resolution. In practice this means the most dynamic recordings will have the M1 doing only a few db of
gain reduction in the digital domain..
This makes for a simple setup with the M1or other source, one only has to connect the balanced output of
the M1 directly to the M15/M25 and then make any fine tune the gain at the rear of the M15/M25 to the
best range. All gross amounts of attenuation are done in the analog domain and the upper level of about
20db is done at the M1 digital attenuator there by maximizing the advantages of each.
6

Audio Performance
The typical audio performance specs of the M15/M25 are outstanding:
Total Harmonic Distortion: Less than 0.005% 20hz-20kHz at full rated power in to 8 ohm and 4 ohms.
M15 Power: 125 W into 8 ohms 250W into 4 ohms 500w into 2 ohms
M25 Power: 150 W into 8 ohms 300W into 4 ohms 600w into 2 ohms
Frequency response: 10hz-150kHz, within 0.5db
Gain: 27 db
Signal to Noise: greater than 85db at full rated power
Topology: Fully Differential
Balanced Input: XLR connector 200k ohm impedance
Unbalanced Input: RCA connector 100k ohm impedance
General Specifications
EMC
Complies with: EN 55103-1 and EN 55103-2 FCC part 15, Class B
RoHS
Complies with: EU RoHS Directive 2002/95/EC
Safety
Certified to: IEC 60065, EN 55103-2
Environment
Operating Temperature: 32 F to 105 F (0 C to 40 C)
Storage Temperature: -22 f to 167 F (-30 C to 70 C
General
Finish: Anodized Aluminum
Dimensions: 16.75”” wide, 10.25” high, 18” deep
Weight: 100 lbs
Shipping Weight: 110 lbs
Mains Voltage set at factory: 100, 120, 220, 230, 240 VAC, 50 Hz –60 Hz
Trigger In: TRS connector for 5V external trigger.
Power consumption: 60W standby, 2W idle
Warranty parts and labor: 5 yrs limited
M15/M25 Limited Warranty
Bricasti Design warrants the M15/M25 against manufacturing defects for 5 years from date of purchase from an
authorized Bricasti Design dealer.
1. The warranty covers only new products purchased from a Bricasti Design dealer or Distributor.
2. The warranty is nontransferable, valid for the original purchaser.
3. All service must be performed by an authorized Bricasti Design Dealer or Distributor
4. For USA customers, if the product is shipped back to Bricasti Design for warranty service, the customer
pays for inbound shipping costs and Bricasti Design will pay for the return shipping.
5. Customer must provide proof of purchase to be eligible for warranty service.
6. All international customers must contact their local distributor for service.
7

Copyright 12/2014- Bricasti Design Ltd.-123 Fells Ave,- Medford MA 01255 USA
This manual suits for next models
1
Table of contents
Other Bricasti Design Amplifier manuals
