Installation Guide - High Performance 3.5" SCSI Hard Disk Enclosure Kit - Rev 1.0 - Nov. 2000 - PN - CN3310CX - Page 2 of 2
Figure 5
Copyright 2000 by DataStor, Inc. All rights reserved. No part of this document may be reproduced in any form
without prior written consent from DataStor. The information and specifications in this document are subject to
change without notice. Changes to this document are incorporated in new versions.
DataStor,and theDataStor logoare reqisteredtrademarks ofDataStor, Inc. Othertrademarks usedherein arethe
property of their respective owners. This document was printed in the United States Of America.
12601 Monarch Street
Garden Grove, CA 92841-3918
800-777-6621 Fax: 949-833-9600
Installing The Hard Disk
Note: If you are not familiar with the location of ALL the listed
items, refer to hard disk user's guide / manufacturer
beforecontinuing.
- SCSI connector.
- Power connector.
- LED (Activity) light pins/port.
- SCSI ID pins and pin #1.
Installing The Cables
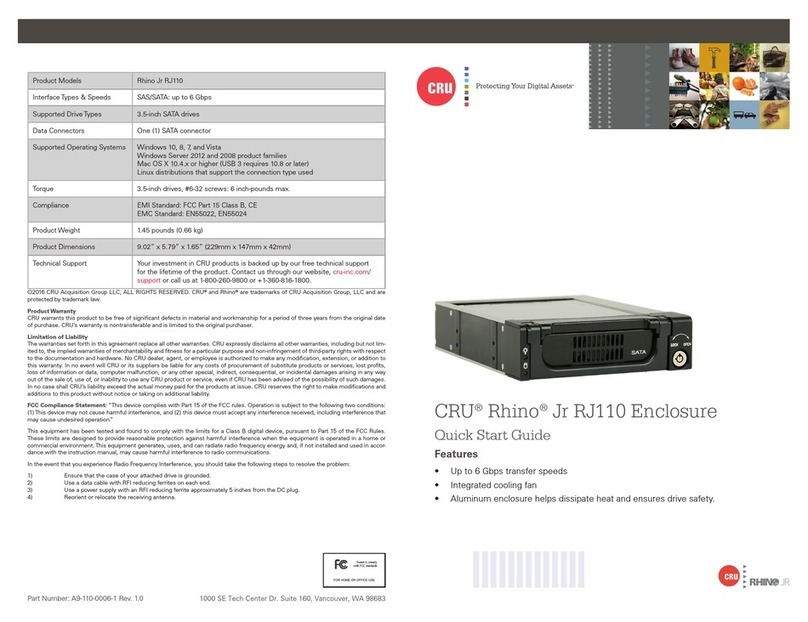
1. If the SCSI ID Cable (Figure 6) has not been connected to the
SCSI ID Switch install it with the RED wire towards the bottom
(Figure 6).
2. LocatetheSCSIID Pins onyour hard diskand connect theSCSI
ID cable to them (Figure 6). Make sure the RED wireconnects
to Pin #1 on the hard disk.
Note: If the wire colors differ from what is shown in Figure 6,
attach the SCSI ID cable to the SCSI ID switch with the
missing wire toward the top. Take the bottom wire and
followittotheothersideoftheSCSI ID cable and connect
it to the hard disk SCSI ID Pin #1.
3. Locate the LED Light connector on your hard disk. Attach the
Blackwire of the LED Lightcable to the negative leadof the LED
Light connector and the White wire to the positive lead of the
LED Light connector.
Note: Many user's guides do not call out the negative and
positive leads of the LED Light connector on the hard
disk. If Disk Activity Light (Figure 3) is not operating,
simply reverse the connectios inside the hard disk
enclosure. This process will not cause damage.
4. Connect the SCSI cable and Power cable (Figure 5). The
connectors on both of these cables are "keyed" and will only
allow for proper installation.
Finishing The Installation
1. Mountthehard disk tothe bottom of the enclosure using the four
(4) screws provided (Figure 5).
2. With the air vents towards the front, hold the cover in your left
hand. Hold the slide-out mounting tray with your right hand.
3. Slide mounting tray into the cover until the front of it snaps into
place against the cover.
4. Reattach rubber feet to the bottom side of the enclosure using
the screws removed in opening the enclosure (Figure 4).
Power
Cable
Hard
Disk SCSI
Cable
SCSI ID
Cable
LED
Light
Cable
Figure 6
SCSIIDCableWireColor SCSIID#
Black GroundPin
Red 1 - Signal Pin
Yellow 2-SignalPin
Blue 4-SignalPin
Orange 8-SignalPin
SCSI ID
Cable
Black
Blue
16Position
SCSI ID
Switch
SCSIJumperPins(OnHardDisk)
Yellow
Red(ToJumperPin#1)
42
1
Orange
8
