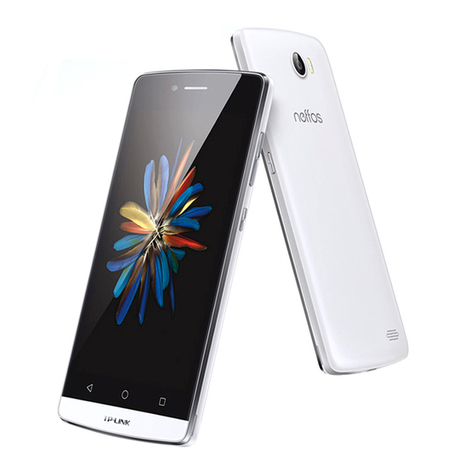
Datawind POCKET SURFER 3G5 User manual

The user manual
Model:3G5
Brand: POCKETSURFER3G5

I
Welcome you choose to use this phone, you can read this manual, a
comprehensive understanding of the use of the phone, appreciate the
perfect function and the introduction of the operation method. Declaration:
this manual are only as a guide for product use, does not represent a
software and hardware configuration of product, product and accessories
may vary from area to area. This phone is double card double stay mobile,
applicable to GSM/GPRS/EDGE network environment, some functions
need the support of network operator or service provider, details please
see the user manual. To ensure your safety use, please read the "safety
instructions"。
Directory
1. KNOW YOUR MOBILE PHONE ············································ 1
KEY DESCRIPTION ······································································· 1
START USING THE EQUIPMENT················································· 4
INSTALLUSIM/SIM CARD AND BATTERY······································ 4
CHARGE BATTERY ····································································· 8
START UP AND SHUTDOWN ·································································· 9
PASSWORD ············································································ 9
PIN··································································· 9
PIN2 ·································································9
PUK and PUK2 ····················································· 10
2. QUICK START GUDE ······························································· 11

II
TURNED ON AND OFF THE SCREEN············································ 11
LOCK AND UNLOCK···································································· 11
COLUMN NOTICE ······································································ 12
APPLICATION MENU ·································································· 12
Open and switching applications························· 12
Run··································································· 13
3. DIAL················································································· 13
MAKE AND RECEIVE CALLS ··························································· 13
making a call····················································· 13
answer calls······················································ 13
CONTACT ············································································· 14
CALL LOG ············································································ 14
All calls·························································· 14
Received calls ·················································· 14
Dialed numbers ·················································· 14
Missed calls ····················································· 14
4. BACKUP AND RESTORE ···························································· 15
5. E-MAIL·············································································· 15
SET UP EMAIL ACCOUNT······························································ 15
CHECK AND READ EMAIL······························································ 15
6. BROWSER ············································································ 15
VIEW THE WEB PAGE ·································································15
OPEN WEBSITE ······································································· 15
7. GOOGLE·············································································· 16
8. SEARCH·············································································· 16
9. MUSIC ··············································································· 16
TO SEARCH FOR MUSIC······························································· 16
ADD/REMOVE MUSIC ·································································· 16
10. SOUND RECORDER·································································· 16

III
11. MESSAGING ········································································· 17
SEND AND RECEIVE MESSAGES ······················································· 17
Send SMS ··························································· 17
Cmppdeliver ······················································· 17
12. CALENDAR··········································································· 17
VIEW CALENDAR ······································································ 18
ADD AN EVENT ······································································· 18
13. GALLERY ············································································ 18
LOOK AT PHOTOS AND VIDEO························································· 19
DELETE THE PHOTOS AND VIDEO····················································· 19
SLIDE SHOW·········································································· 19
SHARE PHOTOS AND VIDEO ··························································· 19
SET AS WALLPAPER ·································································· 20
14. CAMERA·············································································· 20
TAKE PHOTOS AND VIDEOS ··························································· 20
take photos ······················································· 20
videos ······························································ 20
LOOK AT PHOTOS AND VIDEOS························································ 21
15. VIDEO PLAYER ····································································· 21
VIDEO VIEW ·········································································· 21
16. TODO················································································· 21
Add, delete, and edit memo·································21
Add a new item ················································· 21
Delete items······················································· 21
Edit item·························································· 22
17. FILE MANAGER ····································································· 22
18. DOWNLOADS ········································································· 22
19. CLOCK ··············································································· 22
COUNT DOWN ·········································································· 22

IV
CLOCK ················································································ 23
Add the alarm clock ··········································· 23
Delete the alarm clock········································ 23
SECONDS COUNTER ···································································· 23
20. CALCULATOR········································································ 23
21. STTINGS ············································································ 24
WIRELESS NETWORKS ·································································24
SIM MANAGEMENT··········································································· 24
WI-FI································································ 24
BLUETOOTH ················································································· 24
TRAFFIC USAGE········································································· 25
MORE 25
AUDIO PROFILES ··········································································· 25
DISPLAY···················································································· 26
STORAGE···················································································· 26
BATTERY···················································································· 26
APPS 27
PERSONAL··········································································· 27
LOCATION INFORMATION ACCESS···················································· 27
POSITIONING SYSTEM·································································· 27
SECURITY ·················································································· 27
LANGUAGE AND INPUT METHOD······················································ 28
BACKUP $RESET··········································································· 28
ACCOUNTS················································································· 28
SYSTEM ············································································· 28
DATE &TIME············································································· 28
POWER-ON BYALARM ·································································· 28
MISCELLANEOUS FUNCTION·································································· 29
DEVELOPER OPTIONS ······································································· 29

V
ABOUT PHONE··············································································· 29
22. PEOPLE·············································································· 29
CREATE A CONTACT······························································ 29
SEARCH CONTACTS······························································ 30
23. FM···················································································· 30
24. PLAY STORE········································································ 30
DOWNLOADING AN APP·································································30
DELETE APP················································································ 31
25. TALK················································································· 31
26. BATTERY MAINTENANCE AND EQUIPMENT MAINTENANCE··· 31
BATTERY MAINTENANCE······························································· 31
EQUIPMENT MAINTENANCE ····················································· 32
27. SIMPLE TROUBLESHOOTING············································· 34

VI
The use of safety instructions, please read the following simple
rules. Violation of these rules may lead to dangerous or violate
the law. Read the complete user manual for further
information。
Make or receive cell phone while driving while
driving: if, please use headphones or parked
before using a cell phone。
Medical equipment: near the mark do not use
wireless devices medical equipment or medical
place, please turn off equipment。
The plane: wireless devices can cause
interference to aircraft flight, please comply with all
restrictions。
During fuel: do not use near the gas station, fuels,
chemicals in this equipment。
Avoid interference blasting: closing device should
be at the scene of the blast, and comply with the
provisions of any relevant。
Interference: all wireless devices may receive
interference, impact performance。
Original accessories: in order to ensure the best

VII
performance, please use the original accessories
and battery, please don't connect incompatible
products。
Waterproof: this mobile phone does not have
waterproof function, please pay attention to
waterproof, keep the device dry。
Recycling: do not burn equipment battery or the
battery as ordinary garbage disposal. Please
comply with local environmental policy。
Connection: need to connect to other devices,
please read carefully the equipment specifications
to ensure the safety。
Child safety: please put mobile phone, batteries,
small parts, such as place where the children's
reach, lest produce risk。
Data backup: please backup important information
stored in the equipment, in case of loss。

VIII
SOS
SOS:Ensure equipment switched on and in the service
area, call the emergency number, and inform you that your
position。

Know your mobile phone
1
1. Know your mobile phone
Key Description
Key
functional description
Home Key
Any interface click the Home button to
switch to the main interface by default;
Click on the time, long in the near future.
power
Long press for 3 seconds to start up and
shut down; On the short press to close the
screen backlight。
Volume key
+
To speak when adjusting call volume;
Standby adjust phone volume; In the menu
long press to return to the main menu
interface。
Volume key
-
To speak when adjusting call volume;
Standby adjust phone volume; In the menu
long press to return to the main menu
interface。

Start using the equipment
4
Start using the equipment
installUSIM/SIM Card and battery
In before install or remove the SIM/USIM card and
battery, please make sure the power supply, cell phone has
shut down. USIM/SIM card provided by the service provider, it
can store some basic data, such as contact name and phone
number, etc. Pay attention to some UIM/may SIM CARDS and
mobile phones don't match, please consult the service provider
to replace. This original lithium batteries are included in the
mobile phone, do not attempt to open or repair the battery, can
only use the product specified by the battery. Battery is
influenced by many factors, including network configuration,
signal strength, operating equipment when the environment
temperature, the use of voice or data communications and
other program usage.
In order to avoid to ignition and combustion: - do not
open or repair the battery itself. - don't break down, squeezing
and Pierce the battery, not short meet battery outside of the
joint, more do not put it into the fire or into the water. - don't
exposed to more than 40 C temperature environment. - can
only use the product specified batteries for replacement. -
please correct battery, do not arbitrarily discarded.

Start using the equipment
5
open the back:
(1) Confirm phone closed, if the phone open, please hold
the power key about 3 seconds, 】to turn off the phone。
(2) Equipment to the back, with his hands push up can
open the back cover。
Take out the battery:
(3) From here is outstanding, lift up and remove the
battery。

Start using the equipment
6
install SIM block:
(4) According to the direction of graphic insert USIM/SIM
card slot。
This cell phone support GSM dual SIM card, only need to
insert the SIM/USIM card corresponding card slot can be
normal use.
Install battery:

Start using the equipment
7
(5) The battery metal contact with the battery connector PIN
feet alignment. As shown in the first battery connector on one
side, and then gently will click on the other side。
(6) The final reinstall the battery cover。
Before install the battery, be sure to check whether the
battery reverse, pay attention to the alignment battery
connector PIN the feet.
Install the memory card
Install memory card to expand other storage space (the
machine use MicroSD memory card) 。
(1) Install memory card: open the back cover, the MicroSD card with
gold contact side, according to the graphic direction, can be inserted into
the card slot。

Start using the equipment
8
(2) Remove the memory card, open the back cover and push down
MicroSD card and remove the MicroSD card。
It is recommended to use original factory standard MicroSD
card or SanDisk MicroSD card, Kingston and other mainstream
brands, use of certain purchased MicroSD card may exist with the
incompatible problem. Please confirm compatibility before you buy.
MicroSD card belongs to the tiny objects, please don't let the child
contact MicroSD card, in order to avoid the children will be
swallowed its entrance!
Charge battery
Use the travel charger battery: confirmation of mobile phone
batteries. Connect the USB cable and travel charger. Data interface
line mini USB port to connect to the mobile phone, and will travel
charger received standard power outlet. Normal charging, battery
status icon will scroll. The end of the charging display complete
state. After full, please cut off the charger and ac power connection,
and then disconnect the connection with the device.

Start using the equipment
9
Initial several times to use new battery, please after full charge
and full discharge for several times, and for 10 hours, in order to achieve
the best performance. Will damage the batteries run out, please charge
in time, excessive discharge. Mobile phones have slight fever is normal
phenomenon during charging.
Start up and shutdown
Confirmation of mobile phone batteries and battery has
enough power, hold the power key about 3 seconds, 】can be
switched on and off.
password
PIN
PIN PIN (personal identification number) to prevent your SIM card from
being illegally used. Generally the initial PIN number is 1234. PIN
usually provided with SIM card. If three consecutive mistyped PIN code,
you should enter the PUK code to unlock. For details, please contact the
wireless service providers.。
PIN2
PIN2 code into some features require input, if input wrong PIN2 code in
a row, you should input PUK2 code to unlock. For details, please contact
the wireless service providers。

Start using the equipment
10
PUK and PUK2
PUK and PUK2 code may be provided with a SIM card, if three
consecutive input the wrong PIN/PIN2 code, mobile phone will
require you to provide PUK/PUK2 code. If you don't have the
code, please contact the wireless service providers。
If input the wrong PIN number three times in a row, SIM card will
be locked, please contact with network operators to seek help
immediately decoding. Trying to decode may result in the SIM card to a
permanent failure。

Equipment maintenance
11
2. Quick start Gude
Quick start guide will help you to familiar with your mobile
phone as soon as possible, and do some basic operations。
Turned on and off the screen
1. screen off
You can press "power key" to close the screen to save power, prevent the
pressing。
2. Open the screen
To open screen, press the Home button can light up the screen, in the
condition of lock screen press the Home key/power key light screen。
Lock and unlock
To prevent accidental operation of equipment and screen you can lock。
1. LockoutDevice
Short press "power key" lock screen, please note that if you set the system
default or lock screen time of equipment without any operation, the device
will automatically be locked。
2. Unlock the device
Under the condition of lock screen, short press power
key/Home button 】【light screen, unlock icon slipping to
unlock, to the left as the phone records, the right to information,

Equipment maintenance
12
upwards into the camera.Access to the Internet as long as you
open the data connection, the use of the email, browser, maps,
installation, application, market mall。
Column notice
Has not a call with the new information, will be at the top event
notification message indicating bar display screens, a finger from the
event notification indicating column slide down gently, displays all the
message, click the message, to view the new information or call.
Drop-down a note, click in the top right corner of the icon to go in there is
the mobile phone can be quick setup shortcut icon。
Application menu
Open and switching applications
1. If you want to open the application on your phone, please light click its
icon on the main screen;
2. Return to the main screen: click the Home button;
3. Switch to the other main screen: rapid slide your finger to the left or
right. (to the first main screen, can gently press the Home button);
4. You can quickly switch between applications are using; Multitasking

Equipment maintenance
13
also allows some applications running in the background;
5. To view recently used application can long click the Home button for 3
seconds, the screen is displayed recently used applications。
Run
1. Drag to move up or down to scroll the screen;
2. Drag to move finger to scroll will not select or activate any content on
the screen。
3. dial
Make and receive calls
making a call
“Dial "button allows you to quickly access the upper screen: call lo
g, contacts, and digit dialing the keyboard (for manual dialing) to dial"
keyboard ", enter the number, then click "card 1/2" light can make a
phone call
answer calls
When there is a phone call, gently press "answer". If the machine has been
locked, please move the slider. You can also press the center button on the
headset to answer the call. Make calls mute: press "on/off" and
"sleep/wake" button or any volume button。
Table of contents
Other Datawind Cell Phone manuals


