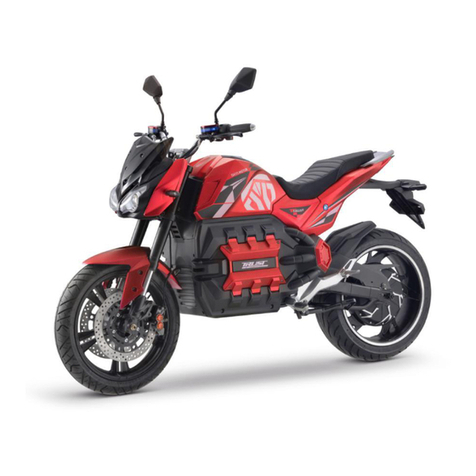
Dayi Motor E-ODIN 2.0 User manual

1
Content
1. Introduction 3
2. Important safety information 3
3. Operating controls and component locations 5
4. Specification 6
5. Each part of the function and operating controls 7
5.1 Headlight 7
5.2 Turn handle & brake 7
5.3 Switch 7
5.4 Lock & turn on 7
5.5 Turn & rear light 8
5.6 Hydraulic shock absorption 8
5.7 Rear brake disc 8
5.8 Shock absorption 8
6. Before riding 9
6.1 How to start the electric scooter 9
6.2 Are you ready to ride? 9
6.3 Pre-ride inspection 9
6.4 Safe riding precautions 9
6.5 Method for correct operation 10
6.5.1 Riding method 10
6.5.2 Parking method 10
6.5.3 Operation method for electricity indication 10
6.5.4 Operation method for power supply lock 10
6.5.5 Turning handle(speed-governing handle) 10
6.5.6 Operation method of the charger and considerations 10
6.5.7 Operation method of the cell and considerations 11
7. Maintaining your scooter 13
8. Maintenance schedule 14
9. Basic maintenance procedures 14
10. Electrical schematic 16
11. Warranty 17

2
1. Introduction
This scooter is ideal for adult riders with the basic experience. Never operate your
scooter on roads (e.g. federal highways or a freeway) on which you violate local
traffic rules and restrictions.
Before riding, please take your time to get acquainted with your scooter and
how it works. Your scooter also needs the necessary care to ensure smooth use. In
addition to regular maintenance, it is important to observe all driving
preparations described in this manual and to carry out regular checks. In this
manual, you will find helpful safety information, instructions, facts and helpful tips.
Read the guarantee page of the manual carefully so that you understand the
guarantee conditions of your scooter and are aware of your rights and
obligations.
2. Important safety information
Your personal safety, and the safety of those around you, is extremely important.
Safeness when you are operating the scooter is a very important aspect.
This information will alert you to potential hazards that could harm you or others.
It is not possible to warn you about all possible hazards associated with operating
and maintaining a scooter. You must use your own good judgment.
The scooter can provide you many years of service and pleasure, provide you
take responsibility for safety, properly maintain your scooter and understand the
challenges you may encounter while riding.
Never allow a child under the age of 16 years to operate this scooter. Use of this
scooter by children under 16 years of age can lead to severe injury or death.
Even youths starting at age 16 or plus may not have the skills, abilities, or
judgment to Operate this scooter safety. Therefore, they should also be
supervised by adults when they train to ride the scooter. Parents should not allow
youth operate this scooter until they have the ability and skills to ride it safely.
THE SCOOTER IS NOT A TOY AND CAN BE HAZARDOUS TO OPERATE.
SEVERE INJURY OR DEATH can result if you don’t follow these instructions

3
DANGER Always Wear A Helmet The following statement is a proven fact:”
Helmets significantly reduce the number and severity of head injuries.” Never ride
your scooter without a helmet. Even a crash at slow speed can result in a fatal
head injury if you are not wearing a helmet.
DANGER Do Not Drink Alcohol And Ride Even one alcoholic drink can impair your
ability to ride a scooter safely. Each drink afterward will make the impairment
worse. Do not drink and ride. Do not let your friends drink and ride.
DANGER Charger Only the charger we offer can be used. Other suppliers charger
maybe can explode. Do NOT use it.
WARNING Ride Within Your Limits Never attempt to ride your scooter in a manner
that is beyond your skill level. It takes time to learn riding skills. Learn to ride your
scooter step by step. Start by practicing on safe terrain at slow speeds and
gradually build your skill level. Instruction from an experienced rider is highly
recommended. Alcohol, drug use, and fatigue will reduce your ability to make
good decisions and ride safety.
WARNING Take Time to Learn and Practice Practice in a safe area until build your
skills and get accustomed to this scooter’s size and weight.
WARNING Keep Away from Moving Parts of the scooter Never place your hands
or any other body part near any moving part of the scooter. Failure to adhere to
this warning many cause physical harm to your body.
WARNING Skidding or Sliding In terrain and on roads, the surface can significantly
affect the likelihood of skidding or slipping. Skidding in a turn is more likely to
occur on slippery surface such as snow, ice, mud and loose gravel. If you skid on
ice you may lose all directional control. To avoid Skidding on slippery terrain, keep
your speed low and drive carefully.
CAUTION Never operate at excessive speed, always at the speed that is proper
for the terrain, visibility and operating conditions, and your experience.
CAUTION Never try risky stunts.
CAUTION Always inspect your scooter each time before you use it make sure it’s
in safe operating condition. Always follow Inspection and maintenance
procedures and schedules described in this manual.
CAUTION Always keep both hands on the handlebar and both feet on the
footboards of scooter during operating.

4
CAUTION Always use the size and type tyres specified in this manual. Always
maintain proper tyre pressure as described in this manual.
CAUTION Preserve the environment and responsibly ride to respect other people
and obey your local laws when you ride it.
CAUTION Please do not charge battery indoors.
3. Operating controls and component locations.
When you ride your scooter on-road, you need to be able to operate the handle,
brakes and other controls without stopping to look at them. Please read this
section carefully you ride your scooter. This section of the manual will describe the
function, location, and operation of all the basic controls of your scooter.

5
4. Specification
1. Overall dimension: 1940 mm*870 mm*1340 mm
2. Wheelbase: 1070 mm
3. N.W.: E-odin 2.0:145kg
4. Tyre: front front 110/70-17 aluminum tyre
rear 140/70-17 aluminum tyre
5. Front brake: Double hydraulic front disc brake with ventilated discs and EABS
Rear brake: Hydraulic rear disc brake with ventilated disc and EABS
6. Max speed: 100 km/hr
7. Distance Range: E-odin 2.0:210KM
8. Max Loading: E-odin 2.0:296kg
9. Battery: E-odin 2.0: 72V 100AH Lithium Battery
10. Charging Time: E-odin 2.0: 10 hours
11. Motor: 6000W

6
5. Each part of the function and operating controls
5.1 Headlight
Turn on the key, Battery capacity,
speed, mileage and Turn light
on the headlight Display will show.
5.2 LED front turn light
The turn lights will be lighted when
turn on the turn lights switch.
5.3 Turn Handle & Brake
Turn Handle and brake, adjust the Speed.
5.4 Switch
The Far and near light will be lighted when
You turn on the Far and near light switch.
The turn light will be lighted when you

7
Turn on the turn light switch.
The speaker will work when you turn
On the speaker switch.
5.5 Ignition key
When the key turns to on, the power
is on. When the key turns to off,
the scooter power is cut off.
5.6 Turn & rear light
The turn lights will be lighted when turn
On the turn lights switch.
The brake light will be lighted when
brake.
5.7 Shock absorption
Front: Double hydraulic front disc brake with ventilated discs and EABS
Rear: Hydraulic rear disc brake with ventilated disc and EABS
5.8 Front dual Brake disc
When you brake, they work
together on the wheel.
5.9 Shock absorption
It is real airbag hydraulic

8
shock absorption. Able to reduce
vibration and make riding more comfortable.
6. Before Riding
Before you ride, you must be absolutely sure that you and your scooter are ready
to ride. To help you get prepared, this section of the manual will discuss how to
improve your riding readiness and how to preform our recommended pre-ride
inspection of your scooter.
6.1 How to start the electric scooter
Before you ride your scooter for first time, we strongly recommend the following:
1. Completely read the manual
2. Be sure you have read and understand all of the safety messages and labels.
3. You know how to operate all the scooter’s controls.
Before you ride your scooter for first time, we also strongly recommend that you:
1.Are in good physical and mental condition.
2.Are free of alcohol and other drugs.
6.2 Are you ready to ride?
Before each and every ride you take, it is extremely important that you inspect
the scooter and make sure any problems you find are corrected. A pre-ride
inspection is a must.
WARNING
Improperly maintaining your scooter or failing to correct a problem before riding
can cause a crash in which you can be seriously hurt or killed. Always perform a
pre-ride inspection before any ride and correct any problems.
6.3 Pre-ride inspection
Check the following items before you get on the scooter:
Tyres-Use a tyre pressure gauge to check the max. load 230kg (510LBS) at
150kPa(22PSI) COLD ,410 KPa(60PSI) MAX. TO SEAT BEADS. Inflate or deflate as
needed. Also check for signs of damage or excessive wear.
Rims-Inspect the rim to be sure it is not bent or damaged.

9
Nuts & Bolts-Look over entire scooter for loose nuts and bolts. Tighten if needed.
Check the following items after you get on the scooter:
6.4 Safe riding precautions
Before riding this scooter, be sure you have read this entire manual up to this
point including the section titled: Important Safety Information & Before Riding.
Always practice in a safe area until you have built your skill level to a point at
which you can safely ride the scooter.
6.5 Method for correct operation
6.5.1 Riding method
(1) Keep the natural posture, and free driving can be got. Driving in sitting posture:
please always keep your body at the center of the cushion to prevent load
reduction of the front tyre and danger caused by handlebar vibration.
(2) Driving slowly on roads with surface damaged or that paved with gravels.
In raining or snowy day, wet ground will easily cause side slip, so you should drive
it slowly with much attention.
6.5.2 Parking method
(1) When parking, please pay attention to those vehicles and pedestrians around.
Park it to the right side of flat road slowly, do not park it on a slope.
(2) After parking it stably, turn the power supply lock rightwards to pull it out and
take it down, and then lock the scooter with a lock.
6.5.3 Operation method for electricity indication
(1) After the power supply lock is connected, the voltage indicator light will be
turned on. There are several electricity indications, when you find the electricity
indication is too low, you should charge the scooter immediately.
6.5.4 Operation method for power supply lock
During driving, you do not remove the key and switch off power supply, nor can
you turn the key in counterclockwise direction to close the power supply lock.
Once you switch off the power supply, the motor will stop running. After parking,
you should turn the power supply lock in counterclockwise direction to switch off
the power supply, and then pull the key out.
6.5.5 Turning handle (speed-governing handle)
No matter under natural start model or push start model.
If the turning handle is turned towards the driver, the scooter will be speeded,
and if it is released to turn back, the speed will be reduced. After reset, cut off the
power supply of motor.

10
6.5.6 Operation method of the charger and considerations
(1) Operation method
A. When charging, plug in the plug of cell box first, then that of electric supply
AC220V. When charging is complete, take the counter procedures, that is unplug
the plug of electric supply AC220V, then that of cell box.
B. During normal charging, the indicator light of the charger shows red. When fully
charged, it will show green.
C. If charging ambient temperature is too high, the red light will flash, which
indicates that the charger is in the temperature protection state. Please take the
charger to a cool or well-ventilated place. When the inside temperature of the
charge lowers to 60℃, normal charging occurs.
(2) Consideration
A. The charger can only be used indoors. User must take care of the charger and
battery.
B. Charging in a closed space or under scorching sun or at a high temperature
environment is strictly prohibited. Do not put the charger on a seat cask or inside
the rear compartment for charging.
C. In case of no charging, do not connect the charger to an AC power supply
without load for a long time.
D. During charging, if the indicator light is abnormal, there is abnormal smell or
the housing of the charger is too hot, please stop charging immediately, and
repair or replace the charger.
E. Do not disassemble or replace the devices inside the charger by yourself.
F. Do not charge the charger that has been fully charged.
G. Do not use the charger in an environment with flammable gas, otherwise
explosion or fire will be caused.
H. Do not place the charger near water source or wet it, otherwise fire or electric
shock may occur.
I. In the event that inside parts are exposed due to charger damage caused by
collision, etc., do not touch them with hands, otherwise you may be injured due
to electric shock.
6.5.7 Operation method of the cell and considerations
(1) Charging
A. Make sure to charge using the charger specifically equipped by our company.
Irregular or non-conforming chargers may reduce the longevity of the cell or
invalid the cell.
B. The cell that has been fully discharged (the scooter stop running) can be
charged with more than 95% of electricity within 2-3h, and can be fully charged
within 3-4h.
C. During charging, neither the positive end nor negative end is allowed to be
contacted with metal.
D. After leaving factory, the cell’s electricity is about 80%. Please use it to 0%

11
before the first time charging fully.
E. If the scooter is left for more than one month, cell’s electricity will reduce by
about 5%. It is recommended to charge it before use.
F. Please charge the cell timely to ensure driving mileage.
G. During charging, the charger may become hot. As long as the temperature
does not exceed 60℃, it is normal.
H. When charging, please put the charger and the whole scooter at a stable and
dry place which is free of flammable and explosive goods and is out of reach of
children.
I. Make sure there’s no short-circuit at the charging port.
(2) Discharging (use)
A. Do not use the cell for purposes other than the scooter of this model, otherwise
warranty will not be provided.
B. Once short-circuit occurs, the cell management system will provide automatic
protection, and the fuse piece connected in series with power line will fuse, giving
dual protection for your cell. At about 2 min after the short circuit is released and
the fuse piece is replaced, the cell will work normally.
C. Damage or unreasonably configuration of the controller, motor, horn, lighting
facility, etc. of the scooter all will cause the cell to discharge at high current. At
this time, the cell will stop output for protection, but will recover within 10s, which
will not have any effect on your driving.
D. Working temperature range of the cell: -10℃~55℃.Like other cells, its available
energy will reduce with the rise of the temperature, which is a normal
phenomenon.
E. Make short out the discharging port.
(3) Storage
A. if long time storage (more than one month) is needed, it is recommended to
charge the cell to 60%~80% of electricity. During storage, it is needed to charge
the cell every 3 months, and charging is also needed before usage.
B. The cell should be stored at a cool and dry environment.
C. During storage, prevent conductive objects connecting the positive pole with
the negative one.
D. Do not use the cell near a fire source.
E. Do not disassemble the cell.
F. Do not refit the cell.
(4) Warning
A. if the cell is found to deform or become hot, you should stop using and seek
help from our company or repair department.
B. In case of fire, do not quench the fire directly using water. It is recommended
to quench it using sand, foam extinguisher or thick clothing soaked with water.

12
C. For the cell fault caused by delayed charging fully-discharged cell, warranty
will not be provided.
D. Do not discard the cell haphazardly.
(5) Check, cleaning and maintenance
Regular or daily check
A. Check the whole scooter at a safe place.
B. Check whether the abnormal parts can be found in time before they impact
safe driving.
C. Braking effect of the brake: check whether the braking handle can be holding
and pinching gently and whether the clearance is appropriate. Check whether it
can brake the scooter normally.
D. Check whether there are chaps, damage or abnormal wear on tyres or
whether there are such sharp objects as metal, pebble, glass embedded in tyres.
If the lug on a tyre has been worn off by 2/3,replace the tyre.
E. Check tyres’ air pressure according to sunken condition of the parts of tyres
contacted with ground. The normal pressure of front and rear tyre is 1.5kg/cm2.
F. Check whether the front and rear wheel shaft become loose.
(5)Common fault and removal method
Number
Fault
Causes
Removal method
1
Speed-
governing
fault or max
speed
decreased
1.Too low voltage.
2.Speed-governing
turning handle
damaged.
3.The spring inside
speed-governing
turning handle got
stuck or failure.
1.Charge the cell;
2.Ask the distributor
for replacement;
2
The motor
does not work
after power
supply is
switched on.
1.The cell’s
connecting line
becomes loose.
2.Speed-governing
turning handle
damaged
3.Motor’s output line
becomes loose or
damaged.
1.Reconnect it;
2.Ask the distributor
for replacement;
3.Ask a dedicated
maintenance
station to repair it.
3
Continuous
driving
mileage is not
sufficient after
charging.
1.Air pressure of tyres is
too low;
2.Low power or the
charger failed;
3.Aging of the cell or it
1.Fill enough air;
2.Fully charge the
cell or replace the
charger;
3.Replace the cell;

13
damaged;
4.Much climbing,
great headwind,
frequent braking and
starting, heavy load.
4.Such condition
will be improved
when driving
condition changes.
4
The charger
fails to charge.
1.The socket of the
charger falls off or the
connection between
plug and socket
becomes loose;
2.The fuse inside the
cell box fused;
3.Battery pack’s
connecting wire falls
off;
1.Fasten the socket
or connectors;
2.Replace the fuse
inside cell box;
3.Weld connecting
wires.
5
Others fault
1.If there is a fault that
you cannot
determine;
2.If the inside of the
motor, cell, controller,
charger, etc
damaged.
Please ask the
distributor or
dedicated
maintenance for
repair, do not open
these parts by
yourself. Otherwise,
warranty will not be
provided.
7. Maintaining your scooter
Keeping your scooter in perfect operating condition is absolutely essential to your
safety. It is also the best way to protect your investment, get maximum
performance, avoid breakdowns and have more fun. To help keep your scooter
well maintained, this section includes a maintenance schedule for required
servicing and step-by-step instructions on how to perform specific maintenance
tasks.
Careful pre-ride inspections and good maintenance are invaluable. The service
intervals in this section are based on average riding conditions, more frequent
service is needed if you subject your scooter to service use or ride in unusually wet
and dusty areas.
WARNING Improperly maintaining this scooter or failing to correct a problem
before you ride can cause a crash in which you can be seriously hurt or killed.
Always follow the inspection and maintenance recommendations and schedules
in this manual.
Remember, proper maintenance is the responsibility of the owner. Be sure to

14
inspect your scooter before each side and follow the maintenance schedules in
this section.
8. Maintenance schedule
Regular inspection and service is required to keep your scooter in safe and
reliable riding condition. Below is a maintenance schedule showing when
components need to be inspected or serviced. Some items on the list can be
performed with basic mechanical skills and hand tools and others are more
extensive procedures requiring special training, tools and /or equipment. If you
do not feel capable of performing any of the procedures described in this
manual or if you need assistance, contact your nearest Authorized Service
Center.
Each item on the maintenance schedule requires some mechanical knowledge
Note: Check your scooter more frequently when you ride in wet or dusty
conditions.
E-ODIN 2.0 Maintenance Chart
Each
Use
1st Mouth
or 20Hrs
Every 3
Mouths or
50Hrs
Every 6
Mouths or
100Hrs
Every
Year or
300Hrs
Check Brakes
×
Check all nuts and
bolts for tightness
x
Check/Adjust idle
Speed
x
9. Basic maintenance procedures
Tyres Air Pressure
Properly inflated tyres will provide you with the best combination of handling,
tread life, and riding comfort. Generally speaking, underinflated tyres will wear
unevenly and adversely affect handling. Underinflated tyres are also more likely
to fail from being overheated and can cause wheel damage on rocky terrain.
Overinflated tyres will cause the scooter to run harshly, and are prone to failure
from surface hazards and wear unevenly.
WARNING
Using tyres that are excessively worn or improperly inflated can cause a crash in
which you can be seriously hurt or killed. Follow all the instructions in this owner’s
manual regarding tyre inflation and maintenance.

15
Make sure the valve stem caps are secure. If needed, install a new cap. Always
check air pressure when your tyres are cold. If you check the air pressure when
the tyres are warm, you will get higher readings, if you let air out of warm tyres to
match the recommended cold tyre pressure, the tyre will be underinflated. The
correct cold tyre pressures are listed below. If you replace the tyre, follow the tyre
pressure marked on the sidewall of the tyre.
Item NO:
Front Tyre(Cold)
Rear Tyre(Cold)
E-ODIN 2.0
36PSI
22PSI
Tyre Inspection
A flat tyre or tyre blowout can be very inconvenient and can even cause you an
accident. Take the time to inspect your tyres and wheels before you ride. For
more information about handling a flat tyre, refer to the section of this manual
titled Resolving the Unexpected.
•Inspect the tyre carefully for bumps or bulges in the sidewall of the tyre and
inside of the threads. Replace any tyres that have bumps or bulges in them.
•Look closely for cuts, slits or cracks in the tyres. replace any tyre if you can see a
fabric or cord showing through. Check for rocks, screws nails or other objects
embedded in the tyres or thread. Remove any foreign objects.
•Inspect your rims.
WARNING
Never ride with a bent or dented rim. The tyre could suddenly lose pressure,
resulting in an immediate lose of control which may cause a serious accident.
10. Electrical schematic

16
11. Warranty
WARRANTY TERMS AND CONDITION
The Limited Warranty starts from the date of purchase of the new scooter by the
customer. In some cases, replacement parts may have to be shipped from
overseas and can take up to 8 weeks for delivery.
Limited Warranty is not transferable and if valid for original purchase only.
WARRANTY CLAIMS
All warranty claims must be accompanied with the following information and
attachments:

17
-Pictures of the scooter
-Picture of the problem
-Pictures of the VIN number
-Motor faults require a picture of the motor number
-Description of the problem
To file a warranty claim, please visit your local dealer.
SERVICE MANUAL
NAME OF SERVICE
PERSON
DATE OF
SERVICE
HOURS OF
SERVICE
SIGNATURES
12. After Sales service welcome to join our SNS group, our tech team will solve
your problems online 24hours/7days.
Dayimotor Users Group
www.facebook.com/groups/131167625640690
DAYI motor- EEC
www.facebook.com/DAYI-motor-EEC-102250708652534
Other manuals for E-ODIN 2.0
1
Table of contents
Other Dayi Motor Motorcycle manuals

