Defy AUTOMAID User manual

Owner’s
Manual
AUTOMAID
CONTENTS
2 Installation
4 Detergent Drawer
4 Control Panel
5 Features
6 Preparation
7 Description Of Programme -
Normal Wash
8 Description Of Programme -
Delicate Wash
8 Description Of Programme -
Wool Wash
9 Operating The Machine
10 Care And Maintenance
11 Technical Specifications
12 Problem Washing
12 Trouble Shooting
www.defy.co.za

THANK YOU FOR CHOOSING DEFY
You are now the proud owner of one of the finest and most modern washing machines
that today’s technology can produce. You and your Automaid are going to make a great
team together. But first it will pay if you really get to know each other. This book will tell
you all you need to know about your machine, what it will do and how to do it. Please
read all the instructions carefully before operating the machine.
INSTALLATION
Packaging
All packaging must be removed from the machine
This includes the base packaging which incorporates a polystyrene motor support.
Failure to do so will hamper the removal of the transport brackets.
Transport fittings
The wash drum is secured during transport to prevent damage. Before using the machine,
the transport fittings must be removed as follows.
1. Turn each of the three fittings a quarter turn to the left (90 degrees –anticlockwise) to
loosen them. If difficulty is experienced, a screw driver may be inserted through the
hole in the fitting handle to improve leverage.
2. Do not attempt to remove the fittings until all three have been loosened in the manner
described above.
3. Once all the fittings have been loosened, remove them by pulling them away from the
rear panel.
4. Store the fittings for future use should the machine require relocation..
5. Insert the three plastic plugs supplied with the machine into the holes to cover them.
TRANSPORT FITTINGS
STEPS 1 AND 2
STEP 3
REAR OF MACHINE

Note: The machine should not be transported without the transport fittings securely
in place. To achieve this, remove the lid to gain access to the locating keyways.
Insert and turn the transport fittings a half turn clockwise to secure them and
replace the lid.
Levelling
1. The machine must stand firmly on the floor. Any instability will negatively affect its
performance when in use.
2. The machine has two fixed feet at the rear and two adjustable feet at the front.
3. To level the machine, loosen the lock nuts on the adjustable feet using a 17 mm
spanner.
4. Rotate the feet until the machine stands firm and level.
5. Then tighten the lock nuts firmly.
6. Caution: Never remove the lock nuts and feet from the machine.
Connecting to the water supply
1. Connect the inlet hose to a 3/4 inch BSP cold water tap.
2. Do not over tighten as you may damage the seal
Water drainage
Draining into a dedicated outlet pipe
1. The outlet pipe must have an inside diameter of at least 40 mm.
2. The end of the pipe should be positioned no less than 500 mm. And no more than
1000 mm. above floor level.
3. Securely hook the end of the drain hose into the outlet pipe.
Draining into a sink or bath
1. The drain hose may be
hooked over the edge of a
sink or bath in such a way
that the end cannot be
immersed in the collected
waste water.
2. The outlet end of the hose
must not be less than 500
mm and not more than 1000
mm. above floor level.
NOT LEVELLED NOT LOCKED LEVELLED
AND LOCKED
COLD WATER
3/4 INCH BSP
TAP
40mm.
INSIDE DIAMETER
OUTLET PIPE
DRAIN
HOSE
INLET
HOSE
500 TO 1000 mm
BACK OF MACHINE
FLOOR LEVEL

Please note: the outlet hose must be kept free of kinks or restrictions as these will hinder
the operation of the machine
Electrical connection
1. The power cord must be connected to a 15 amp earthed wall socket
2. Do not connect the machine through a double adaptor. It requires a dedicated power point
3. If the power-cord should ever need replacing, use only a genuine cord available from
the nearest Defy Service Centre.
The appliance must be earthed and the manufacturer and seller do not accept
responsibility for any damage due to incorrect electrical connection.
THE DETERGENT DRAWER
1. Open the drawer
2. Place the detergent powder and softener in
the appropriate compartment of the
dispenser drawer in accordance with the
instructions on the manufacturers pack
3. The detergents and additives will
automatically be released at the
appropriate time during the wash cycle.
NOTE:
Use only low foam detergents specifically
designed for automatic front loading
washing machines.
THE CONTROL PANEL
123 4 5 6 7 8
1 Detergent dispenser
2 Rinse and hold button
3 Super rinse button
4 No spin button
5 On / Off button
6 Temperature selector
7 Programme selector
8 On / Off indicator light
AB C
A
PRE
WASH
B
MAIN
WASH
C
SOFTENER

FEATURES
1 Detergent dispenser
See the section detailing the detergent dispenser on the previous page.
2 Rinse and hold
Selecting this feature will stop the machine during the final rinse cycle with water in the
tub. The position on the programme selector knob is marked with
This prevents drip-dry and permanent press articles from waiting in a ‘dry’ machine
before being removed thus minimising creasing.
To complete the programme, press the button once more.
3 Super rinse
Selecting this feature will supply extra rinse water for the rinse cycles and is ideal for use
with highly absorbent fabrics such as towelling.
IMPORTANT:
THIS FEATURE MUST BE SELECTED WHEN WASHING WOOL.
4 No spin
Selecting this feature will eliminate the intermediate and final spin on any programme.
Use in conjunction with the ‘RINSE AND HOLD’ button if desired.
5 On—Off
Push the button for power ‘ON’
Push the button once more for power “OFF’
6 Variable temperature control
This feature may be used only when temperatures colder than those indicated on the wash
guide are required.
i.e. If the programme guide indicates 60ºC and you require a wash temperature of 40ºC ,
then set the control to 40ºC.
NOTE:
IF THE MACHINE IS TO BE OPERATED AT THE RECOMMENDED WASH
GUIDE TEMPERATURES, SET THE TEMPERATURE SELECTOR KNOB AT
85°C.
THIS WILL NOT HARM THE WASH AS THE MACHINE WILL
AUTOMATICALLY SET THE CORRECT TEMPERATURE FOR THE
SELECTED PROGRAMME AND WILL NOT OPERATE AT A
TEMPERATURE HIGHER THAN SPECIFIED IN THE WASH GUIDE.
IF A COLD WASH IS REQUIRED, SET THE CONTROL TO ‘0’

7 Wash programme selector
Turn the knob clockwise until the marker aligns with the desired programme number on
the knob.
WARNING:
SWITCH THE MACHINE OFF BEFORE TURNING THE KNOB AND DO NOT
TURN THE KNOB IN AN ANTICLOCKWISE DIRECTION AS THIS COULD
DAMAGE THE TIMER MECHANISM
8 Indicator light
This light indicates when the machine is switched on.
9 The door
The door is opened by gently pulling on the handle.
It is closed by pushing it firmly until it clicks into place.
NOTE:
THE DOOR LOCKS DURING A WASH CYCLE TO PREVENT ACCIDENTAL
OPENING WHILE THERE IS WATER IN THE DRUM.
IT WILL UNLOCK AUTOMATICALLY AT THE END OF THE PROGRAMME,
APPROXIMATELY 10 SECONDS AFTER THE INDICATOR LIGHT HAS
SWITCHED OFF.
PREPARATION
1. Sort washing by material type.
2. Adhere to garment label washing instructions.
3. Fasten zips to prevent them snagging other articles.
4. Mend loose seams and tears before washing.
5. Secure all loose buttons.
6. Empty all pockets of coins and loose objects.
7. Secure or remove brassiere wires.
8. Wash small articles such as socks, handkerchiefs and delicate undies in a wash bag
or pillow slip to prevent them tangling other clothes.
9. Treat any stains before washing.
10. Test fabrics for colourfastness before washing.
11. Wash new denim separately as colours may run.
12. Wash new bulky articles such as quilts and sleeping bags individually. For best
results use the WOOL programme.
13. Do not wash articles which have been soaked in paint, petrol, thinners or other
flammable liquids.
14. Do not wash rubberised articles such as rain coats gym shoes etc.
15. Overloading will result in poor wash results.

DESCRIPTION OF PROGRAMMES – Normal Wash
PROGR TEMP FABRIC
TYPES
MAX
LOAD
PROGRAMME
DESCRIPTION
DETERGENT
DRAWER
OPTION
BUTTONS
1 45ºC White cotton and
linen without
special finishes.
Heavily soiled
resistant fabrics.
5kg Pre-wash at 45’C
Main wash at 85’C
4 Rinses.
2 Intermediate spins.
1 Final spin.
A B C Super rinse.
No spin.
2 85ºC White cotton and
linen without
special finishes.
5kg Main wash at 85ºC
4 Rinses.
2 Intermediate spins.
1 Final spin.
B C Super rinse.
No spin.
3 60ºC Colourfast cotton
/ linen.
White polyester /
cotton blends.
5kg Main wash at 60ºC
4 Rinses.
2 Intermediate spins.
1 Final spin.
B C Super rinse.
No spin.
4 40ºC Non colourfast
cotton / linen.
White nylon
5kg Wash at 40ºC
4 Rinses.
1 Intermediate spin.
1 Final spin.
B C Super rinse.
No spin.
5 Cold Lightly soiled
resistant white or
coloured fabrics
5kg Cold wash
4 Rinses.
1 Intermediate spin.
1 Final spin.
B C Super rinse.
No spin.
6 Cold 3 Rinses.
1 Intermediate spin.
1 Final spin.
C No spin.
7 Cold 2 Rinses.
1 Intermediate spin.
1 Final spin.
C No spin.
8 Cold Softener dispensing.
1 Final spin.
C No spin.
9 Wash distribution
Long Spin
No spin.

DESCRIPTION OF PROGRAMMES – Delicate Wash
PROGR TEMP FABRIC
TYPES
MAX
LOAD
PROGRAMME
DESCRIPTION
DETERGENT
DRAWER
OPTION
BUTTONS
10 45ºC Coloured nylon,
polyester, and
articles with
special finishes.
Cotton /
polyester blends
3kg Pre-wash at 45’C
Main wash at 85’C
4 Rinses.
2 Intermediate spins.
1 Final spin.
A B C Super rinse.
No spin.
Rinse and
hold.
11 60ºC Nylon
White cotton /
polyester
For minimum
creasing
3kg Main wash at 85ºC
4 Rinses.
2 Intermediate spins.
1 Final spin.
B C Super rinse.
No spin.
Rinse and
hold.
12 50ºC Coloured nylon,
polyester and
mixed cottons
3kg Main wash at 60ºC
4 Rinses.
2 Intermediate spins.
1 Final spin.
B C Super rinse.
No spin.
Rinse and
hold.
13 40ºC Fabric / wool
blends
3kg Wash at 40ºC
4 Rinses.
1 Intermediate spin.
1 Final spin.
B C Super rinse
No spin.
Rinse and
hold
14 Cold Lightly soiled
delicate
fabrics
3kg Cold wash
4 Rinses.
1 Intermediate spin.
1 Final spin.
B C No spin.
Rinse and
hold.
15 Cold 3 Rinses.
1 Intermediate spin.
1 Final spin.
C No spin.
16 2 Rinses.
1 Intermediate spin.
1 Final spin.
No spin.
DESCRIPTION OF PROGRAMMES – Wool
PROGR TEMP FABRIC
TYPES
MAX
LOAD
PROGRAMME
DESCRIPTION
DETERGENT
DRAWER
OPTION
BUTTONS
17 40ºC Washable wool.
Blankets.
Wool blends
Silk
2kg Wash at 40ºC
3 Rinses.
Short spin
B C Super rinse
No spin.
18 Cold Softener dispensing.
Short spin
C Super rinse.
No spin.
Rinse and
hold.
NOTE:
SUPER RINSE MUST BE SELECTED WHEN WASHING WOOL OR WOOL BLEND FABRICS

OPERATING THE MACHINE
Loading the machine
It is important not to overload the machine as this will prevent it from washing properly.
You should be able to fit a hand between the top of the drum and the washload in the
drum.
The maximum recommended load of dry clothing that may be washed at one time in your
Automaid is 5kg.
Washing
1. Plug the machine in and switch on at the wall socket.
2. Open the water tap.
3. Check that the drain hose is in position and free of kinks.
4. Open the door.
5. Load washing into the machine, distributing it evenly and loosely in the drum.
6. Close the door.
7. Add detergents and additives to the relevant compartments in the detergent drawer
and close the drawer.
8. Rotate the programme selector knob in a clockwise direction to the desired
programme. Do not attempt to turn the knob back if the programme is inadvertently
bypassed, rather continue around the dial once more.
9. If desired, select a temperature cooler than the one specified for the selected
programme by turning the temperature control knob to the required setting. (See
variable temperature control on page 5.)
10. Select any of the desired option buttons as detailed in the wash guide.
11. Push the power ‘ON’ button
12. The indicator light will glow and the machine will commence with the selected wash
cycle.
NOTE:
DO NOT EXCEED THE MAXIMUM WASH LOAD AS DETAILED IN THE
WASH GUIDE
Unloading the machine
1. The machine will stop automatically at the end of the selected cycle.
2. Approximately 2 minutes after the completion of the cycle, the indicator light will
switch off. A few seconds thereafter the door lock will deactivate allowing the door to
be opened.
3. Open the door and remove the wash load.
4. Gently rotate the drum by hand to check if all the laundry has been removed
5. Leave the door slightly ajar to assist with drying and to prevent unpleasant odours
from forming

CARE AND MAINTENANCE
1. Switch off the power at the wall socket. Do not touch the plug with wet hands
2. Close the water tap after the completion of the wash cycle.
3. Wipe the inside of the wash drum and rubber door seal with a soft dry cloth after
completion of the wash.
4. Should the cabinet need cleaning, wipe it with a soft damp cloth. Do not use abrasive
powders, solvents or scouring pads.
5. Traces of old detergent in the detergent dispenser should be removed periodically as
these could obstruct the flow of water into the machine.
The detergent drawer may be removed to
facilitate cleaning and rinsed under a stream
of hot tap water.
Remove the drawer as follows:
1. Pull the drawer out until it stops against
the built in lip at the back of the drawer.
2. A firm action is required to push the bottom of the drawer upwards far enough for the
lip to clear the frame whilst simultaneously pulling the drawer free from the machine.
3. After rinsing, replace the drawer by first locating the lip behind the frame and then
sliding the drawer into the guide channels on either side until it is closed.
ON NO ACCOUNT USE BENZENE OR OTHER SOLVENTS TO CLEAN THE
CABINET, DOOR OR RUBBER OF THE MACHINE. A DAMP CLOTH WILL
NORMALLY SUFFICE OR IF DESIRED A GOOD WAX POLISH MAY BE
USED ON THE METAL PARTS OF THE CABINET
DETERGENT DRAWER
PULL OUT
PUSH LIP UP

TECHNICAL SPECIFICATIONS
Width x Depth x Height 600 mm x 600 mm x 850 mm
Voltage 230V 50Hz
Capacity—Dry clothes 5 kg.
Spin speed 550 r/m
Max absorbed power 2150W
Heater 1900W
Motor—Wash 350W
Motor—Spin 750W
Water intake Cold fill 3/4 inch BSP fitting
Mobility 4 Feet—2 Adjustable at front
Min water pressure 491 kPa
Max water pressure 784 kPa

PROBLEM WASHING – CHECK LIST
Greasy stains on washing.
• Use more detergent if washing is heavily soiled.
• Use both pre-wash and main wash programmes.
• Check that the machine is not overloaded.
Grey, dirty looking washing.
• Use more detergent if the washing is heavily soiled or if the machine is located in a
hard water area.
• Use pre-wash and main wash programmes.
• Check that the machine is not overloaded.
Poor wash results
• Read the instruction book carefully
• Follow the manufacturer’s instructions on the detergent pack.
• Sort out fabric types and separate natural from synthetic fabrics.
• Select the appropriate wash programme.
• Use fabric softeners for extra softness.
• Check that the machine is not overloaded.
Yellowing
• Could be caused by natural body oils or iron deposits in the water supply
• Select the correct programme (water not too hot)
• Use the correct detergent dosage.
• Wash the garment to the manufacturer’s directions.
Check that the machine is not overloaded.
TROUBLE SHOOTING
If you experience a problem with the machine, please check the following before
calling a Service technician. It may seem obvious but you may be charged for a
service call, even during the warranty period, if no fault is found
The machine will not work at all.
Check:
• House fuses or circuit breakers.
• Wall socket (plug in another appliance to check function)
• That the door is closed properly.
• That the water tap is open.
• That a programme has been selected.
• That the ON/ Off button has been pressed in.
• That the indicator light is on.

The machine does not drain or spin.
Check:
• That the drain hose is not kinked or obstructed.
• That the outlet pipe or sink is not blocked.
The machine does not fill with water.
Check:
• That the water tap is open.
• That the drain hose end is at least 500 mm. above floor level.
• That the inlet hose is not kinked.
• That there is a water supply to the tap.
The machine vibrates or is excessively noisy.
Check:
• Whether anything has fallen between the wall and the machine.
• That the machine stands level and that the feet are locked.
• That the transport brackets and all packaging has been removed.
• That there is a clearance of at least 50 mm. Between the back of the machine and the
wall.
• That the laundry is evenly distributed in the drum.
• That the wash load is balanced. (not one heavy item off to one side.)
The door will not open
Check:
• That two minutes have elapsed since switching off to allow the safety lock to
disengage.
The machine leaks water
Check:
• If the machine is not levelled, it is likely that some water will escape from the
detergent dispenser during filling. To rectify, level the machine from front to back.
• That the inlet and outlet hoses are secured.
The Manufacturer strives for continuous improvements. For this reason, the text and
illustrations in this book are subject to change without notice.
Part Number 062125
Table of contents
Other Defy Washer manuals
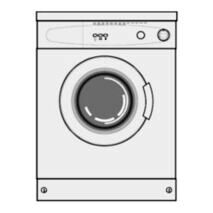
Defy
Defy Automaid 600 electronic User manual
Defy
Defy Twinmaid 800 User manual

Defy
Defy MAXIMAID 720M User manual
Defy
Defy DTL146 User manual
Defy
Defy DTL149 User manual
Defy
Defy DTT151 User manual
Defy
Defy TWINMAID 920 User manual

Defy
Defy TWINMAID 1300 User manual

Defy
Defy Laundromaid Electrologic 720 User manual
Defy
Defy DTL144 User manual
Defy
Defy AUTOMAID SM User manual

Defy
Defy WMY 71283 MLCW User manual
Defy
Defy DAW 376 User manual
Defy
Defy DTL162 User manual

Defy
Defy DTT169 User manual

Defy
Defy DTT180 User manual
Defy
Defy Maximaid 850 User manual
Defy
Defy Laundromaid User manual

Defy
Defy ELECTROLOGIC 720 User manual
Defy
Defy DAW388 User manual
