Deltran Battery Tender 022-0227 User manual

1 P/N 392-0215-RE
IMPORTANT SAFETY INSTRUCTIONS
CAREFULLY READ AND
SAVE THESE INSTRUCTIONS
DOWNLOAD MANUAL
This manual can be read or downloaded from the BATTERY TENDER®
website @ www.batterytender.com
WARNING AND CAUTION LABEL DEFINITIONS:
WARNING
WARNING indicates a potentially hazardous situation which, if not
avoided, could result in serious injury or death.
CAUTION
CAUTION indicates a potentially hazardous situation which, if not
avoided, may result in minor or moderate injury.
CAUTION
CAUTION used without the safety alert symbol indicates a
potentially hazardous situation, which if not avoided, may result
in property damage.
GENERAL PRECAUTIONS
WARNING
Always charge the battery in a well ventilated area. Explosive
hydrogen gas may escape from thebatteryduring charging. Keep
open flames, electrical sparks and smoking materials away from
the battery at all times. Failure to do so could result in serious
injury or death. NOTE :
Gas hot water heaters are a source of open flame to be avoided.
CAUTION
Locate the charger as far away from the battery as is allowed by
the length of the output cable harness. NEVER set the charger
above or below the battery. Gasses or fluids from the batterymay
corrode and damage the charger.
CAUTION
Do not set the charger on a combustible surface. Locate in a well
ventilated area to dissipate heat generated by the charger.
Portable Battery Chargers
Designed for six cell lead-acid batteries
2
CAUTION
NEVER use a battery charger unless the battery voltage matches
the output voltage rating of the charger. For example, do not use
a 12-volt charger with a 6-volt battery and vice versa.
WARNING
Do not expose the charger to rain or snow to avoid risk of electric
shock or fire.
WARNING
Do not use attachments or accessories thatare notrecommended
or sold by the battery charger manufacturer. Doing somay cause
electric shock, fire, or other unforeseen situations resulting in
serious injury or death.
CAUTION
When handling electric power cords, always pull by the plug
rather than by the cord. This reduces the risk of damage to both
the plug and cord, and minimizes the likelihood of electric shock.
CAUTION
Make sure all electric power cords are located so that they cannot
be stepped on, tripped over, or otherwise subjectedto damage or
stress.
CAUTION
Study all of the battery manufacturer's precautions and specific
recommendations for safe operation such as not removing cell
caps while charging and the recommended rates of charge
(charger output current). This is important to avoid damage to the
battery.
CAUTION
When leaving a battery charger connected to a non-sealed,
flooded battery for extended periods of time (weeks, months,
etc.), periodically check individual cell fluid levels against
manufacturer's recommendations for safe operation.
CAUTION
If the battery releases an excessive amount of gas or if the battery
gets hotter than 130F (55C) during charging, disconnect the
charger and allow the battery to cool. Overheating may result in
plate distortion, internal shorting, drying out or other damage.

3
WARNING
NEVER disassemble the charger or attempt to do internal repairs. Take
it to a qualified service technician. Assembling the charger incorrectly
may result in the risk of electric shock or create a fire hazard. If the
supply cord is damaged, it must be replaced by the manufacturer, its
service agent or similarly qualified persons in order to avoid a hazard.
PERSONAL PRECAUTIONS
WARNING
Battery posts, terminals and related accessories contain lead and
lead components, chemicals known to the State of California to
cause cancer and birth defects or other reproductive harm.Wash
hands after handling.
1. Someone should be within range of your voice or close enough to come to
your aid when you work near a lead-acid battery;
2. Have plenty of fresh water and soap nearbyincasebattery acidcontactsskin,
clothing, or eyes;
3. Wear complete eye protection and clothing protection. Avoid touching eyes
while working near battery;
4. If battery acid contacts skin or clothing, wash immediately with soap and
water. If acid enters an eye, immediately floodeye with running cold waterfor
at least 10 minutes and get medical attention immediately;
5. NEVER smoke or allow a spark or flame in vicinity of battery or engine.
6. Be extra cautious to reduce risk of dropping a metal tool ontobattery. It might
spark or short-circuit battery or other electrical part that may cause an
explosion;
7. Remove personal metal items such as rings, bracelets, necklaces, and
watches when working with a lead-acid battery. A lead-acid battery can
produce a short-circuited current high enough to weld a ring or the like to
metal, causing a severe burn;
8. Use the charger for charging a lead-acid battery only. It is not intended to
supply power to an extra low-voltage electrical system or to charge dry-cell
batteries. Charging dry-cell batteries may cause them to burst and cause
injury to persons and damage to property;
NOTE
There are some wet, non-spillable, lead acid batteries on the market whose
manufacturers'make the claimthat they are dry-cellbatteries.Thesebatteriesare
sealed, gas-recombinant, starved electrolyte, possiblywithAGM(Absorbed Glass
Matte) type construction. It is perfectly safe to use the INTERNATIONAL
BATTERY TENDER®to charge these types of batteries. The dry-cell battery
warning is intended for non-rechargeable, alkaline and other similar types of
batteries. If you have any doubt about the type of battery that you have, please
contact the battery manufacturer before attempting to charge the battery.
9. NEVER charge a visibly damaged or frozen battery.
10. Do not recharge non-rechargeable batteries.
4
PREPARING TO CHARGE
1. If it is necessary to remove battery from vehicle to charge it, always
removegrounded terminal frombattery first. Make sureall accessories in
the vehicle are off in order to prevent an arc;
2. Be sure area around battery is well ventilated while battery is being
charged. Gas can be forcefully blown away by using a piece of cardboard
or other nonmetallic material as a fan;
3. Clean battery terminals. Be careful to keep corrosion from coming in
contact with eyes;
4. Adddistilled water ineach cell untilbattery acid reaches level specifiedby
battery manufacturer. This helps purge excessive gas from cells. Do not
overfill. For a battery without cell caps, carefully follow manufacturers’
recharging instructions;
5. Study all battery manufacturers’ specific precautions suchas removing or
not removing cell caps while charging and recommendedrates of charge;
6. Determine voltage of battery by referring to owner’s manual and make
sure it matches output rating of the battery charger.
7. Locate charger:
a. Locatethe charger asfar away frombatteryas theDCcables
permit;
b. Never place the charger directly above or below the battery
being charged. Gases or fluids from the battery will corrode
and damage the charger;
c. Never allow battery acid to drip on the charger when reading
gravity or filling battery;
d. Do not operate the charger in a closed-in area or restrict
ventilation in any way.
e. Do not set a battery on top of the charger.
8. Connect and disconnect DC output clips only after setting any charger
switches to the off position and removing AC cord from the electric outlet.
Never allow clips to touch each other.
9. Follow these steps when battery is installed in a vehicle. A spark near
battery may cause a battery explosion. To reduce risk of a spark near
battery:
a. Position AC and DC cords to reduce risk of damage by hood,
door, or moving engine parts like fan blades, belts, and
pulleys.
b. Check polarity of battery posts. A positive (pos, p, +) battery
post may have a larger diameter than a negative (neg, n, -)
post;
c. Determine which post of battery is grounded (connected) to
thechassis. If negative postis grounded tothe chassis (asin
most vehicles), see item (d). If positive post is grounded to
the chassis, see item (e);
d. For a negative-grounded vehicle, connect the positive (red)
clip from the battery charger to the positive (pos, p, +)
ungroundedpost ofbattery. Connect thenegative (black)clip
to the vehicle chassis or engine block away from battery. Do
not connect the clip to carburetor, fuel lines, or sheet-metal
parts. Connect to a heavy gauge metal part of the frame or
engine block;

5
e. Fora positive-grounded vehicle, connectthe negative(black)
clip from battery charger to negative (neg, n, -) ungrounded
post of battery'. Connect the positive (red) clip to the vehicle
chassis or engine block away from battery. Do not connect
clip to carburetor, fuel lines, or sheet-metal parts. Connect to
a heavy gauge metal part of the frame or engine block;
f. Connect charger AC supply cord to an electric outlet;
g. When disconnecting the charger, turn switches to off,
disconnect AC cord, remove clip from vehicle chassis, and
then remove clip from battery terminal.
10. Follow these steps when battery is outside the vehicle. A spark near the
battery may cause a battery explosion. To reduceriskofa sparknearbattery:
a. Check polarity of battery posts. A positive (pos, p, +) battery
post may have a larger diameter than a negative (neg, n, -)
post;
b. Attach at least a 24 inch long 6-gauge (AWG) insulated
battery cable to the negative (neg, n, -) battery post;
c. Connect the positive (red) charger clip to the positive (pos, p,
+) post of battery;
d. Position yourself and the free end of cable as far away from
battery as possible, then connect negative (black) charger clip
to free end of cable;
e. Do not face battery when making final connection;
f. Connect charger AC supply cord to an electric outlet;
g. When disconnecting the charger, always do so in reverse
sequence of connecting procedure and break first connection
while standing as far away from the battery as is practical.
USER INSTRUCTIONS
AUTOMATIC CHARGING AND BATTERY STATUS MONITORING: All
BATTERY TENDER® chargers are completely automatic and may be left
connected to both AC power and to the battery that it is charging for long
periods of time. The charger output power, voltage, and current depends on
thecondition of thebattery it ischarging. BATTERYTENDER®chargershave
2 status indicator lights that provide a visual means to determine theoperating
mode of the charger and hence the condition of the battery connected to the
charger.
The two-colored status indicator lights are available to determine whether the
chargeris operating inone of the3 primary chargemodes: the bulk mode(full
charge, constant current, battery is 0% to 85% charged), the absorptionmode
(high constant voltage, battery is 85% to 100% charged), or the storage/float
maintenance mode (low constant voltage, battery is 100% to 103% charged).
When the battery is fully charged, the green status indicator light will turn on
and the charger will switch to a storage/maintenance charge mode. The
BATTERY TENDER® charger will automatically monitor and maintain the
battery at full charge.
6
ELECTRICAL CONNECTIONS BETWEEN THE CHARGERAND THE
BATTERY: Before charging, connect the alligator clips or ring terminals to the
battery terminals. Then connect the charger AC power cord to the AC power outlet.
When you want to disconnect the charger from the battery, first disconnect the charger
AC power cord from the AC power outlet. Then disconnect the charger leads from the
battery terminals.
WARNING
Always unplug or turn OFF the battery charger before connecting or
disconnecting the charger clamps to the battery. Connecting or disconnecting
clamps with the charger on could cause a spark resulting in a batteryexplosion.
A battery explosion may rupture the battery case causing a discharge or spray of
sulfuric acid which could result in serious injury or death.
CONNECTIONS FOR ALL LEAD-ACID BATTERY TYPE: (See item 10 under
General Precautions.)
In General: First connect the red positive (+) charger output lead to the
positive terminal of the battery. Then connect the black negative (-) charger
output lead to the negative terminal of the battery. However, pay particular
attention to the next two items and the instructions under item 18 under
General Precautions.
As an added measure of safety, particularly when working with standard,
flooded, lead acid batteries, UL recommends that the second, negative (-)
charger output lead connection be made to the grounded equipment chassis
rather than directly to the negative battery post.
In similar fashion, for positive ground systems, the positive postofthebattery
is now at the same electrical potential as the grounded equipment chassis.
Therefore UL recommends that the positive (+) charger output lead
connection be made at the grounded equipment chassis rather than directly
to the positive battery post.
ATTENTION: BATTERY TENDER®CHARGERS HAVE A SPARK FREE
CIRCUITRY. The output alligator clips or ring terminals will not spark when they are
touched together. The BATTERY TENDER®chargers will not produce an output
voltage until it senses at least 3 volts from the battery.It must be connected to a battery
with the correctpolarity before it will start charging a battery. Therefore, if you plug the
AC power cord into an AC power outlet, and if the output alligator clips or ring terminals
are not connected to a battery, and if you touch the alligator clips or ring terminals
together, there will be no electrical spark.
NOTE:
THE OUTPUT CLIPS OR RING TERMINALS MUST BE CONNECTED TO A
BATTERY BEFORE THE CHARGER CAN PRODUCE AN OUTPUT VOLTAGE.
If the charger is hooked up backwards, the amber light will continue flashing
(International Plus and EURO400), indicating that a charge has not been initiated
(WP800 does not show anylight at all). The alligator clips or accessory ring terminals
must be connected to the battery, with the proper polarity, Red to Positive (+ output to
+ battery post) and Black to Negative (- output to - battery post), before the charger will
generate any output voltage.

7
WORKING WITH A DEAD BATTERY OR ABATTERY WITH AVERY
LOW VOLTAGE:
If you try to charge a dead battery having a voltage below 3 Volts, BATTERY
TENDER®chargers will not start. An internal safety circuit prevents the
BATTERY TENDER®chargers from generating any output voltage unless it
senses at least 3 Volts at the charger output. In this situation, the amber light will
continue to flash (International Plus and EURO400), indicating that a charge has
not been initiated (WP800 does not show any light at all).
NOTE:
If a 12 Volt, Lead-Acid battery has an output voltage of less than 9 volts when it is
at rest, when it is neither being charged nor supplying electrical current to an
external load, there is a good chance that the battery is defective. As a frame of
reference, a fully charged 12-Volt,Lead-Acid battery willhave a rest-state,no-load
voltage of approximately 12.9 volts. Afully discharged 12-Volt, Lead-Acid battery
will have a rest-state, no-load voltage of approximately 11.4 volts. That means
that a voltage change of only 1.5 volts represents the full range of charge 0% to
100% on a 12-Volt, Lead-Acid battery. Depending on the manufacturer, and the
age of the battery, the specific voltages will vary by a few tenths of a volt, but the
1.5-volt range will still be a good indicator of the battery charge %.
STATUS INDICATING LIGHTS: If neither light is lit, then the battery is not
properly connected and/or the charger is not plugged into AC power. The
following describes light operation:
AMBER LIGHT FLASHING – The amber light flashing indicates that the
battery charger (International Plus and EURO400) has AC power available
and that the microprocessor is functioning properly. If the amber light
continues to flash, then either the battery voltage is too low (less than 3 volts)
or the output alligator clips or ring terminals are not connected correctly.
AMBER LIGHT ON STEADY – Whenever the amber light is on steady, a
battery is connected properly and the charger is charging the battery. The
amber light will remain on until the charger completes the charging stage.
GREEN LIGHT FLASHING – (International Plus and EURO400 only) When
EURO400 shows a green light flashing, the battery is 80% charged and may
be used if necessary. When the green light is flashing, and the amber light is
on (International Plus), the battery is greater than 80% charged and may be
removed from the charger and used if necessary. Whenever possible, leave
the battery on charge until the green light is solid.
GREEN LIGHT ON STEADY – All chargers: When the green light stops
flashing and burns steady, the charge is complete and the battery can be
returned to service if necessary. It can also stay connected to maintain the
battery for an indefinite period of time
STATUS INDICATING SYMBOLS: The following symbols are located next to the
status indicator lights.
The symbol next to the AMBER light represents a partially charged
battery. The solid band across the bottom is green in color. The
background is yellow. The green area indicates the charged portionof
the battery and the yellow area represents the uncharged portion.
The symbol next to the GREEN light represents a fully charged
battery. The entire area inside the battery outline is green.
8
TROUBLESHOOTING CHECK LIST:
1. CHARGER LIGHTS DO NOT TURN ON:
a. Remove the charger from the AC outlet and recheck
that the battery charger clamps are connected to the
correct terminals and are making a clean tight
connection.
b. Check to make sure AC outlet is supplying power by
plugging in a lamp, an appliance, or a voltage meter.
2. THE GREEN LIGHT GOES ON IMMEDIATELY WHEN
CHARGING A DISCHARGED BATTERY:
a. The battery may be defective, take battery to the dealer
to be tested.
3. CHARGER IS CHARGING BUT THE GREEN LIGHT DOES
NOT GO ON:
a. The battery may be defective, take battery to the dealer
to be tested.
b. The battery has an excessive current draw, remove
battery from equipment.
4. THE AMBER LIGHT COMES ON WHEN STORAGE
CHARGING BATTERIES:
a. The battery may be defective, take battery to the dealer
to be tested.
b. The battery has an excessive current draw, remove
battery from equipment.
This appliance can be used by children aged from 8 years
and above and persons with reduced physical, sensory or
mental capabilities or lack of experience and knowledge if
they have been given supervision or instruction concerning
use of the appliance in a safe way and understand the
hazard involved.
Children shall not play with the appliance. Cleaning and user
maintenance shall not be mad by children without supervision.
The supply cord cannot be replaced. If the cord is damaged
the appliance should be scrapped.
Examine the battery charger regularly for damage, especially
the cord, plugandenclosure, if the batterychargeris damaged,
it must not be used until it has been repaired.
This symbol indicates separate collection for electrical
and electronic equipment

9
FCC Warning
Title 47 Subpart, 15.105(b)
Note: This equipment has been tested and found to comply with the limits for a
class B digital device, pursuant to part 15 of the FCC Rules. These limits are
designed to provide reasonable protection against harmful interference in residential
installation. This equipment generates, uses and can radiate radio frequency energy
and, if not installed and used in accordance with the instructions, may cause
harmful interference to radio television reception, which can be determined by
tuning the equipment off and on, the user is encouraged to try to correct the
interference by one or more of the following measures:
- Reorient or relocate the receiving antenna.
- Increase the separation between the equipment and receiver.
- Connect the equipment into an outlet on a circuit different from that to
which the receiver is connected.
- Consult the dealer or an experienced radio/TV technician for help.
ICES-001: Industrial, Scientific, and Medical (ISM) Radio
Frequency Generators
This product has been tested with the listed standards and found to be compliant with
the Code of Industry Canada ES-001 and the measurement Procedure according to
CISPR 11. CAN ICES-1/NMB-1
10
WICHTIGE SICHERHEITSHINWEISE
LESEN SIE DIESE ANLEITUNGEN BITTE SORGFÄLTIG
UND BEWAHREN SIE SIE AUF
HANDBUCH HERUNTERLADEN
Dieses Handbuch lesen oder aus der Batterie TENDER heruntergeladen
werden können®Website @ www.batterytender.com
DEFINITIONEN DER WARN- UND VORSICHTSHINWEISE:
WARNHINWEIS
WARNHINWEIS weist auf eine möglicherweise gefährliche
Situation hin, die zu schweren Verletzungen oder zum Todesfall
führen kann, falls diese nicht vermieden wird.
VORSICHT
VORSICHT weist auf eine möglicherweise gefährliche Situation
hin, die zu leichten oder mittelschweren Verletzungen führen
kann, falls diese nicht vermieden wird.
VORSICHT
VORSICHT ohne das Sicherheitswarnsymbol weist auf eine
möglicherweise gefährliche Situation hin, die zu Sachschaden
führen kann, falls diese nicht vermieden wird.
ALLGEMEINE VORSICHTSMASSNAHMEN
WARNHINWEIS
Laden Sie die Batterie immer in einem gut belüftetenBereich auf.
Während dem Ladevorgang kann u.U. explosives Wasserstoffgas
entweichen. Offene Flammen, elektrische Funken und
Rauchwaren sollten immer von der Batterie fern gehalten werden.
Eine Nichtbeachtung kann zu schweren Verletzungen oder zum
Todesfall führen. HINWEIS:
Gasdurchlauferhitzer sind Quellen offener Flammen und sollten
daher unbedingt vermieden werden.
VORSICHT
Stellen Sie das Ladegerät so weit wie möglich, je nach Länge des
Ausgangskabelbaums, von der Batterie entfernt auf. Stellen Sie das
Ladegerät NIEMALS über oder unter der Batterie auf. Gase und
Flüssigkeiten der Batterie können das Ladegerät korrodieren und
beschädigen.
Tragbare Batterieladegeräte
für sechszellige Bleisäure-
Batterien

11
VORSICHT
Stellen Sie das Ladegerät nicht auf einer aus brennbarem Material
bestehenden Fläche auf. Stellen Sie es in einem gut durchlüfteten
Bereich auf, damit sich die vom Ladegerät erzeugte Wärme
ausbreiten kann.
VORSICHT
Benutzen Sie das Batterieladegerät NUR DANN, wenn die
Batteriespannung der Ausgangsspannung des Ladegerätes
entspricht. So sollten Sie beispielsweise ein 12 Volt-Ladegerät
nicht für eine 6 Volt-Batterie verwenden und auch nicht
umgekehrt.
WARNHINWEIS
Um Gefahren wie Elektroschock oder Feuer vorzubeugen, sollte
das Ladegerät niemals Witterungseinflüssen wie Regen und
Schnee ausgesetzt werden.
WARNHINWEIS
Verwenden Sie keine Zusatz- oder Zubehörteile, die nicht vom
Hersteller des Batterieladegerätes empfohlen oder angeboten
werden, da dies zu Gefahren wie Elektroschock, Feuer oder
anderen unvorhersehbaren Situationen führen kann, die
Personenschäden verursachen können.
VORSICHT
Wenn Sie das Netzkabel handhaben, ziehen Sie es immer am
Stecker und nicht am Kabel aus der Steckdose. Dadurch besteht
weniger Gefahr, dass der Stecker oder das Kabel beschädigt wird
und reduziert somit eine Elektroschockgefahr auf ein Minimum.
VORSICHT
Stellen Sie sicher, dass alle Netzkabel so liegen, dass niemand
darauf treten oder darüber stolpern kann bzw. dass sie nicht
beschädigt werden oder Belastungen ausgesetzt sind.
VORSICHT
Lesen Sie alle Sicherheitsvorschriften des Batterieherstellers und die
spezifischen Empfehlungen für den sicheren Betrieb, wie z.B. dass
die Abdeckung der Batteriezellen während des Ladevorgangs nicht
entfernt werden darf oder wie hoch die empfohlene Ladespannung
ist (Ausgangsspannung des Batterieladegerätes). Dies ist zur
Vermeidung von Schäden an der Batterie wichtig.
12
VORSICHT
Wenn das Batterieladegerät über einen längeren Zeitraum hinweg
(Wochen, Monate, etc.) an einer normalen, gefüllten Batterie
angeschlossen bleibt, überprüfen Sie von Zeit zu Zeit den vom
Hersteller in den Anweisungen zum sicheren Gebrauch
empfohlenen Füllstand der einzelnen Zellen.
VORSICHT
Wenn die Batterie während des Ladevorgangs eine übermäßige
Menge an Gasen abgibt oder eine Temperatur von über 55C
erreicht, trennen Sie das Ladegerät von der Batterie und lassen
Sie sie abkühlen. Eine Überhitzung kann zu Verwindung der
Platte, Plattenkurzschluss, Eintrocknen oder sonstigen Schäden
führen.
WARNHINWEIS
Versuchen Sie NIEMALS das Ladegerät auseinander zu bauen
oder Reparaturen im Inneren des Gehäuses vorzunehmen. Für
derartige Reparaturen sollten Sie das Ladegerät zu einem
qualifizierten Wartungstechniker bringen. Der unsachgemäße
Zusammenbau des Ladegerätes kann zu Elektroschock und
Feuergefahr führen. Sollte das Stromanschlußkabel beschädigt
sein, muß dieses durch den Hersteller oder Vertriebspartner. bzw
von einem Fachmann ersetzt werden, um evtl. Gefährdungen
auszuschließen.
PERSÖNLICHE SICHERHEITSVORKEHRUNGEN
WARNHINWEIS
Batteriepole und Anschlussklemmen sowie ähnliche Zubehörteile
enthalten Blei und Bleikomponenten. Hierbei handelt es sich um
chemische Stoffe, die nach den Erkenntnissen des US-
Bundesstaates Kalifornien krebserregend sind und Geburts-
sowie andere Fortpflanzungsschäden hervorrufen können.
Waschen Sie daher nach jedem Gebrauch Ihre Hände.
1. Wenn Sie in der Nähe einer Blei-Säure-Batterie arbeiten, sollte sich
immer jemand in Rufweite oder nahe genug befinden, um Ihnen zu Hilfe
zu kommen;
2. Halten Sie reichlich frisches Wasser und Seife in Reichweite, falls
Batteriesäure mit der Haut, der Kleidung oder den Augen in Kontakt
kommt;
3. Tragen Sie kompletten Augenschutz und Schutzbekleidung. Vermeiden
Sie es, Ihre Augen zu berühren, wenn Sie in der Nähe einer Batterie
arbeiten;

13
4. Falls Batteriesäure mit der Haut oder der Kleidung in Kontakt kommt,
waschen Sie sie sofort mit Seife und Wasser ab. Sollte Säure in die
Augen geraten, spülen Sie sie umgehend für mindestens 10 Minuten mit
kaltem Wasser aus und suchen Sie anschließend umgehend einen Arzt
auf;
5. Rauchen Sie NIEMALS in der näheren Umgebung einer Batterie oder
eines Motors und stellen Sie sicher, dass keine Funken oder Flammen
entstehen.
6. Gehen Sie sehr vorsichtig mit Metallwerkzeugen um, da diese, wenn sie
auf die Batterie fallen, Funken schlagen oder einen Kurzschluss in der
Batterie oder anderen elektrischen Teilen verursachen können, was
wiederum zu einer Explosion führen könnte;
7. Entfernen Sie persönlichen Schmuck, wie z.B. Ringe, Armbänder,
Halsketten und Uhren, wenn Sie in der Nähe von Blei-Säure-Batterien
arbeiten. Eine Blei-Säure-Batterie kann eine Kurzschlussspannung
auslösen, die hoch genug ist, einen Ring oder Ähnliches an Metall zu
schweißen. Dies kann schwere Verbrennungen hervorrufen;
8. Verwenden Sie das Ladegerät nur zum Aufladen von Blei-Säure-
Batterien. Es ist nicht dafür konzipiert, elektrische Systeme mit
Kleinstspannung mit Strom zu versorgen oder Trockenzellbatterien
aufzuladen. Das Aufladen von Trockenzellbatterien kann eine Explosion
dieser verursachen und zu Personen- und Sachschäden führen.
HINWEIS
Es sind verschiedene nasse, auslaufsichere Blei-Säure-Batterien im Handel
erhältlich, die vom Hersteller als Trockenzellbatterien bezeichnet werden.Bei
diesen Batterien handelt es sich jedoch um geschlossene, gas-
rekombinierende Batterien mit verhungerten Elektrolyten, möglicherweise in
einer Mikroglasvlies-Bauweise (AGM – engl. „Absorbed Glass Matte“). Diese
Art von Batterien können sicher mit dem INTERNATIONAL BATTERY
TENDER® aufgeladen werden. Der Warnhinweis für Trockenzellbatterien gilt
für nicht wieder aufladbare, alkalische oder ähnliche Arten von Batterien.
Wenn Sie sich aber nicht 100% sichersind, welcheArt vonBatterie Siehaben,
setzenSie sichmit demBatterieherstellerin Verbindung, bevorSie versuchen,
die Batterie aufzuladen.
9. VersuchenSie NIEMALS einesichtbarbeschädigteoder eingefrorene
Batterie aufzuladen.
10. Nicht wiederaufladbare Batterien nicht anschließen.
VORBEREITUNGEN VOR DEM AUFLADEN
1. Wenn Sie die Batterie zum Aufladen aus dem Fahrzeug nehmen müssen,
trennen Sie zuerst immer den geerdeten Endpol. Stellen Sie sicher, dass
sämtliche Zubehörteile im Fahrzeug ausgeschaltet sind, um eine
Bogenbildung zu verhindern;
2. Stellen Sie sicher, dass während dem Aufladen der Batterie inderen Bereich
eineausreichendeEntlüftungvorhanden ist. Entstehende Gase können durch
kraftvolles Hin- und Herwedeln eines festen Kartonstücks oder sonstigen,
nicht-metallischen Materials weggeweht werden;
3. Säubern Sie die Batteriepole. Gehen Sie dabei vorsichtig vor, damit keine
Rostpartikel in die Augen geraten;
14
4. Füllen Sie jede Zelle bis zur vom Hersteller vorgegebenen Füllhöhe mit
destilliertem Wasser auf. Dadurch wird übermäßiges Gas aus den Zellen
geklärt. Die Zellen nicht überfüllen. Bei Batterien ohne Zellenabdeckung
halten Sie sich hinsichtlich des Aufladens genauestens an die Anweisungen
des Herstellers;
5. Lesen Sie aufmerksam alle spezifischen Sicherheitshinweise des
Batterieherstellers,wie beispielsweise,obdieZellenabdeckung währenddes
Aufladevorgangs abgenommen werden kann und wie hoch die empfohlene
Ladespannung ist;
6. Beziehen Sie sich zur Feststellung der Nennspannung der Batterie auf die
Betriebsanleitung Ihres und stellen Sie sicher, dass diese mit der
Ausgangsspannung des Batterieladegerätes übereinstimmt.
7. Aufstellen des Ladegerätes:
a. Stellen Sie das Ladegerät so weit wie möglich von der Batterie entfernt
auf.
b. Die maximale Entfernung wird jedoch durch die Länge des
Gleichstromkabels bestimmt; Stellen Sie das Ladegerät niemals direkt
über oder unter der aufzuladenden Batterie auf.
c. Gaseund Flüssigkeiten derBatterie können dasLadegerätkorrodieren
und beschädigen;
d. Achten Sie beim Ablesen der spezifischen Dichte oder Auffüllen der
Batterie darauf, dass keine Batteriesäure auf das Ladegerät tropft;
e. Verwenden Sie das Ladegerät nicht in einem geschlossenen Raum
oder einem Bereich mit eingeschränkter Luftzufuhr;
8. Verbinden bzw. trennen Sie die Klemmzangen der Ladekabel erst
nachdem Sie die Ladegerätschalter ausgeschaltet und den Netzstecker
aus der Steckdose gezogen haben. Achten Sie darauf, dass die
Klemmzangen nicht miteinander in Kontakt kommen.
9. Gehen Sie wie folgt vor, wenn sich die Batterie im Fahrzeugbefindet. Ein
in der Nähe der Batterie entstehender Funke kann eine Explosion der
Batterie verursachen. Um die Gefahreiner Funkenbildung inder Nähe der
Batterie zu verringern:
a. Legen Sie die Netz- und Ladekabel so, dass sie nicht durch
bewegliche Motorteile beschädigt werden;
b. Überprüfen Sie die Polarität der Batteriepole. Der positive
Batteriepol (pos, p, +) kann u.U. einen größeren Durchmesser als
der negative Endpol (neg, n, -) haben;
c. Stellen Sie fest, welcher Endpol geerdet ist (am Fahrzeugrahmen
angeschlossen). Wenn der negative Endpol (Minuspol) zum
Fahrzeugrahmen geerdet ist (wie dies in den meisten Fahrzeugen
der Fall ist), siehe Punkt d). Wenn der positive Endpol (Pluspol) mit
dem Fahrzeugrahmen geerdet ist, siehe Punkt e);
d. Bei Fahrzeugen, die am Minuspol geerdet sind, schließen Sie die
positive (rote) Klemmzange des Batterieladegerätes an den
positiven (pos, p, +), nicht geerdeten Endpol der Batterie an.
Befestigen Sie dann die negative (schwarze) Klemmzange in einer
sicheren Entfernung zur Batterie am Fahrzeugrahmen oder
Motorblock. Klemmen Sie diese auf keinen Fall an den Vergaser,
die Benzinleitungen oder Blechteile an, sondern an einem soliden
Metallteil des Fahrzeugrahmens oder des Motorblocks;
e. Bei Fahrzeugen, die am Pluspol geerdet sind, schließen Sie die
negative (schwarze) Klemmzange des Batterieladegerätes am
negativen (neg, n, -) nicht geerdeten Endpol der Batterie an.

15
Befestigen Sie dann die positive (rote) Klemmzange in einer
sicheren Entfernung zur Batterie am Fahrzeugrahmen oder
Motorblock. Klemmen Sie diese auf keinen Fall an den Vergaser,
die Benzinleitungen oder Blechteile an, sondern an einem soliden
Metallteil des Fahrzeugrahmens oder des Motorblocks;
f. Schließen Sie das Netzkabel an den Netzstrom an;
g. Zum Abschalten des Ladegerätes stellen Sie zunächst die
Netzschalter auf AUS, trennen Sie das Netzkabel, entfernen Sie
danndieam Fahrzeugrahmen befestigte Klemmzangeund danndie
am Endpol der Batterie befestigte Klemmzange.
10. Gehen Sie wie nachfolgend beschrieben vor, wenn sich die Batterie
außerhalb des Fahrzeugs befindet. Ein in der Nähe der Batterie
entstehender Funke kann eine Explosion der Batterie verursachen. Um
die Gefahr einer Funkenbildung in der Nähe der Batterie zu verringern:
a. Überprüfen Sie die Polarität der Batteriepole. Der positive
Batteriepol (pos, p, +) kann u.U. einen größeren Durchmesser als
der negative Endpol (neg, n, -) haben;
b. Schließen Sie einmindestens 61 cmlanges,isoliertes Batteriekabel
miteiner AWG-Drahtstärke von6 (4,67 mm)an den negativen(neg,
n, -) Endpol der Batterie an;
c. Befestigen Sie die positive (rote) Klemmzange des Ladekabels an
den positiven (pos, p, +) Endpol bzw. Pluspol der Batterie an;
d. Stellen Sie sich mit dem freien Kabelende so weit wie möglich von
derBatterie entferntund schließenSie danndie negative(schwarze)
Ladeklemmzange am freien Kabelende an;
e. Wenn Sie die letzte Verbindung herstellen, sollten Sie sich in einer
der Batterie abgewandten Position befinden;
f. Schließen Sie das Netzkabel an den Netzstrom an;
g. Beim Trennen des Ladegerätes sollten Sie immer in umgekehrter
Reihenfolgeals beimAnschlussvorgang vorgehenund immerzuerst
die Verbindung trennen, wenn Sie sich am weitesten von der
Batterie entfernt befinden, sofern dies praktischerweise möglich ist.
BETRIEBSANLEITUNG
AUTOMATISCHER AUFLADEVORGANG UND
ÜBERWACHUNG DES BATTERIEZUSTANDS: Alle BATTERY
TENDER® arbeiteten vollautomatisch und können über längere
Zeiträume hinweg am Netz und der aufzuladenden Batterie
angeschlossen bleiben. Die Ausgangsleistung und -spannung sowie
der Ausgangsstrom der Ladegeräte sind vom Zustand der
aufzuladenden Batterie abhängig. BATTERY TENDER® verfügen
über zwei Statusanzeigelichter, die es ermöglichen, optisch die
Betriebsart des Ladegerätes und damit auch den Zustand der am
Ladegerät angeschlossenen Batterie festzustellen.
16
BATTERY TENDER® sind mit zwei Statusanzeigelichtern ausgestattet, mit
denen festgestellt werden kann, in welcher der drei folgenden
Hauptbetriebsarten das Ladegerät arbeitet: Betriebsart „Volumen“: (volle
Aufladung, Konstantstrom,Batterie istzu 0% bis 85% aufgeladen);Betriebsart
„Absorption“ (hoher Konstantstrom, Batterie ist zu 85% bis 100% aufgeladen)
oder Betriebsart „Ladungserhaltung“ (niedriger Konstantstrom, Batterie ist zu
100% bis 103% aufgeladen).
Wenn die Batterie vollständig aufgeladen ist, schaltet sich das grüne
Statusanzeigelicht ein und das Ladegerät wechselt zur Betriebsart
„Ladungserhaltung“ über. BATTERY TENDER® überwachen die Ladung
automatisch und sorgen dafür, dass die Batterie im vollgeladenen Zustand
gehalten wird.
ELEKTRISCHE VERBINDUNGEN ZWISCHEN DEM LADEGERÄT UND
DER BATTERIE: Schließen Sie vor demAufladen dieKrokodilklemmen oder
die geschlossenen Kabelschuhe an die Batteriepole an. Schließen Sie dann
das Netzkabel an das Stromnetz an. Wenn Sie die Batterie vom Ladegerät
trennen möchten, trennen Sie zuerst das Netzkabel des Ladegerätes vom
Stromnetz und danach dann die Verbindungskabel des Ladegerätes von den
Batteriepolen.
WARNHINWEIS
Bevor Sie die Batterieanschlussklemmen an der Batterie
anschließen bzw. von dieser trennen, ziehen Sie immer den
Stecker des Batterieladegeräts aus der Steckdose oder schalten
Sie es aus. Das Anschließen oder Trennen der
Batterieanschlussklemmen bei eingeschaltetem Batterieladegerät
kann eine Funkenbildung hervorrufen, was wiederum zur
Explosion der Batterie führen kann. Durch die Explosion der
Batterie kann das Batteriegehäuse zerbersten, was zur Folge
haben kann, dass Schwefelsäure austritt oder verspritzt. Dies
kann ernste Verletzungen hervorrufen oder zu Verletzungen mit
Todesfolge führen.
VERBINDUNGEN FÜR ALLE ARTEN VON BLEI-SÄURE-BATTERIEN: (SiehePunkt
10 der allgemeinen Vorsichtsmaßnahmen)
Allgemein: Schließen Sie zuerst das rote positive (+) Batterieanschlusskabel des
Ladegerätes am Pluspol der Batterie an und dann anschließend das schwarze
negative (-) Batterieanschlusskabel des Ladegerätes an den Minuspol der
Batterie. Beachten Sie jedoch insbesondere die nächsten beiden Punkte und die
Anleitungen unter Punkt 18 der allgemeinen Vorsichtsmaßnahmen.
Als zusätzliche Sicherheitsmaßnahme und besonders im Umgang mit normalen,
gefüllten Blei-Säure-Batterien, empfiehlt UL, dass die zweite, negative (-)
Kabelverbindung vom Ladegerät nicht direkt zum Minuspol der Batterie erfolgt,
sondern am geerdeten Geräterahmen.
In ähnlicher Weise gilt für positiv geerdete Systeme, dass der Pluspol der Batterie
nun an demselben elektrischen Potential wie der geerdete Geräterahmen liegt.
Aus diesem Grund empfiehlt UL, dass das positive (+) Ausgangskabel des
Batterieladegerätes am geerdeten Geräterahmen angeschlossen wird und nicht
direkt am Pluspol der Batterie.

17
ACHTUNG: BATTERY TENDER® LADEGERÄTE VERFÜGEN ÜBER EINEN
FUNKENFREIEN SCHALTKREIS. Wenn die Batterieanschlusskabel mit den
Krokodilklemmen oder die geschlossenen Kabelschuheeinander berühren, entstehen
keine Funken. Die Batterie muss eine Spannung von 3 Volt aufweisen, bevor
BATTERYTENDER®eine Ausgangsspannung erzeugen. Darüber hinaus müssen sie
mit der richtigen Polarität an der Batterie angeschlossen sein, bevor das Aufladen der
Batterie beginnt. Aus diesem Grund entstehen keineFunken, wennSie das Netzkabel
in die Steckdose stecken, die Krokodilklemmen oder die geschlossenen Kabelschuhe
der Ladegerätkabel nicht an der Batterie angeschlossen sind oder wenn die
Krokodilklemmen, bzw. die geschlossenen Kabelschuhe miteinander in Kontakt
kommen.
HINWEIS:
DIE AUSGANGSKLEMMEN ODER DIE GESCHLOSSENEN KABELSCHUHE DES
LADEGERÄTES MÜSSEN AN DER BATTERIE ANGESCHLOSSEN SEIN, BEVOR
DAS LADEGERÄT EINE AUSGANGSSPANNUNG ERZEUGEN KANN.
Wenn das Ladegerät falsch angeschlossen ist, d.h.eine Falschpolung vorliegt, beginnt
das orangefarbene Anzeigelicht zu blinken (International plus und EURO400), was
darauf hindeutet, dass der Ladevorgang nicht eingeleitet wurde (Bei WP800 gar keine
Anzeige). Die Krokodilklemmen oder diegeschlossenen Kabelschuhe müssen mitder
korrekten Polarität angelegt werden, rot an positiv (+ Plusklemme am + Pluspol) und
schwarz an negativ (- Minusklemme am – Minuspol), bevor das Ladegerät eine
Ausgangsspannung erzeugt.
AUFLADEN VON TOTEN BATTERIEN ODER SOLCHEN MIT SEHR NIEDRIGER
SPANNUNG:
Wenn Sie versuchen, eine tote Batterie miteiner Ladespannung von wenigerals 3 Volt
aufzuladen, schalten sich BATTERY TENDER® nicht ein. Wenn nicht mindestens 3
Volt am Ausgang des Ladegerätes festgestellt werden, verhindert ein interner
Schutzschaltkreis, dass BATTERY TENDER® eine Ausgangsspannung erzeugen. In
diesem Fall blinkt das orangefarbene Anzeigelicht weiter (International plus und
EURO400), was darauf hindeutet, dass der Ladevorgang nicht eingeleitet wurde (Bei
WP800 keine Anzeige). HINWEIS:
Wenn eine 12 Volt Blei-Säure-Batterie eine Ausgangsspannungvon wenigerals9 Volt
im Ruhezustand aufweistund sie weder aufgeladenwirdnoch externe Verbrauchermit
Strom versorgt, ist es gut möglich, dass es sich hierbei um eine defekte Batterie
handelt. Als Bezugswert kann davon ausgegangen werden, dass eine vollständig
aufgeladene 12 Volt Blei-Säure-Batterie im Ruhezustand eine Leerlaufspannung von
ca. 12,9 Volt aufweist. Eine völlig entladene 12 Volt Blei-Säure-Batterie hat im
Ruhezustand eine Leerlaufspannung von ca. 11,4 Volt. Dies bedeutet, dass ein
Spannungsunterschied von nur 1,5 Volt das volleSpektrumdes Ladezustands von 0%
bis 100% einer 12 Volt Blei-Säure-Batterie darstellt. Je nach Hersteller und Alter der
Batterie kann die spezifische elektrische Spannung nur um ein Zehntel eines Volts
variieren. Der 1,5 Volt-Bereich gibt jedoch schon einen gutenAnhaltspunkt hinsichtlich
des Batterieladezustands in Prozent (%)-Anteilen.
18
STATUSANZEIGELICHTER: Wenn keines der Lichter aufleuchtet,
ist entweder die Batterie nicht richtig angeschlossen oder das
Ladegerät ist nicht am Netz angeschlossen. Im Nachfolgenden ist
die Bedeutung der Statusanzeigelichter beschrieben:
ORANGEFARBENES ANZEIGELICHT BLINKT – Ein blinkendes,
orangefarbenesAnzeigelicht (Nur Internationalplus undEURO400)
weist darauf hin, dass das Batterieladegerät mit Wechselstrom
versorgt wird und der Mikroprozessor ordnungsgemäß arbeitet.
Wenn das orangefarbene Anzeigelicht kontinuierlich blinkt, ist
entweder die Ladespannung der Batterie zu niedrig (unter 3 Volt)
oder die Krokodilklemmen bzw. als Zubehör erhältlichen,
geschlossenen Kabelschuhe sind nicht richtig angeschlossen.
ORANGEFARBENES ANZEIGELICHT KONSTANT AN – Ein
konstant leuchtendes, orangefarbenes Anzeigelicht (Alle Geräte)
weist darauf hin, dass die Batterie korrekt angeschlossen ist und
vom Ladegerät aufgeladen wird. Das orangefarbene Anzeigelicht
erlischt, wenn der Ladevorgang abgeschlossen ist.
GRÜNES ANZEIGELICHT BLINKT – (Nur International plus und
EURO400) Wenn das grüne Anzeigelicht blinkt (Bei International
plus leuchtet zusätzlich das orangefarbene Licht konstant), ist die
Batterie bereits zu über 80% aufgeladen und kann nötigenfalls vom
Ladegerät getrennt und benutzt werden. Wenn möglich, lassen Sie
die Batterie jedoch so lange laden, bis das grüne Anzeigelicht
konstant aufleuchtet.
GRÜNES ANZEIGELICHT KONSTANT AN – Wenn das grüne
Anzeigelicht konstant leuchtet (Alle Geräte), ist der Ladevorgang
abgeschlossenund die Batterie kannwiederbenutztwerden,sofern
erforderlich.
STATUSANZEIGESYMBOLE: Die nachfolgenden Symbole
befinden sich neben den Statusanzeigelichtern.
Das Symbol neben dem ORANGEFARBENEN
Anzeigelicht stellt eine teilweise aufgeladene Batterie dar.
Der durchgehende Streifen im unteren Teil ist in Grün
dargestellt, der Hintergrund in Gelb. Der grüne Bereich repräsentiert
den aufgeladenen und der gelbe Bereich den ungeladenen Teil der
Batterie.
Das Symbol neben dem GRÜNEN Anzeigelicht stellt
eine vollständig aufgeladene Batterie dar. Der gesamte
Bereich innerhalb der Batteriekontur ist in Grün
dargestellt.

19
CHECKLISTE FÜR DIE FEHLERSUCHE:
1. ANZEIGELICHTER DES LADEGERÄTES SCHALTEN SICH NICHT
EIN:
a. Trennen Sie das Ladegerät von Netz und überprüfen Sie
nochmals, ob die Batterieanschlussklemmen an den richtigen
Polen befestigt sind und eine saubere, feste Verbindung besteht.
b. Stellen sicher, dass der Netzanschlussauch Strom führt,indemSie
eine Lampe, Gerät oder einen Spannungsmesser anschließen.
2. DAS GRÜNE LICHT SCHALTET SICH SOFORT EIN, WENN EINE
ENTLADENE BATTERIE ANGESCHLOSSEN WIRD:
a. Die Batterie ist möglicherweise defekt und sollte von einem
Fachhändler überprüft werden.
3. DAS LADEGERÄT LÄDT, ABER DAS GRÜNE LICHT SCHALTET
SICH NICHT EIN:
a. Die Batterie ist möglicherweise defekt und sollte von einem
Fachhändler überprüft werden.
b. Die Batterieverzeichnet eineübermäßighohe Stromentnahmeund
solltedeshalb vonder Ausrüstungbzw. Fahrzeuggetrennt werden.
4. DAS ORANGEFARBENE ANZEIGELICHT SCHALTET SICH BEIM
ERHALTUNGSLADEN DER BATTERIE EIN:
a. Die Batterie ist möglicherweise defekt und sollte von einem
Fachhändler überprüft werden.
b. Die Batterieverzeichnet eineübermäßighohe Stromentnahmeund
solltedeshalb vonder Ausrüstungbzw. Fahrzeuggetrennt werden.
Dieses Gerät kann von Kinder ab 8 Jahren und höher
verwendet werden, und Personen mit Behinderungen,
körperlichen, sensorischen oder geistigen Fähigkeiten oder
Mangel an Erfahrung und wissen, wenn sie Aufsicht oder
Anleitung über die Verwendung des Gerätes auf eine sichere
Weise gegeben worden und die Gefahr beteiligt verstehen.
Kinderwerden nicht mit demGerät spielen. Wartung Reinigung
und Benutzer werden nicht verrückt von Kindern ohne Aufsicht
Die Zuleitung kann nicht ersetzt werden. Wenn das Netzkabel
beschädigt ist das Gerät verschrottet werden sollte
Untersuchen Sie das Batterieladegerät regelmäßig für
Schäden, insbesondere der Kabel, Stecker und Gehäuse,
wenn das Ladegerät beschädigt ist, es darf nicht verwendet
werden, bis es repariert wurde.
Dieses Symbol weist auf die separate Entsorgung von elektrischen und
elektronischen Artikeln hin
.
20
IMPORTANTES CONSIGNES DE SÉCURITÉ
À LIRE ATTENTIVEMENT
CONSERVEZ CE MODE D'EMPLOI
TÉLÉCHARGER LE MANUEL
Ce manuel peut être lu ou téléchargé à partir de la pile d'appel d'offres®site @
www.batterytender.com
DÉFINITIONS DES SYMBOLES D'AVERTISSEMENT ET
D'ATTENTION
AVERTISSEMENT
AVERTISSEMENT signale une situation pouvant êtredangereuse
et qui, si elle n'est pas évitée, peut entraîner des blessures graves
ou la mort.
ATTENTION
ATTENTION signale une situation pouvant être dangereuse et qui,
si elle n'est pas évitée, peut entraîner des blessures bénignes ou
légères. ATTENTION
ATTENTION utilisé sans le triangle de danger signale une
situation pouvant être dangereuse et qui, si elle n'est pas évitée,
peut entraîner des dommages matériels.
PRÉCAUTIONS D'ORDRE GÉNÉRAL :
AVERTISSEMENT
Toujours charger la batterie dans un endroit bien ventilé. De
l'hydrogène peut s'échapper de la batterie pendantle chargement.Ne
jamais approcher de la batterie ni feu nu, ni étincelle électrique, ni
aucun matériau incandescent. Impérativement suivre ces règles de
sécurité sous peine de blessures graves ou mort.
REMARQUE :
Un chauffe-eau à gaz fonctionne avec un feu nu qu'il faut éviter.
ATTENTION
EMPLACEMENT DU CHARGEUR : PLACER le chargeur aussi loin
que possible de la batterie, en fonction de la longueur du câble de
sortie. NE JAMAIS placer le chargeur sur la batterie. Des gaz ou des
liquides s'échappant de la batterie peuvent endommager le
chargeur.
Chargeurs de batterie portatifs
Développé pour des batteries acide-plomb à six
cellules

21
ATTENTION
NE JAMAIS placer le chargeur sur une surface faite d'une matière
combustible. Placer dans un local bien ventilé pour dissiper la
chaleur dégagée par le chargeur.
ATTENTION
COMPATIBILITÉ DE LA TENSION ÉLECTRIQUE DU CHARGEUR :
TOUJOURS utiliser un chargeur de batterie dont la tension de sortie
est la même que la tension de la batterie. Par exemple, nepas utiliser
un chargeur à 12 volts pour une batterie de 6 volts et inversement.
AVERTISSEMENT
HUMIDITÉ EXCESSIVE : Ne pas exposer le chargeur à la pluie ou àla
neige afin d'éviter tout choc électrique ou incendie.
AVERTISSEMENT
ACCESSOIRES DU CHARGEUR : Ne pas utiliser d'accessoiresqui ne
sont ni recommandés ni vendus par le fabricant du chargeur de
batterie. L'utilisation d'accessoires non fournis par le fabricant peut
entraîner des risques de choc électrique, d'incendie ou aussi
d'autres situations imprévisibles pouvant causer des dommages
corporels.
ATTENTION
UTILISATION DES CORDONS D'ALIMENTATION : Lorsque vous
utilisez des cordons d'alimentation, tirez toujours la fiche, pas le
cordon. Ceci réduira les risque d'endommagement tant de la fiche
que du cordon et minimisera les risques de choc électrique pouvant
résulter d'un tel endommagement.
ATTENTION
EMPLACEMENT DES CORDONS D'ALIMENTATION : Disposer les
cordons d'alimentation de telle sorte que personne ne puisse
marcher dessus, se prendre les pieds dedans, ou pour qu'ils ne
soient exposés à aucun endommagement éventuel.
ATTENTION
UTILISATION DES MODES D'EMPLOI : Lire attentivement toutes les
précautions d'emploi et les recommandations spécifiques pour le
fonctionnement sans danger prescrites par le fabricant de la batterie,
telles que : l'interdiction de retirer les bouchons d'éléments pendant
le chargement, les taux de charge recommandés (courant de sortie
du chargeur). 22
ATTENTION
SURVEILLANCE DES BATTERIES SANS ENTRETIEN : Si vous
laissez le chargeur de batterie connecté à une batterie sans
entretien sur une période prolongée (semaines, mois, etc.),
vérifiez régulièrement que la batterie ne soit pas plus chaudeque
d'habitude.
ATTENTION
Ceci pourrait indiquer que la batterie ait peut-être un élément
défaillant et qu'elle est susceptible de surchauffer en causant des
dégâts irréversibles à la batterie. Si la batterie dégage beaucoup
de gaz ou si la température de la batterie dépasse 130˚F (55˚C)
pendant le chargement, déconnecter le chargeur et laisser la
batterie refroidir. La surchauffe peut provoquer la distorsion des
plaques, un court-circuit interne, le dessèchement ou d'autres
dommages.
AVERTISSEMENT
ENTRETIEN DU CHARGEUR : NE JAMAIS démonter le chargeur
ou tenter de faire des réparations internes. Le faire réparerpar un
technicien qualifié. Une erreur de remontage du chargeur peut
entraîner un risque de choc électrique ou d'incendie. Si le
câble d'amenage est endommagé, il doit être remplacé par le
fabricant, un distributeur autorisé ou une personnes qualifiée
pour éviter des risques.
PRÉCAUTIONS PERSONNELLES :
AVERTISSEMENT
Les bornes de la batterie et ses accessoires contiennent du
plomb et des composants en plomb, produits chimiques
reconnus par l'État de Californie comme pouvant provoquer
cancer et anomalies congénitales ainsi que d'autres effets
néfastes lors de la reproduction. Laver les mains après utilisation.
1. Une personne doit être à portée de voix ou suffisamment près de
vous pour venir vous aider quand vous manipulez une batterie au
plomb-acide ;
2. Prévoir une réserve d’eau douce et de savon en cas de contact de la
peau, des habits, ou des yeux avec l'acide de la batterie.
3. Porter des lunettes de protection et des habits adaptés. Ne vous
touchez jamais les yeux lorsque vous manipulez une batterie ;

23
4. Laver immédiatement avec de l'eau et du savon en cas de contact de
l'acide de la batterie avec la peau ou les habits. En cas de contact
avec un œil, rincer abondamment avec de l'eau froide du robinet
pendant 10 minutes et prévenir un médecin immédiatement ;
5. NE JAMAIS fumer ou approcher une étincelle ou une flamme à
proximité de la batterie ou du moteur.
6. Soyez particulièrement vigilant à ne pas laisser tomber un outil
métallique sur la batterie. Celui-ci pourrait émettre une étincelle ou
provoquer un court-circuit de la batterie avec une autre pièce
électrique, pouvant provoquer une explosion.
7. Enlever tout effet personnel en métal : bagues, bracelets, colliers et
montres lorsque vous manipulez une batterie au plomb-acide. Une
batterie au plomb-acide peut produire un court-circuit de courant
suffisamment fort pour souder une bague, ou autre, à un métal,
provoquant ainsi de sérieuses brûlures ;
8. N'utiliser le chargeur que pour recharger des batteries au plomb-
acide. Il n'est pas conçu pour alimenter en courant un circuit
électrique à basse tension ou pour recharger des piles sèches. Le
chargement de piles sèches peut entraîner leur explosion et
provoquer des blessures corporelles et matérielles ;
REMARQUE
Il existe sur le marché des batteries humides au plomb-acide, à électrolyte
gélifié que les fabricants vendent sous le nom de "batteries sèches". Ces
batteriessont étanches,avec unélectrolyte recombinantcatalytique degaz, et
peut-être un gel électrolytique spécial.Il esttout à faitsûr d'utiliser lechargeur
de batterie International Battery Tenderpourrechargerce genrede batteries.
Cet avertissement à l'égard des piles sèches concerne les piles (ou batteries)
non rechargeables, alcalines ou similaires. Si vous avez le moindre doute sur
le type de batterie que vous possédez, contactez le fabricant de la batterie
avant de commencer à recharger la batterie.
9. NE JAMAIS recharger une batterie gelée ou visiblement
endommagée.
10. Ne pas recharger des piles non rechargeables.
PRÉPARATION DE LA CHARGE :
1. S'ilfaut sortir labatterie du véhiculepour la charger,commencez toujours
par débrancher la masse. Veillez à ce que tous les accessoires du
véhicule soient éteints afin d'éviter un arc électrique.
2. Assurez-vous de la bonne ventilation du local pendant la charge de la
batterie. On peut ventiler les gaz au moyen d'un morceau de carton ou de
tout autre matériau non métallique comme ventilateur.
3. Nettoyer les bornes de la batterie. Veillez à empêcher le contact entre la
corrosion et les yeux ;
4. Ajoutezde l'eaudistillée danschaque élémentpour compléterl'acide dela
batterie jusqu'au niveau recommandé par le fabricant de la batterie. Ceci
permet de chasser les excédents de gaz des éléments de la batterie. Ne
dépassez pas le niveau prescrit. Pour les batteries sans bouchons 24
d'élément, suivez attentivement les consignes pour la charge indiquées
par le fabricant.
5. Lisez attentivement toutes les précautions d'emploi stipulées par le
fabricant, telles que l'ouverture ou la non ouverture des bouchons
d'élément pendant la charge et les taux de charge recommandés.
6. Vous trouverez la tension de la batterie dans le manuel de votre et
assurez-vous que celle-ci corresponde à la tension de sortie du chargeur
de batterie.
7. EMPLACEMENT DU CHARGEUR :
a. Placer le chargeur aussi loin que possible de la batterie, en fonction
de la longueur des câbles de courant continu.
b. Ne jamais placer le chargeur directement au-dessus ou au-dessous
de la batterie à charger. Des gaz ou des liquides s'échappant de la
batterie abîmeront et provoqueront la corrosion du chargeur ;
c. Ne jamais laisser couler de l'acide de la batterie sur le chargeur
lorsque vous mesurez la densité ou remplissez la batterie.
d. Ne pas utiliser le chargeur dans une zone enfermée ou sans
ventilation.
e. Ne pas mettre la batterie sur le chargeur.
8. Nebrancher ou débrancherles pinces crocodilesducourantde sortie
continuqu'après que tousles interrupteurs duchargeur soient enposition
éteinte et après avoir débranché dela prise secteurle câble d'alimentation
en courant alternatif. Ne jamais laisser les pinces crocodiles se toucher.
9. Voici la marche à suivre si la batterie se trouve dans un véhicule. Une
étincelle à proximité de labatterie peut entraîner une explosionde celle-ci.
Pour réduire le risque d'une étincelle à proximité de la batterie :
a. Placer les câbles de courant alternatif et de courant continu de façon
à réduire au maximum le risque d'endommagement par des pièces
mobiles du moteur ;
b. Vérifierla polarité desbornes de labatterie. La bornepositive (pos,p,
+) peut être plus grosse que la borne négative (neg, n, -).
c. Vérifier quelle borne est reliée à la masse, c'est-à-dire au châssis. Si
la borne négative est reliée au châssis (comme dans la plupart des
véhicules), voir (d). Si la borne positive est reliée au châssis, voir(e).
d. Dans le cas d'un véhicule dont la borne négative est reliée à la
masse, brancher la pince crocodile positive (rouge) du chargeur de
batterie à la borne positive (pos, p, +) – non mise à la masse – de la
batterie. Brancher la pince crocodile négative (noire)sur le châssis du
véhicule ou sur le bloc moteur, à distance de la batterie. Ne pas
brancher la pince ni sur le carburateur, ni sur les canalisations de
carburant, ni sur la tôle. Brancher sur une pièce en métal de forte
épaisseur du cadre ou du bloc moteur ;
e. Dans le cas d'un véhicule dont la borne positive est reliéeà la masse,
brancher la pince crocodile négative (noire) du chargeur de batterie à
la borne négative (neg, n, -) – non mise à la masse – de la batterie.
Brancher la pince crocodile positive (rouge) sur lechâssis du véhicule
ou sur le bloc moteur, à distance de la batterie. Ne pas brancher la
pince ni sur le carburateur, ni sur les canalisations decarburant, ni sur
la tôle. Brancher sur une pièce en métal de forte épaisseur du cadre
ou du bloc moteur ;
f. Brancher le câble d'alimentation en courant alternatif du chargeur à
une prise de courant ;

25
g. Avant de débrancher le chargeur, éteindre les interrupteurs,
débrancher le câble de courant alternatif, retirer la pince du châssis
du véhicule et puis ensuite, retirer la pince de la borne de la batterie.
10. Voici la marche à suivre si la batterie se trouve au-dehors du véhicule.
Une étincelle à proximité de la batterie peut entraîner une explosion de
celle-ci.Pour réduire le risque d'une étincelle à proximité de la batterie :
a. Vérifierla polarité desbornes de labatterie. La bornepositive (pos,p,
+) peut être plus grosse que la borne négative (neg, n, -).
b. Brancherun câble debatterie isolé d'unelongueur minimale de0,6m
et de 4 mm de diamètre (102 kg/km) à la borne négative (neg, n, -) de
la batterie.
c. Brancher la pince crocodile positive (rouge) du chargeur à la borne
positive (pos, p, +) de la batterie.
d. Se tenir à distance et tenir l'extrémité libre du câble aussi loin que
possible de la batterie, puis brancher la pince négative (noire) du
chargeur à l'extrémité libre du câble ;
e. Ne pas faire face à la batterie lors du branchement final ;
f. Brancher le câble d'alimentation en courant alternatif du chargeur à
une prise de courant ;
g. Pour débrancher le chargeur, procéder dans l'ordre inverse de la
procédure de branchement et débrancher le premier câble en vous
tenant aussi loin que possible de la batterie.
MODE D'EMPLOI
CHARGE AUTOMATIQUE ET INDICATION DE L'ÉTAT Le
BATTERY TENDER®est complètement automatique et on peut le laisser
branché tant au courant alternatif qu'à la batterie qu'il charge pendant très
longtemps. La puissance de sortie, la tension et le courant du chargeur
dépendent de la condition de la batterie qu'il charge. Le chargeur BATTERY
TENDER®possède deux voyants d'indication d'état qui permettent de vérifier
visuellementle mode defonctionnement du chargeuret donc aussil'étatdela
batterie connectée au chargeur.
Le BATTERY TENDER®possède deux voyants d'indication d'état qui
permettent de savoir dans lequel des trois modes primaires de charge le
chargeur fonctionne : le mode charge rapide (restitution de la capacité
maximale, courant constant, la batterie est chargée de 0 à 85 %), le mode
absorption (haute tension constante, la batterie est chargée de 85 à 100 %),
ou charge d'entretien (basse tension constante, la batterie est chargéede 100
à 103 %).
Lorsque la batterie est complètement chargée, le voyant vert d'indication de
l'état s'allumera et le chargeur passera au mode de charge d'entretien. Le
BATTERY TENDER®surveillera automatiquement et maintiendra la charge
optimale de la batterie.
BRANCHEMENT ÉLECTRIQUE ENTRE LE CHARGEUR ET
LA BATTERIE : Avant la charge, brancher les câbles du chargeur
(pinces crocodile ou cosses à anneaux accessoires) aux bornes de la
batterie. Puis brancher le câble d'alimentation en courant alternatifà la
26
prise secteur. Avant de débrancher le chargeur de sa connexion avec
la batterie, débrancher d'abord le câble d'alimentation en courant
alternatif du chargeur de la prise secteur. Puis débrancher les câbles
du chargeur des bornes de la batterie.
AVERTISSEMENT
Ne brancher ou débrancher les câbles de sortie du chargeur aux
bornes de la batterie QUE LORSQUE L'ALIMENTATION EN
COURANT ALTERNATIF DU CHARGEUR EST DÉBRANCHÉE OU
QUE LE CHARGEUR EST ÉTEINT. Brancher ou débrancher les
câbles de sortie du chargeur lorsque celui-ci est allumé peut
provoquer une étincelle pouvant entraîner l'explosion de la
batterie. Une explosion de la batterie peut provoquer la rupture du
boîtier de la batterie entraînant un giclement d'acide sulfurique
qui peut entraìner des blessures graves ou la mort.
BRANCHEMENT POUR TOUS TYPES DE BATTERIES AU
PLOMB-ACIDE : (Voir paragraphe 18 dans les Précautions d'ordre
général.)
En général : Brancher d'abord le câble positif rouge (+) du
chargeur à la borne positive de la batterie. Puis brancher le câble
négatif noir (-) du chargeur à la borne négative de la batterie.
Cependant,être particulièrementvigilantauxdeuxparagraphes qui
suivent et aux consignes données au paragraphe 18 dans les
Précautions d'ordre général.
La mesure de sécurité supplémentaire suivante est fortement
recommandée par UL, en particulier lors de la manipulation de
batteries standard humides au plomb-acide : brancher le
(deuxième) câble négatif (-) du chargeur au châssis, mis à la
masse, plutôt que directement à la borne négative de la batterie.
De la même manière, pour les systèmes où la masse est
positive, la borne positive de la batterie est maintenant au même
potentiel électrique que le châssis mis à la masse. C'est pourquoi
UL recommande de brancher le câble positif (+) du chargeur au
châssis mis à la masse plutôt que directement à la borne positive
de la batterie.
ATTENTION : LE BATTERY TENDER®EST ÉQUIPÉ D'UN CIRCUIT
ANTI-ÉTINCELLES Les pinces crocodile de sortie ou les cosses
à anneau accessoires ne produiront pas d'étincelles au contact
l'une de l'autre. Le BATTERY TENDER®ne produira pas de
tension de sortie tant qu'il ne captera pas au moins 3 volts
venant de la batterie. Il doit être branché à une batterie ayant
une polarité conforme avant qu'il ne débute la charge de la
batterie.C'estpourquoi,sivous branchez le câble d'alimentation
en courant alternatif à une prise secteur et que les pinces

27
crocodile de sortie ou les cosses à anneau accessoires ne sont
pas branchées à une batterie, et que si vous mettez les pinces
alligator ou les cosses à anneau au contact l'une de l'autre, il ne
se produira pas d'étincelle électrique.
REMARQUE
LES PINCES CROCODILE DE SORTIE OU LES COSSES À
ANNEAU ACCESSOIRES DOIVENT ÊTRE BRANCHÉES À
UNE BATTERIE POUR QUE LE CHARGEUR PUISSE
PRODUIRE UNE TENSION DE SORTIE.
Si le chargeur est branché à l'envers, le voyant orange
continuera de clignoter (International plus et EURO400),
indication que la charge n'a pas encore commencé
(WP800:voyant n’est pas éclairé). Les pinces crocodile ou les
cosses à anneau doivent être branchées sur la batterie, en
respectant la polarité conforme, rouge sur le positif (+ de sortie
sur le + de la borne de batterie) et noir sur le négatif (- de sortie
sur le – de la borne de la batterie), pour que le chargeur puisse
produire une tension de sortie.
MANIPULATION D'UNE BATTERIE MORTE OU D'UNE
BATTERIE À TRÈS BASSE TENSION :
Si vous essayez de charger une batterie morte dont la tension
est inférieur à 3 volts, le BATTERY TENDER®ne débutera pas.
Un circuit interne de sécurité empêche le BATTERY TENDER®
de produire une tension de sortie tant qu'il ne captera pas au
moins 3 volts venant de la batterie. Dans ce cas, le voyant
orange continuera de clignoter (International plus et EURO400),
indication que la charge n'a pas encore commencé (WP800:
voyant n’est pas éclairé).
28
REMARQUE
Si une batterie au plomb-acide de 12 volts a une tension au repos de
moins de 9 volts, quand elle n'est pas en charge ou ne fournit pas de
courant à une charge externe, il est fort probable que la batterie soit
défectueuse.Pour donner un ordred'idée,une batterie auplomb-acide
de 12 volts complètement chargée aura une tension de repos sans
charge d'environ 12,9 volts. Une batterie au plomb-acide de 12 volts
complètement déchargée aura une tension de repos sans charge
d'environ 11,4 volts. Cela signifie qu'un changement de tension de 1,5
volts seulement représente le spectre de charge completde 0 % à 100
%, pour une batterie au plomb-acide de 12 volts. En fonction du
fabricant et de l'âge de la batterie, les tensions particulières varieront
de quelques dixièmes de volts, mais la différence de 1,5 volts reste
une bonne indication du pourcentage de charge de la batterie.
VOYANTS D'INDICATION D'ÉTAT : Si aucun des voyants n'est allumé, c'est que
la batterie n'est pas branchée correctement et/ou le chargeur n'est pas branché
au courant alternatif du secteur. Les explications qui suivent décrivent le
fonctionnement des voyants :
VOYANT ORANGE CLIGNOTANT (Seulement International plus +
EURO400) – Le voyant orange clignotant indique que le chargeur de batterie est
branché sur le courant alternatif et que le microprocesseur fonctionne
correctement. Si le voyant orange continue de clignoter, c'est que soit la tension
de la batterie est trop basse (moins de 3 volts) ou que les pinces crocodile de
sortie ou les cosses à anneau ne sont pas branchées correctement.
VOYANT ORANGE CONSTANT (Tous les modèles) – Quand le voyant
orange est constant, la batterie est branchée correctement et le chargeur est en
train de charger la batterie. Le voyant orange restera illuminé jusqu'à ce que le
chargeur finisse le cycle de charge.
VOYANT VERT CLIGNOTANT – Quand le voyant vert clignote et que le
voyant orange est allumé, la batterie est chargée à plus de 80 % (International
plus seulement) et peut être débranchée du chargeur et utilisée si nécessaire
(EURO400 : voyant vert seulement). Autant que possible, laisser la batterie en
charge jusqu'à ce que le voyant vert devienne constant.
VOYANT VERT CONSTANT (Tous les modèles) – Quand le voyant vert
cesse de clignoter et brille constamment, la charge est finie et la batterie peut être
utilisée si nécessaire.
SYMBOLES D'INDICATION D'ÉTAT : Les symboles suivants se situent à côté
des voyants d'indication d'état.
Le symbole à côté du voyant ORANGE représente une batterie
partiellement chargée. La bande qui couvre le fond est de couleur
verte. Le fond est jaune. La zone verte indique la partie chargée de la
batterie et la zone jaune représente la partie non chargée.
Le symbole à côté du voyant VERT représente une batterie
complètement chargée. La zone entière à l'intérieur de la batterie est
en vert.

29
CHECK-LIST POUR LE DÉPANNAGE :
1. LES VOYANTS DU CHARGEUR NE S'ALLUMENT PAS :
a. Débrancher le chargeur de la prise secteur et vérifier à nouveau que les
pinces du chargeur de batterie soient branchées correctement aux
bornes et que le branchement soit solide.
b. Vérifier que la prise secteur de courant alternatif fournisse du courant
en branchant une lampe, un appareil ou un voltmètre.
2. LE VOYANT VERT S'ALLUME IMMÉDIATEMENT LORS DE LA
CHARGE D'UNE BATTERIE DÉCHARGÉE :
a. Il se peut que la batterie soit défectueuse, emmenez la batterie chez le
revendeur et faites-la tester.
3. LE CHARGEUR CHARGE MAIS LE VOYANT VERT NE S'ALLUME
PAS :
a. Il se peut que la batterie soit défectueuse, emmenez la batterie chez le
revendeur et faites-la tester.
b. La batterie a une demande en courant excessive, débrancher la
batterie de l'équipement.
4. LE VOYANT ORANGE S'ALLUME QUAND LA BATTERIE EST EN
CHARGE D'ENTRETIEN
a. Il se peut que la batterie soit défectueuse, emmenez la batterie chez le
revendeur et faites-la tester.
b. La batterie a une demande en courant excessive, débrancher la
batterie de l'équipement.
Cet appareil peut être utilisé par des enfants âgés de 8 ans et
plus et les personnes ayant réduit les capacités physiques,
sensorielles ou mentales ou manque d'expérience et de
connaissances, si elles ont été aidées ou instruites concernant
l'utilisation de l'appareil en toute sécurité et comprennent les
risques impliqués.
Enfants ne doivent pas jouer avec l'appareil. Entretien
nettoyage et l'utilisateur ne doit pas être fou par les enfants
sans surveillance
Impossible de remplacer le cordon d'alimentation. Si le cordon
est endommagé l'appareil devrait être mis au rebut.
Examiner le chargeur de batterie régulièrement pour les
dommages, en particulier le cordon, la fiche et la clôture, si la
batterie est endommagée, il ne doit pas être utilisé jusqu'à ce
qu'il a été réparé.
Ce symbole indique que le recyclage des déchets est séparé entre les
éléments électriques et électroniques.
30
Avertissement de la FCC
Titre 47 Sous-partie, 15.105(b)
Remarque : Cet équipement a été testé et déclaré conforme aux limites
d'un appareil numérique de classe B, selon la partie 15 des règles FCC.
Ces limites sont conçues pour fournir une protection raisonnable contre les
interférences nuisibles dans une installation résidentielle. Cet équipement
génère, utilise et peut émettre de l'énergie radio fréquence et, s'il n'est pas
installé et utilisé conformément aux instructions, peut provoquer des
interférences nuisibles à la réception de la radio ou de la télévision, ce qui
peut être déterminé par l'arrêt et la marche de l'appareil, l'utilisateur est
encouragé à essayer de corriger les interférences avec une ou plusieurs
des mesures suivantes :
- Réorientez/déplacez l'antenne de réception.
- Augmentez la distance entre l'équipement et le récepteur.
- Connectez l'équipement à une sortie sur un circuit différent de celui
sur lequel le récepteur est branché.
Consultez le revendeur ou un technicien radio/télévision pour obtenir
de l'aide.
ICES-001 : Générateurs de fréquence radio industriels,
scientifiques et médicaux (ISM)
Ce produit a été testé par rapport aux normes indiquées et jugé conforme au
Codede l'Industrie CanadaES-001 et laprocédure de mesureselon la norme
CISPR 11.
CAN ICES-1/NMB-1

31
ISTRUZIONI IMPORTANTI DI SICUREZZA
LEGGERE CON ATTENZIONE
CONSERVARE QUESTE ISTRUZIONI
IL MANUALE SCARICA
Questomanuale puòessere lettoo scaricatoda tenerala batteria®sito Web@
www.batterytender.com
DEFINIZIONI DELLE INDICAZIONI DI AVVISO E ATTENZIONE:
AVVISO
AVVISO indica una possibile situazione di pericolo che, se non
evitata, può causare gravi ferimenti o la morte.
ATTENZIONE
ATTENZIONE indica una possibile situazione di pericolo che, se
non evitata, può causare ferimenti lievi o moderati.
ATTENZIONE
ATTENZIONE usato senza il simbolo di allerta di sicurezza indica
una possibile situazione di pericolo dalla quale, se non evitata,
possono derivare danni alle proprietà.
PRECAUZIONI GENERALI:
AVVISO
Caricare sempre la batteria in una zona ben ventilata. Durante la
carica, può succedere che si verifichino fughe di gas idrogeno,
esplosivo, dalla batteria. Non lasciare fiamme, scintille elettriche,
sigarette o qualsiasi cosa che generi fumo vicino alla batteria per
tutto il tempo della carica. Nel caso che questa disposizione non
fosse seguita, potrebbero verificarsi gravi ferimenti o la morte.
N.B. :
Le caldaie ad acqua sono una fonte di fiamme che deve essere
evitata.
ATTENZIONE
INSTALLAZIONE DEL CARICABATTERIE: SISTEMARE il
caricabatterie distanziato dalla batteria conformemente alle
dimensioni della spina del cavo d'uscita. NON lasciare mai il
caricabatterie appoggiato sulla batteria. I gas o i fluidi possono
corrodere e danneggiare il caricabatterie.
Caricabatterie portatili
Progettato per un periodo di sei
cella batterie piombo-acido
32
ATTENZIONE
NON lasciare mai il caricabatterie su una superficie di materiale
infiammabile. Collocarlo in una zona ben ventilata per dissipareil
calore generato dal caricabatterie.
ATTENZIONE
COMPATIBILITA' DELLA TENSIONE DEL CARICABATTERIE:
NON usare mai il caricabatterie se la tensione della batteria non
corrisponde alla tensione d'uscita indicata nel caricatore. Ad
esempio, non usare un caricatore da 12 Volts con una batteria da
6 Volts e viceversa.
AVVISO
UMIDITA' ECCESSIVA: Non lasciare il caricabatterie sotto la
pioggia o la neve per evitare il rischio di scossa elettrica o
incendio.
AVVISO
ACCESSORI DEL CARICABATTERIE: Non usare accessori o
apparecchi che non siano raccomandati dal fabbricante del
caricabatterie. Agire in maniera diversa può causare pericolo di
incendio o scossa, e anche ferite accidentali non previste.
ATTENZIONE
COME MANEGGIARE I CAVI DELL'ALIMENTAZIONE:
Maneggiando i cavi elettrici dell'alimentazione, staccarli sempre
prendendo direttamente dalla spina e non dal cavo. Questo
ridurrà il rischio di danni alla spina e al cavo riducendo anche la
probabilità di scosse elettriche che deriverebbero da questo
danno.
ATTENZIONE
POSIZIONE DEI CAVI ELETTRICI: Verificare che tutti i cavi
elettrici di alimentazione siano posti dove non possano essere
pestati, imprigionati sotto qualcosa di pesante o soggetti in
qualche modo a danni o pesi.
ATTENZIONE
USO DEI MANUALI: Studiare tutte le precauzioni e le
raccomandazioni specifiche del fabbricante di batterie per
consentire un uso sicuro, evitando così, ad esempio, di rimuovere
i coperchi delle celle durante il caricamento, e osservare i valori di
carica raccomandati (corrente di uscita del caricabatterie).

33
ATTENZIONE
CONTROLLO DELLE BATTERIE NON SIGILLATE: Lasciando un
caricabatterie collegato ad una batteria piena non sigillata per un
lungo periodo di tempo (settimane, mesi ecc.), è necessario
controllare periodicamente i livelli singoli del fluido della cella
paragonando le raccomandazioni del fabbricante per consentire
un'operazione sicura. Oltre a questo, controllare la batteria per
vedere se è calda in modo anormale: se dovesse succedere,
sarebbe un segnale che la batteria potrebbe avere una cella
debole e che potrebbe verificarsi una situazione di livello termico
eccessivamente elevato.
ATTENZIONE
Se la batteria liberasse una quantità eccessiva di gas o se la
batteria si surriscaldasse a più di 55C (130F) durante la carica,
scollegare il caricabatterie e lasciare raffreddare la batteria. Il
surriscaldamento può causare distorsione della placca, corto
circuito interno, essiccamento totale e altri danni.
AVVISO
MANUTENZIONE DEL CARICABATTERIE: NON smontare il
caricabatterie o tentare di fare riparazioni interne. Portarlo a un
tecnico di manutenzione qualificato. Il montaggio incorretto del
caricatore può generare scossa elettrica o creare un rischio di
incendio. Se il cavo di alimentazione è danneggiato, deve essere
sostituito dal produttore o dal suo rivenditore oppure da
personale autorizzato per evitare rischi.
PRECAUZIONI PERSONALI:
AVVISO
I poli, i terminali della batteria e gli accessori correlati contengono
piombo e componenti del piombo, sostanze chimiche
riconosciute nello stato della California come causa di cancro e
malformazioni congenite o di altri pericoli collegati alla
riproduzione. Lavare le mani dopo esservi entrati in contatto.
1. Qualcuno deve restare a portata di voce o sufficientemente vicino per
prestare soccorso quando si sta lavorando vicino ad una batteria al
piombo;
2. Teneremolta acqua frescae saponenelle vicinanzenel casoche l'acido
della batteria entri in contatto con la pelle, con i vestiti o con gli occhi;
3. Usareprotezione completa pergli occhi eper i vestiti.Evitare disfiorarsi
gli occhi quando si lavora vicino alla batteria;
4. Se l'acido della batteria entra in contatto con la pelle o con i vestiti,
34
lavarsiimmediatamente conacqua esapone. Sel'acido dovesseentrare
inun occhio,sciacquarlo immediatamentecon acquacorrentefredda per
almeno dieci minuti e sottoporsi immediatamente a cure mediche;
5. NON fumare e non permettere che si producano scintille o fiamme nelle
vicinanze della batteria o del motore.
6. Prestare estrema attenzione in modo da ridurre il rischio di cadute di
attrezzi metallici nella batteria. Questi potrebbero creare scintille o
generare un corto circuito nella batteria o in altre parti elettriche, il che
potrebbe causare un'esplosione;
7. Togliere effetti personali metallici come anelli, braccialetti, collane e
orologi quando si lavora con una batteria al piombo. Una batteria al
piombopuò produrre unacorrente di corto-circuitosufficientementealta
per saldare un anello o oggetti simili inmetallo,causando unabruciatura
grave;
8. Usare il caricabatterie per caricare solo batterie al piombo. Il
caricabatterie non è stato progettato per fornire energia ad un sistema
elettrico di bassissima tensione o per caricare batterie a celle secche. Il
caricamento di batterie a celle secche può far sì che esse scoppino e
causino ferite alle persone e danni alla proprietà ;
N.B.:
In commercio esistono alcune batterie al piombo che funzionano a base di
liquido che non travasa, mentre gli stessi fabbricanti possono affermare che
sono batterie a celle secche. Queste batterie sono sigillate, con gas
ricomposto,con elettrolitoa secco,compatibilmente conil tipodi fabbricazione
AGM (Absorbed Glass Matte). E' perfettamente sicuro usare il caricabatterie
INTERNATIONAL BATTERY TENDER®per caricare questo tipo di batterie.
L'avvertenza circa la batteria a celle secche riguarda batterie non ricaricabili,
alcaline o di altro tipo. Se ci fosse qualche dubbio riguardo il tipo di batteria
posseduta, è necessario entrare in contatto con il fabbricante prima di tentare
di caricare la pila.
9. NON caricare mai una batteria gelata o visibilmente danneggiata.
10. Non ricaricare batterie non ricaricabili.
PREPARAZIONE PER IL CARICAMENTO:
1. Seé necessario rimuoverela batteriadal veicolo per caricarla, cominciare
sempre dalla rimozione del terminale legato alla terra della batteria.
Verificare che tutti gli accessori del veicolo siano staccati al fine dievitare
un arco elettrico;
2. Verificare che il locale intorno alla batteria sia ben areato mentre si carica
la batteria. Si può forzare l'uscita del gas agitando un pezzo di cartone o
con altro materiale non metallico come un ventilatore;
3. Pulire i terminali della batteria. Prestare attenzione per impedire che le
sostanze corrosive entrino in contatto con gli occhi;
4. Aggiungere acqua distillata in ogni cella fino a che l'acido della batteria
raggiunga il livello descritto dal fabbricante della batteria. Questo aiuta a
spurgare il gas in eccesso dalle celle. Per una batteria che non abbia il
coperchio delle celle, seguire attentamente le istruzioni di ricarica del

35
fabbricante;
5. Studiare tutte le precauzioni dettate dal fabbricante di batterie come la
rimozione o meno dei coperchi delle celle mentre avviene la ricarica e
anche i valori di carica raccomandati;
6. Determinare la tensione della batteria consultando il manuale del proprietariodel
e verificando che essa corrisponda ai valori di uscita del caricabatterie.
7. COLLOCAZIONE DEL CARICABATTERIE:
a. Sistemare il caricabatterie alla distanza dalla batteria che i cavi di c.c.
consentono;
b. Non collocare mai il caricabatterie direttamente sopra o sotto la batteria
mentre si sta caricando. I gas o ifluidi della batteriacauserebbero corrosione
e danneggerebbero il caricabatterie;
c. Non lasciare che l'acido della batteria sgoccioli nel caricatore mentre si sta
misurando la carica o riempiendo la batteria;
d. Non usare il caricabatterie in un locale chiuso o che abbia una ventilazione
insufficiente.
e. Non collocare la batteria sopra il caricabatterie.
8. Collegare e scollegare i morsetti di uscita di c.c.. solo dopo aver posto tutti i
commutatori del caricabatterie nella posizione spenta e rimuovere il cavo di
c.a. dalla presa elettrica. Non lasciare che i morsetti si tocchino uno con
l'altro.
9. Seguire questo procedimento quando la batteria si trova all'interno del veicolo.
Una scintilla vicino alla batteria può causare un'esplosione. Per ridurre il
rischio di scintille nelle vicinanze della batteria:
a. Sistemare i cavi di c.a. e c.c. in modo da ridurre i danni causati da parti
meccaniche in movimento;
b. Verificare la polarità degli elementi della batteria. Il polo positivo (pos, p, +)
di una batteria può avere un diametro maggioredi quello negativo(neg, n, -);
c. Determinare quale polo della batteria è legato alla terra (connesso) nel telaio.
Se il polo negativo è legato alla terra nel telaio (come nella maggior parte
dei veicoli), consultare l'unità (d). Se il polo positivo è legato alla terra nel
telaio, consultare l'unità (e);
d. Nel caso di un veicolo che abbia il polo negativo legatoalla terra, collegareil
morsetto positivo (rosso) del caricabatterie al polo positivo (pos, p, +) non
legato alla terra della batteria. Collegare il morsetto negativo (nero) altelaio
del veicolo o al blocco motore lontano dalla batteria. Non collegare il
morsetto al carburatore, alle linee di trasmissione del combustibile o alle
parti metalliche. Collegarlo ad una parte metallica molto spessa della
struttura del blocco motore;
e. Nel caso di un veicolo che abbia il polo positivo legato alla terra, collegare il
morsetto negativo (nero) del caricabatterie al polo negativo (neg, n, -) non
legato alla terra della batteria. Collegare il morsetto positivo (rosso) al telaio
del veicolo o al blocco motore lontano dalla batteria. Non collegare il
morsetto al carburatore, alle linee di trasmissione del combustibile o alle
parti metalliche. Collegarlo ad una parte metallica molto spessa della
struttura del blocco motore;
f. Collegare il cavo di fornitura della c.a. del caricabatterie ad una presa
36
elettrica;
g. Scollegando il caricabatterie, spegnere i commutatori, scollegare il cavo di
c.a., rimuovere il morsetto dal telaio del veicolo e, di seguito, ritirare il
morsetto dal terminale della batteria.
10. Seguire questo procedimento nel caso in cui la batteria si trovi all'esterno del
veicolo. Una scintilla vicino alla batteria può causare un'esplosione. Al fine
di ridurre il rischio di scintille vicino alla batteria:
a. Verificare la polarità degli elementi della batteria. Un polo positivo (pos, p,
+) della batteria può avere un diametro maggiore di un polo negativo (neg, n,
-);
b. Collegare un cavo di batteria isolato (AWG) di, perlomeno, calibro 6 da 24
pollici (60 cm) al polo negativo (neg, n, -) della batteria;
c. Collegare il morsetto positivo (rosso) del caricabatterie al polo positivo (pos,
p, +) della batteria;
d. Collocarsi, insieme all'estremità libera del cavo, il più lontano possibile dalla
batteria, poi collegare il morsetto negativo (nero) del caricabatterie
all'estremità libera del cavo;
e. Allontanare il viso dalla batteria quando si completa il collegamento;
f. Collegare il cavo di fornitura della c.a. del caricabatterie ad una presa
specifica;
g. Scollegando il caricabatterie, ripetere sempre questo in sequenza invertita
rispetto al procedimento del collegamento e interrompere il primo
collegamento restando il più lontano possibile dalla batteria.
INSTRUZIONI PER L'UTENTE
CARICAMENTO AUTOMATICO E CONTROLLO DELLO STATUS DELLA
BATTERIA: Il caricabatterie BATTERY TENDER®della Deltran è totalmente
automatico e può essere lasciato collegato all'energia di c.a. e alla batteria che sta
caricando per un lungo periodo di tempo. L'energia d'uscita del caricabatterie, la
tensione e la corrente dipendono dalle condizioni della batteria che si sta caricando. Il
BATTERY TENDER®possiede due luci che indicano lo status e che forniscono un
mezzo visivo di determinare il modo di operare del caricabatterie e, allo stesso modo,
le condizioni della batteria collegata al caricabatterie.
Il BATTERY TENDER®possiede due luci che indicano lo status disponibile per
determinare se il caricabatterie sta operando in uno dei 3 modi di carica: il modo di
compressione (carica totale, corrente costante, la batteria è caricata dallo 0% allo
85%), il modo di assorbimento (tensione alta costante, la batteria è caricata dallo 85%
al 100%), o il modo di manutenzione di immagazzinamento/fluttuazione (tensione
bassa costante, la batteria è caricata dal 100% al 103%).
Quando la batteria è totalmente carica, la luce che indica lo status verde resterà
accesa e il caricabatterie passerà ad un modo di carica di
immagazzinamento/manutenzione. Il BATTERY TENDER®controllerà e manterrà
automaticamente la batteria in carica totale.
COLLEGAMENTI ELETTRICI TRAIL CARICABATTERIE E LABATTERIA: Prima di
caricare, collegare i morsetti a coccodrillo (o i terminali anulari opzionali) ai terminali
della batteria. Poi, collegare il cavo di alimentazione di c.a. del caricabatterie alla
presa di energia di c.a. Quando si vorrà scollegare il caricabatterie dalla batteria,
scollegare inizialmente il cavo dienergiadi c.a. del caricabatterie dalla presa di energia

37
di c.a. Poi, scollegare i conduttori del caricabatterie dai terminali della batteria.
AVVISO
Scollegare sempre o staccare il caricabatterie prima di collegare o scollegare i
morsetti del caricabatterie dalla batteria. Il collegamento o scollegamento dei
morsetti del caricabatterie può causare una scintilla che può provocare una
esplosione della batteria. L’esplosione della batteria può rompere la custodia
della batteria causando una liberazione o spruzzo di acido solforico che può
produrre gravi ferimenti o la morte.
COLLEGAMENTI PER TUTTI I TIPI DI BATTERIE AL PIOMBO: (Consultare
l'unità 18 alla voce Precauzioni generali).
In generale: Collegare prima il conduttore positivo (+) rosso d'uscita del
caricabatterie al terminale positivo della batteria. Poi, collegare il conduttore
negativo (-) nero d'uscita del caricabatterie al terminale negativo della batteria. Nel
frattempo, prestare attenzione particolare alle prossime due unità e alle istruzioni
dell'unità 18 alla voce Precauzioni generali.
Come ulteriore misura di sicurezza, specialmente lavorando conbatterie al piombo
standardizzate piene, la U.L. raccomanda che il collegamento del conduttore
negativo (-) di uscita del caricabatterie sia fatto al telaio legato a terra invece di
collegarlo direttamente al polo negativo della batteria.
Allo stesso modo, per sistemi positivi di collegamento alla terra, il polo positivo
della batteria adesso si trova allo stesso potenziale elettrico del telaio legato alla
terra. Pertanto, la U.L. raccomanda che il collegamento del conduttore positivo (+)
di uscita del caricabatterie sia fatta al telaio legato alla terra invece che
direttamente al polo positivo della batteria.
ATTENZIONE: IL CARICABATTERIE BATTERY TENDER®POSSIEDE CIRCUITI
CHE NON EMETTONO SCINTILLE. I morsetti a coccodrillo o i terminali anulari di
uscita non emetteranno scintille quando entrano in contatto. Il BATTERY TENDER®
non produrrà una tensione di uscita fino a che non riceva, perlomeno, 3 Volts dalla
batteria. Deve essere collegato ad una batteria con la polarità corretta prima di
cominciare a caricarla. Pertanto, sesi collega la spina del cavo di energia c.a. ad una
presa di energia c.a., e se i morsetti a coccodrillo o i terminali anulari di uscita non
sono collegati a una batteria, e se si toccano i morsetti a coccodrillooi terminali anulari
allo stesso tempo, non ci sarà scintilla elettrica.
N.B.:
I MORSETTI DI USCITA O I TERMINALI ANULARI DEVONO ESSERE COLLEGATI
A UNA BATTERIA PER POTER PRODURRE UNA TENSIONE DI USCITA.
Se il caricabatterie è collegato al contrario, la luce ambra continuerà a lampeggiare
(International plus + EURO400), indicando che la carica non è stata iniziata (WP800:
no luce visibile). I morsetti a coccodrillo o i terminali anulari devono essere collegati
alla batteria, con la polarità adeguata, rosso in positivo (uscita + per il polo + della
batteria) e nero per il negativo (uscita - per il polo - della batteria), prima che il
caricatore generi qualsiasi tensione di uscita.
38
LAVORANDO CON UNA BATTERIA SCARICA O CON UNA BATTERIA A
TENSIONE MOLTO BASSA:
Se si tenta di caricare una batteria scarica avendo una tensione sotto i 3 Volts, il
BATTERYTENDER®non funzionerà. Un circuito di sicurezza interna impedisce che il
BATTERY TENDER®generi qualunque tensione di uscita sempre che non riceva
perlomeno 3 Volts all'uscita del caricatore. In questa situazione, la luce ambra
continuerà a lampeggiare (International plus +EURO400),indicando che la carica non
è stata iniziata (WP800: no luce visibile).
N.B.:
Se una batteria al piombo da 12 Volts ha una tensione di uscita di meno di 9 Volts
quando è a riposo, quando non si sta caricando e non sta fornendo neanche corrente
elettrica ad una carica esterna, c'è una buona probabilità che la batteria sia difettosa.
Quindi, una batteria al piombo da 12 Volts completamente carica, avrà uno stato di
riposo, tensione senza carica di circa 12,9 Volts. Una batteria al piombo da 12 Volts
completamente scarica, avrà uno stato di riposo, tensione senza carica di circa 11,4
Volts. Questo significa che un'alterazione della tensione di soli 1,5 Volts rappresenta
tutta la portata dell'alterazione da 0% a 100% in una batteria al piombo da 12Volts. A
seconda del fabbricante, e dall'età della batteria,i voltaggi specifici varieranno di alcuni
decimi di volt, ma l'intervallo 1,5 Volt sarà ancoraun valido indicatoredella percentuale
di carica della batteria.
LUCI INDICATRICI DI STATUS: Se nessuna luce resta accesa, la batteria non è
collegata adeguatamente e/o il caricatore non è collegato all'energia di c.a. Le
unità che seguono descrivono le indicazioni che riguardano le luci:
QUANDO LA LUCE AMBRA LAMPEGGIA (International plus + EURO400) – La
luce ambra che lampeggia indica che il caricabatterie ha un'energia di c.a.
disponibile e che il microprocessore sta funzionando adeguatamente. Se la luce
ambra continua a lampeggiare, la tensione della batteria è molto bassa (meno di 3
volts) oppure i morsetti a coccodrillo o i terminalianulari di uscita non sono collegati
correttamente.
QUANDO LA LUCE AMBRARESTA ACCESA COSTANTEMENTE – Quando la
luce ambra resta accesa in modo costante, la batteria è collegata in modo
adeguato e il caricabatterie sta caricando labatteria. Laluce ambra resterà accesa
fino a che il caricatore non avrà completato la carica.
QUANDO LA LUCE VERDE LAMPEGGIA- Quando la luce verde lampeggia
(International plus + EURO400) e la luce ambra è accesa, la batteria è ricaricata
oltre l'80% e può essere rimossa dal caricatore e usata se necessario. Se
possibile, lasciare la batteria in carica fino a che la luce verde rimanga fissa.
LUCE VERDE ACCESA COSTANTEMENTE - Quando la luce verde non
lampeggia più e resta accesa costantemente, lacarica èterminatae la batteria può
essere usata di nuovo quando ce ne sarà bisogno.
SIMBOLI INDICATORI DI STATUS: I seguenti simboli sono localizzati vicino alle
luci indicatrici di status.
Il simbolo vicino alla luce AMBRA rappresenta una batteria
parzialmente carica. La fascia solida lungo la parte inferiore è verde.
Il fondo è giallo. L'area verde indica la parte carica della batteria e
l'area gialla rappresenta la parte non caricata.
Il simbolo vicino alla luce VERDE rappresenta una batteria totalmente
carica. Tutta l'area dentro il contorno della batteria è verde.

39
LISTA DI VERIFICA PER RISOLVERE EVENTUALI PROBLEMI:
1. LE LUCI DEL CARICABATTERIE NON SI ACCENDONO:
a. Rimuovere il caricabatterie dalla presa di c.a. e verificare di
nuovo se i morsetti del caricabatterie sono collegati ai terminali
corretti e con collegamento perfetto.
b. Verificare che la presa di c.a. stia fornendo energia,
collegandola ad una lampada, un apparecchio o un
misuratore di tensione.
2. LA LUCE VERDE SI ACCENDE SUBITO QUANDO SI
RICARICA UNA BATTERIA SCARICA:
a. La batteria può essere difettosa, portarla al rivenditore affinchè
sia testata.
3. IL CARICABATTERIE STA CARICANDO, MA LA LUCE
VERDE NON SI ACCENDE:
a. La batteria può essere difettosa, portarla al rivenditore affinchè
sia testata.
b. La batteria presenta passaggio di corrente in eccesso, rimuovere
la batteria dall'equipaggiamento.
4. LA LUCE AMBRA SI ACCENDE QUANDO LA BATTERIA E' IN
CARICA NEL MODO D'IMMAGAZZINAMENTO:
a. La batteria può essere difettosa, portarla al rivenditore affinchè
sia testata.
b. La batteria presenta passaggio di corrente in eccesso, rimuovere
la batteria dall'equipaggiamento.
Questo apparecchio può essere utilizzato da bambini di età da
8 anni e di sopra e persone con ridotte capacità fisiche,
sensoriali o mentali o mancanza di esperienza e conoscenza
se essi abbiano ricevuti supervisioneo istruzioni relative all'uso
dell'apparecchio in modo sicuro e capire il rischio coinvolti.
Ibambini non devono giocareconl'apparecchio. Manutenzione
pulizia e utente non sono pazza di bambini senza sorveglianza
Il cavo di alimentazione non può essere sostituito. Se il cavo è
danneggiato l'apparecchio dovrebbe essere scartato.
Esaminare il caricabatterie regolarmente per danni,soprattutto
il cavo, spina e recinzione, se il caricabatterie è danneggiato,
non deve essere utilizzato fino a quando sia stato riparato
Questo simbolo indica la raccolta differenziata per le componenti
elettriche ed elettroniche.
40
IMPORTANTES INSTRUCCIONES DE SEGURIDAD
LEA CUIDADOSAMENTE Y
GUARDE ESTAS INSTRUCCIONES
DESCARGAR MANUAL
Este manual se puede leer o descargado la batería tierno®sitio web @
www.batterytender.com
DEFINICIONES DE LAS ETIQUETAS DE ADVERTENCIA Y
CUIDADO:
ADVERTENCIA
ADVERTENCIA indica una situación posiblemente peligrosa
que, si no se evita, podría resultar en lesiones graves o en la
muerte. CUIDADO
CUIDADO indica una situación posiblemente peligrosa que,
si no se evita, podría resultar en lesiones leves o
moderadas.
CUIDADO
CUIDADO, usado sin el símbolo de alerta de seguridad,
indica una situación posiblemente peligrosa que, si no se
evita, podría resultar en daño a la propiedad.
PRECAUCIONES GENERALES
ADVERTENCIA
Siempre cargue la batería en un lugar bien ventilado. El
explosivo gas de hidrógeno puede escapar de la batería
mientras se carga. Mantenga la batería lejos del fuego, de
chispas eléctricas y de cigarrillos. El no hacerlo podría
resultar en lesiones graves o en la muerte.
NOTA :
Se deben evitar los calentadores de agua a gas, por tener
fuego.
Cargadores portátiles de
batería
Diseñado para seis células baterías de
plomo-ácido
Table of contents
Languages:
Other Deltran Battery Tender Batteries Charger manuals
Deltran Battery Tender
Deltran Battery Tender WP800 User manual
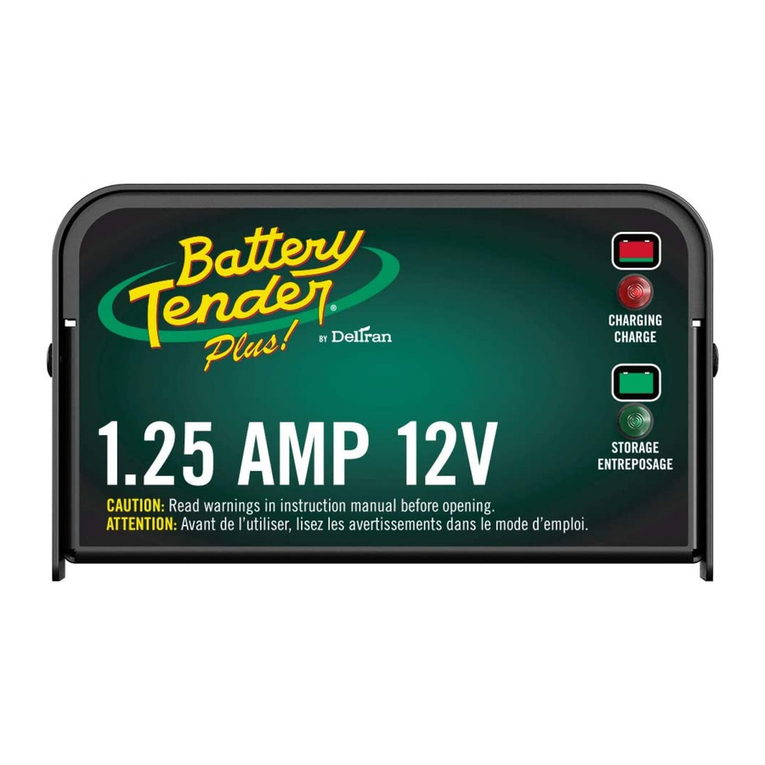
Deltran Battery Tender
Deltran Battery Tender Plus User manual
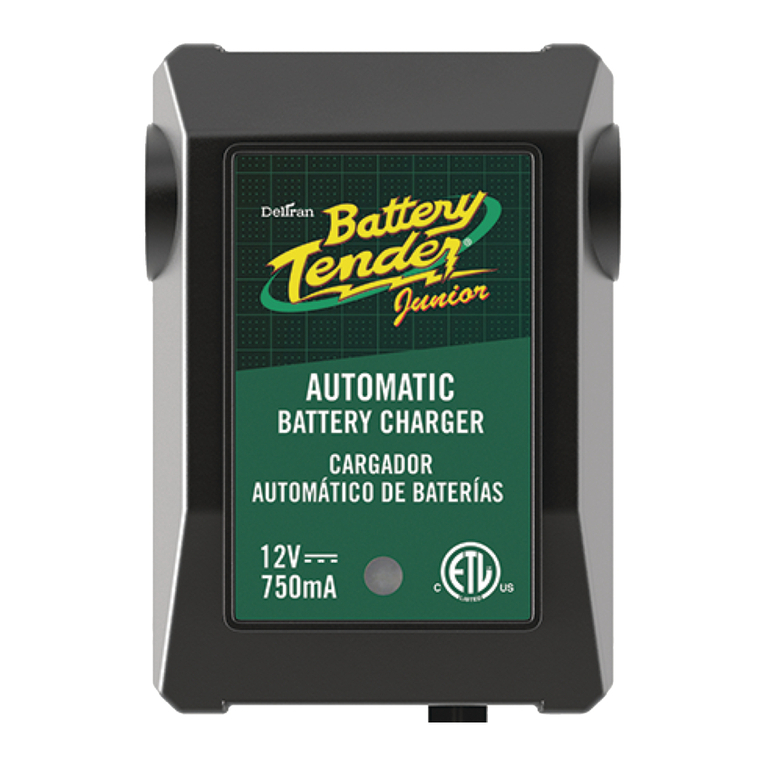
Deltran Battery Tender
Deltran Battery Tender Junior User manual
Deltran Battery Tender
Deltran Battery Tender Selectable User manual

Deltran Battery Tender
Deltran Battery Tender WP800 Installation instructions manual
