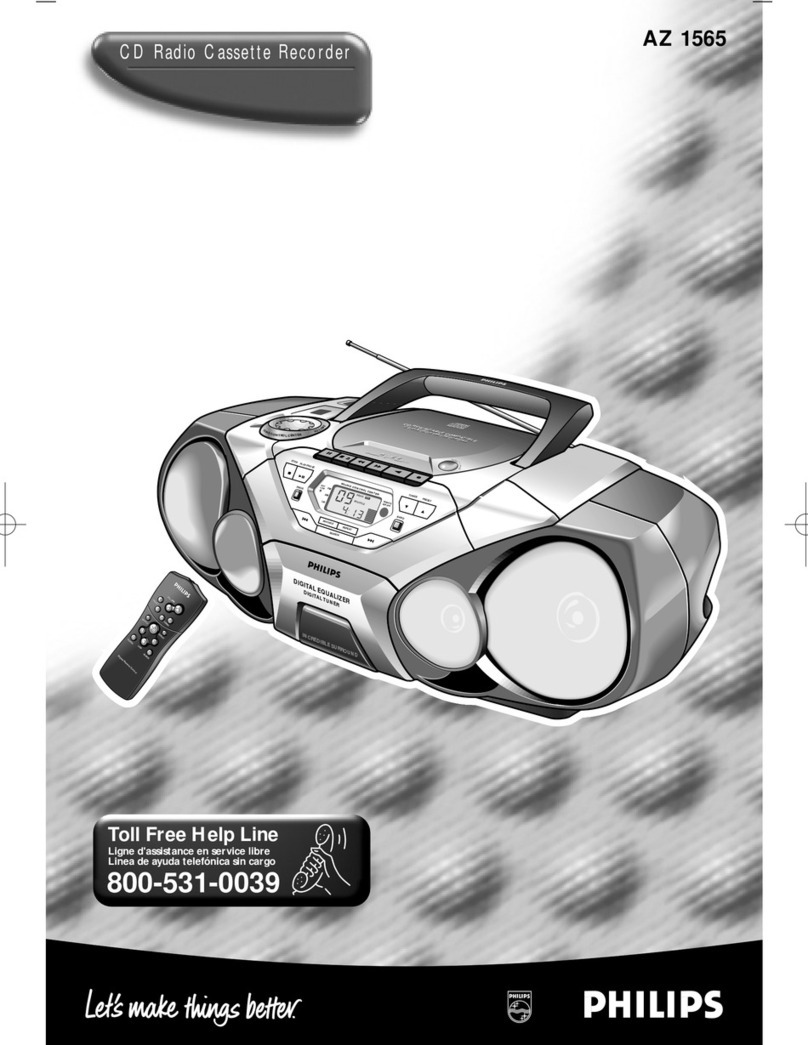
DEN DCD-S10 User manual

DENON
STEREO
CD
PLAYER
DCD-S10/3000
|
OPERATING
INSTRUCTIONS
MODE
D’EMPLOI
INSTRUCCIONES
DE
OPERACION
{
DCD-S10
&
A
3.
r,
LL
EE
a
DCD-3000
ep
a
i
nN
FOR
ENGLISH
READERS
PAGE
5
~
PAGE
18
POUR
LES
LECTEURS
FRANCAIS
PAGE
19
~
PAGE
31
PARA
LECTORES
DE
ESPANOL
PAGINA
32
~
PAGINA
38

IMPORTANT
TO
SAFETY
WARNING:
TO
PREVENT
FIRE
OR
SHOCK
HAZARD,
DO
NOT
EXPOSE
THIS
APPLIANCE
TO
RAIN
OR
MOISTURE.
CAUTION:
1.
Handle
the
power
supply
cord
carefully
Do
not
damage
or
deform
the
power
supply
cord.
If
it
is
damaged
or
deformed,
it
may
cause
electric
shock
or
malfunction
when
used.
When
removing
from
wall
outlet,
be
sure
to
remove
by
holding
the
plug
attachment
and
not
by
pulling
the
cord.
2.
Do
not
open
the
top
cover
in
order
to
prevent
electric
shock,
do
not
open
the
top
cover.
lf
problems
occur,
contact
your
DENON
DEALER.
3.
Do
not
place
anything
inside
Do
not
place
metal
objects
or
spill
liquid
inside
the
CD
player.
Electric
shock
or
malfunction
may
result.
Please,
record
and
retain
the
Model
name
and
serial
number
of
your
set
shown
on
the
rating
label.
Mode!
No.
DCD-S10/3000
Serial
No.
CAUTION
RISK
OF
ELECTRIC
SHOCK
DO
NOT
OPEN
CAUTION:
TO
REDUCE
THE
RISK
OF
ELECTRIC
SHOCK,
DO
NOT
REMOVE
COVER
(OR
BACK).
NO
USER
SERVICEABLE
PARTS
INSIDE.
REFER
SERVICING
TO
QUALIFIED
SERVICE
PERSONNEL.
rN
The
lightning
flash
with
arrowhead
symbol
within
an
equilateral
triangle
is
intended
to
alert
the
user
of
the
presence
of
uninsulated
“dangerous
voltage”
within
the
product’s
enclosure
that
may
be
of
sufficient
magnitude
to
constitute
a
risk
of
electric
shock
to
persons.
The
exclamation
point
within
an
equilateral
triangle
is
intended
to
alert
the
user
of
the
presence
of
important
operating
and
maintenance
(servicing)
instruction
in
the
literature
accompanying
the
ap-
pliance.
A
NOTE:
This
CD
player
uses
the
semiconductor
laser.
To
allow
you
to
enjoy
music
at
a
stable
operation,
it
is
recommended
to
use
this
in
a
room
of
5°C
(41°F)
~
35°C
(95°F).
CAUTION:
USE
OF
CONTROLS
OR
ADJUSTMENTS
OR
REFORMANCE
OF
PROCE-
DURES
OTHER
THAN
THOSE
SPECIFIED
HEREIN
MAY
RESULT
IN
HAZARDOUS
RADIATION
EXPOSURE.
THE
COMPACT
DISC
PLAYER
SHOULD
NOT
BE
ADJUSTED
OR
REPAIRED
BY
ANYONE
EXCEPT
PROPERLY
QUALIFIED
SERVICE
PERSONNEL.
NOTE:
This
unit
may
cause
interference
to
radio
and
television
reception
if
you
do
not
operate
it
in
strict
accordance
with
this
OPERATING
INSTRUCTIONS.
This
unit
complies
with
Class
B
computing
device
rules
in
accord-
ance
with
the
specifications
in
Sub-part
J
or
Part
15
of
the
FCC
Rules,
which
are
designed
to
provide
reasonable
protection
against
such
interference
in
a
residential
installation.
!f
the
unit
does
cause
interference
to
any
radio
or
television
reception,
try
to
reduce
it
by
one
or
more
of
the
following
means:
a)
Turn
the
other
unit
to
improve
reception
b)
Move
this
unit
c)
Move
this
unit
away
from
others
d)
Plug
this unit
respectively
into
a
different
AC
outlet
*
This
is
note
in
accordance
with
Section
15.838
of
the
FCC
Rules.
e
FOR
U.S.A.
&
CANADA
MODEL
ONLY
TO
PREVENT
ELECTRIC
SHOCK
DO
NOT
USE
THIS
(POLARIZED)
PLUG
WITH
AN
EXTENSION
CORD,
RECEPTACLE
OR
OTHER
OUTLET
UNLESS
THE
BLADES
CAN
BE
FULLY
INSERTED
TO
PREVENT
BLADE
EXPOSURE.
e¢
POUR
LES
MODELES
AMERICAINS
ET
CANADIENS
UNIQUEMENT
ATTENTION
POUR
PREVENIR
LES
CHOCS
ELECTRIQUES
NE
PAS
UTILISER
CETTE
FICHE
POLARISEE
AVEC
UN
PROLONGATEUR
UNE
PRISE
DE
COURANT
OU
UNE
AUTRE
SORTIE
DE
COURANT,
SAUF
SI
LES
LAMES
PEUVENT
ETRE
INSEREES
A
FOND
SANS
EN
LAISSER
AUCUNE
PARTIE
A
DECOUVERT.

6A.
10.
11,
SAFETY
INSTRUCTIONS
Read
Instructions
—
All
the
safety
and
operating
instructions
should
be
read
before
the
appliance
is
operated.
Retain
Instructions
—
The
safety
and
operating
instructions
should
be
retained
for
future
reference.
Heed
Warnings
—
All
warnings
on
the
appliance
and
in
the
operating
instructions
should
be
adhered
to.
Follow
Instructions
—
All
operating
and
use
instruc-
tions
should
be
followed.
Water
and
Moisture
—
The
appliance
should
not
be
used
near
water
—
for
example,
near
a
bathtub,
washbowl,
kitchen
sink,
laundry
tub,
in
a
wet
basement,
or
near
a
swimming
pool,
and
the
like.
Carts
and
Stands
—
The
appliance
should
be
used
only
with
a
cart
or
stand
that
is
recommended
by
the
manufacturer.
An
appliance
and
cart
combination
should
be
moved
with
care.
Quick
stops,
excessive
force,
and
uneven
surfaces
may
cause
iS
nis
~~
the
appliance
and
cart
combination
to
overturn.
Wall
or
Ceiling
Mounting
—
The
appliance
should
be
mounted
to
a
wall
or
ceiling
only
as
recommended
by
the
manufacturer.
Ventilation
—
The
appliance
should
be
situated
so
that
its
location
or
position
does
not
interfere
with
its
proper
ventilation.
For
example,
the
appliance
should
not
be
situated
on
a
bed,
sofa,
rug,
or
similar
surface
that
may
block
the
ventilation
openings;
or,
placed
in
a
built-in
installation,
such
as
a
bookcase
or
cabinet
that
may
impede
the
flow
of
air
through
the
ventilation
openings.
Heat
—
The
appliance
should
be
situated
away
from
heat
sources
such
as
radiators,
heat
registers,
stoves,
or
other
appliances
(including
amplifiers)
that
produce
heat.
Power
Sources
—
The
appliance
should
be
connected
to
a
power
supply
only
of
the
type
described
in
the
Operating
instructions
or
as
marked
on
the
ap-
pliance.
Grounding
or
Polarization
—
Precautions
should
be
taken
so
that
the
grounding
or
polarization
means
of
an
appliance
is
not
defeated.
FIGURE
A
EXAMPLE
OF
ANTENNA
GROUNDING
AS
PER
NATIONAL
ELECTRICAL
CODE
GROUND
ANTENNA
DISCHARGE
UNIT
INEC
SECTION
810-20)
ELECTRIC
SEAVICE
EQUIPMENT
{NEC
SECTION
810-21)
GROUND
CLAMPS
POWER
SERVICE
GROUNDING
me
ELECTRODE
SYSTEM
:
{NEC
ART
260,
PART
41
NEC
-
NATIONAL
ELECTRICAL
CODE
12.
14.
15.
16.
17.
18.
19.
20.
Power-Cord
Protection
-
Power-supply
cords
should
be
routed
so
that
they
are
not
likely
to
be
walked
on
or
pinched
by
items
placed
upon
or
against
them,
paying
particular
attention
to
cords
at
plugs,
con-
venience
receptacles,
and
the
point
where
they
exit
from
the
appliance.
Cleaning
-—
The
appliance
should
be
cleaned
only
as
recommended
by
the
manufacturer.
Power
Lines
—
An
outdoor
antenna
should
be
located
away
from
power
lines.
Outdoor
Antenna
Grounding
—
If
an
outside
antenna
is
connected
to
the
receiver,
be
sure
the
antenna
system
is
grounded
so
as
to
provide
some
protec-
tion
against
voltage
surges
and
built-up
static
charges.
Article
810
of
the
National
Electrical
Code,
ANSI/NFPA
70,
provides
information
with
regard
to
proper
grounding
of
the
mast
and
supporting
struc-
ture,
grounding
of
the
lead-in
wire
to
an
antenna-
discharge
unit,
size
of
grounding
conductors,
loca-
tion
of
antenna-discharge
unit,
connection
to
grounding
electrodes,
and
requirements
for
the
grounding
electrode.
See
Figure
A.
Nonuse
Periods
—
The
power
cord
of
the
appliance
should
be
unplugged
from
the
outlet
when
left
unused
for
a
long
period
of
time.
Object
and
Liquid
Entry
—
Care
should
be
taken
so
that
objects
do
not
fall
and
liquids
are
not
spilled
into
the
enclosure
through
openings.
Damage
Requiring
Service
—
The
appliance
should
be
serviced
by
qualified
service
personnel
when:
A.
The
power-supply
cord
or
the
plug
has
been
damaged;
or
B.
Objects
have
fallen,
or
liquid
has
been
spilled
into
the
appliance;
or
C.
The
appliance
has
been
exposed
to
tatn;
or
D.
The
appliance
does
not
appear
to
operate
normal-
ly
or
exhibits
a
marked
change
in
performance,
or
E.
The
appliance
has
been
dropped,
or
theenciosure
damaged.
Servicing
~
The
user
should
not
atternptto
service
the
appliance
beyond
that
described
in
theo
perating
instructions.
All
other
servicing
should
be
teferred
to
qualified
service
personnel.

e
Avoid
high
temperatures
Aliow
for
sufficient
heat
dispersion
when
installed
on
a
rack.
e
Eviter
des
températures
élevées
Tenir
compte
d’une
dispersion
de
chaleur
suffisante
lors
de
I’instalia-
tion
sur
une
étageére.
e
Evite
altas
temperaturas
Permite
la
suficiente
dispersion
de!
calor
cuando
esta
instalado
en
la
consola.
Handle
the
power
cord
carefully.
Hold
the
plug
when
unplugging
the
cord.
e
Manipuler
le
cordon
d’‘alimentation
avec
précaution.
Tenir
la
prise
lors
du
débranche-
ment
du
cordon.
e
Maneje
el
cordon
de
energia
con
cuidado.
Sostenga
el
enchufe
cuando
de-
sconecte
el
cordon
de
energia.
-
ENGLISH
FRANCAIS
ESPANOL
NOTE
ON
USE/OBSERVATIONS
RELATIVES
A
L’UTILISATION/NOTAS
SOBRE
EL
USO
e
Keep
the
set
free
from
moisture,
water,
and
dust.
e
Protéger
l'appareil
contre
I’humidi-
té,
l'eau
et
la
poussiére.
e
Mantenga
el
equipo
libre
de
hume-
dad,
agua
y
polvo.
e
Unplug
the
power
cord
when
not
using
the
set
for
long
periods
of
time.
e
Débrancher
le
cordon
d’alimenta-
tion
lorsque
l'appareil
n’est
pas
utilisé
pendant
de
longues
périodes.
e
Desconecte
el
cordon
de
energia
cuando
no
utilice
el
equipo
por
mucho
tiempo.
*(For
sets
with
ventilation
holes)
e
Do
not
obstruct
the
ventilation
holes.
e
Ne
pas
obstruer
les
trous
d’aéra-
tion.
e
No
obstruya
los
orificios
de
ventila-
cion.
e
Do
not
let
foreign
objects
in
the
set.
e
Ne
pas
laisser
des
objets
étrangers
dans
l'appareil.
e
No
deje
objetos
extrahfos
dentro
del
equipo.
e
Do
not
let
insecticides,
benzene,
and
thinner
come
in
contact
with
the
set.
e
Nepas
mettre
en
contact
des
insec-
ticides,
du
benzene
et
un
diluant
avec
l'appareil.
e
No
permita
el
contacto
de
insectici-
das,
gasolina
y
diluyentes
con
el
equipo.
e
Never
disassemble
or
modify
the
set
in
any
way.
e
Ne
jamais
démonter
ou
modifier
Vappareil
d'une
maniére
ou
d‘une
autre.
e
Nunca
desarme
o
modifique
el
equipo
de
ninguna
manera.

Thank
you
for
purchasing
this
DENON
Compact
Disc
Player.
Please
read
the
operating
instructions
thoroughly
in
order
to
acquaint
yourself
with
the
CD
player
and
achieve
maximum
satisfaction
from
it.
—
TABLE
OF
CONTENTS
—
CONNECTION
wicscccscsessisacscosveedercsecsndevoseansizedsnescaversvusivsedestisescsedtssegeazeestesbersteds
8
OPENING
AND
CLOSING
THE
DISC
HOLDER
AND
LOADING
A
DISC
........
9
NORMAL
CD
PLAYBACK
ADVANCED
CD
PLAYBACK
TIMER-CONTROLLED
PLAYBACK
....
THE
COMPACT
DISC
..........0000
15
INSTALLATION
PRECAUTIONS
.
15
TROUBLESHOOTING
os
eceeseessrererssestarenesenenenes
PLAYBACK
USING
THE
REMOTE
CONTROL
UNIT
ay
SPECIFICATIONS.
......scsscssesssccssseceeseversscororserssovsneesessssesesessnersrarsrsecatersneerasenes
Please
check
to
make
sure
the
following
items
are
included
with
the
main
unit
in
the
carton:
(1)
Operating
Instructions
...
(2)
Connection
Cord
sie
(3)
Remote
Control
Unit
RC-253
(DCD-S10)
RC-252
(DCD-3000)
(4)
REP
AA
Dry
Cell
Battery
oo.
ee
ecesceeceeersessestensesesereseesensenes
2
e
Line
Voltage
Selection
(for
multiple
voltage
model
only)
The
desired
voltage
may
be
set
with
the
VOLTAGE
SELECTOR
knob
on
the
rear
panel,
using
a
screwdriver.
Do
not
twist
the
VOLTAGE
SELECTOR
knob
with
excessive
force
as
this
may
cause
damage.
If
the
VOLTAGE
SELECTOR
knob does
not
turn
smoothly,
please
contact
a
qualified
serviceman.
FEATURES
The
DCD-S10/3000
is
a
CD
player
equipped
with
DENON’s
unique
advanced
super
linear
converter
which
eliminates
loss
of
sound
quality
in
the
PCM
playback
section,
plus
carefully
selected
parts.
It
reproduces
all
the
sounds
of
the
studio
or
hali
where
the
compact
disc
was
recorded
with
high
performance
and
rich
musical
expression.
(1)
Ultimate
signal
reproduction
using
a
newly
developed
ALPHA
processor
1.
High
speed
interpolation
by
the
newly
developed
ALPHA
proces-
sor
recreates
the
data
below
the
LSB
(least
significant
bit)
lost
upon
recording
to
provide
smooth
waveform
reproduction.
2.
The
original
signals,
including
such
unusual
waveforms
as
impulse
response,
can
also
be
reproduced
with
no
ringing.
3.
The
effects
of
ALPHA
processing
are
particularly
noticeable
at
low
levels,
such
as
when
music
gently
fades
out
or
gradually
emerges
from
total
silence.
(2)
Real
20-bit
S.L.C.
The
DCD-S10/3000
uses
a
new
“S.L.C.”
(super
linear
converter)
circuit
in
effect
eliminating
zero
cross
distortion,
the
main
cause
of
loss
of
sound
quality
in
the
PCM
playback
section.
Together
with
a
real
20-bit
digital/analog
converter
with
excellent
resolution,
it
greatly
improves
music
reproducibility,
especially
at
low
volumes.
In
addition,
two
digital/analog
converters
are
used
for
each
channel,
and
the
8-times
oversampling
further
reduces
noise
and
improves
resolution
to
recreate
sound
fields
with
rich
musical
expression.
(3)
Brawny
power
source
The
DCD-S10/3000
uses
a
large
transformer
with
independent
coils
for
the
digital
servo
circuitry
and
audio
circuitry.
in
conjunction
with
a
high
capacity
smooth
capacitor,
this
offers
power
with
room
to
spare.
VOLTAGE
SELECTOR

ENGLISH
NAMES
AND
FUNCTIONS
OF
PARTS
DCD-S10
DCD-3000
‘oben
coada
oMhca:
20Nn
bp
OFF
INVERT
EXT
INPUT
>
it
Sires
BB
vor
98.86."
12
ws
20(
AU
ecu
AUDIO
the
oavicomdact
esc
maven
DCD-OS10
Orencione
PHONES
—
LINE
OUT
PHONES
LEVEL
PHONES
—
LINE
OV
OPEN/CLOSE
a
PHONES
LEVEL
1)
one
Switch
(POWER)
When
the
power
is
turned
on,
“00”
appears
at
the
track
number
display,
and
tf
no
disc
is
loaded,
“00sc0000”
appears
on
the
number
display
and
the
calendar
lights.
lf
a
disc
is
loaded
when
the
power
is
turned
on,
in
several
seconds
the
total
number
of
tracks
on
the
disc
appears
at
the
track
number
display,
the
total
time
appears
at
the
time
display,
and
the
numbers
on
the
calendar
display
light
up
to
the
total
number
of
tracks
on
the
disc,
then
playback
starts.
Q
Disc
Hoider
This
is
where
the
disc
is
loaded.
Press
the
disc
holder
open/close
button
@
(&
to
open
and
close
the
disc
hoider.
The
disc
holder
is
also
closed
if
the
play
button
@
(PLAY).
OPEN/CLOSE)
3]
Remote
Control
Sensor(REMOTE
SENSOR)
This
is
the
sensor
for
the
wireless
remote
control
signals.
For
remote
control,
point
the
supplied
remote
contro!
unit
towards
this
sensor.
When
a
signal
is
transmitted
from
the
remote
control
unit,
the
remote
control
indicator
in
the
display
@
will
light
up
briefly.
6
Display
Window
Program
indicator
Remote
indicator
Repeat
indicator
REPEAT
TRACK
INDRX
PROGR:
>
|
{45678
9101112131415
16171819
20))>
4
Pa
Play
indicator
The
digital
display
is
divided
into
sections,
such
as
displays
for
track
number,
index,
playback
time
and
calendar,
as
shown
below.
Peak
search
indicator
Auto
space
indicator
Edit
indicate
Remaining
time
of
entire
disc
Remaining
time
of
current
track
control
TIME
PEAK
AM
188
Baio
BBuB
Bs.
Fade
out
indicator
use
indicator
Fade
in
indicator
20-track
music
calendar
Random
play
indicator
|
{
1

Disc
Holder
Open/Close
Button
(
OPEN/
CLOSE)
e
Press
this
to
open
and
close
the
disc
hoider
@.
®
When
pressed,
the
disc
holder
@
opens.
When
pressed
again,
the
disc
holder
@
closes.
e
lfadisc
is
loaded,
the
total
number
of
tracks
on
the
disc
and
the
total
playing
time
appear
on
the
display
window
@
several
seconds
after
the
disc
holder
@
is
closed.
Play
Button
(PLAY)
Press
this
button
to
start
playback
of
a
disc.
e
When
this
button
is
pressed,
D
is
displayed,
and
the
track
number
being
played
is
displayed
together
with
the
elapsed
playback
time
of
the
track.
e
Tracks
are
shown
on
the
calendar
display.
Once
a
track
has
been
played,
the
corresponding
track
number
goes
out
on
the
calendar
display.
Stop
Button
(STOP)
Press
this
button
to
stop
playback.
The
disc
will
stop
rotating,
and
the
number
of
tracks
and
total
playing
time
of
the
disc
are
displayed
on
the
TRACK
NO.
and
TIME
displays,
respectively.
e
In
case
programmed
playback
is
engaged
when
this
button
is
pressed,
the
number
of
tracks
and
total
playing
time
of
the
program
are
displayed.
Automatic
Search
Reverse
Button
(
K€
)
e
Press
this
button
to
return
the
pickup
to
the
beginning
of
the
present
track.
Press
again
to
return
to
other
tracks.
e
By
pressing
the
button
a
number
of
times,
the
pickup
will
move
back
the
corresponding
number
of
tracks.
Automatic
Search
Forward
Button
(
Ppt)
e
Press
this
button
to
move
the
pickup
forward
to
the
beginning
of
the
next
track.
Press
again
to
move
ahead
to
other
tracks.
e
By
pressing
the
button
a
number
of
times,
the
pickup
will
advance
the
corresponding
number
of
tracks.
Input
Selector
Switches
(EXT.
INPUT)
Use
these
switches
to
select
the
digital
signals
input
to
the
digital
input
jacks
on
the
rear
panel.
@
The
input
signal
is
set
to
the
CD
player
when
the
power
is
turned
on.
Press
this
switch
to
change
the
input
signal
in
the
following
order:
CD
player
--
COAXIAL
—
OPTICAL
—
CD
player
e
Digital
audio
signals
with
three
sampling
frequencies
(32kHz,
44,1kHz
and
48kHz)
can
be
connected
to
this
unit's
digital
inputs.
e
The
sampling
frequency
of
the
digital
audio
signals
of
the
digital
input
selected
with
the
input
selector
is
shown
on
the
display
(32,
44
or
48).
e
The
sampling
frequency
is
not
displayed
if
no
external
input
ts
connected.
The
input
indicator
flashes
at
this
time.
Input
Indicators
(COAXIAL/
OPTICAL)
e@
The
LEDs
(light-emitting
diodes)
light
to
indicate
the
digital
input
jack
selected
with
the
input
selector
switch
@.
The
sound
of
the
main
unit
is
selected
when
all
the
LEDs
are
off.
Phase
Inverter
Switch
(INVERT)
e
Press
this
to
invert
the
phase
of
the
output
signals
from
output
jacks
®
and
@.
@
The
LED
(light-emitting
diode)
lights
when
the
inverted
output
mode
is
selected.
Headphones
Jack
(PHONES)
e
Use
this
jack
to
plug
in
headphones.
(Headphones
are
sold
separately.)
8
@
8
@
®
ENGLIS
Volume
Adjust
Control
(LINE
OUT/PHONES)
e
Use
this
to
adjust
the
output
level
(volume)
of
the
headphones
or
the
line
out
(VARIABLE)
output
level.
e
This
operation
is
also
possible
using
the
included
remote
control
unit.
(Refer
to
Page
17.)
Output
Terminal
(FIXED
and
VARIABLE)
e
Connect
these
to
the
amplifier’s
input
jacks.
(Refer
to
page
8.)
Digital
Output
Jack
(OPTICAL)
e
Digital
data
is
output
in
optical
form
from
this
jack.
e
Contact
your
nearest
Denon
Consumer
Center
or
office
for
information
on
the
optical
fiber
cable
to
be
used
for
connection.
Digital
Output
Jack
(COAXIAL)
e
This
jack
outputs
digital
data.
e
We
recommend
using
a
75:0
/ohm
pin
cord
(available
in
stores)
for
connections.
Digital
Input
Jack
(OPTICAL)
e
Digital
data
is
input
in
optical
form
from
this
jack.
Digital
Input
Jack
(COAXIAL)
e
Digital
data
is
input
to
this
jack.
Analog
Output
Jacks
(BALANCED)
(Canon
XLR-3-32
type)
e
Use
these
jacks
for
connection
to
the
amplifier’s
balanced
input
jacks
(600
Q/ohm
input
impedance).
Continuous
Operation
If
the
automatic
search
reverse
button
@,
the
automatic
search
forward
button
@,
are
held
in,
the
function
of
that
button
will
be
repeated.

ENGLISH
CONNECTION
(1
}
Connections
to
the
Output
Jacks
(FIXED
and
VARIABLE)
Using
the
included
pin
cords,
connect
the
left
(L)
and
right
(R)
output
jacks
(FIXED
and
VARIABLE)
on
the
DCD-S10/3000
to
the
left
(L)
and
right
(R)
CD,
AUX,
or
TAPE
PLAY
input
jacks
on an
amplifier.
There
are
two
types
of
output
jacks.
The
output
is
variable
for
the
VARIABLE
jacks,
and
fixed
for
the
FIXED
jacks.
If
you
want
to
be
able
to
control
the
output
level
on
the
DCD-S10/3000,
use
the
VARIABLE
jacks.
DCD-S10/3000
Power
outlet
=
=
vaet
AEC
PLAY
©®
.
©
of™
-
a=)
os.
0
ce™.
che
(2)
Connections
to
the
Digital
Optical
Output
Jack
(OPTICAL)
(3)
(4)
Use
an
optical
fiber
cable
to
connect
the
digital
optical
output
jack
on
the
DCD-S10/3000
to
the
optical
input
jack
on
a
digital
processor
or
D/A
unit.
DCD-S10/3000
Power
outlet
Connections
to
the
Digital
Output
Jack
(COAXIAL)
Use
a
75
Q/ohm
pin
cord
to
connect
the
digital
output
jack
(COAXIAL)
of
the
DCD-S10/3000
to
the
digital
input
jack
(COAXIAL)
on
a
digital
processor
or
D/A
unit,
available
in
stores.
DCD-S10/3000
Power
outlet
Digital
processor
or
D/A
unit
Connections
to
the
Digital!
Input
Jack
(OPTICAL)
Use
an
optical
fiber
cable
to
connect
the
digital
optical
input
jack
on
the
DCD-S10/3000
to
the
optical
output
jack
on
a
digital
processor
or
DAT.
DCD-S10/3000
Digital
processor
(5)
Connections
to
the
Digital
Input
Jack
(COAXIAL)
Use
a
75
Q/ohm
pin
cord
to
connect
the
digital
input
jack
(COAXIAL)
of
the
DCD-$10/3000
to
the
digital
output
jack
(COAXIAL)
on
a
digital
processor
or
DAT.
DCD-S$10/3000
Power
outlet
(6)
Connections
to
the
Analog
Output
Jack
(BALANCED)
e
Connect
as
shown
on
the
diagram
using
a
Canon
connector
(XLR
type)
cord,
available
in
stores.
e
Canon
connector
signal
layout
1:
Common
2:
Cold
3:
Hot
Canon
connector
signal
layout
NOTE:
Do
not
short-circuit
the
hot
or
cold
terminal
with
the
common
terminal.
DCD-S10/3000
Power
outlet
i=
Sl
(Amplifier)
Connection
Precautions
«
Before
proceeding
with
connections
or
disconnections
of
cabies
and
power
cords,
be
sure
to
turn
all
system
components
off.
e
Ensure
that
all
cables
are
connected
properly
to
the
L
(left)
and
R
(right)
jacks.
e
Insert
plugs
fully
into
the
terminalis.
e
Connect
the
output
jacks
to
the
amplifier
CD,
AUX
or
TAPE
PLAY
input
jacks.

OPENING
AND
CLOSING
THE
DISC
HOLDER
AND
LOADING
A
DISC
Opening
and
closing
the
disc
holder
(This
operation
only
works
while
the
power
is
on.)
1.
Press
the
power
switch
(POWER)
to
turn
on
the
power.
2.
Press
the
open/close
button
(4
OPEN/CLOSE).
How
to
load
a
disc
e
Make
sure
the
disc
holder
is
completely
open.
e
Hold
the
disc
by
the
edges
and
place
it
on
the
disc
tray.
(Do
not
touch
the
signal
surface,
i.e.,
the
glossy
side.)
«
When
using
12
cm.
diameter
discs,
make
sure
the
outer
edge
matches
the
tray
guide
circumference
(Fig.
1),
and
when
using
CD
singles
(8
cm.
diameter)
match
the
outer
edge
with
the
inner
tray
guide
circumfer-
ence.
(Fig.
2)
e
Press
the
open/close
button
(
4
OPEN/CLOSE)
to
close
the
disc
holder.
e
When
the
disc
holder
is
closed,
the
disc
is
read
and
after
a
few
seconds
the
number
of
tracks
and
total
playing
time
are
displayed
on
the
TRACK
NO.
and
TIME
displays,
respectively.
e
When
the
disc
holder
is
open
and
a
disc
is
load:
d,
you
may
also
press
the
play
(PLAY)
button
to
close
the
disc
holder.
(If
the
play
button
(PLAY)
is
pressed,
playback
will
start
immediately
upon
the
disc
contents
having
been
read.)
Tray
guide
for
12
cm
disc
12
cm
disc
Fig.
2
Tray
guide
for
8
cm
disc
(CD
single)
Caution:
e
tf
your
finger
should
get
caught
in
the
disc
holder
when
it
closes,
press
the
open/close
button
(
4S
OPEN/CLOSE).
e
Do
not
place
any
foreign
objects
on
the
disc
tray,
and
do
not
place
more
than
one
disc
on
the
tray
at
a
time.
Otherwise
malfunction
may
occur.
e
Do
not
push
in
the
disc
tray
manually
when
the
power
is
off
as
this
may
cause
malfunction
and
damage
the
CD
player.
ENGLIS
NORMAL
CD
PLAYBACK
{1)
Starting
Playback
1
Turn
the
power
switch
on
and
joad
the
disc.
Press
the
play
button
(PLAY).
The
number
of
the
track
currently
playing,
the
index
number,
and
the
elapsed
time,
etc.,
are
displayed.
(2)
Stopping
Playback
(
STOP)
1
Press
the
stop
button
(STOP).
e
The
stop
mode
is
set
automatically
once
all
tracks
on
the
disc
are
played.
NOTE:
e
If
no
disc
is
loaded
or
if
the
disc
is
loaded
upside-down,
the
track
number,
index,
and
time
displays
will
all
read
zero,
and
the
entire
calendar
will
light.
TRACK
INDEX
TIME
NA
AN
nannn
UYU
uYU
Ulin
U
Us
12:3
45
6
7
8
9
3011
12
13
14
15
16
17
18
19
20
e
ff
the
information
at
the
innermost
side
of
the
disc
cannot
be
read
properly
due
to
dirt
or
scratches,
the
display
will
be
as
shown
below,
and
the
number
of
tracks
and
remaining
time
per
track
will
not
be
displayed.
Also,
the
search
operation
may
take
longer
than
usual.
When
normal
TRACK
INDEX
TIME
i?
og
34.
15,
123
45
67
8
9
10
41:12
When
data
cannot
be
read
properly
TRACK
INDEX
TIME
An
ANA
Go
UU
Us
UYU
uU
12:3
4
5 6
7
8 9
10:11
12
13
14
15
16
17
18:19
20

ENGLISH
ADVANCED
CD
PLAYBACK
oO
Playing
a
Specific
Track
.............:ccscceesesseseessseeeeeesees
4]
Finding
Sections
Within
a
Track
..........cscccccsseereesscesenes
(Remote
control
only)
(Remote
control
only}
e
Use
this
function
to
start
playback
from
certain
sections
within
a
track
divided
by
index
numbers.
(Number
buttons)
@
Use
the
number
buttons
and
the
+10
button
to
input
the
number
of
the
desired
track.
For
example,
to
play
the
fourth
track
press
[4]
,
and
to
play
the
12th
track
(INDEX)
press
and
[2].
The
beginning
of
the
track
is
found
and
playback
starts.
(2)
Moving
to
Following
Tracks
During
Playback
..........cccsscccssscesscsessetssccssssasseceneee
@
Press
the
INDEX
button.
“--”
appears
at
the
TRACK
NO.
display.
@
Use
the
number
buttons
to
specify
the
track
number.
“.."
now
appears
at
the
INDEX
display.
Input
the
desired
index
number.
Playback
starts
from
there.
For
example,
to
start
listening
from
index
number
2
on
track
3,
press
INDEX,
3
and
2.
indexes
e
Indexes
are
numbers
which
are
assigned
to
sections
within
a
track.
Check
the
disc’s
explanatory
notes
for
the
index
numbers.
Press
the
automatic
search
forward
button
{
Dp4
).
If
you
make
an
index
search
for
an
index
number
that
is
not
on
y
the
disc,
playback
will
start
from
the
last
index
number
on
the
track.
Taree
[eens
[ane
lll)
6
Playing
Specific
Tracks
in
a
Specific
Order
oo...
secssessescensescevenssesesetesesesnres
Programmed
Play
@
Press
the
automatic
search
forward
button
(
Ppl
).
e
With
this
function,
you
can
choose
any
of
the
tracks
on
the
disc
and
e
[f
the
automatic
search
forward
button
(
PPI)
is
pressed
again
during
program
them
to
play
in
any
order.
the
search
operation,
the
pickup
moves
on
to
the
next
track,
etc.
e
Programming
is
possible
with
the
disc
holder
open.
Up
to
20
tracks
can
be
programmed.
3}
Returning
to
the
Beginning
of
the
e
The
programmed
tracks
are
shown
on
the
calendar.
CUrrent
Track.
.csicccscsscsssscscssssuesnssaisenenencitcesandiveasens
(1)
Programming
(Remote
control
only)
(Number
buttons)
@
Press
the
automatic
search
reverse
button
(
K€
).
e
lf
the
automatic
search
reverse
button
(
Ke
)
is
pressed
again
during
the
search
operation,
the
pickup
moves
on
to
the
previous
track,
etc.
:
10

(2)
(3)
(4)
(5)
The
PROGRAM
indicator
lights
when
the
program
button
(PROGRAM)
is
pressed.
Next,
use
the
number
buttons
and
the
+10
button
to
program
the
tracks.
To
program
tracks
3,
12,
and
7,
for
example,
press
[PROGRAM
_],
F
C+10),
2],
and
2).
The
track
number
lights
on
the
calendar
each
time
a
track
is
programmed.
The
number
of
tracks
programmed
is
displayed
at
the
index
display,
and
the
total
playing
time
for
the
programmed
tracks
is
indicated
at
the
time
display.
After
the
tracks
are
programmed,
the
total
number
of
programmed
tracks
is
displayed
at
the
track
number
display,
and
the
total
playing
time
for
the
programmed
tracks
is
indicated
at
the
time
display.
Checking
the
Programmed
Tracks
(Remote
controi
only)
(CALL)
Press
the
CALL
button.
The
programmed
tracks
are
displayed
in
order
on
the
TRACK
NO.
display
each
time
the
CALL
button
is
pressed.
Playing
the
Programmed
Tracks
(PLAY)
Press
the
(PLAY)
button
to
play
the
tracks
in
the
programmed
order.
Correcting
Programs
(Remote
contro!
only)
(Number
buttons)
(CLEAR)
To
correct
a
programmed
track,
first
press
the
CLEAR
button,
then
Program
the
correct
track.
The
last
track
programmed
is
replaced
with
the
correct
track.
To
ciear
a
track
in
the
middie
of
the
program,
use
the
CALL
button
to
call
out
that
track,
then
press
the
CLEAR
button
to
clear
it
from
the
Program.
Clearing
the
Entire
Program
Press
the
DIRECT
button
to
clear
the
entire
program.
The
entire
Program
can
also
be
cleared
by
pressing
the
OPEN/CLOSE
button.
lf
the
DIRECT
button
is
pressed
during
programmed
playback,
the
Program
mode
is
cleared
and
norma!
playback
continues
from
that
track
on.
6
Playing
All
Tracks
Repeatedly
.............:ccceeseseeeees
Repeat
Piayback
NOTES
e
Ifthe
programming
operation
is
performed
in
the
play
or
pause
mode,
the
current
track
is
programmed
as
the
first
track
in
the
program.
Other
programs
can
be
added,
but
the
number
of
programmed
tracks
and
playing
time
will
not
be
displayed.
e
Direct
search
is
not
possible
during
programmed
playback.
Pressing
the
number
buttons
adds
tracks
to
the
end
of
the
program,
e
Programming
is
also
possible
when
the
disc
holder
is
open.
A
track
number
greater
than
the
number
of
tracks
on
the
disc
can
be
set
in
the
program,
but
it
will
automatically
be
cleared
from
the
program
before
playback
starts.
e
The
remaining
time
per
track
can
only
be
displayed
for
the
first
20
tracks
on
the
disc.
e
The
total
program
time
and
remaining
program
time
as
well
will
not
be
displayed
if
tracks
numbers
greater
than
20
are
prog-
rammed.
{Remote
control
only)
{
>
PLAY)
PEAK
TE
DISPLAY
(REPEAT)
Press
the
REPEAT
button.
The
REPEAT
indicator
lights.
The
operation
is
the
same
whether
button
@
or
@
is
pressed
first.
The
one-track
repeat
mode
is
set
if
the
REPEAT
button
is
pressed
again
during
repeat
playback.
The
all-track
repeat
mode
is
set
even
if
the
REPEAT
button
is
pressed
during
playback.
To
cancel
the
repeat
mode,
press
the
REPEAT
button
twice.
If
the
REPEAT
button
is
pressed
during
programmed
playback,
the
tracks
are
repeated
in
the
programmed
order.

ENGLISH
....
|
One-track
Repeat
(Remote
control
only)
[]
(REPEAT)
FADER
PEAK
(TIME
DISPLAY
Press
the
REPEAT
button
twice.
Cae
[oe
[one
)
-
|
The
track
is
repeated
'
|
continuously.
e
Press
this
button
when
you
hear
a
track
you
want
to
play
repeatedly.
e
Press
the
REPEAT
button
twice
during
playback.
The
REPEAT
indicator
lights,
and
if
you
are
at
track
number
20
or
less,
that
number
appears
on
the
calendar
display
and
that
track
is
played
repeatedly.
e
For
track
numbers
21
and
above,
the
track
number
is
not
displayed
on
the
calendar
display
but
the
one-track
repeat
mode
will
function.
e
Ifthe
REPEAT
button
is
pressed
twice
in
the
stop
mode,
track
number
1
appears
on
the
calendar
display
and
one-track
repeat
is
possible.
Press
the
PLAY
button
to
start
playback.
e
Press
the
REPEAT
button
once
again
to
cance!
the
one-track
repeat
mode.
The
display
and
playback
return
to
normal.
8]
Stopping
Momentarily
During
Playback
..........:-c:cssesesseseeeeeees
(Remote
controi
only)
e
Playback
can
be
stopped
momentarily
then
resumed
from
the
same
point.
(
Il
PAUSE)
@
Press
the
pause
button
(
ll
PAUSE).
[ans
ame
Doe
iD
—
(Pause)
@
Press
the
play
button
(
»
PLAY)
or
the
pause
button
(
If
PAUSE).
*
To
resume
playback,
press
either
the
play
button
(
®
PLAY)
or
the
pause
button
(Il
PAUSE).
12
@
Finding
a
Track
While
Listening
at
High
Speed
ou...
cccesecseresneeesseenenseeeseesenensenneaees
Manual
Search
(Remote
control
only)
e
You
can
skip
through
the
disc
while
listening
at
high
speed.
This
function
comes
in
handy
for
finding
a
certain
part
in
the
middle
of
a
long
track
and
starting
playback
from
there.
e
Once
you
find
the
desired
position
using
the
manual
search
operation,
release
the
manual
search
forward
button
{
PP
)
or
manual
search
reverse
button
(
€€
)
to
start
normal
playback.
(1)
Manual
Search
Forward
UTO
SPACE
AUTOEDT
RANDOM
REPEAT
FADER
PEAK
TIME
DISPLAY
Hold
in
the
manual
search
forward
button
(
PP
)
[ae
[ome
[aoe
ID
ah
oe
Play
Be
ak
te
es
;
oot
he
tg
et
es
Skip
Skip Skip
Skip
Skip
@
During
playback,
press
and
hold
in
the
manual
search
forward
button
(
PP»
)
to
skip
through
the
disc
while
listening
at
high
speed.
e
The
number
of
the
track
being
skipped
through,
the
index,
number,
and
the
elapsed
time
for
that
track
are
indicated
on
the
display
window.
e
Inthe
pause
mode,
the
disc
moves
at
about
three
times
the
speed
as
during
the
play
mode,
but
no
sound
is
heard.
e
When
the
end
of
the
last
track
is
reached
while
pressing
the
manual
search
forward
button
(
PP
),
“J.”
appears
on
the
display
window
and
the
manual!
search
operation
is
stopped.
To
resume
playback,
press
the
manual
search
reverse
button
(
«),
then
do
another
operation
once
the
“J.”
disappears
from
the
display.
{2}
Manual
Search
Reverse
VOLUME
{
«€)
\UTO
SPACE
AUTOEOTT
RANDOM
REPEAT
FADER
DISPLAY
PEAK
Lindt:

Hold
in
the
manual
search
reverse
button
(
€¢
)
fame
[me
[oem
ll
ee
ge
ner
ee
ae
ee
ee
Skip
Skip
Skip
Skip
@
During
playback,
press
and
hold
in
the
manual
search
reverse
button
(
44}
to
skip
through
the
disc
while
listening
at
high
speed.
e
The
display
is
the
same
as
during
the
manual
search
forward
operation.
e
In
the
pause
mode,
the
disc
moves
at
about
three
times
the
speed
as
during
the
play
mode,
but
no
sound
is
heard.
e
When
the
beginning
of
the
first
track
is
reached
while
pressing
the
manual
search
reverse
button
(
€4
),
“££”
appears
on
the
display
window
and
the
manual
search
operation
is
stopped.
To
resume
playback,
press
the
manual
search
forward
button
(
PP
),
then
do
another
operation
once
the
“C{”
disappears
from
the
display.
@
inserting
Blanks
Between
Tracks
.............ccsessseceeesseeeees
(Remote
control
only)
e
This
function
inserts
blank
spaces
between
tracks,
making
editing
easier,
UME
DISPLAY
(
>
PLAY)
(AUTO
SPACE)
@
The
AUTO
SPACE
indicator
lights
when
the
auto
space
button
is
pressed.
@
Press
the
play
button
(
®
PLAY)
to
start
playback.
When
the
end
of
a
track
is
reached,
a
blank
space
of
approximately
4
seconds
is
inserted
-
before
the
beginning
of
the
next
track.
©
Press
the
auto
space
button
again
to
turn
the
auto
space
function
off.
®@
Pausing
At
the
Beginning
of
a
Track
After
Searchitig
cscisiis.ccscsssssscossicsastaceuniectlecdotecsssassestaaseasseseceanuchece
(Remote
control
only)
(1)
Direct
Search
e
Pausing
at
the
beginning
of
a
track
found
with
the
direct
search
Operation
comes
in
handy
for
practicing
karaoke.
( 1
PAUSE)
ENGLIS
@
Use
the
number
buttons
to
set
the
desired
track.
@
Press
the
pause
button
(Il
PAUSE).
e
To
start
playback,
press
either
the
play
button
(
»
PLAY)
or
the
pause
button
(
fi
PAUSE).
(2)
Program
Search
e
Press
the
pause
button
(il
PAUSE)
after
programming
tracks.
The
beginning
of
the
first
track
in
the
program
is
found
and
the
disc
is
paused
there.
®
Playing
Tracks
in
Random
Order
............ccccsseesees
Random
Playback
(Remote
control
only)
e
All
of
the
tracks
recorded
on
the
disc
can
be
played
once
in
random
order.
\UTO
SPACE
AUTOEDT
RANDOM
REPEAT
FADER
PEAK
e
When
the
random
button
(RANDOM)
is
pressed,
the
RANDOM
indicator
lights
and
random
playback
starts
automatically.
e
If
the
random
button
(RANDOM)
is
pressed
when
tracks
are
program-
med,
only
the
programmed
tracks
are
played
at
random.
e
Ifthe
random
button
(RANDOM)
is
pressed
when
the
repeat
function
is
set,
all
tracks
will
be
played
through
once
in
random
order,
after
which
all
tracks
will
be
played
through
again
in
different
order,
and
so
on.
¢
During
the
search
operation,
the
track
numbers
from
the
first
to
the
last
track
on
the
disc
are
displayed
in
rapid
succession
on
the
track
number
display,
so
you
cannot
tell
what
track
is
going
to
be
played
next
until
playback
begins.
NOTE:
®
The
total
remaining
time
is
not
displayed
during
the
random
mode.
e
The
auto
edit
mode
is
cancelled
if
the
random
button
(RANDOM)
is
pressed
during
the
random
mode.
®
Edit
Recording
on
Sides
A
and
B
of
the
Tape
000...
eccscessccesseneceseeseeeeeneeesenes
Edit
Function
(1)
Auto
Edit
Function
(AUTO
EDIT)
(Remotocontrol
only)
The
auto
edit
function
automatically
divides
the
tracks
on
the
co
mpact
disc
into
sides
A
and
B,
with
the
division
at
the
beginning
of
a
track
in
such
as
way
that
the
disc’s
total
playing
time
is
divided
as
close
as
possible
by
one
half.
UTO
SPACE
AUTOEDT
RANDOM
REPEAT
TE
DISPLAY
@
When
the
AUTO
EDIT
button
is
pressed
in
the
stop
condiio
m,
the
total
play
time
of
side
A
(the
first
half)
and
the
track
numbers
(on
the
calendar)
are
displayed
for
about
2
seconds.
Next,
the
sick
E
(last
half)
information
is
similarly
displayed
after
which
the
player
iutomatically
pauses
at
the
beginning
of
the
first
track
of
side
A.
EDIT
ani
PROGRAM
will
be
lit
on
the
display
at
this
time.
@
Pressing
the
play
button
(
>»
PLAY)
or
the
pause
button
(
PAUSE)
will
start
the
play
mode.
When
side
A
has
finished
playing,
th
player
will
pause
at
the
beginning
of
the
first
track
on
side
B.
@
Pressing
the
play
button
{
®
PLAY)
or
the
pause
buttor(
ll
PAUSE)
again
will
start
the
play
mode.
When
side
B
has
finishedp6aying,
the
player
automatically
stop.
13

ENGLISH
®
Fading
Out
or
Fading
In
at
the
Desired
Location
............csscccsssssscsesssesssessscesssresesseaees
{Analog
output
only)
(1)
Fading
out
and
fading
in
is
possible
at
the
desired
position
during
play
Manual
Fader
(Remote
control
only)
@
Fade
Out
When
the
fader
button
(FADER)
is
pressed
during
play,
fade
out
will
be
provided
for
about
5
seconds.
(*°5)
will
light
up
during
the
operation
and
(
I»
)
will
flash.
When
fade
out
is
completed
the
player
will
automatically
pause.
@
Fade
In
When
the
fader
button
(FADER)
is
pressed
from
the
pause
mode,
the
player
will
start
playing
and
fade
in
will
be
provided
for
about
3
seconds.
FADE
will
light
up
during
the
operation
and
(CAPE)
will
flash.
CLEAR
CALL
INDEX
UTO
SPACE
AUTOEDT
RANDOM
REPEAT
FADER
PEAK
TIME
DISPLAY
(FADER)
(2)
Setting
the
Fade
Out
Time
in
Advance
(TIME
FADE)
(Remote
control
only)
@
When
the
fader
button
(FADER)
is
pressed
in
the
stop
mode,
the
FADE
indicator
(C*°F})
will
light
up,
TIME
will
appear
as
--M--S,
and
the
player
will
wait
for
the
input
of
the
fade
out
time.
@
input
the
fade
out
time
with
the
(0~9)
number
buttons.
@
Pressing
the
play
button
(
®
PLAY)
will
start
the
playback
and
the
FADE
indicator
(CAE)
will
light
up.
@
The
(
I»
)
indication
will
start
flashing
5
seconds
before
the
specified
fade
out
time
and
then
the
fade
out
will
begin.
The
fade
out
will
end
at
the
specified
time
and
the
player
will
automatically
pause.
The
time
fade
function
will
be
cancelled
if
an
auto
search
or
manual
search
is
performed
during
playback.
WD)
(Number
buttons)
CLEAR
CALL
INDEX
SME
DISPLAY
(FADER)
14
®
To
Search
for
the
Peak
Level
OF
ENE
DISC
si
2cco
sind
insicelecstesinsesatvaadbeeideeddteneantesi
teas
toads
Peak
Search
(Remote
control
only)
e
The
player
searches
for
the
peak
portion
and
plays
a
few
seconds
either
side
of
this
point
repeatedly.
This
is
convenient
for
making
recording
adjustments
on
the
tape
recorder.
CLEAR
CALL
UTO
SPACE
AUTOEDT
RANDOM
REPEAT
FADER
PEAK
TIME
DISPLAY
(PEAK)
@
When
the
peak
search button
(PEAK)
is
pressed
in
the
stop
mode,
the
PEAK
indicator
will
flash
and
the
player
will
search
for
the
portion
having
the
peak
level.
@
After
the
search,
the
PEAK
indicator
lights
up
and
a
few
seconds
either
side
of
the
peak
level
point
are
played
back
repeatedly.
This
is
convenient
for
making
recording
adjustments
on
the
tape
recorder.
@
To
cancel
the
peak
search,
press
the
stop
(
Ml
STOP)
button.
@
When
the
play
button
(
»
PLAY)
or
the
pause
button
(
Il
PAUSE)
is
pressed
during
peak
search
or
while
playing
the
peak
portion
back
repeatedly,
the
player
will
go
to
the
beginning
of
the
first
track
(the
first
track
of
the
program
for
program
playback,
or
the
track
that
was
first
selected
in
the
time
edit)
and
begin
playback
from
here
if
the
play
button
was
pressed
or
enter
the
pause
mode
if
the
pause
button
was
pressed.
NOTE:
e
The
peak
search
function
reads
the
level
of
the
disc
from
the
beginning
of
the
disc
to
the
end
at
a
fixed
interval
and
regards
the
maximum
value
that
was
read
as
the
peak.
Peak
search
takes
a
little
time
for
this
reason.
The
peak
portion
may
change
each
time
the
disc
is
read
and
there
may
be
a
slight
difference
in
the
actual
peak
level,
but
since
this
difference
ever
so
slight
there
will
be
no
adverse
affects
on
the
adjustment
of
the
recording
level.
The
time
fade
function
is
cancelled
when
the
peak
search
operation
is
performed.
To
use
the
time
fade
function,
set
to
the
stop
mode
then
reset
the
function.
Buttons
other
than
the
open/close
button
(4
OPEN/CLOSE),
play
button
(
®
PLAY),
pause
button
(
Hf}
PAUSE),
and
stop
(
STOP)
button
will
not
function
during
peak
search
or
repeat
play
of
the
peak
portion.

TIMER-CONTROLLED
PLAYBACK
w
Operation
1.
Turn
on
the
power
of
all
system
components.
2.
Set
the
input
selector
on
the
amplifier
to
correspond
to
the
inputs
the
CD
player
is
connected
to.
3.
Make
sure
a
disc
has
been
loaded
in
the
disc
holder.
4.
Check
the
time
on
the
timer
and
then
set
the
desired
turn-on
time.
5.
Turn
the
audio
timer
ON.
Power
is
turned
off
automatically
in
all
components
connected
to
the
timer.
6.
When
the
preset
turn-on
time
is
reached,
power
is
turned
on
in
the
system
components,
and
CD
playback
starts
from
the
first
track.
gm
Connection
DCD-S10/3000
Audio
Timer,
sold
separately
INSTALLATION
PRECAUTIONS
The
CD
player
uses
a
microcomputer
for
controlling
internal
electronic
circuits.
in
the
event
that
the
player
is
used
while
a
near-by
tuner
or
TV
is
turned
on,
although
unlikely,
interference
could
occur
either
in
the
sound
from
the
tuner
or
the
picture
of
the
TV.
To
avoid
this,
piease
take
the
following
precautions.
e
Keep
the
CD
player
as
far
away
from
the
tuner
or
TV
set
as
possible.
e
Keep
the
power
cable
and
connecting
cable
of
the
CD
player
separate
from
the
antenna
wires
of
the
tuner
and
TV.
e
interference
is
particular
likely
to
occur
when
an
indoor
antenna
or
a
300
Q/ohm
feeder
cable
is
used.
Thus,
use
of
an
outdoor
antenna
and
75
Q/ohm
coaxial
cable
is
strongly
recommended.
TROUBLESHOOTING
—
THE
COMPACT
DISC
1.
ENGLIS§
Precautions
on
handling
compact
discs
e
Do
not
allow
fingerprints,
oil
or
dust
on
the
surface
of
the
compact
disc.
\f
the
signai
surface
is
dirty,
wipe
it
off
with
a
soft,
dry
cloth.
Wipe
in
circular
motions
from
the
center
and
out.
e
Do
not
use
water,
benzene,
thinner,
record
sprays,
electrostatic
proof
chemicals,
or
silicone-treated
cloth
to
clean
discs.
e
Always
use
care
when
handling
discs
to
prevent
damaging
the
surface,
in
particular
when
removing
a
disc
from
the
case
and
returning
it.
Do
not
bend
compact
discs.
Do
not
apply
heat
to
compact
discs.
Do
not
enlarge
the
hole
in
the
center
of
the
disc.
Do
not
write
on
the
disc
and
do
not
attach
any
labels.
Condensation
will
form
on
the
disc
surface
if
it
is
brought
into
a
warm
room
from
a
cold
area,
such
as
outdoors
during
winter.
Wait
until
the
condensation
disappears.
Never
dry
discs
with
hair
dryers,
etc.
eeeeee
Precautions
on
storage
e
After
playing
a
disc,
always
return
it
to
its
case.
e
Keep
discs
in
the
cases
when
they
are
not
to
be
played.
This
will
protect
them
from
dust
and
dirt
and
prolong
their
service
life.
e
Do
not
store
discs
in
the
following
places:
1)
Places
exposed
to
direct
sunlight
for
a
considerable
time.
2)
Places
subject
to
accumulation
of
dust
or
high
humidity.
3)
Places
exposed
to
high
temperatures,
such
as
close
to
heater
outlets.
a
ae
300
©/ohm
feeder
cabie
75
Q/ohm
coaxial
céble
lf
the
CD
player
does
not
seem
to
be
functioning
properly,
check
the
following:
Disc
holder
does
not
open
or
close.
e
ls
the
power
on?
When
a
disc
is
loaded,
00220000
is
displayed.
e@
Isthe
disc
loaded
properly?
0...
eeceescecessecseetereerenes
See
page
9
When
the
play
button
(
»
PLAY)
is
pressed,
playback
does
not
start.
e
tsthe
disc
dirty
or
scratched?
oo...
ee
eee
treeteeteees
See
page
15
There
is
no
sound,
or
it
is
distorted.
e
ls
the
output
cord
properly
connected
to
the
AMPIiFIOT?
oo...
cece
etsessesensenetseeseeneesesseereesssuseeeecess
See
page
8
e
Have
the
amplifier
controls
been
set
correctly?
Volume
is
low.
e®
is
volume
setting
(with
volume
buttons
on
remote
CONtrOl
UNIt)
COFFECE?
.......eeeeesesstseteeeeeereeees
See
page
17
A
specific
section
of
the
disc
will
not
play.
e
Isthe
disc
dirty
or
scratched?
oe
eecctsereteeeeeenees
$ee
page
15
Programmed
piayback
does
not
work.
e
Have
programming
been
properly
GONG?
ices
es
ceo
Mecvbeatenaaiiseeedeuecraess
See
pages
10,
11
and
17
Incorrect
operation
when
buttons
on
the
remote
contro!
are
pressed.
e
ts
the
remote
control
unit
being
operated
too
far
from
the
CD
player?
oo...
cecsesecseesssesseenenreeere
$
ee
page
16
e
Are
there
obstacles
blocking
the
ray?
e
is
the
remote
control
sensor
exposed
to
strong
light?
e
Are
the
batteries
exhausted?
15

ENGLISH
PLAYBACK
USING
THE
REMOTE
CONTROL
UNIT
The
accessory
RC-253/RC-252
remote
control
unit
can
be
used
to
contro!
the
CD
player
from
a
convenient
distance.
(1)
inserting
the
dry
cell
batteries
1.
Remove
the
battery
cover
on
the
back
of
the
remote
control
unit.
2.
Insert
two
R6P
(standard
size
AA)
dry
cell
batteries
with
correct
polarity
as
indicated
inside
the
battery
compartment.
Notes
on
the
Batteries
16
The
remote
contro!
unit
uses
standard
size
AA
dry
cell
batteries.
The
batteries
will
need
to
be
replaced
approximately
once
a
year.
Replacement
may
be
necessary
earlier
depending
on
how
much
the
remote
control!
unit
is
used.
lf,
in
less
than
a
year
from
the
time
new
batteries
were
inserted,
the
remote
control
fails
to
operate
the
CD
player
from
a
near-by
position,
it
is
time
to
replace
the
batteries.
Insert
the
batteries
properly,
following
the
polarity
diagram
inside
the
battery
compartment,
in
other
words
make
sure
(+)
and
(—)
terminals
are
properly
aligned.
Batteries
are
prone
to
damage
and
leakage.
Therefore:
e
Do
not
combine
new
batteries
with
used
ones.
e
Do
not
combine
different
types
of
batteries.
e
Do
not
jumper
opposite
poles
of
the
batteries,
expose
them
to
heat,
break
them
open
nor
expose
of
them
in
open
fire.
lf
the
remote
control
unit
is
not
to
be
used
for
a
long
period
of
time,
remove
the
batteries
from
the
unit.
If
the
batteries
have
jeaked,
remove
any
traces
of
battery
fluid
from
the
battery
compartment,
wiping
thoroughly
with
a
dry
cloth.
Then
insert
new
batteries.
(2)
Directions
for
Use
e
Operate
the
remote
contro!
unit
while
pointing
it
towards
the
remote
control
sensor
on
the
CD
piayer
(see
below).
Remote
contro!
sensor
Left
30°
When
a
remote
contro!
signal
is
received,
the
remote
control
indicator
on
front
of
the
CD
player
lights
briefly.
The
remote
contro!
unit
can
be
used
at
a
distance
up
to
8
meters
in
a
straight
line
from
the
CD
player.
This
distance
decreases
if
there
are
obstructions
blocking
the
signa!
path
or
when
the
remote
control
unit
is
operated
at
an
angle
from
the
remote
control
sensor.
The
buttons
on
the
remote
control
unit
have
identical
functions
with
those
on
the
CD
player.
However,
the
following
functions
cannot
be
remote
controlied:
Power
ON/OFF.
Cautions
on
Use
Do
not
press
the
operation
buttons
on
the
main
unit
and
on
the
remote
control
unit
simultaneously,
as
this
will
result
in
malfunction.
The
remote
contro!
unit
may
not
operate
properly
if
the
remote
control
sensor
is
exposed
to
direct
sunlight
or
strong
artificial
lighting,
or
if
there
is
an
object
between
the
remote
control
unit
and
the
remote
control
sensor.

REMOTE
CONTROL
UNIT
RC-253/RC-252
Disc
Holder
Open/Close
button
(
©
OPEN/CLOSE)
Play
button
(
®
PLAY)
Pause
button
(
Hl
PAUSE)
Stop
button
(
HM
STOP)
Automatic
search
forward
button
(
Ppl
)
Automatic
search
reverse
button
(
Ke
)
Manual
search
reverse
button
(
€€
)
Manual
search
forward
button
(
PP
}
Clear
button
(CLEAR)
Index
button
(INDEX)
Auto
space
button
(AUTO
SPACE)
Fader
button
(FADER)
Auto
edit
button
(AUTO
EDIT)
Peak
search
button
(PEAK)
Display
Button
(DISPLAY)
Press
this
button
to
change
the
brightness
of
the
display.
_
Press
once
to
make
the
display
2/3
as
bright
as
normal.
Press
again
to
make
the
display
1/3
as
bright
as
normal.
Press
once
again
to
turn
the
entire
display
off
during
playback
and
all
but
the
track
number
off
in
any
other
mode.
Direct
Search
Normally,
direct
search
is
possible
simply
by
pressing
the
desired
number
buttons.
Program
Search
(During
playback,
the
track
which
is
currently
playing
is
programmed
as
the
1st
track.)
Press
the
PROGRAM
button,
then
press
the
number
buttons.
For
example,
to
program
tracks
number
3,
11,
and
5,
press
PROGRAM
—
3
—
+10
and
1
—
5.
To
cancel
the
program,
press
the
DIRECT
button.
TIME
ENGLIS
Setting
to
the
Program
Mode
e
For
program
search,
press
the
PROGRAM
but-
ton
then
the
number
buttons
(0
through
9
and
+
10).
The
remote
control
unit
is
normally
set
to
the
direct
mode.
Program
button
(PROGRAM)
Direct
button
(DIRECT)
Number
buttons
(0
through
9)
+10
button
Volume
buttons
(VOLUME)
Call
button
(CALL)
Repeat
button
(REPEAT)
DISPLAY
Random
button
(RANDOM)
Display
button
(DISPLAY)
Time
mode
button
(TIME)
Use
this
to
adjust
the
output
jevel
(VOLUME)
of
the
headphones
or
line
output
(VARIABLE).
The
volume
increases
when
the
(+)
button
is
pressed,
decreases
when
the
(—)
button
is
pressed.
inputting
the
Track
Numbers
For
track
numbers
below
9,
simply
press
the
corresponding
button.
For
track
numbers
of
10
and
greater,
press
the
+10
ther
the
number
buttons.
For
example,
for
track
number
22
press
+10
twice
thin
2.
Volume
The
volume
contro!
on
the
unit
will
operate
when
the
velurme
buttons
are
pressed.
The
volume
can
be
checked
by
looking
at
tle
position
of
the
control.
17

ENGLISH
SPECIFICATIONS
AUDIO
No.
of
Channels:
2
channels
Frequency
Response:
2
~
20,000
Hz
Dynamic
Range:
100
dB
Signa!-to-noise
Ratio:
118
dB
Harmonic
Distortion:
0.0018%
(1
kHz)
Separation:
110
dB
(1
kHz)
Wow
&
Flutter:
Below
measurable
limit:
(40.001
%
W.peak)
Output
Voltage:
FIXED
2.0
V
VARIABLE
0~2.0
V
DISCS
Compact
Disc
format
GENERAL
CHARACTERISTICS
Power
Supply:
Voitage
and
frequency
are
shown
on
rating
label.
Power
Consumption:
22W
Dimensions:
434
(W)
x
120
(H)
x
340
(D)
mm
(17-3/32")
x
(4-23/32")
x
(13-25/64")
Weight:
DCD-S10_
10.0
kg
(22
Ibs
502)
DCD-3000
8.0
kg(17
Ibs
6402)
18
*
Design
and
specifications
are
subject
to
change
without
notice
in
the
course
of
product
improvement.
FUNCTIONS
AND
DISPLAY
Functions:
Display:
Others:
REMOTE
CONTROL
UNIT
Remote
Control
System:
Power
Supply:
External
Dimensions:
Weight:
Direct
selection,
automatic
search,
programmed
playback,
repeat
playback,
manual
search,
auto
space,
time
mode,
auto
edit,
index
search,
fader,
peak
search.
Track
number,
time,
music
calendar,
and
engaged
modes
Headphones
jack
DCD-S10
RC-253
DCD-3000
RC-252
Infrared
pulse
system
3
V
DC;
two
R6P
(standard
size
AA)
dry
cell
batteries
60
(W)
x
177
(H)
x
18
(D)
mm
(2-23/64")
x
(6-31/32")
x
(45/64)
120
g
(26
oz)(including
batteries)

RECOMMANDATIONS
iMPORTANTES
ATTENTION:
AFIN
D’EVITER
LES
RISQUES
D‘INCENDIE
OU
DE
COURT-
CIRCUIT,
NE
PAS
EXPOSER
CET
APPAREIL
A
LA
PLUIE
OU
A
L’HUMIDITE.
PRECAUTIONS:
1,
Prendre
soin
du
cordon
d’alimentation.
Veiller
a
ne
pas
déformer
ou
endommager
le
cordon
d’alimentation.
Cela
pourrait
provoquer
un
court-circuit
ou
un
fonctionnement
défec-
tueux
de
l'appareil.
Lors
du
débranchement
du
cordon
de
la
fiche
secteur,
songer
a
ne
jamais
tirer
sur
le
cordon
jui-méme,
mais
a
saisir
la
fiche
de
raccordement.
2.
Ne
pas
ouvrir
la
plaque
supérieure.
Afin
d’éviter
tout
risque
de
court-circuit,
ne
jamais
démonter
vous-
mémeia
plaque
supérieure
de
l'appareil.
En
cas
de
probleme,
contactez
votre
concessionnaire
DENON.
3.
Ne
jamais
rien
introduire
a
!’intérieur
de
l'appareil.
Ne
jamais
introduire
d’objet
métallique
ou
de
liquide
a
l’intérieur
du
lecteur
de
disque
compact.
Un
court-circuit
ou
une
panne
de
fonction-
nement
en
résulterait.
REMARQUE:
Ce
lecteur
de
disque
compact
contient
un
rayon
laser
semi-conducteur.
Maintenir
la
température
ambiante
de
la
piéce
d’écoute
entre
5°C
et
35°C
pour
obtenir
un
fonctionnement
stable.
Merci
d’avoir
acheté
ce
lecteur
de
disque
compact
DENON.
Veuillez
lire
ce
mode
d'emploi
de
fagon
a
bien
connaitre
le
lecteur
de
disque
compact
et
d’en
profiter
au
maximum.
—
TABLE
DES
MATIERES
—
CARACTERISTIQUES
NOMENCLATURE
CONNEXION
OUVERTURE
ET
FERMETURE
DU
RECEPTACLE
DE
DISQUE
COMPACT
ET
CHARGEMENT
D’'UN
DISQUE
1.0...
eeceseecsesseeseeseesessensessesenes
LECTURE
NORMALE
D’UN
DISQUE
COMPACT
LECTURE
AVANCEE
D’UN
DISQUE
COMPACT
LECTURE
SUR
MINUTERIE
....
LE
DISQUE
COMPACT
PRECAUTIONS
D'INSTALLATION
DEPANNAGE
LECTURE
A
L’AIDE
DE
LA
TELECOMMANDE
SPECIFICATIONS
Veuillez
contrdler
que
jes
articles
suivants
sont
bien
joints
a
l'appareil
principal
dans
le
carton:
(t)
Mode
d’emploi
.....
(2)
Cordon
de
CONNEXION
.....cccseesescssensseeesenereessseseseseneassesesecseseeees
1
(3)
Télécommande
RC-253
(DCD-S$10)
...
RC-252
(DCD-3000)
....
(4)
Pile
Seche
REP/AA
ou...
eeccescsccsssessescseeseseseceeserescssscsessceatacseassees
FRANCAIS
Inscrire
le
numéro
de
série
de
l'appareil
dans
|’espace
fourni
ci-dessous
et
ranger
ce
mode
d'emploi
dans
un
endroit
sir
pour
le
consulter
lorsque
vous
en
aurez
besoin.
Modéle
No.
DCD-$10/3000
No.
de
série
CARACTERISTIQUES
Le
DCD-S10/3000
est
un
lecteur
CD
équipé
du
convertisseur
super
linéaire
d’avant-garde
de
DENON
qui
élimine
la
baisse
de
qualité
sonore
dans
la
section
de
lecture
PCM,
ainsi
qu’a
des
endroits
soigneusement
sélection-
nés.
ll
reproduit
tous
les
sons
du
studio
ou
de
la
piece
dans
iequel
le
disque
compact
a
été
enregistré
avec
une
haute
performance
et
une
riche
expression
musicale.
{1}
Reproduction
sonore
optimale
utilisant
un
processeur
ALPHA
nou-
vellement
mis
au
point
1.
Une
interpolation
4
grande
vitesse
par
le
processeur
ALPHA
nouvellement
mis
au
point
recrée
les
données
au-dessous
du
bit
le
plus
significatif
(LSB)
perdues
lors
de
|’enregistrement
afin
de
fournir
une
reproduction
réguliere
de
la
forme
d’onde.
2.
Les
signaux
originaux,
y
compris
les
formes
d’onde
anormales,
telle
que
la
réponse
impulsionnelie,
peuvent
également
étre
reproduits
sans
parasites.
3.
Les
effets
du
processeur
ALPHA
sont
tellement
perceptibles
aux
bas
niveaux,
comme
pendant
un
fondu
a
|’entrée
de
la
musique
ou
une
sortie
progressive
a
partir
d’un
silence
total.
(2)
Convertisseur
super
linéaire
(S.L.C.)
réel
20
bits
Le
DCD-S10/3000
utilise
un
nouveau
circuit
“S.L.C.”
(convertisseur
super
linéaire)
pour
éliminer
effectivement
ta
distorsion
croisée
zéro,
cause
principale
de
ja
perte
de
qualité
sonore
dans
la
section
de
lecture
par
modulation
d’impulsions
codées
(PCM).
Combiné
au
convertisseur
numérique/analogique
réel
20
bits
avec
une
excellente
résolution,
il
améliore
fortement
ta
reproductibilité
musicale
en
particulier
aux
niveaux
de
volume
faibles.
De
pilus,
deux
convertisseurs
numériques/analogiques
sont
utilisées
pour
chaque
canal
et
le
suréchantillonnage
8
fois
réduit
davantage
le
bruit
et
améliore
la
résolution
pour
recréer
des
champs
sonores
avec
une
expression
musicale
riche.
(3)
Source
d’alimentation
musciée
Le
DCD-S10/3000
utilise
un
grand
transformateur
avec
des
bobines
indépendantes
pour
le
circuit
servo
numérique
et
le
circuit
audio.
Associé
4
un
condensateur
de
haute
capacité,
ceci
offre
de
la
puissance
avec
une
économie
d’espace.
IMPORTANT
(Uniquement
modéle
pour
le
marché
Canada)
Le
présent
appareil
numérique
n’émet
pas
de
bruites
radioéiectriques
dépassant
ies
limites
applicables
aux
appareils
numériques
de
la
Class
B
prescrites
dans
le
Réglement
sur
ie
brouillage
redio-
électrique
édicté
par
le
ministére
des
Communications
du
Canada.
e
POUR
LES
MODELES
AMERICAINS
ET
CANADIENS
UNIQUE-
MENT
ATTENTION
POUR
PREVENIR
LES
CHOCS
ELECTRIQUES
NE
PAS
UTILI-
SER
CETTE
FICHE
POLARISEE
AVEC
UN
PROLONGATEUR
UNE
PRISE
DE
COURANT
OU
UNE
AUTRE
SORTIE
DE
COURANT,
SAUF
Si
LES
LAMES
PEUVENT
ETRE
INSEREES
A
FOND
SANS
EN
LAISSER
AUCUNE
PARTIE
A
DECDUVERT.
4
9

FRANCAIS
NOMENCLATURE
DCD-S10
DENON
|
(
eo
Bra
G0
abrem
88.08)
Gee,
ie
;
14
_
PCM
AUDIO
TECHNO
OGY/COMMact
DSc
Laven
DCD-OS10
DCD-3000
>
to
itn
88
BB
ton
LINE
OUT
PHONES
LEVEL
ton
88.88.
rae
¥
©
a
101s
1712
vate
t0s7
ve
ce
pott
ety
0
interrupteur
d‘alimentation
(POWER)
e
lorsque
l'appareil
est
sous
tension,
“90”
apparait
dans
Vaffi-
chage
de
numéro
de
plage
et
si
aucun
disque
n’est
introduit,
40090000!"
apparait
sur
l’écran
numérique
et
le
calendrier
s‘allume.
e
Siun
disque
est
introduit
lorsque
l'appareil
est
sous
tension,
le
nombre
total
de
plages
sur
le
disque
apparait
en
quetques
secondes
sur
!’affichage
de
nombre
de
plages,
ta
durée
totale
s‘affiche
sur
I‘écran
de
Ja
durée
et
les
numéros
du
calendrier
s‘allument
et
correspondent
au
nombre
total
de
plages
sur
le
disque,
ensuite
commence
la
lecture.
Q
Réceptacie
de
disque
e
Ceci
est
l’endroit
ot
le
disque
doit
étre
chargé.
e
Appuyer
sur
la
touche
d’ouverture/fermeture
(&
OPEN/
CLOSE)
@
du
réceptacie
de
disque
pour
ouvrir
et
fermer
le
receptacle
de
disque.
e
Le
réceptacle
de
disque
est
également
fermé
en
appuyant
sur
la
touche
de
lecture
(PLAY)
@.
3]
Détecteur
de
ia
télécommande
e
Ceci
est
le
détecteur
des
signaux
de
la
télecommande
sans
fil.
e
Diriger
la
télécommande
sans
fil
vers
ce
détecteur
lors
de
son
utilisation.
e
lindicateur
de
détecteur
de
télecommande
sur
ja
fenétre
d'affichage
@
s’allume
lorsque
la
télécommande
est
utilisee.
20
©
Affichage
e
L'affichage
numérique
est
divisé
dans
des
sections,
tels
que
'affichage
de
numéro
de
plage,
de
numéro
d'index,
de
temps
de
reproduction
ei
du
calendrier,
comme
indiqué
ci-dessous.
Indicateur
de
programme
indicateur
de
télécommande
Indicateur
de
recherche
de
créte
indicateur
d'espacement
automatique
Indicateur
de
d'édition
Durée
restante
du
disque
entier
indicateur
de
Durée
restante
de
repetition
la
piste
en
cours
REPEAT
TRACK
INDEX
TIME
gett
PROGRAM
SINGLE
88
8Eltorm
88u8
8
>
O10
OLTOTAL
Mi
s
4567
8
910111213
1415
16
17
1819
20
Indicateur
de
pause
Indicateur
de
fondu
a
l’ouverture
indicateur
de
fondu
Indicateur
de
lecture
.
a
la
fermeture
Compteur
musical
20
pistes
Indicateur
de
lecture
aiéatoire
This manual suits for next models
1
Table of contents
