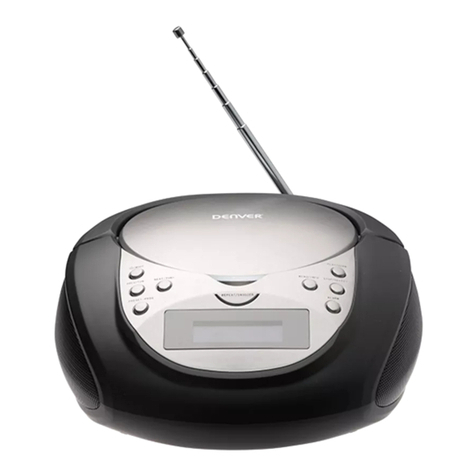
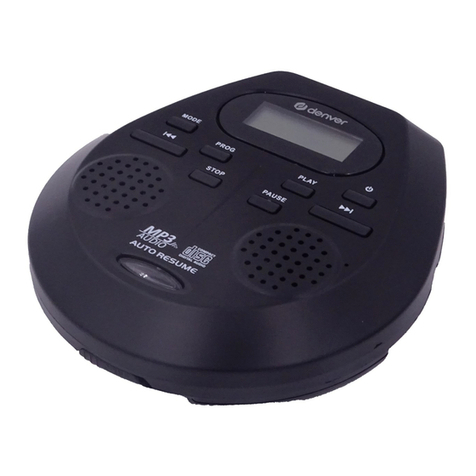
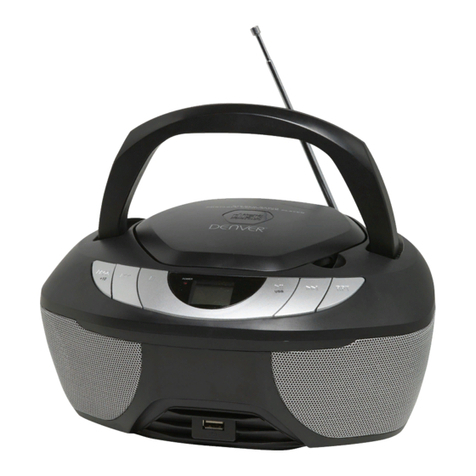
Denver TCM-381 User manual

HEAVY DUTY PORTABLE CD/MP3
WHIT RADIO CASSETTE RECORDER
TRAGBARER HOCHLEISTUNGS- CD/MP3-PLAYER
MIT RADIO-KASSETTENRECORDER
KRAFTIG BÆRBAR CD/MP3 AFSPILLER
MED RADIO OG KASSETTEOPTAGER
SOLID BÄRBAR CD/MP3- OCH KASSETT BANDSPELARE
CD/MP3 PORTÁTIL CON RADIO Y GRABAD
OR DE CINTAS DE CASSETTE
CD/MP3 PORTATILE AD ALTA ROBUSTEZZA E
RADIOREGISTRATORE CON CASSETTA
LEITOR DE CASSETES PORTÁTIL RESISTENTE CD/MP3
KESTÄVÄ KANNETTAVA CD/MP3/RADIO-KASETTISOITIN
TCM-381
INSTRUCTIONS MANUAL
BEDIENUNGSANLEITUNG
BETJENINGSVEJLEDNING
BRUKSANVISNING
MANUAL DE INSTRUCCIONES
MANUALE D’ISTRUZIONI
MANUAL DE INSTRUÇÕES
KÄYTTÖOHJE

FEATURES AND CONTROLS TCM--381
12
3
4
56
7
8
9
10
11
12
13
14
15
16
17
21
22
23
24
25
26
27
28
29
30
31
32
33
34 35
5
17
18
19
20
36

To achieve the utmost in enjoyment and performance, please read this manual carefully before
attempting to operate the unit in order to became familiar with its features, and assure you years of
faithful, trouble free performance and listening pleasure.
* Keep instructions the safety and operating instructions should be retained for future reference.
* Avoid installing the unit in locations described below:
Places exposed to direct sunlight or close to heat radiating appliances such as electric heaters.
On top of other stereo equipment that radiate too much heat.
Places locking ventilation or dusty places.
Places subject to constant vibration.
Humid or moist places.
* Make sure not to obstruct the ventilation opening.
Operate turning controls and switches as instructed in the manual.
* Before turning on the power for the first time, make certain the power cord is properly installed.
* Store your tapes or CD in a cool area to avoid damage from heat.
For safety reasons, do not remove any covers or attempt to gain access to the inside of the product.
Refer any servicing to qualified personnel.
Do not attempt to remove any screws, or open the casing of the unit; there are no user serviceable
parts inside, refer all servicing to qualified service personnel.
TO REDUCE THE RISK OF ELECTRIC SHOCK DO NOT REMOVE COVER ( OR BACK ) ,
NO USER SERVICEABLE PARTS INSIDE, REFER SERVICING TO QUALIFIED SERVICE
PERSONNEL.
Conductor dangerous voltage, that may be of sufficient magnitude to constitute a risk
of electric shock to persons is present within this products enclosure.
The owners manual contains important operating and maintenance instructions , for
your safety, it is necessary to refer to the manual.
TO PREVENT FIRE OR SHOCK HAZARD, DO NOT EXPOSE THIS APPLIANCE TO
DRIPPING OR SPLASHING.
This unit will become warm when used for a long period of time. This is normal and does not indicate
a problem with the unit.
This CD player includes micro-processors which may malfunction as a result of external electrical
interference or noise. If the CD player is not working properly, disconnect the power source and
then reconnect it.
CAUTION :
WARNING :
Note:
Important Notes
DANGEROUS VOLTAGE
ATTENTION
UK-1

FEATURES AND CONTROLS
UK-2
1. CD DOOR
2. FM ANTENNA
3. BASS BUTTON
4. VOLUME UP BUTTON
5. HANDLE
6. VOLUME DOWN BUTTON
7. FUNCTION(CD//TAPE/OFF//RADIO)
SWITCH
8. TUNING KNOB
9. BAND(AM/FM/FM ST.) SWITCH
10. CD DOOR OPEN BUTTON
11. CASSETTE PAUSE BUTTON
12. CASSETTE STOP/EJ BUTTON
13. CASSETTE FAST FORWARD BUTTON
14. CASSETTE REWIND BUTTON
15. CASSETTE PLAY BUTTON
16. CASSETTE RECORD BUTTON
17. SPEAKER
18. UNIT BUTTON
19. TEN BUTTON
20. HUNDRED BUTTON
21. CD SKIP DOWN/F.REV BUTTON
22. CD SKIP UP/F.FWD BUTTON
23. CASSETTE LOCK/UNLOCK KNOB
24. REPEAT BUTTON
25. PROGRAM BUTTON
26. RANDOM BUTTON
27. CD STOP BUTTON
28. POWER INDICATOR
29. LCD DISPLAY
30. FM STEREO LED
31. CD PLAY/PAUSE BUTTON
32. PHONES JACK
33. BATTERY DOOR
34.
35.
DC JACK
AC SOCKET
POWER SUPPLY
Connect one end of the supplied mains power cord to the AC IN socket on the back panel, and plug
the other end into a mains socket and set the unit s main power switch to ON.
First plug the transformer AC cord which is carry-in teminal into AC outlet in the wall. Then plug the
transformer DC cord which is carry-out terminal into the unit DC jack. The unit will be in standby mode.
NOTE : 1.the rated electric current of the transformer should be5Aandthereadvoltage should
be 12 V.
2.Make sure that you plug the transformer DC jack according to the polarity markings
("+" and "-" ) into the DC jack.
Mains power
Battery power
N B.:
Important:
DC Power
You must disconnect the mains power cord before you can operate the set using battery power.
- Remove the battery compartment cover.
- Insert LR20 (D cell)(MN1300) batteries(1.5Vx8) with the correct polarity (as shown by the +
and symbols in the diagram inside the battery compartment), then replace the cover.
- Never mix new and old batteries
- Never mix different types of battery.
Replace the old batteries with new ones when the sound output begins to fluctuate or the volume
fades.
When replacing spent batteries, always dispose of them in accordance with applicable regulations.
Take them to an approved disposal point so that they can be safely recycled without damaging the
environment.
Mains power
Battery power
NB.:
Important:
DC Power

1. Put through the power, then turn on the main switch of the unit.
2. When push the function switch CD//TAPE/OFF//RADIO to TAPE/OFF position the unit will be
on standby mode, meanwhile the indicator of POWER is off. When push the switch to the CD
position, the unit will be switched on, and you can appreciate MP3 or listen to CD, meanwhile
the LED indicator will light on. To RADIO position you can receive the broadcast with AM or
FM band and the POWER indicator is lighting.
OPERATING THE UNIT
UK-3
Set the FUNCTION switch to RADIO.
Select the FM or FM STEREO by BAND switch. Turn the TUNING knob to select the require station.
The FM stereo LED indicator will light on when a stereo broadcast is being received. Fully extend
the FM antenna and adjust its direction for best FM reception.
Select AM by BAND switch. Turn the TUNING knob to select the require station. For operation on
AM the set contains a built-in ferrite aerial which is directional. Therefore, the set should be
positioned for the best signal strength.
FM antenna rod for better FM reception
FM
AM
FM Antenna
When playing of cassette, open the cover of the CASSETTE BUTTON DOOR first.
Be sure to tighten any slack tape in the cassette before use. Using either a pencil or a ball-point
pen, simply insert the pen or pencil into the center of the spool and rotate to remove slackness.
Depress the CASS. STOP / EJECT button to open the cassette door.
Insert the cassette into the compartment with the open end facing upwards and full reel on the
left hand side, push the cassette well down and close the door. Be sure not to touch the tape
surface. Select "TAPE" on the FUNCTION switch and press the PLAY button. To stop playback,
press the CASS. STOP / EJECT button once. To release the cassette, press the CASS. STOP /
EJECT button again.
Set the FUNCTION button to RADIO select AM or FM on TUNER / BAND button and press to the
desired broadcast (refer to radio operation section). Insert a cassette into the deck and press the
RECORD button.
Press the CASS. STOP / EJECT button to stop recording. The CASS. PAUSE button can be used to
stop recording for short intervals. Press the CASSETTE F.FWD to fast forword the tape, press the
CASSETTE REWIND button to fast rewind the tape.
Set the FUNCTION to CD. Select the required tracks to be recorded. Insert a cassette into the
cassette deck and press the CASS. RECORD button.
Press the CASS. STOP / EJECT button to stop recording.
Playing Of Cassette
Recording From Radio
Recording From CD
RADIO OPERATION
CASSETTE OPERATION

UK-4
When the tape reaches the end in PLAY or RECORD, the built-in AUTO STOP system functions
to release the depressed PLAY, RECORD keys. The AUTO STOP system operates while recording
from the built-in RADIO or CD player. Only the cassette function is brought automatically to a
stop , the RADIO or CD PLAYER will continue to play.
Use only good quality cassettes (IEC TYPE1) for making recordings. May be used to replay other
types of cassette but is unable to make proper recordings on these more specialized tapes. The
use of C120 cassettes is not recommended in this machine.
Normally, anything recorded on the tape is automatically erased when new recording is made.
It is possible to protect your recordings from accidental erasure by removing the tabs found on
the rear of the cassette.
When the cassette is held with the recorded side upper-most and exposed tape facing the front,
the protective tab will be found on the left rear of the cassette.
All pre-recorded cassette are protected in this way to prevent accidental erasure of the
commercial recordings. "Protected" cassettes will prevent the record button from being operated.
If at any time you attempt to record and find that this button will not depress, never force the
mechanism or it may be damaged. Check that a cassette has been loaded and that tab has not
been removed. Recording on a cassette from which the tabs have been removed can be done by
covering the tab openings with a piece of adhesive tape.
Gently clean the tape head and pinch-wheel / capstan assemblies after every 10 hours of use
until all traces of oxide deposit have been removed. A range of cassette care products are
available.
The erase head and record/play head and the surface of the pinch roller are delicate and must
not be touched with metal objects such as screwdrivers. You may find it easier to clean the
assembly by pressing the PLAY button to bring head and pinch roller into view. Be sure to press
the CASS. STOP button after cleaning the mechanism.
Damage to the pinch wheel can occur if the unit is left in PLAY mode with the power switched off.
Under no circumstances should you attempt to lubricate any part of the machine.
Disconnect from the mains at the wall socket when not in use. Do not expose the set to rain or
moisture.
Auto Stop
Type Of Cassettes
Protecting Recordings
Care Of Cassette Mechanism
WARNING
RECORD/PLAY HEAD CAPSTAN
ERASE HEAD PINCH ROLLER

UK-5
LISTENING TO COMPACT DISC (CD / MP3
LISTENING TO COMPACT DISC (CD/MP3)
)
1. When playing of CD / MP3 , press the CD DOOR OPEN BUTTON first, and then the CD door will
open itself automatically.(F1)
2. Insert the CD or MP3 disc into the CD compartment, press the CD door , and then the CD door
will close .
3. Push the function switch CD//TPAE/OFF//RADIO to CD/MP3 position to select the CD/MP3 mode,
This unit begin selecting and into the CD or MP3 mode itself automatically .
4. If there is no disc inserted in the CD compartment or loading failed, it will appear NO DISC
on the display .(F2)
A) In the CD mode
This unit can be reading as CD, CD-R, CD-RW.
B) In the MP3 mode
This unit also available to reading as below :
1. It can be reading as"8cm"and"Multi Section " of MP3 DISC.
2. It can be reac "Playback Transfer Rate in 32-320 kbps".
3. It can be read "Max Readable to MAX 512 for total Folders and files count".
The MP3 sampling frequency 32, 44.1 & 48 KHz
1. Push the function switch CD//TAPE/OFF//RADIO to CD position to select the CD mode, the
CD indicator and total track number will appear on the display. (F3)
2. Press the PLAY/PAUSE button once to start playing the CD/MP3 from the first track, and
the " " indicator will appear on the display. (F4)
3. Press the PLAY/PAUSE button again to pause playing the CD/MP3, and the " " indicator
will appear on the display.(F5)
4. To resume playback, press the PLAY/PAUSE button again.
5. To stop playback, press the STOP button.
HINT:
NOTE:
Playing The CD
HINT:
NOTE:
Playing The CD
F1 F2
F4F3 F5

UK-6
Selecting A Different Track During Play
In the CD playing mode:
In the MP3 playing mode:
1. Press the SKIP(UP & DOWN) button or press "TEN" and "UNIT", the required track number
appears on the display. (F6)
2. Press the PLAY/PAUSE button . Starting with the track that is currently playing.
1. Press the SKIP(UP & DOWN) button or press "HUNDRED" , "TEN" and "UNIT" directly to
select you wish to track number. (F7)
2. Press the PLAY / PAUSE button , to start playing the MP3 from the order track.(F8)
3. Repeat the above steps1 to 2, to select the other tracks that you wish to program.
Note : Using the SKIP (UP & DOWN) button to select the track, when playing the MP3. It will be easy
to error occurs. Switch the unit off for a few seconds, and then turn on it to restart playing the
MP3.
You can select and enter the hundred numbers of the tracks directly, and only the number from 0 to 9
can be entered, and the number that has been selected flashing on the display (F9).
Note: the button is in effect only while using MP3 disc.
You can select and enter the ten numbers of the tracks directly, and only the number from 0 to 9 can be
entered, and the number that has been selected flashing on the display. (F10) (F11)
HUNDRED BUTTON
TEN BUTTON
Selecting ADifferent Track During Play
In the CD playing mode:
In the MP3 playing mode:
MP3
F7F6
MP3
F8
MP3
F9
F10
MP3
F11

UK-7
UNIT BUTTON
SKIP (UP/DOWN) FUNCTION
You can select and enter the unit numbers of the tracks directly, and only the number from 0 to 9 can
be entered, and the number that has been selected flashing on the display. (F12) (F13)
IN STOP MODE:
IN PLAYING MODE:
1) Press the SKIP(UP/DOWN) button less than 0.7second, it will skip to the next/previous track.
2) Until you searched the desire track, then press the PLAY/PAUSE button to play.
a). Press the SKIP(UP/DOWN) button less than 0.7second, it will skip to the next/previous
track.
b). Press and hold the SKIP(UP/DOWN) button more than 0.7second, it will be fast forward
/downward.
a). Press the SKIP(UP/DOWN) button less than 0.7second, it will skip to the next/previous
folder.
1. If you desire to repeat the same track only , press the REPEAT button once and the
"RPT" indicator will appear on the display . (F14)
2. If repeat all , press the REPEAT button twice and the "RPT ALL" indicator will appear
on the display(F15)
3. To cancel repeat play, press the REPEAT button or press the STOP button until the repeat
indicator disappeared. (F16)
If in "REPEAT ALL" mode, the normal & program playing will also effect in this function.
-CD
- MP3
While playing the CD:
Note :
REPEAT PLAY FUNCTION
-CD
-MP3
While playing the CD:
Note :
F12
MP3
F13
F14 F15 F16

MP3
UK-8
1. If you desire to repeat the same track only, press the REPEAT button once and the "RPT"
indicator will appear on the display. (F17)
2. If repeat a folder , press the REPEAT button twice and the "RPT FOLDER" indicator will appear
on the display.(F18)
3. If repeat all , press the REPEAT button again and the "RPT ALL" indicator will appear on
the display. (F19)
4. To cancel repeat play, press the REPEAT button or press the STOP button until the repeat
indicator disappeared.
While playing the MP3:
1. If you desire to repeat a group of tracks memorized , press the REPEAT button once and
the "RPT" indicator will appear on the display. (F20)
2. If repeat all tracks memorized , press the REPEAT button twice and the "RPT ALL" indicator
will appear on the display.(F21)
3. To cancel repeat play, press the REPEAT button or press the STOP button until the repeat
indicator disappeared.
While playing with random, it can only repeat playing a track.
1. On stop mode, press RANDOM button to playing with random , the playing tracks are
edited randomly,and the "RANDOM" indicator will appear on the display. (F22) (F23)
3. To cancel random play, press the STOP button until the random indicator disappeared.
While playing the memorized tracks:
RANDOM PLAY
While playing the MP3:
While playing the memorized tracks:
MP3 MP3
F17 F18 F19
MP3
F20
MP3
F21
F22
MP3
F23

1. In play/pause mode, press STOP button to stop state (viz. the mode which has finished
loading the messages).
In memory edit/play mode, press this button to stop or remaining memory state.
While the unit is playing random, press this button to stop and cancel the playing state.
2. Open the CD door on the unit to remove the CD/MP3 .
By programming the CD / MP3 player , you can play up to 20 tracks in any desired order.(possible
only when the CD/MP3 is in stop mode.)
1. Place the disc to be programmed in the tray. Press the PROGRAM button.
2. The display will show the memory track and "PROGRAM P01 00" (in CD mode) or "PROGRAM
P01 000" (in MP3 mode) ,And the "PROGRAM 00" or "PROGRAM 000" are flashing. (F24)(F25)
3. Press SKIP/SEARCH(UP&DOWN) button or press "HUNDRED","TEN" and "UNIT" to select the
digit of the tracks number to be programmed.
4. When the desired track appears on the display, press the PROGRAM button again.
5. The display will show the memory track and "PROGRAM P02 00" (in CD mode) or "PROGRAM
P02 000" (in MP3 mode) .,And the "PROGRAM 00" or "PROGRAM 000" are flashing. (F26)(F27)
6. Repeat this procedure to select other tracks that you wish to program from the disc into the
memory.
7. Press the PLAY/PAUSE button to playing from the first memory track.
8. In STOP mode, repeat to press PROGRAM button can be able to view the track number last
time memorized. If input the number again will be able to change the tracks
A program is erased if you :
Press the PROGRAM button, and then STOP button in stop mode. Or Switch the unit OFF.
Headphone socket is provided on the unit. You can use headphone by inserting the headphone
jack to the socket.
.
STOPPING PLAY
PROGRAMMING PRESETS STATION
ERASING A PROGRAM
Listen to Music By Using Headphone
F24
MP3
F25 F26 F27
UK-9

COMPACT DISC
1. Always use a compact discs bearing the mark as shown.
2. Notes on handling discs
Removing the disc from its storage case and loading it.
* Do not touch the reflective recorded surface.
* Do not stick paper or write anything on the surface.
* Do not bend the disc.
3. Storage
* Store the disc in its case.
* Do not expose discs to direct sunlight or high temperatures, high humidity or dusty
places.
4. Cleaning a disc
* Should the disc become soiled, wipe off dust, dirt and fingerprints with a soft cloth.
* The disc should be cleaned from the centre to the edge.
* Never use benzene, thinners, record cleaner fluid or anti static spray.
* Be sure to close the CD door so the lens is not contaminated by dust.
* Do not touch the lens.
UK-10
CORRECT INCORRECT
FROM THE CENTRE TO THE EDGE

UK-11
CD DISPLAY WINDOW
SPECIFICATION
A. PLAY INDICATOR
B. PAUSE INDICATOR
C. NUMBER TRACK INDICATOR
D. REPEAT INDICATOR
E. FOLDER NUMBER INDICATOR
POWER SUPPLY : AC 230V~50Hz DC 12V
OUTPUT POWER : 10 Watts x 2
UNIT DIMENSION : 480(W) x 262 (D) x 164(H) mm
N. W. : 5.2 kg
FREQUENCY RANGE : FM 88 - 108 MHz
AM 540 - 1600 kHz
TAPE SPEED : 4.75 CM/SEC
FREQUENCY RESPONSE : 125Hz-8KHz
OPTICAL PICKUP : 3 - BEAM LASER
FREQUENCY RESPONSE : 100Hz - 16kHz
Dripping warning : " The product shall not be exposed to dripping or splashing and that no objects
filled with liquids, such as vases, shall be placed on the product."
Ventilation warning : " The normal ventilation of the product shall not be impeded for intended use."
RADIO SECTION
CASSETTE SECTION
COMPACT DISC SECTION
SPECIFICATION SUBJECT TO CHANGE WITHOUT FURTHER NOTICE.
MP3
AB
C
D
E

FUNKTIONEN UND REGLER TCM-381
12
3
4
56
7
8
9
10
11
12
13
14
15
16
17
21
22
23
24
25
26
27
28
29
30
31
32
33
34 35
5
17
18
19
20
36

Für besten Hörgenuss und höchste Leistung lesen Sie bitte dieses Handbuch
aufmerksam durch, bevor Sie das Gerät einschalten. Auf diese Weise werden Sie mit den
Funktionen vertraut und dies garantiert Jahre uneingeschränkter Leistung und höchsten
Hörvergnügens. Wichtige Hinweise
Bewahren Sie die Sicherheitshinweise und Bedienungsanleitungen für künftige
Nachschlagezwecke auf.
Stellen Sie das Gerät nicht an den folgenden Orten auf:
Orte, die direkter Sonneneinstrahlung ausgesetzt sind oder in der Nähe von Wärme
abstrahlenden Geräten, wie elektrischen Heizkörpern.
Auf anderen Stereoanlagen, die zu viel Hitze abstrahlen.
An Orten, an denen die Belüftung gestört wird oder an staubigen Orten.
An Orten mit permanenten Vibrationen.
An feuchten oder nassen Orten.
Vergewissern Sie sich, dass die Lüftungsschlitze nicht verstellt werden.
Bedienen Sie die Regler und Schalter, wie in diesem Handbuch erläutert.
Bevor Sie das Gerät das erste Mal einschalten, vergewissern Sie sich bitte, dass das
Stromkabel richtig angeschlossen ist.
Bewahren Sie Ihre Bänder und CDs an kühlen Orten auf, damit sie nicht durch
Hitzeeinstrahlung beschädigt werden.
Aus Sicherheitsgründen dürfen keine Gehäuseabdeckungen abgenommen und
Veränderungen im Inneren des Geräts vorgenommen werden. Überlassen Sie
Wartungsarbeiten dem Kundendienst.
Versuchen Sie nicht Schrauben zu entfernen oder das Gerätegehäuse zu öffnen. Im
Inneren befinden sich keine vom Benutzer zu wartenden Teile. Wenden Sie sich an
qualifiziertes Fachpersonal.
VORSICHT: ZUR VERMEIDUNG VON ELEKTRISCHEN SCHLÄGEN NEHMEN SIE BITTE DAS
GEHÄUSE (ODER DIE RÜCKSEITE) NICHT AB. KEINE VOM BENUTZER ZU
WARTENDEN TEILE IM INNEREN DES GERÄTS. WENDEN SIE SICH AN EINEN
VERSIERTEN K U N D E N D I E N S T .
GEFÄHRLICHE STROMSPANNUNG
Die gefährliche Stromspannung im Inneren des Geräts kann elektrische Schläge
verursachen.
ACHTUNG
Dieses Bedienungshandbuch enthält wichtige Bedienungsanleitungen und
Wartungsanweisungen. Zu Ihrer eigenen Sicherheit ist es wichtig, dass Sie die
Anleitungen in diesem Handbuch einhalten.
WARNUNG: ZUR VERMEIDUNG EINES BRANDES ODER DER GEFAHR EINES
ELEKTRISCHEN SCHLAGES DAS PRODUKT KEINEM TROPF- ODER
SPRITZWASSER AUSSETZEN.
Hinweis:
Dieses Gerät heizt sich nach einer längeren Betriebsdauer auf. Dies ist normal und deutet
nicht auf einen Gerätefehler hin.
Dieser CD-Player ist mit Mikroprozessoren ausgestattet, deren Funktion beeinträchtigt
werden kann, wenn Sie externen elektrischen Störungen oder Geräuschen ausgesetzt
werden. Wenn der CD-Player nicht korrekt arbeiten sollte, trennen Sie ihn bitte von der
Stromquelle und schließen ihn dann wieder an.
DE-1

FUNKTIONEN UND REGLER
1. CD-FACHTÜR
2. UKW-ANTENNE
3. BASSTASTE
4. LAUTSTÄRKE +
5. GRIFF
6. LAUTSTÄRKE -
7. FUNKTIONSSCHALTER
(CD/BAND/AUS/RADIO)
8. ABSTIMMUNGSREGLER
9. BANDWAHLSCHALTER(MW/UKW/UK
W ST.)
10.KASSETTENFACHÖFFNER
11.KASSETTEN-PAUSETASTE
12.KASSETTENSTOPP/AUSWURF-TASTE
13.KASSETTENSCHNELLVORLAUF
14.KASSETTENSCHNELLRÜCKLAUF
15.KASSETTENWIEDERGABE
16.KASSETTENAUFNAHME
17.LAUTSPRECHER
18.GERÄTETASTE
19.TASTE 10
20.TASTE 100
21.CD-VOR-/SCHNELLRÜCKLAUF
22.CD-RÜCK-/SCHNELLVORLAUF
23.KASSETTENSPERRE/ENTSPERREN
24.WIEDERHOL TASTE
25.PROGRAM TASTE
26.RANDOM TASTE
27. CD-STOP-TASTE(STOP)
28.STROMANZEIGE
29.LCD-ANZEIGE
30.UKW-STEREO LED
31.CD WIEDERGABE/PAUSE
32.KOPFHÖRERBUCHSE
33.
BATTERIEFACHABDECKUNG
34.GS-BUCHSE
35. WS-BUCHSE
36.WS-HAUPTEIN- + AUSSCHALTER
Stromversorgung
Netzspannung
Verbinden Sie ein Ende des beiliegenden Stromkabels mit der Buchse AC IN an der
Geräterückseite, verbinden Sie das andere Ende mit einer Netzsteckdose und schalten
Sie das Gerät EIN.
Gleichstrom
Verbinden Sie zuerst das Wechselstromübertragungskabel mit der
Wechselstromwandsteckdose. Verbinden Sie dann das Gleichstromübertragungskabel
mit der Gleichstrombuchse. Das Gerät schaltet in den Standby-Modus.
Hinweis: 1. Die elektrische Nennspannung des Wandlers beträgt 5 Amp, die
Messspannung 12 Volt.
2. Vergewissern sie sich, dass Sie den Gleichstromwandler entsprechend der
Polaritätsmarkierungen (+ und -) mit der Gleichstrombuchse verbinden.
Batteriebetrieb
Bevor Sie das Gerät mit Batterien betreiben können, müssen Sie das Stromkabel
abziehen.
Nehmen Sie die Batteriefachabdeckung ab.
Legen Sie LR20 (D-Zelle) (MN 1300) Batterien (1,5 V x 8) entsprechend der
Polaritätsmarkierungen ein (entsprechend der Symbole "+" und "-" im Batteriefach).
Schließen Sie dann die Abdeckung.
Anmerkung:
Mischen Sie niemals alte und neue Batterien.
Mischen Sie niemals unterschiedliche Batterietypen.
DE-2

Tauschen Sie die Batterien aus, wenn die Ausgabe schwankt oder die Lautstärke sich
verringert.
Wichtig:
Entsorgen Sie leere Batterien immer entsprechend der geltenden
Umweltschutzbedingungen. Bringen Sie die Batterien zu einer Sammelstelle, wo sie ohne
schädliche Umwelteinflüsse entsorgt werden.
GERÄTEBEDIENUNG
1. Stellen Sie die Stromversorgung her, schalten Sie das Gerät dann mit dem
Hauptschalter ein.
2. Wenn Sie den Funktionsschalter CD/TAPE/OFF/RADIO drücken oder die Position
TAPE/OFF wählen, schaltet das Gerät in den Standby-Modus. Die
Strommeldeleuchte POWER erlischt. Wenn Sie den Schalter in die Stellung CD
drücken, schaltet das Gerät ein und Sie können MP3 oder CD hören. Die
LED-Anzeige leuchtet. In der Position RADIO können Sie UKW- oder MW-Sender
empfangen. Die Anzeige POWER leuchtet.
RADIOBEDIENUNG
Schalten Sie den Funktionsschalter auf RADIO.
FM/UKW
Wählen Sie mit dem Schalter BAND FM/UKW oder FM/UKW-STEREO aus. Suchen Sie die
gewünschte Station mit dem Abstimmungsregler. Die UKW-LED-Anzeige leuchtet, wenn eine
Stereosendung empfangen wird. Ziehen Sie die UKW-Antenne vollständig heraus und richten
Sie sie so aus, dass Sie den besten UKW-Empfang haben.
AM/MW
Wählen Sie mit dem Schalter BAND AM/MW aus. Suchen Sie die gewünschte Station mit
dem Abstimmungsregler. Für den MW-Empfang ist das Gerät mit einer eingebauten
Richtungswurfantenne ausgestattet. Sie müssen die Antenne daher so positionieren, dass
Sie die stärksten Signale empfangen können.
UKW-ANTENNE
UKW-Antenne für den besseren UKW-Empfang.
KASSETTENBEDIENUNG
Kassettenwiedergabe
Um eine Kassette wiederzugeben, öffnen Sie zuerst die Kassettenfachabdeckung mit
dem Fachöffner.
Ziehen Sie lose Bänder fest an, bevor Sie diese verwenden. Führen Sie einen Bleistift
oder einen Kugelschreiber in die Mitte der Kassettenspule ein und drehen Sie ihn, bis das
Band gestrafft ist. Mit der Taste KASS. STOP / EJECT öffnen Sie die Kassettenfachtür.
Legen Sie die Kassette mit dem offenen Ende nach oben und der vollen Spule auf der
linken Seite in das Fach ein, drücken Sie die Kassette nach unten und schließen Sie das
Fach. Achten Sie darauf, das Band nicht zu berühren. Wählen Sie am Funktionsschalter
TAPE aus und drücken Sie die Taste PLAY. Um die Wiedergabe zu unterbrechen,
DE-3

drücken Sie einmal die Taste KASS. STOP / EJECT. Um die Wiedergabe der Kassette
fortzusetzen, drücken Sie erneut die Taste KASS. STOP / EJECT.
Radioaufnahmen
Wählen Sie mit dem Funktionsschalter RADIO aus und mit dem Abstimmungsregler
(TUNER/BAND) AM/MW oder FM/UKW und drücken Sie die Taste auf die gewünschte
Frequenz (siehe Abschnitt Radiobedienung). Legen Sie eine Kassette in das Fach ein und
drücken Sie die Taste RECORD.
Mit der Taste KASS. STOP / EJECT stoppen Sie die Aufnahme. Mit der Kassettentaste
PAUSE können Aufnahmen kurzfristig unterbrochen werden. Für den Schnellvorlauf des
Bandes drücken Sie die Kassettentaste F.FWD, für den Schnellrücklauf die Kassettentaste
REWIND.
CD-Aufnahmen
Schieben Sie den Funktionsschalter in die Position CD. Wählen Sie aufzunehmende Titel
aus. Legen Sie eine Kassette in das Fach ein und drücken Sie die Kassettentaste
RECORD.
Mit der Taste KASS. STOP / EJECT stoppen Sie die Aufnahme.
Automatikstopp
Wenn das Band bei der Wiedergabe oder der Aufnahme das Bandende erreicht, löst die
eingebaute Automatikstoppfunktion die gedrückten Tasten PLAY, RECORD. Die
Automatikstoppfunktion ist bei Aufnahmen vom eingebauten RADIO oder dem CD-Player aktiv.
Nur bei der Kassettenfunktion erfolgt ein automatischer Stopp, das RADIO oder der CD-Player
spielen weiter.
Kassettentypen
Verwenden Sie für Aufnahmen nur hochwertige Kassetten (IEC TYP 1). Sie können auch
andere Kassettentypen verwenden, allerdings ist die Aufnahmeleistung mit spezielleren
Bändern höher. Wir empfehlen für dieses Gerät keine C120-Kassetten zu verwenden.
Aufnahmeschutz
Normalerweise wird jede Aufnahme durch eine neue Aufnahme überspielt Sie können Ihre
Aufnahmen jedoch gegen das Überspielen schützen, indem Sie die Kassettenzungen an der
Rückseite der Kassette herausbrechen.
DE-4

Wenn Sie die Kassette mit der Seite mit der Aufnahme nach oben und dem Band nach vorne
vor sich halten, sehen Sie die Schutzzunge an Seite links hinten an der Kassette.
Alle Kassetten mit fertigen Aufnahmen sind auf diese Weise geschützt, damit kommerzielle
Aufnahmen nicht unbeabsichtigt gelöscht werden. Bei "geschützten" Kassetten kann die
Aufnahmetaste nicht betätigt werden. Sollten Sie eine Aufnahme herstellen wollen und
sich diese Taste nicht herunterdrücken lassen, versuchen Sie nicht dies gewaltsam zu
tun, da sonst der Mechanismus beschädigt werden könnte. Vergewissern Sie sich,
dass eine Kassette eingelegt ist und dass die Zunge nicht entfernt wurde. Kassetten
mit ausgebrochenen Zungen können wieder bespielt werden, wenn Sie die Öffnungen
der Zungen mit Klebeband überkleben.
Pflege des Kassettenmechanismus
Reinigen Sie den Bandkopf, das Rädchen und das Spulenzubehör jeweils nach 10 Stunden
Betrieb bis alle Oxidrückstände entfernt sind. Im Handel wird eine Reihe an
Kassettenpflegeprodukten angeboten.
Der Lösch-, der Aufnahme- und Wiedergabekopf und die Oberfläche der Andruckrolle
sind empfindlich und dürfen nicht mit Metallobjekten, wie Schraubenziehern, in Kontakt
kommen. Eventuell ist es einfacher die Reinigung durchzuführen, in dem Sie die Taste PLAY
drücken, damit Kopf und Andruckrolle in Ihr Blickfeld gelangen. Drücken Sie nach Abschluss
der Reinigung die Taste KASS. STOP.
Wenn der Strom abgeschaltet ist und das Gerät sich im Wiedergabemodus befindet, könnte
die Andruckrolle beschädigt werden. Versuchen Sie unter keinen Umständen Teile des
Geräts zu schmieren/ölen.
WARNUNG:
Trennen Sie das Gerät von der Stromversorgung, wenn Sie es nicht verwenden. Setzen
Sie das Gerät weder Regen noch Feuchtigkeit aus.
DE-5
AUFNAHME/WIEDERGABEKOPF
Rollenantrieb
LOSCHKOPF Andruckrolle

KOMPAKTDISKS HÖREN (CD / M P 3 )
1. Drücken Sie für die Wiedergabe von CD / MP3 zuerst den CD-Fachöffner, das CD-Fach
öffnet sich automatisch (F1).
2. Legen Sie eine CD oder MP3-Disk in das CD-Fach ein, drücken Sie gegen die
CD-Fachtür, diese schließt sich.
3. Drücken Sie den Funktionsschalter CD/TAPE/OFF/RADIO in die Position CD/MP3, um
den CD/MP3-Modus auszuwählen. Das Gerät wählt den CD- oder MP3-Modus
automatisch.
4. Sollte keine Disk im CD-Fach eingelegt bzw. das Laden nicht möglich sein, wird an der
Anzeige NO DISC eingeblendet (F2).
HINWEIS:
A) Im CD-Modus:
Kann dieses Gerät CDs, CD-Rs, CD-RWs lesen.
B) Im MP3-Modus:
Kann dieses Gerät ebenfalls folgende Formate lesen:
1. "8 cm" und "Multi-Abschnitt" einer MP3-Disk.
2. "Eine Wiedergabeübertragungsrate von 32-320 kbps".
3. "Maximal bis MAX 512 für die Gesamtordner und Gesamtdateien".
4.
Hinweis: Die MP3-Abtastfrequenz ist 32, 44,1 und 48 KHz.
KOMPAKTDISKS HÖREN (CD/MP3)
CD-Wiedergabe
1. Drücken Sie den Funktionsschalter CD/TAPE/OFF/RADIO in die Position CD, um den
CD-Modus auszuwählen. Am Display werden die CD-Anzeige und die Gesamtzahl der
Titel eingeblendet. (F3)
2. Zur Wiedergabe des ersten Titels einer CD/MP3 drücken Sie die Taste PLAY/PAUSE.
Am Display wird eingeblendet. (F4)
3. Um die CD/MP3 zu unterbrechen, drücken Sie erneut die Taste PLAY/PAUSE. Am
Display wird eingeblendet (F5).
4. Um die Wiedergabe fortzusetzen, drücken Sie erneut die Taste PLAY/PAUSE.
5. Um die Wiedergabe zu beenden, drücken Sie die Taste STOP.
Titelwechsel während der Wiedergabe
Im CD-Wiedergabemodus:
1. Drücken Sie die Taste SKIP (VOR + ZURÜCK) oder "ZEHN" plus "EINHEIT". Die
gewünschte Titelnummer wird an der Anzeige eingeblendet. (F6)
2. Drücken Sie die Taste PLAY/PAUSE. Es wird mit dem aktuellen Titel gestartet.
DE-6
F4F3 F5
F1 F2
Table of contents
Languages:
Other Denver CD Player manuals

Denver
Denver TCU-206 User manual

Denver
Denver TCM-103C2 User manual

Denver
Denver MC-5010 User manual

Denver
Denver TCU-206RED User manual

Denver
Denver DM-60 User manual

Denver
Denver TCM-230C User manual

Denver
Denver MC-5220 MK2 User manual

Denver
Denver TCU-203C User manual

Denver
Denver TCU-207 User manual

Denver
Denver DMP-395B User manual

Denver
Denver MCU 5210 User manual

Denver
Denver MC5220 User manual

Denver
Denver TC-26 User manual

Denver
Denver TC-23C User manual

Denver
Denver DM-65 JOG/CARKIT User manual

Denver
Denver DMP349 User manual

Denver
Denver MCA-230M K2 User manual

Denver
Denver DM-17 User manual

Denver
Denver TCU-209 User manual

Denver
Denver DM-75 User manual