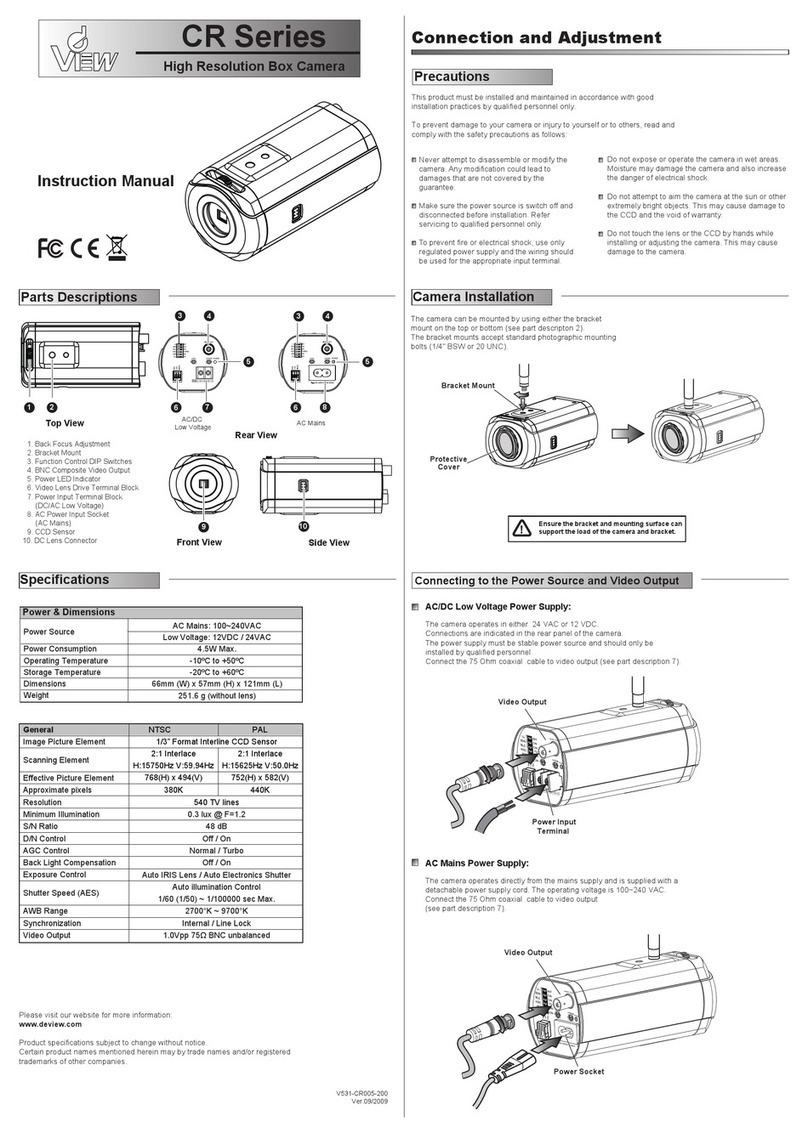
DeView DN22H485 User manual

INSTRUCTION MENU
System Day/Night Camera
WARNING
To prevent fire or electric shock hazard, Do not expose this appliance to rain or
moisture.
RF EMISSIONS
This Class B digital apparatus complies with Canadian ICES-003.
Cet Appareil numérique de la classe B est conforme à la norme NMB-003 du
Canada.
Note: This equipment has been tested and found to comply with the limits for a
Class B digital device, pursuant to part 15 of the FCC Rules. These limits are
designed to provide reasonable protection against harmful interference in a
residential installation. This equipment generates, uses, and can radiate radio
frequency energy and, if not installed and used in accordance with the instructions,
may cause harmful interference to radio communications. However, there is no
guarantee that interference will not occur in a particular installation. If this
equipment does cause harmful interference to radio or television reception, which
can be determined by turning the equipment off and on, the user is encouraged to
try to correct the interference by one or more of the following measures:
-reorient or relocate the receiving antenna.
-increase the separation between the equipment and receiver.
-connect the equipment into an outlet on a circuit different from that to which
the receiver is connected.
-consult the dealer or an experienced radio/TV technician for help
PREFACE
CB series camera introduces a new high picture quality , high resolution and high
sensitivity 1/3 inch type interline transfer CCD image sensor.
The CB series cameras have been developed using the advanced technology of
Digital Signal Processing LSI ( DSP ) together with On Screen Display control ( OSD ).
This series cameras is ideal for advance surveillance applications, or as an input
device for an mage processing system.
FEATURES
zHigh sensitivity with minimum illumination needed for quality video.
zLow image distortion and residual, withstanding electric and magnetic field
interference and mechanical vibration.
zApplications: Surveillance, Monitoring and Security.
zExcellent signal to noise ratio.
zAccurate color reproduction and 2 application range of Auto Tracing White
balance ( ATW ) over a wide color temperature.
zAperture and color suppression under low light to reduce spectral and Chroma
noise.
zAutomatic electronic shutter provides >1,600 : 1, equivalent to 40 steps,
dynamic range to correct exposure, if a manual iris lens is used.
zThe following functions are built in :
1 ) On Screen Display ( OSD ) digital control.
2 ) Internal and line lock synchronizations.
3 ) Auto IRIS ( AI ) / Auto Electronic Shutter ( AES ).
4 ) Auto IRIS level adjust by digital process on OSD manual.
5 ) 6 option for full application of Black Light Conversation ( BLC ).
6 ) Advance parameter adjust for application conditions.
7 ) 2 range Auto Tracking White balance ( ATW ) for indoor and outdoor
application conditions.
zThe back focus adjustment function allows easy adjustment and installation.
zExcellent picture quality
1 ) 2 edge ( vertical and horizontal ) picture enhancer for greater picture
sharpness.
2 ) New Chroma processing circuit for better color reproduction.
3 ) New concept ATW curve for good color emendation.
PRECAUTION
zDo not attempt to disassemble the camera.
To prevent electric shock, do not remove screws, case or covers. There are
no user serviceable parts inside. Ask a qualified service person for serving.
zHandle the camera with care.
Do not abuse the camera. Avoid striking, shaking, etc. The camera could
damage by any improper handing or storage.
zDo not expose the camera to rain or moisture, or try to operate it in
wet areas.
Take immediate action if the camera becomes wet. Turn power OFF and
refer servicing to a qualified service person for servicing. Moisture can
damage the camera and also create the danger of electric shock.
1
zDo not use strong or abrasive detergents when cleaning the camera
body.
Use a dry cloth to clean the camera when dirty. In case the dirt is hard to remove,
use a maid detergent and wipe gently.
zClean the CCD faceplate with care.
Do not clean the CCD with strong or abrasive detergents. Use lens tissue or a
cotton tipped applicator and ethanol.
zNever face the camera towards the sun.
Permanent damage may occur when subjected to intense light. Whether the
camera is in use or not. Use cautiously when operating any electrical device.
Keep the camera out of the direction of spotlights and light reflecting objects.
zDo not operate the camera beyond the specified temperature, humidity
or power source ratings.
Do not use the camera in an extreme environment where high temperature or high
humidity conditions exist. Use the camera under conditions where temperatures
are within -10℃~ + 50℃, and humidity is below 80% relative humidity. The
input power source is 220VAC ~ 240VAC for AC230V model and DC12V/AC24V ±
20% for AC24V model camera.
zDo not touch the CCD sensor with your fingers. If necessary, use soft
cloth moistened with alcohol to wipe off the dust.
zWhen the camera is not in use, keep the cap on the lens to protect the
CCD sensor.
CAMERA DRAWING
PART DESCRIPTION
CONNECTION
Important Note:
Qualified service personnel or system installers should make the installation. Check
the power is OFF before handling the power cable no matter AC main power or low
voltage AC24V/DC12V.
A. Main Power Model (100VAC-240VAC 50Hz) :
1. Connect the AC power cord (supplied as standard accessory) to the power cord
socket of the camera.
2. Connect the AC power cord to an electrical outlet of AC100V ~ AC240V
50Hz/60Hz.
2
Notes:
zConnect the power cord firmly. The power cord should be long enough for
panning and tilting. If the cable is too short, the power cord plug may be
pulled off the camera when the camera pans or tilts.
zBrown: Live, Reference line lock. Blue: Neutral.
zThis camera voltage could accept range rated is AC90V ~ AC260V. But
recommend range is AC100V ~ AC240C.
B. Dual Power Model (12VDC/24VAC).
The series model has an AC/DC compatible input terminal. DC12V or AC24V
power supply cable can be connected to this terminal. The camera detects
the power source automatically.
Recommended wire gauge size. Φ0.65mm(AWG22), Stranded wire
0.32m ㎡(AWG22), Element wireφ0.18Min.
1. 12V DC Power Supply
Connect the power cable to the AC/DC compatible input terminal on the rear
panel of the camera. +12VDC should connect is the RED terminal. 0VDC
to the white terminal. Black terminal for Earth connection.
2. 24V AC Power Supply
Connect the power cable to the AC/DC compatible input terminal on rear
panel of the camera.
Notes:
zIf the cable is too short, the power cable may be pulled off the camera
when the camera pans or tilts.
zRed: Live, Reference line lock, Black: GND,. White: Neutral.
zVoltage range: Rated AC12V ~ AC28V. or DC10V ~ DC30V.
C. Video Cable
!
RISK OF ELECTRIC SHOCK
DO NOT OPEN
CAUTION
1. It is recommended to use a monitor whose resolution is at least equal to
the camera.
2. Set the termination switch to the 75Ωposition on the last monitor, and
to the Hi-Z position on the other monitors. Do not change the positions
after setting.
a. Use a 75Ωcoaxial cable.
b. The maximum extensible coaxial cable length between the camera
and the monitor is shown below.
RG-59/U RG-6U RG-11/U
Type of Coaxial cable 3C-2V 5C-2V 7C-2V
m 250 500 600
Recommended
Maximum
Cable length ft 825 1650 1980
3. Wiring precautions:
zDo not bend the coaxial into curve whose radius is smaller than 10
times cable’s diameter.
zNever staple the cable even if with circular staples. Impedance
mismatching will occur.
zNever crush or pinch the cable and cause poor picture quality.
D. Installation of Auto Iris Lens Connections
The camera supports Manual Iris Lens, Video Auto Iris Lens and DC Auto Iris
Lens. Use Video Auto Iris Lens or DC Auto Iris Lens is recommended for
outdoor application to prevent smear of the CCD.
1. Video Auto Iris lens
The connection terminal is on the rear panel of the Camera.
Refer the pin assignment (as Figure 1 at Right ) is necessary to insure
correct operation.
Recommended wire gage:
Solid wire : φ1.2mm(AWG16), Stranded wire :
0.25m ㎡(AWG16), Element wire : φ0.18Min.
Pin assignment
GND : Shield, ground.
+12V : Power source; +12VDC, 50mA Max.
Video : Video signal output.
2. DC Auto Iris Lens
The 4pin connection terminal is on the rear panel of the Camera.
Refer the pin assignment is necessary to insure correct operation.
G. Mounting the Lens
1.Mount the lens by turning it clockwise on the lens mount of the camera.
2.Connect the lens cable to the auto iris lens connector on the rear panel of
the camera.
Caution for Mounting the Lens
The lens mount should be a CS –mount (1”-32UN) and the lens weight
should be less than 450g (0.99 lbs). IF the lens is heavier, both the lens
and camera should be secured by using the supporter.
H. Focus and Back Focal Adjustment
The following adjustment should be made by qualified service personnel or
system installers.
1. Loosen the screw of back
focus adjust on the topside of
front head.
2. Move the back focus adjust screw
to the desired position.
3. Fixing the screws on the back focal adjusting screw.
Caution:
Do not fix the back focus screw too tight, otherwise the back
focus mechanize unit might be damaged. Finger tight only.
When the C-mount lens is mounted, do not rotate the ring
Counter clockwise by force after it. If the ring is rotated by
force, the inner lens or CCD image sensor may be damaged.
I. LAMP Contact
To prevent mechanize OLPF hunting, this camera equipped the
external contact terminal with IR lamp control. Connect to GND that
switch camera to nighttime mode immediately.
Caution :
When use IR illuminations, use a lens that is
compatible with the IR illuminations.
Any lens other than the compatible one
can result out of focus due to such
characteristics.
J. RS485
Terminal for remote control by EIA/TIA RS485 format,
refer pin assignment to have correct connection.
Those cables should 0.654 conductor twisted
pair cables. With these cables the max
extension distance is 1,000m. 3
CS Lens mount,
1"-32 UNF
Back Focus Adjust
Back Focus Fix Screw
DC Auto IRIS
Output Connector
BNC,
Video Output
Terminal Block,
Power Input
Video Auto IRIS Drive Output.
RS-485 Controller.
IR Lamp Contect.
Power Input.
110VAC ~ 240VAC
OSD menu, Arrow Key.
OSD menu, Enter Key.
Mounting screw hole,
¼", 7mm deep.
Rotation preventive hole
VIDEO LENS
GND
+12V
VIDEO
GND
LAMP
RS485
+
-
Pin 1 Damp +
Pin 2 Damp -
Pin 3 Drive +
Pin 4 Drive - Pin 1
Pin 2 Pin 3
Pin 4
GND
LAMP
RS485
+
-

OSD Menu Operation
A. OSD menu flow chart
The function indicated with * for default setting.
B. Tact Switch Operation
This camera utilizes a user menu “ Set Up Menu “ that is displayed on the
monitor. To set items on the “ Set Up Menu “, use the following buttons on
the side panel.
UP Key: This button is used to move the cursor upwards.
Down Key: This button is used to move the cursor downwards.
Right Key: This button is used to move the cursor to the right.
Use this button to select or adjust the parameters of the selected item.
The parameter changes each time this button is pressed.
Left Key: This button is used to move the cursor to the left.
Use this button to select or adjust the parameters of the selected item.
The parameter changes each time this button is pressed.
Set Key: This button is used to set the determined parameter. If the item
has its own setting menu ( indicted by ), press this button to display the
next page setting menu.
C. Opening the Set Up Menu
Press SET Key for three second. The
“ SET UP MENU “ will appear on the
monitor as shown on right side. Check
the current settings on the menu.
Refer to the sections below for a
detailed description of menu items. If
you decide not to make any changes
after checking the current settings,
move the cursor to “ QUIT“ and press
SET Key to close the “ SET UP MENU
“ and return to normal camera picture.
D. Reset
Reset allows you to reset all setup menu items to the factory settings if you are
unsure about the correct settings. Proceed as follows: Move OSD cursor to
“ Reset “ and press SET Key. The words “ Resetting “ momentarily appear on
the monitor. At this time all adjustments and parameters are reset to the
factory default settings.
Note:
If no button is pressed for 30 second while the OSD menu or any other setting
menu is displayed, the menu is automatically canceled and returns to the normal
camera picture.
4
FUNCTION OPERATION
1. Synchronization Setting (SYNC)
You can select internal sync mode (INT) or line-lock mode (LL).
a. Use UP Key and Down Key move the cursor to the Sync parameter and use
Right Key or Left Key to select line-lock ( LL ) or internal ( INT ), and press
SET Key.
b.If LL is selected, the Sync second menu appears, If INT is selected, the
synchronization mode is automatically set to internal sync , and the menu is
displayed INT.
1-1. Line-lock Sync Mode (LL)
The line-lock mode has its own menu for line-lock vertical phase adjustment.
When the vertical phase adjustment menu appears on the monitor. use Right
Key or Lift Key to move the cursor for phase adjustments. If the camera
installation is relocated, check the vertical phase adjustment again since the AC
line phase may be different.
Note: The line-lock ( LL) sync mode is not available when the camera operates
on DC power.
How to make sure the Phase:
Set the oscilloscope to the vertical rate and expand the vertical sync portion on
the oscilloscope.
Press Right Key or Lift Key of the camera to match the vertical phase for both
video output signals as closely as possible.
Phase adjustment range can be incremented in 16 steps by 22.5 degrees.
When Right Key or Lift Key is kept pressed for a second or longer, the " I "
cursor moves faster.
Note : If the AC line contains noise (spike noise, etc.), the stability of
the vertical phase of the camera video output signal may be disturbed.
2. Shutter Speed Setting (Shutter)
To select electronic shutter speed, you can select an manual electronic shutter
speed of 1/50 (1/60), 1/120 (1/100). 1/250. 1/500, 1/1000, 1/2000, 1/4000,
1/10000 seconds. Or Auto Electronics Shutter ( AES ). The 1/50 (1/60) is shutter
OFF. This function is effective to raise the sensitivity in low light conditions when
OFF is selected for Auto IRIS Lens. Move the cursor to the Shutter parameter
and select the electronic shutter speed. The preset values for Shutter (electronic
shutter speed) change by pressing Right Key or Lift Key as follows:
3. Lens
3-1 Bright
This item is used to adjust the level of auto iris tens drive which supplied to DC
drive lens or video iris lens. Before operation make sure that connection is
correct for video auto iris lens or DC auto iris lens.
a. Move the cursor to the Lens parameter and press SET Key, the second
menu of Lens is appear on the monitor.
b. Change the curser by Right Key or left Key to adjust IRIS to close or open.
Once the picture is optimum move curse to Back and press SET key to safe
setting and return to top menu.
3.2 BF
This function is allow installer very easy to adjust optical back focus. When used
auto iris lens, this function will automatically fully open the IRIS of lens and change
to AES ( auto electronics shutter ). In case of manual lens, this function will
automatically switch to AES.
a. Move curse to Lens by Control Key, change to BF and press SET key. In
the meantime “ Press SET for return” is display on monitor.
b. Adjust optical back focus to optimum position that press SET key for return to
top menu. ( Please refer to section H Focus and Back Focal Adjustment )
4. BLC
This provide camera incase face strong light to have compensation luminance on
monitor. There are six BLC pattern and each are could adjust compensation level.
Compensation area indicated as below
5. Configure
5-1. Aperture, Move the curse to Aperture and press SET key. The second menu
will appear. Move the “ I “ to adjust V-Aperture and H-Aperture level.
5-2. Gamma, Move the curse to Gamma and press SET key. The second menu will
appear. Use Lift and Right key to select gamma 0.45, 0.8 or 1.
5-3. Pedestal, Move the curse to Pedestal and press SET key. The second menu
will appear. Move the “ I “ to adjust pedestal level.
5-4. Chroma, Move the curse to Chroma and press SET key. The second menu
will appear. Move the “ I “ to adjust Chroma level.
5-8. AGC, 7 limited value could select to limit enhance gain of AGC circuit, also select
OFF could closed AGC function and select Sens Up to have maximum value (38dB) of
AGC gain.
6. White Balance
6-1. WB-Auto ( White Balance Auto), In this mode, the color temperature is
monitored continuously and thereby white balance is set automatically. The color
temperature range for the proper white balance is approximately 2500 - 9100K.
6-2. WB-Menu (White Balance Menu), This mode provide user to adjust
white balance by manual adjust, There are R-gain and B-gain could adjust
independent.
6-3. WB-Push, Move curse to WB-Push. Press on SET key to start the white
balance tracing. When the white balance setting is completed, release SET key and
push white was completely.
7. CAM Title
The camera provide text generation on the display monitor. The 16 character in one
line is available for CAM Title function.
5
8. D/N
This function provide camera automatically switch from color camera to B/W
camera by auto detect luminance, manual switch or external contact terminal by
IR lamp on rear panel.
8-1. Fuzzy, The camera switch to B/W camera by auto detect luminance.
D/N Level, the detect level could be select by Low or High.
Burst On, Keep Burst signal when camera changes to B/W mode.
Burst Off, Remove Burst signal when camera changes to B/W mode.
8-2. IR Pass, Change camera to B/W camera by selects this function.
Burst On, Keep Burst signal when camera changes to B/W mode.
Burst Off, Remove Burst signal when camera changes to B/W mode.
8-3. IR Cut, Close Day/Night function, keep camera on color mode, at this
mode the camera will not accept IR luminance.
9. RS485
Before operation is function make sure correct connection on rear panel for
RS485.
Provide 000 ~ 999 ID address, 3 Password to protect RS485 setting.
Use arrow key to move curse to RS485 and press SET key,
Password, Before into RS485 setting. Camera system request 3 character
password, input correct password to second menu.
Note, before password change the default password is 000.
Address, provide 000 ~ 999 ID address. Wrong address ID setting both
control and receive will cause remote control no function.
B-rate, Baud rate setting, provide 2 rate select 4800 or 9600.
Note, Incorrect baud rate setting will cause remote control no function.
Package
Camera 1pcs.
InstructionManual 1pcs.
CCDProtectCover 1pcs.
Main Power Cable ( Main power model only ) 1pcs
Specification
General PAL Model / NTSC Model
Image Size 1/3 Format Interline CCD Sensor
Pixel Element PAL Model : 768 (H) ×582 (V) approx. 440K pixels
NTSC Model : 768(H) x 494 (V) approx. 380K pixels
Scanning Frequency PAL 2 : 1 Interlace / H : 15625Hz , V : 50Hz
NTSC 2: 1Interlance / H : 15750Hz, V : 60Hz
Operation Temperature -10℃~ +50℃
Storage Temperature -20℃~ +60℃
Output Terminal BNC 75Ohm Unbalance
Power Source Dual Switching Mode Power Supply DC12V / AC24V ±20%
Universal Switching Power Supply AC100V ~ AC240V
Power Consumption 4.5 W Max,
Power Indicator 3θGreen LED on Rear Panel
IRIS Connector 4 pin Connector For DC Drive Lens ( Panasonic Standard )
3pin Terminal Block For Video Drive Lens
Lens Mount CS Mount, Change C Mount by Adaptor.
Mounting Hole 1/4” Top and Bottom
External Dimension 73mm (W) x 63mm (H) x 122mm (D)
Weight TBD
Functional Specification
Auto IRIS Control Video Drive / DC Drive Separate Output
* Day & Night Optical Low Pass Filter Removable
* IR Lamp Trigger External Relay Contact for GND Loop
Chroma Separate CS / Color Killer
* Color Killer ON / OFF / Fuzzy
SYNC System INT / Line Lock
Line Lock Phase Adjust Range 0°~ 270°
Frequency Range PAL 50Hz ±1Hz / NTSC : 60Hz ±1Hz
Remote Controller RS-485 two way communications
Camera Addressable 001 ~ 999
Text Display 16 Character with one line
Resolution 470 TV Line
Minimum Illumination 0.5Lux @F=1.2 ( 50IRE Video Output )
Video Output 1.0Vpp 75Ohm BNC unbalance
S/N Ratio 50dB
Gamma Compensation 3 Curve Selectable ; 0.45 / 0.8 / 1
Function Control or Selectable By OSD and RS-485
SYNC System INT / LL Selectable
V-Phase 0°~ 270°
Exposure Control Auto Electronics Shutter / Manual Electronics Shutter
/ Auto IRIS lens
Auto Electronics Shutter Max, Limit and Level Adjustable
Menu Electronics Shutter 8 Step 1/50 (1/60), 1/120 (1/100) , 1/250 , 1/500
1/1000 , 1/2000 , 1/4000 , 1/10000
Auto IRIS Lens Driver Video IRIS lens / DC IRIS lens
Lens Level Control Both For DC IRIS Lens and Video IRIS Lens
BLC 6 Area Select and Level Adjustable; Center 1, Center 2,
Door Way 1, Door Way 2, Upper Half, Lower Half.
White Balance Control Auto White Balance / Push White Balance /
Menu White Balance
Auto White Balance 2 Application Range Selectable;
2500K ~ 9500K / 2000K ~ 18000K
Menu White Balance 1 Preset; R gain / B gain Adjustable
Gain Control Auto Gain Control
Auto Gain Control 12dB ~ Sensitivity up (38dB max.) Adjustable.
Gamma Control 3 Step Selectable; 0.45 / 0.8 / 1
Aperture Control 0 ~ 15 IRE Max. For Vertical and Horizontal
Chroma Level Adjustable
* Color Killer ON / OFF / Fuzzy Selectable
* Day/Night IR Pass / IR Cut / Fuzzy
Remote Control RS-485, Two way communications
Address 001 ~ 999 ID selectable
Note : Function indicated * for System Day/Night model only.
Document Nr. : TOM-20030606-01B
Version Nr. : 030804A
Part Nr. : 531-CD000-000
6
Set key
Right key
Down key
Up key
Left key
Detect
Area
CENTER 1 CENTER 2
Detect
Area
DOORWAY 1
Detect
Area
DOORWAY 2
Detect
Area
LOW HALF
Detect
Area
UP HALF
Detect
Area
TOP MENU SECOUND MENU THIRD MENU
BF
Lens Bright
Configure
Chroma Level
Pedestal Level
Aperture H-APT Level
V-APT Level
Sync INT *
LL V-Phase
BLC Off *
Center 1
Center 2
Door Way 1
Up Half
Low Half
Level
Door Way 2
Gamma 0.45 *
0.8
1
RS485 Address _ _ _
B-Rate 9600dps *
Address
4800dps
Password Setting Password _ _ _
Shutter AES 1/2K
1/60(1/50) *
1/100(1/120)
1/250
1/500
1/1K
1/2K
1/4K
1/10K
Bright
1/5K
1/10K
1/20K
1/50K *
1/100K
Text
CAM Tilte
Position
Off *
On
D/N IR Pass
IR Cut
Burst On
Burst Off *
Fuzzy
D/N Level Low
D/N Level High
Burst On
Burst Off *
AGC Off
18dB
26dB
30dB *
32dB
34dB
Sens Up
36dB
22dB
R-Gain
B-Gain
2500K ~ 9500K *
2000K ~ 18000K
WB - Auto *
WB - Menu
WB - Push
White Bal
NU
Set up Menu
Sync Int
Shutter
Lens
BLC
Configur
White B
Cam Tit
D/N
1/50
Bright
Off
e Aperture
al AWB
le Off
Fuzzy
RS-485 Address
Exit ResetQuit
TOP MESECOUND MENUTHIRD MENU
BFLensBrightConfigureChromaLevelPedestalLevelApertureH-APT LevelelV-APT LevSyncINT*LLV-PhaseBLCOff*Center 1Center 2Door Way 1Up HalfLow HalfLevelDoor Way 2Gamma0.45*0.81RS485Address _ _ _B-Rate9600dps*Address4800dpsPassword SettingPassword _ _ _ShutterAES1/2K1/60(1/50)*1/100(1/120)1/2501/5001/1K1/2K1/4K1/10KBright1/5K1/10K1/20K1/50K*1/100KTextCAM TiltePositionOff
*
OnD/NIR PassIR CutBurst OnBurst Off
*
FuzzyD/N LevelLowD/N LevelHighBurst OnBurst Off
*
AGCOff18dB26dB30dB
*
32dB34dBSens Up36dB22dBR-GainB-Gain2700K ~ 9100K*2500K ~ 15000KWB- Auto *
Other DeView Digital Camera manuals
