Dewenwils HDWT02B User manual

SKU: HDWT02B

ZONE ①ZONE ②
Battery Indicator
Manual Watering Button
Toggle Button
+/- Buttons
Zone 1 2 Button

We recommend relplacing batteries when the indicator reachaes

1.Press the Cursor Button to move the Arrow Pointing to SET CLOCK.
2.Press the & buttons to adjust the clock to the current time.
3.Press the Cursor Button again to set the time and move to the next
setting, Start Water.
Setting The Clock
RAIN DELAY, HOLD
OFF
START WATER HOW LONG
HOW OFTEN AUTO
SET CLOCK
TIME
AM

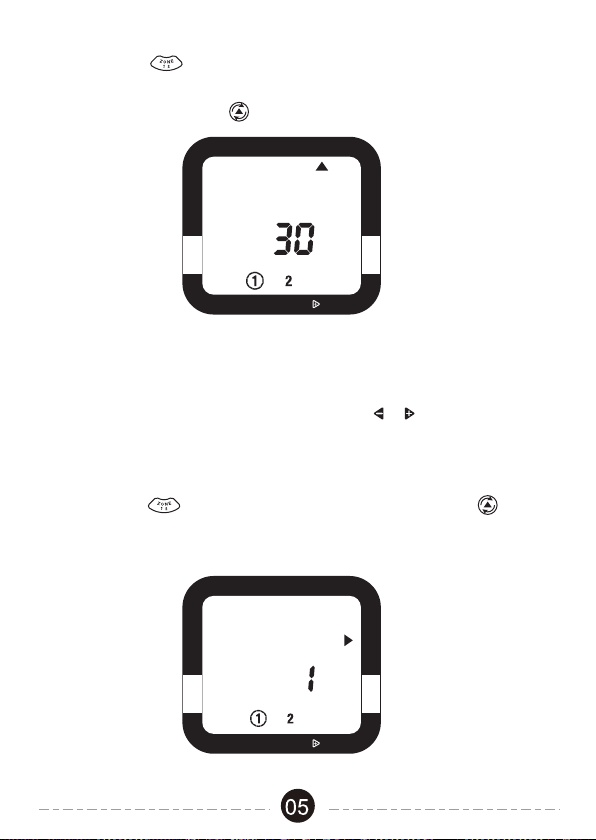
1. With the arrow pointing to How Long use the & buttons to select the
length of each watering cycle. Cycles can be up to 360 minutes (6 hours)
in duration.
1. With the arrow pointing to Start Water, use the & buttons to select
the first time of the day you want to water. All remaining watering cycles
during the day will be based on this time.
2. Press ZONE to change the zone. You must first enter a start time
for each zone you are programming before any other settings for a zone.
3. Press the Cursor Button to move to the next setting.
Select When To Water
Select How Long To Water
RAIN DELAY, HOLD
OFF
START WATER HOW LONG
HOW OFTEN AUTO
SET CLOCK
ZONE
START
AM
ZONE
START
RAIN DELAY, HOLD
OFF
START WATER HOW LONG
HOW OFTEN AUTO
SET CLOCK
ZONE
START
AM
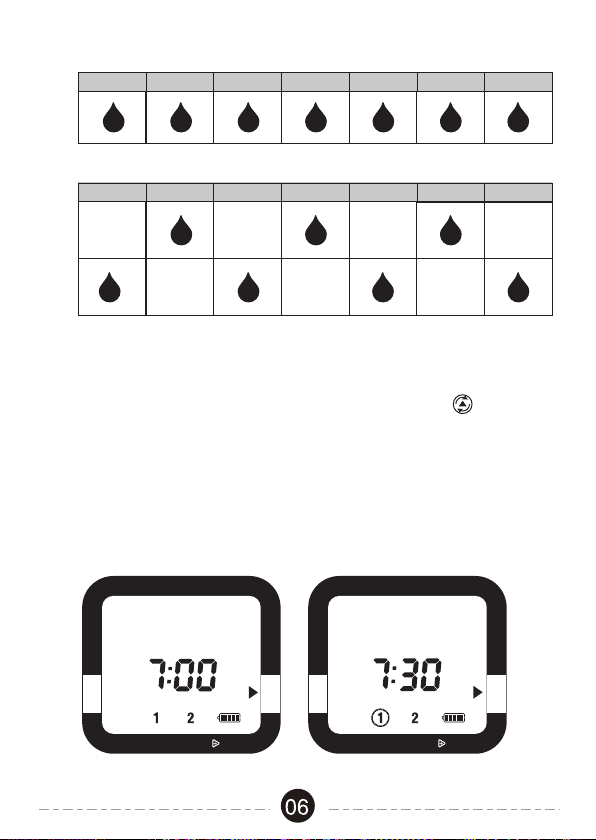
1. With the arrow pointing to How Often use the & buttons to select the
watering frequency.
2. You will be able to water as often as every 1 hour, every day or as
infrequently as once every 7 days.
3. Press ZONE to change the zone or the Cursor Button to move
to the next setting. You must set How Often for each zone you are
programming before proceeding.
2. Press ZONE to change the zone. You must set How Long for each
zone you are programming before proceeding.
3. Press the Cursor Button to move to the next setting.
Select How Often To Water
RAIN DELAY, HOLD
OFF
START WATER HOW LONG
HOW OFTEN AUTO
SET CLOCK
FOR
ZONE
MIN
RAIN DELAY, HOLD
OFF
START WATER HOW LONG
HOW OFTEN AUTO
SET CLOCK
EVERY
ZONE
DAY
1. After programming, the timer will be in Auto mode.
2. If the timer is not in Auto mode, press the Cursor Button to switch to
Auto.
3. The screen display will alternate between the current TIME and the NEXT
START TIME for each zone. This will allow you to see at a glance what
will happen next.
4. If the next watering cycle is more than 24 hours away, the NEXT START
TIME will be displayed in days instead showing a time.
Auto Mode
RAIN DELAY, HOLD
OFF
START WATER HOW LONG
HOW OFTEN AUTO
SET CLOCK
RAIN DELAY, HOLD
OFF
START WATER HOW LONG
HOW OFTEN AUTO
SET CLOCK
SUNDAY MONDAY TUESDAY
WEDNESDAY
THURSDAY
EVERY 1 DAY
EVERY
WEEK
FRIDAY SATURDAY
SUNDAY MONDAY TUESDAY
WEDNESDAY
THURSDAY FRIDAY SATURDAY
EVERY 2 DAY
EVERY
ONE
EVERY
TWO
ZONE
TIME
AM
ZONE
NEXT START TIME
AM
1. If there is rain in the forecast and you wish to temporarily stop watering,
you can use Rain Delay.
2. Rain Delay Mode will stop all watering for up to 7 days.
3. After the delay period, the watering program will begin running automatically.
4. To activate Rain Delay Mode, make certain the arrow is pointing to AUTO.
Hold the key for 3 secs, then select the delay period. You can reduce
the delay period with the key.
5. In Rain Delay Mode , the screen will toggle between the current TIME
and the remaining DELAY time. If the delay is greater than 12 hours,
the DELAY will be shown in DAYS.
Rain Delay Mode
RAIN DELAY, HOLD
OFF
START WATER HOW LONG
HOW OFTEN AUTO
SET CLOCK
RAIN DELAY, HOLD
OFF
START WATER HOW LONG
HOW OFTEN AUTO
SET CLOCK
ZONE
NEXT START TIME
DAY
DELAY
ZONE
DAY
07

Note:
Setting the timer to OFF disables all watering zones. In order to disable a
specific zone (or zones), use the Cursor Button to move to HOW LONG.
Ensure you are adjusting the desired watering zone by using the ZONE
button. Adjust the HOW LONG setting to “0”. To reactivate the zone, adjust
the HOW LONG setting back to the desired watering duration.
1. If you wish to stop watering for an extended period, push the Cursor
Button until the arrow is pointing to OFF. The timer will not water
automatically while in this mode. The screen will display the word OFF
in large letters.
2. To start watering automatically again, simply press the Cursor Button
until the arrow is pointing to AUTO. The program will begin watering at
the next available Start Time.
Off Mode
RAIN DELAY, HOLD
OFF
START WATER HOW LONG
HOW OFTEN AUTO
SET CLOCK
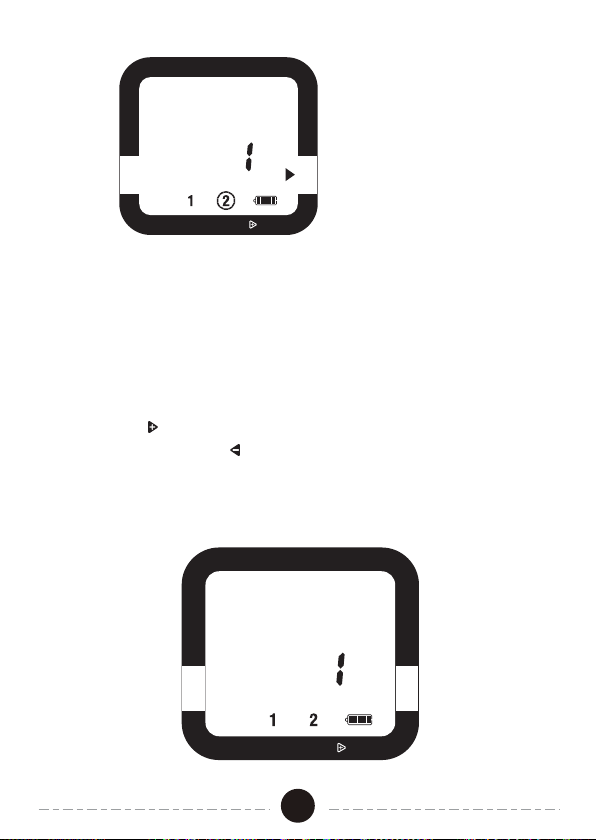
1. Press Manual On/Off , then the manual mode will start.
2. Press ZONE to select the zone you want to open. Then press the
or button to adjust the amount of time you want the valve to be open.
Manual Watering
08

3. The valve will open after a few seconds and automatically close after the
selected time.
Timer Reset
RAIN DELAY, HOLD
OFF
START WATER HOW LONG
HOW OFTEN AUTO
SET CLOCK
RAIN DELAY, HOLD
OFF
START WATER HOW LONG
HOW OFTEN AUTO
SET CLOCK
FOR
ZONE MANUAL
MIN
NOTE:
The manual mode of both zones cannot be activated as long as any of zone
is open.
1. If you need to completely erase all settings in the timer and return it to
it’s original state, press and hold the Cursor Button for 7 seconds.
2. The screen will display RESET to confirm the action.
NOTE: All programming will be lost when the timer is RESET.
RESET
09
Useful Tips
BATTERY LIFE
- Only use fresh long lasting alkaline batteries
- Do not use rechargeable batteries
- Turn off the unit when not in use
- Remove the batteries before storage
- Moisture sensor uses more energy
- Frequently watering schedules can cause the batteries to drain faster
CLEANING YOUR TIMER
Your timer should be cleaned periodically. From time to time, you may get
sediment or dirt build-up in your timer. Follow the information below.
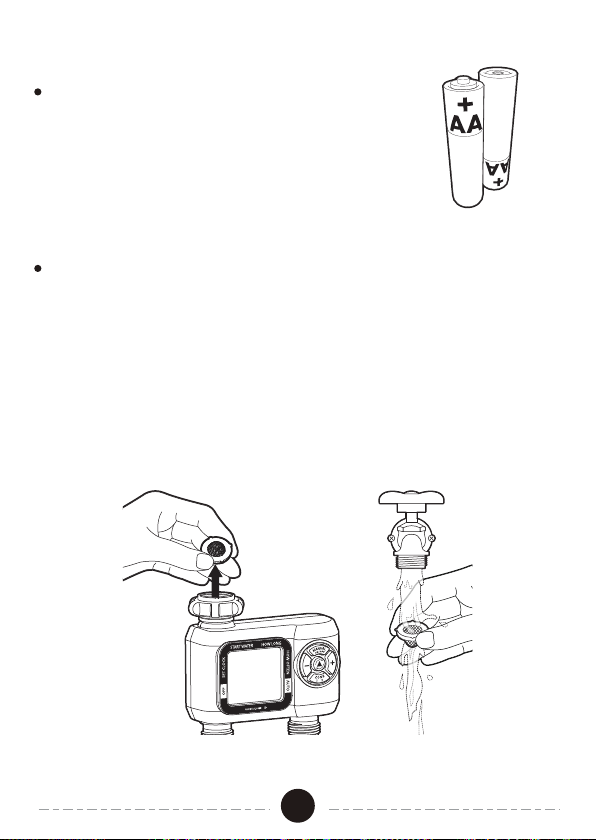
1) Turn of your water faucet. Remove the timer from the faucet connection
and your hose connections. Look at the filter washer at the faucet
connection input. Check that the filter washer is clear of any built-up
sediment.
2) If the filter is dirty, remove the filter washer from the timer. Clean out
the filter washer by placing it under running water.
10
SEASONAL STORAGE
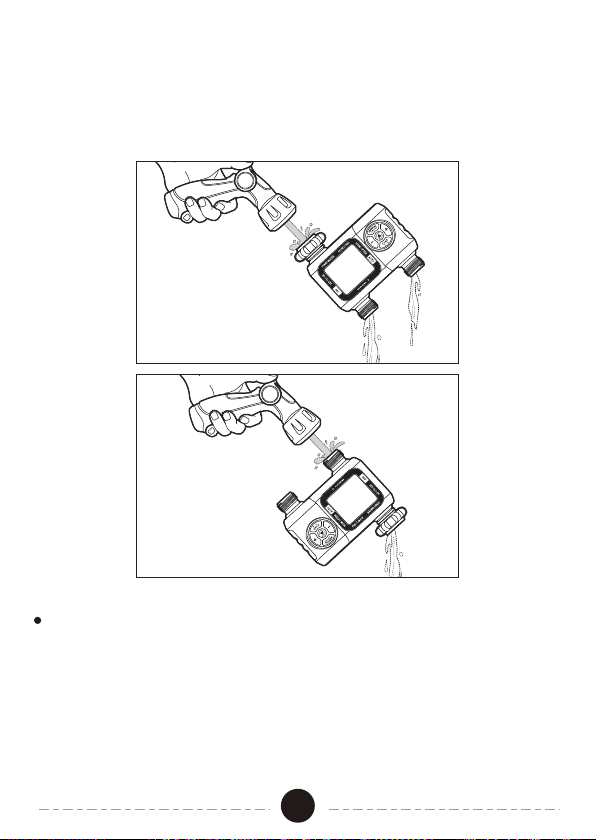
3) Turn the timer upside down and activate the MANUAL mode. This will
open up the valves and allow you to run water into the output connectors.
By doing this, you can see if there are any clogs in the water flow. Once
you see the water flow is correct, deactivate the MANUAL mode.
Cold or freezing temperatures can damage to the timer if still connected
to the faucet. At the first forecast of frost, it is best to remove the timer
from the faucet and place the timer indoors. (Cold water, if left in the timer,
will damage the timer from the ice formed).
- Remove the batteries when the timer is placed in storage
- Recycle used batteries, do not dispose in the garbage
11

Specifications
- Watering Duration: 1min-360min
- Max. Water Pressure:120 psi
- Battery:2 x AA batteries (not included)
Packing List
- Water Hose Timer x 1
- Instruction Manual x 1
One Year Limited Warranty
DEWENWILS warrants this product to be free from defects in material and
workmanship for a period of one year from the date of purchase.
Warranty is void if damage is caused by misuse or improper installation.
Email: [email protected].
Our dedicated customer service team will get back to you within 24 hours.
12
Table of contents
Other Dewenwils Lawn And Garden Equipment manuals


Popular Lawn And Garden Equipment manuals by other brands


Grizzly
Grizzly AGS 3680-2 D-Lion Instructions for use

Scheppach
Scheppach rs 400 Translation of original instruction manual

SPYKER
SPYKER 76-22 Operation guide service manual parts list

New Holland
New Holland 47CO Specifications

Alice's Garden
Alice's Garden ANEMONE manual

Costway
Costway TL35142 user manual


