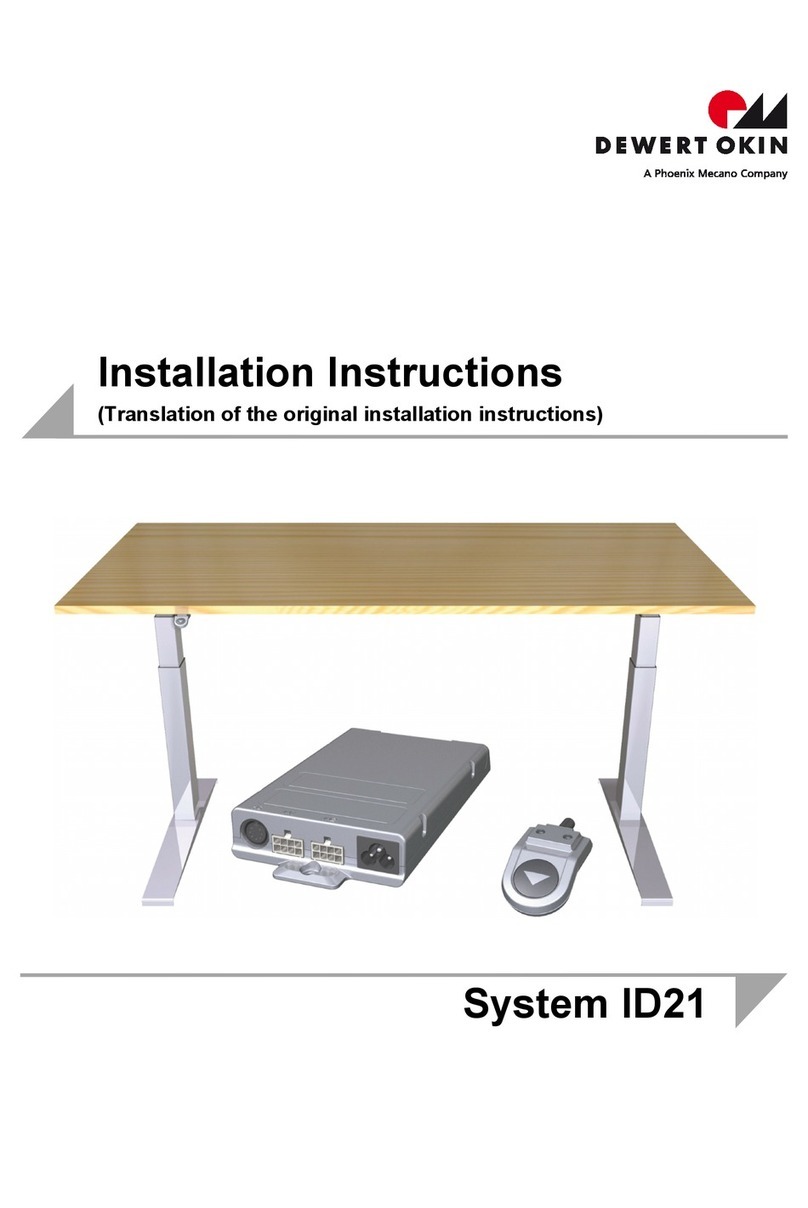
dewert okin System DD11 User manual

Installation Instructions
(Translation of the original installation instructions)
DD11 System
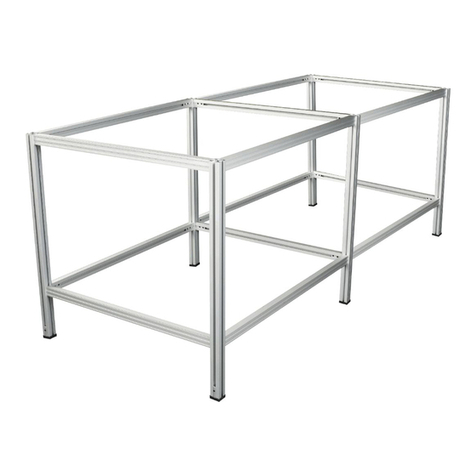
DD21 System


System DD11 / System DD21
82774 2.0 3
Document revision history
Version Date Modification, change
(-) 10/2016 First release
V 2.0 11/2018 Second release
Disclaimer and exclusion of liability
DewertOkin is not responsible for damage resulting from:
•failure to observe these instructions,
•changes made to this product which have not been approved by DewertOkin, or
•the use of replacement parts which have not been approved or manufactured by DewertOkin.
.
We reserve the right to make unannounced technical changes in the course of our continual
product improvement process!
Creation of a complete operating instruction manual for the entire end product
These instructions are only intended to be used by the end-product manufacturer. They should not
be given to the operator of the end product. The factual information contained within may be used as
a basis when creating the end-product manual.
The warning and danger notices are best suited for use in the end product's manual. However it is
not sufficient to simply follow these notices. You should also carry out an internal risk assessment for
your end product. This can then be used as the basis for the safety notices in your manual.
These installation instructions do not contain all information required to safely operate the end prod-
uct. They only describe the installation and operation of the drive as partially completed machinery.
The instructions are intended for the technicians responsible for manufacturing an end product and
not for the operators of the end product.

System DD11 / System DD21
4 82774 2.0
Document revision history ..............................................................................................................................3
Disclaimer and exclusion of liability...............................................................................................................3
Creation of a complete operating instruction manual for the entire end product .....................................3
1. General Information.................................................................................................6
1.1 About these installation instructions.................................................................................................6
1.2 Safety notices within the installation instruction and the operating instructions for the entire
machine .................................................................................................................................................7
1.3 Conventions used ................................................................................................................................7
2. Safety notices ..........................................................................................................8
2.1 Proper and intended usage .................................................................................................................8
2.2 Selection and qualification of personnel ...........................................................................................9
3. System component description ...........................................................................10
3.1 Complete installed system DESKFRAME C DD-A 1xCB / DESKFRAME C DD-A 2xCB .............10
3.2 Mounted complete system DESKFRAME C DD-B 1xCB ...............................................................12
3.3 SMART and COMPACT control units ...............................................................................................14
3.4 Control keypads .................................................................................................................................15
3.5 Lifting columns...................................................................................................................................23
4. System configurations ..........................................................................................25
5. Installation..............................................................................................................27
5.1 Safety notices to observe during installation .................................................................................27
5.2 Installing the DD11 and DD21 lifting columns.................................................................................29
5.3 Installing the control keypads...........................................................................................................33
5.4 Installing the SMART/COMPACT control units ...............................................................................39
5.5 Electrical connections for the SMART/COMPACT control units...................................................42
5.6 Mounting the sensor unit ..................................................................................................................44
5.7 Mains power supply for the SMART/COMPACT control units.......................................................48
6. Initial commissioning ............................................................................................49
6.1 Reset during initial commissioning and after the removal of connecting cables......................49
7. Notes for operation................................................................................................50
7.1 General information ...........................................................................................................................50
8. Operating the control keypads .............................................................................52
8.1 Functions of the Motion Assist control keypad ..............................................................................52

System DD11 / System DD21
82774 2.0 5
8.2 Functions of the HSCO control keypad ...........................................................................................53
8.3 Functions of the HSU Varioline control keypad..............................................................................54
8.4 Functions of the HSU control keypad ..............................................................................................55
8.5 Functions of the HSF control keypad ..............................................................................................57
8.6 Functions of the TOUCHbasic-inlay control keypad ......................................................................60
8.7 Functions of the TOUCHbasic-down control keypad .....................................................................61
8.8 Functions of the TOUCHfx keypad ...................................................................................................62
8.9 Functions of the TOUCHdown keypad.............................................................................................64
8.10 Functionality of the TOUCHinlay keypad.........................................................................................66
9. Troubleshooting ....................................................................................................68
9.1 Malfunctions .......................................................................................................................................68
9.2 Error messages on the control keypad's display ...........................................................................69
9.3 Error messages, as indicated by clicking tones from the control unit ........................................72
9.4 Error messages displayed by the LEDs (COMPACT control unit) ................................................72
10. Maintenance and cleaning ....................................................................................73
10.1 Maintenance........................................................................................................................................73
10.2 Cleaning ..............................................................................................................................................73
11. Technical specifications and product designation.............................................74
11.1 Table ....................................................................................................................................................74
11.2 SMART and COMPACT control units ...............................................................................................75
11.3 Size of SMART control unit ...............................................................................................................76
11.4 Size of COMPACT control unit..........................................................................................................77
11.5 DD11 lifting column............................................................................................................................78
11.6 Dimensions of DD11 lifting column..................................................................................................79
11.7 DD21 lifting column............................................................................................................................80
11.8 Dimensions of DD21 lifting column..................................................................................................81
11.9 Product labelling ................................................................................................................................82
12. Disposal..................................................................................................................88
12.1 Packaging material.............................................................................................................................88
12.2 Drive components ..............................................................................................................................88
Declaration of incorporation/installation .....................................................................................................89
EU Declaration of Conformity .......................................................................................................................90

General Information System DD11 / System DD21
6 82774 2.0
1. General Information
1.1 About these installation instructions
These installation instructions are not specific operating instructions for the end product. Rather, they
describe the functions of the control keypads and the installation of the DD11/DD21 system compo-
nents:
•DD11 lifting columns,
•DD21 lifting columns,
•C DD-A 1xCB* desk frame (two lifting columns, one cross bar)
•C DD-A 2xCB* desk frame (two lifting columns, two cross bars)
•C DD-B 1xCB* desk frame (three lifting columns,+ C DD-A Deskframe)
•Control keypads,
•SMART and COMPACT control units.
These instructions will help you to minimize danger, repair costs and down times. They will also help
you to maximize the reliability and lifespan of the end product.
NOTICE
The instructions for installing the DD11/DD21 system should also be followed.
CAUTION
The notices in these instructions must be followed! Following the guidelines during installation and
connection procedures will help to minimize:
•the risk of accident and injury, and
•damage to the drive system or the end product.
These installation instructions have been written with due care and attention. However, we cannot
guarantee that the data, images and drawings are complete and correct nor do we accept any liability
for the information contained therein, unless required by law.
We reserve the right to make unannounced technical changes in the course of our continual
product improvement process!
Availability of this document
As manufacturer of the end product, you are obligated to comply with Machinery Directive
2006/42/EC. This directive stipulates that the installation instructions must be kept on file for govern-
mental inspection purposes.
Keep these instructions in a safe place!
Application
These testing principles apply towards the testing and certification of sitting/standing desks used for
office, meeting, conference and training rooms. The work tables can be adjusted and used for both
sitting and standing work conditions.
* Cross bar

System DD11 / System DD21 General Information
82774 2.0 7
1.2 Safety notices within the installation instruction and the operating instruc-
tions for the entire machine
The manufacturer of the complete machine (the end product) is only permitted to operate the
DD11/DD21 lifting columns (by itself an incomplete machine)
•when the end product (for which the DD11/DD21 lifting columns are intended) is in compliance
with all protective measures specified in the Machinery Directive 2006/42/EC, and
•when the manufacturer expressly declares the compliance of the end product.
The manufacturer of the end product must create a manual for the users of that product. The safety
notices in the end-product manual must be written based on the end product's risk assessment.
1.3 Conventions used
Notices which do not relate to safety are indicated in these instructions with a symbol:
Triangular notice symbol
Explanations of warning notices
CAUTION
CAUTION indicates a hazardous situation which, if not avoided, could result in minor or moderate
injury.
NOTICE
NOTICE is used to address practices which are not related to personal injury but may result in
damage to the product or surroundings.

Safety notices System DD11 / System DD21
8 82774 2.0
2. Safety notices
2.1 Proper and intended usage
The DD11/DD21 system is intended:
•for adjusting the height of tables in conjunction with the SMART/COMPACT control units and the
DD11/DD21 lifting columns from DewertOkin.
It may only be used for applications where unintended motion cannot lead to damage.
It may only be used in dry rooms.
DESKFRAME C DD-A 1xCB / DESKFRAME C DD-A 2xCB / DESKFRAME C DD-B 1xCB:
This height-adjustable table (without tabletop*) for office work:
•is designed for working while sitting,
•sitting and standing or
•only standing
•when a tabletop is already present.* (DD11 system, type D, EN527-1
DD21 system, type A, EN527-1)
CAUTION
Risk of accident
The DD11/DD21 system should only be used for the purposes described above. Any other use is
forbidden. Improper usage can lead to accidents or destruction of the unit. Such non-approved
applications will lead immediately to the expiration of all guarantee and warranty claims on the
part of the end-product manufacturer against the manufacturer.
Improper usage
Be sure to follow the notices below concerning improper usage. You should include them in your
product manual in order to inform the users of your end product.
The DD11/DD21 system should not be used:
•with a medical product, or installed in a medical product,
•as a power source for toys or games,
•for raising and lowering loads in industrial or technical applications.
•in a moist environment,
•outdoors,
•for industrial applications.
* The tabletop will be provided and installed by the manufacturer of the end product.

System DD11 / System DD21 Safety notices
82774 2.0 9
NOTICE
When installing and operating the lifting column, please note the following:
•Handle the lifting column with care!
•Do not drop the lifting column vertically to the ground.
•Do not tilt the lifting column sideways and let it fall to the ground.
•Do not subject the lifting column to lateral shock loads during the installation.
The DD11/DD21 system can be used by children of 8 years and older, persons with reduced physi-
cal, sensory or mental capabilities, or persons with lack of experience or knowledge when they are
supervised or instructed concerning the safe use of the device and when they understand the result-
ing risks. Do not allow children to play with this device. The cleaning and user maintenance must not
be carried out by children without supervision.
You should only use spare parts which have been manufactured or approved by DewertOkin.
Only these parts will guarantee a sufficient level of safety.
CAUTION
Danger of pinching/crushing injuries!
There is a danger of being crushed when the table position is changed. This is particularly true
when there is no protective mechanism guarding against crushing injuries. However, crushing
injuries may even occur in exceptional cases when a safety guard is installed. Make sure that
there are no persons within the danger zone and that nobody reaches into the danger zone. This
also applies in the following situations:
•In the event of a malfunction, the table may move a bit during an adjustment before the safety
shutdown mechanism triggers. This could result in a crushing injury.
•The impact protection mechanism is not active during resets and end-position queries. This
could result in a crushing injury.
2.2 Selection and qualification of personnel
The installation of the drive in the end product may only be performed by qualified personnel. You
should only install this drive when you are qualified to do so. Otherwise, a properly qualified person
should be found for this task.

System component description System DD11 / System DD21
10 82774 2.0
3. System component description
The DD11/DD21 system uses lifting columns to adjust the height of tables. A table-mounted control
keypad and the SMART/COMPACT control units can be used for the adjustments.
The DD11/DD21 system variants differ by:
•the type of control keypads,
•the number of lifting columns that can be connected,
•the design of the lifting columns that can be connected,
DD11: single telescopic
DD21: double telescopic
•the type and number of control units connected.
3.1 Complete installed system
DESKFRAME C DD-A 1xCB / DESKFRAME C DD-A 2xCB
Figure 1 Example: DD11 system with two DD11 lifting columns
A Control keypad
B Tabletop
C SMART or COMPACT control units
D DD11 lifting column (single telescopic)
E Table base
F 2xCB (cross bars)
A
C
B
D
E
D
E
800 - 1000
Max. 2000
F

System DD11 / System DD21 System component description
82774 2.0 11
Figure 2 Example: DD21 system with two DD21 lifting columns
A Control keypad B Tabletop
C SMART or COMPACT control units
D DD21 lifting column (double telescopic)
E Table base
F 2xCB (cross bars)
3.1.1 Dimensions
Specifications for the installed system:
•Max. lengthwise extension: 1200 – 2000 mm
•Max. transverse extension: 800 – 1000 mm
•The max. permissible tabletop size is 2000 x 1000 mm.
•Max. load for the frame: 100 kg (including tabletop)
•Lifespan: max. 10,000 cycles (with load)
A
C
B
D
E
D
E
800 - 1000
Max. 2000
F

System component description System DD11 / System DD21
12 82774 2.0
3.2 Mounted complete system DESKFRAME C DD-B 1xCB
Figure 3 Example: DD11 system with three DD11 lifting columns
A Control keypad
B Tabletop
C
COMPACT control unit
D
DD11 lifting column (single telescopic)
E Table base
F 2xCB (cross bars)
G 1xCB (cross bar)
C
D
E
D
E
D
E
800 - 1000
Max. 2000
Max. 2000
Max. 1000
Max. 1000
A
B
G
F

System DD11 / System DD21 System component description
82774 2.0 13
Figure 4 Example: DD21 system with three DD21 lifting columns
A Control keypad
B Tabletop
C
COMPACT control unit
D
DD21 lifting column (double telescopic)
E Table base
F 2xCB (cross bars)
G 1xCB (cross bar)
3.2.1 Dimensions
Specifications for the installed system:
•Max. lengthwise extension: 1200 – 2000 mm
•Max. transverse extension: 800 – 1000 mm
•The max. permissible tabletop size is (1000-2000) x (800-1000) x (1600-2000) mm.
•Max. load for the frame: 120 kg (including tabletop)
•Lifespan: max. 10,000 cycles (with load)
C
D
E
D
E
D
E
800 - 1000
Max. 2000
Max. 2000
Max. 1000
Max. 1000
A
B
F
G

System component description System DD11 / System DD21
14 82774 2.0
3.3 SMART and COMPACT control units
The SMART and COMPACT control units have an enclosure with connections for the power supply,
lifting columns, and for the control keypad.
3.3.1 SMART control unit
The SMART control unit is used for adjusting one or two lifting columns.
Figure 5 SMART control unit
A Connection for the control keypad
B Mains power supply connection
C
Connection for the lifting columns
3.3.2 COMPACT control unit
The COMPACT control unit is used for adjusting one, two or three lifting columns.
Figure 6 COMPACT control unit
A Connection for the control keypad
B Mains power supply connection
C
Connection for the lifting columns
D
Status LEDs
E Sensor connection / cascade connection
C
C
A
B
A
D
E
B
C
C
C

System DD11 / System DD21 System component description
82774 2.0 15
3.4 Control keypads
The control keypads are used to adjust the table height, to save positions (optional), and to adjust
motor group 2. The table positions and optional saved (programmed) positions can be moved to di-
rectly.
3.4.1 Motion Assist control keypad
The Motion Assist control keypad has two keys for the up and down adjustments.
Figure 7 Motion Assist control keypad
A key (adjusting down)
B Mounting surface
C
Connection cable
D
key (adjusting up)
3.4.2 HSCO control keypad
The HSCO control keypad has two keys for the up and down adjustments.
Figure 8 HSCO control keypad
A key (adjusting down)
B
Mounting surface
C Connection cable D key (adjusting up)
D
A
C
B
A
D
B
C

System component description System DD11 / System DD21
16 82774 2.0
3.4.3 HSU Varioline control keypad
The HSU Varioline control keypad has two keys for the up and down adjustments.
Figure 9 HSU Varioline control keypad
A key (adjusting down) B Mounting surface
C Connection cable D key (adjusting up)
A
D
C
B

System DD11 / System DD21 System component description
82774 2.0 17
3.4.4 HSU control keypad
The HSU control keypad has two keys for the up/down adjustment movements, four memory keys, a
save key and a display.
Figure 10 HSU control keypad
A key (adjusting down) B Mounting surface
C Connection cable D key (adjusting up)
E memory key 1 F memory key 2
G memory key 3 H memory key 4
I Display J save key
C
B
J
F
E
H
G
I
D
A

System component description System DD11 / System DD21
18 82774 2.0
3.4.5 HSF control keypad
The HSF control keypad has two keys for the up/down adjustment movements, four memory keys,
two keys for motor group 2, a save key and a display.
Figure 11 HSF control keypad
A key (adjusting down) B Mounting surface
C Connection cable D key (adjusting up)
E memory key 1 F memory key 2
G memory key 3 H memory key 4
I Display J save key
K motor group 2
Adjusting downwards
L motor group 2
Adjusting upwards
B
K
F
E
G
J
H
A
L
D
I
C

System DD11 / System DD21 System component description
82774 2.0 19
3.4.6 TOUCHbasic-inlay control keypad
The TOUCHbasic-inlay control keypad has two keys for the up and down adjustments.
Figure 12 TOUCHbasic-inlay control keypad
A key (adjusting down) D key (adjusting up)
3.4.7 TOUCHbasic-down control keypad
The TOUCHbasic-down control keypad has two keys for the up and down adjustments.
Figure 13 TOUCHbasic-down control keypad
A key (adjusting down) B Mounting surface
C Connection cable D key (adjusting up)
D
A
D
A
B
C

System component description System DD11 / System DD21
20 82774 2.0
3.4.8 TOUCHfx control keypad
The TOUCHfx control keypad has two keys for the up/down adjustment movements, four memory
keys, a save key and a display.
Figure 14 TOUCHfx control keypad
A -key (adjusting down) B Mounting surface
C Connection cable D -key (adjusting up)
E Memory key 1 F Memory key 3
G Memory key 2 H Memory key 4
I Display J -save key
E
D
B
C
F
H
G
I
J
A
This manual suits for next models
8
Table of contents
Other dewert okin Indoor Furnishing manuals
Popular Indoor Furnishing manuals by other brands

Pitarch
Pitarch 1022 Assembly instructions
Mainstays
Mainstays D2118.0001-MP manual

Noble House Home Furnishings
Noble House Home Furnishings Bar Chair Assembly instructions

Bensons for Beds
Bensons for Beds STK268001 Assembly instructions

Furniture of America
Furniture of America CM6514-VN Assembly instructions
Boraam
Boraam FENTON 76024 Assembly instructions
