8
Function Definition
Primary
Menu
Secondary
Menu
Description
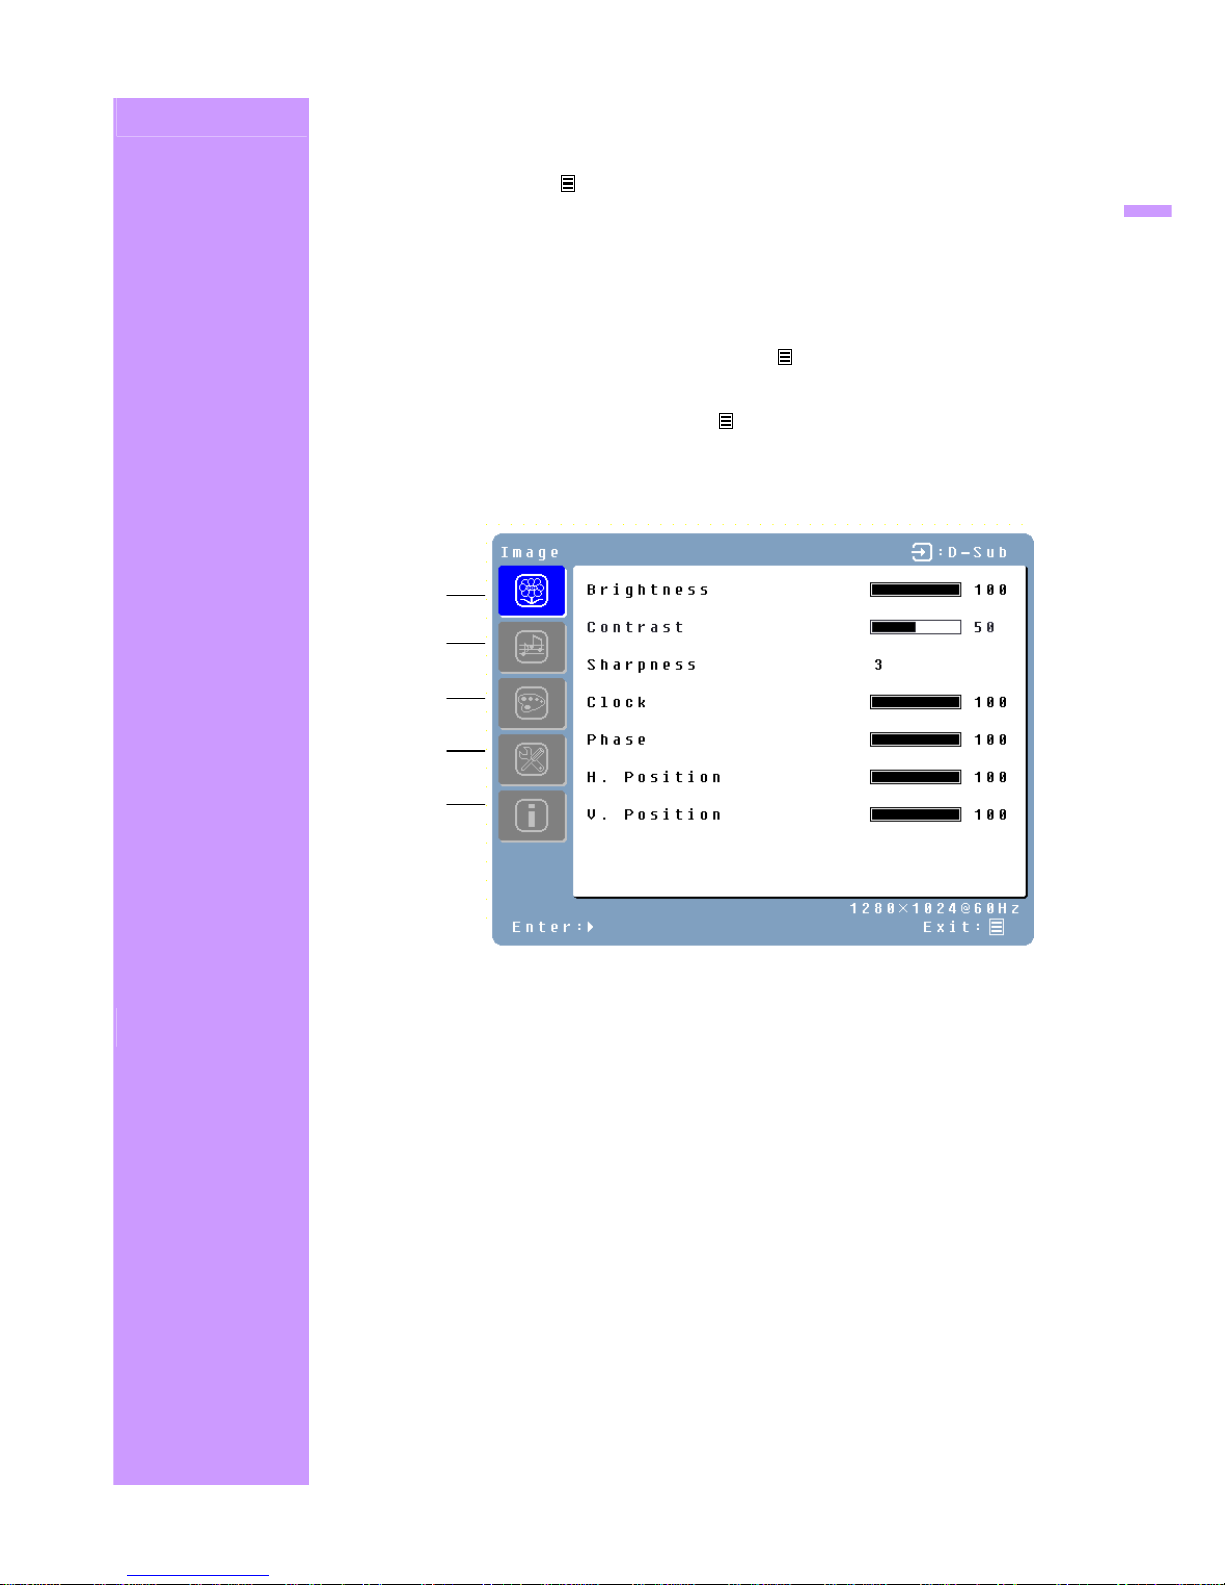
Image Brightness
Adjust the brightness of the screen.
Contrast
Adjust the contrast of the image.
Sharpness
Adjust the picture sharpness of low resolution pictures.
Clock
Adjust the monitor clock. (Optional)
Phase
Adjust the monitor phase. (Optional)
H. Position
Move the image left or right on the screen. (Optional)
V. Position
Move the image up or down on the screen. (Optional)
Audio Volume Adjust the volume of the audio.
Mute Disable the audio.
Color Color temp
User/9300K/7500K/6500K/sRGB
Red
Adjust red color.
Green
Adjust green color.
Blue
Adjust blue color.
Misc Language English, Français, Deutsch, Español, Italiano, 日本語,
Русский, 繁體中文 ,简体中文, 한국어
OSD time-out Adjust OSD display time setting.
OSD position Move OSD display position to any one of the following 5
positions within the overall screen.
Reset Restore LCD monitor to factory settings.
Input Select Analog / Digital
Auto setting Adjust clock, phase and positions automatically. (Optional)
CM Engine Color Management Engine. (Optional)
Info Resolution
Displays resolution.
Horizontal
frequency Displays horizontal frequency.
Vertical
frequency Displays vertical frequency.
Version
Displays firmware version.
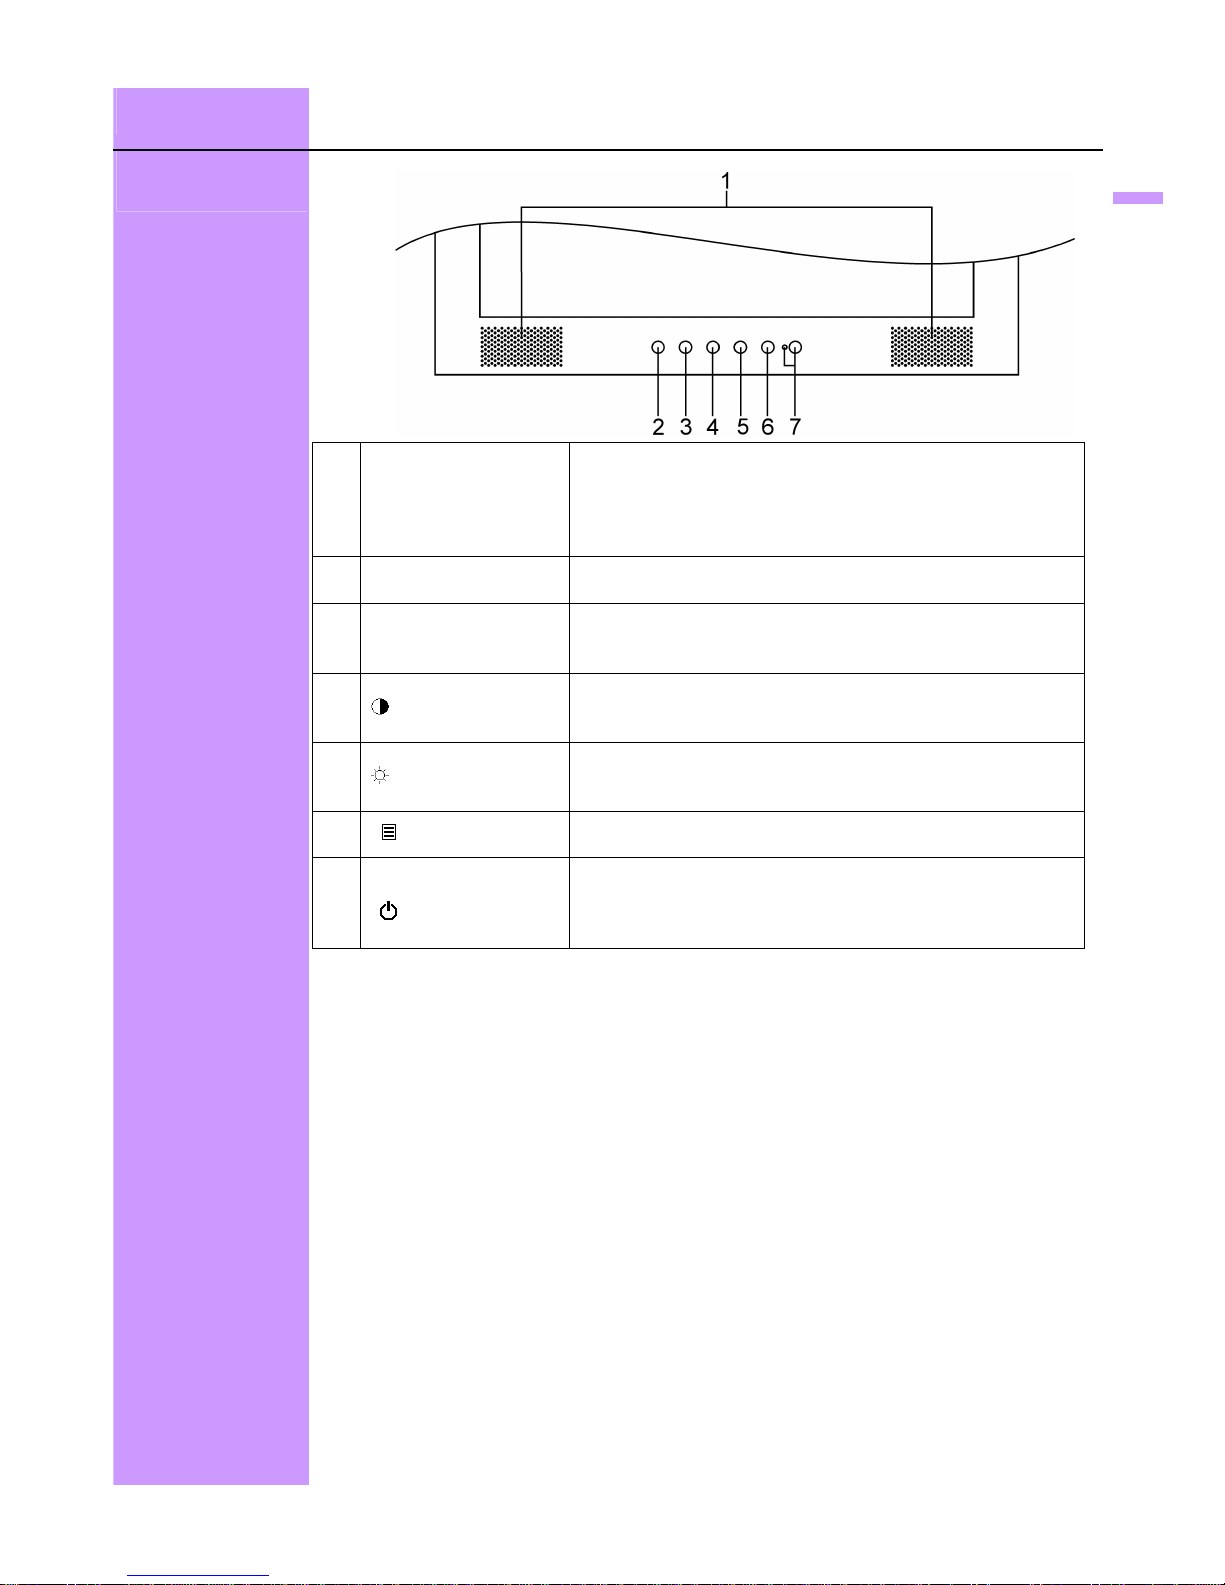
Quick Adjustment You can skip the Menu pages and display an adjustment scale directly by using the
following button operations:
Brightness: Press the Brightness button when the Menu is not displayed.
Contrast: Press the Contrast button when the Menu is not displayed.
Auto Setting: Press the Auto button when the Menu is not displayed.
Turbo: Press the Turbo button when the Menu is not displayed to switch between
picture modes.
Picture Mode - High brightness
Text Mode - Normal
Economy Mode - Brightness of back-light is reduced
Changing to a lower brightness mode can lessen eye fatigue.
Change from Picture Mode to Text Mode when working with text.
Change from Text Mode to Economy Modes when viewing the screen for long periods.
English
3
1
5
2
4