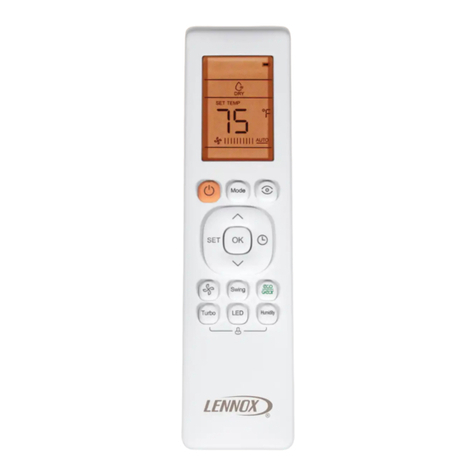
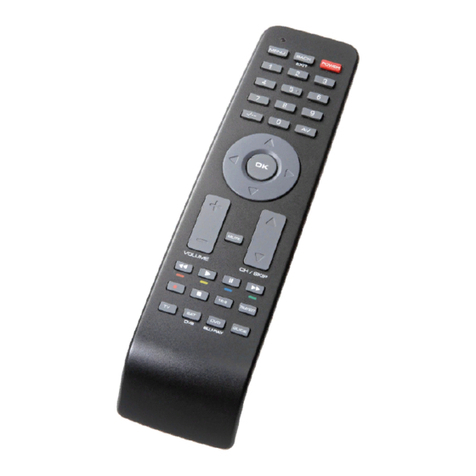
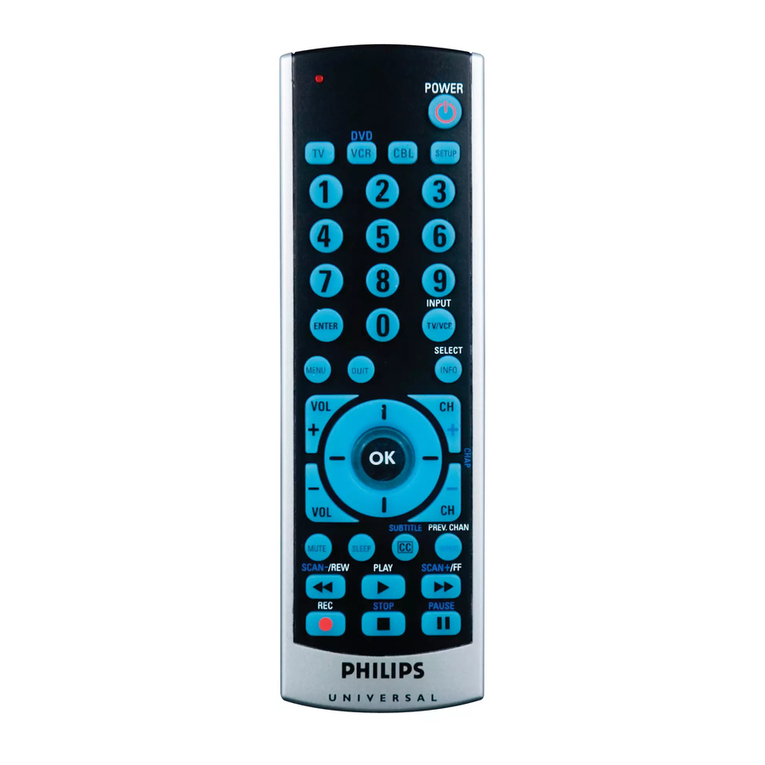
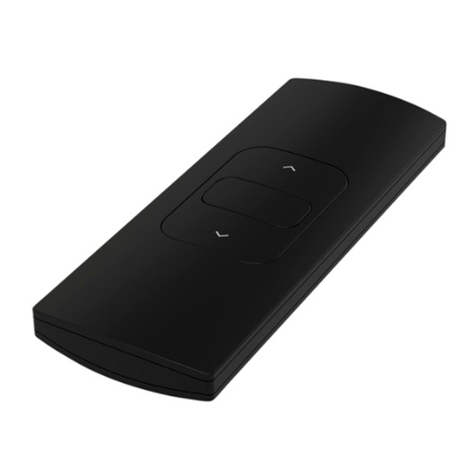
DIAL RCH-RTY2-0 User manual

WIRELESS REMOTE CONTROL
Thank you very much for purchasing this Air Condioner. Please read the
Wireless Remote Control instrucons carefully before using this appli-
ance and keep this manual for future reference.
*The design and specicaons of the Wireless Remote Controller are subjected to change without prior noce.


REMOTE CONTROL
1
No. Symbols Meaning
1Auto Mode
2Cooling Mode
3Dry Mode
4Fan Only Mode
5Heang Mode
68°C Heang Funcon
7ECO Funcon
8Timer/Clock Funcon
9Temperature Indicator
10 Fan Speed:
Auto/ High/ Mid-High/ Mid/ Mid-Low/ Low
11 MUTE Funcon
12 TURBO Funcon
13 Up-Down Auto Swing
14 Le-Right Auto Swing
15 SLEEP Funcon
16 I FEEL Funcon
17 Signal Indicator
18 Child-Lock
19 Clean Funcon
Remote Control Display
The display and some funcons of the remote control may vary by model.

REMOTE CONTROL
2
No.
1ON / OFF Turns on/o the air condioner.
2Temp + Increases temperature, or Timer/Clock seng hours.
3Temp - Decreases temperature, or Timer/Clock seng hours.
4MODE Selects the mode of operaon (AUTO, COOL, DRY, FAN, HEAT).
5ECO Acvates/deacvates the ECO funcon.
6TURBO Acvates/deacvates the TURBO funcon.
7FAN Selects the fan speed.
8TIMER ON Sets the me for TIMER ON funcon.
9TIMER OFF Sets the me for TIMER OFF funcon.
10 SLEEP Switches on/o the SLEEP funcon.
11 LIGHT Switches on/o the indoor unit LED display.
12 SWING Stops or Starts horizontal louver movement or sets the desired
up/down air ow direcon.
13 SWING Stops or Starts vercal louver movement or sets the desired le/
right air ow direcon.
14 I FEEL Switches on/o the I FEEL funcon.
15 MUTE
Switches on/o the MUTE funcon.
Press for 5 seconds to acvate/deacvate the CLEAN funcon
16 CLOCK Sets the current me.
17
TIMER ON
+
TIMER OFF
Press for 3 seconds to acvate/deacvate the CHILD-LOCK funcon.
18
SWING
+
TEMP +
Acvates/deacvates the 8°C Heat funcon.
19
MODE
+
- TEMP
Press for 2 seconds to alternate between °C and °F scale.
The display and some funcons of the remote control may vary by model.
The shape and posion of buons and indicators may vary by model, but their funcons are the same.
The indoor unit will beep to acknowledge the recepon of a signal from the remote when a buon is pressed.
▲
▼
▲
▼
▲
▼

REMOTE CONTROL
3
1. Point the remote control toward the air condioner and
make your selecons. The indoor unit will beep if the signal
is received.
2. The remote control will operate the air condioner at a
distance up to 23 (7m).
3. Check that there is no object between the remote control
and the signal receptor in the indoor unit.
4. Never leave the remote control exposed to direct sunlight.
5. Keep the remote control at least 3.5 feet (1m) from the
television or other electrical appliances.
Use 2 AAA (1.5V) baeries.
Do not use rechargeable baeries.
When the display is no longer legible, replace the 2
old baeries with new ones of the same type and at
the same me. Dispose of baeries responsibly per
regulatory requirements.
Storage and Tips for Using the Remote Control
Remove the baery cover plate from the rear of the remote control, by sliding it in the direcon
of the arrow.
Install the baeries according to the direcon (+ and -) shown on the Remote Control. Reinstall
the baery cover by sliding it into place.
The remote control may be mounted on a wall with a
remote control holder (oponal part).

REMOTE CONTROL
4
Press MODE buon to select the mode of operaon (AUTO, COOL, DRY, FAN, HEAT).
COOLING MODE
HEATING MODE
AUTO MODE
COOL
HEAT
AUTO FAN
FAN Change the operang fan speed.
Automac mode.
The cooling funcon allows the
air condioner to cool the room
and reduce air humidity at the
same me.
The heang funcon allows the
air condioner to heat the room.
Fan mode, air venlaon only.
To set to FAN mode, press MODE unl the
symbol appears on the display.
To set to AUTO mode, press MODE unl
the symbol appears on the display.
In AUTO mode the run mode will be set
automacally according to the room tem-
perature.
Press the FAN buon to set the running fan
speed. It can be set to AUTO/ HIGH/ MID-
HIGH / MID/ MID-LOW/ LOW speed.
When the unit rst starts in heat mode, it may take
2-5 minutes before air ow will be discharged from
the unit. If needed, wait 3 minutes before restarng
the unit.
To acvate the cooling funcon (COOL), press
the MODE buon unl the symbol
appears on the display.
Set the desired temperature using the +or -
buons. The cool mode will acvate when
room temperature is above the set tempera-
ture.
Note: Set temperature range is between 61°F and 86°F.
To acvate the heang funcon (HEAT), press
the MODE buon unl the symbol
appears on the display.
Set the desired temperature using the +or -
buons. The heat mode will acvate when
room temperature is below the set tempera-
ture.
Note: Set temperature range is between 61°F and 86°F.
DRY MODE
DRY This funcon reduces the humid-
ity of the air to make the room
more comfortable.
To set to DRY mode, press MODE unl
the symbol appears on the display. When
acvated, the unit will automacally reduce
the humidity to a predetermined seng.
If the unit does not respond when changing modes, wait 3 minutes and try again.
Indoor Temperature Mode Target Temperature
≤ 70°F (21°C) HEATING 72°F (22°C)
70°F-73°F (21°C-23°C)
FAN ONLY
73°F-79°F (23°C-26°C)
DRY
Room temperature
decrease 2°F aer
3 minutes.
> 79°F (26°C)
COOLING
79°F (26°C)

REMOTE CONTROL
5
TIMER ON
TIMER OFF
CLOCK Change the current local me.
Switch the unit OFF aer a set me.
Switch the unit ON aer a set me.
Press the CLOCK buon once. Set the cur-
rent local me in 24 hour format using the
+and - buons. Press the CLOCK buon a
second me to conrm.
Never adjust or set the ap or deectors manually as
this could damage the mechanism.
Note: If unit does not have 4-way airow funcon,
the horizontal airow may be adjusted manually.
Never insert ngers, scks or other objects into the
air inlet or outlet vents as this acon could cause
serious injury or damage to the unit.
Avoid seng the horizontal louver downward for an
extended period of me in Cooling or Dry modes to
prevent condensed water from dripping out of the
front of the unit.
With the unit switched o, set the TIMER. To set
the mer to switch the unit on automacally:
1. Press the TIMER ON buon once. The
"12:00 ON" will appear and ash on the
remote display.
2. Press the +or - buons to set the desired
Timer-on me in 24hr format.
3. Press the TIMER ON buon a second me
to conrm. A beep will sound, "ON" will stop
ashing and the mer indicator on the indoor
unit will light up.
4. Aer seng the mer press the MODE
buon to set the needed mode (Auto, Cool,
Dry, Fan or Heat). Set the needed fan speed
by pressing the FAN buon.
Press +or - to set the needed operaon
temperature. CANCEL the mer funcon by
pressing the TIMER ON buon again.
1. Press the buon to acvate the
horizontal ap to swing up and down.
The symbol will appear on the remote
display. Press again to stop the swing
movement at the current angle.
2. Press to acve the vercal deec-
t o r s t o s w i n g l e a n d r i g h t . T h e s y m b o l
will appear on the remote display.
Press again to stop the swing movement
at the current angle.
To set the mer to switch the unit o automat-
ically:
1. Conrm the appliance is ON.
2. Press the TIMER OFF buon once to set the
unit to switch o. The "12:00 OFF" will appear
and ash on the remote display. Press the +
or - to set the mer in 24hr format.
3. Press the TIMER OFF buon a second me
to conrm. A beep will sound, "OFF" will stop
ashing and the mer indicator on the indoor
unit will light up. Cancel the mer funcon by
pressing the TIMER OFF buon again.
• Press the +or - buon once, the me increases/
decreases by 1 minute.
• Press and hold the +or - buon for 2 seconds, the
me increases/decreases by 10 minutes.
• Long press the +or - buon, the me increases/
decreases by 1 hour.
Note: If the Timer ON/OFF buon has been pressed
and there is no further acvity for 10 seconds, the
unit will return to normal operaon and the mer
funcon will be canceled.
▲
▼
▲
▼
The horizontal louver is automacally ad-
justed according to the selected operang
mode. The direcon of airow can be further
adjusted by using the SWING buons on the
remote control.
COOL, DRY Horizontal
HEAT, FAN ONLY Downward

REMOTE CONTROL
6
Sleep
Mode
Mode
Target Temp Increase/Decrease
1 hour 2 hours 6 hours 7 hours
Mode 1 Cool/Dry - +2°F - -
Heat - -2°F - -
Mode 2 Cool/Dry - +2°F -1°F -1°F
Heat - -2°F +1°F +1°F
Mode 3 Cool/Dry +1°F +2°F -2°F -1°F
Heat -2°F -2°F +2°F +2°F
Mode 4 Cool/Dry
No Change - Turns o aer 8 hours
Heat
No Change - Turns o aer 8 hours
MUTE
SLEEP
ECO
I FEEL
Automacally sets the operaon at
minimum capacity to save energy.
Press the ECO buon. The symbol will
appear on the display, and the appliance
will run in ECO mode. Pressing the ON/OFF,
MODE, TEMP, FAN, SLEEP, MUTE or ECO
buons will cancel ECO funcon.
Note: The ECO funcon is not available in AUTO Mode.
Sleep funcon gives you a more comfortable
environment for sleep. It can be set in Cool-
ing, Heang or Dry modes.
The appliance will stop operaon automa-
cally aer operang for 8 hours. Fan speed is
automacally set at low speed.
There are 4 levels of sleep funcon. Each
me the SLEEP buon is pressed, the sleep
funcon will be changed in the following
sequence:
Press the I FEEL buon to acve the
funcon. The symbol will appear on the
remote display. Press again to deacvate this
funcon.
This funcon enables the remote control to
sense the temperature at its current locaon,
and send this signal to the air condioner to
opmize the temperature around you and
ensure your comfort. The remote must be
near the indoor unit to receive the signal.
When turning o the unit or when the I FEEL
funcon is not needed, turn o the funcon
to save energy. If the I FEEL funcon will not
turn o, press and hold buon for 5 seconds.
1. Press the MUTE buon to acvate this
funcon. The symbol will appear on
the remote display. Press buon again to
deacvate this funcon.
2. When MUTE is selected, the remote con-
troller will display the auto fan speed, and
the indoor unit will operate at the lowest
fan speed to minimize sound.
3. Press the FAN or MODE buon to cancel
the MUTE funcon. The MUTE funcon
cannot be acvated under Dry Mode.
TURBO
To acvate the turbo funcon, press the
TURBO buon. The symbol will appear
on the display. Press again to cancel this
funcon.
When in Fan Only or Dry mode, the fan
speed will be set to high automacally.
When in Cooling mode, the fan speed will be
set to high and the temperature to 61°F.
When in Heang mode, the temperature is
set to 86°F and the fan speed to AUTO.
OFF

REMOTE CONTROL
7
LIGHT Switch the LED display on the
indoor unit panel ON or OFF.
1. Press and hold the and TEMP + but-
t o n s f o r 3 s e c o n d s t o a c v a t e t h i s f u n c o n .
will appear on the remote display.
2. This funcon will auto start the heang
mode when the room temperature is
lower than 8°C (46°F), and it will return to
standby if the temperature reaches 9°C
(48°F).
3. Press the any buon other than TIMER
ON, TIMER OFF, I FEEL or SWING will deac-
vate the 8°C Heang funcon.
Press the LIGHT buon to switch o the LED
display. Press the buon again to switch on
the LED display.
To acvate this funcon, the indoor unit
must be o with the mode set to COOL or
DRY. This funcon cannot be acvated with
TURBO funcon.
Press and hold the MUTE buon for 5 sec-
onds to acvate this funcon. will appear
on the remote display.
1. This funcon helps to clear accumulat-
ed dust, bacteria, etc. from the indoor
evaporator.
2. Aer the cleaning process is nished,
the unit will return to the preset mode.
The symbol will remain for 10 minutes
aer funcon is complete. Press the
ON/OFF or MODE buon to cancel this
funcon.
It's normal if there is some noise during this
operaon, as plasc materials expand with
heat and contract with cold.
Perform this funcon in the following am-
bient condions to avoid acvang certain
safety protecon features:
It is recommended to perform this funcon
every 3 months.
Indoor
Unit Temp < 86°F (30°C)
Outdoor
Unit
41°F (5°C) < Temp < 86°F (30°C)
1. Press and hold the TIMER ON and
TIMER OFF buons together to acve
this funcon. Perform this step again to
deacvate this funcon.
2. When the Child-Lock funcon is acvated,
the buons on the remote will be inacve.


CONTROL REMOTO INALÁMBRICO
Muchas gracias por comprar este aire acondicionado. Lea atentamente
las instrucciones del control remoto inalámbrico antes de usar este
aparato y conserve este manual para consultarlo en el futuro.
*El diseño y las especicaciones del control remoto inalámbrico están sujetos a cambios sin previo aviso.


CONTROL REMOTO
11
Núm. Símbolos
1
Modo Auto
2
Modo Cooling (Frío)
3
Modo Dry (Deshumidicación)
4
Modo Fan (Venlador)
5
Modo Heang (Calor)
6
Función 8°C Heang (Calor)
7
Función ECO
8
Función Timer/Clock (Temporizador/Reloj)
9
Indicador de Temperatura
10
Velocidad del Venlador:
Auto/ Alto/ Medio-Alto/ Medio/ Medio-Bajo/ Bajo
11
Función MUTE (Silencio)
12
Función TURBO
13
Oscilación Automáca Arriba-Abajo
14
Oscilación Automáca Izquierda-Derecha
15
Función SLEEP (Dormir)
16
Función I FEEL
17
Indicador de Señal
18
Bloqueo para Niños
19
Función Clean (Autolimpieza)
Pantalla de Control Remoto
La pantalla y algunas funciones del control remoto pueden variar según el modelo.

CONTROL REMOTO
12
Núm. Botón Función
1ON / OFF
Para encender/apagar el aire acondicionado.
2Temp +
Para aumentar la temperatura o las horas de ajuste del temporizador/reloj.
3Temp -
Para disminuir la temperatura o las horas de ajuste del temporizador/reloj.
4MODE
Para seleccionar el modo de operación (AUTO, COOL, DRY, FAN, HEAT).
5ECO
Para acvar/desacvar la función ECO.
6TURBO
Para acvar/desacvar la función TURBO.
7FAN
Para seleccionar la velocidad del venlador.
8TIMER ON
Para congurar el empo de encendido del temporizador.
9TIMER OFF
Para congurar el empo de apagado del temporizador.
10 SLEEP
Para acvar/desacvar la función SLEEP (Dormir).
11 LIGHT
Para encender/apagar la pantalla LED de la unidad interior.
12 SWING
Para detener o iniciar el movimiento de la rejilla horizontal o establecer la
dirección de ujo de aire hacia arriba/abajo deseada.
13 SWING
Para detener o iniciar el movimiento de la rejilla vercal o establecer la
dirección de ujo de aire izquierda/derecha deseada.
14 I FEEL
Para acvar/desacvar la función I FEEL.
15 MUTE
Para acvar/desacvar la función MUTE (Silencio).
Presione durante 5 segundos para acvar/desacvar la función AUTOL-
IMPIEZA.
16 CLOCK
Para congurar la hora actual.
17
TIMER ON
+
TIMER OFF
Presione durante 3 segundos para acvar/desacvar la función
Bloqueo para Niños.
18
SWING
+
TEMP +
Para acvar/desacvar la función 8°C Heang.
19
MODE
+
- TEMP
Presione durante 2 segundos para alternar entre la escala °C y °F.
La pantalla y algunas funciones del control remoto pueden variar según el modelo.
La forma y la posición de los botones e indicadores pueden variar según el modelo, pero sus funciones son las mismas.
La unidad interior emirá un pido para reconocer la recepción de una señal del control remoto cuando se presione un bot
ó
n.
▲
▼
▲
▼
▲
▼

CONTROL REMOTO
13
1. Apunte el control remoto hacia el acondicionador de
aire y haga sus selecciones. La unidad interior emirá un
pido si se recibe la señal.
2. El control remoto operará el acondicionador de aire a
una distancia de hasta 23 pies (7 m).
3. Compruebe que no haya ningún objeto entre el control
remoto y el receptor de señal de la unidad interior.
4. Nunca deje el control remoto expuesto a la luz solar
directa.
5. Mantenga el control remoto al menos a 3,5 pies (1 m) de
la televisión u otros aparatos eléctricos.
Ulice 2 pilas AAA (1,5 V).
No use baterías recargables. Cuando la
pantalla ya no sea legible, reemplace las
2 baterías viejas por otras nuevas del
mismo po y al mismo empo. Deseche las
baterías de manera responsable según los
requisitos reglamentarios.
Reemplazo de Baterías
Almacenamiento y Consejos para Usar el Control Remoto
Rere la placa de la tapa de la batería de la parte posterior del control remoto, deslizándola en
la dirección de la echa.
Instale las baterías de acuerdo con la dirección (+ y -) que se muestra en el control remoto. Vuel-
va a instalar la tapa de la batería deslizándola en su lugar.
El control remoto se puede montar en una pared con un
soporte para control remoto (parte opcional).

CONTROL REMOTO
14
Presione el botón MODE para seleccionar el modo de operación
(AUTO, COOL, DRY, FAN, HEAT).
MODO AUTO
COOL
HEAT
AUTO FAN
FAN Cambie la velocidad del venlador
de funcionamiento.
Modo automáco.
La función de enfriamiento permite-
que el acondicionador de aire enfríe
la habitación y reduzca la humedad
del aire al mismo empo.
La función de calefacción permite
que el aire acondicionado caliente
la habitación.
Modo venlador, solo venlación
de aire.
Para congurar el modo FAN, presione MODE
hasta que aparezca el símbolo en la pantalla.
Para congurar el modo AUTO, presione
MODE hasta que aparezca el símbolo en
la pantalla. En el modo AUTO, el modo de
ejecución se congurará automácamente de
acuerdo con la temperatura ambiente.
Presione el botón FAN para congurar la veloci-
dad del venlador en funcionamiento. Se puede
congurar en AUTO/ ALTO/ MEDIO-ALTO/ MEDIO/
MEDIO-BAJO/ BAJO.
Cuando la unidad se inicia por primera vez en modo
calor, pueden pasar de 2 a 5 minutos antes de que
se descargue el ujo de aire de la unidad. Si es nece-
sario, espere 3 minutos antes de reiniciar la unidad.
Para acvar la función de enfriamiento, presi-
one el botón MODE hasta que el símbolo
aparece en la pantalla.
Congure la temperatura deseada con los
botones +o - . El modo frío se acvará cuando
la temperatura ambiente esté por encima de la
temperatura de ajuste.
Nota: El rango de temperatura de ajuste es entre 61 °F y
86 °F.
Para acvar la función de calefacción, presione
el botón MODE hasta que aparezca el símbolo
en la pantalla.
Congure la temperatura deseada con los botones
+o - . El modo calor se acvará cuando
la temperatura ambiente esté por debajo de la
temperatura de ajuste.
Nota: El rango de temperatura de ajuste es entre 61 °F y
86 °F.
DRY
Esta función reduce la humedad del aire
para que la habitación sea más cómoda.
Para congurar el modo DRY, presione el botón
MODE hasta que aparezca el símbolo en la pan-
talla.Cuando se acva, la unidad reducirá automáca-
mente la humedad a un ajuste predeterminado.
Si la unidad no responde al cambiar de modo, espere 3 minutos y vuelva a intentarlo.
Temperatura Interna Modo Temperatura Meta
≤ 70°F (21°C)
HEATING
72°F (22°C)
70°F-73°F (21°C-23°C)
FAN
73°F-79°F (23°C-26°C)
DRY
La temperatura
ambiente disminuye 2°F
después de 3 minutos.
> 79°F (26°C)
COOLING
79°F (26°C)

CONTROL REMOTO
15
Función Temporizador - ENCENDIDO
Función Temporizador - APAGADO
Función SWING
TIMER ON
TIMER OFF
CLOCK
Congurar la hora actual.
Apague la unidad después de un empo
establecido.
Encienda la unidad después de un
empo establecido.
Presione el botón CLOCK una vez. Establezca
la hora local actual en formato de 24 horas
usando los botones +y - . Presione el botón
CLOCK por segunda vez para conrmar.
Nunca ajuste o coloque la solapa o los deectores
manualmente ya que esto podría dañar
el mecanismo.
Nota: Si la unidad no ene la función de ujo de aire
de 4 vías, el ujo de aire horizontal se puede ajustar
manualmente.
Nunca inserte los dedos, palos u otros objetos en
las rejillas de venlación de entrada o salida de aire,
ya que esta acción podría causar lesiones graves o
daños a la unidad.
Evite colocar la solapa horizontal hacia abajo duran-
te un período de empo prolongado en los modos
Enfriamiento o Secado para evitar que el agua
condensada gotee por el frente de la unidad.
Con la unidad apagada, congure el temporizador.
Para congurar el temporizador para que
encienda la unidad automácamente:
1. Presione el botón TIMER ON una vez. El símbolo
"12:00 ON" aparecerá y parpadeará en la pantalla
remota.
2. Presione el botón +o - para congurar el empo
de acvación del temporizador deseado en forma-
to de 24 horas.
3. Presione el botón TIMER ON por segunda vez
para conrmar. Sonará un pido, "ON" dejará de
parpadear y el indicador del temporizador en la
unidad interior se encendará.
4. Después de congurar el temporizador, presione el
botón MODE para congurar el modo necesario
(Auto, Cool, Dry, Fan o Heat). Congure la velocidad
del venlador necesaria presionando el botón
FAN . Presione +o - para congurar la temperatura
de operación necesaria. CANCELAR la función del
temporizador presionando el botón TIMER ON .
1. Presione para acvar la solapa
horizontal para que se mueva hacia arriba y
hacia abajo. El símbolo aparecerá en la
pantalla remota. Presione nuevamente para
detener el movimiento de oscilación en el
ángulo actual.
2. Presione para acvar los deectores
vercales para girar hacia la izquierda y hacia
la derecha. El símbolo aparecerá en la
pantalla remota. Presione nuevamente para
detener el movimiento de oscilación en el
ángulo actual.
Congure el temporizador cuando la unidad esté
encendida. Para congurar el temporizador para que la
unidad se apague automácamente:
1. Conrme que el aparato esté ENCENDIDO.
2. Presione el botón TIMER OFF una vez. El símbolo
"12:00 OFF" aparecerá y parpadeará en la pantalla
remota. Press the +or - to set the mer en forma-
to de 24 horas.
3. Presione el botón TIMER OFF por segunda vez
para conrmar. Sonará un pido, "OFF" dejará de
parpadear y el indicador del temporizador en la
unidad interior se encendará. Cancele la función de
temporizador presionando el botón TIMER OFF .
• Presione el botón + o - una vez, el empo aumenta/dis-
minuye en incrementos de 1 minuto.
• Mantenga presionado el botón + o - durante 2 segundos, el
empo aumenta/disminuye en incrementos de 10 minutos.
• Mantenga presionado el botón + o -, el empo aumenta/
disminuye en incrementos de 1 hora.
Nota: Si se ha presionado el botón Timer ON/OFF y no hay
más acvidad durante 10 segundos, la unidad volverá al
funcionamiento normal y la función del temporizador se
cancelará.
▲
▼
▲
▼
La solapa horizontal se ajusta automácamente
según el modo de funcionamiento seleccio-
nado. La dirección del ujo de aire se puede
ajustar aún más usando los botones SWING en
el control remoto.
Modo de Operación Dirección del Flujo de Aire
COOL, DRY Horizontal
HEAT, FAN Hacia Abajo

CONTROL REMOTO
16
Función I FEEL
Función ECO
MUTE
SLEEP
ECO
I FEEL
Congura automácamente la
operación a la capacidad mínima
para ahorrar energía.
Presione el botón ECO . El símbolo apare-
cerá en la pantalla y el aparato funcionará en
modo ECO. Presione el botón ON/OFF, MODE,
TEMP, FAN, SLEEP, MUTE o ECO para cancelar la
función ECO.
Nota: La función ECO no está disponible en modo AUTO.
Presione el botón I FEEL para acvar la
función. El símbolo aparecerá en la pantalla
remota. Presione nuevamente para desacvar
esta función.
Esta función permite que el control remoto
detecte la temperatura en su ubicación actual
y envíe esta señal al aire acondicionado para
opmizar la temperatura a su alrededor y ga-
ranzar su comodidad. El control remoto debe
estar cerca de la unidad interior para recibir
la señal. Cuando apague la unidad o cuando
no se necesite la función I FEEL, desacve la
función para ahorrar energía. Si la función no se
apaga, mantenga presionado el botón durante
5 segundos.
1. Presione el botón MUTE para acvar esta
función. El símbolo aparecerá en la pan-
talla remota. Presione el botón nuevamente
para desacvar esta función.
2. Cuando se selecciona MUTE, el control
remoto mostrará la velocidad del venlador
automáco y la unidad interior funcionará
a la velocidad más baja del venlador para
minimizar el sonido.
3. Presione el botón FAN o MODE para cancelar
la función MUTE. La función MUTE no se
puede acvar en el modo DRY.
Función TURBO
TURBO
Para acvar la función turbo, presione el botón
TURBO . El símbolo aparecerá en la pan-
talla. Presione nuevamente para cancelar esta
función.
Cuando esté en el modo Fan Only o Dry, la
velocidad del venlador se establecerá en alta
automácamente.
Cuando esté en el modo de refrigeración, la
velocidad del venlador se establecerá en alta y
la temperatura en 61°F.
Cuando está en el modo de calefacción, la tem-
peratura se establece en 86°F y la velocidad del
venlador en AUTO.
Modo de
Dormir
Modo de
Operación
Temperatura Meta
Aumento/Disminución
1 hora 2 horas 6 horas 7 horas
Modo 1 Cool/Dry - +2°F - -
Heat - -2°F - -
Modo 2 Cool/Dry - +2°F -1°F -1°F
Heat - -2°F +1°F +1°F
Modo 3 Cool/Dry +1°F +2°F -2°F -1°F
Heat -2°F -2°F +2°F +2°F
Modo 4 Cool/Dry Sin Cambios: Apagar Después
de 8 Horas
Heat Sin Cambios: Apagar Después
de 8 Horas
La función SLEEP le Brinda un ambiente más
cómodo para dormir. Se puede congurar en
los modos Cool, Heat, o Dry.
El aparato dejará de funcionar automáca-
mente después de 8 horas de funcionamiento.
La velocidad del venlador se ajusta automá-
camente a baja velocidad.
Hay 4 niveles de función de Dormir. Cada vez
que se presiona el botón SLEEP , la función
de dormir cambiará en la siguiente secuencia:
Apagada

CONTROL REMOTO
17
Función 8°C HEATING
LIGHT Encienda o apague la pantalla LED
en el panel de la unidad interior.
1. Mantenga presionados los botones y
TEMP + durante 3 segundos para acvar
esta función. El símbolo aparecerá en la
pantalla remota.
2. Esta función iniciará automácamente el
modo de calefacción cuando la temperatura
ambiente sea inferior a 8°C (46°F) y volverá
al modo de espera si la temperatura alcanza
los 9°C (48°F).
3. Presione cualquier botón que no sea TIMER
ON, TIMER OFF, I FEEL o SWING para desac-
var la función 8°C Heang.
Presione el botón LIGHT para apagar la
pantalla LED. Presione el botón nuevamente
para encender la pantalla LED.
Para acvar esta función, la unidad interior
debe estar apagada con el modo en COOL o
DRY. Esta función no se puede acvar con la
función TURBO.
Mantenga presionado el botón MUTE durante
5 segundos para acvar esta función. El símbolo
aparecerá en la pantalla.
1. Esta función ayuda a eliminar el polvo
acumulado, las bacterias, etc. del evaporador
interior.
2. Una vez nalizado el proceso de limpieza, la
unidad volverá al modo preestablecido. El
símbolo permanecerá durante 10 minu-
tos después de que se complete la función.
Presione el botón ON/OFF o MODE para
cancelar esta función.
Es normal si hay algo de ruido durante esta
operación, ya que los materiales pláscos
se expanden con el calor y se contraen con
el frío.
Realice esta función en las siguientes
condiciones ambientales para evitar acvar
determinadas funciones de protección de
seguridad:
Se recomienda realizar esta función cada 3
meses.
Unidad
Interior Temp < 86°F (30°C)
Unidad
Exterior 41°F (5°C) < Temp < 86°F (30°C)
Función de Bloqueo para Niños
1. Mantenga presionados los botones
TIMER ON y TIMER OFF juntos para
acvar esta función. Realice esta función
nuevamente para desacvar esta función.
2. Cuando se acva la función Bloqueo para
Niños, los botones del control remoto es-
tarán inacvos.

Table of contents
Languages:


