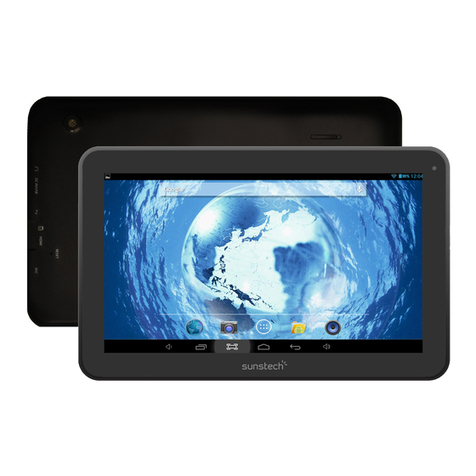
Difrnce DIT901102 User manual

USER'S MANUAL DIT901102
MID-9108 Allwinner A13 方案 ENGLISH MANUAL 4.1
标准说明书 ,70g书纸,135x102mm,钉装
*ANY PROBLEM OR QUESTIONS, CALL SUPPORT DESK 0900-3437623 (NL)
*VRAGEN OF PROBLEMEN, BEL ONZE SUPPORT DESK 0900-3437623 (NL)
*BEI FRAGEN ODER PROBLEMEN WENDEN SIE SICH BITTE AN
UNSEREN SERVICE: 00-31-348 409 371 (DU)
*VRAGEN OF PROBLEMEN, BEL ONZE SUPPORT DESK 0900-88020 (BE)
*SI VOUS AVEZ DES QUESTIONS SOIR DES PROBLEMES, CONTACTEZ-
NOUS AU NUMERO DE SAV SUIVANTE: 0900-88020 (BE)
www.difrnce.com

Table of Contents
Table of Contents......................................P1
Features..................................................P2
Unit at a Glance .......................................P3
Getting Started....................................P4-P5
About Applications...............................P5-P6
Preinstalled Applications...........................P6
Connect to a Wi-Fi network....................P7-P8
Optional Connections................................P9
Specifications.........................................P10
1

Features
2
Browse the Web.
Visit your favorite websites
Check your e-mail
Keep in touch with friends and family
Watch YouTube™ videos
Browse the world’s most popular video-sharing
community
Read your favorite books
Download thousands of books with the included E-
book reader *
Discover thousands of apps for Android™
Games, applications, and more with
marketplace(need for customer installed)
Connect to the Internet wirelessly
High-speed Wi-Fi 802.11 b/g/n networking
Enjoy your media library anywhere
Portable powerhouse plays popular music, video,and
photo formats
microSD memory card reader
Increase your storage capacity (up to 32 GB
supported)
Built-in camera
Convenient front-facing camera
Automatic orientation detection
Read any way you want; the display adjusts
automatically!
Reading books in the ePub format requires the
included E-book reader application.
Android™ is a trademark of Google Inc
The software bundled with this product includes
software files subject to certain open source license
requirements. Such open source software files are
subject solely to the terms of the relevant open source
software license. The open source software on this
device is provided to you on an “AS IS” basis to the
maximum extent permitted by applicable law. The
preferred license for the Android Open Source Project
is the Apache Software License, 2.0 ("Apache 2.0" of
which you may obtain a copy via this link:
http://www.apache.org/licenses/LICENSE-2.0. The
Linux kernel patches are under the GPLv2 license of
which you may obtain a copy
viahttp://www.kernel.org/pub/linux/kernel/COPYING.
You may also obtain a copy of GNU General Public
License, Version 3 at
http://www.gnu.org/licenses/gpl.html For the relevant
copyright and licensing terms of the open source files
contained on the device, please access the “Open
source license” section located at: Settings => About
Tablet => Legalinformation and then “Open Source
Licenses”.
Until three (3) years after our last shipment of this
product, you may obtain a copy of the source code
corresponding to the binaries for any GPL-Licensed
file by contacting us and you will be send a link to the
desired source code or we can provide the source
code on a physical medium (like DVD) at a minimal
service charge. We offer this source code and service
to everyone receiving this information.

Unit at a Glance
3
1.ESC
Press this button to return to a previous screen.
2/3. VOL+/VOL-
Press VOL+ to increase the volume level.
Press VOL- to decrease the volume level.
4. POWER
Press to turn the unit on, or to turn the screen on
or off.
Press and hold to access the Power Off menu.
5. Headphone
Audio output connection for headphones.
6. TF CARD
Load external microSD memory cards here.
7. micro USB OTG
Connect to a USB device.
8.DC IN 5V
Change and power the tablet with the included
power adapter.
1
2
4
5
6
7
8
3
VOL - VO L
+

Getting Started
Turning the Tablet on or off
2. Touch ok the screen to turn off the tablet.
Turning the Screen On or off
(Standby)
When the tablet is on, you can turn off the
screen to conserve battery power. Simply press
the Power key once to turn the screen
off. Press the Power key again to turn the
screen back on.
To turn the tablet on:
Press and hold the Power key until the LCD
screen turns on. Wait until the Home screen
appears; the tablet is now ready for use.
To turn the tablet off:
1.Press and hold the Power key until the
Device Options menu appears.
To conserve battery power, the screen
can be set to turn off automatically when
the tablet is not in use (between
1 minute and 30 minutes).
This Screen timeout option can be found
in the Display menu.
4

Getting Started
5
Unlocking the Screen
About Applications
To open an application, touch the application
icon on the home screen or in the Launcher
where you can tap the icon right up on the
home screen to get in..
Launcher screen:
The screen shown above is for illustrative
purposes only. Reserves the right to modify
and improve the final list of applications
available on the tablet.
When the screen turns off, you will have to
unlock the screen
when you turn it back on.
To unlock the screen, drag the lock icon across
the screen towards the lock icon.
.

About Applications
6
Preinstalled Applications
Some applications have been installed on your
tablet for your convenience.
These applications include:
Browse the web.
Perform simple mathematical operations.
Take pictures or videos with the
frontfacing camera.
Check your e-mail.
Play music.
Access the Settings menu to adjust the
tablet’s options.
Preinstalled Applications
Installing Applications
You can also download an install additional
applications from the device’s applications
marketplace, the web browser, or other
sources.
The tablet must be set to allow installation of
applications from non-Market sources. The
Unknown sources option can be set in the
Application settings menu.

7
Connect to a Wi-Fi network
The Notification bar displays icons that indicate
your tablet’s Wi-Fi status.
Notification that an open Wi-Fi network is
in range.
Connected to a Wi-Fi network (waves
indicate connection strength).
When Wi-Fi is on, the tablet will look for and
display a list of available Wi-Fi networks.
[no icon] There are no Wi-Fi networks in
range, or the Wi-Fi radio is off.
1. Turn on the Wi-Fi radio if it is not already
on. To turn on Wi-Fi:
a.Go to the Home screen: Press the Home
key.
b.Open the Settings menu: tap the icon right
up on the home screen to get into the
launcher, then touch Settings icon.
c.Open the Wireless & networks menu: Slide
the icon to ON status.
If a network that you have connected to
previously is found, the tablet will
connect to it.If you don’t see your
network in the list, you can force the
tablet to re-scan. To scan for networks,
tap the Menu key, and then touch Scan.

8
Connect to a Wi-Fi network
To learn about how to add a Wi-Fi network
when it is not in range or when the router
is set to obscure the network name (SSID);
or to configure advanced Wi-Fi options,
please refer to the manual.
When you have successfully connected to a
Wi-Fi network, the Notifications bar at the the low
of the screen will show a Wi-Fi signal indicator.
2. Select an available Wi-Fi network to connect
to:
In the same Wi-Fi settings menu above,touch a
network in the list.
If the network is open,the tablet will prompt you to
confirm connection to the network. Touch Connect
to confirm.
If the network is secured (as indicated by a Lock
icon),the tablet will prompt you to enter a
password or other credentials.Touch the Wireless
password box to show the on-screen keyboard
and then use it to enter the password. Touch
Connect to confirm.

9
Optional Connections
Connecting to a Computer 3.Mount the storage.
Touch button Turn on USB storage to mount the
tablet’s built-in storage. When it is mounted, you
can copy files to or from your tablet.
Connect the tablet to a computer to transfer files.
1.Connect your tablet to the computer.
With the included USB cable: Plug the small end
of the cable into the USB 2.0 high speed
connector of the tablet. Plug the large end of the
cable into an available USB 2.0 high speed port
on the computer.
2.When your tablet is connected,slide up the
USB icon right down on the screen and then
touch icon USB connected.

10
Specifications
Music was tested with a 128 kbps MP3 file; video
was tested with a 1920x1080 MPEG-4/AVC file;
browsing was tested with the screen brightness
set to default. Actual playback results may vary.
Processor
RAM
Storage
Display
Wi-Fi Networking
Audio Output
PC Interface
Additional Features
Operating System
Power
Playback Time
(hours)
Allwinner A13 1GHz(Cortex A8)
512MB DDR3
4 (option) flash built-in; micro
SD card slot (max.32GB supported)
9.0” TFT LCD(800x480), Capacitive
touchscreen
IEEE 802.11 b/g/n
3.5mm headphone
USB 2.0 high speed
Up to 8 hours music,
4 hours video,
3.5 hours web browsing
Built-in microphone
Front facing camera(0.3MP)
1W speaker
Android™ 4.1
Rechargeable Li-poly battery power
Adapter(DC 5V,2A)

HANDLEIDING DIT901102
*ANY PROBLEM OR QUESTIONS, CALL SUPPORT DESK 0900-3437623 (NL)
*VRAGEN OF PROBLEMEN, BEL ONZE SUPPORT DESK 0900-3437623 (NL)
*BEI FRAGEN ODER PROBLEMEN WENDEN SIE SICH BITTE AN UNSEREN
SERVICE: 00-31-348 409 371 (DU)
*VRAGEN OF PROBLEMEN, BEL ONZE SUPPORT DESK 0900-88020 (BE)
*SI VOUS AVEZ DES QUESTIONS SOIR DES PROBLEMES, CONTACTEZ-NOUS
AU NUMERO DE SAV SUIVANTE: 0900-88020 (BE)
www.difrnce.com

1
Inhoudsopgave
Inhoudsopgave………………................................................ ...............P1
Kenmerken................................................................................. .............P2
Het apparaat in een oogopslag..................................................P3
Beginnen................................................................................ .........P4-P5
Over toepassingen.................................................................. .........P4-P5
Voorgeïnstalleerde toepassingen.......................................... ..............P6
Verbinden met een Wi-Fi netwerk.................................................P7-P8
Optionele verbindingen..........................................................................P9
Specificaties.................................................................................. ..........P10

2
Kenmerken
Surf op het internet.
Bezoek uw favoriete websites
Controleer uw email
Houd contact met vrienden en familie
Bekijk YouTube™ video's
Blader door de meest populaire
video-sharing community
Lees uw favoriete boeken
Download duizenden boeken met de beschikbare E-book reader *
Ontdek duizenden apps voor Android™
Spelletjes, toepassingen en meer met
toepassingenmarkt (te installeren door klant)
Maak draadloos verbinding met internet
Snelle Wi-Fi 802,11 b/g/n netwerkverbinding
Geniet overal van uw mediabibliotheek
Draagbare krachtpatser speelt populaire muziek-,
video- en fotoformaten
microSD geheugenkaartlezer
Verhoog uw opslagcapaciteit (tot 32 GB
ondersteund)
Ingebouwde camera
Handige front-facing camera
Automatische oriëntatiedetectie
Lees hoe u wilt; het display past zichzelf automatisch aan!
Het lezen van boeken in het ePub-formaat vereist de meegeleverde E-book
reader applicatie.
Android™ is a trademark of Google Inc

3
Het apparaat in een oogopslag
1.ESC
Druk op deze knop om terug te keren naar een vorig scherm.
2/3. VOL+/VOL-
Druk op VOL+ om het volume te verhogen.
Druk op VOL- om het volume te verlagen.
4. AAN/UIT
Indrukken om het apparaat aan te zetten,of om het scherm aan en uit te zetten.
Indrukken en vasthouden om toegang te verkrijgen tot het Uitschakelmenu
5. Hoofdtelefoon
Audio-uitgang aansluiting voor een hoofdtelefoon.
6. TF-KAART
Laad hier externe microSD-geheugenkaarten.
7. micro-USB OTG
Sluit aan op een USB-apparaat
8.DC IN 5V
Laad en voorzie de tablet van stroom met de bijgeleverde adapter.

4
Beginnen, de tablet aan- of uitzetten
Om het apparaat aan te zetten:
Druk de aan-/uit knop in en houd deze even vast tot het LCD-scherm aan gaat.
Wacht tot het beginscherm verschijnt; de tablet is nu gereed voor gebruik.
Om het apparaat uit te zetten:
1. Druk de aan-/uit knop in en houd deze even vast tot het apparaat-opties menu
verschijnt.
2. Druk op ok op het scherm om de tablet uit te zetten.
Het scherm aan- of uitzetten (stand-by)
Als de tablet aan staat, kunt u het scherm uitschakelen om de batterijen te
sparen. Druk eenvoudig éénmaal op de aan-/uit knop om het scherm uit te
zetten. Druk de aan-/uit knop nogmaals in om het scherm weer aan te zetten.
Om de batterijen te sparen kan het scherm z
o
ingesteld worden dat het automatisch uitgaat al
s
de tablet niet gebruikt wordt (tussen 1 minuur e
n
30 minuten).
Deze time-out optie voor het scherm kunt
u
vinden in het displaymenu

5
Beginnen
Het scherm ontgrendelen
Wanneer het scherm uitschakelt dient u het scherm weer vrij te geven wanneer u
het scherm weer inschakelt.
Om het scherm vrij te geven sleept u het slot-pictogram over het scherm naar het
vrijgeef-pictogram.
Over toepassingen
Om een toepassing te openen raakt u het toepassingspictogram aan op het
beginscherm of in het startmenu waar u op het pictogram kunt klikken om het
te starten of op het beginscherm te zetten.
Startmenu:
Het getoonde scherm hierboven dient slechts te
r
illustratie. Het recht is voorbehouden d
e
uiteindelijke lijst met op de tablet geïnstalleerd
e
toepassingen aan te passen en te verbeteren

6
Over toepassingen
Voorgeïnstalleerde toepassingen
Sommige toepassingen zijn voor uw gemak reeds op uw tablet geïnstalleerd.
Deze toepassingen zijn onder andere:
Surf het internet.
Voer eenvoudige wiskundige berekeningen uit.
Maak foto's of video's met de voorste camera.
Lees uw email.
Speel muziek
Ga naar het instellingenmenu om de opties van de tablet aan te passen.
Voorgeïnstalleerde toepassingen
Installeren van toepassingen
U kunt extra toepassingen downloaden en installeren vanuit de
toepassingenmarkt van de tablet, het internet of andere bronnen.:

7
Verbinden met een Wi-Fi netwerk
De statusbalk toont pictogrammen die de Wi-Fi status van uw tablet weergeven.
Bericht dat er een open Wi-Fi netwerk binnen bereik is.
Verbonden met een Wi-Fi netwerk (golfjes geven de sterkte van de
verbinding aan).
[geen pictogram] Er zijn geen Wi-Fi netwerken binnen bereik, of de Wi-Fi functie
staat uit.
1. Zet de Wi-Fi functie aan als deze niet aanstaat.
Om de Wi-Fi aan te zetten:
a. Ga naar het beginscherm: Druk op de home-knop.
b. Open het instellingenmenu: tik op het pictogram rechts op het startscherm
om in het startmenu te komen, raak dan het instellingenpictogram aan.
c. Open het draadloos & netwerkmenu: Sleep het pictogram naar AAN.
Wanneer Wi-Fi aan staat zal de tablet gaan zoeken naar beschikbare Wi-Fi
netwerken en deze in een lijst weergeven.
Als er een netwerk wordt gevonden waar u al eerder
mee verbonden bent geweest zal de tablet daar
verbinding mee maken.
Al u uw netwerk niet ziet in de lijst, kunt u de tablet
opnieuw laten zoeken. Om te zoeken naar netwerken tikt
u op de menu-toets en daarna op zoeken.

8
Verbinden met een Wi-Fi netwerk
2. Selecteer een beschikbaar Wi-Fi netwerk om mee te verbinden:
In hetzelfde Wi-Fi-instellingen menu als hierboven tikt u op een netwerk in de
lijst.
Wanneer het netwerk open is, zal de tablet u vragen om de verbinding met het
netwerk te bevestigen.
Tik op verbinden om te bevestigen.
Wanneer het netwerk beveiligd is (dit wordt aangegeven door een pictogram van
een slotje), zal de tablet u vragen een wachtwoord of andere referenties in te
voeren. Tik op het draadloos wachtwoordvakje om het toetsenbord tevoorschijn
te halen en gebruik dit om het wachtwoord in te voeren.
Tik op verbinden om te bevestigen.
Wanneer u succesvol verbonden bent met een Wi-Fi netwerk, zal de
mededelingenbalk onderaan het scherm een Wi-Fi signaalindicator
weergeven.
Om te leren hoe een Wi-Fi-netwerk toe te voegen dat niet binnen
bereik is of wanneer een router ingesteld is om de naam van het netwerk
(SSID) te verbergen; of om uitgebreide Wi-Fi mogelijkheden te configureren,
kijkt u in de handleiding.
Table of contents
Languages:
Other Difrnce Tablet manuals
