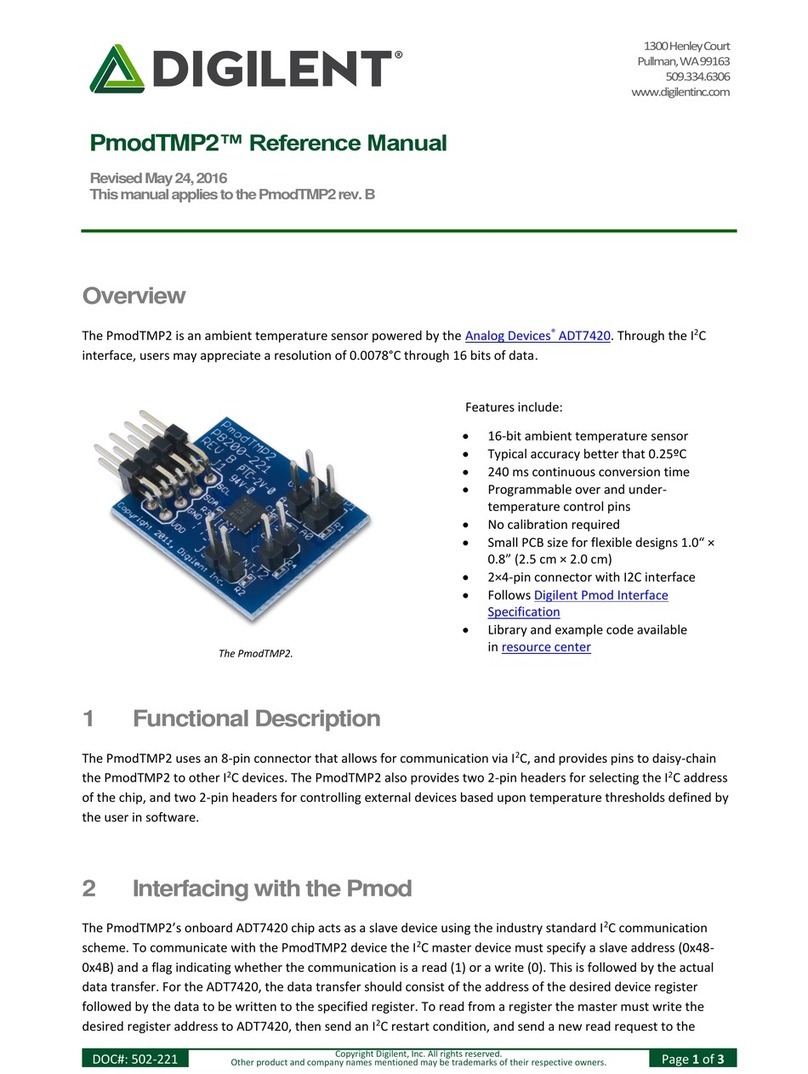
Digilent Pmod CMPS2 User manual

1300HenleyCourt
Pullman,WA99163
509.334.6306
www.store.digilent.com
PmodCMPS2™ Reference Manual
RevisedJuly19,2017
ThismanualappliestothePmodCMPS2rev.A
DOC#: 410-355
Copyright Digilent, Inc. All rights reserved.
Other product and company names mentioned may be trademarks of their respective owners.
Page 1of 12
TableofContents
Table of Contents .................................................................................................................. 1
Overview............................................................................................................................... 2
1Specifications................................................................................................................. 2
1.1 Pinout Table Diagram....................................................................................................... 3
1.2 Physical Dimensions ......................................................................................................... 3
2Functional Description ................................................................................................... 3
2.1 Serial Communication ...................................................................................................... 3
2.2 Register Details................................................................................................................. 3
2.2.1 Data Registers ........................................................................................................... 3
2.2.2 Status Register .......................................................................................................... 4
2.2.3 Internal Control Registers ......................................................................................... 4
2.2.4 Continuous Measurement Mode.............................................................................. 5
2.2.5 Output Resolution Measurement Time.................................................................... 5
2.3 Quick Start........................................................................................................................ 5
2.4 Applications Information.................................................................................................. 7
2.4.1 Calibration................................................................................................................. 7
2.4.2 Data Conversion...................................................................................................... 11
2.5 Timing Diagrams............................................................................................................. 12
Downloaded from Arrow.com.

Pmod CMPS2™ Reference Manual
Copyright Digilent, Inc. All rights reserved.
Other product and company names mentioned may be trademarks of their respective owners.
Page 2of 12
Overview
The Digilent Pmod CMPS2 is a 3 axis anisotropic magneto-resistive sensor. With Memsic's MMC34160PJ, the local
magnetic field strength in a ±16 Gauss range with a heading accuracy of 1° and up to 0.5 mG of resolution.
1 Specifications
The Pmod CMPS2.
Features include:
Low noise 3-axis Digital Compass
0.5 mG Field Resolution in ±16 Gauss fields
I²C Slave, FAST (≤400 kHz) mode
Optional pull-up resistors for SCL and SDA pins
±1° heading accuracy
Small PCB size for flexible designs 0.8“ × 1.25” (2.0
cm × 3.2 cm)
6-pin Pmod connector with I²C serial interface
Pass-through Pmod host port for daisy chaining
Follows Digilent Pmod Interface Specification 1.1.0
Library and example code in the Pmod
CMPS2 Resource Center
Parameter
Min
Typical
Max
Units
Power Supply Voltage
1.62
1.8
3.6
V
Output Resolution
12
14
16
bits
Alignment Error
-3
±1
+3
Degrees
Parameter
Condition
Value
Units
Total RMS Noise
16 bits at 7.92 ms/S
1.5
mG
Total RMS Noise
16 bits at 4.08 ms/S
2.0
mG
Total RMS Noise
14 bits at 2.16 ms/S
4.0
mG
Total RMS Noise
12 bits at 1.20 ms/S
6.0
mG
Max Output Data Rate
16 bits at 7.92 ms/S
125
Hz
Max Output Data Rate
16 bits at 4.08/S
250
Hz
Max Output Data Rate
14 bits at 2.16 ms/S
450
Hz
Max Output Data Rate
12 bits at 1.20 ms/S
800
Hz
Parameter
Value
Units
Field Range for Each Axis
±16
G
Downloaded from Arrow.com.Downloaded from Arrow.com.

Pmod CMPS2™ Reference Manual
Copyright Digilent, Inc. All rights reserved.
Other product and company names mentioned may be trademarks of their respective owners.
Page 3of 12
1.1 PinoutTableDiagram
Header J1
Header J2
Jumper JP1
Pin
Signal
Description
Pin
Signal
Description
Pin
Status
Description
1
N/C
Not Connected
1
N/C
Not Connected
SCL
Loaded
4.7 kΩ Pullup
to Vcc
2
N/C
Not Connected
2
N/C
Not Connected
SCL
Unloaded
No Pullup to
Vcc
3
SCL
Serial Clock
3
SCL
Serial Clock
SDA
Loaded
4.7 kΩ Pullup
to Vcc
4
SDA
Serial Data
4
SDA
Serial Data
SDA
Unloaded
No Pullup to
Vcc
5
GND
Power Supply
Ground
5
GND
Power Supply
Ground
6
VCC
Power Supply
(3.3V)
6
VCC
Power Supply
(3.3V)
1.2 PhysicalDimensions
The pins on the pin header are spaced 100 mil apart. The PCB is 1.25 inches long on the sides parallel to the pins on
the pin header and 0.8 inches long on the sides perpendicular to the pin header.
2 FunctionalDescription
The Pmod CMPS2 utilizes the MMC34160PJ to collect magnetic field data. While communicating with the host
board via the I²C protocol using an I²C address of 0x0110000/ users can measure the ±16 G field surrounding the
device.
2.1 SerialCommunication
The Pmod CMPS2 communicates with the host board via the I²C protocol. By first sending the 7-bit I²C device
address of 0110000 and then a read/write bit (high/low logic level, respectively), followed by the register address
of interest at a maximum clock frequency of 400 kHz users can both configure and read from the Pmod CMPS2. An
additional set of pins on header J2 is provided so that users may daisy chain the Pmod CMPS2 with other I²C
devices.
2.2 RegisterDetails
2.2.1 DataRegisters
Each Cartesian axis has two registers to store the high and low data bytes for each measurement. The data
registers are arranged in a low byte, high byte arrangement.
Data Registers addresses 0x00 to 0x05
Address
Register Name
0x00
X out LSB
0x01
X out MSB
Downloaded from Arrow.com.Downloaded from Arrow.com.Downloaded from Arrow.com.

Pmod CMPS2™ Reference Manual
Copyright Digilent, Inc. All rights reserved.
Other product and company names mentioned may be trademarks of their respective owners.
Page 4of 12
Data Registers addresses 0x00 to 0x05
Address
Register Name
0x02
Y out LSB
0x03
Y out MSB
0x04
Z out LSB
0x05
Z out MSB
2.2.2 StatusRegister
Bit Name
Bit Number
Bit Description
Bit Values
Functional Description
RSV
[7]
Reserved
0¹
Reserved Bit
RSV
[6]
Reserved
0¹
Reserved Bit
RSV
[5]
Reserved
0¹
Reserved Bit
RSV
[4]
Reserved
0¹
Reserved Bit
ST_XYZ_OK
[3]
ST_XYZ_OK
0¹
Indicates that the selftest was OK when
this bit is a "1"
Rd_Done
[2]
Rd_Done
0¹
Indicates that chip was successfully able
to read its memory.
Pump On
[1]
Pump On
0¹
This bit indicates the status of the charge
pump.
RSV
[0]
Meas Done
0¹
Indicates that a measurement event is
completed.
2.2.3 InternalControlRegisters
Internal Control 0
Bit Name
Bit Number
Bit Description
Bit Values
Functional Description
Refill Cap
[7]
Refill Cap
0¹
Setting this bit will recharge
the
capacitor at the CAP pin, it is
requested to be issued
before the SET/RESET
command
RST
[6]
Reset Sensor
0¹
Setting this bit will reset the
sensor
SET
[5]
Set Sensor
0¹
Setting this bit will set the
sensor
No Boost
[4]
No boost
0¹
Disable the charge pump
CM Freq1²
[3]
Continuous
Measurement bit 1
0¹
Controls the continuous
measurement rate of the
chip
CM Freq0²
[2]
Continuous
Measurement bit 0
0¹
Controls the continuous
measurement rate of the
chip
Cont Mode On
[1]
Continuous
Measurement
Mode
0¹
Setting this bit enables
Continuous Measurement
Mode
TM
[0]
Take Measurement
0¹
Setting this bit will initiate a
reading
Downloaded from Arrow.com.Downloaded from Arrow.com.Downloaded from Arrow.com.Downloaded from Arrow.com.

Pmod CMPS2™ Reference Manual
Copyright Digilent, Inc. All rights reserved.
Other product and company names mentioned may be trademarks of their respective owners.
Page 5of 12
Internal Control 1
Bit Name
Bit Number
Bit Description
Bit Values
Functional Description
RST
[7]
Software reset bit
0¹
Normal Operation, this bit
self clears
TEMP-tst
[6]
Temp test
0¹
Factory-use register
ST_XYZ
[5]
Selftest check
0¹
Set this bit an execute TM
command, the result can be
read as bit ST-XYZ_OK
Z-inhibit
[4]
Z-inhibit
0¹
Factory-use register
Y-inhibit
[3]
Y-inhibit
0¹
Factory-use register
X-inhibit
[2]
X-inhibit
0¹
Factory-use register
BW1³
[1]
Bandwidth bit
0¹
Controls the output
resolution and
measurement time
BW0³
[0]
Bandwidth bit
0¹
Controls the output
resolution and
measurement time
Notes:
¹ - This is the value on power-up and reset
² - For more details see the Continuous Measurement Mode section
³ - For more details see the Output Resolution and Measurement Time section
2.2.4 ContinuousMeasurementMode
Continuous Measurement Mode Settings
CM Freq1
CM Freq0
Frequency
0
0
1.5 Hz
0
1
13 Hz
1
0
25 Hz
1
1
50 Hz
2.2.5 OutputResolutionMeasurementTime
Bandwidth Output Resolution and Measurement Time
BW1
BW0
Output Resolution
Measurement Time
0
0
16 bits
7.92 mS
0
1
16 bits
4.08 mS
1
0
14 bits
2.16 mS
1
1
12 bits
1.20 mS
2.3 QuickStart
Here is the series of commands to acquire a set of magnetometer data from the Pmod CMPS2 via pseudo I²C code.
1. Power on the Pmod CMPS2 and wait for 10 mS before further operation.
2. Provide a START condition and call the device ID with a write bit
Downloaded from Arrow.com.Downloaded from Arrow.com.Downloaded from Arrow.com.Downloaded from Arrow.com.Downloaded from Arrow.com.

Pmod CMPS2™ Reference Manual
Copyright Digilent, Inc. All rights reserved.
Other product and company names mentioned may be trademarks of their respective owners.
Page 6of 12
I2CBegin(0xA0); //device ID 0x30 with a write (0) bit
3. Wait to receive an ACK from the Pmod CMPS2.
4. Send the Internal Control Register 0 (address 0x07) as the register to communicate with
I2CWrite(0x07); //address 0x07 corresponds to Control Register 0
5. Wait to receive an ACK from the Pmod CMPS2.
6. Write the command to take a measurement by setting bit 0 high followed by a STOP bit.
I2CWrite(0x01); //0x01 initiates a data acquisition
7. Delay at least 7.92 mS by default to allow the Pmod CMPS2 to finish collecting data.
8. Provide a START condition and call the device ID with a write bit
I2CBegin(0xA0); //device ID 0x30 with a write (0) bit
9. Wait to receive an ACK from the Pmod CMPS2.
10. Send the Status Register (0x03) as the register to read
I2CWrite(0x03); //indicate you wish to interact with address 0x03
11. Provide a START condition and call the device ID with a read bit
I2CBegin(0xA1); //device ID 0x30 with a read (1) bit
12. Wait to receive an ACK from the Pmod CMPS2.
13. Cycle the SCL line to receive the Status Register data on the SDA line. Keep reading the Status Register by
repeating steps 8 through 13 until bit 0 is set to '1', indicating that the data on all 3 axes as available to be
read.
14. Provide a START condition and call the device ID with a write bit
I2CBegin(0xA0); //device ID 0x30 with a write (0) bit
15. Wait to receive an ACK from the Pmod CMPS2.
16. Send the first register address corresponding to Xout LSB (0x00) as the register to be read.
I2CWrite(0x00); //address 0x00 as the first register to be read
17. Provide a START condition and call the device ID with a read bit
I2CBegin(0xA1); //device ID 0x30 with a read (1) bit
18. Wait to receive an ACK from the Pmod CMPS2.
19. Cycle the SCL line to receive the data bits from the X, Y, and Z registers in the SDA line, providing an ACK
between each data byte. The Pmod CMPS2 address pointer automatically moves to each consecutive
byte. End the communication by sending a NACK followed by a STOP command.
Downloaded from Arrow.com.Downloaded from Arrow.com.Downloaded from Arrow.com.Downloaded from Arrow.com.Downloaded from Arrow.com.Downloaded from Arrow.com.

Pmod CMPS2™ Reference Manual
Copyright Digilent, Inc. All rights reserved.
Other product and company names mentioned may be trademarks of their respective owners.
Page 7of 12
I2CReadMultiple(6); //read six bytes, sending an ACK to the slave device betwe
en each byte received and a NACK after the last byte
20. Convert the readings into usable data. More details are available in the Data Conversion section.
21. Wait 1/3 of the acquisition time (by default 2.64 ms) before performing another measurement.
2.4 ApplicationsInformation
The Pmod CMPS2 is an ideal Pmod to use as a compass. Like all compasses, it is recommended that the Pmod
CMPS2 is calibrated before using the module.
2.4.1 Calibration
To calibrate the magnetometer, the offset associated with the magnetic sensors and the environment needs to be
calculated and removed from future measurements.
The internal offset can be calculated and accounted for through the following method:
1. Power on the Pmod CMPS2 and wait for 10 mS before further operation.
2. Provide a START condition and call the device ID with a write bit
I2CBegin(0xA0); //device ID 0x30 with a write (0) bit
3. Wait to receive an ACK from the Pmod CMPS2.
4. Send the Internal Control Register 0 (address 0x07) as the register to communicate with
I2CWrite(0x07); //address 0x07 corresponds to Control Register 0
5. Wait to receive an ACK from the Pmod CMPS2.
6. Write the command to recharge the capacitor to prepare for the SET action.
I2CWrite(0x80); //0x80 refills the capacitor
7. Wait to receive an ACK from the Pmod CMPS2.
8. Delay at least 50 mS to allow the Pmod CMPS2 to finish preparing.
9. Provide a START condition and call the device ID with a write bit
I2CBegin(0xA0); //device ID 0x30 with a write (0) bit
10. Wait to receive an ACK from the Pmod CMPS2.
11. Send the Internal Control Register 0 (address 0x07) as the register to communicate with
I2CWrite(0x07); //address 0x07 corresponds to Control Register 0
12. Wait to receive an ACK from the Pmod CMPS2.
13. Write the command to start a SET action.
Downloaded from Arrow.com.Downloaded from Arrow.com.Downloaded from Arrow.com.Downloaded from Arrow.com.Downloaded from Arrow.com.Downloaded from Arrow.com.Downloaded from Arrow.com.

Pmod CMPS2™ Reference Manual
Copyright Digilent, Inc. All rights reserved.
Other product and company names mentioned may be trademarks of their respective owners.
Page 8of 12
I2CWrite(0x20); //0x20 starts the SET action
14. Wait to receive an ACK from the Pmod CMPS2.
15. Delay at least 1 mS to allow the Pmod CMPS2 to finish the SET action.
16. Provide a START condition and call the device ID with a write bit
I2CBegin(0xA0); //device ID 0x30 with a write (0) bit
17. Wait to receive an ACK from the Pmod CMPS2.
18. Send the Internal Control Register 0 (address 0x07) as the register to communicate with
I2CWrite(0x07); //address 0x07 corresponds to Control Register 0
19. Wait to receive an ACK from the Pmod CMPS2.
20. Write the command to take a measurement by setting bit 0 high followed by a STOP bit.
I2CWrite(0x01); //0x01 initiates a data acquisition
21. Delay at least 7.92 mS by default to allow the Pmod CMPS2 to finish collecting data.
22. Provide a START condition and call the device ID with a write bit
I2CBegin(0xA0); //device ID 0x30 with a write (0) bit
23. Wait to receive an ACK from the Pmod CMPS2.
24. Send the Status Register (0x03) as the register to read
I2CWrite(0x03); //indicate you wish to interact with address 0x03
25. Provide a START condition and call the device ID with a read bit
I2CBegin(0xA1); //device ID 0x30 with a read (1) bit
26. Wait to receive an ACK from the Pmod CMPS2.
27. Cycle the SCL line to receive the Status Register data on the SDA line. Keep reading the Status Register by
repeating steps 8 through 13 until bit 0 is set to '1', indicating that the data on all 3 axes as available to be
read.
28. Provide a START condition and call the device ID with a write bit
I2CBegin(0xA0); //device ID 0x30 with a write (0) bit
29. Wait to receive an ACK from the Pmod CMPS2.
30. Send the first register address corresponding to Xout LSB (0x00) as the register to be read.
I2CWrite(0x00); //address 0x00 as the first register to be read
31. Provide a START condition and call the device ID with a read bit
Downloaded from Arrow.com.Downloaded from Arrow.com.Downloaded from Arrow.com.Downloaded from Arrow.com.Downloaded from Arrow.com.Downloaded from Arrow.com.Downloaded from Arrow.com.Downloaded from Arrow.com.

Pmod CMPS2™ Reference Manual
Copyright Digilent, Inc. All rights reserved.
Other product and company names mentioned may be trademarks of their respective owners.
Page 9of 12
I2CBegin(0xA1); //device ID 0x30 with a read (1) bit
32. Wait to receive an ACK from the Pmod CMPS2.
33. Cycle the SCL line to receive the data bits from the X, Y, and Z registers in the SDA line, providing an ACK
between each data byte. The Pmod CMPS2 address pointer automatically moves to each consecutive
byte. End the communication by sending a NACK followed by a STOP command.
I2CReadMultiple(6); //read six bytes, sending an ACK to the slave device betwe
en each byte received and a NACK after the last byte
34. Each of the readings will contain the external magnetic field Hin addition to offset associated with the
current put through the coil by the SET action.
𝑂𝑢𝑡𝑝𝑢𝑡1 = +𝐻 +𝑂𝑓𝑓𝑠𝑒𝑡
35. Now a RESET action will be performed to reverse the magnetization for the sensing resistors to get the
inverse offset value.
36. Provide a START condition and call the device ID with a write bit
I2CBegin(0xA0); //device ID 0x30 with a write (0) bit
37. Wait to receive an ACK from the Pmod CMPS2.
38. Send the Internal Control Register 0 (address 0x07) as the register to communicate with
I2CWrite(0x07); //address 0x07 corresponds to Control Register 0
39. Wait to receive an ACK from the Pmod CMPS2.
40. Write the command to recharge the capacitor to prepare for the RESET action.
I2CWrite(0x80); //0x80 refills the capacitor
41. Wait to receive an ACK from the Pmod CMPS2.
42. Delay at least 50 mS to allow the Pmod CMPS2 to finish preparing.
43. Provide a START condition and call the device ID with a write bit
I2CBegin(0xA0); //device ID 0x30 with a write (0) bit
44. Wait to receive an ACK from the Pmod CMPS2.
45. Send the Internal Control Register 0 (address 0x07) as the register to communicate with
I2CWrite(0x07); //address 0x07 corresponds to Control Register 0
46. Wait to receive an ACK from the Pmod CMPS2.
47. Write the command to start a RESET action.
I2CWrite(0x40); //0x40 starts the RESET action
48. Wait to receive an ACK from the Pmod CMPS2.
49. Delay at least 1 mS to allow the Pmod CMPS2 to finish the SET action.
Downloaded from Arrow.com.Downloaded from Arrow.com.Downloaded from Arrow.com.Downloaded from Arrow.com.Downloaded from Arrow.com.Downloaded from Arrow.com.Downloaded from Arrow.com.Downloaded from Arrow.com.Downloaded from Arrow.com.

Pmod CMPS2™ Reference Manual
Copyright Digilent, Inc. All rights reserved.
Other product and company names mentioned may be trademarks of their respective owners.
Page 10 of 12
50. Provide a START condition and call the device ID with a write bit
I2CBegin(0xA0); //device ID 0x30 with a write (0) bit
51. Wait to receive an ACK from the Pmod CMPS2.
52. Send the Internal Control Register 0 (address 0x07) as the register to communicate with
I2CWrite(0x07); //address 0x07 corresponds to Control Register 0
53. Wait to receive an ACK from the Pmod CMPS2.
54. Write the command to take a measurement by setting bit 0 high followed by a STOP bit.
I2CWrite(0x01); //0x01 initiates a data acquisition
55. Delay at least 7.92 mS by default to allow the Pmod CMPS2 to finish collecting data.
56. Provide a START condition and call the device ID with a write bit
I2CBegin(0xA0); //device ID 0x30 with a write (0) bit
57. Wait to receive an ACK from the Pmod CMPS2.
58. Send the Status Register (0x03) as the register to read
I2CWrite(0x03); //indicate you wish to interact with address 0x03
59. Provide a START condition and call the device ID with a read bit
I2CBegin(0xA1); //device ID 0x30 with a read (1) bit
60. Wait to receive an ACK from the Pmod CMPS2.
61. Cycle the SCL line to receive the Status Register data on the SDA line. Keep reading the Status Register by
repeating steps 8 through 13 until bit 0 is set to '1', indicating that the data on all 3 axes as available to be
read.
62. Provide a START condition and call the device ID with a write bit
I2CBegin(0xA0); //device ID 0x30 with a write (0) bit
63. Wait to receive an ACK from the Pmod CMPS2.
64. Send the first register address corresponding to Xout LSB (0x00) as the register to be read.
I2CWrite(0x00); //address 0x00 as the first register to be read
65. Provide a START condition and call the device ID with a read bit
I2CBegin(0xA1); //device ID 0x30 with a read (1) bit
66. Wait to receive an ACK from the Pmod CMPS2.
Downloaded from Arrow.com.Downloaded from Arrow.com.Downloaded from Arrow.com.Downloaded from Arrow.com.Downloaded from Arrow.com.Downloaded from Arrow.com.Downloaded from Arrow.com.Downloaded from Arrow.com.Downloaded from Arrow.com.Downloaded from Arrow.com.

Pmod CMPS2™ Reference Manual
Copyright Digilent, Inc. All rights reserved.
Other product and company names mentioned may be trademarks of their respective owners.
Page 11 of 12
67. Cycle the SCL line to receive the data bits from the X, Y, and Z registers in the SDA line, providing an ACK
between each data byte. The Pmod CMPS2 address pointer automatically moves to each consecutive
byte. End the communication by sending a NACK followed by a STOP command.
I2CReadMultiple(6); //read six bytes, sending an ACK to the slave device betwe
en each byte received and a NACK after the last byte
68. Each of the readings will contain the external magnetic field Hin addition to offset associated with the
current put through the coil by the RESET action.
𝑂𝑢𝑡𝑝𝑢𝑡2 = −𝐻 +𝑂𝑓𝑓𝑠𝑒𝑡
69. The offset associated with the device can be calculated and then subtracted from future measurements to
obtain the actual magnetic field.
𝑂𝑓𝑓𝑠𝑒𝑡 = 𝑂𝑢𝑡𝑝𝑢𝑡1+𝑂𝑢𝑡𝑝𝑢𝑡2
2
The other method of calibration is to remove the hard iron bias introduced to the magnetometer by the
surrounding environment by measuring (either continually or for a set time) all of the possible magnetometer
readings in a Cartesian sphere and keep track of the highest and lowest readings for each axis. The offset can then
be calculated in the same fashion as described above with the SET and RESET actions. The advantage of this
method is when the Pmod CMPS2 is continually changing locations or when other external magnetic fields may be
introduced into the test environment.
2.4.2 DataConversion
The Memsic MMC34160PJ provides data for each axis in units of Gauss, but the information is generally more
legible when presented as a compass heading. The method for converting Gauss units to a compass heading is
provided below.
1. Calculate the real Gauss value for the X and Y axes from the amount of LSBs returned where the LSB value
by default is 0.48828125 mG, resulting in 2048 LSBs per Gauss.
𝑥𝐺𝑎𝑢𝑠𝑠𝐷𝑎𝑡𝑎 = 𝑥𝐷𝑎𝑡𝑎𝐿𝑆𝐵 ∗0.48828125𝑚𝐺
𝑥𝐺𝑎𝑢𝑠𝑠𝐷𝑎𝑡𝑎 = 𝑦𝐷𝑎𝑡𝑎𝐿𝑆𝐵 ∗ 0.48828125𝑚𝐺
2. Calculate the direction Dby first checking to see if the X Gauss data is equal to 0 to prevent divide by 0
zero errors in the future calculations. If the X Gauss data is 0, check to see if the Y Gauss data is less than
0. If Y is less than 0 Gauss, the direction D is 90 degrees; if Y is greater than or equal to 0 Gauss, the
direction D is 0 degrees.
3. If the X Gauss data is not zero, calculate the arctangent of the Y Gauss and X Gauss data and convert from
polar coordinates to degrees.
𝐷 = arctan(𝑦𝐺𝑎𝑢𝑠𝑠𝐷𝑎𝑡𝑎
𝑥𝐺𝑎𝑢𝑠𝑠𝐷𝑎𝑡𝑎) ∗180
𝜋
4. If the direction D is greater than 360 degrees, subtract 360 degrees from that value.
5. If the direction D is less than 0 degrees, add 360 degrees to that value.
6. The compass heading can then be determined by the direction value D:
If D is greater than 337.25 degrees or less than 22.5 degrees –North
If D is between 292.5 degrees and 337.25 degrees –North-West
If D is between 247.5 degrees and 292.5 degrees –West
If D is between 202.5 degrees and 247.5 degrees –South-West
If D is between 157.5 degrees and 202.5 degrees –South
Downloaded from Arrow.com.Downloaded from Arrow.com.Downloaded from Arrow.com.Downloaded from Arrow.com.Downloaded from Arrow.com.Downloaded from Arrow.com.Downloaded from Arrow.com.Downloaded from Arrow.com.Downloaded from Arrow.com.Downloaded from Arrow.com.Downloaded from Arrow.com.

Pmod CMPS2™ Reference Manual
Copyright Digilent, Inc. All rights reserved.
Other product and company names mentioned may be trademarks of their respective owners.
Page 12 of 12
If D is between 112.5 degrees and 157.5 degrees –South-East
If D is between 67.5 degrees and 112.5 degrees –East
If D is between 0 degrees and 67.5 degrees –North-East
2.5 TimingDiagrams
An example timing diagram for reading and writing to the Pmod CMPS2 taken from the Memsic datasheet is
provided below:
When using an external power supply to run the Pmod, be sure to stay within the parameters provided
in Specifications.
Downloaded from Arrow.com.Downloaded from Arrow.com.Downloaded from Arrow.com.Downloaded from Arrow.com.Downloaded from Arrow.com.Downloaded from Arrow.com.Downloaded from Arrow.com.Downloaded from Arrow.com.Downloaded from Arrow.com.Downloaded from Arrow.com.Downloaded from Arrow.com.Downloaded from Arrow.com.
Table of contents
Other Digilent Accessories manuals
Popular Accessories manuals by other brands

Vega
Vega VEGAVIB 62 operating instructions

Imetec
Imetec SCALDALETTO Instructions for use
YoSmart
YoSmart DS77-U02W user manual
PCB Piezotronics
PCB Piezotronics 740M04 Installation and operating manual
turck
turck FCS-G1/2A4-NAEX0/L065 manual
CMA Dishmachines
CMA Dishmachines FLOWRATE SENSOR 0387I user guide

UNITED
UNITED B4413 instruction manual

McAfee
McAfee IIP-M65K-ISAA - Network Security Platform... product manual
Tru-Test
Tru-Test WOW2 quick start guide
Heath
Heath Heathkit SB-644A Schematic diagram
Kobold
Kobold SEN-9601 operating instructions
American Standard
American Standard ACRYLUX 3838Y1K.DT Specifications
