7
Do not expose the outdoor sensor or main station to direct sunlight. Place them on a
horizontal, level surface or mount them on the vertical wall.
Make sure to put outdoor sensors under awnings to protect them from rain and direct sunlight.
The main station can be hung on a wall using the hole (23) on the back, or placed on a
horizontal, level surface by flipping out the stand (26).
ATTENTION:
Notes: Main station is designed for indoor use only.
Power on
1. Place the main station and 3 outdoor sensors on a flat, level surface.
2. Connect the power supply and insert 3 new AAA batteries into the back of the main station.
You will hear a short beep and see the weather icon blink. Press the “ ” button (32)
or “ ” button (33) to set a forecast based on TV or internet data, which can help improve
the accuracy of the weather forecast.Alternatively, you can press the “PRESSURE” button
(37) to skip this step and set the weather manually later (refer to the Weather Forecast &
Barometer Setting).
3. Insert 2 new AAA batteries into the battery compartment of the 3 outdoor sensors.
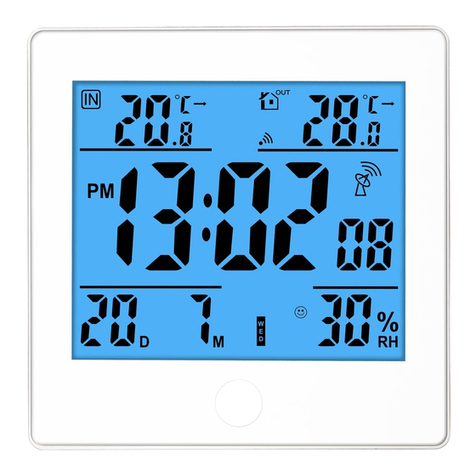
4. Connection process: The main station will automatically search for signals from the 3
outdoor sensors. This process may take a few minutes. The symbol (20) will blink under
each outdoor channel symbol (18) during connection. If the signal is successfully received,
the symbol (20) will stop blinking and display permanently.
5. Reception process: The radio tower symbol (5) will blink on the display as the main
station searches for the WWVB (US) / DCF77 (DE) radio signal. This process may take 3-7
minutes. During the reception process, only the “SNOOZE/LIGHT” button (39) will function.
If the radio signal reception is successful, the time (1), day of the week (6), and date (7) will
be automatically set, and the radio tower symbol (5) will stop blinking and permanently
appear on the display. If reception is unsuccessful and takes more than 7 minutes, the radio
tower symbol (5) will disappear. In this case, you can set the time manually (refer to the
Basic Settings).
During daylight-saving time, “DST” will appear on the display below the radio tower symbol (5)
Open the battery compartment of the outdoor sensor, press the “TX” button (46) to transmit the
measured data from the sensor to the main station. The LED light (44) will blink.
Press the “℃/℉” button (45) to select the temperature unit Celsius (℃) or Fahrenheit (℉).
1. Recent data backup will be saved when the batteries of the main station are installed.
When you unplug the adapter, the storage setting value will not be deleted.
Notes:
Manually Set Outdoor Sensor


