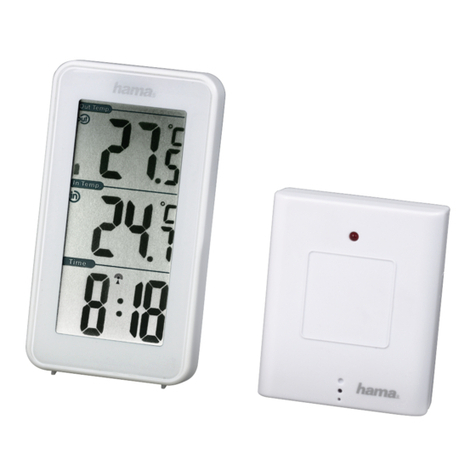
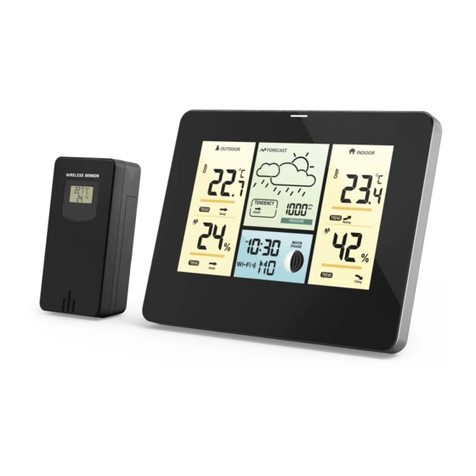
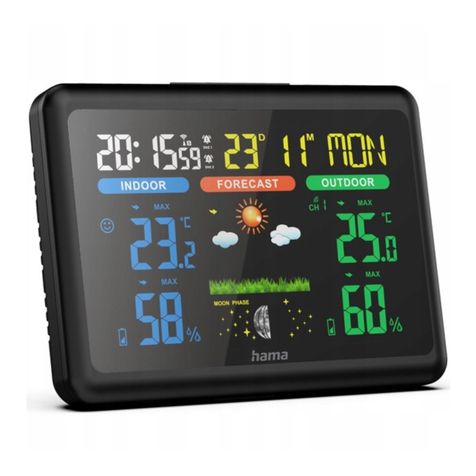
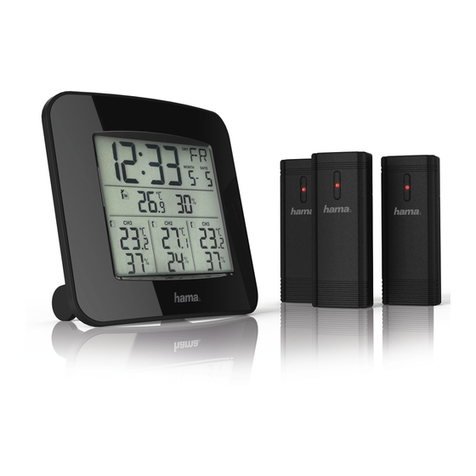
Hama EWSC-100 User manual

00
176965
“EWSC-100”Electronic Weather Station
Elektronische Wetterstation
E
CZ
F
D
GB
I
P
NL
GR
RO
H
FIN
BG
PL
S
RUS
SK
Használati útmutató
Návod kpoužití
Návod na použitie
Manual de instruções
Manual de utilizare
Bruksanvisning
Käyttöohje
Работна инструкция
Operating Instructions
Bedienungsanleitung
Mode d‘emploi
Instrucciones de uso
Руководство по эксплуатации
Istruzioni per l‘uso
Gebruiksaanwijzing
Οδηγίες χρήσης
Instrukcja obsługi

1
2
17
18
14
16
19
15
13
3
4
5
6
7
8
MAX/
MIN –DOWN –UP
–
ALARM–MODE–LIGHT
10
12
11
9
8
31 1

2
GOperating instruction
Controls and Displays
1. Display
2. Temperaturetrend display (h/°C)
3. MAX/MIN button =used to display the stored maximum/minimum
indoor and outdoor temperaturevalues
4. DOWN button (decrease set value)
5. UP button (increase set value)
6. ALARM button
7. MODE button
8. LIGHT button (display light)
9. Outdoor sensor
10. Opening for wall mounting
11. Stand
12. Battery compartment cover
13. Outdoor temperaturedisplay
14. Indoor temperaturedisplay
15. Four-level weather visualisation
=sunny,partly cloudy,cloudy,rainy
16.Humidity display (as %)
17. Time
18. Days of the week
19. Comfort display
1. Explanation of Warning Symbols and Notes
Warning
This symbol is used to indicate safety instructions or to draw your
attention to specichazards and risks.
Note
This symbol is used to indicate additional information or important
notes.
2. Package Contents
•Electronic Weather Station
•3xAAA batteries
•These operating instructions
3. Safety Notes
•The product is intended for private, non-commercial use only.
•Protect the product from dirt, moistureand overheating, and only use
it in adry environment.
•Do not use the product in areas wherethe use of electronic devices is
not permitted.
•Do not use the product in the immediate vicinity of heaters or other
heat sources or in direct sunlight.
•Do not drop the product and do not expose it to any major shocks.
•Do not attempt to service or repair the product yourself.Leave any and
all service work to qualied experts.
•Do not modify the product in any way.Doing so voids the warranty.
•Keep the packaging material out of the reach of children due to the
risk of suffocation.
•Dispose of packaging material immediately according to locally
applicable regulations.
Warning –Batteries
•Immediately remove and dispose of dead batteries from the
product.
•Only use batteries (or rechargeable batteries) that match the
specied type.
•Do not mix old and new batteries or batteries of adifferent type
or make.
•When inserting batteries, note the correct polarity (+ and -
markings) and insert the batteries accordingly.Failure to do so
could result in the batteries leaking or exploding.
•Do not overcharge batteries.
•Keep batteries out of the reach of children.
•Do not short circuit the batteries/rechargeable batteries and keep
them away from uncoated metal objects
4. Getting Started
4.1 Inserting the battery
•Remove the battery that was already inserted into the clock, remove
the protective lm if necessary as well as the contact interrupter and
the re-insert the battery with the correct polarity.The clock is ready
for operation.

3
4.2 Replacing the batteries
•Remove and dispose of any used batteries. Insert the new battery
(AAA). Ensurethat the polarity of the battery corresponds to the
symbols in the battery compartment (12).
5. Installation
Youcan either stand the weather station on an even surface using the
fold-out stand (11) on the back of the device, or attach it to awall using
the opening (10) on the back of the device.
Note
•In order to measurethe temperatureoutside, the outdoor sensor (9)
must be located outside of the building.
•Ensurethat the outdoor sensor is protected from direct sunlight
and rain.
•Note that the maximum distance between the thermometer and the
outdoor sensor (9) is approximately 135 cm due to the length of the
cable. Forthis reason, we recommend placing the thermometer near
awindow or adoor.
•Ensurethat the outdoor sensor cable is not bent, placed on sharp
edges or otherwise damaged.
Warning
Beforemounting, check that the wall you have chosen is suitable for
the weight to be mounted Also make surethat thereare no electric,
water,gas or other lines running through the wall at the mounting
site.
6. Operation
6.1 Manually setting the date/time
Time/date
•Press and hold the MODE button (7) for approximately 3seconds until
the year ashes.
•Press the UP (5) or DOWN (4) button to select the individual values.
•Set the following information in the order listed:
•year,month, day,hours, minutes
•Press the MODE button (7) to adopt the setting value displayed.
Note
Hold down the UP-button (5) or the DOWN button (4) to select the
values faster.
Note
•The weekday is set automatically when setting the date manually.
•If you do not make an entry for several minutes, you automatically
exit the setup mode. The settings that weremade up to that point
arenot saved!
Selecting 12 or 24-hour format
•Press the UP button (5) to switch between the 12 and 24-hour
formats. In the 12-hour format, ‘PM’ is displayed beforethe time.
Setting the alarm time
•Press and hold the Alarm button (6) to switch to the alarm settings.
•The hours display begins to ash. Use the UP (5) or DOWN (4) button
to set the alarm time.
•Press the Alarm button to conrm your settings.
•If you do not press the Alarm button within 30 seconds, the weather
station automatically switches to normal mode.
Activating/deactivating the alarm
•Press the Alarm button (6) repeatedly to activate/deactivate the alarm.
•The alarm time now appears on the display.
•Press the Alarm button (6) once more. The alarm symbol is
displayed, meaning that the alarm is activated.
•Pressing the Alarm button (6) once morewill deactivate the alarm.
6.2 Backlight
•If you press the LIGHT button (8), the display lights up for approx.
3seconds.

4
7. Temperature trend display
This display shows the temperaturetrend over the last 12, 6, 3, 2or
1hour(s), within amax. range of +/- 3°Cor+/- 5.4 °F.Itisonly for
informational purposes; you cannot make any settings on this display.
8. Temperature measurement, maximum/minimum
•Press the DOWN button (4) when in any mode to choose between °C
(Celsius) and °F (Fahrenheit).
•Press the MAX/MIN button (3) to display the maximum or minimum
recorded values for temperatureand humidity.
•If you press the MAX/MIN button (3) once, the maximum value is
displayed. When you press the button once more, the minimum value
is displayed.
9. Comfort display
Display Meaning
*Grinning smiley* The temperatureisbetween 20–25°C and
humidity is between 40–70%.
*Sad smiley* Humidity is above 70%, irrespective of
temperature.
*Smiley with astraight
mouth*
Humidity is below 40%, irrespective of
temperature.
No smiley The temperatureisabove 25°C and
humidity is between 40–70%.
10. Care and Maintenance
•Only clean this product with aslightly damp, lint-free cloth and do not
use aggressive cleaning agents.
•Make surethat water does not get into the product.
11. Warranty Disclaimer
Hama GmbH &CoKG assumes no liability and provides no warranty for
damage resulting from improper installation/mounting, improper use of
the product or from failuretoobserve the operating instructions and/
or safety notes.
12. Technical Data
Weather station a
Power supply 1.5 V
3xAAA batteries
Measuring range
Temperature
Indoors: 10°C –60°C ,
Outdoors: -30°C –60°C
Humidity measuring
range
20% –99%
Cable length 135 cm

5
Bedienungselemente und Anzeigen
1. Display
2. Anzeige Temperaturentwicklung h/C°
3. MAX/MIN Taste =Anzeige der gespeicherten Max.-/Min.-Außen-
und Innentemperaturwerte
4. DOWN Taste (Einstellwert verringern)
5. UP Taste (Einstellwert erhöhen)
6. ALARM-Taste
7. MODE Taste
8. LIGHT Taste (Displaybeleuchtung)
9. Außensensor
10. Aussparung für Wandmontage
11. Standfuß
12. Batteriefachabdeckung
13. Anzeige Außentemperatur
14. Anzeige Innentemperatur
15. Vierstuge Wettervisualisierung
=sonnig, teilweise bewölkt, bewölkt, regnerisch
16. Feuchtigkeitsanzeige in %
17. Uhrzeit
18. Wochentage
19. Komfortanzeige
1. Erklärung von Warnsymbolen und Hinweisen
Warnung
Wirdverwendet, um Sicherheitshinweise zu kennzeichnen oder um
Aufmerksamkeit auf besondereGefahren und Risiken zu lenken.
Hinweis
Wirdverwendet, um zusätzlich Informationen oder wichtige Hinweise
zu kennzeichnen.
2. Packungsinhalt
•Elektronische Wetterstation
•3AAA Batterien
•diese Bedienungsanleitung
3. Sicherheitshinweise
•Das Produkt ist für den privaten, nicht-gewerblichen
Haushaltsgebrauch vorgesehen.
•Schützen Sie das Produkt vor Schmutz, Feuchtigkeit und Überhitzung
und verwenden Sie es nur in trockenen Umgebungen.
•Benutzen Sie das Produkt nicht in Bereichen, in denen elektronische
Produkte nicht erlaubt sind.
•Betreiben Sie das Produkt nicht in unmittelbarer Nähe der Heizung,
anderer Hitzequellen oder in direkter Sonneneinstrahlung.
•Lassen Sie das Produkt nicht fallen und setzen Sie es keinen heftigen
Erschütterungen aus.
•Versuchen Sie nicht, das Produkt selbst zu warten oder zu
reparieren. Überlassen Sie jegliche Wartungsarbeit dem zuständigen
Fachpersonal.
•Nehmen Sie keine Veränderungen am Produkt vor.Dadurch verlieren
Sie jegliche Gewährleistungsansprüche.
•Halten Sie Kinder unbedingt von dem Verpackungsmaterial fern, es
besteht Erstickungsgefahr.
•Entsorgen Sie das Verpackungsmaterial sofort gemäß den örtlich
gültigen Entsorgungsvorschriften.
Warnung -Batterien
•Entfernen und entsorgen Sie verbrauchte Batterien unverzüglich
aus dem Produkt.
•Verwenden Sie ausschließlich Akkus (oder Batterien), die dem
angegebenen Typentsprechen.
•Mischen Sie alte und neue Batterien nicht, sowie Batterien
unterschiedlichen Typs oder Herstellers.
•Beachten Sie unbedingt die korrekte Polarität (Beschriftung +
und -) der Batterien und legen Sie diese entsprechend ein. Bei
Nichtbeachtung besteht die Gefahr des Auslaufens oder einer
Explosion der Batterien.
•Laden Sie Batterien nicht.
•Bewahren Sie Batterien außerhalb der Reichweite von Kindern auf.
•Schließen Sie Akkus/Batterien nicht kurz und halten Sie sie von
blanken Metallgegenständen fern.
DBedienungsanleitung

6
4. Inbetriebnahme
4.1 Batterien einlegen
•ÖffnenSie die Batteriefachabdeckung(12),entfernen Sie den
Kontaktunterbrecherund schließenSie dieBatteriefachabdeckung (12)
wieder.
4.2 Batterien wechseln
•Öffnen Sie das Batteriefach (12), entnehmen und entsorgen Sie
die verbrauchten Batterien und legen Sie zwei neue AAA Batterien
polrichtig ein. Schließen Sie die Batteriefachabdeckung (12).
5. Montage
Sie können die Wetterstation wahlweise mithilfe des ausklappbaren
Standfusses (11) auf der Rückseite auf einer ebenen Fläche aufstellen
oder es mithilfe der Aussparung (10) auf der Rückseite an einer Wand
montieren.
Hinweis
•Für die Außentemperaturmessung muss sich der Außensensor (9)
außerhalb des Gebäudes benden.
•Achten Sie darauf,dass der Außensensor vor direkter Sonne und
Regen geschützt ist.
•Beachten Sie, dass die maximale Reichweite zwischen
Wetterstation und Außensensor (9) aufgrund der Kabellänge rund
135cm beträgt. Es empehlt sich daher,die Wetterstation in der
Nähe eines Fensters, einer Tür,etc. zu positionieren.
•Stellen Sie sicher,dass das Kabel des Außensensors nicht zu
stark gequetscht, über scharfe Kanten verlegt oder anderweitig
beschädigt wird.
Warnung
•Prüfen Sie vor Montage die Eignung der vorgesehenen Wand für
das anzubringende Gewicht und vergewissern Sie sich, dass sich
an der Montagestelle in der Wand keine elektrischen Leitungen,
Wasser-, Gas- oder sonstige Leitungen benden.
6. Betrieb
6.1 Manuelle Einstellung Datum/ Uhrzeit
Uhrzeit /Datum
•Drücken und halten Sie die MODE-Taste (7) für ca. 3Sekunden, bis
das Jahr blinkt.
•Drücken Sie zum Auswählen der einzelnen Werte die UP (5) oder
DOWN (4) -Taste.
•Stellen Sie folgende Information nacheinander ein:
•Jahr,Monat, Tag, Stunden, Minuten
•Drücken Sie die MODE-Taste (7), um den angezeigten Einstellungswert
zu übernehmen.
Hinweis
•Halten Sie die UP-Taste (5) oder die DOWN-Taste(4) gedrückt, um
die Werte schneller auswählen zu können.
Hinweis
•Die Wochentageinstellung erfolgt automatisch durch die manuelle
Datumseinstellung.
•Erfolgt einige Minuten keine Eingabe, wirdder Einstellungsmodus
automatisch verlassen.
•Die bis dahin vorgenommenen Einstellungen werden gespeichert!
12- oder 24-Stundenformat auswählen
•Drücken Sie die UP-Taste (5), um zwischen dem 12- und 24
Stundenformat zu wechseln. Im 12 Stundenformat wirdPMvor der
Uhrzeit angezeigt.
Einstellung Weckzeit
•Drücken und halten Sie die Alarm-Taste (6) um zur Alarmeistellung
zu wechseln.
•Die Stundenanzeige beginnt zu blinken. Stellen Sie mit den Tasten UP
(5) oder DOWN (4) die Weckzeit ein.
•Drücken Sie die Alarm-Taste, um IhreEinstellungen zu bestätigen.
•Wenn Sie die Alarm-Taste nach 30 Sekunden nicht betätigen wechselt
die Wetterstation automatisch in den normalen Modus.

7
Aktivierung/ Deaktivierung Wecker
•Drücken Sie wiederholt die Alarm-Taste (6), um den Wecker zu
aktivieren/ deaktivieren.
•Auf dem Display erscheint nun die Alarmzeit.
•Drücken Sie erneut auf die Alarm-Taste (6). Der Alarm ist nur aktiviert,
da das Alarmsymbol angezeigt wird.
•Bei erneutem Drücken der Alarm-Taste (6) wirdder Alarm deaktiviert.
6.2 Hintergrundbeleuchtung
•Drücken Sie die Light -Taste (8), wirddas Display für ca. 8Sekunden
beleuchtet.
7. Anzeige Temperaturentwicklung
Diese Anzeige informiert über die Temperaturentwicklung innerhalb der
letzten 12, 6, 3, 2, 1-Stunden, im Bereich von max. +/-3°C oder +/-5,4°F.
Sie ist rein informativ ohne Einstellmöglichkeiten.
8. Temperaturmessung, Maximum/Minimum
•Drücken Sie in einem beliebigen Modus die DOWN (4) -Taste,um
zwischen °C (Celsius) oder °F (Fahrenheit) auszuwählen.
•Drücken Sie die MAX/MIN-Taste (3), um die Maximal- oder
Minimalwerte der Temperatur-und Luftfeuchtigkeitsaufzeichnung
anzuzeigen.
•Drücken Sie die MAX/MIN-Taste (3) einmal, dann wirdIhnen der
maximale Wert angezeigt. Bei erneutem Drücken der Taste wirdder
minimale Wert angezeigt.
9. Komfortanzeige
Anzeige Bedeutung
*grinsender Smiley* Wenn die Temperatur zwischen 20-25°C
und die Luftfeuchtigkeit zwischen 40-70%
liegt.
*Trauriger Smiley* Wenn die Luftfeuchtigkeit unabhängig von
der Temperatur über 70% liegt.
*Smiley mit geradem
Mund*
Wenn die Luftfeuchtigkeit unabhängig von
der Temperatur unter 40% liegt.
Kein Smiley Wenn die Temperatur über 25°C und die
Luftfeuchtigkeit zwischen 40-70% liegt.
10. Wartung und Pflege
Reinigen Sie dieses Produkt nur mit einem fusselfreien, leicht feuchten
Tuch und verwenden Sie keine
aggressiven Reiniger.Achten Sie darauf,dass kein Wasser in das Produkt
eindringt.
11. Haftungsausschluss
Die Hama GmbH &Co. KG übernimmt keinerlei Haftung oder
Gewährleistung für Schäden, die aus unsachgemäßer Installation,
Montage und unsachgemäßem Gebrauch des Produktes oder
einer Nichtbeachtung der Bedienungsanleitung und/ oder der
Sicherheitshinweise resultieren.
12. Technische Daten
Wetterstation a
Stromversorgung 1,5 V
3xAAA Batterie
Messbereich
Temperatur
Innenbereich: 10 °C -60°C Außenbereich:
-30°C -60°C
Messbereich
Luftfeuchtigkeit
20 %-99%
Kabellänge 135cm

8
FMode d‘emploi
Éléments de commande et d'affichage
1. Écran
2. Achage d’évolution des températures h/°C
3. Touche MAX/MIN =achage des températures intérieureet
extérieuremaxi /mini en mémoire
4. Touche DOWN (augmentation de la valeur en cours de réglage)
5. Touche UP (diminution de la valeur en cours de réglage)
6. Touche ALARM
7. Touche MODE
8. Touche LIGHT (éclairage de l‘écran)
9. Capteur extérieur
10. Boutonnièrepour l‘installation murale
11. Pied
12. Couvercle du compartiment àpiles
13. Achage de la températureextérieure
14. Achage de la températureintérieure
15. 1Visualisation du temps sur quatreniveaux
=ensoleillé, partiellement nuageux, nuageux, pluvieux
16. Achage de l’humidité en %
17. Heure
18. Jours de la semaine
19. Achage de confort
1. Explication des symboles d'avertissement et des
remarques
Avertissement
Ce symbole est utilisé pour indiquer des consignes de sécurité ou pour
attirer votreattention sur des dangers et risques particuliers.
Remarque
Ce symbole est utilisé pour indiquer des informations supplémentaires
ou des remarques importantes.
2. Contenu de l'emballage
•Station météorologique électronique
•Mode d‘emploi
•3piles AAA
3. Consignes de sécurité
•Ce produit est destiné àune installation domestique non commerciale.
•Protégez le produit de toute saleté, humidité, surchauffe et utilisez-le
uniquement dans des locaux secs.
•N‘utilisez pas le produit dans les zones dans lesquelles l‘utilisation
d‘appareils électroniques est interdite.
•N’utilisez pas le produit àproximité immédiate d‘un chauffage,
d’autres sources de chaleur ou exposé aux rayons directs du soleil.
•Protégez le produit des secousses violentes et évitez tout choc ou
toute chute.
•Ne tentez pas de réparer l’appareil vous-même ni d’effectuer
des travaux d’entretien. Déléguez tous travaux d‘entretien àdes
techniciens qualiés.
•N’apportez aucune modication àl’appareil. Des modications vous
feraient perdrevos droits de garantie.
•Tenez les emballages d‘appareils hors de portée des enfants, risque
d‘étouffement.
•Recyclez les matériaux d’emballage conformément aux prescriptions
locales en vigueur.
Avertissement –Pilas
•Retirez les piles usagées immédiatement du produit pour les recycler.
•Utilisez exclusivement des batteries (ou des piles) du type indiqué.
•N’utilisez pas simultanément des piles usagées et des piles neuves
ou des piles de différents types.
•Respectez impérativement la polarité de la pile (marquage +
et -) lors de l‘insertion dans le boîtier ;risques d‘écoulement et
d‘explosion des piles si tel n‘est pas le cas.
•Ne surchargez pas les piles.
•Conservez les piles hors de portée
des enfants.
•Ne court-circuitez pas les batteries/piles et éloignez-les des objets
métalliques.
4. Mise en service
4.1 Insertion de la pile
•Retirez la pile insérée dans l‘horloge, retirez, le cas échéant, le lm
de protection ainsi que l‘interrupteur de contact, puis insérez la pile
conformément aux indications de polarité. Votrehorloge est alors
prête àfonctionner.

9
4.2 Remplacement de la pile
•Le cas échéant, retirez une pile déchargée et recyclez-la conformément
aux directives en vigueur.Insérez une nouvelle pile (LR6/AAA) dans le
compartiment. Respectez les indications de polarité lors de l’insertion
de la pile (12).
5. Installation
Vous pouvez placer la station météo sur une surface plane àl‘aide du
pied rabattable (11), situé sur la face arrièredelastation, ou la xer à
une paroi àl‘aide de la fente (10) située également sur sa face arrière.
Remarque
•Vous devez placer le capteur extérieur (9) àl‘extérieur du bâtiment
andedétecter la températureextérieure.
•Veuillez protéger le capteur extérieur de l‘ensoleillement direct et
de la pluie.
•Veuillez noter que la portée maximale entrelethermomètreetle
capteur extérieur (9) est d’environ 135 cm (longueur du câble). Nous
vous recommandons donc de placer le thermomètreàproximité
d‘une fenêtreoud‘une porte.
•Veillez ànepas détériorer le câble du capteur en exerçant une
pression trop importante, en le faisant passer sur des bords vifs,etc.
Avertissement
•Avant de xer l‘appareil au mur,vériez que le mur/la cloison est
susamment solide et qu‘aucune gaine électrique ou conduite
d‘eau ou de gaz ne passe àproximité.
6. Fonctionnement
6.1 Réglage manuel de la date /del'heure
Heure/date
•Appuyez sur la touche MODE (7) pendant env.3secondes, jusqu’au
clignotement des chiffres de l’année.
•Appuyez sur la touche UP (5) ou DOWN (4) pour sélectionner les
valeurs.
•Vous pouvez paramétrer successivement les informations suivantes :
•année, mois, jour,heures, minutes
•Appuyez sur la touche MODE (7) and’adopter la valeur de réglage
achée.
Remarque
•Maintenez la touche UP -(5) ou la touche DOWN (4) enfoncée
andefairedéler rapidement les chiffres.
Remarque
•Le jour de la semaine est réglé automatiquement lors du réglage
de la date.
•Le mode de paramétrage s‘interrompt automatiquement si vous
n‘appuyez sur aucune touche pendant quelques minutes.
•Les réglages effectués jusque-là seront sauvegardés.
Sélection du format d‘achage de l’heure:12 heures ou 24
heures
•Appuyez sur la touche UP (5) andecommuter entrel’achage de
l’heureauformat 12 heures ou 24 heures. L’indication PM apparaît
avant les chiffres de l’heurelorsque vous sélectionnez le format 12
heures.
Réglage de l’heurederéveil
•Maintenez la touche Alarm (6) enfoncée andepasser au
paramétrage de l’alarme.
•Les chiffres de l’heuresemettent àclignoter.Réglez l’heurederéveil à
l’aide des touches UP (5) DOWN (4).
•Appuyez une nouvelle fois sur la touche Alarm andeconrmer
votresélection.
•La station météo se met automatiquement en mode normal si vous
n’appuyez sur aucune touche dans les 30 secondes.
Activation /désactivation du réveil
•Appuyez plusieurs fois sur la touche Alarm (6) and’activer /
désactiver le réveil.
•L’heured‘alarme apparaît àl’écran.
•Appuyez ànouveau sur la touche Alarm (6). L’alarme est activée,
l’icône d’alarme apparaît àl’écran.
•Appuyez une nouvelle fois sur la touche Alarm (6) pour désactiver
cette fonction.
6.2 Rétroéclairage
•Appuyez sur la touche LIGHT (8) and’allumer l’écran pendant env.
3secondes.

10
7. Affichage de l’évolution de la température
Cet achage vous informe sur l’évolution de la températureaucours
des 12, 6, 3ou2dernières heures, voiredel’heureprécédente, dans
une plage de +/- 3°C ou +/- 5,4°F maxi. Cette fonction est purement
informative et ne peut êtreréglée.
8. Mesure de la température, maximum/minimum
•Appuyez sur la touche DOWN (4), dans n’importe quel mode, ande
sélectionner °C (Celsius) ou °F (Fahrenheit).
•Appuyez sur la touche MAX/MIN (3) and’acher les valeurs
maximale ou minimale de températureetdel’humidité de l’air en
mémoire.
•Appuyez une fois sur la touche MAX/MIN (3) ;lavaleur maximale
apparaît àl’écran. Appuyez une nouvelle fois sur cette touche ande
consulter la valeur minimale.
9. Affichage de confort
Achage Signication
*Smiley souriant* La températureest située entre20-25 °C et
l’humidité de l’air entre40-70 %.
*Smiley triste* L’humidité de l’air,indépendamment de la
température, est supérieureà70%.
*Smiley neutre* L’humidité de l’air,indépendamment de la
température, est inférieureà40%.
Aucun smiley La températureest supérieureà25°Cet
l’humidité de l’air entre40-70 %.
10. Soins et entretien
Nettoyez la balance uniquement àl’aide d’unchiffon non breux
légèrement humide ;évitez tout détergent agressif.Veillez àcequ’aucun
liquide ne pénètredans le produit.
11. Exclusion de garantie
La société Hama GmbH &CoKG décline toute responsabilité en cas de
dommages provoqués par une installation, un montage ou une utilisation
non conformes du produit ou encoreprovoqués par un non respect des
consignes du mode d‘emploi et/ou des consignes de sécurité.
12. Caractéristiques techniques
Station météo a
Alimentation en
électricité
1,5 V
3xAAA
Plage de mesure
Température
Intérieur :10°C-60°C
Extérieur :-30 °C -60°C
Plage de mesurede
l'hygrométrie
20 %-99%
Longueur du câble 135cm

11
Elementos de manejo eindicadores
1. Pantalla
2. Visualización de la evolución de la temperaturaenh/°C
3. Tecla MAX/MIN =indicación de los valores de temperatura
interior yexterior máximos ymínimos almacenados
4. Tecla DOWN (disminuir el valor de ajuste)
5. Tecla UP (aumentar el valor de ajuste)
6. Tecla ALARM
7. Tecla MODE
8. Tecla LIGHT (iluminación de la pantalla)
9. Sensor exterior
10. Aberturaparaelmontaje en pared
11. Pie
12. Cubierta del compartimento parapilas
13. Indicación de temperaturaexterior
14. Indicación de temperaturainterior
15. Visualización del tiempo en cuatroniveles
=soleado, parcialmente nublado, nublado, lluvioso
16. Indicación de humedad en %
17. Hora
18. Días de la semana
19. Visualización del confort
1. Explicación de los símbolos de aviso ydelas
indicaciones
Aviso
Se utiliza paracaracterizar las indicaciones de seguridad oparallamar la
atención sobrepeligros yriesgos especiales.
Nota
Se utiliza paracaracterizar informaciones adicionales oindicaciones
importantes.
2. Contenido del paquete
•Estación meteorológica electrónica
•3pila AAA
•Estas instrucciones de manejo
3. Instrucciones de seguridad
•El producto es paraeluso doméstico privado, no comercial.
•Proteja el producto de la suciedad, la humedad yelsobrecalentamiento y
utilícelo sólo en recintos secos.
•No utilice el producto en áreas donde no se permitan aparatos
electrónicos.
•No opereelproducto en las inmediaciones de la calefacción, de otras
fuentes de calor obajo la radiación directa del sol.
•No deje caer el producto ni lo someta asacudidas fuertes.
•No intente mantener oreparar el aparato por cuenta propia.
Encomiende cualquier trabajo de mantenimiento al personal
especializado competente.
•No realice cambios en el aparato. Esto conllevaría la pérdida de todos
los derechos de la garantía.
•Mantenga el material de embalaje fueradel alcance de los niños,
existe peligrodeasxia.
•Deseche el material de embalaje en conformidad con las disposiciones
locales sobreeldesecho vigentes.
Aviso –Pilas
•Retireydeseche de inmediato las pilas gastadas del producto.
•Utilice exclusivamente pilas recargables (o pilas) que sean del
mismo tipo.
•No mezcle pilas viejas ynuevas, ni tampoco pilas de tipos o
fabricantes diferentes.
•Observe siemprelacorrecta polaridad (inscripciones +y-) de las
pilas ycoloque éstas de forma correspondiente. La no observación
de lo anterior conlleva el riesgo de derrame oexplosión de las pilas.
•No sobrecargue las pilas.
•Mantenga las pilas fueradel alcance de los niños.
•No cortocircuite las pilas recargables/baterías ymanténgalas
alejadas de objetos metálicos.
4. Puesta en funcionamiento
4.1 Colocación de la pila
•Retirelapila que se encuentrayacolocada, retire, de proceder,la
lámina de seguridad yelseparador de contacto ycoloque la pila
atendiendo alapolarización correcta. El reloj está listo parael
funcionamiento.
EInstrucciones de uso

12
4.2 Cambio de la pila
•Retireydeseche la pila gastada según corresponda. Coloque una
pila nueva (AAA). Al hacerlo, respete la polaridad correcta, según
indiquen las marcas en el compartimento de la pila (12).
5. Montaje
Puede elegir entrecolocar la estación meteorológica sobreuna
supercie plana utilizando el pie plegable (11) situado en la parte
posterior oinstalarla en la pared mediante el hueco (10) situado en
la parte posterior.
Nota
•Para la medición de la temperaturaexterior,elsensor exterior
(9) debe situarse fueradel edicio.
•Al colocar el sensor exterior,preste atención aque quede
protegido de la radiación directa del sol ydelalluvia.
•Tenga en cuenta que el alcance máximo entreeltermómetroy
el sensor exterior (9) es de aproximadamente 135 cm debido
alalongitud del cable. Porello, se recomienda situar el
termómetrocerca de una ventana, una puerta, etc.
•Asegúrese de que el cable del sensor exterior no queda
aplastado ynose ha tendido sobrebordes alados ode
cualquier otraforma que pudieradañarlo.
Aviso
•Es necesario que compruebe antes del montaje que la pared
elegida puede soportar el peso que se va amontar.Asimismo,
asegúrese de que por el punto de montaje no pasan cables
eléctricos, tuberías de agua, gas odecualquier otrotipo.
6. Funcionamiento
6.1 Ajuste de la hora/el formato de hora
Hora/fecha
•Mantenga pulsada la tecla MODE (7) durante aprox. 3segundos,
hasta que parpadee el año.
•Para seleccionar cada valor,pulse la tecla UP (5) o DOWN (4).
•Ajuste sucesivamente los siguientes datos:
•Año, mes, día, horas, minutos
•Pulse la tecla MODE (7) paraaceptar el valor de ajuste
visualizado.
Nota
•Mantenga pulsada la tecla- UP (5) olatecla DOWN (4) para
seleccionar los valores más rápidamente,
Nota
•El ajuste del día de la semana se efectúa automáticamente
mediante el ajuste manual de la fecha.
•Si no se introduce ningún dato en algunos minutos, se
abandona automáticamente el modo de ajuste. Se guardan los
ajustes realizados hasta ese momento.
Modicación del formato de visualización de 12/24 horas
•Pulse la tecla UP (5) paraconmutar entrelos formatos de 12 y24
horas. En el formato de 12 horas se visualiza PM antes de la hora.
Ajuste de la alarma
•Mantenga pulsada la tecla de alarma (6) paracambiar el ajuste
de la alarma.
•La visualización de las horas empieza aparpadear.Ajuste la hora
de la alarma con las teclas UP (5) o DOWN (4).
•Pulse la tecla de alarma paraconrmar los ajustes.
•Si no acciona la tecla de alarma,alos 30 segundos la estación
meteorológica cambia automáticamente al modo normal.

13
Activación/desactivación del despertador
•Pulse repetidamente la tecla Alarm (6) paraactivar/desactivar el
despertador.
•Ahoraaparecerá la horadealarma en la pantalla.
•Pulse de nuevo la tecla Alarm (6). Ahoraestá activada la alarma, ya
que se muestraelsímbolo de alarma .
•Si se vuelve apulsar la tecla Alarm (6), se desactiva la alarma.
6.2 Retroiluminación
•Si pulsa la tecla LIGHT (8), la pantalla se ilumina durante aprox. 3
segundos.
7. Visualización de la evolución de la temperatura
Esta visualización informa sobrelaevolución de la temperaturaalolargo
de las últimas 12, 6, 3, 2, 1hora(s), con un rango de desviación de máx.
+/- 3°C o+/- 5,4°F.Esta información se visualiza con nes meramente
informativos, sin posibilidades de ajuste.
8. Medición de la temperatura, máximos/mínimos
•Desde cualquier modo, pulse la tecla DOWN (4) paraseleccionar
entre°C(Celsius) o°F(Fahrenheit).
•Pulse la tecla MAX/MIN (3) paramostrar los valores máximos o
mínimos de los registros de temperaturayhumedad.
•Pulse la tecla MAX/MIN (3) una vez paraver el valor máximo. Al
volver apulsar la tecla se muestraelvalor mínimo.
9. Komfortanzeige
Visualización Signicado
*Emoticono sonriente* Cuando la temperaturaestá entre20-25
°C ylahumedad ambiental está entre
40-70 %.
*Emoticono triste* Cuando la humedad ambiental está por
encima del 70 %, independientemente de
la temperatura.
*Emoticono con boca
recta*
Cuando la humedad ambiental está por
debajo del 40 %, independientemente de
la temperatura.
Sin emoticono Cuando la temperaturaestá por encima
de 25 °C ylahumedad ambiental está
entre40-70 %.
10. Mantenimiento ycuidado
Limpie este producto sólo con un paño ligeramente humedecido que
no deje pelusas ynoutilice detergentes agresivos. Asegúrese de que no
entreagua en el producto.
11. Exclusión de responsabilidad
Hama GmbH &CoKG no se responsabiliza ni concede garantía por los
daños que surjan por una instalación, montaje omanejo incorrectos del
producto opor la no observación de las instrucciones de manejo y/o de
las instrucciones de seguridad.
12. Datos técnicos
Estación meteorológica a
ntación de corriente 1,5 V
3AAA
Rango de medición TemperaturaRango en interior: 10 °C-60 °C
Rango en exterior: -30 °C-60 °C
Rango de medición de humedad
del aire
20 %-99%
Longitud del cable 135cm

14
RРуководство по эксплуатации
Органы управления ииндикации
1. Дисплей
2. Индикация изменения температуры ч/°C
3. Кнопка MAX/MIN =индикация сохраненных максимальных
иминимальных значений наружной ивнутренней температуры
4. Кнопка DOWN (уменьшение значения)
5. Кнопка UP (увеличение значения)
6. Кнопка ALARM
7. Кнопка MODE
8. Кнопка LIGHT (подсветка дисплея)
9. Блок наружногодатчика
10. Отверстие для настенногомонтажа
11. Подставка
12. Крышка отсека батарей
13. Индикация наружной температуры
14. Индикация температуры впомещении
15. Четырехступенчатаявизуализация погоды
=ясно,переменная облачность,пасмурно,дождь
16. Индикация влажности в %
17. Время
18. Дни недели
19. Индикация комфортногоклимата
1. Предупредительные пиктограммы иинструкции
Внимание
Данным значком отмечены инструкции,несоблюдение которых
можетпривести копасной ситуации.
Примечание
Дополнительная или важная информация.
2. Комплект поставки
•Электронный метеорологический прибор
•3батарея AАА
•Настоящая инструкция
3. Техника безопасности
•Изделие предназначено толькодля домашнегоприменения.
•Беречь от грязи,влаги иисточников тепла.Эксплуатировать тольков
сухих условиях.
•Не применять взапретных зонах.
•Не эксплуатировать внепосредственной близости снагревательными
приборами,беречь от прямых солнечных лучей.
•Не ронять.Беречь от сильных ударов.
•Запрещается самостоятельно ремонтировать устройство.Ремонт
разрешается производить толькоквалифицированному персоналу.
•Запрещается вносить изменения вконструкцию.Впротивном случае
гарантийные обязательства аннулируются.
•Упаковку не давать детям:опасность асфиксии.
•Утилизировать упаковку всоответствии сместными нормами.
Внимание –Батареи
•Израсходованные батареи немедленно удалять из прибора и
утилизировать.
•Разрешается применять аккумуляторы толькоуказанноготипа.
•Не применять различные типы или новые истарые батареи
вместе.
•Соблюдатьполярность батарей (+ и-). Несоблюдение полярности
можетстатьпричиной взрыва батарей.
•Не подвергатьаккумуляторы чрезмерной зарядке.
•Батареи хранить вбезопасном месте инедавать детям.
•Не закорачивать контакты батарей.Не хранить рядом с
металлическими объектами.
4. Ввод вэксплуатацию
4.1 Загрузка батарей
Откройте отсекбатарей (12) иудалите изолятор.Закройте крышку
отсека батарей.
4.2 Порядок замены батареи
•Откройте отсекбатарей (12), удалите иутилизируйте старые
батареи.Вставьте новые батареи AАА,соблюдая полярность.
Закройте крышку отсека батарей.

15
5. Монтаж
Метеорологическую станцию можно установить на ровную
поверхность спомощью складной подставки (11) либо повесить на
стену за предназначенную для этого выемку (10) на задней панели.
Инструкция
•При необходимости измерения наружной температуры
установите внешний датчик (9) снаружи здания.
•Блок внешнегодатчика должен размещаться вместе,
защищенном от воздействия прямых солнечных лучей и
осадков.
•Максимальное расстояние между термометром ивнешним
датчиком (9) составляет ок.135 см (длина провода). Поэтому
термометр рекомендуется размещать рядом сокном,дверью
ит.п.
•Не повредите проводвнешнегодатчика острыми кромками
или слишком сильным зажатием.
Предупреждение
Убедитесь,чтостена подходит для монтажа.Встене на месте
монтажа не должно быть электрической проводки,газопровода,
водопровода идругих трубопроводов.
6. Работа
6.1 Настройка календаря ичасов вручную
Время/дата
•Нажмите иоколо 3секунд удерживайте кнопку MODE (7), пока не
начнет мигатьзначение года.
•Для выбора значений нажимайте кнопки UP (5) иDOWN (4)
•Настройка параметров осуществляется вуказанной ниже
последовательности.
•год,месяц,день,часы,минуты
•Чтобы применить отображаемое значение настройки,нажмите
кнопку MODE (7).
Инструкция
Чтобы ускорить изменение значения во время настройки,
удерживайте кнопку
-UP
(5) или кнопку DOWN (4).
Инструкция
•День недели устанавливается автоматически после настройки
даты.
•Режим настройки выключается автоматически,если нажатий
на кнопки не производилось втечение нескольких минут.
•Измененные параметры при этомнесохраняются!
Выбор формата индикации времени (12-часовой или
24-часовой)
•Кнопкой UP (5) установите форматиндикации времени:
12-часовой или 24-часовой.В12-часовом формате перед
индикацией времени отображается значок PM.
Настройка будильника
•Для переходакнастройкам будильника нажмите кнопку Alarm
(6).
•Начнет мигатьзначение часов.Настройте время будильника с
помощью кнопок UP (5) иDOWN (4).
•Чтобы сохранить настройку,нажмите Alarm.
•Если кнопка Alarm не нажата втечение 30 секунд,
метеорологическая станция автоматически переходит вобычный
режим работы.
Включение иотключение будильника
•Включение иотключение будильника осуществляется повторным
нажатием кнопки Alarm (6).
•На дисплее отображается время будильника.
•Нажмите кнопку Alarm (6) еще раз.Будильник активирован,на
дисплее отображается символбудильника .
•Будильник отключается повторным нажатием кнопки Alarm (6).
6.2 Подсветка
•Нажмите кнопку LIGHT (8), чтобы примерно на 3секунды
включить подсветку дисплея.
7. Индикация изменения температуры
Режим показывает динамику изменения температуры за последние
12, 6, 3, 1 и1час вдиапазоне от макс.+/- 3°C или +/- 5,4°F. Режим
служит лишь информативным целям инастройкенеподлежит

16
8. Измерение температуры,максимальные/
минимальные значения
•Влюбом режиме нажмите кнопку DOWN (4), чтобы
переключиться между °C (Цельсий)и°F (Фаренгейт).
•Чтобы отобразить максимальные или минимальные значения
температуры ивлажности,нажмите кнопку MAX/MIN (3).
•Для просмотра максимальных значений нажмите кнопку
MAX/MIN (3) один раз.При повторном нажатии отображается
минимальное значение
9. Индикация комфортного климата
Индикация Значение
*Улыбающийся
смайлик*
При температуре 20—25° C ивлажности
воздуха 40—70%.
*Грустный смайлик*При влажности воздуха более 70%
независимо от температуры.
*Нейтральный
смайлик*
При влажности воздуха менее 40%
независимо от температуры.
Без смайлика При температуре выше 25° C и
влажности воздуха 40—70%.
10. Уход итехническое обслуживание
Чистку изделия производить толькобезворсовой слегка влажной
салфеткой.Запрещается применять агрессивные чистящие средства.
Следите за тем,чтобы вустройство не попала вода.
11. Отказ от гарантийных обязательств
Компания Hama GmbH &CoKGне несет ответственность за ущерб,
возникший вследствие неправильногомонтажа,подключения и
использования изделия не по назначению,атакжевследствие
несоблюдения инструкции по эксплуатации итехники безопасности.
12. Технические характеристики
Метеорологическая станция a
Питание 1,5 В
3батареи ААА
Диапазон измерения
Температура
Впомещении:от 10 до
60° C, вне помещения:от
–30 до 60° C
Диапазон измерения влажности:От 20 до 99%
Длина кабеля 135 см

17
Elementi di comando eindicazioni
1. Display
2. Indicazione sviluppo temperaturah/°C
3. Tasto MAX/MIN =Indicazione dei valori max.-/min. memorizzati
-Valori temperaturaesterna einterna
4. Tasto DOWN (diminuzione del valoreattuale)
5. Tasto UP (aumento del valoreattuale)
6. Tasto ALARM
7. Tasto MODE
8. Tasto LIGHT (illuminazione display)
9. Sensoreesterno
10. Foro per montaggio aparete
11. Piedino di sostegno
12. 1Coperchio vano batterie
13. Indicazione temperaturaesterna
14. Indicazione temperaturainterna
15. Visualizzazione del tempo in quattromodalità
=sole, poco nuvoloso, nuvoloso, pioggia
16. Indicatoredel livello di umidità in %
17. Ora
18. Giorni della settimana
19. Indicazione comfort
1. Spiegazione dei simboli di avvertimento edelle
indicazioni
Attenzione
Viene utilizzato per contrassegnareleindicazioni di sicurezza oppure
per rivolgerel‘attenzione verso particolari rischi epericoli.
Avvertenza
Viene utilizzato per contrassegnareinformazioni supplementari o
indicazioni importanti.
2. Contenuto della confezione
•Stazione meteo elettronica
•3batteria AAA
•Queste istruzioni per l’uso
3. Indicazioni di sicurezza:
•Il prodotto èconcepito per l’uso domestico privato, non commerciale.
•Proteggereilprodotto da sporcizia, umidità esurriscaldamento e
utilizzarlo solo in ambienti asciutti.
•Non utilizzareilprodotto in zone in cui non sono ammesse le
apparecchiatureelettroniche.
•Evitaredimettereinesercizio il prodotto in prossimità di
riscaldamento, altrefonti di caloreola luce diretta del sole.
•Non farecadereilprodotto enon sottoporlo aforti scossoni!
•Non tentarediaggiustareoripararel’apparecchio da soli. Fare
eseguirequalsiasi lavorodiriparazione al personale specializzato
competente.
•Non apportaremodiche all’apparecchio per evitarediperdereidiritti
di garanzia.
•Tenerel’imballo fuori dalla portata dei bambini, pericolo di
soffocamento!
•Smaltireimmediatamente il materiale d‘imballaggio attenendosi alle
prescrizioni locali vigenti.
Attenzione –Batterie
•Rimuovereesmaltireimmediatamente le batterie scariche.
•Utilizzareunicamente accumulatori (o batterie) conformi al tipo
indicato.
•Non utilizzarebatterie di tipi ocostruttori diversi, né mischiare
batterie vecchie enuove.
•Attenersi semprealla corretta polarità (scritte +e-) delle batterie e
inserirle di conseguenza. La mancata osservanza comporta la perdita
di potenza oilrischio di esplosione delle batterie.
•Non scaricarecompletamente le batterie.
•Conservarelebatterie al di fuori della portata dei bambini.
•Non cortocircuitarelebatterie etenerle lontano da oggetti metallic
4. Messa in esercizio
4.1 Inserimento della batteria
•Retirelapila que se encuentrayacolocada, retire, de proceder,la
lámina de seguridad yelseparador de contacto ycoloque la pila
atendiendo alapolarización correcta. El reloj está listo parael
funcionamiento.
IIstruzioni per l‘uso

18
4.2 Sostituzione della batteria
•Retireydeseche la pila gastada según corresponda. Coloque una pila
nueva (AAA). Al hacerlo, respete la polaridad correcta, según indiquen
las marcas en el compartimento de la pila (12).
5. Montaggio
Èpossibile collocarelastazione meteo ascelta mediante il piede
estraibile (11) sul retro, su una supercie piana oppuremontarlo aparete
mediante il foro(10) posto sul retro.
Avvertenza
•Perlamisurazione della temperaturaesterna, il sensoreesterno (9)
deve trovarsi all‘esterno dell‘edicio.
•Prestareattenzione che il sensoreesterno sia protetto dalla luce diretta
del sole edalla pioggia.
•Prestareattenzione che la portata massima trailtermometroeil
sensoreesterno (9) èdicirca 135cm, acausa della lunghezza del cavo.
Si consiglia quindi di posizionareiltermometronelle vicinanze di una
nestra, una porta ecc.
•Accertarsi che il cavo del sensoreesterno non venga schiacciato
troppo forte, che non venga posato su spigoli appuntiti oche non
venga danneggiato diversamente.
Attenzione
•Prima di procederealmontaggio, vericareche la parete sia
idonea per il peso da montareeaccertarsi che nel punto della
parete dove si desideramontareilsupporto non vi siano cavi
elettrici, né tubazioni di acqua, gas oaltro.
6. Funzionamento
6.1 Impostazione manuale data/ora
Ora/data
•Tenerepremuto il tasto MODE (7) per ca. 3secondi, no ache
l’indicazione dell’anno non inizia alampeggiare.
•Perselezionareisingoli valori, premereiltasto UP (5) o DOWN (4).
•Impostareinsequenza le seguenti informazioni:
•anno; mese; giorno; ora; minuti
•Premeredirettamente il tasto MODE (7) per memorizzareilvaloredi
impostazione visualizzato.
Avvertenza
Tenerepremuto il tasto -UP
(5)
oiltasto DOWN (4) per selezionarei
valori più velocemente.
Avvertenza
•L’impostazione dei giorni della settimana avviene automaticamente
mediante l’impostazione manuale della data.
•Se per alcuni minuti non si effettua alcuna immissione, si esce
automaticamente dalla modalità d‘impostazione. Le impostazioni
effettuate noravengono salvate!
Selezionareilformato 12/24 ore
•Premereiltasto UP (5), per passaretra iformati 12 e24ore.Nel
formato 12 ore, prima dell‘oraviene visualizzato PM
Attivazione /disattivazione sveglia
•Perpassareall’impostazione dell’allarme premereetenerepremuto
il tasto Alarm (6).
•Inumeri delle oreiniziano alampeggiare. Impostarel’oradell’allarme
utilizzando itasti UP (5) o DOWN (4).
•Perconfermareleproprie impostazioni premereiltasto Alarm.
•Se non si preme il tasto Alarm per 30 secondi, la stazione meteo
passa automaticamente nella modalità normale.
Attivazione /disattivazione sveglia
•Perattivare/disattivarelasveglia, premereripetutamente il tasto
Alarm (6).
•Oraapparesul display l’oradisveglia.
•Quindi premerenuovamente il tasto sveglia (6). L’allarme èquindi
attivo eilsimbolo sveglia viene visualizzato.
•L’allarme si disattiva premendo nuovamente il tasto sveglia (6).
6.2 Retroilluminazione/sensore di movimento
Se si preme il tasto LIGHT (8), il display viene illuminato per ca. 3
secondi.

19
7. Indicazione sviluppo temperatura
Questa indicazione informa sullo sviluppo della temperaturanell’arco
delle ultime 12, 6, 3, 2, 1ore,nel campo di max. +/- 3°C o+/- 5,4°F.
Si tratta di una funzione esclusivamente informativa, senza possiiblità
di impostazioni.
8. Misurazione della temperatura; massimo/minimo
•In una modalità qualsiasi, premereiltasto DOWN (4) per passaretra
°C (Celsius) o°F(Fahrenheit).
•Premereiltasto MAX/MIN (3) per visualizzareivalori massimi o
minimi registrati per la temperaturael’umidità.
•Premereuna volta il tasto MAX/MIN (3), così si visualizza il valore
massimo. Premendo nuovamente il tasto si visualizza il valoreminimo.
9. Indicazione comfort
Display Signicato
*smiley sorridente* Se la temperaturasitrova trai20-25°C e
l’umidità atmosferica ètra il 40-70%
*smiley triste* Se l’umidità atmosferica indipendentemente
dalla temperaturasuperail70%
*smiley con bocca
diritta*
Se l’umidità atmosferica indipendentemente
dalla temperaturasuperail40%
Nessun smiley Se la temperaturasitrova trai25°C e
l’umidità atmosferica ètra il 40-70%
10. Cura emanutenzione
Pulireilprodotto unicamente con un panno che non lascia pelucchi e
appena inumidito enon ricorrereadetergenti aggressivi. Fare attenzione
anon farepenetrareacqua nel prodotto.
11. Esclusione di garanzia
Hama GmbH &CoKG non si assume alcuna responsabilità per idanni
derivati dal montaggio ol‘utilizzo scorretto del prodotto, nonché dalla
mancata osservanza delle istruzioni per l‘uso e/o delle indicazioni di
sicurezza.
12. Dati tecnici
Stazione meteo a
Alimentazione elettrica 1,5 V
3batterie AAA
Campo di misurazione
Temperatura
Ambiente interno: 10 °C
-60°C ambiente esterno:
-30°C -60°C
Campo di misurazione umidità dell'aria 20 %-99%
Lunghezza cavo 135 cm
This manual suits for next models
1
Table of contents
Languages:
Other Hama Weather Station manuals
Popular Weather Station manuals by other brands

Philips
Philips AJ260/79 user manual

Bresser
Bresser 7003800 instruction manual

Aercus
Aercus WS3083 Operation manual

La Crosse Technology
La Crosse Technology WS-9630TWC-IT instruction manual

La Crosse Technology
La Crosse Technology WW85784 Instructional manual

Raindrip
Raindrip WeatherSmart RSC600i Installation & programming manual

Pessl Instruments
Pessl Instruments iMETOS Maintenance & troubleshooting

La Crosse Technology
La Crosse Technology WS-9611U-IT instruction manual

THOMSON
THOMSON 513630 manual

Campbell
Campbell TLX106 instruction manual

La Crosse Technology
La Crosse Technology S75617 Setup guide

IMOU
IMOU ZTM1 quick start guide