Digital Blue Disney Mix Stick 1GB User manual

Getting Started . . . . . . . . . . . . . . . . . . . . . . . . . . . . . . . . . . . 1
Installing Software. . . . . . . . . . . . . . . . . . . . . . . . . . . . . . . . . . 2
Charging the Player . . . . . . . . . . . . . . . . . . . . . . . . . . . . . . . . . 4
Player Components. . . . . . . . . . . . . . . . . . . . . . . . . . . . . . . . . . 5
Attaching the Lanyard. . . . . . . . . . . . . . . . . . . . . . . . . . . . . . . . 6
Using the Software. . . . . . . . . . . . . . . . . . . . . . . . . . . . . . . . 6
Adding Files to your Library. . . . . . . . . . . . . . . . . . . . . . . . . . . . 7
Using the Mix It Plug-In. . . . . . . . . . . . . . . . . . . . . . . . . . . . . . 11
Transferring Files to the Player. . . . . . . . . . . . . . . . . . . . . . . . .12
Using the Player. . . . . . . . . . . . . . . . . . . . . . . . . . . . . . . . . .13
Listening to Music. . . . . . . . . . . . . . . . . . . . . . . . . . . . . . . . . . 14
Making Mix It Playlists. . . . . . . . . . . . . . . . . . . . . . . . . . . . . . . 14
Using SD/MMC Cards. . . . . . . . . . . . . . . . . . . . . . . . . . . . . . . .15
Additional Help. . . . . . . . . . . . . . . . . . . . . . . . . . . . . . . . . . . . .16

Getting Started
Congratulations on purchasing a Disney Mix Stick Music Player!
With the Mix Stick you can listen to music on the go!
Installing Software
The included Mix It Software allows you to make instant mixes that
match the mood and style of song you are listening to.
We recommend that you use Windows Media Player (WMP) to
organize and sync media to the Player. By default, your computer
should have WMP already installed. If it doesn’t, you can download
it from www.microsoft.com.
Note: The PC must be connected to the Internet and have Windows
XP with WMP 10 or higher for the Mix It Plug-In to work.

To Install the Software:
1. Insert the Software CD into the PC. If the installation doesn’t
start automatically, double-click on the My Computer icon then
double-click on the CD Drive. When the installation screen
appears, click “Install.”
2. Follow the prompts to nish installing the software.
3. The program will automatically launch after installation.
Windows Media Player will launch simultaneously.
4. To analyze your music library with the Mix-It Plugin, click “Go.”
Note: To have the Mix It Plug-In analyze songs, you may need to
change the setting of the Plug-In. To do this, click the Mix It icon on
the desktop in the Start menu. Select “tools”on the Mix It screen.
Under the tools menu, check the box next to“Use Extended
Analysis.”Then, from the drop down menu next to“Processor
Load”, choose “Maximum”.
Note: If you are running Windows 98, you will need to install the
Windows 98 driver on the Mix It CD to use the Player.

To Install the Windows 98 Driver:
1. Insert the Software CD into the PC. If the installation doesn’t
start automatically double-click My Computer then double-click on
the CD Drive. When the installation screen appears, click“Install
Mix It Plug-In”.
2. Continue the installation by following the prompts.
3. Once the driver is installed, you will need to restart before
plugging in the Player.
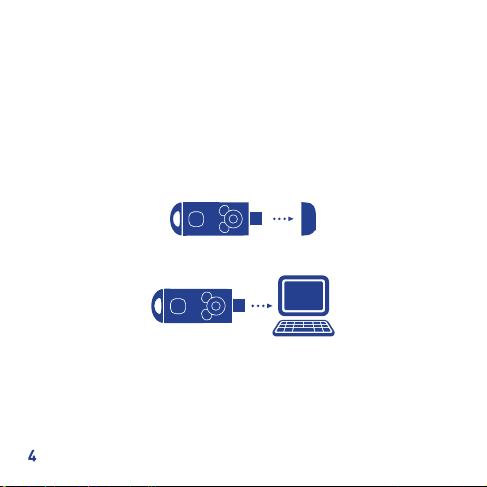
Charging the Player
The player needs to be charged before it can be used and every time
the battery gets low. It takes approximately 2.5 hours to charge the
Player. Once fully charged, the Player lasts approximately 8 hours.
To charge the Player:
Remove the USB cover on the Player.
Connect the Player to the PC using the Flash Plug.
The Player will begin charging. The battery indicator should begin
to ash, alternating red and green.
Once the battery is fully charged, the indicator light will stay red.
Note: If this is the rst time the Player is connected, wait until
Windows detects the Player and follow the prompts to install it.

Player Components
Volume Up button-Press +to increase the volume level.
Volume Down/Mute button-Press – to decrease the volume and
mute the Player.
Repeat All button-Use to play all songs on the Player in order. After
the last song is over, the player will play all the songs again.
Mix It button-Click to instantly create Mix It playlists or random
playlists.
Play/Pause button-Use to play, pause or stop songs. This button
also powers up the player to begin playing music.
Left/Rewind button-Use the to select previous songs or rewind.
Fast Forward button-Use to choose dierent selections or to skip
through songs.
mi it
Repeat All
Volume Up
Play/Pause
Rewind
Mix It
Fast Forward
Volume Down/Mute
mi it

mi it
Lanyard Holder
Power Switch
USB Flash Plug
USB Flash Plug Cover
Headphone Jack
Memory Card Slot
Player Components Continued

Lanyard Holder- Attaches the safety lanyard to the Player.
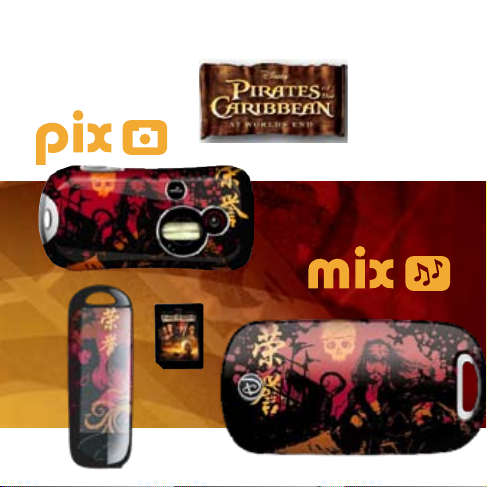
SD/MMC Memory Card Slot-The SD/MMC Memory Card Slot allows
you to use a memory card to store more songs. Also, play Mix Clips
(sold separately) by inserting them here.
USB Flash Plug-Connects the Player to the computer.
USB Flash Plug Cover-This protects the Flash Plug when not
transferring media.
Headphone Jack-Attach the headphones to the Player.
Power Switch-Use this switch to turn the Player O/On.
Headphones-Attach the headphones to listen to music.

Attaching the Lanyard
Your new Mix Stick comes with a lanyard so you can take your
music with you.
Insert the loop through the hole in the body of the Player.
Insert the lanyard through the loop and pull until snug.
The lanyard contains a safety snap that will come apart if a strong
pulling force is applied to the lanyard.
Using the Software
Adding songs to the device is easy! Windows Media Player (WMP)
allows you to transfer les from your PC to the device using the
Sync feature. Windows Media Player also uses the Mix It feature to
instantly mix songs based on the current song playing.

Using the Mix-It Skin
The Mix-It Plug-In comes loaded with a cool“skin” that you can use
to change the look of Windows Media Player when you are listening
to music on your PC. Using the skin is easy!
1. If you are using Windows Media Player with Classic Menus
(displayed along the top), click on“View” and then choose“Skin
Mode.” If you are not using Classic Menus, simply right click in the
black bar along the bottom of the program. Choose“View” and then
“Skin Mode.”
2. In order to go back to Full Mode, choose“View”as above and
then “Full Mode.”
Note: When using the special skin, you will only be able to listen
to music. If you want to synch your music to your player, you must
return to Full Mode.
Adding les to your library
To add music to Windows Media Player, you can either copy music
from CDs you own or you can purchase music on the Internet. Most
PCs with Windows 98 have WMP 9 and PCs with XP have WMP 10 or
11. Most versions of Windows Media Player will be OK to use.

To “Rip”Music to Windows Media Player 10 and 11:
Insert a CD in the drive
A screen will appear giving you some options.
Choose “Rip Music From CD”.
Windows Media Player will open and automatically begin ripping
the music from the CD.
When completed, the music can be found in the My Music folder
and is accessible with Windows Media Player.
To “Rip”Music using Windows Media Player 9:
Insert a CD into the drive.
The Media Player will open and show the CD Tracklist.
Select “copy music” (red button) and the CD will begin copying.
When the copying is completed, the music in the Player will
automatically begin playing.
Note: When downloading music, be sure to set the directory to the
location where you want to store all of your les.

Using the Mix It Plug-In
The Mix It Plug-In analyzes the songs in your library and tags them
with information so that you can create playlists quickly and easily
on the Player.
For mixes using the Mix It Plug-In, the Player requires at least 25
Mixable songs. The following process will allow you to see which
songs are Mixable using Windows Media Player.
1. In Windows Media Player 10, right-click one of the column
headings within the library.
2. Click on “More…” at the very bottom of the list.
3. In the window that appears, ensure that there is a check next to
“Custom 1”.
4. Click the “OK” button to save the preferences.
5. In the Library, scroll to the right until you see the“Custom 1”column.
6. This column will display if a song is Mixable or not.
Note: By default, the Mix It Plug-In will perform a quick analysis
of the music. Not all of the les within the collection may be
recognized during the“quick analysis” process. In this case, you
may want to use the“Extended Analysis”capability of the Mix It
Plug-In. This will ensure that all possible remaining les within the
Windows Media Player library are ready to be used on the Player.
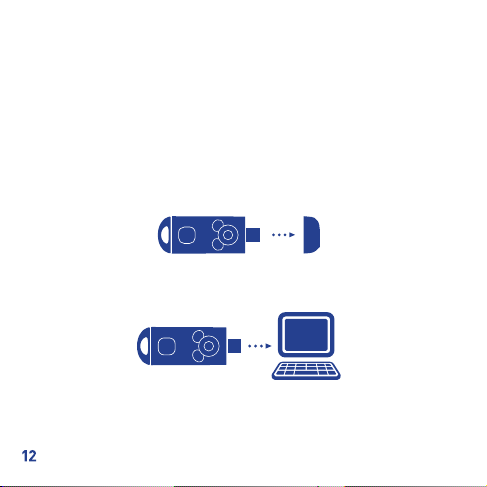
Transferring Files to the Player
Once you have music on your PC, you can transfer it to the Player.
We recommend that you use Windows Media Player’s Sync feature
to transfer les.
To transfer les:
Remove the USB cover on the Player.
Connect the Player to the PC using the Flash Plug as shown.
Drag the items you want synced to the left side (Ready to Sync) of
the screen.
Press the“Start Sync” button at the bottom right of the Player.
You will see the bars next to each le ll up. This means the les
are synching with the Player.

Using the Player
Turn on the Player- Slide the Power switch up.
Turn o the Player-Slide the Power switch down.
Play a song- Press .
Pause a song-Press during a song.
Change the volume-Use the and to raise or lower the volume.
Skip ahead in a song-Press and hold the .
Rewind a song-Press and hold the .
Skip to the next song-Press .
Start a song over-Press once.
Play the previous song-Press twice.

Listening to Music
You can listen to music on the Player using the following method:
Slide the power button up to turn the Player on.
Make sure the headphones are connected to the Player.
Press the Play button to begin listening to music.
Making Mix It Playlists
If you are listening to a song and would like to listen to more
music like it, use the Mix It feature on the Player. The Mix It feature
makes playlists based on the song you are currently listening to.
Pressing the Mix It button will instantly mix the songs on the
Player. There are two dierent types of mixes: mixes that use the
Mix It Plug-In and Random Mixes.
Random Mixes
-Press, or press and hold, the Mix It button while playing a song
that isn’t Mixable.
-Press the Mix It button in start up mode.
-Pause a song that isn’t Mixable and press the Mix It button.

Mix It Mixes
-Press the Mix It button while a Mix It song is playing.
-Press and hold the Mix It button in start up mode.
-Press the Mix It button while a Mix It song is playing in pause mode.
Using SD/MMC Cards
The Player can store music in onboard memory or to an SD/MMC
card. You can also play Mix Clips (sold separately). The Player
has 512 MB of onboard memory. If you add an SD/MMC card it will
increase your storage capacity.
To insert a card:
Slide the SD/MMC Card into the slot located at the
top of the player. Push on the card until it is secure
in the slot. The card will stick out slightly.
Note: When you insert an SD card, the Player will
store music on it until it is full.
front
of
card

Need Additional Help?
For additional product support visit out website: www.digiblue.com
and select Customer Service.
If you are still having problems with the product, contact customer
support at 888-800-0502.
check out some
treasure.....
www.digiblue.com

Disney Elements © Disney 2007. All rights reserved. All brands
and product names are trademarks of their respective owners.
TM and © 2007 Digital Blue, Inc. All rights reserved.

This manual suits for next models
1
Table of contents
Other Digital Blue MP3 Player manuals


 user guide")


