INTRODUCTION
The Letterwriter 100
User
Documentation Package describes all
models of Letterwriter 100 terminals. The documents are for three
general audiences:
@
the hardware installer who needs specific installation
and checkout information,
@
the operator who needs general operating information, and
@
the applications programmer who needs interface and
control function descriptions.
Letterwriter 100 documentation
is
divided into three books:
a
Installation Guide
@
Operator Guide
e
Programmer Reference Guide.
This installation guide describes how to unpack, install, power
up and check out Letterwriter 100 terminals. The guide
is
divided
into the following chapters
:
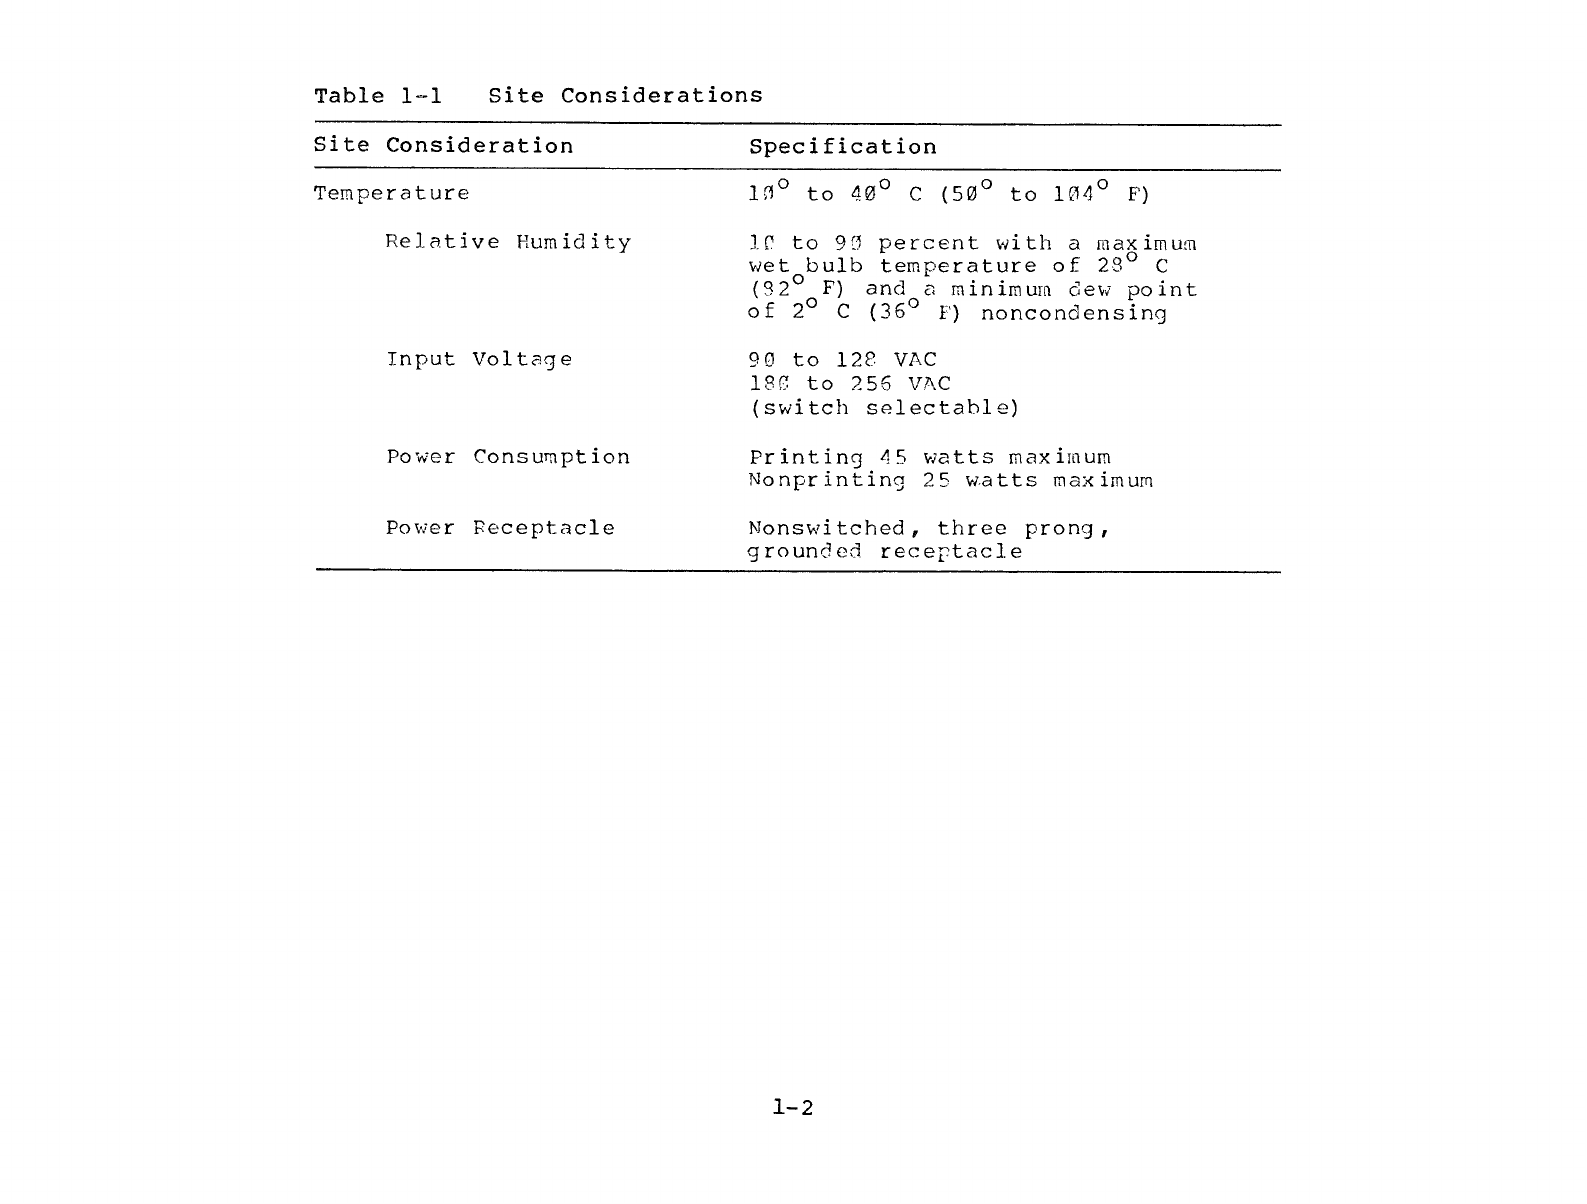
Site Preparation
--
describes the enviromental and power
considerations for the Letterwriter 100. Read this chapter before
installing the terminal.
ter
2
Unpacking/Repacking
--
Detailed illustrations show how
to unpack and repack the terminal.
apter
3
Installation
--
includes the procedure to install and
verify proper operation of the Letterwriter 100.