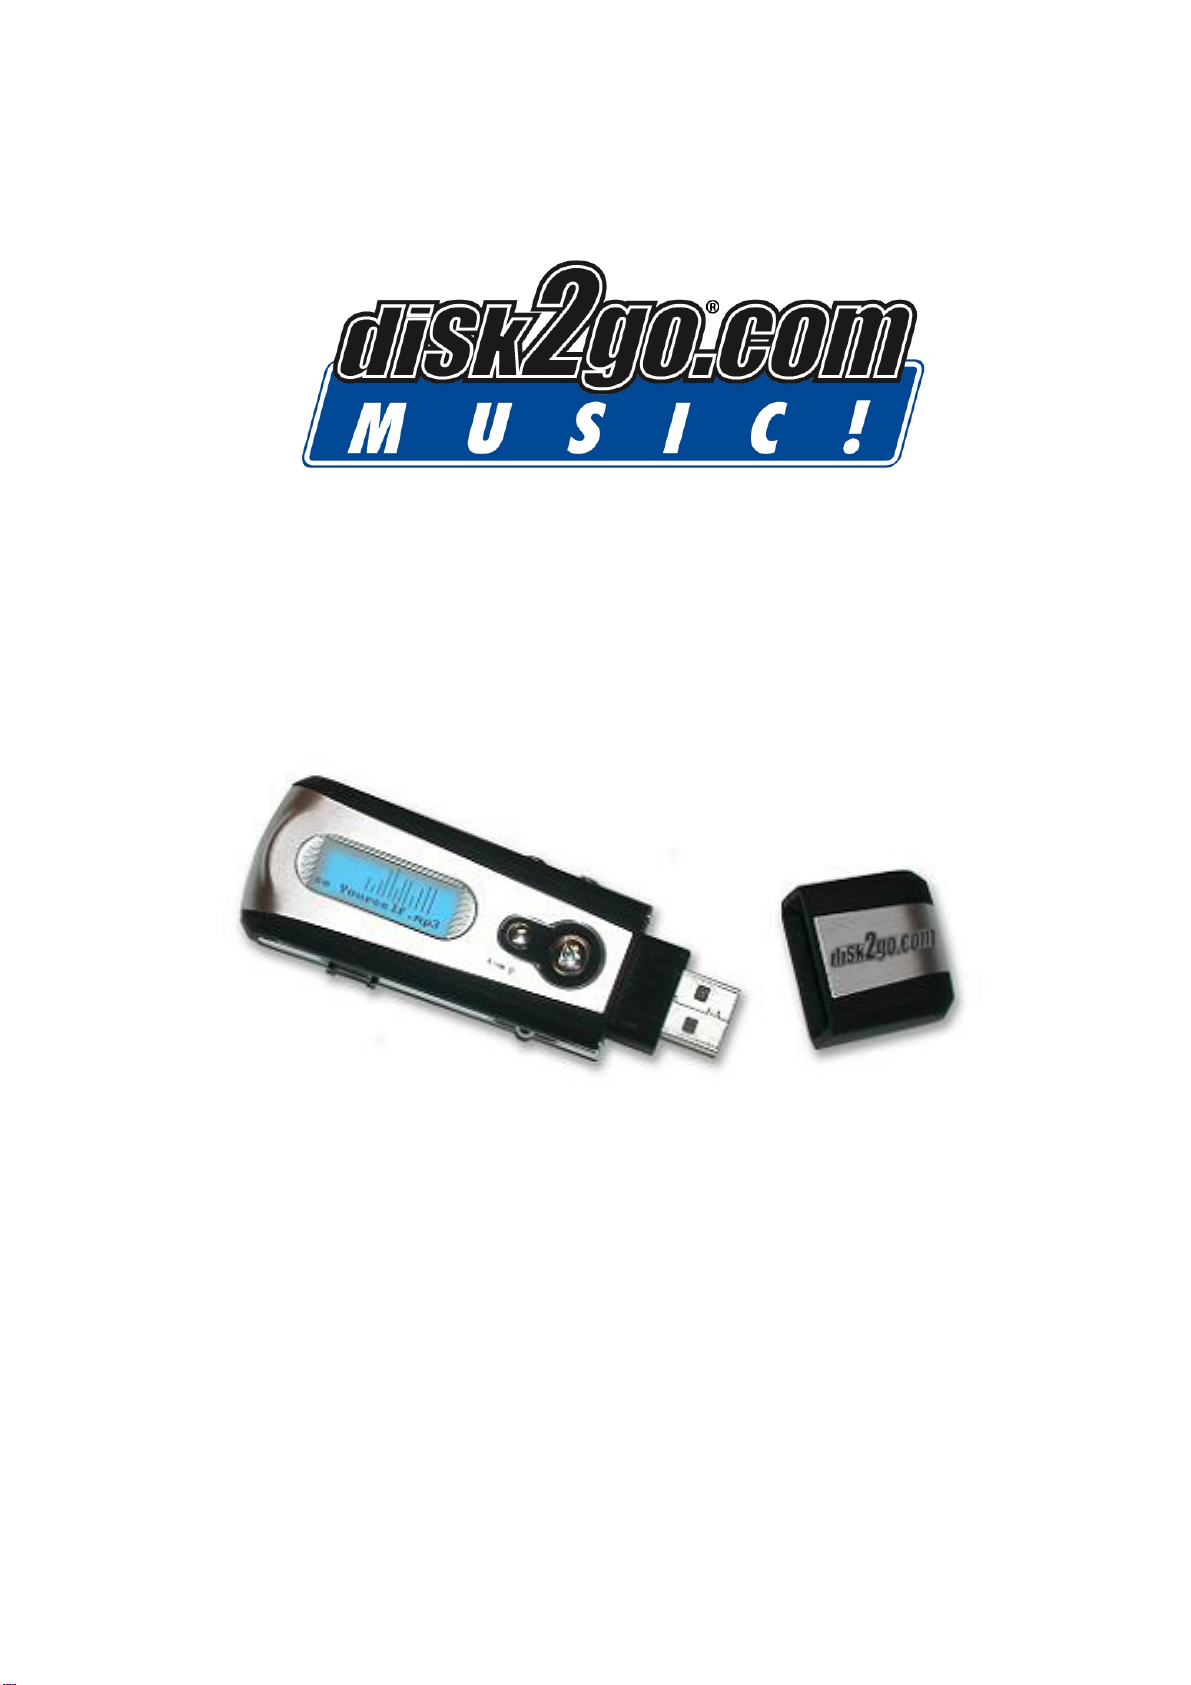
Disc2go Music 128 Mb User manual
User Manual
English

User Manual «MUSIC! 128MB & 256MB»
Version 1.1 / 2003 / © disk2go.com Page 2/20
Index
1. Overview 3
1.1.Product Specification 4
1.2.Operating System Requirement 4
1.3.AccessoriesIncluded 4
1.4.LCD 5
2. Operating disk2go® Music!
2.1.TurningthePowerON/OFF 5
2.2.Playing MP3 Music 5
2.3.UsingMenuwhileinPlayMode 6
2.4.VoiceRecordingFunction 7
2.5.ExitVoiceRecording 8
2.6.Deletearecordedfile 8
2.7.EQ(Equalizer) 9
2.8.RepeatMode 9
2.9.Backlight 10
2.10.Memory 10
2.11.USBConnection 11
2.12.A–BLoopButton 11
2.13.SystemRequirement 11
2.14.Installation of Digital Audio Manager 12
2.15.UsingDigitalAudioManager 12
2.16.Copying files to disk2go® Music! 13
2.17.Moving files from disk2go® Music to PC 14
2.18.FormattingMemory 15
2.19.Deleting files from disk2go® Music 16
2.20.Refreshing Digital Audio Manager Display 17
2.21.InternalMemoryDisplay 17
2.22.Pre-listenFeature 17
3. Frequently Asked Questions (FAQ) 19
User Manual «MUSIC! 128MB & 256MB»
Version 1.1 / 2003 / © disk2go.com Page 3/20
1. Overview
This three-in-one disk2go® Music allows you to store essential computer files, play
MP3 songs on the go and record voice messages – all from a single, compact device!
•5-Mode Equalizer and Dynamic bass booster allow for high quality sound
production of MP3, MP3 PRO or WMA files
•Dynamic LCD screen clearly shows song title, time elapse, remaining memory
and battery life
•Plugs into any USB 2.0 or USB 1.1 port
•Only one solid piece – no worries about multiple parts to get lost or broken
•1 AAA Battery (Included) – Playing/Recording time is up to 12 hours
•Includes headphones and neck strap for convenient transportation
•True Plug ‘n’ Play – No additional installation required
•Simple-to-use Voice Recorder makes for an ideal digital notepad
•128MB / 256MB Memory
*Actual memory capacity may vary under Windows, Mac, and Linux operating
systems.
User Manual «MUSIC! 128MB & 256MB»
Version 1.1 / 2003 / © disk2go.com Page 4/20
1.1. Product Specifications:
PC system with USB
ports IBM PC / AT & Notebook & Sub-Notebook
Operating System Windows 98SE, Me, 2000, XP / Mac 10.2
Memory 128MB or 256MB
Interface USB 1.1 or USB 2.0 port
Data Retention Up to 10 Years
Write Protection By hold protection switch
LCD Display Dynamic with status display
Dimension (L x W x H) (128MB) 95mm w/cap x 32mm x 22mm
Weight 1.6 ounce
EMI Compliance FCC, CE, EMI, EMS
Power Supply USB bus-powered / 1.5V battery included
Standby 300 µA (typical), 500 µA (max)
1.2. Operating System Requirement
Supports the following Operating System:
•Windows 98 SE
•Windows ME
•Windows 2000
•Windows XP
•Mac 10.2
1.3. Accessories Included
•USB Cable
•Head Phones
•Neck Strap
•AAA Battery
•Users Manual
•CD
User Manual «MUSIC! 128MB & 256MB»
Version 1.1 / 2003 / © disk2go.com Page 5/20
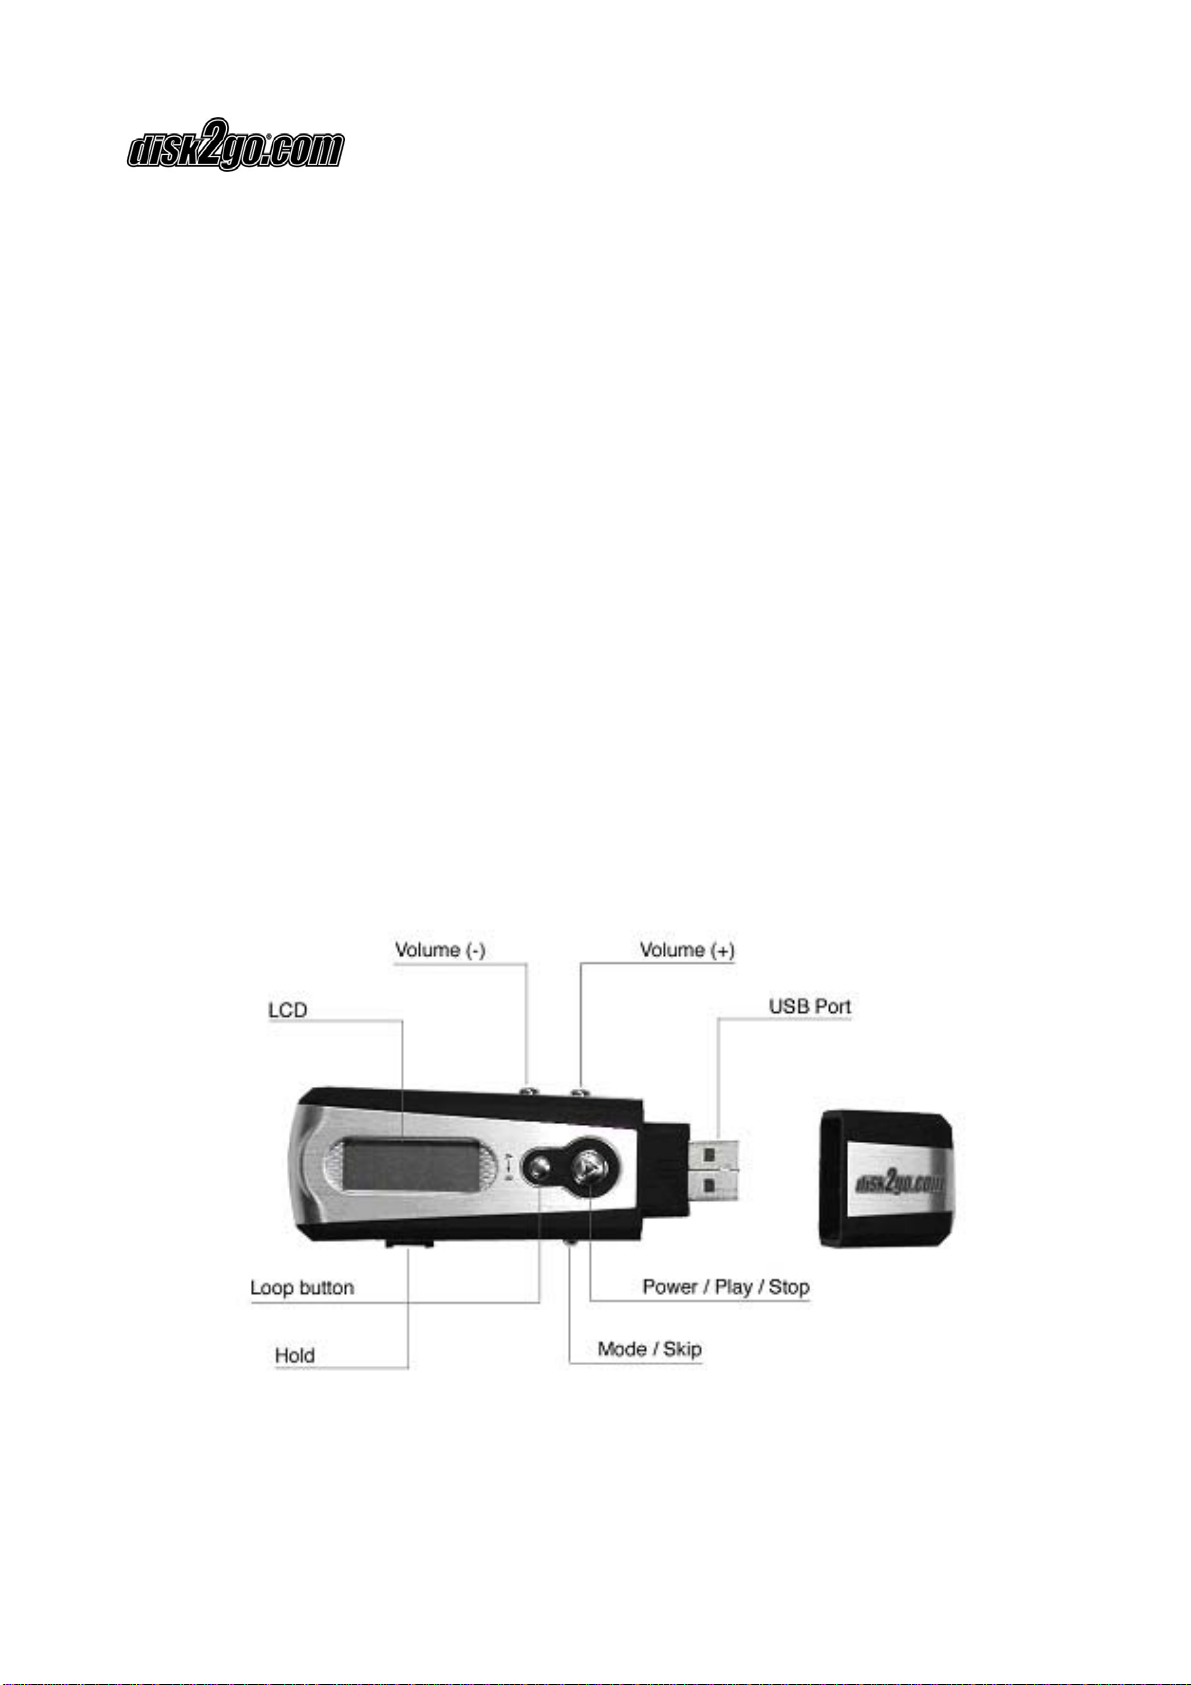
1.4. LCD
A – B
03 – 33
MP3
The Bends Street
spir
Loop mode includes Repeat, Repeat All, Random, Preview and Normal. Equalizer Mode
includes Jazz, Classic, Rock, Pop and Normal.
2. Operating disk2go® Music
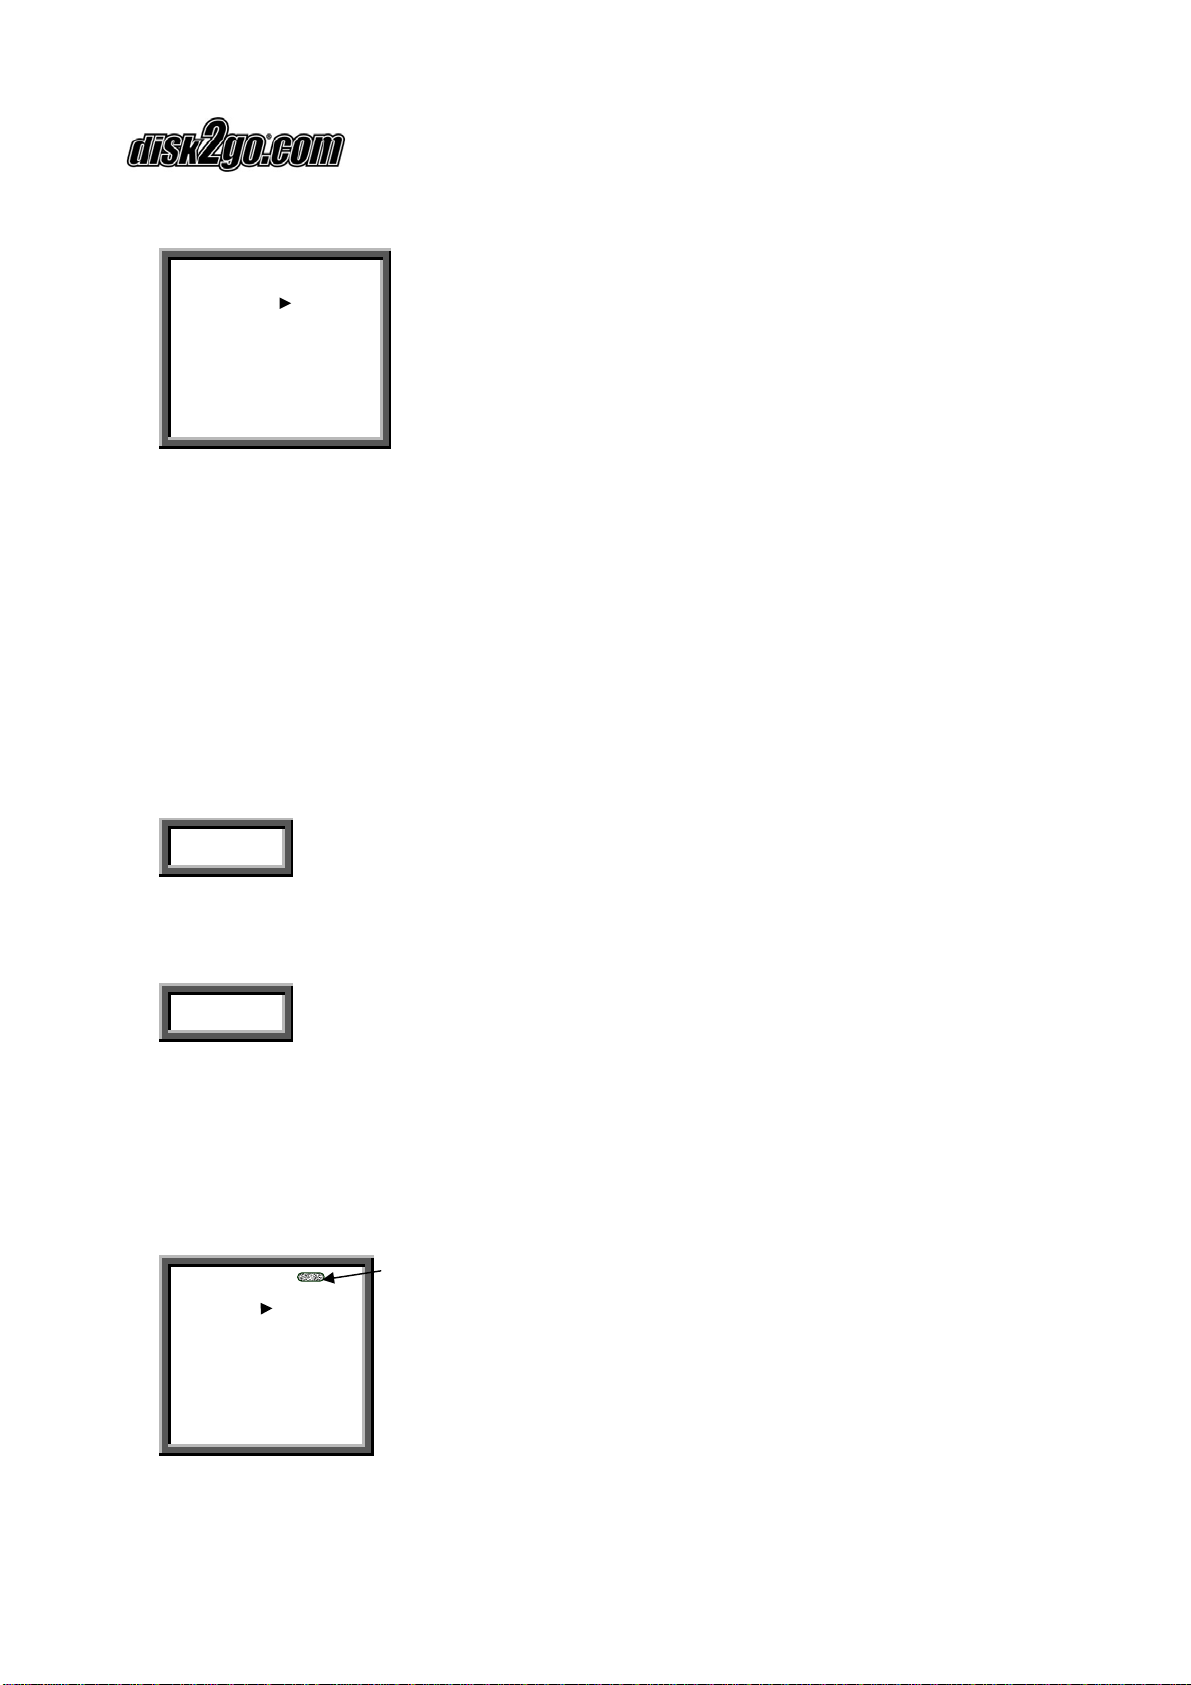
2.1.Turning the Power On / Off
The power is turned on when Play / Stop button is pressed momentarily for two
seconds. The LCD light will be ON, and “Power On” will be displayed on the Display
Indicator.
Power On
Pressing Play / Stop button for more than three seconds will “Power Off” the
disk2go® Music.
Power Off
2.2. Playing MP3 Music
1) Turning the power on by pressing Play / Stop button you would see the following
interface. 03-33 means there are 33 songs in the disk2go® Music and this is the
third song.
Battery Indicator
00:45
03-33
MP3
The Bends-Street
sp
User Manual «MUSIC! 128MB & 256MB»
Version 1.1 / 2003 / © disk2go.com Page 6/20
2) When you press Play / Stop button again, the current song will be played as
shown above. The indicator on the top left corner is the playback time indicator.
3) To play next or previous song, move the Mode Selector Right or Left to change.
To pause the music press Play / Stop button once.
4) To control the volume, press the volume button to “+” or “–“ button. The volume
will increase or decrease when the + / – button is pressed respectively. There are
thirty two volume steps and the volume level ranges from zero to thirty two.
Vol
|||||||||||||
Note: The battery status indicator may flicker while the songs are played.
2.3. Using Menu while in Play Mode
Press Play / Stop to turn ON the disk2go® Music.
Press the Mode Selector, in the center to see the functions menu while in Play Mode.
REC
EQ
REC Enter into record operation
EQ Equalizer Mode
Repeat Repeat Mode
Back Light Background light
Del File Delete audio files
Memory Info Memory Information
Return Return
To select the option listed above move the Mode Selector left or right and press the
Mode Selector to enter the function.
When you select the “Del File” to delete the file the selected file is deleted.
When you select the Memory Info, the total memory will be displayed. If no button is
pressed, it will return to Play mode after two seconds.
User Manual «MUSIC! 128MB & 256MB»
Version 1.1 / 2003 / © disk2go.com Page 7/20
Total
Memory
128.0 M
Byte
2.4.Voice Recording Function
After turning on the power by pressing Play / Stop button, press the Mode Selector.
The menu as below will appear.
REC
EQ
Select REC by pressing the Mode Selector, to enter Voice Recording.
List of Record files will be displayed, if previously recorded files are available.
Record
02
Record
01
Select the files to be played by toggling the Mode Selector.
Press the Play / Stop button to listen to the recorded files.
If no file is available "No REC File" will be displayed.
No REC
File
To Record press the Mode Selector.
Select “Record” from the menu by moving the Mode Selector to the right.
Music Mode
RecordRecord
Press the Mode Selector to enter the record mode, speak into the microphone to
record.

User Manual «MUSIC! 128MB & 256MB»
Version 1.1 / 2003 / © disk2go.com Page 8/20
00:13
REC
Record 01
2.5.Exit Voice Recording
To stop recording press the Play / Stop button once.
While in Record Mode you can switch between different mode by pressing the Mode
Selector.
Record
02
Record
01
Music
Mode
Record
Del REC
File
Memory
Info
Backlight
Return
Toggle the Mode Selector Left or Right to enter into a different Mode.
Press the Mode Selector to confirm.
2.6.Delete a recorded file
To delete the file select from the main menu "Del REC file".
Select the file and press the Mode Selector Knob.
Record 02
Record 01

User Manual «MUSIC! 128MB & 256MB»
Version 1.1 / 2003 / © disk2go.com Page 9/20
Yes? Mode Key
Del No? Other Key
To delete press the Mode Selector.
To cancel press any other Mode Selector.
Note: While recording, all buttons except Play / Stop button will not work.
2.7.EQ (Equalizer)
You can select different mode according to different music.
Press Play / Stop button to turn ON the disk2go® Music.
Press Mode Selector to enter the Menu.
Select EQ from the Menu.
Press Mode Selector and the EQ menu would show up.
Select the Equalizer Mode Selector.
There are five modes. Jazz, Classic, Rock, Pop and Normal. The list shows up after the
EQ option is selected.
Jazz
Classic
Rock
Pop
Normal
Return
2.8.Repeat Mode
disk2go® Music offers a unique function to enable you to repeat a song.
Press Play / Stop button to turn on the disk2go® Music.
Press Mode Selector in the center to get the menu.
Select “Repeat” from the Menu.
Press Mode Selector to get Repeat Menu.
User Manual «MUSIC! 128MB & 256MB»
Version 1.1 / 2003 / © disk2go.com Page 10/20
Selecting Repeat displays the as below.
Random
Normal
Repeat
ALL
Repeat
one
Preview
Return
Random: Plays all songs in random order and then stops.
Normal: Plays songs in order and stops after the last song has been played.
Repeat All: Plays all songs in order repeatedly until another function is called.
Repeat One: Plays the current song repeatedly.
Preview: Plays the song for 10 seconds in order and stops after last song has
been played.
Return: Returns back to the current settings.
2.9.Backlight
Backlight illuminates the LCD in darkness.
Select Backlight from the menu.
Press Mode Selector to view the Backlight options.
Off
5 Sec
Select Off to switch OFF the backlight or select the duration for backlight display
period of 5, 10, 15 or 20 seconds each time the button is pressed.
Battery life will increased by leaving the backlight OFF.
2.10. Memory Status
To view the total physical memory, select Memory Info from the menu by pressing the
Mode Selector.
Press Mode Selector to confirm.
User Manual «MUSIC! 128MB & 256MB»
Version 1.1 / 2003 / © disk2go.com Page 11/20
This will display the total physical memory capacity.
Total
Memory
128.0 M
Byte
2.11.USB Connection
Easily transmit MP3 and other files from PC to the disk2go® Music.
Make sure your PC supports USB devices.
Connect the USB cable to the disk2go® Music USB interface.
LCD display will show “USB” icon and PC icon if successfully connected.
You can now transfer files from and between the disk2go® Music and the PC.
2.12. A – B Loop Button
loop button enables you to repeat a specific song or a sentence.
To repeat a specific song or a sentence, follow the steps.
Press the Play Button twice to start the selected song.
Press button once.
Sign “A” will be visible in the Display Indicator.
After selecting the song to repeat for a specific length press button again.
Pressing button again will display Sign “A” and “B” in the Display Indicator.
This will repeat the song starting back to where you had pressed the button
earlier.
To stop, Press the button again and the song will play forward.
2.13. System Requirement
•IBM compatible personal computer.
•Pentium 166 MHz MMX or faster.
•Windows 98SE, ME, 2000 / XP, Mac 10.2
•USB Port
•32 MB Ram or more (98 MB recommended for Windows 2000/XP)

User Manual «MUSIC! 128MB & 256MB»
Version 1.1 / 2003 / © disk2go.com Page 12/20
•20 MB free hard-disk space or more.
•4 x CD-Rom drive or more
•Sound Card (Optional)
2.14. Installation of Digital Audio Manager
Insert the CD into the CD-ROM Drive. Click Next button on installation screen, and the
Digital Audio Manager Software and USB Driver will be installed. Restart the PC when
installation is finished.
A icon will be created on the desktop, also it should be available on your
“/Start/Programs/MP3Player”.
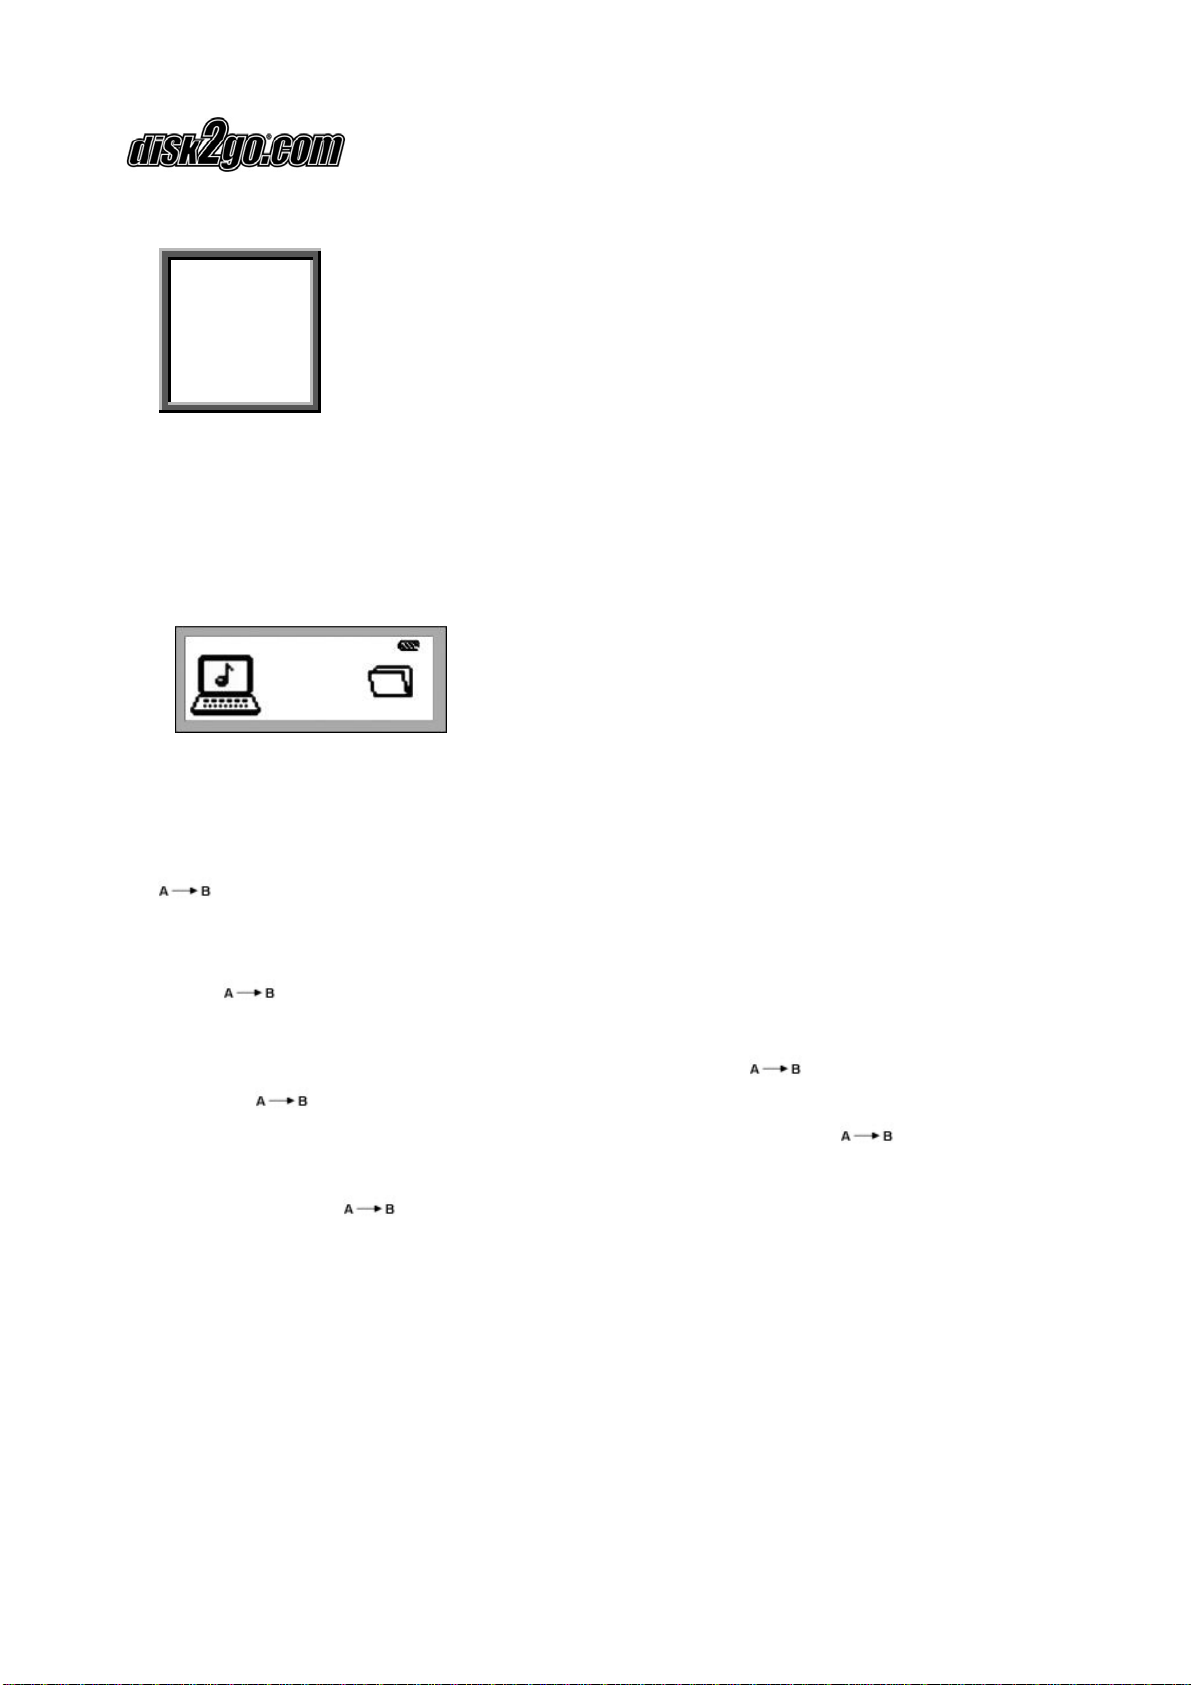
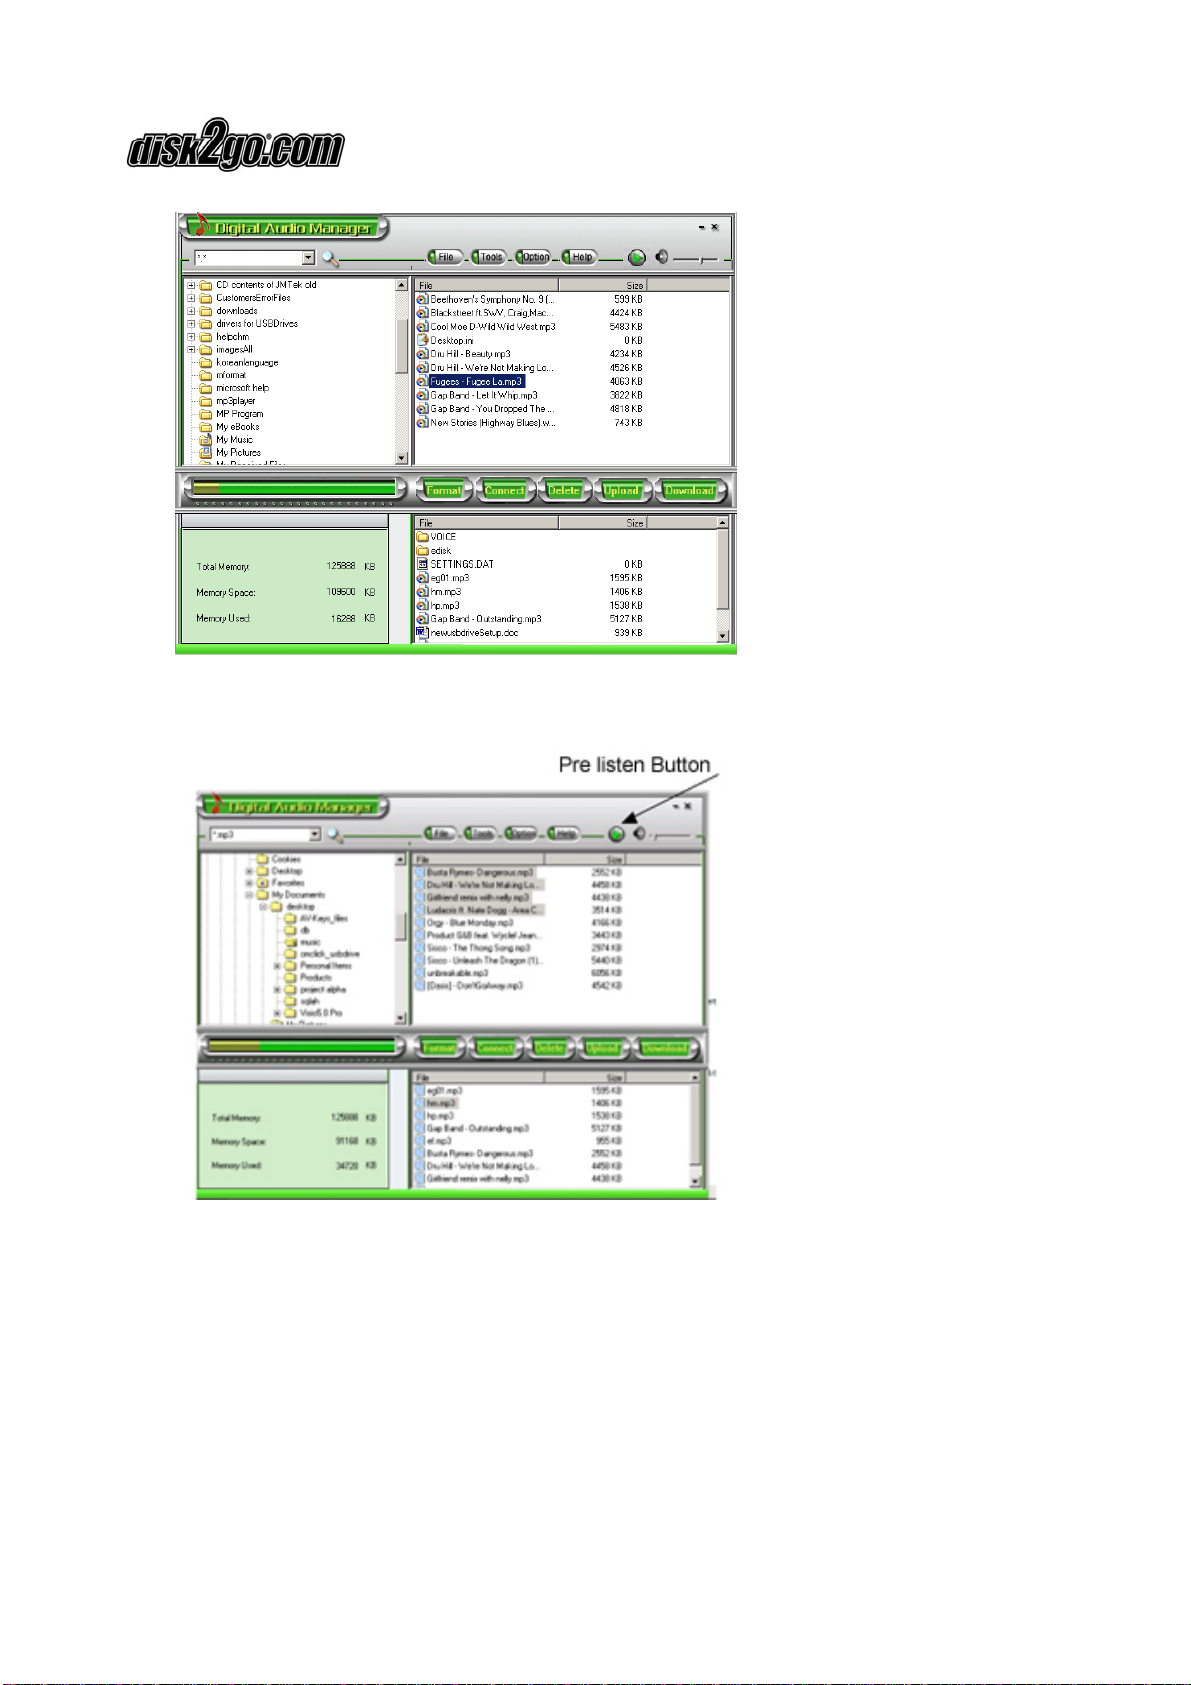
2.15. Using the Digital Audio Manager
First connect the disk2go® Music and your PC with the USB cable. The LCD display will
show as below showing “USB” connection is finished.
Double clicking the icon on the Desktop, opens the interface of Digital Audio
Manager.
User Manual «MUSIC! 128MB & 256MB»
Version 1.1 / 2003 / © disk2go.com Page 13/20
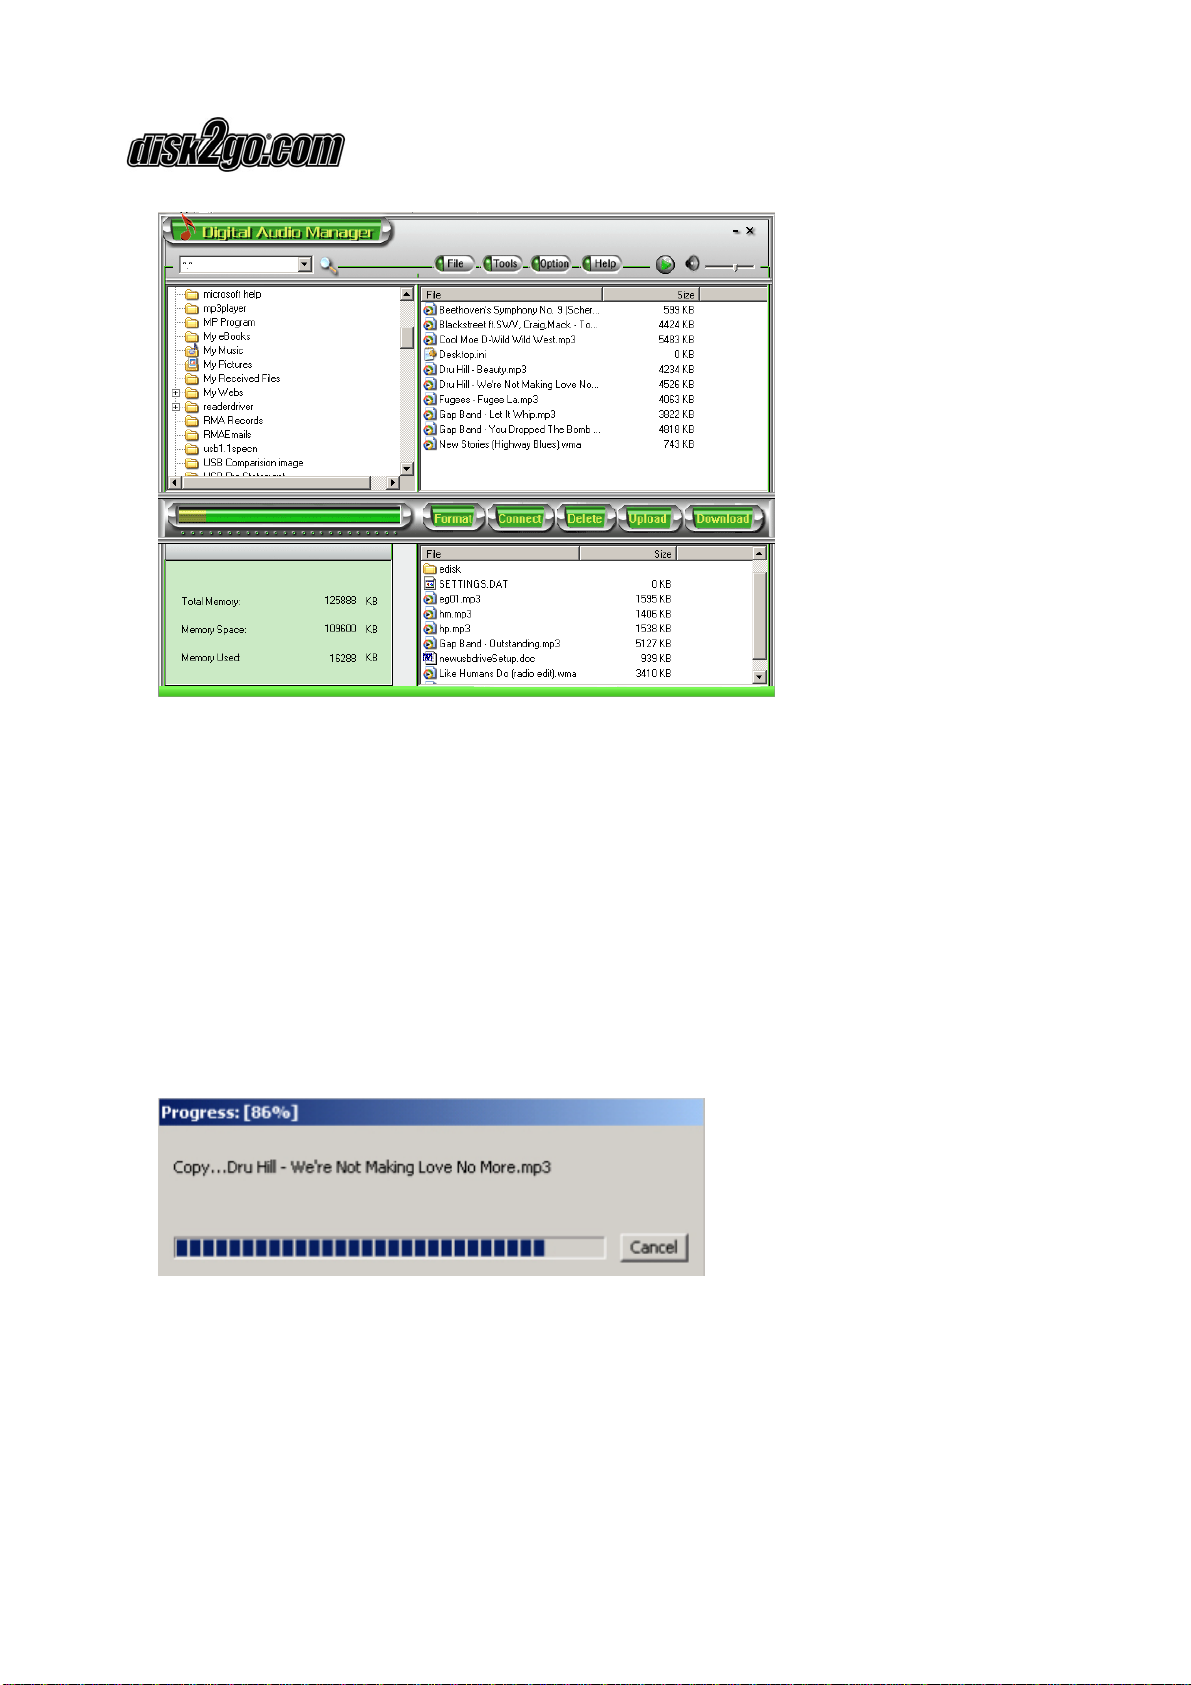
2.16. Copying files to the disk2go® Music
Before copying, please turn ON the disk2go® Music and connect to your PC through
the USB cable.
1. Double click the MP3 Player icon on the desktop.
2. Select the folder that includes the files to be copied from the left Program
Manager. The files in the folder will be displayed on the right column. You can
also select the files types in the menu from the top left corner.
3. Click the Download button or select the “Download” option from the Tools
menu.
4. Progress status will appear.
5. System will set up an EDISK directory automatically and copy the non-audio
files to EDISK in the removable disk of the disk2go® Music after you
download the non-MP3 or WMA files.

User Manual «MUSIC! 128MB & 256MB»
Version 1.1 / 2003 / © disk2go.com Page 14/20
6. The Digital Audio Manager checks the disk2go® Music connection
automatically. When the disk2go® Music is not connected to the computer,
the Digital Audio Manager will not work.
Note:
1) Do not remove the USB cable or memory card while a file is being
downloaded. This can damage to your disk2go® Music.
2) If the disk2go® Music does not work, remove the battery and reinsert it after
3 seconds. Reconnect disk2go® Music to PC.
3) Non-audio files will be saved in EDISK directory.
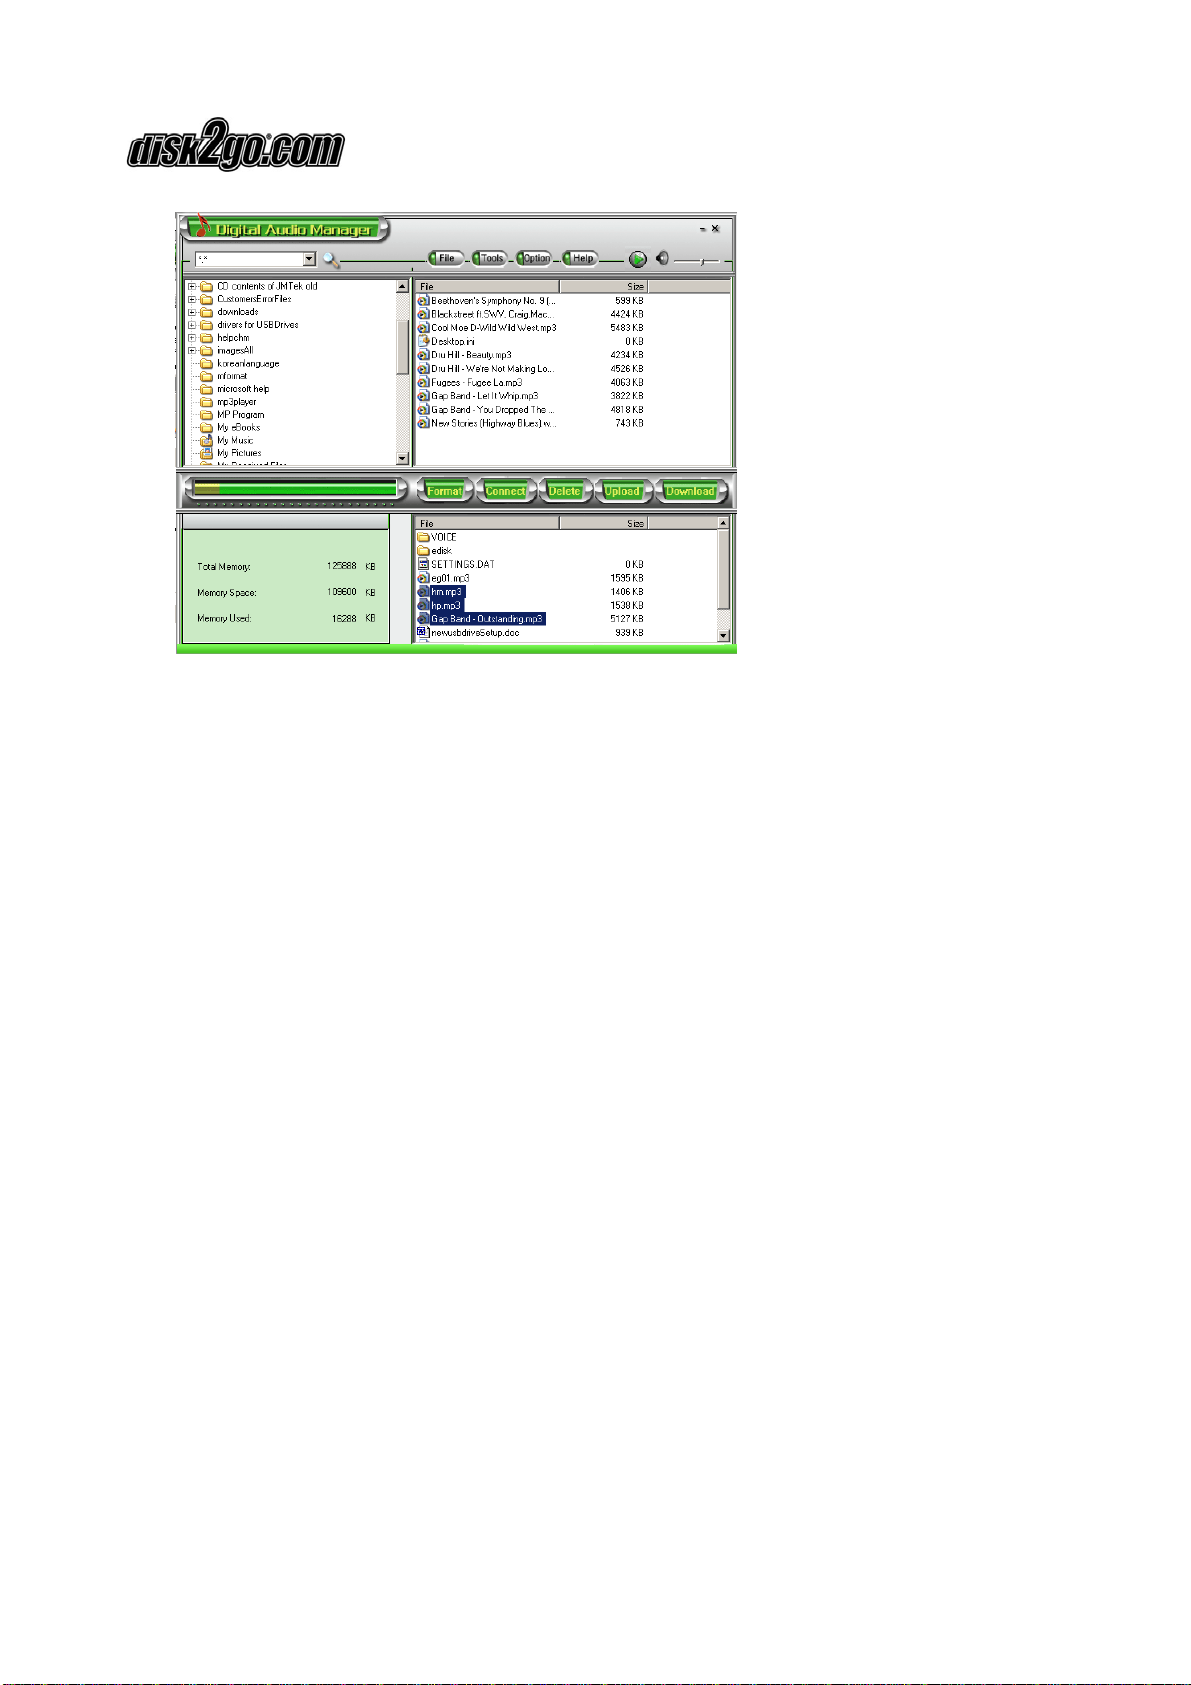
2.17. Moving files from disk2go® Music to PC
The disk2go® Music can also act as a removable disk. You can copy files from the
disk2go® Music to your PC with the Digital Audio Manager. The audio files can not be
copied from disk2go® Music to PC due to copyright protection. Only files in the
EDISK can be copied
1. Connect the disk2go® Music and PC with USB cable.
2. Select the files to be sent.
3. Click the Upload button in the Digital Audio Manager.
4. The interface of transmission would be displayed.
Caution:
1. Do not remove the USB cable or disk2go® Music while a file is being
downloaded. This can harm your disk2go® Music.
2. Coping MP3 or WMA files from disk2go® Music to the PC is not permitted.
System will warn you “it cannot be sent” if you select MP3 or WMA files.
User Manual «MUSIC! 128MB & 256MB»
Version 1.1 / 2003 / © disk2go.com Page 15/20
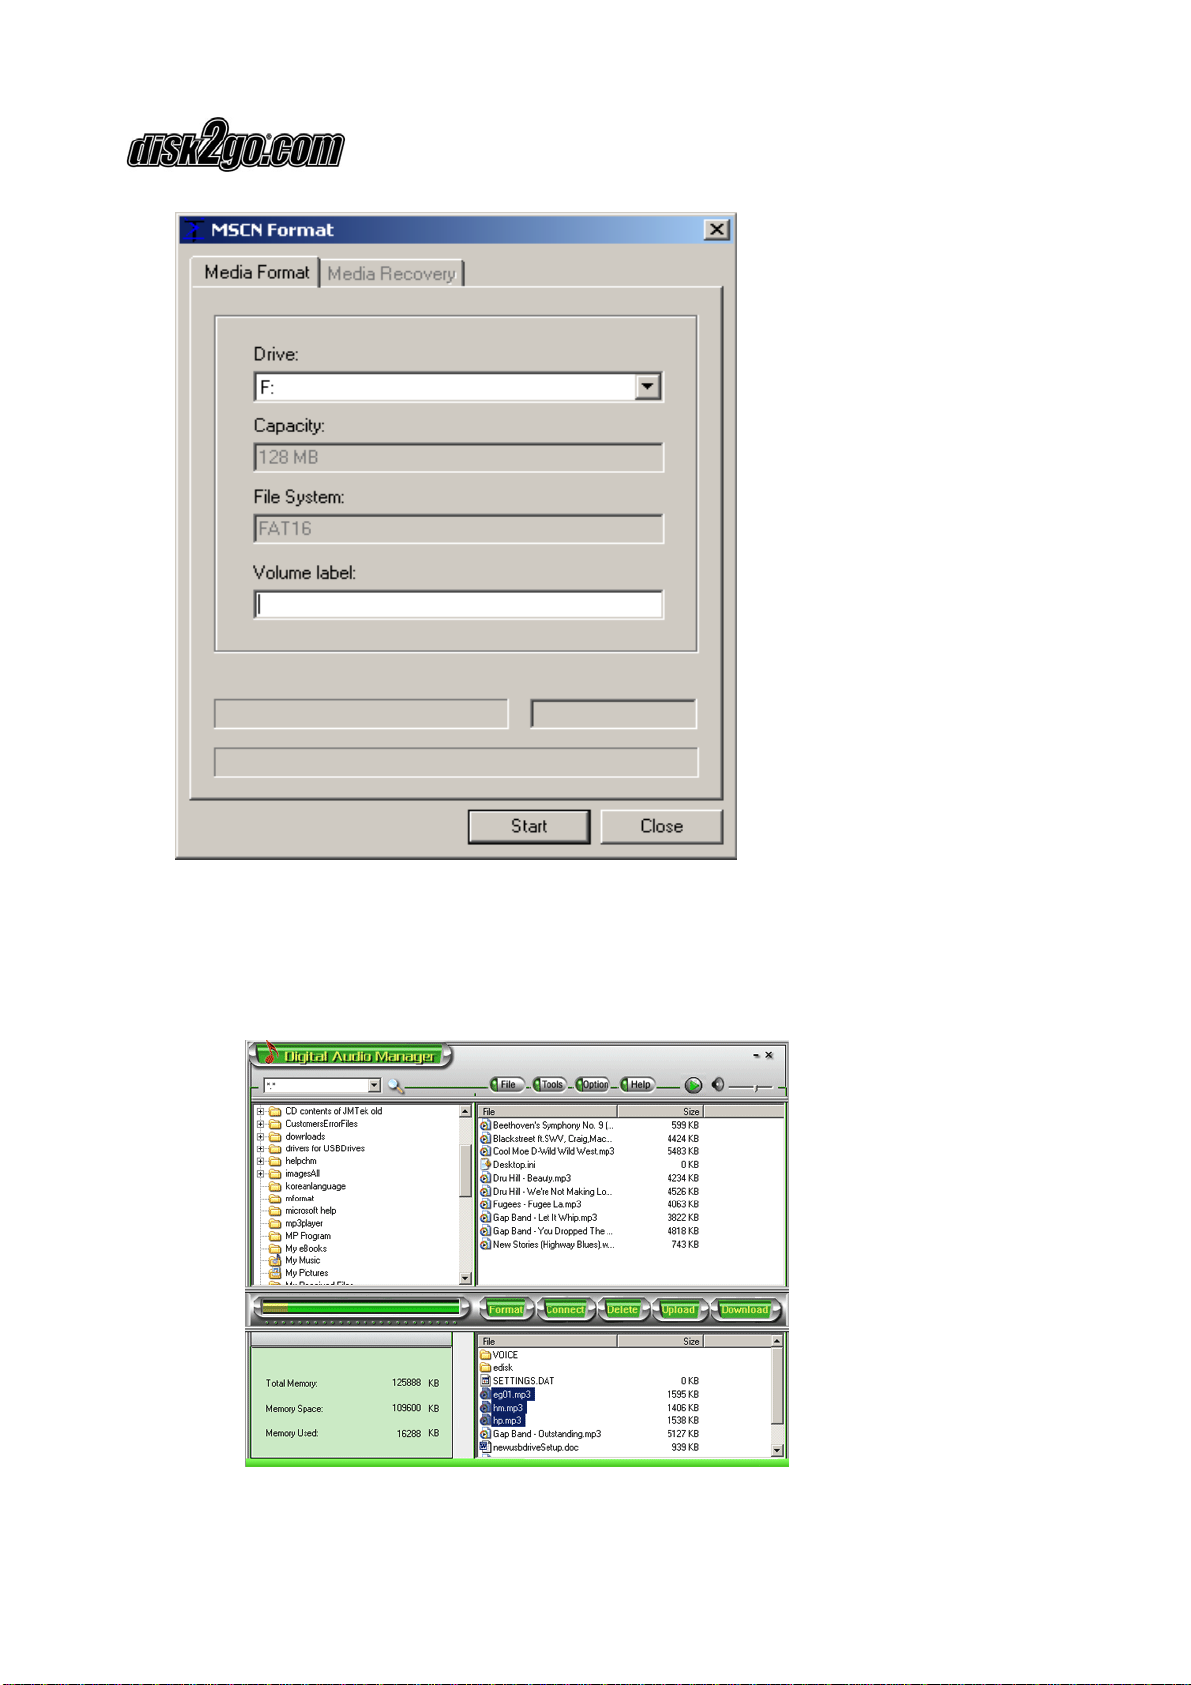
2.18. Formatting disk2go® Music Memory
Before formatting, be sure that the disk2go® Music is turned ON and connected to
PC.
1. Run the Digital Audio Manager from the desktop.
2. Click Format icon, the dialog box of format will pop up.
3. Select the disk symbol to be formatted from the Drive column. There are
two disk symbols. One represents the drive letter of the disk2go® Music
and the other represents the file system.
4. Click Start button after selecting the drive. It will begin to format
disk2go® Music.
Note:
1. All the files will be deleted by formatting the memory.
2. Do not disconnect while formatting. This may result in losing system files and
may make the disk2go® Music unusable.
User Manual «MUSIC! 128MB & 256MB»
Version 1.1 / 2003 / © disk2go.com Page 16/20
2.19. Deleting files from disk2go® Music
1. Connect the disk2go® Music to the PC, turn on the disk2go® Music and run
Management System.
User Manual «MUSIC! 128MB & 256MB»
Version 1.1 / 2003 / © disk2go.com Page 17/20
2. Select the files to be deleted.
3. Click the Delete button .
You can also use the option to Delete from the menu.
Note:
•In addition to using the Digital Audio Manager, you may also delete contents
using disk2go® Music GUI (Graphical User Interface).
Once a file is deleted, it cannot be restored.
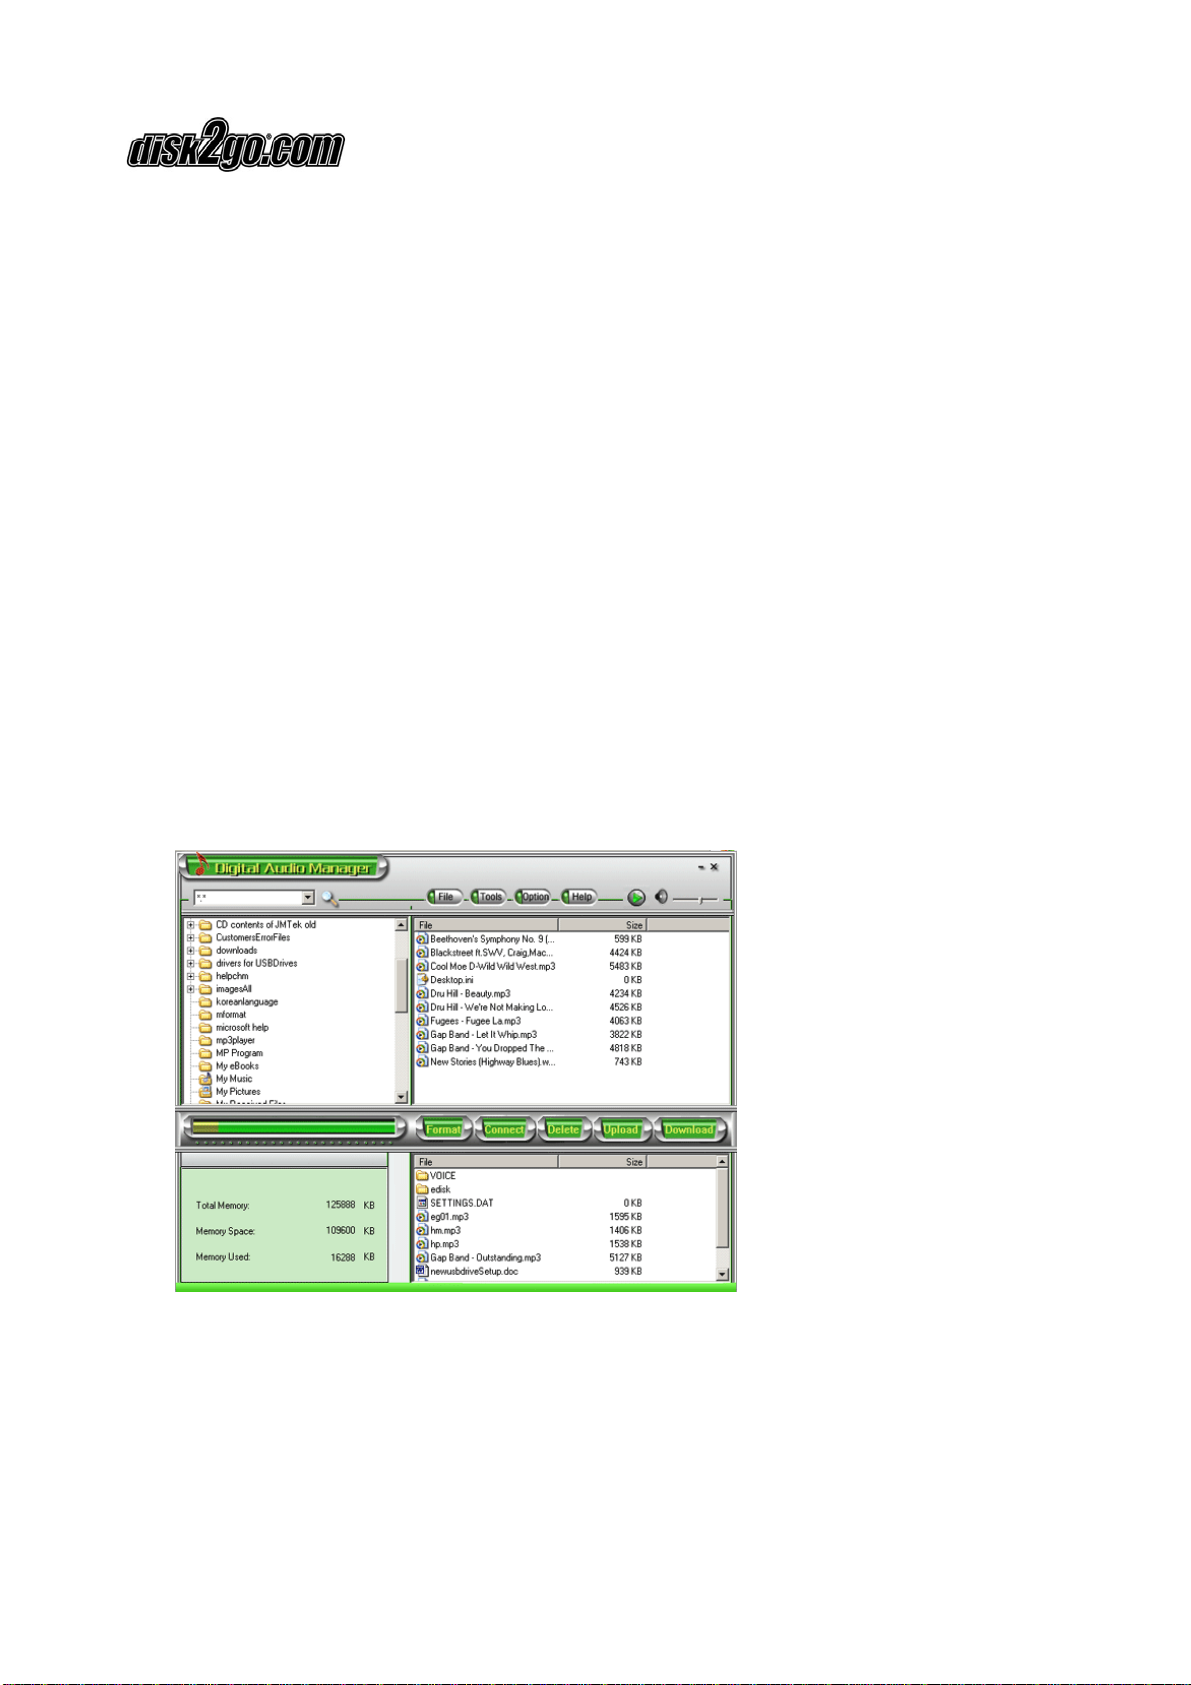
2.20. Refreshing Digital Audio Manager Display
While the disk2go® Music is connected to your PC, click the Connect button from
the Digital Audio Manager to refresh the display window.
2.21. Internal Memory Display
The Digital Audio Manager also displays the internal memory capacity of the
disk2go® Music.
The Digital Audio Manager will display the Total Memory, Memory available and
Memory used.
2.22. Pre-listen feature
After selecting a song in your PC, you can listen to it by using Digital Audio Manager.
Select the song you would like to hear.
User Manual «MUSIC! 128MB & 256MB»
Version 1.1 / 2003 / © disk2go.com Page 18/20
Click the Pre-listen button on the top right corner.
This will play the music from the PC. The Pre-listen button will now be displayed as
a Stop button. To stop playing music, click the Stop button. To hear the next song,
click Stop and then select the next song.

User Manual «MUSIC! 128MB & 256MB»
Version 1.1 / 2003 / © disk2go.com Page 19/20
3. Frequently Asked Questions (FAQ)
1. Why won’t the disk2go® Music software work with a Linux or a Macintosh OS?
The disk2go® Music software is Windows based and only compatible with
Windows 98 SE, ME, 2000 and XP.
2. Can I copy files from the disk2go® Music to my computer?
Data files can be copied from the disk2go® Music to your computer, but you
cannot copy MP3 and WMA files from the disk2go® Music to your computer
due to copyright laws.
3. The disk2go® Music LCD display remains blank after turning ON the unit.
Check if the battery has been inserted, or if it needs replacement. Try
reinserting after 5 seconds or replace with a new one.
4. The buttons on the disk2go® Music do not respond.
Please make sure that the Hold button is not ON, release the Hold button to
allow other buttons to work.
5. No sound can be heard while playing MP3 or WMA files.
Please check if the volume level. Check to make sure that the head phones
are securely connected to the disk2go® Music.
6. What type of battery is required?
AAA (1.2 – 1.5V) is required.
7. How long is the battery life?
The battery life should be approx 12 hours, however battery life may be vary
depending on the use of unit.

User Manual «MUSIC! 128MB & 256MB»
Version 1.1 / 2003 / © disk2go.com Page 20/20
Thank you for choosing this product!
If you experience problems with disk2go® DIGIVIEWER and cannot find an
answer in the previous troubleshooting sections, please contact your dealer.
© disk2go.com®, September 2003
Limited Warranty
Coverage
The Manufacturer (disk2go.com) warrants that the disk2go® Music is free from defect in
materials and workmanship for the period of 1 Year. This non-transferable, limited warranty
is only to you, the first end-user purchaser. The warranty begins on the date of purchase
and lasts for the period of 1 Year.
Excluded Products
This warranty does not apply to expendable components such as (A) fuses or bulbs; (B)
third party products, hardware or software, supplied with the warranted product. The
manufacturer makes no warranty of any kind on such products which, if included, are
provided “AS IS”. Excluded is damage caused by accident, misuse, abuse, unusually heavy
use or use of non-disk2go.com supplied or approved accessories. Also excluded is damage
caused by external environmental causes.
Remedies
Your sole and exclusive remed
y
for a covered defect is re
p
air or re
p
lacement of the defective
product, at disk2go.com’s sole option and expense, and disk2go.com may use new or
refurbished parts or products to do so. The replaced part/product will be warranted for the
remainder of the original warranty or three (3) months from the date of shipment of such
parts/products, whichever is longer. If disk2go.com is unable to repair or replace a defective
product, your alternative exclusive remedy shall be a refund of the original purchase price.
The above is disk2go.com’s entire obligation to you under this warranty. IN NO EVENT
SHALL DISK2GO.COM BE LIABLE FOR INDIRECT, INCIDENTAL, CONSEQUENTIAL OR
SPECIAL DAMAGES OR LOSSES, INCLUDING LOSS OF DATA, USE, OR PROFITS EVEN IF
DISK2GO.COM HAS BEEN ADVISED OF THE POSSIBILITY OF SUCH DAMAGES. In no event
shall disk2go.com’s liability exceed the original purchase price of the product. Some
jurisdictions do not allow the exclusion or limitation or incidental or consequential damages,
so the above limitation or exclusion may not apply to you.
This manual suits for next models
1
Table of contents


