Discovery Expedition D105X User manual
INSTRUCTION MANUAL
SELF-POWERED AM / FM / SW /
NOAA WEATHER RADIO
D105X

IMPORTANT SAFETY INSTRUCTIONS
When used in the directed manner, this unit has been designed
and manufactured to ensure your personal safety. However,
improper use can result in potential electrical shock or fire
hazards. Please read all safety and operating instructions
carefully before installation and use, and keep these
instructions handy for future reference. Take special note of all
warnings listed in these instructions and on the unit.
1 Read these instructions – All the safety and operating
instructions should be read before the appliance is operated.
2 Keep these instructions – The safety and operating
instructions should be kept for future reference.
3 Heed all warnings – All warnings on the appliance and in the
operating instructions should be adhered to.
4 Follow all instructions – All operation and use instructions
should be followed.
5 Do not use this apparatus near water – The appliance
should not be used near water; for example, near a bath tub,
washbowl, kitchen sink, laundry tub, in a wet basement, or
near a swimming pool.
6 Clean only with dry cloth – The appliance should be cleaned
only as recommended by the manufacturer.
7 Do not install near any heat sources such as radiators, heat
registers, stoves, or other apparatus (including amplifiers)
that produce heat.
8 Only use attachments / accessories specified by the
manufacturer.
9 Refer all servicing to qualified service personnel. Servicing
is required when the apparatus has been damaged in any
way, such as power-supply cord or plug is damaged, liquid
has been spilled or objects have fallen into the apparatus,
the apparatus has been exposed to rain or moisture, does
not operate normally, or has been dropped.
10 This appliance shall not be exposed to dripping or
splashing water and that no object filled with liquids such as
vases shall be placed on the apparatus.
11 Power Sources – The appliance should be connected to a
.
.
.
.
.
.
.
.
.
.
.
1

power supply only of the type described in the operating instructions or
as marked on the appliance. Do not overload wall outlet.
12 Danger of explosion if battery is incorrectly replaced. Replace only with
the same or equivalent type.
13 Do not attempt to dismantle, open or repair this product yourself. If a
fault occurs, seek advice from your local qualified service technician or
contact the distributor via the telephone number at the back of this
instruction manual.
Caution marking and nameplate are located on bottom of product
.
.
14.
COMPLIANCE WITH FCC REGULATIONS
This equipment has been tested and found to comply with the limits for a
Class B digital Device, pursuant to Part 15 of the FCC Rules. These limits
are designed to provide reasonable protection against harmful interference
in a residential installation. This equipment generates uses and can radiate
radio frequency energy and, if not installed and used in accordance with the
instructions, may cause harmful interference to radio communications.
However, there is no guarantee that interference will not occur in a particular
installation. If this equipment does cause harmful interference to radio or
television reception, which can be determined by turning the equipment off
and on, the user is encouraged to try to correct the interference by one or
more of the following measures:
Reorient or relocate the receiving antenna.
-Increase the separation between the equipment and receiver.
Connect the equipment into an outlet on a circuit different from that to which
the receiver is connected.
-Consult the dealer or an experienced radio technician for help.
(1) This device may not cause harmful interference, and (2) this device
must accept any interference received, including interference that may
cause undesired operation.
WARNING:
Changes or modifications to this unit not expressly approved by the party
responsible for compliance could void the user's authority to operate the
equipment.
-
-
This device complies with Part 15 of the FCC Rules. Operation is subject to
the following two conditions:
2

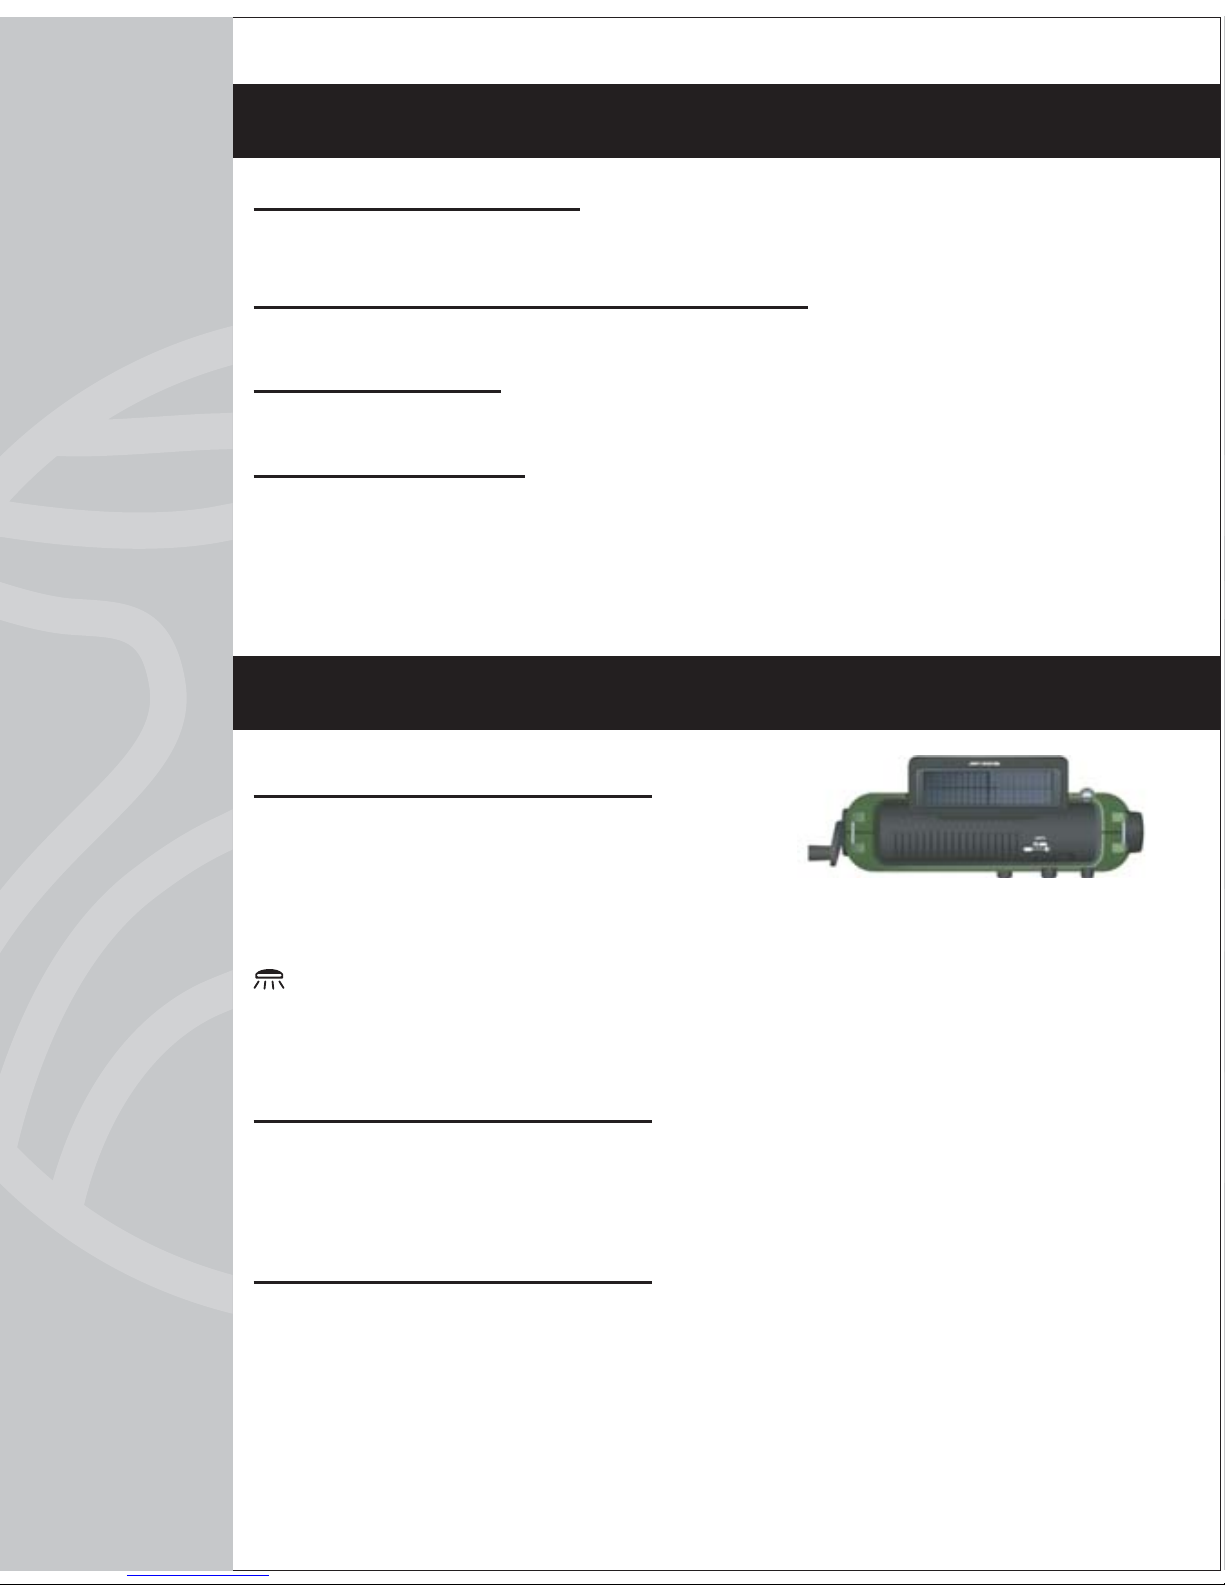
LOCATION OF CONTROLS
SPECIAL NOTE
To prevent any scratching or damage to your furniture, we
strongly recommend that you purchase small self-adhesive
felt pads, available at hardware stores and home
improvement centers everywhere, and apply these pads to
the bottom of the unit before you place the product on any fine
wooden furniture.
10 11
4
3
2
1
5
6
7
8
912
3
1 Hand Crank
2. Battery Level Indicator
3. Tuning/Charging Indicator
4. Reading Lamp
5. Solar Panel
6. Reading Lamp/Flash/SOS Light Selector
7. Flashlight
8. Dial Pointer
9 Speaker
10 Weather Channel Selector
11. WX/FM/AM/SW1/SW2 Band Selector
12. Power Source Selector
.
.
.

4
13
14
15
16
17
18
13 Carrying Strap
14.Telescopic Antenna
15.Tuning Knob
16.Volume Knob
17 Battery Compartment
.
.
18 Connector Rubber Dust Cover.
19
20
21
22
19 Charger IN/OUT Switch
20.USB Jack
21.Earbuds Jack
22.DC IN Jack
.

POWER SOURCE
This radio is designed to operate on multiple power sources.
A) FIVE WAYS TO POWER THE UNIT
“DYNAMO” POWER OPERATION1)
1 A DC 3.6V rechargeable battery is included with
D105X. When first time using the unit, open the battery
compartment and plug the rechargeable battery into the
socket as shown.
.
5
RECHARGEABLE
BATTERY 3.6V
(“AA” SIZE UM-3) (“AA” SIZE UM-3)
(“AA” SIZE UM-3)
2 Close the Battery Door.
3 Set the Power Source Selector to the “OFF” position.
4 Lift the Crank Handle outward until it is fully extended.
Rotate the Crank, the TUNING/CHARGING Indicator will
light.
.
.
.
.5 Set the Power Source Selector to SOLAR/CRANK position
to turn on the unit for operation.

6
Ni-MH Battery Safety Instructions
Do not burn or bury batteries. Do not puncture or crush. Do not
disassemble.
Recycle Ni-MH batteries. Do not dispose of in the trash.
If the electrolyte in the cells should get on your skin, thoroughly wash
with soap and water. If in the eyes, rinse thoroughly with cool water.
Immediately seek medical attention.
Use only chargers rated for Ni-MH cells. Be sure the charger's voltage
and current settings are correct for the battery pack being charged.
Charge batteries on a fireproof surface away from flammable items or
liquids.
Batteries should NEVER be left unattended while charging. Only
adults should charge the batteries.
Follow the manufacturer's instructions for charging the product and do
not charge longer than recommended. Unplug the charger when the
battery is charged.
Recycle Rechargeable Batteries
Recycle your old rechargeable batteries at one
of the many collection sites in the U.S. and
Canada. To find the site nearest you, visit
www.call2recycle.org or call toll-free 1-877-2-
RECYCLE.
2 Battery Operation)
1 Open the Battery Door on the back of the radio..

7
2 Following the polarity diagram shown in the battery
compartment, insert 3 'AA' (UM-3) batteries (Not included)
and close the battery door.
3 Open the Connector Rubber Dust Cover, set the Charger
IN/OUT Switch to IN position.
4 When batteries were installed, the power of the build-in
rechargeable battery pack will be cut off after setting the
Power Source Selector to “BATT./DC” (DRY CELL
Battery/DC Power) position.
.
.
.
IMPORTANT:
Be sure that the batteries are installed correctly.
Wrong polarity may damage the unit.
WARNING:
- Be sure that the batteries are installed correctly. Wrong
polarity may damage the unit.
- Do not mix old and new batteries.
- Do not mix alkaline, standard (carbon-zinc) or rechargeable
(nickel-cadmium) batteries.
- Only batteries of the same or equivalent type as recommend
are to be used.
- If the unit is not to be used for an extended period of time,
remove the battery. Any old or leaking battery can cause
damage to the unit and may void the warranty.
- Do not dispose of batteries in fire, batteries may explode or
leak.
Do not try to recharge batteries not intended to be recharged;
they can overheat, rupture
and leak(Follow battery manufacturer's directions).
-
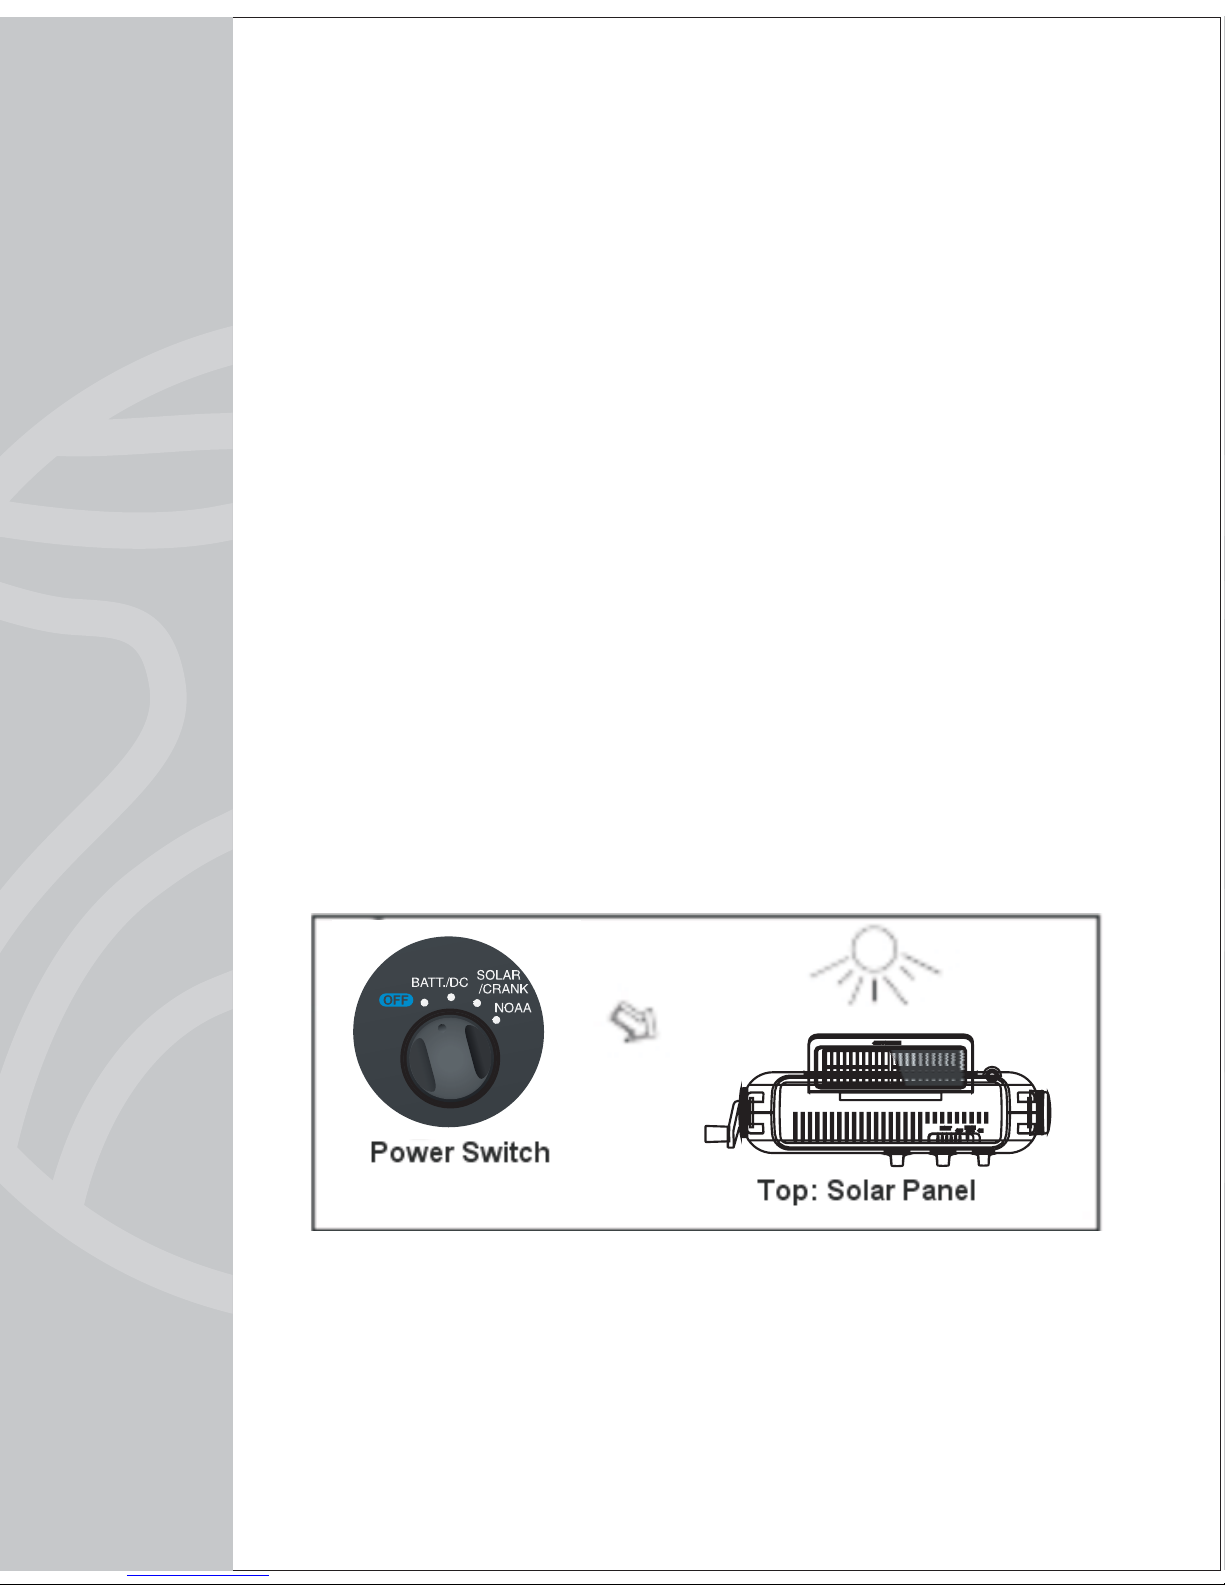
3)SOLAR POWER
1. Set the Power Source Selector to "SOLAR/CRANK” position.
2. Put the unit in the sunlight, make the solar panel of the unit is
facing to the sun. If the sunlight is strong enough, the Battery
Level Indicator “HI” will be on, the unit can work normally.
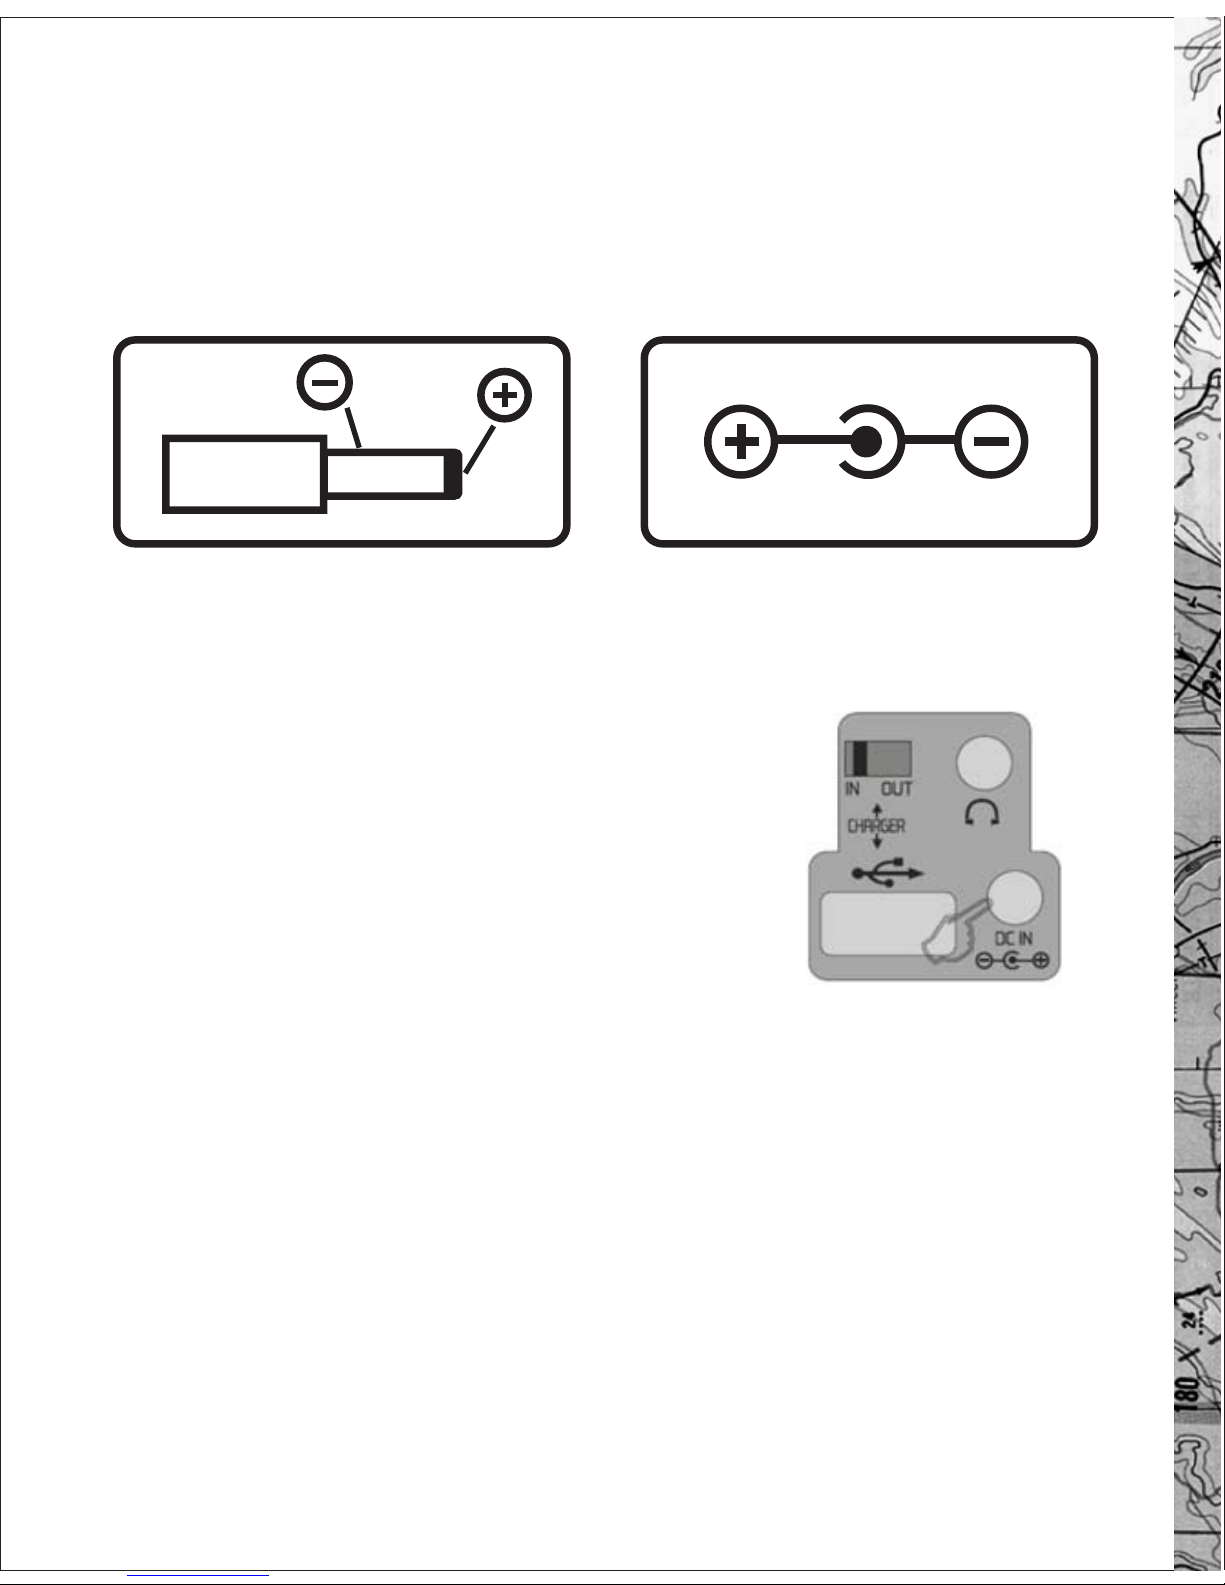
4)AC ADAPTOR OPERATION
You can also power the unit by using an AC Adapter (not included).
Please make sure to use an AC adapter with a rating of 6V DC, 250
mA with the following center positive (+) polarity
1 If you are using a universal adapter with an output polarity switch
or polarized plugs, be sure to set the center plug polarity to “+”.
2 Open the Connector Rubber Dust Cover on
the back of the unit, set the Charger IN/OUT
Switch to “IN” position.
3 Firmly and securely insert the DC plug of
the adapter into the DC IN Jack on the unit,
the batteries are automatically disconnected.
Set the Power Source Selector to “BATT./DC”
position.
.
.
.
Note: The CHARGE Indicator will light once the AC Adaptor is
plugged into the AC outlet regardless of the setting of the
Power Source Selector except unit is in weather band and
Power Source Selector either in BATT./DC or SOLAR/CRANK
position.
8

5) Computer USB Power
The unit has a standard USB jack on the back of the unit under
the Connector Rubber Dust Cover.
1 Use a standard USB cable (not included), connect your
computer's USB port to the USB connector of the unit.
2 Set the Charging IN/OUT Switch on the back of the unit to
“IN” position.
3 Turn on your computer and set the Power Source Selector to
"SOLAR/CRANK" position.
.
.
.
B) POWER INDICATORS
When the rechargeable battery power is high, the BATT. HI
green LED on the front of the unit is on.
When the battery power goes low, the BATT. LOW red LED will
be on, you are recommended to charge the rechargeable
batteries.
LISTEN TO RADIO
1 Set the Power Source Selector to "BATT./DC." or
"SOLAR/CRANK." position to turn the unit on.
2 Set the Band Switch to select AM/FM/SW1/SW2 band.
3 Rotate the tuning Knob to select the desired radio station,
the Red tuning LED will light if the station is properly tuned and
signal is strong enough.
4 Adjust Volume Knob to obtain the desired sound level.
5 To tune the radio off, set the Power Source Selector to
“OFF”position.
.
.
.
.
.
HINTS FOR BEST RECEPTION:
- The AM antenna is located inside the cabinet of the unit. If AM
reception is weak, change the position of unit until the internal
antenna picks up the strongest signal.
9
9
LISTEN TO WEATHER CHANNEL
1) Weather Band
1 Set the Power Source Selector to "BATT./DC" or "SOLAR/CRANK"
position to turn the unit on.
2 Set the Band Switch to "WX" position.
3 Set the Weather Channel Switch to select your local weather
broadcasting.
4 Adjust Volume Knob to obtain the desired sound level.
5 To tune the radio off, set the Power Source Selector to “OFF”
position.
.
.
.
.
.
Weather Band Channel Frequency Table
CHANNEL FREQUENCY(MHZ)
CH1 162.400
162.425
162.450
162.475
162.500
162.525
162.550
CH2
CH3
CH4
CH5
CH6
CH7
Note: with regard to the NOAA Weather Band: You need to identify
which band receives your local weather band report. When you
change locations either to another city or state, you may need to
choose a different band to get the local report in that location.
HINTS FOR BEST RECEPTION:
- To insure maximum weather band reception, the Telescopic Antenna
should be fully extended and to obtain the best
possible station reception.
rotate the unit
-
rotate the unit
To insure maximum SW1/SW2/FM tuner reception, the Telescopic
Antenna should be fully extended and to obtain the
best possible station reception.
10

11
2) RECEIVING EMERGENCY WEATHER ALERT
NOAAAlert allows you to set the unit so it is in a standby mode
and will turn the radio on automatically if there is a severe
weather emergency in your area. To receive emergency
weather alert warnings, turn the unit on, tune to the strongest
local NOAA channel, adjust the volume control to a level that
you will hear when an alert is received. Set the BAND Switch
to the WEATHER ALERT position. The radio remains silent
until an “alert” broadcast occurs.
1 Set the Band Selector to “WX” position and turn the weather
band to your local weather station.
2 Set the Power Source Selector to “NOAA” position and the
unit will go on automatically after 3 times Beeper alarm when
there is an alert from the National Weather Service.
3 Set the Power Source Selector to “OFF” position to turn off
the NOAAAlert. It is recommended to use the AC adaptor to
power the radio when you turn on the NOAA Alert.
1. NOAA Weather band is a service broadcast of the
U.S. Government and available in all 50 states, Puerto Rico
and the U.S. Virgin Islands.
2 The NOAA Weather Service broadcasts a test alert every
Wednesday between 11 am and Noon. To receive the
broadcasts, the radio must be within the range of the local
broadcast site, 10 - 40 miles, depending on terrain and
obstructions.
Click on http://www.nws.noaa.gov/nwr/ for NOAA (National
Oceanic & Atmospheric Administration) and
http://www.ec.gc.ca/ for Environment Canada.
Note:
To learn more:
.
.
.
.
11

CHARGING THE INTERNAL BATTERY
1. DYNAMO CHARGING
NOTE:
2. COMPUTER USB CHARGING
NOTE:
3. AC ADAPTOR CHARGING
1. Install Ni-MH batteries correctly.
2. Set the Power Source Selector to "OFF" position.
3. Turning the hand crank, the built-in dynamo will start to generate
electricity. The unit will charge the Ni-MH battery automatically.
4. While charging, the Charging green LED in front of the unit will be
on.
The brightness of LED lights shows the charging intensity of the batter
power
While the intensity of the battery power is limited, when the
battery level indicator goes RED, the rechargeable Ni-MH batteries
are low, you can turn the hand crank to generate electricity for
emergency.
1. Install the Ni-MH batteries correctly.
2. Set the Power Source Selector to "OFF" position.
3. Open the Connector Rubber Dust Cover, set the Charger Switch to
IN position.
4. Use a standard USB to USB cable (not included), plug one end with
USB into the computer USB port. Plug the other end into USB jack of
the unit. It will start charge the Ni-MH battery automatically when your
computer is ON.
5. While charging, the Charging green LED in front of the unit will be
on.
Before the first use, we recommend to charge the Ni-MH batteries
for 4 hours the maximum. Please do not charge the battery longer than
recommendation as it will shorten the battery life.
1. Plug the AC adaptor into a household AC outlet.
2. Set the Power Source Selector to "OFF" position.
3. Open the Connector Rubber Dust Cover, set the Charger switch to
“IN” position.
12
13
4. Connect DC plug of the AC adaptor to the DC IN jack on the
back of the unit. It will start charge the Ni-MH battery
automatically.
5. While charging, the Charging green LED in front of the unit
will be on.
The solar panel on the back of the unit can rotate a full 180
degrees to let you angle it for optimal charging.
1. Set the Power Source Selector to "OFF" position.
2. Put the unit in the sunlight , rotate the panel to make sure
the solar panel of the unit is irradiated by the sunlight. The unit
will charge the rechargeable battery automatically.
NOTE: 1. Before the first use, we recommend to charge the
Ni-MH batteries for 4 hours the maximum. Please do not
charge the battery longer than recommendation as it will
shorten the battery life.
2. Unplug the adaptor from the radio when not in use to
avoid overcharging of the rechargeable batteries.
4. SOLAR CHARGING
NOTE: 1 The unit will also charge from indoor light and lamps but at a
slower rate.
2 Battery charging LED will not lignt in solar
、
、charging mode.
13

CHARGING THE EXTERNAL DEVICE
This unit has a USB which can charge your Cell phone or MP3 player if
they have a built in Mini USB port to accept external charging power.
Because of large variety of cell phones and different circuitry,
not every cell phone or MP3 device with Mini USB can be
charged in this way. Refer to your cell phone or MP3 player user
manual before you charge them in this way.
1. Open the Connector Rubber Dust Cover.
2. Use a USB to Mini USB cable(not included) to connect the unit and
your external device which has a Mini USB port.
3. Plug the end with USB to USB Jack of the unit, plug the other end
with Mini USB to Mini USB port of your external device.
4. Set the Charger IN/OUT Switch to “OUT” position.
5. Set the Power Source Selector to "OFF" Position.
6. Follow below procedures to charge your external device.
Turn the hand crank to start charging your external device.
It is recommended you charge your external device when its
battery goes low. It is more difficult to crank charge an external device
when its rechargeable batteries are completely exhausted.
NOTE:
Dynamo Charging
Note:
-
14
CHARGING/TUNING LED INDICATOR
Battery Charging Only
LED shows Green.
Battery Charging and Using the Radio
-LED shows Orange.
Tuning the Radio
-LED shows Red.
NOAAAlert mode
-LED shows Green steadily about 18 seconds at first when
switch on, the unit is in normal power mode.
-LED flashing about every 6 seconds, the unit is in power
saving mode.
-
USING THE FLASHLIGHT
1. Using the reading lamp
2. Using the flashlight
3. Using the SOS light
On bottom side of the solar panel is a
5-LED Reading Lamp. The lamp can
be rotated 180 degrees to let you tilt
it to one of many desired positions.
1 Set the Reading Lamp/Flash/SOS Light Selector on the top
of the unit to Position to turn on the lamp.
2. Set the Light Selector to OFF position to turn off the lamp.
The LED flashlight is built into the side of the unit above the
tuning knob. To use the flashlight, set the Light Selector to
“ON” position. To turn off the flashlight, set the Lights Selector
to OFF position.
In an emergency, you can turn on the flashing red SOS light
by setting the Light Selector to “FLASH” position. To turn it
off, set the Light Selector to OFF position.
.
15

USE EARBUDS (NOT INCLUDED)
Inserting the plug of your earbuds into the earbuds jack will enable
you to listen in private. When using earbuds, the speakers will be
disconnected.
1.) Avoid extended play at very high volume as it may impair your
hearing.
2.) If you experience ringing in your ears, reduce the volume or shut
off the unit.
3.) Keep the volume at a reasonable level even if your headset is an
open-air type designed to allow you to hear outside sounds. Please
note that excessively high volume may still block outside sounds.
Read this Important Information before Using Your Earbuds
CARE AND MAINTENANCE
1. Do not subject the unit to excessive force, shock, dust or extreme
temperature.
2. Do not tamper the internal components of the unit.
3. Clean your unit with a damp (never wet) cloth. Solvent or
detergent should never be used.
4. Avoid leaving your unit in direct sunlight or in hot, humid or dusty
places.
5. Keep your unit away from heating appliances and sources of
electrical noise such as
fluorescent lamps or motors.
Never allow any water or other liquids to get inside the
unit while cleaning.
CAUTION:
16
TROUBLESHOOTING GUIDE
If you experience difficulties in the use of this unit please check
the following or call 1-800-777-5331 for Customer Service.
Symptom Possible Cause Solution
No/low
sound when
power on
the radio
VOLUME Control is
set to minimum.
Station has not been
tuned properly.
FM reception is weak.
AM reception is weak.
Unit in Weather Alert
Mode.
Adjust the VOLUME
control.Tune the station
properly.Extend and rotate
the FM antenna.
Relocate the position
of the unit.
Select AM, FM or WB as
desired.
Power is
not on
The built-in rechargeable
battery pack is low
The batteries are
exhausted.
Recharge the built-in
rechargeable battery pack.
Replace all the batteries.
SPECIFICATION
Power requirement:
DC Input:
3 X AA (UM-3) Batteries or
Built in DC 3.6V, 600mAH Ni-MH rechargeable battery or
DC 6V, 250mAAC adaptor or
DC 5V Computer USB Power
Frequency Range
Radio Band
FM 88 ~ 108 MHz
AM 530 - 1710 KHz
SW1 3.2 – 8.0 MHz
SW2 9.0 – 22 MHz
WXCH1–7
17
17

TROUBLESHOOTING GUIDE
LIMITED WARRANTY AND SERVICE
SPECTRA MERCHANDISING INTERNATIONAL, INC. warrants this unit
to be free from defective materials or factory workmanship and will
replace or repair this unit or any part thereof, except batteries, if it proves
to be defective in normal use or service within 90 days from date of original
purchase. Our obligation under this warranty is the repair or replacement of
the defective unit or any part thereof, except batteries, when it is returned,
transportation pre-paid, to SPECTRA. This warranty will be considered void
if unit is tampered with, improperly serviced, or subject to misuse,
negligence or accidental damage. There are no other express warranties
other than those stated herein.
This warranty gives you specific legal rights, and you may also have other
rights which varies from state to state. TO OBTAIN SERVICE please pack
the unit carefully and send it prepaid by secured parcel post or UPS to
SPECTRA at the address shown below. It would be helpful if you include a
note explaining how the unit is defective.
IF THE UNIT IS RETURNED WITHIN THE WARRANTY PERIOD shown
above, please include a proof of purchase (dated cash register receipt) so
that we may establish your eligibility for warranty service and repair of the
unit without cost.
IF THE UNIT IS OUTSIDE THE WARRANTY PERIOD, please include a
check for $40.00 to cover the cost of repair, handling and return postage.
SPECTRA MERCHANDISING INTERNATIONAL, INC.
4230 North Normandy Avenue,
Chicago, Illinois 60634, USA.
773-202-8408 or 1-800-777-5331
For quicker, easier product registration, you can also register your
product warranty on-line:
www.spectraintl.com/warranty.asp@
18

V080811
Table of contents
Other Discovery Expedition Weather Radio manuals


