DK Digital DVP-198 User manual

3

Thank you very much . . .
. . . for choosing one of our portable DVD players. This manual is valid for model DVP-198 in
several colour combinations. For your own safety and in order to learn all about the
functions available, please read this manual and keep it for future reference. And if you once
sell the unit please include the manual.
www.dk-digital.com
© 2007 Copyright, manufacturer: DK digital GmbH, Germany
2

Important Safety Instructions, please read carefully!
•This unit is meant to playback DVDs as
well as other digital video and audio
media. Using it in any other way you risk
electric shock. This device may not be
used differently from the instructions in
this manual.
•Never attempt to open the housing of your
DVD player. All servicing or repair must be
referred to qualified service personnel
authorised by us.
•To avoid the risk of electric shock never
use the product in humid areas or near
water - e.g. near a bathtub, washbowl,
kitchen sink, in a wet basement or near a
swimming pool, or the like.
•This unit is intended for exclusive use with
the mains adaptor supplied, mains voltage
of AC230V~/50 Hz, with the rechargeable
battery supplied or the car cigarette
lighter adapter providing a direct voltage
of DC12V=. Never try to use it with
different voltage supply.
•The unit must only be used with the
supplied cigarette lighter in cars with the
chassis connected to the negative
battery pole.
•If objects have fallen inside or liquid
has been spilt onto the product disconnect
the adaptor plug from the mains
immediately and consult qualified service
personnel.
•Never let children play with the unit or
stick anything into it. Otherwise they face
the risk of electric shock.
•Do not operate the device on a bed or on
the sofa, so that the cushions do not
block the vents for ventilation. This could
overheat and ignite the easily combustible
materials.
•Do not place the unit near strong magnetic
fields, water or heat. It should not be
exposed to direct sunlight for a longer
period. Avoid positions with heavy dust or
poor ventilation. The unit should not be
exposed to mechanical vibrations or
shock.
•This product uses invisible
“Class-1- Laser”. Never
expose your eyes to this
dangerous laser beam.
•Mains adaptors don’t have an on/off
switch. So disconnect the adaptor from
the mains when the unit is not in use.
•Never touch a power cable or a power
adaptor with damp or wet hands! Never
use a damaged power cable! It can cause
an electric shock.
•We wish to clearly bring to your notice,
that the DVD player should only be
placed in the rear seats of a motor
vehicle and earphones or headphones
must be used in order to not distract the
driver. In case of an accident of the
vehicle, the device should not pose as
a threat to the occupants!
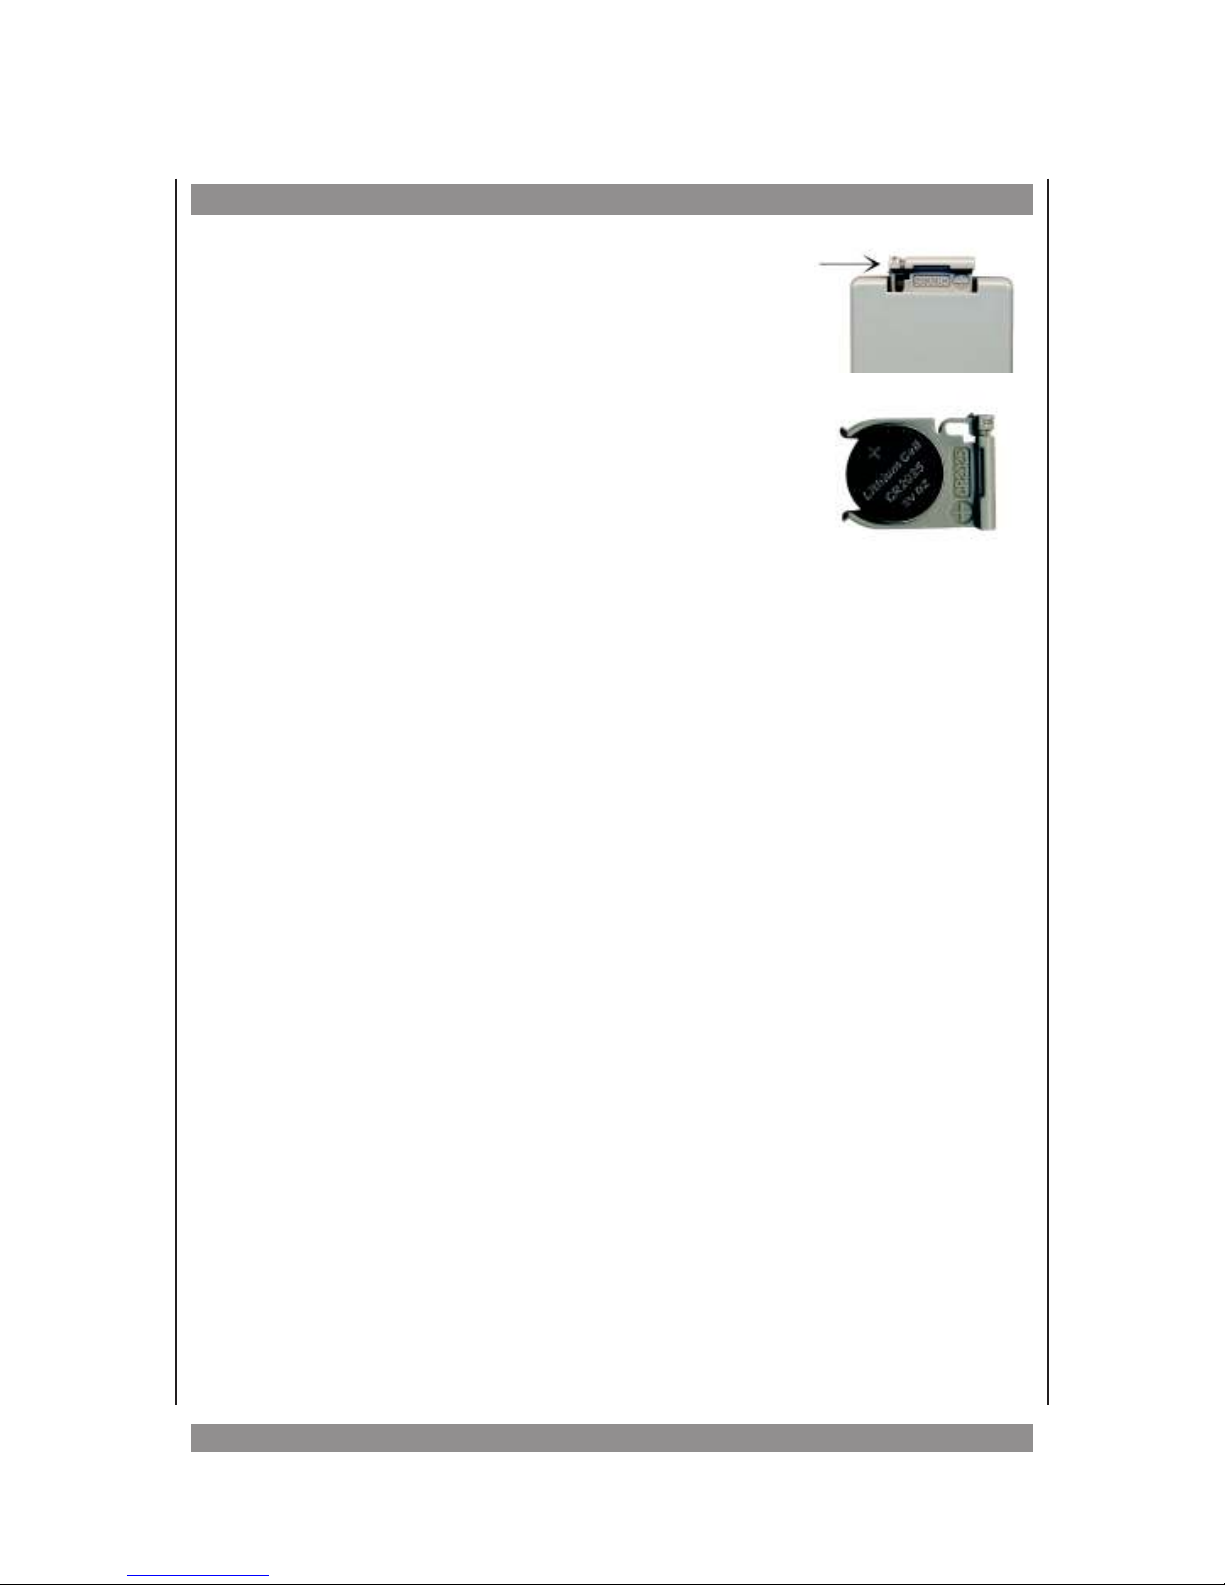
•If you transport the unit from cold to warm
conditions, condensation inside may
cause moisture leading to
malfunctions. If so please open the disc
tray and wait about 30 minutes, until the
moisture has evaporated.
•After disconnection of the mains adaptor
from the mains you can use a soft damp
cloth to clean the housing. Don’t use
strong cleansing products!
3

Table of contents
Important Safety Instructions, please read carefully! . . . . . 3
About this Manual . . . . . . . . . . . . . . . . . 5
Many Disc Formats are supported . . . . . . . . . . . 5
Important Information . . . . . . . . . . . . . . . 5
Comments on the copyright . . . . . . . . . . . . . 5
Region Management Information . . . . . . . . . . . . 5
Before You Switch ON . . . . . . . . . . . . . . . . . 6
Place of Use . . . . . . . . . . . . . . . . . . 6
Condensing Moisture . . . . . . . . . . . . . . . 6
Handling Disc’s . . . . . . . . . . . . . . . . . 6
Cleaning a Disc . . . . . . . . . . . . . . . . . 6
Using the Remote Control Handset . . . . . . . . . . . 7
Overview of the Control Elements . . . . . . . . . . . . . 8
The remote control (R/C) . . . . . . . . . . . . . . . 10
Hook up . . . . . . . . . . . . . . . . . . . 12
Memory card slot / USB memory device . . . . . . . . . . . 12
Control . . . . . . . . . . . . . . . . . . . 13
Switch On/Off . . . . . . . . . . . . . . . . . 13
Play DVDs . . . . . . . . . . . . . . . . . . 13
Volume control, mute. . . . . . . . . . . . . . . 13
Direct chapter access . . . . . . . . . . . . . . . 14
Skip chapters, search run . . . . . . . . . . . . . 14
Search run . . . . . . . . . . . . . . . . . . 14
Zoom . . . . . . . . . . . . . . . . . . . 15
Different camera angles . . . . . . . . . . . . . . 15
Repeat function . . . . . . . . . . . . . . . . 15
A-B repeat . . . . . . . . . . . . . . . . . . 15
Change sound track language . . . . . . . . . . . . 15
Show subtitles . . . . . . . . . . . . . . . . . 15
Access the DVD menu . . . . . . . . . . . . . . 16
Display key . . . . . . . . . . . . . . . . . . 16
Programming chapters/CD titles. . . . . . . . . . . . 16
Switch off the screen. . . . . . . . . . . . . . . 17
The Setup Menu . . . . . . . . . . . . . . . . . . 18
System Setup . . . . . . . . . . . . . . . 18
Language Setup . . . . . . . . . . . . . . 19
Audio Setup . . . . . . . . . . . . . . . 19
Video Setup . . . . . . . . . . . . . . . 20
Speaker Setup . . . . . . . . . . . . . . . 20
Digital Setup . . . . . . . . . . . . . . . 20
Use in cars . . . . . . . . . . . . . . . . . . . 21
Using the rechargeable battery . . . . . . . . . . . . . . 21
Installation of battery pack . . . . . . . . . . . . . 21
Deinstallation of the battery pack . . . . . . . . . . . 22
Important advice when dealing with lithium polymer batteries . . 22
Specifications for CD playback . . . . . . . . . . . . . . 22
Specifications for VCD playback (only VCD 2.0) . . . . . . . . . 22
Specifications for MP3-CD playback . . . . . . . . . . . . . 23
Data carriers with jpeg pictures . . . . . . . . . . . . . 24
Disposal Advice. . . . . . . . . . . . . . . . . . . 25
Troubleshooting . . . . . . . . . . . . . . . . . . . 25
Technical specifications . . . . . . . . . . . . . . . . 27
4

About this Manual
The operation described here mainly refers to the use of the remote control handset (R/C).
Buttons with same or similar marking at the main unit have the same function like those of
the R/C.
If the message “Invalid Key” is displayed on the monitor while you press a key, that function
requested is not supported by the media type inserted.
Many Disc Formats are supported
DVD-Video RCD/DVD±R(W) RVCD R
SVCD RCD Audio RMP3 / WMA R
HDCD RCDG RJPEG Foto CD R
Important Information
ØUsually the unit plays CD-R, CD-RW, MP3 discs as well as “burned” DVDs. But
due to the variety of blank disc types, recording computers, operating systems
and burning software we cannot guarantee that every “burned disc” is
playable. The unit does not play DVD-ROM, CD-ROM etc. and does not support
playback of files which are subject to the Digital Rights Managements (DRM).
ØThe types of functions and operations that can be used for a particular disc vary
depending on the features of that disc. In some cases, these functions and operations
may differ from the descriptions given in this Operations Manual. In this event, follow the
instructions given on the screen and on the sleeve of the disc.
ØThe built-in display uses a vast number of pixels. Brighter or darker pixels are common
and no defects.
Comments on the copyright
This product incorporates copyright protection technology that is protected by method
claims of certain US patents and other intellectual property rights owned by Macrovision
Corporation and other rights owners. Use of this copyright protection technology must be
authorized by Macrovision Corporation, and is intended for home and other limited viewing
uses only unless otherwise authorized by Macrovision Corporation. Reverse engineering or
disassembly is prohibited.
Region Management Information
This DVD player is designed and manufactured to respond to the region
management information that is recorded on a DVD disc. If the region number
described on the DVD disc does not correspond to the Region number of this
DVD player, this DVD player cannot play this disc. The region number for this
DVD player is “2”.
Please note for a better understanding of this manual that the program of a DVD may be
divided into several “titles” (e.g. main movie, bonus material, interviews etc.). Each of
these titles can be divided into “chapters”. The program of audio CD’s is divided into
“tracks”.
5

Before You Switch ON
Place of Use
ØFor operating the unit please always choose a location with sufficient air circulation
around. That prevents overheating. Don’t expose the unit to direct sunlight or other heat
sources.
ØThe product must be positioned horizontally only. Don’t put any heavy objects on its
housing.
ØTo protect the laser unit avoid dusty surroundings. If necessary, please use a cleansing
disc carefully following its operating instructions.
Condensing Moisture
In these cases water may be condensing on the laser lens causing malfunction:
ØThe unit is suddenly brought from a cold to a warm surrounding.
=> Please take out the disc and wait for about
an hour, until the unit has warmed.
ØThe unit is operated in a very humid surrounding.
=> Please choose a location with lower humidity.
Handling Disc’s
ØIn order to keep the disc clean please never touch its shiny
surface.
ØNever put any sticker or adhesive label on the disc. Imbalance would occur and cause
malfunction.
ØDont expose discs to direct sunlight or other heat sources.
ØPlease store the discs only in their sleeves.
Cleaning a Disc
To clean a disc use a soft cloth without any cleaning agent, liquid or solvent.
Only wipe from the centre hole towards the outer edge, never in circular
movement.
6

Using the Remote Control Handset
1. The remote control uses a pre-installed NiMH type battery. To
prevent an anticipated discharge of the battery, we’ve inserted
an insulating strip. Please pull it out prior to first operation.
Should the r/c start to work unreliably replace the battery with
a new one of the same type (Cr2025). Open the battery
compartment. Push the retention clip in the direction of arrow
and pull out the battery mounting.
2. Before you take out the empty battery, please memorise its
position. The “+” marking must show upwards, otherwise the
r/c will not work and may be damaged.
3. Please point the r/c towards the main unit when operating its
buttons. The r/c works properly in a distance below 6m and in
an angle of up to 30° of the front of the unit. No obstacles may
stand in the way between r/c and infrared sensor.
ØBatteries should not be disposed by ordinary refuse disposal. Please lead
empty batteries towards appropriate collecting points. Never throw batteries
into fire.
ØIf you won’t use the r/c for some time, please remove the battery from the compartment,
to prevent damage by leakage.
7

Overview of the Control Elements
8

1. OPEN - open disc tray
2. Speakers
3. TFT display
4. Switch allowing for turning off the screen when device is closed
5. DC IN 9V - mains adapter port or cigarette lighter port
6. ON / OFF - on/off switch
7. COAXIAL - digital audio output
8. A / V OUT - Composite video output
9. EARPHONES - headphones output (3.5 mm jack)
10. USB - USB port
11. MMC/SD/MS CARD - card slot
12. Operating indicator - operating indicator, green when unit is in use
13. Infrared Sensor - receiver for remote control signals
14. Lock for opening the disc compartment
15. MENU - go to the inserted disc’s menu
16. AUDIO - access different sound tracks
17. SETUP - open monitor dialogue window for unit settings
18. <STOP - interrupt playback
19. 4; PLAY/PAUSE - start playback and/or pause playback and freeze images
20. VOL+ / :- increase volume (hold pressed)
switch to next chapter (DVD) to next CD title,
navigation button “up” in menu
21. 7- backward search run / navigation button “left” in menu
22. VOL— / 9- decrease volume (hold pressed)
switch to previous chapter (DVD) to previous CD title,
navigation button “down” in menu
23. 8- forward search run / navigation button “right” in menu
24. ENTER - input button
9

The remote control (R/C)
10

1. STANDBY - on/off switch
2. TITLE - go to title menu if available
3. DISPLAY - display time information for each programme
4. MENU - go to the menu of the inserted disc
5. TFT POWER - switch monitor on/off
6. 0 - 9 - number keys
7. PROGRAM - starts programming mode
8. P/N - toggle the colour system: NTSC - PAL - Auto
9. CANCEL - deletes all data entered in the menus
10. SEARCH - starts search mode
11. ZOOM - enables 3-stage zoom
12. REPEAT - starts repeat mode
13. SETUP - open monitor dialog window for unit settings
14. 3456 - navigation keys
15. ENTER - confirm/got to individual menu items
16. A-B REPEAT - repeat programme section
17. SLOW - enables slow motion function
18. AUDIO - access different sound tracks
19. SUBTITLE - display available subtitles
20. STEP ;- pauses playback / frame by frame playback
21. ANGLE - change the camera angle (if supported with
DVD inserted)
22. STOP <- interrupt playback
23. PLAY/PAUSE 4- start playback and/or pause playback
and freeze images
24. 7- start backward search run
25. 8- start forward search run
26. :- switch to next DVD chapter, or to next CD title
27. 9- switch to previous DVD chapter, or to previous CD
title
28. VOL — - decrease volume
29. VOL + - increase volume
30. PBC - PlayBackControl (VCD 2.0 only)
31. MUTE - switch between mute and volume
11

Hook up
Important information:- All cables shown or mentioned here are not
supplied with your DVD player (unless expressly stated).
You’ll find them at your TV shop.
- Please switch off all equipment involved before
making any connections. This will protect your
speakers from possible damage.
1. You can connect headphones to the EARPHONES port on the right side of the unit
(3.5mm jack). This will switch off the built-in speakers. Please make sure not to damage
your hearing. Be careful with regard to your hearing. A too high volume may
lastingly impair the hearing ability of your ears.
2. Despite the player has a screen, you can connect it with an external TV device. In doing
so, use the enclosed special cable for connecting the A/V out to the video and audio ins of
the TV set: The yellow plug transmits the video signal, the other two the audio signal
(red = right stereo channel, white = left stereo channel). You can alternatively play the
sound via a stereo amplifier.
3. Connect the cable of the supplied mains adapter or the cigarette lighter to the 9V DC IN port.
Memory card slot / USB memory device
Your DVP-198 can also playback suitable multi-media files on memory cards which you can
insert in the slot on the right side of the device. This is suitable only for the following types of
memory cards:
SD card (Secure Digital Card)
Multimedia card (MMC),
MS card (Sony memory stick)
To the right, next to the card slot, there is a USB connection where you can connect USB
storage devices of the type “USB Mass Storage Devices”. External hard disks or USB hubs
cannot be connected.
ØNever try to insert cards different from those mentioned in here into the slot!
ØMake sure that you insert the cards in the correct manner. Never use force.
ØMedia files of MP3, WMA, JPEG and MPEG formats can be played by inserting
cards.
If required, remove the disc, close the disc tray and connect the desired memory device
with the suitable slot or connection. The device automatically looks for suitable media files.
A main menu appears in which files or directories are listed on the left. You can navigate this
menu using the 3456 buttons. In case image, video and sound files are on the medium,
the files of one file type are listed only. You can chose the desired category by selecting the
buttons of the desired category with the navigation keys and activate it with the ENTER
button.
Tip: If the unit recognises both memory card and USB device after switching on it will play
back the USB medium. To select the other memory device just disconnect the unwanted
medium from the unit.
12

Control
Switch On/Off
ØPlug the mains plug into a correctly connected
common 230V mains socket.
ØThen connect the adapter cable to the DC IN 9V port on
the right side of the unit.
ØPush the ON/OFF switch on the right unit side to the
ON position in order to switch on the unit.
ØMove the lock button of the screen to the left and open
the screen.
ØIf no disc has been inserted, the monitor will display
our welcome screen. The operating light will be green.
ØIf you want to switch the device into the standby mode press the standby button on the
remote control. The operating light will then be red. In order to switch on the device from
the standby mode, again press the standby key on the remote control.
ØMove the ON/OFF switch back to the OFF position in order to switch off the unit.
Play DVDs
Press the OPEN button to open the disc tray. Insert the disc with the label facing upwards.
With two fingers, carefully push the disc centre into the stud of the disc tray until it clicks
into place. Close the disc compartment by pressing gently on the spot of lid that is marked
with PUSH.
The DVD will be start automatically. In case of DVDs, a selection menu is usually displayed
which can be controlled using the 3456 navigation keys. Once you selected the desired
menu item, press the ENTER key in order to start such item. In most cases, the DVD case
gives further information on the contents.
If you wish to stop playback, press the STOP <key once. The screen will now display “Pre
Stop 4<”. This means that the unit memorised the exact position at which you stopped
playback. Press the PLAY/PAUSE 4key to continue playback. If you press the STOP <
key again, the unit will fully stop and delete all information on the last position from the
memory. It is possible that not all discs support continuing playback.
Tip: Resuming of playback even works after the device has been cut off from the mains
supply. This function makes it necessary that the device has been in standby mode before.
If the message “Invalid Key” is displayed on the monitor while you press a key the desired
function is not available. It is either not supported by the inserted disc or the current
operating mode.
Volume control, mute
Our unit is equipped with volume control. Hold VOL—/9pressed on the device in order to
decrease the volume. Hold VOL+/:pressed to increase the volume. You can also control
the volume with the VOL+/- key on the remote control.
13

Pressing the MUTE key will switch off the sound. The screen will display “Mute”. Press this
key again in order to switch the sound back on.
Direct chapter access
During playback, you may skip to specific chapters. Simply enter the desired chapter
number using the RC number keys. For double-digit numbers, press the +10 key
accordingly. For chapter 22, press the +10 key twice and once the key 2. Playback will be
continued from this chapter.
If you have stopped the disc completely, namely if you have pressed the STOP key twice,
select the respective chapter in the title played last by using the digit keys.
Skip chapters, search run
Press the 9or :keys in order to skip to the previous or next chapter (DVD) and/or CD title.
Repeatedly press the SLOW key in order to first start forward slow-motion at 1/2, 1/3, 1/4,
1/5, 1/6 or 1/7 speed. Pressing this key again or pressing the PLAY/PAUSE4button to
return to normal playback. During slow-motion, the sound will be off.
If you wish to freeze an image, press the STEP ;key. If you press the key again, the next
image will be shown (frame to frame mode). Press the PLAY/PAUSE 4button, to resume
normal playback.
78: These keys allow for fast backward or forward search run during playback. Depending
on how often you press the key, the images will be shown at 2, 4, 8, or 20x speed. In this
case, the sound will always be off. Press the 7or 8keys once again or the PLAY/PAUSE4
key to return to playback at normal speed.
Search run
During playback or when the disc is completely stoped you can skip to a specific title and/or
chapter to be played. To do so, press the SEARCH key once. The following entry bar is now
displayed, for example:
Move the selection field using the 34 navigation keys to the parameter for which you want
to make settings. Enter the desired title or chapter number or select a specific time by using
the digit keys. Then press the ENTER button and playback will begin from there.
14

Zoom
During DVD playback (also frozen images, search run and slow motion), you can first zoom
out images in three stages and then zoom back in using the zoom function. To do so, simply
press the ZOOM key. The navigation keys allow you to move the zoomed out image section.
Press the ZOOM key once again (multiple times if necessary) in order to continue playback
with normal images.
Different camera angles
The programme of some DVDs was shot from different camera angles. This allows you to
watch the same scene from different angles. The DVD case will normally give information if
such function is available.
If a scene was shot from different camera angles, such will be displayed simultaneously on
the screen. The camera symbol appears on the screen. In this case, press the ANGLE key
repeatedly until the desired angle is shown. The images will then be adjusted within 1 to 2
seconds. The unit shows you the current perspective followed by the number of available
angles, e.g.: .
Repeat function
Depending on the type of disc inserted, there are different repeat functions available:
DVD: Repeat a chapter, a title or all titles.
CD: Repeat one or all CD titles.
During playback press the REPEAT key once to display the current repeat function setting.
If you press the REPEAT key once when this setting is displayed, the current chapter (CD:
current song) will be repeated once it ended. If you press the REPEAT key twice, the entire
song (CD: all songs) will be repeated. All titles will be repeated if you press the REPEAT key
three times. In order to deactivate the repeat function [OFF], press the key again.
A-B repeat
If you wish to repeat a programme section, press the A-B REPEAT key once at the
beginning of this section and once more when the section has ended. Sections marked this
way will be repeated until you press the A-B REPEAT key again and, thus, disable this
function.
Change sound track language
During playback, press the AUDIO key in order to switch from the current language
selected for the sound track to another if the DVD contains several sound tracks of different
languages.
Show subtitles
During playback, press the SUBTITLE key in order to select the subtitle language (if
available on the DVD) or to disable this function.
15

Access the DVD menu
If you press the MENU key, the DVD contents menu will be displayed (if available). Here,
you can access the different titles or programme sections of the DVD. In order to continue
playback, simple press the PLAY 4key once again. Some DVDs also contain a title menu
which can be accessed using the TITLE key.
Display key
During DVD or CD playback, you can access different information as regards the elapsed
and remaining time on the screen by pressing the DISPLAY key:
If you press the DISPLAY button again, the next chart appears:
Programming chapters/CD titles
You can playback up to 16 DVD chapters and/or 16 CD titles in the order previously
programmed. To do so, follow the below steps:
DVD: With the disc inserted, press the PROGRAM key. The following entry mask will
appear:
Now enter, one after the other, the desired title numbers for the programme slots and then
the chapter number. Once you have entered this information, move the selection bar to
“PLAY” using the navigation keys and then press the ENTER key. The programmed chapters
will now be played in the set order. In order to delete the programming settings, press the
STOP <button while the entry mask is displayed on the screen.
16

CD: With the CD inserted, press the PROGRAM key.
Now enter, one after the other, the CD title numbers for the available programme slots.
Once you have entered this information, move the selection bar to “PLAY” using the
navigation keys and then press the ENTER key. The programmed CD titles will now be
played in the set order. In order to delete the programming settings, open the disc tray.
Switch off the screen
By using the TFT POWER key you can switch off the screen separately, e.g. when playing
CDs. This is especially useful when using the rechargeable battery.
17

The Setup Menu
In this menu, you can set all key parameters for the DVD player. The menus described in
this section can be accessed via the SETUP key. Such can be intuitively controlled using the
navigation keys. Items individually selected are confirmed/enabled by pressing the ENTER
key. If you have completed setting or if you wish to exit the menu, press the SETUP key
again to continue playback.
System Setup
TV SYSTEM
Here, you can choose the colour system of the video
device connected to the AV port. NTSC is the American
TV norm, in Germany, you should usually choose PAL.
SCREEN SAVER
If this function is enabled, a moving DVD symbol will be
displayed before a black screen after approximately
one minute with no input or playback. This protects the
monitor from frozen images burn-in. Select “Off” if
you, however, wish to disable this function.
TV TYPE
The respective image format (e.g. 4:3 – normal TV, 16:9 – wide screen TV) is defined by the
DVD itself. Please note that the screen format does not necessarily match the format of the
built-in or connected monitor. Such can be optimised by proceeding as follows:
—4:3 PS: Choose this mode if a normal-format TV set is connected. The images will be
displayed as full screen, however, parts of the images to the left and right will not be
visible.
—4:3 LB: Choose this mode if TV sets other than normal sets are connected. The images
will be shown in their full width, however, black bars will appear on the top and the
bottom of the screen.
—16:9: Choose this mode if you are using the built-in screen or if a wide screen TV set
(16:9 format) is connected.
PASSWORD
Here, you can enter the password needed for modifying the child safety lock. Otherwise you
can not select the right column of the child safety lock menu. Mark “ ” and enter the
password 8888 with the digit keys. Press the ENTER key. Now, the lock is displayed open at
the right side and the child safety lock is deactivated.
RATING
With this function, you can prevent playback of DVDs not suitable for children. This,
however, requires the DVD to be accordingly encoded. After having carried out the steps
described under “PASSWORD”, you can chose from 8 ways of classification:
1. KID SAF: safe for children
2. G: for all age groups
3. PG: parental guidance recommended
4. PG13: parental guidance recommended under 13 years of age
5. PGR: parental guidance recommended under 17 years of age
6. R: parental guidance urgently recommended under 17 years of age
18

7. NC17 17 or older
8. ADULT for adults (= all contents will be displayed)
Choose the desired category and press the ENTER key.
DEFAULT
Choosing this menu item and then enabling “Restore” will reset all and any settings back to
factory settings.
Language Setup
OSD LANGUAGE
Here, chose the language in which the information
displayed on the monitor are to be shown. Available
languages are English, German, Dutch, and Polish.
AUDIO LANG(UAGE)
Here, you can define in which default language the
sound tracks of the DVD are to be played. Of course,
this depends on the languages in which the audio data
is available on the DVD. During playback, you may also
change the sound track language by pressing the
AUDIO key.
SUBTITLE LANG(UAGE)
Here, you choose in which default language the DVD’s subtitles are to be displayed. As
stated above, this also depends on the DVD’s subtitles languages. You may also change the
subtitles language during playback by pressing the SUBTITLE key on the RC.
MENU LANG(UAGE)
Here, you can choose in which language the DVD menu stored on the disc is to be played –
as a matter of course, depending on the material contained on the DVD.
Audio Setup
AUDIO OUT
Here, you can chose whether the signals at the
COAXIAL output are to be supplied in the PCM or RAW
format. If you wish to deactivate this output, please
choose “SPDIF Off”.
DOWN SAMPLE
Here, you can define the sampling rate for the audio
output, 48, 96 or 192 kbit/s.
19

Video Setup
When selecting the brightness, contrast, hue or
saturation and then pressing the ENTER key, you can
set the desired intensity for each function using the
56 navigation keys. Then press the ENTER key to
return to parameter selection.
Speaker Setup
DOWNMIX stands for the reduction of the sound signal
to dual-channel. Choosing LT/RT will enable
cinema-sound for the two speakers provided that the
DVD was encoded in Pro Logic Dolby Digital Format.
Chose “Stereo” for normal stereo playback.
Digital Setup
Dynamic Range
Here, you can adjust the sound’s dynamics.
“Dynamics”, in this case, is the difference of volume
during sections with very high and low volume, e.g.
between explosions and whispering.
If you have sensitive neighbours or if you like watching
action movies at night, pull down the controller in
order to reduce dynamics.
Dual Mono
The following audio options can be enabled under this menu item:
—STEREO: normal stereo images, recommended
—MONO L: left stereo signal supplied left and right
—MONO R: right stereo signal supplied left and right
—MIX MONO: both channels supply the same mono signal
20
Table of contents
Other DK Digital Portable DVD Player manuals