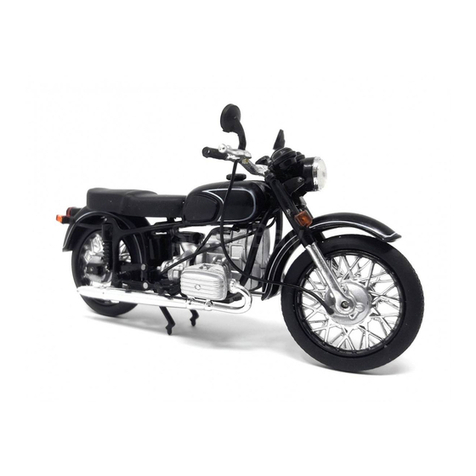
Dnepr MT9 Operating instructions

MOTORCYCLES "DNEPR"
MT9
and
MTIO
REPAIR
MANUAL
V/0 AVTOEXPORT •
USSR
•
MOSCOW

CONTENTS
Pag
''
I.
Preparing the Mota·C)cie for Repairs
I
I.
Checking the Motorcycie for Technical
Co
nditi
on
Ill. N\ounting and Dismanllmg Operations
JV.
Engine Reconditioning
·~
L<0
v.
Repairing the Gear
Box
7'
• j
V
I.
Repairing the J\la
in
Drive
~2
VII. Repairing the Whe
el
r.s
r-
VIII. Repairing lhe r ront
fo,··k
:
·
~
I
X.
1\epairing the ,Frame
~
F
'
X.
Rep
ai
ring the Rear Suspension
!ILi
XI.
REpairing the Ha-ndlebar and Control Cables .n
XII. Repairing
!li
e rue! Supply
Syst
em I
JG
XIII.
Repairing the Intake and Exhaust Systems l•
ll
X
IV
. Repairing the Sideca,, 1
02
XV.
ElectricaI System
De
v1ces
l!'l

I. PREPARING
THE
MOTORCYCLE
FOR
REPAIRS
Regardless
of the
type
of
repairs
to be
carried
out,
one
must
do
·
the
following:
wash
the
motorcycle;
check it for
technical
condition;
draw
up an inspection report.
Prior
to
washing
the
motorcycle,
take
out
the
iouls; remove
the
seat
cus
hion
and
back,
take
off the cov
er
as
the3e should be
washed
separately
.
Fig
. !. Motorcycle "Dnepr"' MT9
When
washing,
take
care
to keep
water
out
of
the
ele
ctrical
de-
vices,
carburettors,
air
filter,
air
passages
and
petrol
tank.
The
techni
ca
l condit
io
n of
the
motorcycle
should
be checked
by
inspection
as
well
as
by
testing
the
appropriate
units
or
asse
mblies
du-Fing
riding.
r 3
.. .

Before
doing
this, it is
necessary
to
adjust:
spark
plug
gaps;
contact
breaker
gaps;
clearances
in the
va
lve
gear
drive;
carburettors
fo
r idling,
average
speed
and
for the
synchronous
operation
of
the
cylind
ers;
brakes
contro
ls;
c
lut
ch
release
drive;
tyre
pressure.
Fig. 2.
Motorcycle
"Dn
epr"
MTIO
At
the
same
time, check
the
amo
unt
of oil
in
the
crankcase
and
in
the
gear
box and
main
drive
cas
in
gs
.
Adju
st
the
clea
ranc
es in accor
danc
e with lhe Ope
ratin
g
In
s
tru
c-
tions.
II.
CHECKING THE MOTORCYCLE FOR TECHNICAL
CONDITION
The
technical
co
ndition
of the motorcycle, of its
units
and
assem-
blies
deteriorates
in
the
process of co
ntinuou
s service. As
th
e compo-
nents
become
worn,
the
eng
ine power diminishes, fuel
an
d oil con-
s
umption
incr
eases
,
operation
of
some
of
the
units
becomes
noisy
and
failures
occur
mor
e fre
qu
ently due to
fatigue
and
corrosion.
The
wear
of com
ponent
s leads to
increas
ed
clearances
in the
joi
nts, and
ca
uses
the
dynamic,
economical
and
operating
ch
arac
teri
stic
s
of
the
motorcycle
to
deteriorate.
Therefore,
periodic checks of the
motorc
ycle for tec
hnical
condi-
tion a
nd
elimination
of detected
faults
in due
tim
e are
mo
st impor-
tant
to
prolong
its
service
life. In
order
to
determine
whether
the

motorcycle
and
its
units
are
in good
conditio
n, it is
necessary
to
:
1.
Check
tha
t
ihe
motorcycle
is complete with all
necessa
ry
units;
parts
and
accessor
ies.
2.
Check
the
general
condition
of
the
motorcycle,
including:
free
rolling
path;
ma
ximum speed;
braking
di
stance;
trial
petrol
consumptio
n.
3. Check
the
engi
ne co
ndition
:
oil
consumption;
compression in the
cylinders;
make
sure
that:
no
extra
neous noises
are
produced
during
operation;
no loca l
heating
is ob
served;
there
are
no oil lea
kage
s;
check the
engine
operation
under
l
oad
at
various
rotational
speeds.
4.
Check
the
clutch
mechanism
condition,
including:
disengagement
of disks
during
declutching;
smoo
thn
ess
of
engagement;
absence
of
s
lipping
;
absence
of
extraneous
noise
with
the clutch released.
5.
Check
the
gear
box co
ndition
:
return
of
the
st
ar
ting
mechanism
pedal;
easy
and
faultless
gea
rs
hiftin
g;
mak
e
sure
that:
the
gears
do
not
di
se
ngag
e by
themselves;
there
are no o
il
l
eakages;
no local
overheati
ng
is observed;
no
extra
neous
noises
are
heard.
6.
Check the
propeller
sh
aft
and
the
main
drive
for:
the
absence
of
increased
cl
eara
nces in
th
e
joint
s
of
elas
tic
coup
l-
ing, in the uni
versa
l
joint
,
geari
ng
a
nd
at
the
wheel
hub
junction;
absence
of oil l
eakage;
absence
of local
overheating
and inc
rea
sed
run-out
of
the
pro-
peller shaft;
check
ihe
el
astic
coupling
for good
condit
ion.
7.
Check the
wheels
for:
wear
of the
tyres
and
possible
damag
e;
wear
of
ih
e shoes
and
of
intern
al
surfaces
of
the
brake
drum
s;
wear
of the
bearing
s;
radial
a
nd
axial
run-out
of
the
rim
and
tyre;
make
sure
that
th
e spokes
are
all
available
and
uniformly
ten-
sione
d;
check the condition of
the
toothed
coupling
with
the
wheel hub.
8.
Check
th
e front fork for:
clearances
in
the
stee
ring
column,
lower
end
piec
es
of
the
fork,
.as well
as
at
the
bridg
e
and
traverse
joints;
1
I

I
\
smoothness
of
operation
during
riding,
the
condition
of
the
cas-
ings
and
fender;
tightening
of
fastenings
;
absence
of h
eavy
shocks
during
ope
ration;
co
ndition
of
the
springs;
abse
nce
of d
amp
ing
f
luid
leakage
.
9.
Check
th
e
motorcycle
frame
for:
tightening
of
fastenings;
abse
nc
e of cr
acks
at
weld
sea
ms;
ab
se
nce of exte
rn
al s
ign
s of
damage;
proper
cond
ition of fenders.
10.
Check
the con
dition
of the hy
drauli
c shock
abso
rbers,
including:
s
moothne
ss
of their
operation
during
riding;
co
ndition
of
the
casings
and
silent-blocks;
absence
of
heavy
s
hock
s
during
operation;
absence
of da
mping
fluid l
eakage;
clea
ranc
es in the
joints.
11.
Check
th
e
condition
of
the
petrol
tank
by
making
sure
that
:
petrol
does
not
leak
through
weld
seams
and
joint
s;
the
petrol
cock
and
hos
es
are
in
good
c
ondition;
the
petrol
tank
is
free
of
dents
and
other
injuri
es.
12
.
Check
th
e
exhaust
system
for:
tight
co
nn
ections;
absence
of
dents
and
other
signs
of
damage
on
th
e
lubes
and
silencers
.
13.
Check
the
condition
of
the
contro
ls,
including
:
condition
of
the
handl
e
bar
and
of
the
levers
and
other
mecha-
nisms
dispo
sed
on it;
co
ndition
of
cables
and
cable
sh
eaths;
foot
brake
pedal
and
brake
controls;
braking
effect,
when
using
the
both
brakes.
14.
Check
the
condition
of
lhe
sidecar,
including:
condition
of
the
shock
absorber;
absence
of
clearances
in
lhe
sidecar
-to-motor
cycle
attachment
hinges;
condition
of
the
wheel
fender, body,
sidecar
frame,
seat
cushion
and
back, cover.
15.
Ch
eck
the
condition
of
the
el
ectric
devices:
operation
of
the
ignition
lock;
operation
of
the
light
switch;
condition
of the
lighting
devices
;
operation
of
the
ignition
system;
operation
of
the
horn;
co
ndition
of
the
pilot
lamps;
condition
of the
wiring;
condit
ion of
the
speedome
t
er;
operation
of
the
emergency
oil
pressure
transmitter,
stop
light,
neutral
position
indicator
and
turn
indicator
switch.
6

.
~
' .
. ..
METHODS FOR
CHECKING
THE
MOTORCYCLE'S PARAMETERS
The
free rolling
path
of
the
motorcycle
is
measured
by
riding
a
fully
loaded
motorcycle on a
st
r
aight-line
section
of
the
hard-surface
road, in
dr
y
weather,
at
a
wind
speed
not
exceedin
g·
3
m/s.
The
mo-
torcycle is acce
lerat
ed up to 50
km/hr,
following
which
the
clutch
is
withdrawn,
the
gea
r
sh
ift
lever
is
set
to
the
ne
utral
position
and
th
e
motorcycle
is
allowed
to
move
until
it
comes
to a full
stop.
Measure-
ments
arc
made
by
riding
the
motorcycle
in
both
di r
ect
ions.
Th
e
l
engt
h of the
rolling
path
is
measured
from
the
point
of
clutch
with-
drawa
l to the ful l
stop
of
the
motorcyc
le.
The free
rolling
path
is
determined
as
the
arithmet
ic
mean
of
two
rides
in
both
directions
and,
·with
the
motorc
ycle in
good
repairs,
must
be
not
le
ss
than
250 m.
The
maximum
speed
is
determined
by
riding
on a
measured
(1
km
lo
ng)
stretc
h of
the
road
,
the
time
being
mea
s
ur
ed
with
a
stop-
watch.
The
maximum
speed
is
determi
n
ed
as
the
arit
hm
et
ic
mean
of
the
speeds
deve
l
oped
during
two
rid
es
in
the
opposite
directions
and
must
be
not
less
than
100
km/hr
for
the
MT9
motorcycle,
and
105 km/
hr
for
the
MTIO
model.
The
acceleration
must
be
sufficient
to a
llow
the
motorcycle
to
develop
th
e
maximum
steady
speed
before
reaching
the
measured
s
tretch
of
the
road,
the
road
cond
iti
ons
being
the
sa
me
as
when
measuring
a free
rolling
pat
h.
If
the
maximum
speed is
below
th
e
specified
figure
,
with
the
l
ength
of
the
free
rolling
path
being
nor-
mal,
this
means
that
the
engine
power
.is
insuffici
e
nt
and
the
engine
h
as
to be
repaired.
The
trial
petrol
consumption
mu
st
be de
termin
ed by
riding
the
se
rvi
ceab
le
motor
cycle
under
full
load
in
two
opposite
directions,
on
a m
easu
red (
10
km
long)
s
tr
etch of
the
dry,
hard-surface
road
hav-
ing
no
steep
upgrades
and
descents,
with
the
motorcycle
running
in
a
high
gea
r
at
75
km
/
hr
speed.
The
petrol
consumption
must
not
exceed
7.2 1
per
100
km
(to
be
mea
s
ur
ed
by
adding
petrol
into
the
tank
from a
measuring
vessel).
Simultaneously
with
measuring
petrol
consumption,
oil
consumption
is checked, which
must
not
excee
d 0.15 I per 100
l<m.
The
engine
condition
to
be
diagnosed
by
extraneous
noises
pro-
duced
during
the
engi
ne
operation,
as
we
ll
as
the
compression
in
the
cylinders
are
checked
emp
irically
by a
skilled
mechanic
of a
se
rvice
station
or
maintenance
shop
(Table
1).
Local
heating
and
general
overheating
can
be
detected
to
the
touch.
The
clutch
me
c
hani
sm
is
checked
for
condit
ion in
the
follow-
ing
manner:
when
the
e
ngine
is
inop
e
rativ
e,
release
the
clutch
and
turn
the
kick lever, in
this
case
the
engine
crankshaft
must
not
turn;
when
the
engine
is
running,
with
the
first
speed
gear
engaged
and
the
clutch
released,
the
motorcycle
must
not
move.
When
gradu-
:ally
engaging
the
clutch
release
l
eve
r,
the
motorc
ycle
must
start
moving
smoothly,
without
jerks.
With
the
gear
and
clutch
engaged,
7
..
JJ

I
I
a
sudden
ope
nin
g of
the
throttles
must
cause
the
motorcycle
to ra-
pidly
increa
se
its
sp
eed
w
ithout
any
noticeable
clutch
slip.
Th
e
gear
box,
propeller
shaft
and
main
drive
shou
ld be checked for
good
con-
clition by
testing
the
operation
of
these
mec
hani
sms
with
the
motor-
cycle
at
r
est
and
on
the go.
The
backla
sh in the
main
drive
gearing
must
be
wit
hin
0.1
and
0.3 mm,
the
permissible
run-out
of
th
e
propeller
s
haft
not
exceed-
ing
1.5
mm.
The
wheels
are
checked for condition by succ
essive
ly
in
specting
each
of
them
(by r
ais
in g, r
otating
th
e
whee
l
and
rocking
it
from
side
to
side)
. The
whee
ls must
rotat
e freely,
wit
h
out
play,
snaps
and
se
izur
es.
The
permissible
(lateral
and radial)
run-
out
of the
rim
s
hould
be
1.
5
mm.
The
spokes
are
checked
for
uni
form
tens
ioni
ng
by
li
stening to the sou.
nd
produc
ed when
tapping
the
spokes.
Th
e
front
fo
rk
, hy
draulic
shock
absorb
ers, s
teering
contro
ls
and
br
akes
are
checked for
condition
by
inspecting
them w
ith
th
e
motor-
cycle
at
rest or by t
est
ing their
operation
on the go. The
fork
must
be free
to
rotate
in the steerin g
column,
without
pla
ys
and
sto
pping
in ce
rt
ain
positions
.
When
inspecting
and
checking lhe
motorc
ycle
units,
m
ake
sure
that
the
<lnti
ru
st
co<1ting and p<linting of
the
component
p
ar
ts are in
good
co
nditi
on.
The
cau
ses
of
faults
and
troubl
es
hootin
g
procedure
s
are
gi
ve
n in
Table
2.
On
completing
the inspection
and
checking,
draw
up a
technical
co
ndition
r
eport,
on
th
e
basis
of
which
th
e
motorc
ycle _
ma
y be
sub-
jected
to
adjust
ment,
partial
or
total
di
sm
an
tling
and
r
eq
uir
ed re-
pairs.
III. MOUNTING AND DISMANTLING OPERATIONS
If, as·
lhe
result
of
checking
for
technical
condition,
it
is found
necessary
to
pe
rform
a
partial
or
total
dis
mantling
of
some
of
th
e
units,
asse
mblies
or
the
entire
motorc
yc
le for
th
e
purpose
of
repair-
ing
or
re
placing
the
component
parts,
the
dism
a
ntling
should
be
carried
out
to
the
ex
tent
not
greater
than
required.
Subj
e
ct
ed to
partial
dism
a
ntling
ma
y
be
the
assemblies
that
are
removed
or
not
removed
from
the
motorcycle.
Prio1
to
dismant
l
ing,
clean
and
wash
the
e
ntire
assembly
to
remove
oil,
dirt
and
du
st
that
may
foul
the
friction
parts
of
the
jointed
membe
rs
during
dismantling
.
After
disassembling,
clean
off
dirt
,
carbon
deposits
and
remnants
of
bak
elite
lacquer
from
th
e
co
mponent
part
s,
wash
and
examine
them
for
good
condi.tion,
mak
e
appropriate
mea
s
urements
to
determine
the
degree
of
wear.
The
maintenance
shop
or
service
station
must
have
at
its
disposal
a com-
plete
set
of
tools
necessar
y for
dismantling
or
assembling
th
e
motor
-
cycle
units.
In
case
the
unil
s or
assemblies
have
to
be
dismantled
without
re
moving
them
from
the
motorcycle
or
when
their
removal
is requ-ired,
it
is
advisable
to
detach
the
sidecar
to
ensure
a
better
access
and
thus
facilitate
the
re
pair
operations.
8

l ...
~
• •
~
Table
1
Checking the Motorcycle Engine lor Technical Condition by Noises and Knocks
Point
s
(junction
of
com-En
gine
!her-
Engine
operating
Poin
ts (l
ocatio
n
s)
Cone!usions
regarding
pone
nt
s)
of
possible
kn
ocks mal condi· conditions
to
be
Iistened
to
~aturc
ol knocks
further
usage
tions
Piston
pin -
conn
ect
-~
Warmed
U
nd
er load,
Cylinder
loca-
Clear
shrill
me
tal-
I
Must
not
he
opera
ted.
ing
-rod
small
e
nd
up followed by a lion lie knock
Cl
e
an
the
combu
stion
s
udd
en incr
ease
chamb
er
to
r
emove
car-
in ro
tati
ona
l bon de
posits;
if
neccs-
speed
sary,
replace
the
piston
pin en
sur
ing
that
i
ts
co-
louring
corresponds
to
that
of
con
n
ect
ing
rod
sma
ll end
Same
Pi
ston
pin -
piston
Sa
me
Same
Same
Knocks
no
t
so
boss
clea r
but
be
come
more
distinct
as
the
engine
warms
to
a
higher
tc
n1p
c
rature
Pi
ston -
cylinder
Cold
Idling
Cylinder
Joca -
Dry
metallic
knock
May be
operated
in
lion
\\"hich
becomes
mo- case the !mock
disap-
re
apparent
as
the
peMs
as
the
engi
ne
rota
tiona I
spe
ed
warms
up.
When
r
epai
r-
changes;
the
knock
ing
, repl
ace
the
piston
be
comes
l
ess
audible
as
the e
ngine
war
ms
up
<0
I
Simi
la r
kno
ck
due
Must
not
be
operate
d.
· to
the
pin being
Replace
the
piston
and
I
se
ized in
the
con
-
p:
n
necting-rod
sma
ll
end
i ,
' "

0
Points
(junction
of com-
ponents)
of
poss
ibl
e
kno
cks
Engine
ther-
mal
cond
i-
tions
Connecting-rod
big
I Any
end-
crankp
in
(of the
cranksha
ft)
Crankshaft
bearings
-
~
Warmed-
crankshaft
up
Va!Yc lilfli
ng-
pi
ni
on I Snrnc
Va l
ves-
val
ve
seats
I Warmed
up
Clutch disks Any
flywheel-
cr
an
ksha
ft
S
ame
Engine
operating
Points
(locations)
Nature
ol
knocks
conditions to be listened to
During
idling
and
especially
when the motor-
cycle runs after
coasting,
at
s
li
ghtly closed
throttles (thrott-
led down sl
ig-ht-
ly)
Under loa d
and
when the thrott-
les arc suddenly
opened
Idling
During
id
li
n
g-
and coast
in
g
Central portion I ,\tedium pitch thud
of
the engine
crankc:1sc
Crankcase,
at
I
Lo
w pitch thud
points where bea-
rings
ar
c located
Location
of
pi- Frequent metallic
nions
ru111bling
knock (of
varying
tone)
Cylinder heads Frcqucnl clear so-
und w
hi
ch
increases
with increasing- ro-
. tationaI speed re-
gard
less oi
th
e load
Continued
Conclusions
regarding
further
usag-e
Must not
be
operated.
Engine needs
to
be
repaired
Same
lv\ay be operated.
\Vhen rep2iring the en-/
gine, repla
ce
the pinions
..
May
be
operated. Ad-
l/
ju
st
the clea rance. When
repairing the
eng
ine.
lap the \'aJI·es
C
lu
tch released Zone of
cl
utch
location
on
engine
Clear
knock metallic I Nlay
be
operated.
Idling, clutch
not released Rear
po
rtion
of
the e
ng
ine
Strong
metallic
thud, which disap-
pears when the
clutch is released
\Vhen repairi
ng
the
c
n-
gine, examine the clutch
Must
not
be
operated.
ReiiJove the clutch
and
fly11'heel,
check the key
joint, fit the flywheel
in
place and secure reliab-
ly

Points (junction of com-
ponents)
of possible
knocks
Generator
i:ear-
cam-
shaft
gear
Breather-
front
cover
Trouble
Engine
will
not
start
~-
-
' .
!>._
-
Continued
Engine
thcr-
Engin
e operating
Point
s
(locations)
Cone! usions
reg~
rd
i
ng
mal
condi-
con
ditions
to
be
list
ened
to
Nature
of knocks
furth
~
r
usage
tions
Any
Variable
du
ty
Front
upper
Frequent
rumblini:
May
be
operated
af-
portion
of
the
metallic
knock, tcr
adjusting
the clear-
engine
"howl"
ance
in the
gearing
(by
turning
the
generator
body)
Warmed
Idling
Front
portion
Frequent
metall
ic
May
be
operated.
At
up of the
engine
knocks
.Troubleshooting
of
the Motorcycle Units
Cause
Symptoms
and
fault
tracing
Engine
I.
Petrol
not
supp
lied to
carburettor
2.
Excess
of
petrol
in cy-
linders
(especially
when
en-
gine
is
hot)
I.
Press
down
on
carburet-
tor
depressor
with
your
fing-
er;
if
petrol
docs
not
flow
out
of it,
this
means
that
fuel
is
not
supp
lied to
carburettor
2.
Sporadic
flashes
with
backfire
the first
opportunity
examine
the
breather
af
-
ter
first r
emoving
th
e
distributo
r
cover
Table 2
Remedy
I.
Open
the petrol cock
2.
Close
the
petrol
cock. ful-
ly
open
the
thr
o
ttle
,
press
down
the
kick lever 5
to
l0
times,
start
the
engine

""
Tr
oub
le
-~
Cause
3.
Filter
and
petrol cock
dirty
or
clogged
4. No
spark
produced
by
plug
:
a)
no
gap
between
plug
electrodes,
dirt
and carbon
deposits in
plugs,
insulator
punctured;
b) no
gap
between breaker
(contact)
points,
breaker
po-
ints
oi
led or
burnt;
c)
ignition
co
il
faulty;
d)
low-tension
wires
bro-
ken
Symptoms and
fault
tracing
3.
Di
sconnect
petrol
supply
pipes from
carburettors
and
check to
see
whether
petrol
runs
if cock is opened for re-
serve
fuel consumption
a)
screw
out
the p
lu
g, con-
nect
its
body to
"earth"
and
check
whet
h
er
spa
rk is pro-
duced
at
pl
ug
electrodes;
b)
remove
wire tip
and
check wh
ether
spark
appears
at tip
by
connecting
it
to
"e
arth
",
with
a
small
air gap_
If
spark
is produced, this
means
that
plug
is f
aulty.
Ab-
sence
of
spark
i
ndicates
that
there is no
gap
between bre-
ak
er
points;
c)
if
, duri
ng
checking
by
method specifi ed in step
"b",
spark
does
not
appear,
this
indicates
that
ignition coil is
probably
at
fault;
d)
remove
front
cover,
switc
h on ignition. Check por-
tab
le l
amp
circuit. for which
Continued
Remedy
3.
Disconnect
the
ends
of
petrol
supply
pipes from
car-
burettors
and
blow
them
Lhr
ough
(one
after
another,
by
clutching
the
ot
her pipe).
If
this fails to
make
petrol
fl
ow
in a full jet, remove set-
tler, cock filter a
nd
wash
them
with petrol
a)
replace
plugs
or, ii their
condition permits,
sel
the re-
quired
gap
between electrodes,
clean the p
lu
gs;
b)
after
removing
crank-
case
outer
cover, set
breaker
point
gap
within
0.4
and
O.G
mm.
Clean
an
d,
if
nec
essa-
ry, trim
the
contact
points
with
needle f
il
e;
c)
replace
ignition coil
I
I
I
1_/

e
Trouble
w
Caust.!
5.
No
compression
or
insuf-
fici
ent
compression
in
engi-
ne:
a)
no
cl
earances
in
valve
gear;
b)
valves
loosely fitted due
to
lhc
presence
of
carbon
de-
posits
or
valve
retainers
be-
ing
burnt
through;
c)
piston
rings
are
burnt
or
broken
SYllliJtoms
and
iault
tracing
l
amp
wi re
to
"earth",
and
the
other
end
-
to
low-t
ension
terminals
of
ignition
co
il
,
and
th
en -
to
termina
l of
breaker
wire.
Lamp
will
not
light
up:
if
connected
to
input
termi-
nal of
ignition
coil,
in
case
headlamp-to-ignition
coil
wire
is
broken;
if
connected
to
output
ter-
minal
of
ignition
coil, in
case
primary
circuit of
ignition
coil
itself is broken;
if
connected
to
terminal
of
breaker
wire, in
case
ignition
coil-
to
-break
er
wire
is
broken;
in
this
case
breaker
points
must
be in a
disconnected
state
a)
when
depressing
starting
pedal,
engine
crankshaft
\\·ill
turn
with
out
compression;
b)
same
c)
smoke
escaping
from
breather
•
Continued
Remedy
a)
ad
ju
st
clearances;
b)
repair
the
eng
ine,
lap
or
repair
lhe
valves
;
c) repair
the
engine,
cl
ean
the
piston
rings
an
d
grooves
to
remove
carbon
deposits,
re-
place
rings

""
Trouble
Irregular,
erratic
opera-
tion of
engine;
only
one
cy-
lind
er
functioning
.
--
Cause I
Symptoms
and
fault
tracing
6.
Clutch s
li
pping
I
6.
Engine
c
rank
sh
aft
will
not
rotate
when
pressing
down
starting
pedal
I.
Mixture
too lean: I
I.
Engine
back-fires
a)
petro
l
supply
to
carbu-
rettor
is insufficient
and
ir-
regular;
b)
carb
urett
or
jets
dirty;
c)
water
in
petrol
2.
Plugs
faulty
3.
Poor
contact
at
sto
r
age
ba tlery
term
ina Is
4.
Bad
condition of
breaker
points
5.
Capacitor
faulty
or
bad-
ly
connected
6.
Mixture
enrichment
due
to
float
chamber
being
over
-
filled with petrol:
a)
float needle
valve
dirty
and
leaky (lets petrol
out);
b) leaky float
c)
carburettor
jet
came
un-
c:rrPH'Prl
2.
Same
as
in
step
4 a of
the first failure of
engine
3.
Pilot
l
amp
blinks
4.
Spark
occurs
irr
egular
ly
between wire
tips
and
"earth"
5.
Bangs
heard
from silen-
cer,
bad
spa
rk
a)
engine
smokes
badly,
bangs
heard
from
silencer,
petrol
leaking thr
ough
carbu-
rctlor
--
Continued
Remedy
6.
Adjust
the
driv
e;
if
clutch
continues
to slip, r
epair
the
clutch
(dismantle
and
exam
ine
it)
I.
Same
as
in
step
3 of
the
first failure of e
ngin
e;
c)
change
petrol
2.
Same
as
in
step
4 a
of
the
fi
r
st
failure
of
e
ngine
3.
Ensure
good
contact
at
storage
battery
te
rminals.
Clean
;'
the
contacts,
light
en
screws
faste
ning
the
wires
1
--'
4.
Examine
co
ntact
points.
trim
or
file them off,
adjust
the
gap
5.
Ensure
good
contact
or
repla ce
capac
itor
a)
clean
the
needle
valve;
b) repair the
carb
ur
ettor,
re-
place
or
repair the
float;
fit
the
jet
properly

......
<.!'
+
Tro uble
Engine
knocks
Engine ope
rat
es well
at
high speed but
ba
c
k-
fi
res
at
averaJ:!e speed and dies
out
at
low speed
Engine
fa
il
s to develop
full power (insuffici
ent
"traction", when
thr
ottle
is
fu
ll
y opened, motorcycle fa-
ils to devel
op
sufficient ac-
ce
leration)
..
Cause
7.
Carburettor maladjusted
8.
Piston rings burnt or
broken
9.
Valves loosely filled to
their
seats
due to
great
anw-
unt
of
ca
rb
on
l.
Ear
ly ignition (above
permiss
ibl
e)
2.
Eng
in
e overheats
3.
Piston
pins, piston
s,
cy-
linders, connecting rod bush-
ings, crankshaft bearings
worn oul
I. Idl
ing
jet clogged or mal-
adjusted
2. Carburettors maladjusted
(carburcllors operation not
synch ronized)
3.
Clearance betw
ee
n valve
and
rocker end is incorrectly
sel
l.
Late ignition
is
set
or
breaker
gap
too sma
ll
2.
Air cl
ea
ner or a
ir
hole
in
petrol
tank
p
lu
g
clogg
ed
Symptoms and
fault
t
racing
7.
Operalion of cylinders
not synchronized
8. Bad compression,
eng
in
e
smokes and splashes p
lu
gs
wi
th
oil
9.
Insufficient
co
mpression
I.
Knocks disappear
at
l
ate
ignition
2.
Hot
sur
fa
ce
ignition
be-
gins to take place
3.
Faults to be traced by
li
steni
ng
lo the engine
2.
Faults to be located by
l
is
t
en
ing to eng
in
e
3. Check the size of clear-
ance wilh a feeler. Cl
eara
n
ce
must be equa l to 0
.07
mm
wi
tl
1
engine
co
ld
I.
Po
wer increases
at
early
ignition
•
6
Continued
Remedy
7.
Adjust
the ca rbur
ettors
8. Repair
th
e
eng
ine,
cl
ea
n
or repair the rings
9.
Repai1·
the engine, clean
off
ca
r
bo
n
and
lap the valves
I. Adjust ignition
2. Stop
th
e engine
and
al-
low
it
to cool
3. Repair the engine
1.
Adjust idling
and
blow
air through the jet
2.
Adju
st
ca
rburettors for
sync
hr
onous operation
3.
Adjust
the clearance
in
valves
I.
Set ignition correctl
y.
Check breaker
gap
2.
Remove
and
wash out the
air cleaner with kerosene
an
d
fill it wilh motor oil, clean
out
th
e hole in plug

a>
Troubl
e
Engine
overheats
Cnusc
3.
Va
lves do
not
fit close-
ly to th
eir
scats
due
to accu-
mulatio
n of
ca
rbon
deposits
4.
Gases
burst
fo
rth
from
under
cy
lind
er
head
5.
Pi
ston
ri
ng
s
burnt
·
or
broken
6. Cylind
ers
and
pi
sto
ns cx-
cess
iY
ely
worn
l.
No
oil or
insufficient
amount
of
it
in
the
c
rankca
se
2.
Enri
c
hed
mixture:
a)
ca
rbur
ettor
overfi
lled
du
e
to
float
needle Ya l
ve
be-
ing
badl
y
seated
;
b)
air
clean
er
dirt
y;
c)
carburettor
thro
tt
le need-
le
wrongly
set
3.
Diluted
mix
tur
e:
a)
th
rottle
n
ee
dle inco
rr
ect-
ly
set;
b) air inle
akage
at
carbu-
r
ettor
-t
o-head
junctio
ns
4.
Lat
e
ignition
advance
Symptoms and iJ
ul
t lracillR
3. L
ow
compression
is ob-
served
4.
Bangs
arc
heard
an
d lo\\.
compression
is
obsen·ed
5. L
ow
compression,
eng
ine
smokes a
nd
splashes
the
plugs
with oil
6.
To
be
checked at
main-
te
nan
ce
shop
l.
Ch
ec
k o
il
level
2.
Engine
fai ls to
de\·elop
sufiicient
speed:
a)
check
whether
pe
trol
flows
fr
om
fl
oat
chamb
2r
(chamber
overfilled)
a)
eng
ine, if
und
er
l
oad
,
fails
to
de
velop
the
proper
speed;
b)
bangs
in
the
ca
rbur
et
l
or
Continu
ed
Remedy
3.
R
epair
the e
ngine.
Clean
off
carbo
n
and
l
ap
th
e val
ves
tl.
Tight
en the
nuts
sec
ur
i
ng
the
h
ea
ds
lo
cy
l
inder
5.
Repair
the
en
gin
e.
Clean
or
r
eplace
the
rings
6.
Repair
th
e e
ngin
e.
Repla
-
ce
or
r
epai
r
the
cy
linders
and
pist
ons
at
maintenanc
e shop
I. Fill up w
ith
o
il
2.
Clean
dirt
from
the
float
c
hamb
er:
a)
repair
the
carburetlor
1.
and
Ia
p
the
needle
va
lve; ..
l./
b) r
emove
the
air
c
lean
er
and
was
h it;
c)
adj
ust
the
ca
rbur
et
tor
a)
a
dju
st
th
e
carb
ur
e
tt
or;
b)
tighte
n
the
nuts
secu
ring
the
car
bur
e
tt
or
to the
head.
If
in
l
eakage
continues
to
take
place, re
place
the
gasket.
Check
the
breaker
gap
.
Set
the
igniti
on

.
"'
§
!"'
'l
~
•
Trouh
lc
Excessive oil consumption
Emergency oil pressure
transmitter lamp is
on
Clutch slipping
Clutch
wi
ll not disenga-
ge completely
Cause
a) piston rings burnt or
broken;
b)
cylinder face or piston
worn;
c)
fitting place for breather
in
the cover
of
distribution
box worn out;
d)
drain holes for discharg-
ing oil from cylinder heads
clogged
I. Faulty
transmittN
2.
Engine out of order
~
~~
--
·~
~
-
::.....
":'
-
--
~~
-
.
Syrnptorns
ami
r.:~ult
tracing
I. Check with
pressure
gauge
2.
Sarne
reference I
Continued
Remedy
a) repair the engine. Repla-
ce the piston rings;
b)
repair the engine. Bore
th
e cylinders or replace with
n
ew
ones (at the same time
t·eplace the piston and
rings);
c)
repair the engine;
d)
clean out the drain holes
I. Replace the tratlsrnilter
2. Repair tltc engine
Power
Transmi
ssion
I. Incomplete engagement
due to maladjustment
of
con-
trol drive
2.
Driven disk facings grea-
sy
3.
Driven disk facings ,,·orn
or burnt
I. Clutch drive maladjusted
(free travel of lever too
great)
I. Check the clutch control
lever for proper
fre
e travel
2.
Check during dismantling
and exami
ne
3.
Same
I. Check
th
e clutch lever on
handlebar for free travel
I. Adjust the control drive
by
turning the
adjusting
screw
until a
fr
ee travel of 5 to
8 rnrn
is
ensured
at
the end
of clutch lever
2. Dismantle the
cl
utch.
Wash the facings wi
th
petrol
3. Repa ir the clutch. Repla-
ce
the facings or disk assem-
bly
l.
Adjust the clutch drive by
turning the
adjusting
screw so
as to ensure complete disen-
gagement of the clutch and to
provide a 5 to 8
mm
free tra-
vel
nl
lhc
end
of
clutch
lever

cc
Tro
uble
When
depre
ss
ing
the kick
sta
rt
er
l
eve
r of
gear
box,
the l
ever
goes
do
wn
, bu t
en
-
gin
e c
rank
sha
ft fails to
turn
Kick l
ever
fails to
return
to
upp
er
pos
ition
Free
trav
el of
starting
lever is
too
gre
at
One
of the
gears
will
not
engage
Gears
disengage
by
them-
selves
during
riding
Gear
box
operates
with
nois
e
Main
drive
gear
s noisy
Cause
a)
r
atche
t
gear
teeth
bro-
ken;
b)
quad
r
ant
t
eeth
brok
en;
c) cl
utch
slipping
Starting
me
chanism
spring
broken
or
front
bushing
wa-
sher
came
out
of
mesh
with
the
end
fac
e
lugs
of
the
bush-
in
g
Wedge
became
l
oose
and
lever
turns
free
wi
th
respect
to
starting
shaft
One
of
the
pins
in
gearshift
disk
is
broken
Splines
of
gearshift
sleeves
or
gear
splines
worn
out
I.
Little
oil
in
the
gear
box
casi
ng
2.
Gear
teeth
worn
3.
Bearings
of
the
primary
or
seco
nd
ary
shaft
worn
I. Little oil in
th
e
main
dri-
ve
casing
2.
Gearing
maladjusted
(backlash
must
be
with
in
0.1
and
0.3
mm)
.
Symptoms and fault
tra
cing
a)
wh
en
depressing
the
kick
sta
rter
l
ever,
with
speed
gear
enga
ged,
motorcycle
r
emains
at
re
st
;
b)
same;
c)
starting
mechanism
ope-
rates
(mo
torcy
cle
moves)
bu
t
e
ngin
e
cra
nkshaft
fails to t
urn
Kick l
ever
ca
n be
easi
ly
raised
to
upp
er
position
by
hand
I. Check oil level
I.
Check
the
presence
of o
il
Continued
Remedy
a)
repair
the
gea
r box. Re-
plac
e
the
gea
rs on
int
e
rm
e-
diate
shaf
t;
b) r
eplace
the
quad
ra
nt;
c) check
th
e
clutch
control
drive
for pr
oper
ad
ju
stment;
if
necessary,
ad
ju
st
Repair
the
gear
box.
Repla-
ce
the
spring.
Check
whet
her
quadrant
is
cor
r
ect
ly
pr
essed
on
(refer
io
Fig.
28),
bring
the
washer
in
mes
h
wit
h
th
e
l
ugs
of bu
shing
1
Drive
the
wedge
in
and
L,..-
tig
ht
en
th
e
nut
Repair the
gear
box
Repair
the
gear
box.
Repla-
ce the s l
eeves
or
gears
I.
Add
oil
2.
Repair
the
gear
box. Re-
place
worn
gears
3.
Repair
the
g-e
ar
box. Re-
place
worn
bear
ing
s
I.
Add
oil
2.
Adju
st
the
backlash

""
*
-
'-='
•
Trouble
Main drive casing- over-
h
ea
ts
Front fork knocking
Cause
3.
Key
bolt loosened
L
No
oil or
oil
of
inade-
quate grade
2.
Component parts worn
or broken
Symptoms and
fault
tracing
I
I 3 Too great axial play
of
the universal jotnt
l.
Check the presence and
quality
of
oil
I 2 Dismantle the main drive
and check it for condition
at
i maintenan
ce
shop
I
Running
Gear
L Play
of
steering
col
umn
in
radial bearings
2.
Play
of
tapered end
pie-
ces
of
fork legs
in
traverse
du
e to clamp nuts
g-etting-
loose
3.
Fastenin.:
of
tlie front
fender or headlamp
is
dis-
turbed
4. Bushings
of
the fork leg
tubes are excessive
ly
worn,
lower bushing disconnected or
dropped
L Brake the front wheel
and, holding the motorcycle
by
the handlebar, push it
backward and forward to
de-
termine whether there
is
a
play
in
radial bearings
2. Check for the p
la
y by
pushing the motorcycle
for-
ward and backward with the
front wheel braked
3.
Examine and ·check the
nuts for proper lightening
by
using a wrench
4.
Place the motorcycle
on
a support and raise the front
whee
l.
Too great a play,
re-
vealed when shifting the legs
up
and down, indicates that
the front fork
is
faulty
Continued
Remedy
3.
Tighten
up
the nut
of
key
bolt
I.
Acid
oil
or replace it
2.
Repair the main drive.
Replace worn component parts
L Eliminate the play by
tightening the bearings
2.
Eliminate the play by
screwi
ng
in
the nuts
3.
Eliminate
th
e fault by
tightening the nuts
4.
Repair the front fork.
Check the component parts
for
condition, rep lace
t
h~
bush_-
ings

"-'
0
Troubl
e
Recurrent heavy shoc
ks
in the front fo
rk
(bad shock
absorption)
Cause
5.
End pieces came un-
screwed from the
spr
i
n~
I.
No
oil
in
the front fork
due to leakage
2.
Front fork
sprin~s
lost
e
la
sticity
Symptoms
and
faull
tra
dng
I. Take out the drain screw
of fork
l
e~
end piece (located
at
the bottom), c
he
ck the pre-
sence of
oi
l (130 cm3
of
oi
l is
r
eq
uired ior each fork leg).
Locale
oi
l leakage
by
inspec-
tion
2.
Dismantle
th
e fork, re-
move the
spr
in
~s
and check
Continued
Remedy
5.
After
unscrewin~
th
e
clamp nut, check and,
if
ne-
cessary, sere,,· up the end pie-
ces
I.
If
oil
is
leaking through
the drain screw, screw up
th
e
latter lightly
after
first clean-
in~
the
gasket
washer. Hal·-
in~
undone the clamp nul
of
fork leg tube, fill oil into the
fork and make
sure
the1·
e IS
no leakage.
If
o
il
leaks from under lllc
axl
e.
partially
di
smantle the
fork (remove lhe
whc~l,
screw
oif the ci;:Hilp nut on the tra-
\'l'I'Se, unscrew the gland hous-
ing
on
fork leg end piece, re-
mo,·e end pieces together with
sho
ck
absorbe
r}.
In
this case oil may leak
from under lhe s
ho
ck ahsorhcr
holtom.
Eliminate the l
eakage
by
lightening the bolt.
Pour
in
kerosene to check the tight-
ness. Assemble the fork and
fill it
wi
lh o
il
, make sure
th
ere
is
no
l
ea
ka
gc
2.
Repa ir the fork. Repla
ce
lite springs
This manual suits for next models
1
Table of contents
Other Dnepr Motorcycle manuals
