manuals.online logo
Brands
  1. Home
  2. •
  3. Brands
  4. •
  5. Dometic
  6. •
  7. Refrigerator
  8. •
  9. Dometic NDE1292 User manual

Dometic NDE1292 User manual

Other Dometic Refrigerator manuals

Dometic RM2350 Manual

Dometic

Dometic RM2350 Manual

Dometic RM 2355 and User manual

Dometic

Dometic RM 2355 and User manual

Dometic RC 1600 EGP User manual

Dometic

Dometic RC 1600 EGP User manual

Dometic RMS 8400 User manual

Dometic

Dometic RMS 8400 User manual

Dometic NDR1062 User manual

Dometic

Dometic NDR1062 User manual

Dometic RM 182 B User manual

Dometic

Dometic RM 182 B User manual

Dometic RM 7390 (L) User manual

Dometic

Dometic RM 7390 (L) User manual

Dometic DS 450 User manual

Dometic

Dometic DS 450 User manual

Dometic RM2612 User manual

Dometic

Dometic RM2612 User manual

Dometic RA1302 and User manual

Dometic

Dometic RA1302 and User manual

Dometic 5 Series User manual

Dometic

Dometic 5 Series User manual

Dometic CoolMatic CRX 50 User manual

Dometic

Dometic CoolMatic CRX 50 User manual

Dometic RM2191 Manual

Dometic

Dometic RM2191 Manual

Dometic RM2807 Manual

Dometic

Dometic RM2807 Manual

Dometic WA3200 User manual

Dometic

Dometic WA3200 User manual

Dometic REFRIGERATION 10-Series User manual

Dometic

Dometic REFRIGERATION 10-Series User manual

Dometic CRX Series Owner's manual

Dometic

Dometic CRX Series Owner's manual

Dometic 8 Series User manual

Dometic

Dometic 8 Series User manual

Dometic RM6275L User manual

Dometic

Dometic RM6275L User manual

Dometic N30P1 User manual

Dometic

Dometic N30P1 User manual

Dometic NEA1402 User manual

Dometic

Dometic NEA1402 User manual

Dometic REFRIGERATION 10-Series User manual

Dometic

Dometic REFRIGERATION 10-Series User manual

Dometic RM 5310 User manual

Dometic

Dometic RM 5310 User manual

Dometic RC10.4T.70 User manual

Dometic

Dometic RC10.4T.70 User manual

Popular Refrigerator manuals by other brands

Frigidaire FRS26TS7DW2 Use & care manual

Frigidaire

Frigidaire FRS26TS7DW2 Use & care manual

Fisher Scientific 10ECEEFSA manual

Fisher Scientific

Fisher Scientific 10ECEEFSA manual

Summit FF22BDRSS user manual

Summit

Summit FF22BDRSS user manual

Frigidaire FFRU17B2QWE use & care

Frigidaire

Frigidaire FFRU17B2QWE use & care

Hotpoint ENBGH 19xxx FW operating instructions

Hotpoint

Hotpoint ENBGH 19xxx FW operating instructions

Hitachi R-SG28KPH instruction manual

Hitachi

Hitachi R-SG28KPH instruction manual

AEG S71700TSW0 user manual

AEG

AEG S71700TSW0 user manual

Electrolux ENB3669 Instruction book

Electrolux

Electrolux ENB3669 Instruction book

Electrolux ERN 2930 Instruction book

Electrolux

Electrolux ERN 2930 Instruction book

Beko GNE 60520 X user manual

Beko

Beko GNE 60520 X user manual

Jenn-Air JUR248LBES00 Use & care guide

Jenn-Air

Jenn-Air JUR248LBES00 Use & care guide

LG LRBP1031W - 10 Cu. Ft. Cabinet Depth Bottom Freezer... owner's guide

LG

LG LRBP1031W - 10 Cu. Ft. Cabinet Depth Bottom Freezer... owner's guide

Daewoo RN-33 Series user manual

Daewoo

Daewoo RN-33 Series user manual

Haier RF-8888-174 Service manual

Haier

Haier RF-8888-174 Service manual

Blaupunkt 5CK2 Series user manual

Blaupunkt

Blaupunkt 5CK2 Series user manual

Beko B5RCNE366HG user manual

Beko

Beko B5RCNE366HG user manual

GE TBX21 use and care manual

GE

GE TBX21 use and care manual

Brandt BFC7650SW BFC7650SX instruction manual

Brandt

Brandt BFC7650SW BFC7650SX instruction manual

manuals.online logo
manuals.online logoBrands
  • About & Mission
  • Contact us
  • Privacy Policy
  • Terms and Conditions

Copyright 2025 Manuals.Online. All Rights Reserved.

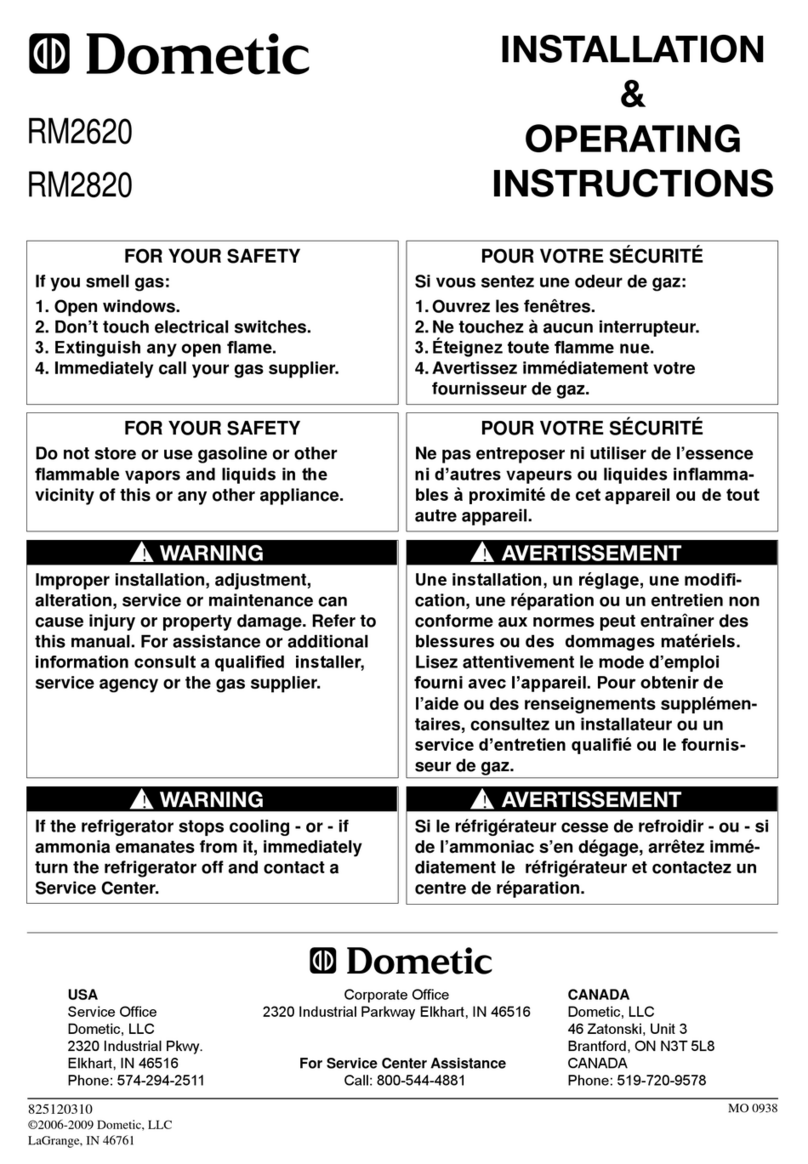
INSTALLATIONAND
OPERATING INSTRUCTIONS
REFRIGERATOR FOR ELECTRIC OPERATION
NDE1292
USA Corporate Office CANADA
Service Office 2320 Industrial Parkway Elkhart, IN 46515 Dometic Distribution Inc.
Dometic Corporation 866 Langs Drive
509 South Poplar Street Cambridge, Ontario
LaGrange, IN 46761 For Service Center Assistance N3H 2N7 Canada
Phone:260-463-4858 Call:800-544-4881 Phone:519-653-4390
8251233-00(French3309319.006)
®
®
Contents: Page
Installation 4
Operating Instructions 8
Maintenance & Service 11
FOR YOUR SAFETY
Do not store or use gasoline or other
flammable vapors and liquids in the
vicinity of this or any other appliance.
WARNING: Improper installation,
adjustment, alteration, service or
maintenance can cause injury or
property damage. Refer to this
manual. For assistance or additional
information consult a qualified
installer, service agency or the sup-
plier.
Pour votre sécurité
Ne pas entreposer ni utiliser de l’essence ni
d’autres vapeurs ou liquides inflammables à
proximité de cet appareil ou de tout autre
appareil.
Avertissement: Une installation, un réglage,
une modification, une réparation ou un
entretien non conforme aux normes peut
entraîner des blessures ou des dommages
matériels. Lisez attentivement le mode d’em-
ploi fourni avec l’appareil. Pour obtenir de
l’aide ou des renseignements supplémentai-
res, consultez un installateur ou un service
d’entretien qualifié ou le fournisseur.
3
FIG. 1
12V DC
AC relay
Flexible cord
12 volt
Terminal block
Drain water hose
Thermofuse
Protection
cover
Power module
and fuses
Heaters
Refrigerator control panel
FIG. 2
AC
OFF
ON COLD 12345 COLDEST
12
B
A
CD LEGEND
1. Main Power Button ON/OFF
2. Temperature Selector Button
A. AC Indicator Lamp
B. Temperature Indicator Lamps
C. Climate Control Switch
D. LowAmbient Switch
4
INSTALLATION
GENERAL INSTRUCTION
This appliance is designed for storage of foods and
storage of frozen foods and making ice.
This appliance is certified under the latest edition of
ANSI Z21.19•CSA 1.4 Refrigerators using gas fuel.
The installation must conform with local codes, or in ab-
sence of local codes, the following standards as appli-
cable.
In the U.S. the installation must conform with:
1. Recreational Vehicles Code,ANSIA119.2 (latest
edition)
2. Manufactured Home Construction and Safety
Standard, Title 24 CFR, Part 3280.
If an external electrical source is utilized, the refrigera-
tor, when installed, must be electrically grounded in ac-
cordance with local codes or, in the absence of local
codes,the NationalElectricalCode,ANSI/NFPA70- (lat-
est edition).
In CANADA, the installation must conform with:
1. CSAZ240 RV Series, Recreational Vehicles.
2. Current CSA Z240.4, Gas-equipped Recreational
Vehicles and Mobile Housing.
If an external electrical source is utilized, the refrigera-
tor, when installed, must be electrically grounded in ac-
cordance with local codes or, in the absence of local
codes, the Canadian Electrical Code, CSAC22.1, Parts
Iand II - (latest edition).
VENTILATION
The installation shall be made in such a manner as to
provide necessary air circulation over thr cooling unit.
Openings for air supply shall have a minimum dimen-
sion of not less than 1/4 inch.
Properinstallationrequires onelowerfresh airintakeand
one upper exhaust vent. The ventilation kits shown in
this instruction manual have been certified for use with
the refrigerator models listed in the table. For “Certified
Vent System Kits” see page 13.
The ventilation kits must be installed and used without
modification.The lower vent of the recommended kits is
provided with proper size openings.
The flow of ventilating air must not be obstructed.
Thelowersideventisfittedwithapanel,whichprovides
an adequate access opening for ready serviceability of
the refrigerator. This should be centered on the back of
the refrigerator.
ELECTRICAL CONNECTION
120 Volts AC Connection
Therefrigeratorisequippedwitha three-prong (ground-
ing) plug for your protection against shock hazards and
shouldbeplugged directlyintoaproperlygroundedthree-
prongreceptacle.DO NOTcutorremovethegrounding
prongfrom this plug.The free lengthof the cord is 2 feet
and therefore recommended that the receptacle be lo-
cated to the right side of the refrigerator (viewed from
the rear). The receptacle should be 3” (from the bottom
of the plastic receptacle) above the refrigerator mount-
ing floor. (see FIG. 3). This allows easy access through
the vent door. The cord should be routed to avoid direct
contact with the burner cover, flue cover or any other
components that could damage the cord insulation.
12 Volts DC Connection
The refrigerator model NDE1292 require a continuous
12 volt DC supply to operate the control system.
The connection is made to the positive (+) and negative (-)
terminals of the terminal block on the back of the refrig-
erator. (See FIG. 1). Correct polarity must be observed
when connecting to the DC supply.
Do not use the chassis or vehicle frame as one of the
conductors.
Connect two wires at the refrigerator and route to the
DCsupply.
The distance the current must travel from the battery to
the refrigerator dictates the AWG wire size to be used.
Should the wire be too small for the distance, a voltage
drop will result.
Recommended wire sizes are shown below.
The wires from the battery to the refrigerator must be of
large enough size to handle the load. The connections
must be clean, tight and free from corrosion.
MAXIMUM TOTAL CONDUCTOR WIRE LENGHT
(in feet and meters)
Wire lenght AWG
17 ft. 14
5 m
27 ft. 12
8 m
FIG. 3
120 Volt AC
receptacle
3’’
5
INSTALLING REFRIGERATOR IN
ENCLOSURE
Securing the Refrigerator
After the refrigerator is put in place, the refrigerator is to
be secured in the enclosure with six screws (not in-
cluded). The screws have to be installed in the following
order:
STEP1:Two screws installedthrough the front base,
which includes the lower front strip installation.
The refrigerator is provided with a lower front strip
(shippedas a loosepart).The front stripisto be attached
after the refrigerator is set into the cutout opening.
1. Install the lower front strip by sliding it under the
bottom hinge plates, as shown in FIG. 5.
2. Secure the refrigerator and the lower front strip with
two screws: One screw through each hinge. See
FIG 6.
The transport support at the rear of the refrigerator can
be removed if necessary for the installation of the refrig-
erator in the enclosure. (See figure above).
NOTE: DO NOT install the appliance directly on
carpeting. Carpeting must be removed or
protectedby ametal or wood panel beneath
the appliance, which extends at least full
width and depth of the appliance.
Caution: Use care when installing the refrigerator. This
refrigeratorisequippedwith the latest vacuum insulated
panel technology. These insulating panels are located
ontheTop,Back, Bottom, Sides andDoors of the refrig-
erator.
If the surface is punctured, loss of insulation will occur,
resulting in poor refrigerator performance.
NOTE: A wood strip must be in place across the upper
openingoftheenclosure.The top frame of the refrigera-
tor will be anchored to the wood strip with screws, see
FIG. 10.
The refrigerator must be installed in a substantial enclo-
sure and must be level. When installing the refrigerator
in the enclosure, all areas within the recess in which the
refrigerator is installed must be sealed.
Make sure that there is a complete seal between the
front frame of the refrigerator and the top, sides and
bottom of the enclosure. Alength of sealing strip is ap-
plied to the rear surface of the front frame for this pur-
pose, see FIG. 4. The sealing should provide a com-
pleteisolation ofthe appliance’scombustion systemfrom
the vehicle interior.
NOTE: Be careful not to damage the sealing strip when
the refrigerator is put in place.
FIG. 4
FIG. 5
FIG. 6
6
Step 2: Two screws installed in the top frame.
The top decoration panel must be removed from the re-
frigerator before the screws can be installed.
Openthedoorsandremovethe four screws that secure
the top decoration panel to the top frame. Two screws
are accessible from underneath see FIG. 7, the second
two screws that secure the decoration panel to the front
frame are located on each side of the lock retainer.
Carefully tilt the top decoration panel and lift up to re-
move from top frame. Be careful not to damage the cir-
cuit board and wires.
Install the two screws in the top frame, the holes are
accessible from underneath.
Seal the opening for the screws with aluminum tape.
Replace the top decoration panel with its four screws.
Be careful not to pinch the wires behind the panel.
Failure to follow the sequence in securing refrigerator in
enclosure can cause leakage between the frame and
cabinet.
Any space between the counter, storage area or ceiling
andtopoftherefrigeratorgreaterden1-1/2inchesshould
be blocked. The heat produced at the rear of the refrig-
eratorwillbecometrappedin this space, making the top
of the refrigerator hot and reduce the efficiency of the
refrigerator.
Drain water hose
Ahole must be drilled through flooring see FIG. 8.
The hole must be drilled in the cut out opening of the
base plate at the rear of the refrigerator. The installer
MUST make sure that the hose does not kink when run
throughthe floor.Seal aroundthehose thatgoes through
thedrilled hole. If a longerhosethan supplied is required
to get the water to drain outside of the vehicle, the in-
staller will have to supply the extra length of hose.
STEP 3: Two screws installed in the rear base.
See FIG. 8.
FIG. 7
Hole for drain
water hose
FIG. 8
7
CERTIFIED INSTALLATION
Certifiedinstallationsrequire oneroofvent andonelower
side vent.
For “Certified Vent System Kits” see page 13.
For further information contact your dealer or distribu-
tor.
METHODS OF INSTALLATION
The method of installation is shown in FIG. 9. It is es-
sential that all maximum or minimum dimensions are
strictly maintained as the performance of the refrigera-
tor is dependent on adequate flow of air over the rear of
the refrigerator.
NOTE: The upper vent should be centered over the
condenser coil at the back of the refrigerator.
VENTILATION HEIGHTS
CLEARANCES
Minimum clearances in inches to combustible materials
are:
G: Top 0
K: Side 0
L: Bottom 0
M: Rear 0
N: See NOTE: Clearance “N” below.
NOTE: Clearance “M” is between the rearmost part of
the refrigerator and the wall behind the refrigerator.
NOTE: Clearance “N” is the distance between the bot-
tom of the lower vent to the roof material. For ventilation
height, see tableVENTILATION HEIGHTS
See Figures 9, and 10.
Installation with roof Minimum ventilation
vent and lower side vent heights in:
Refrigerator Inches mm
NDE 1292 65 1651
LOWER VENT CUTOUT
13-5/8”
28-5/8”
FIG. 9
Ventilation
height
Condenser
K
G
KN
L
M
NOTE: Wood Strip
MUST be in place
FIG. 10
8
OPERATING
INSTRUCTIONS
IMPORTANCE OF LEVELING A
REFRIGERATOR
In an absorption refrigerator system, ammonia is lique-
fied in the finned condenser coil at the top rear of the
refrigerator. The liquid ammonia then flows into the
evaporator (inside the freezer section) and is exposed
to a circulating flow of hydrogen gas, which causes the
ammonia to evaporate, creating a cold condition in the
freezer.
When starting this refrigerator for the very first time, the
cooling cycle may require up to four hours of running
time before the cooling unit is fully operational.
Thetubing intheevaporator sectionisspecifically sloped
to provide a continuous movement of liquid ammonia,
flowing downward by gravity through this section. If the
refrigerator is operated when it is not level and the ve-
hicle is not moving, liquid ammonia will accumulate in
sections of the evaporator tubing. This will slow the cir-
culation of hydrogen and ammonia gas, or in severe
cases, completely block it, resulting in a loss of cooling.
Any time the vehicle is parked for several hours with the
refrigerator operating, the vehicle should be leveled to
preventthislossofcooling.The vehicle needs to be lev-
eled only so it is comfortable to live in (no noticeable
sloping of floor or walls).
When the vehicle is moving, the leveling is not critical,
as the rolling and pitching movement of the vehicle will
pass to either side of level, keeping the liquid ammonia
from accumulating in the evaporator tubing.
OPERATION
This refrigerator is designed to work on 120 VoltAC.
The refrigerator require a continuous 12V DC supply to
operate the control system, the controls will work down
to 9.6 volt DC.
Overall Recess
Refrigerator Dimensions Dimensions
Model Height Width Depth Height Width Depth
ABCHWD
inch 59-31/32 33-11/16 26-21/32 59-1/16 32-3/4 24
NDE 1292 mm 1523 855 677 1500 832 610
This method of installation and these clearances will give you adequate space for service and proper installation.
FIG. 11 Side view View from above
H
D
W
D
C
B
A
9
DESCRIPTION OF OPERATING
MODES
LIMP MODE OF OPERATION
This control system contains a feature where it will con-
tinue to operate the cooling system in the event of a fail-
ureofamajor operatingcomponent.Twodifferentmodes
of operation can occur in this category.
Ifforsomereason thedisplay modulebecomesnonfunc-
tional, the refrigerator will continue to operate and the
temperature of the refrigerator will be maintained at the
MIDpositionwithinnormaltemperaturetolerances.The
power module will continually attempt to reestablish op-
eration of the display module.
The second limp mode of operation will execute when a
failure of the temperature sensing device or associated
electronic circuitry occurs. If this should occur, the re-
frigerator will run continuously.
The refrigerator will continue to operate in this mode in-
definitely or until a new sensor is installed and the sys-
tem is reset.
START UP INSTRUCTIONS
A. Acontinuous 12 volt DC supply mustbeavailablefor
the electronic control to function.
B. Press the main power ON/OFF button (1) to the
DOWN position.
C. Press the TEMPERATURE SELECTOR button (2)
until the lamp at the desired setting is illuminated.
Note: Dependingonambienttemperature,iftheset-
ting is left on in “COLDEST” position too long it may
causeoverfreezing.
TO SHUT OFF THE REFRIGERATOR
To shut off the refrigerator press the main power ON/
OFF button (1) to the UP (OFF) position.
This shuts off all DC power to the refrigerator, including
the interior light.
DISPLAY PANEL
BA
2
AC
OFF
ON COLD 12345 COLDEST
1
10
HOW TO USE THE REFRIGERATOR
FOOD STORAGE COMPARTMENT
Thefood storage compartmentis completely closed and
unventilated,which isnecessaryto maintain therequired
low temperature for food storage. Consequently, foods
having a strong odor or those that absorb odors easily
should be covered. Vegetables, salads etc. should be
covered to retain their crispness. The coldest positions
in the refrigerator are under the cooling fins and at the
bottom of the refrigerator. The warmer areas are on the
upper door shelves. This should be considered when
placing different types of food in the refrigerator.
When the refrigerator is heavily loaded, it will take a
longer time to lower the temperature; therefore, to get
maximum efficiency the refrigerator and food items
shouldbepre-cooledprior toloading.Theshelvesshould
not be covered with paper or plastic, and the food items
should be arranged so air can circulate freely.
Two door shelves are equipped with fingers. The fin-
gers are designed to prevent large containers (1/2-gal-
lon milk or juice) from shifting or spilling while traveling.
FROZEN FOOD STORAGE
COMPARTMENT
Quick frozen soft fruits and ice cream should be placed
in the coldest part of the compartment, which is on the
top freezer shelf. Frozen vegetables, may be stored in
any part of the compartment.
This compartment is not designed for deep or quick-
freezing of food. Meat or fish, whether raw or prepared,
can be stored in the frozen food storage compartment
providedthey arepre-cooledfirst intherefrigerator. They
canbe stored about threetimeslongerin the frozen food
compartment as compared to the fresh food compart-
ment. To prevent food from drying out, keep it in cov-
ered dishes, containers, plastic bags or wrapped in alu-
minum foil.
Total Refrigerated Volume 12 cu.ft.
ICE MAKING
Ice cubes can be made in the freezer compartment.
Forfaster icemaking,the traysshouldbe placedindirect
contact with the freezer shelves.
Ice will be made more rapidly if the thermostat is set at
its highest position.
It is a good idea to do this a few hours before the antici-
pated need for ice, but be sure to move the thermostat
back to normal setting, usually about mid setting when
the ice is formed. Food in the fresh food compartment
may be frozen if the setting is left on “COLDEST” posi-
tion.
DEFROSTING
Shutofftherefrigeratorby pressing the main power ON/
OFF button to the UP (OFF) position.
Empty the refrigerator, leaving the drip tray under the
finned evaporator, and the cabinet and freezer doors
open.Filling theicetrays withhotwater andplacingthem
on the freezer shelves can reduce defrosting time.
When all the frost has melted, dry the interior of the re-
frigeratorand freezer with a clean cloth.Replaceallfood
and set the thermostat to the COLDEST temperature
setting for a few hours. Then reset the thermostat to the
desired setting, usually at mid setting.
DO NOT use a hot air blower. Permanent damage
could result from warping the metal or plastic parts.
DO NOT use a knife or an ice pick, or other sharp
tools to remove frost from the freezer shelves. They
can create a leak in the ammonia system.
CLEANING
Cleaning the refrigerator is usually done after it is de-
frosted or put into storage. To clean the interior liner of
the refrigerator, use lukewarm weak soda solution. Use
onlywarm water to clean thefinnedevaporator,icetrays
andshelves.NEVER usestrongchemicals or abrasives
to clean these parts, as the protective surfaces will be
damaged. It is important to always keep the refrigerator
clean.
SHUT OFF - STORAGE PROCEDURE
Shut off the refrigerator by pressing the main power
ON/OFF button to the UP (OFF) position.
If the refrigerator will not be in operation for a period of
weeks,itshouldbeemptied,defrosted,cleanedandthe
doors left ajar. The ice trays should also be dried and
kept outside the cabinet.
! CAUTION
! WARNING
DO NOT store explosive substances in the refrig-
erator, such as cigarette lighter gas, gasoline, ether
or the like.
NOTE: Sodium chromate is used for corrosion protec-
tion (less than 2-weight % of the coolant).
CLIMATE CONTROL
During the summer months of high temperatures and
humidity,themetalframe between the freezer and fresh
food compartments may have water droplets forming.
The number of water droplets will increase if the vehicle
isn’t air conditioned during these months.
This refrigerator comes standard with a 12 volt (DC)
climatecontrolthat willevaporatethewaterdropletswhen
they form.
To have the climate control on, you position the switch
(“C” see figure 2) located beneath the top decoration
panel that houses the control panel to ON.
The climate control can be left on continuously or only
used when temperatures require it.
NOTE: The climate control will draw 12 volt DC power
continuouslywhen intheON position.Itshould beturned
OFF when a charging source is not available.