Beko GNE 60520 X User manual

GNE60520X
GNE60520DX
GRNE60520DB
EN

Please read ths manual frst!
Dear Customer,
We hope that your product, which has been produced in modern plants and checked
under the most meticulous quality control procedures, will provide you with
effective service.
For this, we recommend you to carefully read the entire manual of your product
before using it and keep it at hand for future references.
The user manual wll help you use the product n a fast and safe way.
Please note that this manual may be valid for other models as well.
Symbols and ther descrptons
This instruction manual contains the following symbols:
CImportant information or
useful usage tips.
AWarning against dangerous
conditions for life and
property.
BWarning against electric
voltage.
Packaging materials of the prod-
uct are manufactured from re-
cyclable materials in accordance
with our National Environment
Regulations.

2 / 36 EN Refrgerator / User Manual
1. Safety and environment
instructions 3
1.1. General safety . . . . . . . . . . . . . . . . . . . 3
1.1.1 HC warning . . . . . . . . . . . . . . . . . . . . . . 5
1.1.2 For models with water dispenser6
1.2. Intended use. . . . . . . . . . . . . . . . . . . . . 6
1.3. Child safety . . . . . . . . . . . . . . . . . . . . . . 7
1.4. Compliance with WEEE Directive and
Disposing of the Waste Product. 7
1.5. Compliance with RoHS Directive 7
1.6. Package information . . . . . . . . . . . . 7
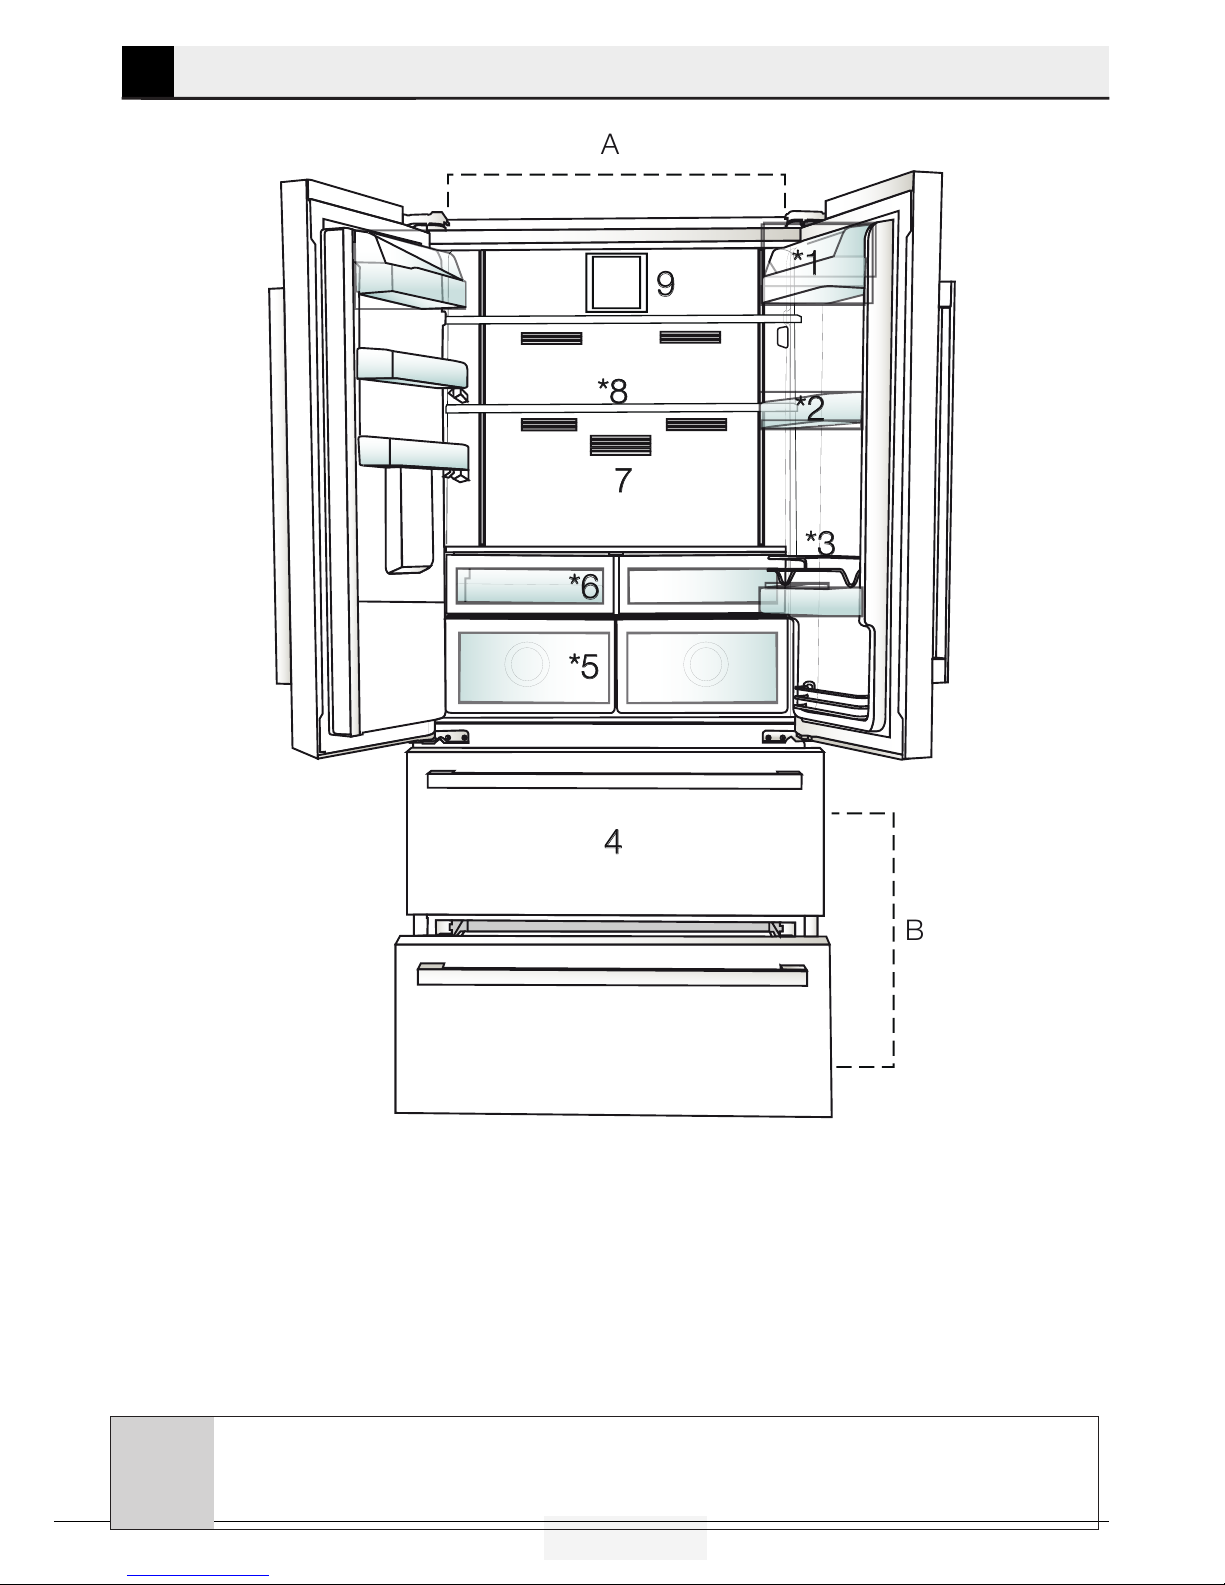
2 Refrigerator 8
3 Installation 9
3.1. Right place for installation . . . . . . 9
3.2. Attaching the plastic wedges . . . 9
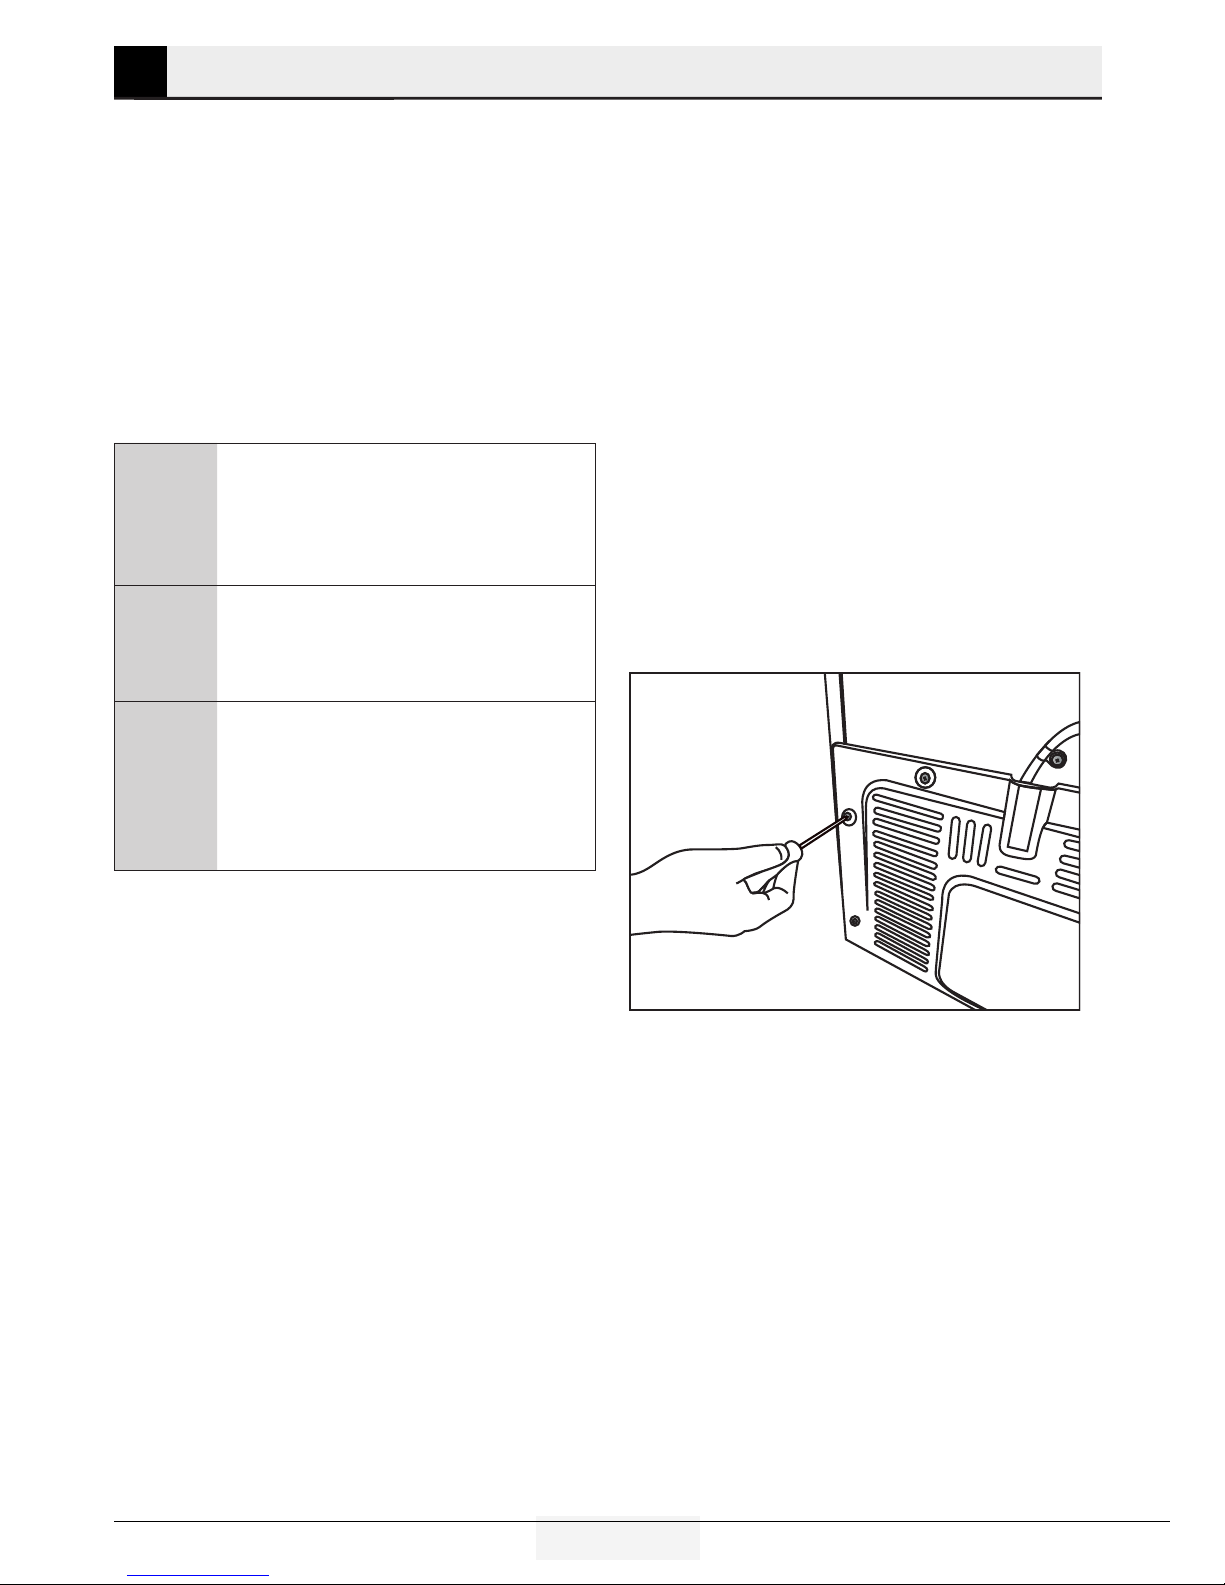
3.3. Adjusting the feet . . . . . . . . . . . . . .10
3.4. Power connection . . . . . . . . . . . . . .10
3.5. Water connection . . . . . . . . . . . . . .10
3.6. Connecting water hose to the
product . . . . . . . . . . . . . . . . . . . . . . . . . 11
3.7. Connecting to water mains . . . . 11
3.8. For products using water carboy12
3.9 Water filter. . . . . . . . . . . . . . . . . . . . . . . 13
3.9.1. Fixing external filter on the wall
(Optional) . . . . . . . . . . . . . . . . . . . . . . . 13
3.9.2. Internal filter . . . . . . . . . . . . . . . . . . 15
4 Preparation 17
4.1. What to do for energy saving. . . 17
4.2. First use . . . . . . . . . . . . . . . . . . . . . . . . 17
5 Using the product 18
5.1. Indicator panel. . . . . . . . . . . . . . . . . .18
5.2. Zero degree compartment . . . . .26
5.3. Vegetable bin . . . . . . . . . . . . . . . . .26
5.4. Blue light. . . . . . . . . . . . . . . . . . . . . . . .26
5.5. Description and cleaning of odour
filter. . . . . . . . . . . . . . . . . . . . . . . . . . . . .26
5.6. Telescopic drawer . . . . . . . . . . . . . .27
5.7. Ionizer . . . . . . . . . . . . . . . . . . . . . . . . . .27
5.8. Ice box . . . . . . . . . . . . . . . . . . . . . . . . . .27
5.9. Ice maker. . . . . . . . . . . . . . . . . . . . . . . .27
5.10.Movable middle section . . . . . . .28
5.11.Ice container . . . . . . . . . . . . . . . . . . . .28
5.12.Freezing fresh food. . . . . . . . . . . . .29
5.13.Recommendations for storing frozen
foods. . . . . . . . . . . . . . . . . . . . . . . . . . . .29
5.14.Deep freezer details. . . . . . . . . . . .29
5.15.Placing the food . . . . . . . . . . . . . . . .30
5.16.Door open alert. . . . . . . . . . . . . . . . .30
5.17.Interior light . . . . . . . . . . . . . . . . . . . .30
6Maintenance and Cleaning31
6.1. Preventing Bad Odour . . . . . . . . . . 31
6.2. Protecting Plastic Surfaces . . . . 31
7 Troubleshooting 32

3 / 36 EN
Refrgerator / User Manual
1. Safety and envronment nstructons
Ths secton provdes
the safety nstructons
necessary to prevent the
rsk of njury and materal
damage. Falure to observe
these nstructons wll
nvaldate all types of
product warranty.
Intended use
A
WARNING:
openngs, n the
applance enclosure
or n the bult-
nstructure, clear of
obstructon.
A
WARNING:
Do not use
mechancal devces
or other means
to accelerate the
defrostngprocess,
other than those
recommended by
the manufacturer.
AWARNING:
Do not damage the
refrgerant crcut.
A
WARNING:
Do not use electrcal
applances nsde
the food storage
compartments
of the applance,
unless they
are of the type
recommended by
the manufacturer.
1.1. General safety
• Ths applance can be
used by chldren aged
from 8 years and above
and persons wth
reduced physcal,sensory
or mental capabltes or
lack of experence and
knowledge f they have
been gven supervson
or nstructon concernng
use of the applance n a
safe way and understand
the hazards nvolved.
Chldren shall not play
wth the applance.
• In case of malfuncton,
unplug the devce.
• After unpluggng, wat
at least 5 mnutes before
pluggng n agan.
• Unplug the product
when not n use.

4 / 36 EN Refrgerator / User Manual
Safety and envronment nstructons
• Do not touch the plug
wth wet hands! Do not
pull the cable to plug off,
always hold the plug.
• Do not plug n the
refrgerator f the socket
s loose.
• Unplug the product
durng nstallaton,
mantenance, cleanng
and repar.
• If the product wll not be
used for a whle, unplug
the product and remove
any food nsde.
• Do not use the product
when the compartment
wth crcut cards located
on the upper back part
of the product (electrcal
card box cover) (1) s
open.
1
1
• Do not use steam or
steamed cleanng
materals for cleanng
the refrgerator and
meltng the ce nsde.
Steam may contact the
electrfed areas and
cause short crcut or
electrc shock!
• Do not wash the product
by sprayng or pourng
water on t! Danger of
electrc shock!
• In case of malfuncton,
do not use the product,
as t may cause electrc
shock. Contact the
authorsed servce as
soon as possble.
• Plug the product nto an
earthed socket. Earthng
must be done by a
qualfed electrcan.
• If the product has LED
type lghtng, contact

5 / 36 EN
Refrgerator / User Manual
Safety and envronment nstructons
the authorsed servce
for replacng or n case of
any problem.
• Do not touch frozen food
wth wet hands! It may
adhere to your hands!
• Do not place lquds n
bottles and cans nto the
freezer compartment.
They may burst.
• Place lquds n uprght
poston after tghtly
closng the ld.
• Do not spray flammable
substances near the
product, as t may burn or
explode.
• Do not keep flammable
materals and products
wth flammable gas
(sprays, etc.) n the
refrgerator.
• Do not place contaners
holdng lquds on top of
the product. Splashng
water on an electrfed
part may cause electrc
shock and rsk of fre.
• Exposng the product to
ran, snow, sunlght and
wnd wll cause electrcal
danger. When relocatng
the product, do not pull
by holdng the door
handle. The handle may
come off.
• Take care to avod
trappng any part of your
hands or body n any of
the movng parts nsde
the product.
• Do not step or lean on
the door, drawers and
smlar parts of the
refrgerator. Ths wll
cause the product to fall
down and cause damage
to the parts.
• Take care not to trap the
power cable.
1.1.1 HC warnng
If the product comprses
a coolng system usng
R600a gas, take care
to avod damagng the
coolng system and ts ppe
whle usng and movng
the product. Ths gas s
flammable. If the coolng
system s damaged,
keep the product away
from sources of fre
and ventlate the room
mmedately.

6 / 36 EN Refrgerator / User Manual
Safety and envronment nstructons
C
The label on the
nner left sde
ndcates the type
of gas used n the
product.
1.1.2 For models
wth water
dspenser
• Pressure for cold water
nlet shall be maxmum
90 ps (6.2 bar). If your
water pressure exceeds
80 ps (5.5 bar), use a
pressure lmtng valve
n your mans system.
If you do not know how
to check your water
pressure, ask for the
help of a professonal
plumber.
• If there s a rsk of water
hammer effect n your
nstallaton. Consult a
plumber.
• Do not nstall on the
hot water nlet. Take
precautons aganst
of the rsk of freezng
of the hoses. Water
temperature operatng
nterval shall be 33°F
(0.6°C) mnmum and
100°F (38°C) maxmum.
• Use drnkng water only.
1.2. Intended use
• Ths product s desgned
for home use. It s not
ntended for commercal
use.
• The product should be
used to store food and
beverages only.
• Do not keep senstve
products requrng
controlled temperatures
(vaccnes, heat senstve
medcaton, medcal
supples, etc.) n the
refrgerator.
• The manufacturer
assumes no
responsblty for any
damage due to msuse or
mshandlng.

7 / 36 EN
Refrgerator / User Manual
Safety and envronment nstructons
1.3.Child safety
•
chldren’s reach.
• Do not allow the chldren to play wth
the product.
• If the product’s door comprses a lock,
break off the lock when eventually
dsposng of the product.
1.4. Compliance
with WEEE Directive
and Disposing of the
Waste Product
Ths product comples wth
EU WEEE Drectve (2012/19/EU). Ths
product bears a classfcaton symbol
for waste electrcal and electronc
equpment (WEEE).
Ths product has been
manufactured wth hgh
qualty parts and materals
whch can be reused and are
sutable for recyclng. Do not
dspose of the waste product
wth normal domestc and
other wastes at the end of ts servce
lfe. Take t to the collecton center for
the recyclng of electrcal and electronc
equpment. Please consult your local
authortes to learn about these
collecton centers.
1.5.Compliance with
RoHS Directive
• Ths product comples wth EU WEEE
Drectve (2011/65/EU). It does
not contan harmful and prohbted
materals specfed n the Drectve.
1.6.Package information
• Packagng materals of the product
are manufactured from recyclable
materals n accordance wth our
Natonal Envronment Regulatons.
Do not dspose of the packagng
materals together wth the domestc
or other wastes. Take them to the
packagng materal collecton ponts
desgnated by the local authortes.

8 / 36 EN Refrgerator / User Manual
*1
*3
*2
*5
*6
7
*8
9
4
A
B
2 Refrgerator
C*Optonal: Fgures n ths user gude are schematc and may not exactly match
your product. If your product does not comprse the relevant parts, the nformaton
pertans to other models.
A- Cooler compartment
B- Freezer compartment
1. Butter-cheese shelf
2. Door shelves
3. Shelter wre
4. Frozen food storng compartments
5. Vegetable bns
6. Breakfast compartment
7. Odour flter
8. Adjustable glass shelves
9. Fan

9 / 36 EN
Refrgerator / User Manual
3 Installaton
3.1.Right place for
installation
Contact the authorised Service for
the product's installation. To ready
the product for installation, see the
information in the user guide and make
sure the electric and water utilities are
as required. If not, call an electrician
and plumber to arrange the utilities as
necessary.
BWARNING:The manufacturer
assumes no responsblty for
any damage caused by the work
carred out by Unauthorsed
persons.
BWARNING:The product’s power
cable must be unplugged durng
nstallaton. Falure to do so may
result n death or serous njures!
A
WARNING: If the door span s too
narrow for the product to pass,
remove the door and turn the
product sdeways; f ths does not
work, contact the Unauthorsed
servce.
avod vbraton.
from the heater, stove and smlar
sources of heat and at least 5 cm away
from electrc ovens.
drect sunlght or keep n damp
envronments.
crculaton to functon effcently. If
the product wll be placed n an alcove,
remember to leave at least 5 cm
dstance between the product and the
celng and the walls.
envronments wth temperatures
below -5°C.
3.2.Attaching the
plastic wedges
Use the plastc wedges provded wth
the product to provde suffcent space
for ar crculaton between the product
and the wall.
1.To attach the wedges, remove the
screws on the product and use the
screws provded wth the wedges.
2.Attach 2 plastc wedges on the
ventlaton cover as shown n the
fgure.

10 / 36 EN Refrgerator / User Manual
Installaton
3.3.Adjusting the feet
If the product s not n balanced poston,
adjust the front adjustable feet by
rotatng rght or left.
3.4. Power connection
AWARNING:Do not use
extenson or mult sockets n
power connecton.
BWARNING:Damaged power
cable must be replaced by
authorsed Servce.
CWhen placng two coolers n
adjacent poston, leave at
least 4 cm dstance between
the two unts.
• Our frm wll not assume
responsblty for any damages
due to usage wthout earthng and
power connecton n complance wth
natonal regulatons.
• The power cable plug must be easly
accessble after nstallaton.
• Connect the refrgerator to an
earthed socket wth 220-240V/50 Hz
voltage. The socket must comprse a
10-16A fuse.
• Do not use mult-group plug wth or
wthout extenson cable between the
wall socket and the refrgerator.
3.5.Water connection
(Optonal)
AWARNING:Unplug the product
and the water pump (f avalable)
durng connecton.
The product can be connected to a
carboy or drectly to the water mans,
dependng on the model. To establsh
the connecton, the water hose must
frst be connected to the product.
Check to see the followng parts are
suppled wth your product’s model:
3
1
4
2
*5
1.
Connector (1 pece): Used to attach the
water hose to the rear of the product.

11 / 36 EN
Refrgerator / User Manual
Installaton
2.
Hose clp (3 peces): Used to fx the
water hose on the wall.
3.
Water hose (1 pece, 5 meter dameter
1/4 nches): Used for the water
connecton.
4.
Tap adapter (1 pece): Comprses a
porous flter, used for connecton to the
cold water mans.
5.
Water flter (1 pece *Optonal): Used to
connect the mans water to the product.
Water flter s not requred f carboy
connecton s avalable.
3.6. Connecting water
hose to the product
To connect the water hose to the
product, follow the nstructons
below.
1.
Remove the connector on the hose
nozzle adaptor n the back of the
product and run the hose through the
connector.
2.
Push the water hose down tghtly and
connect to the hose nozzle adaptor.
3.
Tghten the connector manually to fx
on the hose nozzle adaptor. You may
also tghten the connector usng a ppe
wrench or plers.
3.7.Connecting to
water mains
(Optonal)
To use the product by connectng to
the cold water mans, a standard 1/2”
valve connector must be nstalled to the
cold water mans n your home. If the
connector s not avalable or f you are
unsure, consult a qualfed plumber.
1.
Detach the connector (1) from the tap
adaptor (2).

12 / 36 EN Refrgerator / User Manual
Installaton
1
23
2.
Connect the tap adaptor to the water
mans valve.
3.
Attach the connector around the water
hose.
4.
Attach the connector nto the tap
adaptor and tghten by hand / tool.
5.
To avod damagng, shftng or
accdentally dsconnectng the hose,
use the clps provded to fx the water
hose approprately.
AWARNING:After turnng the
tap on, make sure there s no
water leak on ether end of the
water hose. In case of leakage,
turn the valve off and tghten all
connectons usng a ppe wrench
or plers.
3.8. For products
usng water carboy
(Optonal)
To use a carboy for the product’s
water connecton, the water pump
recommended by the Unauthorsed
servce must be used.
1.
Connect one end of the water hose
provded wth the pump to the product
(see 3. 6) and follow the nstructons
below.

13 / 36 EN
Refrgerator / User Manual
Installaton
2.
Connect the other end of the water
hose to the water pump by pushng the
hose nto the pump’s hose nlet.
3.
Place and fasten the pump hose nsde
the carboy.
4.
Once the connecton s establshed,
plug n and start the water pump.
CPlease wat 2-3 mnutes after
startng the pump to acheve the
desred effcency.
CSee also the pump’s user gude for
water connecton.
CWhen usng carboy, water flter s
not requred.
3.9 Water flter
(Optonal)
The product may have nternal or
external flter, dependng on the model.
To attach the water flter, follow the
nstructons below.
3.9.1. Fxng external
flter on the wall (Optonal)
AWARNING:Do not fx the flter on
the product.
Check to see the followng parts are
suppled wth your product’s model:
123
4
5
6
1.
Connector (1 pece): Used to attach the
water hose to the rear of the product.
2.
Tap adapter (1 pece): Used for
connecton to the cold water mans.
3.
Porous flter (1 pece)
4.
Hose clp (3 peces): Used to fx the
water hose on the wall.
5.
Flter connectng apparatus (2 peces):
Used to fx the flter on the wall.
6.
Water flter (1 pece): Used to connect
the mans water to the product.

14 / 36 EN Refrgerator / User Manual
Installaton
Water flter s not requred f carboy
connecton s avalable.
1.
Connect the tap adaptor to the water
mans valve.
2.
Determne the locaton to fx the
external flter. Fx the flter’s connectng
apparatus (5) on the wall.
3.
Attach the flter n uprght poston
on the flter connectng apparatus, as
ndcated on the label. ( 6 ).
4.
Attach the water hose extendng from
the top of the flter to the product’s
water connecton adaptor (see. 3 6).
After the connecton s establshed, t
should look lke the fgure below.

15 / 36 EN
Refrgerator / User Manual
Installaton
Water lne:
Carboy lne:
3.9.2. Internal flter
The internal filter provided with the
product is not installed upon delivery;
please follow the instructions below to
install the filter.
1.
“
Ice Off”
ndcator must be actve
whle nstallng the flter. Swtch the
ON-OFF ndcator usng the “
Ice”button
on the screen.
2.
Remove the water flter by-pass cover
by pullng.
CA few drops of water may flow out
after removng the cover; ths s
normal.
3.
Place the water flter cover nto the
mechansm and push to lock n place.

16 / 36 EN Refrgerator / User Manual
Installaton
4.
Push the
“Ice”
button on the screen
agan to cancel the “
IceOff”
mode.
CThe water flter wll clear certan
foregn partcles n the water. It
wll not clear the mcroorgansms
n the water.
CThe flter replacement perod
of your product s 6 months.

17 / 36 EN
Refrgerator / User Manual
4 Preparaton
4.1. What to do for
energy saving
AConnectng the product to
electronc energy-savng systems
s harmful, as t may damage the
product.
• Do not keep the refrgerator doors
open for long perods.
• Do not place hot food or beverages
nto the refrgerator.
• Do not overfll the refrgerator;
blockng the nternal ar flow wll
reduce coolng capacty.
• To be able store maxmum food n
the freezer compartment of your
refrgerator, the upper drawers have
to be removed and placed on top of
wre rack. The net volume and energy
consumpton values specfed n the
energy label of the refrgerator was
tested after removng the freezer
compartment’s upper shelf and
the ce contaner whch can easly
be removed manually. Usng the
lower drawer whle loadng s hghly
recommended.
• Dependng on the product’s features;
defrostng frozen foods n the cooler
compartment wll ensure energy
savng and preserve food qualty.
• Make sure the foods are not n
contact wth the cooler compartment
temperature sensor descrbed below.
• Food must be stored n drawers nsde
the cooler compartment n order to
provde energy savng and preserve
the food n a better ambent.
• Prevent drect contact between the
temperature sensor n the freezer
compartment and the food packages.
Energy consumpton may ncrease n
case of a contact wth the sensor.
4.2. First use
Before usng your refrgerator, make sure
the necessary preparatons are made
n lne wth the nstructons n “Safety
and envronment nstructons” and
“Installaton” sectons.
•
food nsde for 6 hours and do not
open the door, unless absolutely
necessary.
CA sound wll be heard when the
compressor s engaged. It s
normal to hear sound even when
the compressor s nactve, due to
the compressed lquds and gasses
n the coolng system.
CIt s normal for the front edges of
the refrgerator to be warm. These
areas are desgned to warm up n
order to prevent condensaton.
CIn some models, ndcator panel s
dmmed automatcally 5 mnutes
after the door s closed. It wll be
actvated agan when the door s
opened or any key s pressed.

18 / 36 EN Refrgerator / User Manual
5 Usng the product
5.1.Indicator panel
Indcator panels may vary dependng on the model of your product.
Audo and vsual functons of the ndcator panel wll assst n usng the refrgerator.
1. Cooler compartment ndcator
2. Error status ndcator
3. Temperature ndcator
4. Vacaton functon button
5. Temperature adjustment button
6. Compartment selecton button
7. Freezer compartment ndcator
8. Economy mode ndcator
9. Vacaton functon ndcator
*optonal
45
76
8
9
123
C*Optonal: Fgures n ths user gude are schematc and may not exactly match
your product. If your product does not comprse the relevant parts, the nformaton
pertans to other models.

19 / 36 EN
Refrgerator / User Manual
Usng the product
1. Cooler compartment ndcator
The cooler compartment light will
turn on when adjusting the cooler
compartment temperature.
2. Error status ndcator
This sensor will activate if the
refrigerator is not cooling adequately
or in case of sensor fault. When
this indicator is active, the freezer
compartment temperature indicator will
display "E" and the cooler compartment
temperature indicator will display "1, 2,
3..." etc. numbers. The numbers on the
indicator serve to inform the service
personnel about the fault. ( )
3. Temperature ndcator
Indicates the temperature of the freezer
and cooler compartments.
4. Vacaton functon button
To activate this function, press and
hold the Vacation button for 3 seconds.
When the Vacation function is active,
the cooler compartment temperature
indicator displays the inscription "- -" and
no cooling process will be active in the
cooling compartment. This function is
not suitable to keep food in the cooler
compartment. Other compartments
will remain cooled with the respective
temperature set for each compartment.
Push the Vacation button ( ) again to
cancel this function.
5. Temperature adjustment button
Respective compartment's temperature
varies in -24°C... -18°C and 8°C...1°C
ranges. ( )
6. Compartment selecton button
Use the refrigerator compartment
selection button to toggle between the
cooler and freezer compartments. ( )
7. Freezer compartment ndcator
The freezer compartment light will
turn on when adjusting the freezer
compartment temperature.
8. Economy mode ndcator
Indicates the refrigerator is running on
energy-saving mode. This indicator will
be active when the temperature in the
freezer compartment is set to -18°C. ( )
9. Vacaton functon ndcator
Indicates the vacation function is active.
( )
Other manuals for GNE 60520 X
5
This manual suits for next models
2
Table of contents
Other Beko Refrigerator manuals

Beko
Beko RCSA330K31W User manual

Beko
Beko BR 11 Manual

Beko
Beko GNE794DX User manual

Beko
Beko CN232120X User manual

Beko
Beko RDNT13C3W User manual

Beko
Beko RSSE445K21WN User manual

Beko
Beko GNE490E30DZXPN User manual

Beko
Beko CSA 34023 User manual

Beko
Beko RCSU8330K20S User manual

Beko
Beko CBI 7701 User manual

Beko
Beko RSSA215K20W Instruction Manual

Beko
Beko DN168220DE User manual

Beko
Beko CN 142220 DS User manual

Beko
Beko CS 137010 User manual

Beko
Beko RCNE480K30XP User manual

Beko
Beko CS234022T User manual

Beko
Beko DN136110M User manual

Beko
Beko GN168421X User manual

Beko
Beko LS421 User manual

Beko
Beko BU 1153 User manual