Draper BCSD300T User manual

11966
EN
Original Instructions
Version 3 – March 2023
B AT T E R Y
STARTER &
CHARGER

1.1 Product Reference
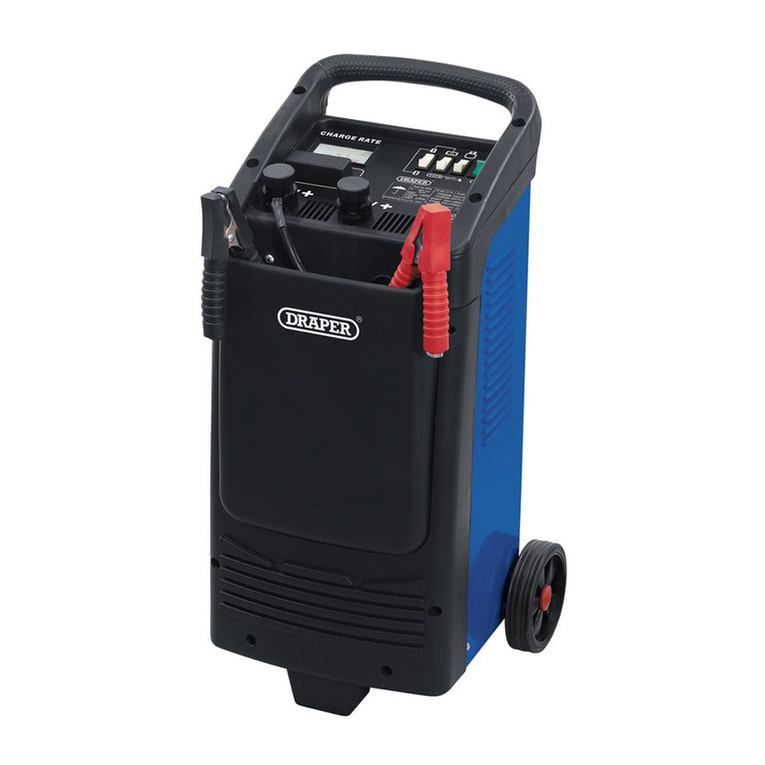
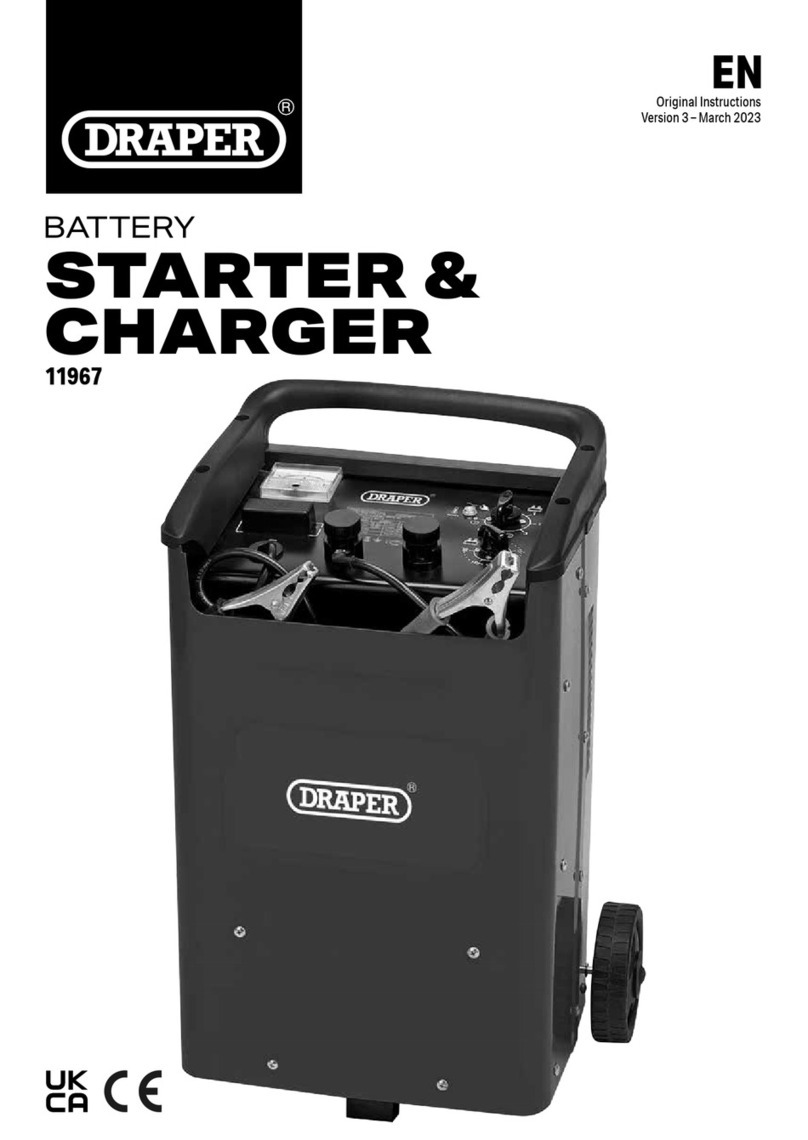
User Manual for: 12/24V Battery Starter/Charger, 260A
Stock No: 11966
Part No: BCSD300T
1.2 Revisions
Version 1: October 2011
First release
Version 2: April 2016
General formatting and content updates
Version 3: March 2023
General formatting and content updates
Separated from combined manual
As our manuals are continually updated, always ensure
that the latest version is used.
Please visit drapertools.com/manuals for the latest
version of this manual and the associated parts list, if
applicable.
1.3 Understanding the Safety Content of
This Manual
WARNING!
– Situations or actions that may result
in personal injury or death.
CAUTION! – Situations or actions that may result
in damage to the product or surroundings.
Important: – Information or instructions of particular
importance.
1.4 Copyright © Notice
Copyright © Draper Tools Limited.
Permission is granted to reproduce this manual for
personal and educational use ONLY. Commercial
copying, redistribution, hiring or lending is strictly
prohibited.
No part of this manual may be stored in a retrieval system
or transmitted in any other form or means without written
permission from Draper Tools Limited.
In all cases, this copyright notice must remain intact.
1. Preface
– 2 –
These are the original product instructions. This
document is part of the product; retain it for the life
of the product, passing it on to subsequent holders.
Read this manual in full before attempting to
assemble, operate or maintain this product.
This Draper Tools manual describes the purpose
of the product and contains all the necessary
information to ensure its correct and safe use.
Following all the instructions and guidance in
this manual will ensure the safety of both the
product and the operator and increase the
lifespan of the product.
All photographs and drawings within this manual are
supplied by Draper Tools to help illustrate correct
operation of the product.
Every eort has been made to ensure the
information contained in this manual is accurate.
However, Draper Tools reserves the right to amend
this document without prior warning. Always use the
latest version of the product manual.

2. Contents
– 3 –
EN
1. Preface 2
1.1 Product Reference 2
1.2 Revisions 2
1.3 Understanding the Safety Content of This
Manual 2
1.4 Copyright © Notice 2
2. Contents 3
3. Product Introduction 4
3.1 Intended Use 4
3.2 Specication 4
4. Health and Safety Information 5
4.1 General Health and Safety Precautions 5
4.2 Additional Safety Instructions for Jump
Starters and Portable Power Packs 5
4.3 Working With Lead-Acid and Other Vehicle
Batteries 6
4.4 Connection to the Power Supply 6
4.5 Residual Risk 7
5. Identication and Unpacking 8
5.1 Product Overview 8
5.2 What’s in the Box? 9
5.3 Packaging 9
6. Preparing the Starter/Charger 10
6.1 Connecting a Plug 10
6.2 Attaching the Wheels and Foot 10
7. Connecting a Battery 12
7.1 Battery Sizes and Ratings 12
7.2 Connection Procedure 12
8. Charging a Battery 13
8.1 Charging Times 13
8.2 Charging Procedure 13
8.3 Notes on Charging 13
8.4 Fast Charging 14
9. Jump-Starting 15
10. Maintenance and Troubleshooting 16
10.1 General Maintenance and Storage 16
10.2 Replacing the Output Overload Fuses 16
10.3 Troubleshooting 17
11. Spares, Returns and Disposal 18
12. Warranty 18
13. Explanation of Symbols 19

3. Product Introduction
– 4 –
3.1 Intended Use
This product is designed to charge 12V and 24V
lead-acid, lead-acid maintenance-free, lead AGM, lead
calcium and GEL batteries and may be used to jump-start
engines of up to 2.0L petrol and 1.6L diesel. This product
requires a mains power connection to run.
Any other application beyond the conditions established
for use will be considered misuse. Draper Tools accepts
no responsibility for improper use of this product.
Important: This product is tted with a 13A. This plug is
only suitable for specic operations. For all other
operations, an appropriate plug must be tted to the
product by a qualied electrician. For more information,
see 6.1 Connecting a Plug.
WARNING! This product is not a toy and must be
respected.
Read this manual in full before attempting to assemble,
operate or maintain the product, and retain it for later
use.
Important: These instructions are intended as a guide
ONLY. ALWAYS refer to the vehicle and battery
manufacturer manuals for specic instructions relating
to the battery or vehicle as the procedure may vary. Any
manufacturer instructions relating to other equipment to
be used in the immediate area should also be consulted.
Read all instructions in full BEFORE using this product.
3.2 Specication
Stock No.: 11966
Part No.: BCSD300T
Input
Rated voltage: 220–240V AC
Rated frequency: 50Hz
Charging
Power: 1.6kW
Current 4.5A
Starting
Power: 8kW
Current: 6.5A
Output
Rated voltage: 12V/24V
Current at 12V:
Charge setting 1 (Min + 1): 23A
Charge setting 2 (Min + 2): 30A
Charge setting 3 (Boost): 36A
Current at 24V:
Charge setting 1 (Min + 1): 1A
Charge setting 2 (Min + 2): 27A
Charge setting 3 (Boost): 40A
Start (CCA): 260A
Battery amperage range: 0–700Ah
Duty cycle (jump-starting): 3 seconds in 2
minutes, max. 5
attempts
Physical Attributes
IP rating IP20
Fuse: 2 × 5A
Time delay fuse: 15°
Charging cable length: 2m
Dimensions: W 270 × H 560
× D 240mm
Weight: 13.9kg

4. Health and Safety Information
Important: Read all the Health and Safety instructions
before attempting to operate, maintain or repair this
product. Non-compliance with these instructions may
result in injury or damage to the user, the product or any
connected devices.
4.1 General Health and Safety
Precautions
• Observe all standard safety precautions and good
practices when working with electrical equipment and
batteries.
• Ensure that your working environment is well lit, with
any bystanders a safe distance away.
• Use the product only as instructed by this manual; DO
NOT disassemble or modify it in any way.
• ONLY use spare parts supplied by Draper Tools.
• DO NOT use this product if you are tired or under the
inuence of alcohol, drugs or other medication.
• DO NOT use this device in wet environments or
expose it to water or other liquids.
• DO NOT use or store this product in temperatures
exceeding 60°C.
• DO NOT obstruct or insert foreign objects into the air
vents.
• Before every use, inspect the product for broken,
cracked, and loose or corroded parts.
Important: DO NOT use this product if it is damaged in
any way. DO NOT attempt to disassemble a damaged
product; contact Draper Tools to discuss repair and
replacement options.
• ALWAYS wear protective gloves and eye protection
while using this product.
• Damaged external cords must be replaced by the
manufacturer, its service agent or similarly qualied
persons in order to avoid a hazard.
• NEVER carry the product by the plug or external
cords.
• Keep this product out of reach of children.
WARNING! DO NOT leave this product
unattended or unobserved while in use under
any circumstances.
WARNING! NEVER use this product to jump-
start lithium-ion batteries.
4.2 Additional Safety Instructions for
Jump Starters and Portable Power Packs
• Use this product in well-ventilated areas and DO NOT
cover the charger or obstruct the ventilation grilles at
any time.
• NEVER use this product near ammable substances
or substances that produce ammable vapours.
• DO NOT use this product near devices that may cause
sparks.
• This product may become warm during extended
periods of use.
−ALWAYS position this device on a non-ammable
surface during use.
−NEVER cover the product or battery during use or
charging.
−ALWAYS ensure that the power pack is switched
o and that there is no power to the cables before
connecting a battery.
− When jump-starting, the cables should remain o
until you are instructed otherwise as part of the
jump-starting process.
• NEVER jump-start a frozen battery.
• NEVER charge a non-rechargeable battery.
• NEVER charge a damaged or misshapen battery.
• NEVER place the charger in the vehicle when
charging or starting the battery.
• NEVER allow the clamps to touch one another or
contact the same piece of metal as this may result in
current arcing.
• NEVER touch both the positive and negative
terminals of the connection leads.
• If the terminals are connected incorrectly, switch o
the product IMMEDIATELY and correct the
connections.
• NEVER disconnect cables from the battery terminals
while the product is switched on.
• DO NOT use or store this product in excessively warm
environments, in direct sunlight or near sources of
heat or ignition.
• Ensure that both the product and the battery are in an
upright position during charging.
• If the battery has not charged after the period
specied, disconnect it from the power source and
contact Draper Tools for support.
– 5 –
EN

4. Health and Safety Information
• NEVER burn or mutilate batteries or products
containing batteries as they may explode or release
toxic substances.
• Battery acid is highly corrosive; if the product battery
begins to leak, stop all operations immediately and
contact Draper Tools for support.
− DO NOT use this product if there is evidence of
battery leakage.
− If battery acid comes into contact with your skin,
wash it o immediately with plenty of clean water.
− If battery acid comes into contact with your eyes,
ush them with plenty of clean water and seek
medical attention immediately.
Important: This product is suitable for use with 12V and
24V DC circuits and batteries ONLY.DO NOT use this
product as a DC power source.
4.3 Working With Lead-Acid and Other
Vehicle Batteries
WARNING!! Risk of explosive gases. Working in
close proximity to lead-acid batteries is
dangerous as they produce potentially explosive
gases during normal operation. ALWAYS read
this manual in full before EVERY use and keep
your work area well-ventilated. Contact Draper
Tools for assistance if you are not condent in
the use of this product.
Use this manual in conjunction with the battery
manufacturer manual and that of any other equipment to
be used in the vicinity. Review all safety markings and
rating plates present on the battery, charger and any
other nearby equipment before using this product to
jump-start a vehicle battery.
• DO NOT work with vehicle batteries on your own;
ALWAYS ensure that someone is nearby to come to
your aid if necessary.
• Wear complete eye and hand protection and wear
suitable clothing that covers your skin appropriately.
− Avoid touching your eyes while working with
lead-acid batteries.
− Keep plenty of fresh water and soap nearby in
case battery acid comes into contact with your
skin, eyes or clothing.
− If battery acid comes into contact with your skin
or clothing, wash the aected area immediately
with soap and water.
− If battery acid enters your eyes, ush the eye
immediately with copious cool and clean running
water for at least 15 minutes and seek medical
attention immediately.
−NEVER smoke or allow sparks or ames in the
vicinity of the battery or engine.
− Take extra care to prevent metal objects or tools
from falling onto the battery as this may cause a
spark, short-circuit the battery or cause an
explosion.
−ALWAYS remove personal metallic objects before
use.
− Lead-acid batteries can produce a short-circuit
current high enough to weld metal and cause
severe burns.
DO NOT top up the electrolyte beyond the
manufacturer’s recommended level. Overlling
the battery may cause the acid content to leak.
WARNING! DO NOT use this product to
jump-start batteries outside of the rated battery
amperage range.
4.4 Connection to the Power Supply
Risk of electric shock. DO NOT open this product.
This appliance is supplied with an approved plug and
cable for your safety. Some operations require the use of
a higher-capacity plug; see 6.1 Connecting a Plug.
ALWAYS ensure that the tted plug is suitable for the
operation.
If the power supply cord is damaged, it must be replaced
by Draper Tools, an authorised service agent or similarly
qualied personnel in order to avoid a hazard.
The damaged or incomplete plug, when cut from the
cable, shall be disabled to prevent connection to a live
electrical outlet.
This is a Class I* product and is designed for connection
to a power supply matching that detailed on the rating
label and compatible with the plug tted.
The fuse in the power supply for this product cannot be
replaced. Contact Draper Tools for replacement options
if the fuse in the supplied plug has blown.
If an extension lead is required, use an approved and
compatible lead rated for this appliance.
Follow all the instructions supplied with the extension
lead.
– 6 –

4. Health and Safety Information
*Earthed: This product requires an earth connection to
protect against electric shock from accessible
conductive parts in the event of a failure of the basic
insulation.
Important: Always follow the extension lead instructions
regarding maximum load while the cable is wound. If in
doubt, unwind the entire cable. A coiled extension lead
generates heat which could melt the lead and cause a
re.
4.5 Residual Risk
The safety instructions in this manual cannot account for
all possible conditions and situations that may occur.
Exercise common sense and caution when using this
product and protect against any additional conceivable
risks.
– 7 –
EN

– 8 –
5. Identication and Unpacking
5.1 Product Overview
(1) (12)V terminal
(2) (24)V terminal
(3) Ammeter
(4) Foot
(5) Negative (Black) clamp
(6) Output overload fuse cover
(7) Positive (red) clamp
(8) Transport handle
(9) Wheels
(10) Charge/start mode switch
(11) Min/Boost switch
(12) Power switch
(13) Step current switch
(4)
(3)
(6)
(2)
(1)
(5)
(9)
(8)
(7) (13) (11) (10) (12)

5. Identication and Unpacking
– 9 –
5.2 What’s in the Box?
Carefully remove the product from the packaging and
examine it for signs of damage that may have occurred
during shipment.
Before assembling the product, lay the contents out and
check them against the parts shown below. If any part is
damaged or missing, do not attempt to use the product.
Please contact the Draper Helpline; contact details can
be found at the back of this manual.
(A) 1 × Starter/charger unit (not shown)
(B) 1 × Positive clamp and cable
(C) 1 × Foot
(D) 2 × Wheels
(E) 1 × Axle
(F) 3 × M5 × 10mm screws
(G) 5 × Circlips
(H) 2 × Spare 50A fuses
5.3 Packaging
Keep the product packaging for the duration of the
warranty period for reference should the product need to
be returned for repair.
WARNING! Keep packaging materials out of
reach of children. Dispose of packaging
correctly and responsibly and in accordance
with local regulations.
Please visit drapertools.com for our full range of accessories and consumables.
(B)
(C)
(D)
(F)
(H)
(G)
(E)
EN

6. Preparing the Starter/Charger
Important: Before using this product, read and
understand all the safety instructions listed in this
manual.
6.1 Connecting a Plug
Important: This product must be tted with a plug that is
appropriate to the function it is used to perform.
This product is tted with a 13A plug. This plug may
ONLY be used for charging using the lowest mode [ ].
To safely use any other charging mode, a 16A plug MUST
be tted before use.
If the product is used for jump-starting purposes, a 32A
plug MUST be tted. Failure to t an appropriate plug
will result in the product overheating and may cause
signicant damage to the jump starter. Draper Tools
highly recommends installing a 32A plug for jump-
starting operations.
Important: The plug MUST be tted by a qualied
electrician or an otherwise qualied and competent
person.
6.2 Attaching the Wheels and Foot
1. Carefully lay the machine down on its front panel.
2. Align the foot (C) with the three holes on the base of
the product and secure it in place using the M5 ×
10mm screws (F).
1 Fig.
(C)
3. Use the axle to punch the hub caps (14) from both
wheels.
2 Fig.
(E)
(14)
4. Using a pair of pliers, snap a circlip (G) into one of the
outer grooves at the very ends of the axle (E).
5. Slide the other end of the axle through the front of
one of the wheels (9) until it reaches the circlip.
3 Fig.
(G)
6. Snap a second circlip into the groove behind the
wheel and push the hub cap back into the wheel bore.
4 Fig.
(G)
– 10 –

6. Preparing the Starter/Charger
7. Insert the axle into one of the holes at the back of the
sides of the product frame and guide it through the
housing until it emerges at the other side.
5 Fig.
8. Install a third circlip into the axle groove closest to the
product frame and slide the remaining wheel onto the
axle.
6 Fig.
(G)
9. Snap the nal circlip into the remaining groove and
push the hub cap into place.
10. Carefully tip the product back into an upright
position.
– 11 –
EN

Engine Capacity
<1300cc 5 - 15Ah 15 - 30Ah 35 - 45Ah – 60 - 110Ah
>1300cc – – 45 - 65Ah 45 - 65Ah 60 - 110Ah
Diesel – – 60 - 90Ah 60 - 90Ah 60 - 110Ah
7. Connecting a Battery
Important: Before operating this product, read and
understand all the safety instructions listed in this
manual and ensure that the product is correctly prepared
for the operation. Refer to the vehicle and battery
manufacturer manuals for specic instructions relating
to the battery to be charged or started.
Important: This product is only suitable for charging
lead-based batteries.
7.1 Battery Sizes and Ratings
Important: Ensure that the battery is within the
appropriate amperage range for the charger before
connecting the battery to the product.
The chart below gives typical battery ratings for dierent
vehicle types (for guidance ONLY). ALWAYS check the
battery specic to your vehicle.
– 12 –
7.2 Connection Procedure
Important: Ensure that the product is switched o and
disconnect it from the power supply BEFORE connecting
the battery.
Important: To prevent the risk of damage to the
alternator, Draper Tools recommends that the battery is
disconnected from the vehicle before charging. Loss of
codes can be prevented by connecting an appropriate
Draper Memory Saver (Stock Nos. 22277 and 22231).
The battery should remain connected during a
jump-start.
1. Ensure that the battery and the charger are situated
on a level surface.
2. If the vehicle battery is not a maintenance-free or
sealed battery:
a. Remove the cell ller caps and check the level of
electrolyte.
b. If necessary, top up the electrolyte to the
manufacturer’s recommended level using distilled
or deionised water.
CAUTION! Top up with distilled or
deionised water ONLY. NEVER top up
lead-acid batteries with tap water.
WARNING! Battery uid is corrosive. DO
NOT touch the battery uid or overll the
cells.
c. Draper Tools recommends also checking the
electrolyte density (specic gravity) using a
hydrometer (not supplied) to ensure that the acid
to water ratio is sucient.
d. the cell ller caps loose or removed to allow
charging gases to escape.
3. Clean the battery terminals with a dry cloth to
optimise conduction with the terminal clamps.
Important: ALWAYS wear protective gloves when
handling battery terminals.
4. Ensure that the charger is disconnected from the
power supply.
5. Remove the plastic cap of the 12V (1) or 24V (2)
charger terminal as appropriate and place the ring
contact of the positive cable (B) onto the exposed
bolt, then screw the cap securely back into place.
Important: Ensure that the positive cable is
connected to the correct terminal for the battery.
6. Refer to the vehicle and battery manufacturer
instructions for guidance on connecting the terminal
clamps (5) (7) to the battery terminals and/or chassis.
Most vehicles require the positive clamp (7) to be
connected before the negative clamp (5); ALWAYS
follow the manufacturer instructions.
WARNING! If the terminals are connected
using the incorrect polarity, disconnect them
IMMEDIATELY to avoid damaging the
battery.

Important: Ensure that the charger is correctly prepared
and the battery is connected correctly before charging
the battery.
Important: Continually monitor the battery voltage and
adjust the charging output current during charging.
8.1 Charging Times
Calculate the approximate charging time for a battery
using the following equation:
Charging time/hours = Capacity in Ah (battery)
Charger output (Amps)
For example, a 45Ah would require roughly 2 hours to
charge on a 23A current.
As the battery nears a full charge, the ammeter (3) needle
will approach the “0” value of the scale. When the needle
is near the “0”, it is fully charged. Disconnect the battery
immediately.
Important: Charging times are subject to the battery
condition. Partially charged batteries require less
charging time than fully discharged batteries.
8.2 Charging Procedure
1. Ensure that the plug tted to the appliance is
appropriate for the intended operation; see 6.1
Connecting a Plug.
2. Connect the charger to the battery;
see 7. Connecting a Battery.
3. Set the switches to the correct positions:
− Charge/start mode switch (10): [ ]
− Step current switch (13): [ ]
− Min/Boost Switch (11): [ ]
4. Connect the charger to the power supply and move
the power switch (12) to the [ ] position.
5. Monitor the battery voltage with a suitable meter (not
supplied).
− As the battery voltage increases, move the step
current switch to the [ 2] position.
− When the battery reaches 12V or 24V as
appropriate, move the fast charging switch to the
[] position for the nal part of the charge.
− When the battery is fully charged, move the power
switch to the [o icon] position and disconnect
the mains power supply.
CAUTION! The current may ONLY be
increased if a 16A plug has been tted to the
product.
6. Disconnect the battery from the charger in reverse
order and in accordance with the manufacturer’s
instructions.
8.3 Notes on Charging
• The machine can be used to charge multiple batteries
simultaneously:
− The 12V terminal can be used to charge a single
12V battery or multiple 12V batteries wired in
parallel.
− The 24V terminal can be used to charge two 24V
batteries wired in series.
Important: DO NOT attempt to charge batteries of
dierent types or with dierence capacities or levels of
charge at the same time.
WARNING! Simultaneous battery charging must
ONLY be undertaken by a qualied electrician
or an otherwise experienced and competent
person.
• The fast charging option applies low and high current
to the battery; see 8.4 Fast Charging.
WARNING! Use the boost mode for short
periods ONLY and observe the battery at all
times while boost mode is active.
• The step current switch (13) steps up the current while
the fast charging switch is set to [ ].
• The ammeter indicates the current being applied to
the battery; the battery is charged when the ammeter
displays a value of near zero.
8. Charging a Battery
– 13 –
EN

8. Maintenance and Troubleshooting
8.4 Fast Charging
Fast charging is activated by moving the fast charging
switch to the [ ] position.
Charge the battery initially using the lower settings to
build up a charge. Charging may then be boosted by
switching to the fast charging modes for a short period of
time ONLY.
Important: When fast charging is enabled, the 1/2
switch position does not apply.
CAUTION! NEVER begin a charging operation
using the boost charging setting. Fast charging
mode is only suitable for use with batteries
rated over 40Ah.
Important: Charging times may be signicantly reduced
while fast charging is active. DO NOT allow the battery to
overcharge.
• DO NOT leave the battery unattended or unobserved.
• DO NOT allow the battery to overcharge.
• ALWAYS adhere to the battery manufacturer’s
recommendations regarding boosted charging.
– 14 –

– 15 –
9. Jump-Starting
EN
Important: Jump-starting requires large amounts of
current and will cause the components inside this
products to heat up. NEVER disregard the duty cycles
and starting procedures of this product. DO NOT
disconnect the battery from the vehicle.
Important: These instructions are intended as a guide
ONLY.ALWAYS refer to the vehicle and battery
manufacturer manuals for specic instructions relating
to the vehicle to be jump-started as the procedure varies
between vehicles. Any manufacturer instructions relating
to other equipment to be used in the immediate area
should also be consulted. Read all instructions in full
BEFORE using this product.
Important: This product can only help to jump-start
engines in good mechanical condition. When cranking
the engine of vehicles with higher battery capacities or
in very cold environments, you may need to pre-charge
the battery for approximately 15 minutes before
attempting a jump-start.
Important: When jump-starting a diesel engine, preheat
the glow plugs before cranking the engine to prevent
them from being damaged.
WARNING! NEVER jump-start a lithium-ion
battery.
CAUTION! The product MUST be tted with a
32A plug before performing a jump-start. DO
NOT attempt to jump-start an engine using a
13A or 16A power supply.
The jump-starting process requires two people: one in
the vehicle, and the other operating the starter/charger.
1. Connect the starter to the battery; see 7. Connecting
a Battery and ensure that the charge/start mode
switch (10) is in the [ ] position.
2. Connect the starter to the mains supply and move the
power switch (12) to the [ ] position.
3. Begin cranking the vehicle.
At the same time, move the charge/start mode switch to
the [ ] position for MAX.THREE SECONDS.
− If the vehicle does not start within three seconds,
move the mode switch back to the [ ] position
and wait for at least two minutes before retrying.
− If the vehicle fails to start after ve attempts, there
may be a fault with the vehicle; investigate and
resolve any issues before retrying.
CAUTION! Failure to observe the cooling o
periods will cause signicant damage to the
product and may cause it to become
dangerously warm.
4. Once the vehicle has started, move the charge/start
mode switch to the charge position and disconnect
the mains power.
5. Disconnect the battery from the charger in reverse
order and in accordance with the manufacturer’s
instructions.

10. Maintenance and Troubleshooting
Important: Disconnect the starter/charger from the
battery and mains power before performing any
maintenance.
10.1 General Maintenance and Storage
Other than the output overload fuse, this product
contains no parts that are serviceable by the user.
However, the product should be kept in good condition
to ensure a long working life. Maintenance should be
carried out ONLY by suitably qualied personnel
authorised by Draper Tools.
• Keep all ventilation openings and output ports clean
from dust and dirt.
• Keep the terminal clamps and contacts free from
corrosion and store them tidily with the machine.
• Clean the product regularly using a dry cloth.
CAUTION!NEVER use aggressive chemicals
to clean the product as these may damage the
product frame.
• Store the product in a clean and dry location, out of
direct sunlight and out of reach of children.
− Ensure that the terminal caps are securely
screwed onto the terminals to prevent corrosion.
− Ensure that the cables are tidy and not pinched or
kinked when stored.
− Ensure that there are no metallic objects nearby
that may fall onto the battery and connect the
terminals.
Important: Poor storage conditions may signicantly
reduce the performance capabilities and lifespan of the
product.
10.2 Replacing the Output Overload Fuses
In the event that the output current becomes too high,
the output overload fuses will blow if the excessive
current is maintained.
This product uses two 50A time delay fuses.
7 Fig.
(H)
(6)
To replace the output overload fuses:
1. Disconnect the machine from the battery and the
mains power supply and allow it to cool thoroughly.
2. Pinch the shorter edges of the output overload fuse
cover (6) together and pull it away from the product
interface.
3. Unscrew the fuse.
4. Screw a new identical fuse securely in its place and
replace the cover.
– 16 –

10. Maintenance and Troubleshooting
– 17 –
EN
10.3 Troubleshooting
Problem Possible Cause Remedy
The power indicator does not
illuminate when the product is
switched on.
The product is not connected to an
active power supply.
Check the power connection and
cable to the machine.
The fuse in the mains plug has blown. Check and replace the fuse with an
identical item.
The power indicator goes out
during use.
The product has overheated and the
time fuse has blown.
Switch o and disconnect the
product from mains power and the
battery. Allow it to cool thoroughly;
the fuse will reset automatically.
The product is powered on but
delivers no output current.
The output overload fuses have
blown.
Switch o and disconnect the
product from mains power and the
battery. Allow it to cool thoroughly
and replace the output overload
fuses; see 10.2.
The cables are connected with incor-
rect polarity.
Disconnect the cables immediately
and reconnect them correctly.
The battery terminals or terminal
clamps are dirty and cannot conduct
the current.
Clean the battery terminals and
clamps and retry.
The jump leads are damaged or
faulty.
Disconnect the jump leads
IMMEDIATELY and contact Draper
Tools for support.

For spare parts, servicing, and repair and replacement
options, please contact the Draper Tools Product
Helpline for details of your nearest authorised agent.
Draper Tools will endeavour to hold any spare parts, if
applicable, for seven years from the date that it sells the
nal matching stock item.
Any servicing or repairs carried out by unauthorised
personnel or installation of spare parts not supplied by
Draper Tools will invalidate your warranty.
Important: For safety, ALWAYS drain and clean the
product of any oil, fuel, chemicals or other substances
before returning it to Draper Tools or its authorised
agent. Store these materials in suitable containers and
dispose of them in accordance with local regulations.
Draper Tools and its agents cannot be responsible for the
disposal of these substances.
At the end of its working life, dispose of the product
responsibly and in line with local regulations. Recycle
where possible.
• DO NOT dispose of this product with domestic waste;
most local authorities provide appropriate recycling
facilities.
• DO NOT burn or mutilate batteries; this may release
toxic or corrosive substances.
11. Spares, Returns and Disposal
– 18 –
12. Warranty
Draper Tools products are carefully tested and inspected
before shipment and are guaranteed to be free from
defective materials and workmanship.
Should the tool develop a fault, return the complete tool
to your nearest distributor or contact Draper Tools
directly. Contact information can be found at the back of
this manual.
Proof of purchase must be provided.
If, upon inspection, it is found that the fault occurring is
due to defective materials or workmanship, repairs will
be carried out free of charge. This warranty period covers
parts and labour for 12 months from the date of
purchase. Where tools have been hired out, the warranty
period covers 90 days from the date of purchase.
This warranty does not apply to any consumable parts,
batteries or normal wear and tear, nor does it cover any
damage caused by misuse, careless or unsafe handling,
alterations, accidents, or repairs attempted or made by
any personnel other than the authorised Draper Tools
repair agent.
In all cases, to make a claim for faulty workmanship or
materials within the standard warranty period, please
contact or return the product to the place of purchase.
Proof of purchase may be required.
If the place of purchase is no longer trading or if you
experience any diculties with your warranty, please
contact Customer Services with the product details and
your proof of purchase. Contact details can be found at
the back of this manual.
If the tool is not covered by the terms of this warranty,
repairs and carriage charges will be quoted and charged
accordingly.
This warranty supersedes any other guarantees
expressed or implied and variations of its terms are not
authorised.
Your Draper Tools guarantee is not eective until you can
produce, upon request, a dated receipt or invoice to
verify your purchase within the guarantee period.
Please note that this warranty is an additional benet
and does not aect your statutory rights.
Draper Tools Limited

13. Explanation of Symbols
– 19 –
Read the instruction manual
Warning!
Wear suitable eye protection
Wear protective gloves
Do not incinerate or throw onto re
Supply voltage
Input power
Maximum starting current
Rated charging current (12V/40A)
Rated charging current (24V/36A)
Reverse polarity protection
Thermal overload protection
Lead Acid Battery
'Gel' type battery
Absorbent Glass Mat battery
Maintenance free battery
Class I appliance; must be earthed
WEEE –
Waste Electrical & Electronic Equipment
Do not dispose of Waste Electrical & Electronic Equipment
in with domestic rubbish
European conformity
UK Conformity Assessed
EN

© Published by Draper Tools Limited© Published by Draper Tools Limited
Delta International
Delta International BV
Oude Graaf 8
6002 NL
Weert
Netherlands
Contact Details
Draper Tools
Draper Tools Limited
Hursley Road
Chandler’s Ford
Eastleigh
Hampshire
SO53 1YF
UK
Website: drapertools.com
Email: [email protected]
Product Helpline: +44 (0) 23 8049 4344
Telephone Sales Desk: +44 (0) 23 8049 4333
General Enquiries: +44 (0) 23 8026 6355
General Fax: +44 (0) 23 8026 0784
Please contact the Draper Tools Product Helpline for repair and servicing enquiries.
Other manuals for BCSD300T
2
This manual suits for next models
1
Table of contents
Other Draper Batteries Charger manuals
Draper
Draper 33861 User manual
Draper
Draper 53489 User manual
Draper
Draper BCD5 User manual
Draper
Draper BCD12 User manual
Draper
Draper C18UB User manual

Draper
Draper BC14 User manual
Draper
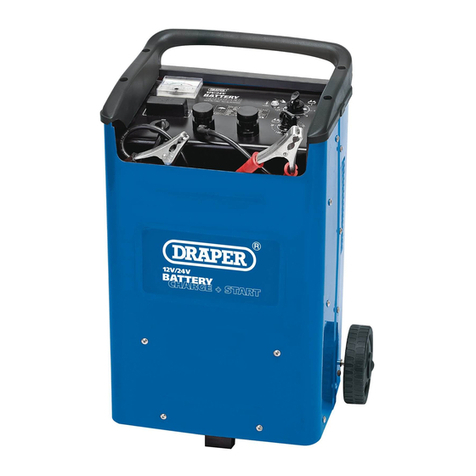
Draper BCSD300T User manual
Draper
Draper BCI5 User manual

Draper
Draper 66800 User manual
Draper
Draper BC15ACO User manual

Draper
Draper 70807 User manual
Draper
Draper 70549 User manual
Draper
Draper 03295 Expert User manual
Draper
Draper BC30A User manual
Draper
Draper BCSD400T User manual

Draper
Draper MTC100 User manual
Draper
Draper 70544 User manual
Draper
Draper BCD12 User manual
Draper
Draper BCSD130 User manual
Draper
Draper IBC1 User manual
