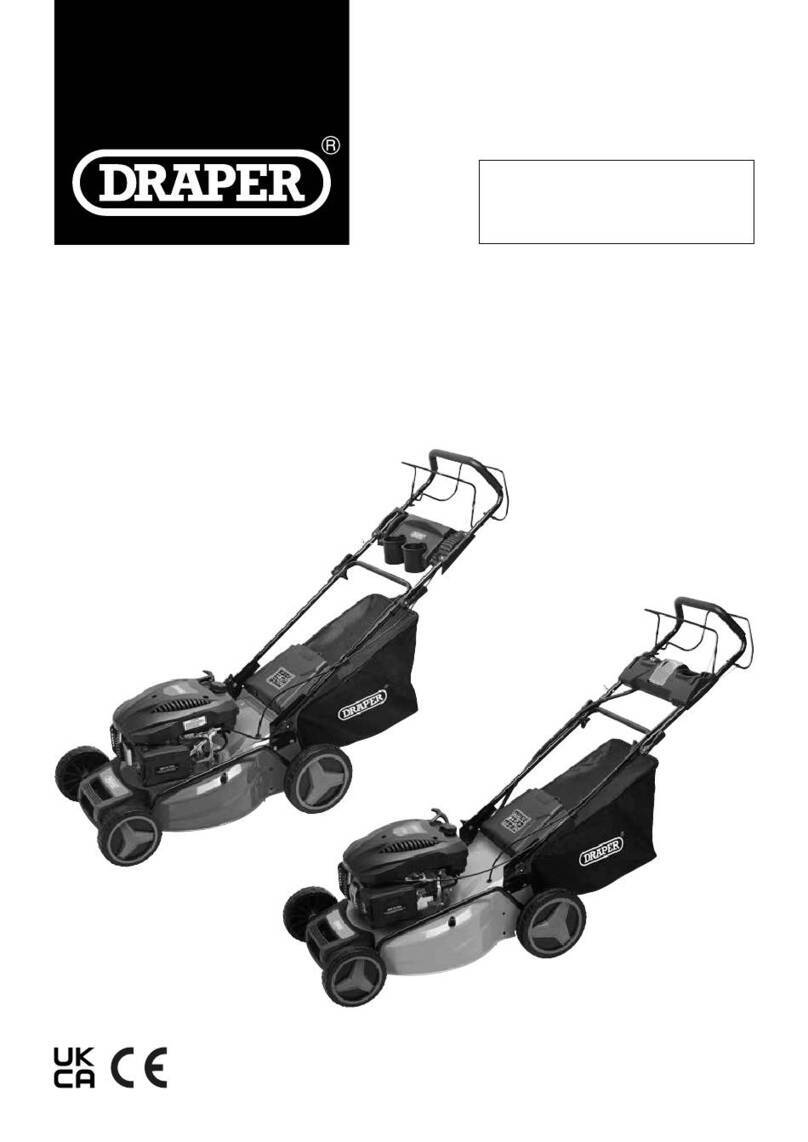
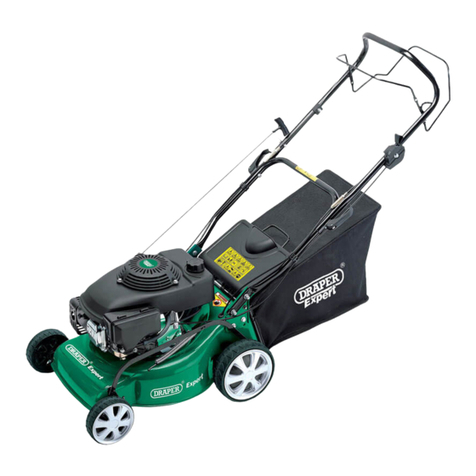
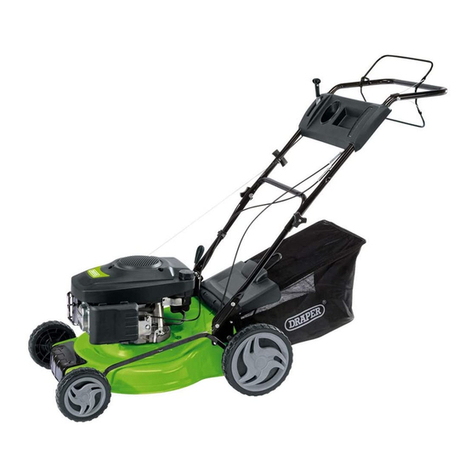
Draper LMP410SP User manual

SELF PROPELLED PETROL
LAWN MOWER
08671 & 08672
These instructions accompanying the product are the original instructions. This document is part of the product, keep it
for the life of the product passing it on to any subsequent holder of the product. Read all these instructions before
assembling, operating or maintaining this product.
This manual has been compiled by Draper Tools describing the purpose for which the product has been designed, and
contains all the necessary information to ensure its correct and safe use. By following all the general safety instructions
contained in this manual, it will ensure both product and operator safety, together with longer life of the product itself.
AlI photographs and drawings in this manual are supplied by Draper Tools to help illustrate the operation of the product.
Whilst every effort has been made to ensure the accuracy of information contained in this manual, the Draper Tools
policy of continuous improvement determines the right to make modifications without prior warning.
Please note that model number 08672 is illustrated throughout this instruction booklet.

– 2 –
1. TITLE PAGE
1.1 INTRODUCTION
USER MANUAL FOR: Self Propelled Petrol Lawn Mower
Stock Nos: 08671 & 08672
Part Nos: LMP410SP & LMP460
1.2 REVISION HISTORY
Date first published: November 2020.
As our user manuals are continually updated, users should make sure that they use
the very latest version.
Downloads are available from: http://drapertools.com/manuals
Draper Tools Limited
Hursley Road
Chandler’s Ford
Eastleigh
Hampshire
SO53 1YF
UK
Website: drapertools.com
Product help line: +44 (0) 23 8049 4344
General Fax: +44 (0) 23 8026 0784
1.3 UNDERSTANDING THIS MANUAL’S SAFETY CONTENT
WARNING! – Information that draws attention to the risk of injury or death.
CAUTION! – Information that draws attention to the risk of damage to the product or surroundings.
1.4 COPYRIGHT © NOTICE
Copyright © Draper Tools Limited.
Permission is granted to reproduce this publication for personal and educational use only.
Commercial copying, redistribution, hiring or lending is prohibited.
No part of this publication may be stored in a retrieval system or transmitted in any other form or
means without written permission from Draper Tools Limited.
In all cases this copyright notice must remain intact.

– 3 –
2. CONTENTS
2.1 CONTENTS
1. TITLE PAGE
1.1 INTRODUCTION ................................................................................................................. 2
1.2 REVISION HISTORY........................................................................................................... 2
1.3 UNDERSTANDING THIS MANUAL’S SAFETY CONTENT ................................................ 2
1.4 COPYRIGHT © NOTICE ..................................................................................................... 2
2. CONTENTS
2.1 CONTENTS......................................................................................................................... 3
3. WARRANTY
3.1 WARRANTY ........................................................................................................................ 4
4. INTRODUCTION
4.1 SCOPE ................................................................................................................................ 5
4.2 SPECIFICATION ................................................................................................................. 5
4.3 HANDLING AND STORAGE ............................................................................................... 5
5. HEALTH AND SAFETY INFORMATION
5.1 LAWN MOWER SAFETY WARNINGS................................................................................ 6
5.2 HEALTH AND SAFETY INFORMATION CONCERNING THE USE OF FUELS................. 8
6. TECHNICAL DESCRIPTION
6.1 IDENTIFICATION ................................................................................................................ 9
7. UNPACKING AND CHECKING
7.1 PACKAGING...................................................................................................................... 10
7.2 WHAT’S IN THE BOX........................................................................................................ 10
8. PREPARING THE LAWN MOWER
8.1 ASSEMBLING THE HANDLE.............................................................................................11
8.2 ATTACHING THE CABLE CLIPS .......................................................................................11
8.3 ASSEMBLING THE GRASS COLLECTION BAG ............................................................. 12
8.4 ASSEMBLING THE GRASS COLLECTION BAG ONTO THE LAWN MOWER ............... 12
8.5 FILLING WITH OIL AND CHECKING THE OIL LEVEL..................................................... 13
8.6 FILLING WITH ENGINE FUEL .......................................................................................... 14
8.7 SETTING THE CUTTING HEIGHT.................................................................................... 14
9. OPERATING THE LAWN MOWER
9.1 START UP OPERATION ................................................................................................... 15
9.2 MOWING ........................................................................................................................... 15
10. MAINTENANCE
10.1 MAINTENANCE.......................................................................................................... 16-17
11. TROUBLESHOOTING
11.1 TROUBLESHOOTING GUIDE......................................................................................... 18
12. EXPLANATION OF SYMBOLS
12.1 EXPLANATION OF SYMBOLS ....................................................................................... 19
13. DISPOSAL
13.1 DISPOSAL....................................................................................................................... 19

– 4 –
3. WARRANTY
3.1 WARRANTY
Draper tools have been carefully tested and inspected before shipment and are guaranteed to be
free from defective materials and workmanship.
Should the tool develop a fault, please return the complete tool to your nearest distributor or
contact
Draper Tools Limited, Chandler’s Ford, Eastleigh, Hampshire, SO53 1YF. England.
Telephone Sales Desk: +44 (0) 23 8049 4333 or Product Help Line +44 (0) 23 8049 4344.
A proof of purchase must be provided with the tool.
If upon inspection it is found that the fault occurring is due to defective materials or workmanship,
repairs will be carried out free of charge. This warranty period covering labour is 12 months from
the date of purchase except where tools are hired out when the warranty period is 90 days from
the date of purchase. The warranty is extended to 24 months for parts only. This warranty does not
apply to any consumable parts, any type of battery or normal wear and tear, nor does it cover any
damage caused by misuse, careless or unsafe handling, alterations, accidents, or repairs
attempted or made by any personnel other than the authorised Draper warranty repair agent.
Note: If the tool is found not to be within the terms of warranty, repairs and carriage charges will
be quoted and made accordingly.
This warranty applies in lieu of any other warranty expressed or implied and variations of its terms
are not authorised.
Your Draper warranty is not effective unless you can produce upon request a dated receipt or
invoice to verify your proof of purchase within the warranty period.
Please note that this warranty is an additional benefit and does not affect your statutory rights.
Draper Tools Limited.

– 5 –
4. INTRODUCTION
4.1 SCOPE
This petrol lawn mower has been designed for the cutting of grass lawn areas in private houses
and gardens. Any other application is considered misuse.
4.2 SPECIFICATION
STOCK NOS. .................................................................... 08671........................................... 08672
PART NOS. .................................................................... LMP410SP.................................... LMP460
DISPLACEMENT .............................................................. 132CC ......................................... 150CC
ENGINE HORSE POWER ................................................ 3.3HP ............................................3.6HP
DRIVE TYPE .......................................................... SELF PROPELLED ...........SELF PROPELLED
DECK MATERIAL ............................................................. STEEL ......................................... STEEL
SPEED (NO LOAD) ........................................................ 2800RPM .................................. 2800RPM
CUTTING WIDTH ............................................................420MMØ.....................................460MMØ
CUTTING HEIGHTS .................................................... 7: 25 – 75MM ......................... 7: 25 – 75MM
COLLECTION BAG CAPACITY .......................................... 45L ..................................................55L
FUEL TANK CAPACITY (UNLEADED RON95)....................0.8L.................................................0.8L
OIL TANK CAPACITY (SAE30 / 10W-30).............................0.4L.................................................0.4L
SOUND PRESSURE LEVEL.........................................79.8±3dB(A)............................ 81.6±3dB(A)
SOUND POWER LEVEL............................................... 91.3±3dB(A)............................ 93.9±3dB(A)
SINGLE VALUE NOISE LEVEL† ..................................... 96dB(A) ...................................... 96dB(A)
WEIGHT (GROSS / DRY) .................................................. 23KG ............................................ 31KG
†A-weighted sound pressure level in accordance to 2000/14/EC.
4.3 HANDLING AND STORAGE
– Care must be taken when handling this product.
• Dropping this lawn mower could have an effect on its accuracy and could also result in
personal injury. This product is not a toy and must be respected.
– Environmental conditions can have a detrimental effect on this product if neglected.
• Exposure to damp air can gradually corrode components.
• If the product is unprotected from dust and debris, components will become clogged.
• If not cleaned and maintained correctly or regularly, the machine will not perform at its best.

– 6 –
5. HEALTH AND SAFETY INFORMATION
5.1 LAWN MOWER SAFETY WARNINGS
LAWN MOWERS ADDITIONAL SAFETY
Warning:
Keep bystanders away.
The engine shall be stopped before carrying out adjustment, cleaning or maintenance.
Read user instructions before operating this machine.
The lawn mower shall not be operated without either the entire grass catcher or the guard in place.
Caution: Do not touch rotating blade.
Beware of blades. Blades continue to rotate after the motor is switched off. Use ear protection
as appropriate.
Never operate the mower if you are tired, ill or under the influence of alcohol, drugs or medication
that may impair your vision, judgement or coordination.
The blade control handle is a safety device. Never attempt to bypass its operation. Doing so
makes the safety device inoperative and may result in personal injury through contact with the
rotating blade. The blade control handle must operate easily in both directions and automatically
return to the disengaged position when released.
SAFE OPERATION PRACTICES FOR PEDESTRIAN-CONTROLLED ROTARY
LAWN MOWERS.
1. Training.
– Read the instructions carefully. Be familiar with the controls and the proper use of
the equipment.
– Never allow children or people unfamiliar with these instructions to use the lawn mower,
Local regulations may restrict the age of the operator.
Never mow while people, especially children, or pets are nearby.
– Keep in mind that the operator or user is responsible for accidents or hazards occurring to
other people or their property.
2. Preparation.
– While mowing, always wear substantial footwear and long trousers. Do not operate the
equipment when barefoot or wearing open sandals.
– Thoroughly inspect the area where the equipment is to be used and remove all objects which
can be thrown by the machine.
WARNING Petrol is highly flammable:
– store fuel in containers specifically designed for this purpose;
– refuel outdoors only and do not smoke while refuelling;
– add fuel before starting the engine. Never remove the cap of the fuel tank or add petrol while
the engine is running or when the engine is hot;
– if petrol is spilled, do not attempt to start the engine but move the machine away from the area
of spillage and avoid creating any source of ignition until petrol vapours have dissipated;
– replace all fuel tank and container caps securely.
– Replace faulty silencers.
– Before using, always visually inspect to see that the blades blade bolts and cutter
assembly are not worn or damaged. Replace worn or damaged blades and bolts in sets
to preserve balance.
– On multi-bladed machines, take care as rotating one blade can cause other blades to rotate.

– 7 –
3. Operation.
– Do not operate the engine in a confined space where dangerous carbon monoxide fumes
can collect.
– Mow only in daylight or in good artificial light.
– Avoid operating the equipment in wet grass, where feasible.
– Always be sure of your footing on slopes. Walk, never run.
– For wheeled rotary machines, mow across the face of slopes, never up and down.
– Exercise extreme caution when changing direction on slopes.
Do not mow excessively steep slopes.
– Use extreme caution when reversing or pulling the lawn mower towards you.
– Stop the blade(s) if the lawn mower has to be tilted for transportation when crossing surfaces
other than grass, and when transporting the lawn mower to and from the area to be mowed.
– Never operate the lawn mower with defective guards, or without safety devices, for example
defectors and/or grass catchers, in place.
– Do not change the engine governor settings or overspeed the engine.
– Disengage all blade and drive clutches before starting the engine.
– Start the engine or switch on the motor carefully according to instructions and with feet well
away from the blade(s).
– Do not tilt the lawn mower when starting the engine or switching on the motor; except if the
lawn mower has to be tilted for starting. In this case, do not tilt it more than absolutely
necessary and lift only the part which is away from the operator.
– Do not start the engine when standing in front of the discharge chute.
– Do not put hands or feet near or under rotating parts. Keep clear of the discharge opening at
all times.
– Never pick up or carry a lawn mower while the engine is running.
Stop the engine and disconnect the spark plug wire, make sure that all moving parts have
come to a complete stop and, where a key is fitted remove the key:
– before cleaning a blockage or unclogging chute;
– before checking, cleaning or working on the lawn mower;
– after striking a foreign object. Inspect the lawn mower for damage and make repairs before
restarting and operating the lawn mower;
– if lawn mower starts to vibrate abnormally (check immediately).
– Stop the engine and disconnect the spark plug wire, make sure that all moving parts have
come to a complete stop and, where a key is fitted remove the key:
– whenever you leave the lawn mower;
– before refuelling.
– Reduce the throttle setting during engine shut down and, if the engine is provided with a
shut-off valve, turn the fuel off at the conclusion of mowing.
– Go slow when using a trailing seat.

– 8 –
4. Maintenance and storage.
– Keep all nuts, bolts and screws tight to be sure the equipment is in safe working condition.
– Never store the equipment with petrol in the tank inside a building where fumes can reach an
open flame or spark.
– Allow the engine to cool before storing in any enclosure.
– To reduce the fire hazard, keep the engine, silencer, battery compartment and petrol
compartment and petrol storage area free of grass, leaves, or excessive grease.
– Check the grass catcher frequently for wear or deterioration.
– Replace worn or damaged parts for safety.
– If the fuel tank has to be drained, this should be done outdoors.
5.2 HEALTH AND SAFETY INFORMATION CONCERNING THE USE
OF FUELS
Fuels are inflammable and explosive. Reduce the risk of explosion and fire by:
– Turning off and cooling the motor down before filling the tank with fuel.
– Refrain from smoking and starting open fires when handling fuels.
– Store and mix fuels in approved and correspondingly labelled canisters.
– Store fuels in closed containers. Keeping in mind that fuels may evaporate at room
temperature and collect on the floor of closed rooms (risk of explosion).
– Start the device at least nine metres away from any stored fuels or flammable liquids.
Fuels are toxic, they contain substances that have an immediate toxic effect and may cause
permanent damage to your health. Take all precautionary measures to prevent your body from
absorbing any of these substances:
– Refill tank and siphon fuels only outdoors or in well-ventilated rooms.
– Do not inhale fuel fumes.
– Avoid contact with eyes and skin.
– Wear gloves when transferring fuel.
– When fuel has come into contact with your clothes, change them immediately. Clean your
clothes before putting them back on.
– Store fuels out of the reach of children.
When handled inappropriately, fuels may cause damage to the environment:
– Transfer fuel carefully. Fuel must never trickle into the ground or the sewage system.
– Dispose of any remaining fuel in an appropriate manner. Never dispose of fuel with regular
household waste.
– Fuels may be stored only for a limited time. Purchase only such quantities that can be used up
within a few months.
5. HEALTH AND SAFETY INFORMATION

– 9 –
6. TECHNICAL DESCRIPTION
6.1 IDENTIFICATION
(1) Engine operation lever
(2) Drive lever
(4) Upper handle section
(5) Lower handle section
(6) Connection cable
(7) Main lawn mower
motor/body
(8) Starter handle
(9) Priming bulb
(10) Fuel tank cap
(11) Spark plug boot
(13) Front wheel
(14) Engine oil cap
(15) Rear wheel
(16) Engine oil cap
(17) Height adjusting handle
(18) Grass collection bag
(19) Rear discharge cover
(21)Bolt and knob
(22)Cable clips
(4)
(22)
(1)
(2)
(8)
(18)
(13) (9)
(19)
(15)
(17)
(21)
(21)
(21) (22)
(10)
(5)
(6)
(7)
(11)
(14)
(7)

– 10 –
7. UNPACKING AND CHECKING
7.1 PACKAGING
Carefully remove the product from the packaging and examine it for any sign of damage that may
have happened during shipping. Lay the contents out and check them against the parts shown
below. If any part is damaged or missing, please contact the Draper Help Line (the telephone
number appears on the Title page) and do not attempt to use the product.
The packaging material should be retained at least during the warranty period, in case the
machine needs to be returned for repair.
Warning!
– Some of the packaging materials used may be harmful to children. Do not leave any of these
materials in the reach of children.
– If any of the packaging is to be thrown away, make sure they are disposed of correctly,
according to local regulations.
7.2 WHAT’S IN THE BOX
As well as the lawn mower, there are several parts not fitted or attached to it.
Note: For details of our full range of accessories and consumables, please visit drapertools.com
(21) 4 x bolts and knobs
(22) 2 x cable clips
(21) (22)

– 11 –
8. PREPARING THE LAWN MOWER
8.1 ASSEMBLING THE HANDLE –
FIGS. 1 – 4
Fasten the lower handle section (5) to the main
lawn mower motor/body (7) by using two bolts and
knobs (21)on each side.
Fasten the upper handle section (4) to the lower
handle section (5) by using two bolts and knobs
(21)on each side.
8.2 ATTACHING THE CABLE CLIPS –
FIG. 4
Fix the connection cable (6)to the handle with the
cable clips (22).
FIG. 1
FIG. 2
(7)
FIG. 3
FIG. 4
(21)
(5)
(21)
(5)
(4)
(6)
(22)
(7)

– 12 –
8. PREPARING THE LAWN MOWER
8.3 ASSEMBLING THE GRASS
COLLECTION BAG – FIGS. 7 & 8
Clip the plastic clips over the metal frame of the
grass collection bag (18). Make sure that these
clips are fully secured to the metal frame.
8.4 ASSEMBLING THE GRASS
COLLECTION BAG ONTO THE LAWN
MOWER – FIGS. 7 & 8
Lift the rear discharge cover (19)with one hand
and hook in the grass collection bag (18). Release
the rear discharge cover (19) to secure the grass
bag (18)in position.
FIG. 5
FIG. 6
(18)
FIG. 7
FIG. 8
(21)
(18)(19)

– 13 –
8.5 FILLING WITH OIL AND CHECKING
THE OIL LEVEL – FIGS. 9 – 10
Caution!
The following procedures and adjustments must be
performed before the engine is started.
Do not attempt to make any of these adjustments
while the engine is running.
To prevent engine damage, the engine is shipped
without oil or petrol. The engine must be filled with
the correct grade of oil and petrol before starting
the engine. SEE SPECIFICATION ON PAGE 5.
Note: Running the engine with a low oil level will
cause engine damage. It is recommend that high
detergent, premium quality 4-stroke engine oil
used. Using non-detergent oil can shorten the
engine’s service life and using 2-stroke oil will
damage the engine.
Caution!
Always use high quality detergent oil classified
SAE30 oil (or equivalent e.g. SAE 10W/30, often
termed as 4 Stroke lawn mower oil). Never use
additives with recommended oil. To prolong the life
of your engine it is important that the oil is changed
after the first 5 hours of use.
Note: To check the engine oil level, stop engine
and place the mower on a level surface.
Remove the engine oil cap (14)and wipe oil from it
with a clean cloth. Insert the dipstick into the oil
filler neck, but do not turn it in. Then remove the
dipstick and check the oil level. The oil level must
be between the Min and Max marks on the
dipstick. If near the lower level, fill to upper lever
with the recommended oil (SAE30 or equivalent).
Do not overfill. Wipe away any spilt oil. Align the
ribs of the cap with the groove of the filler neck,
then rotate 1/4 turn to secure it.
FIG. 9
FIG. 10
(14)

– 14 –
8. PREPARING THE LAWN MOWER
8.6 FILLING WITH ENGINE FUEL –
FIG. 11
Warning!
Petrol is highly flammable and extreme precaution
must be taken when handling or working with it.
Keep out of reach of children. Refuel in a well-
ventilated area with the engine stopped. Do not
smoke or allow flame or sparks in the area where
the engine is re-fueled or where petrol is stored.
Avoid repeated or prolonged contact with skin or
inhalation of vapour. Take extra care when filling a
hot engine. Avoid if possible, and wait for the
engine to cool before filling.
Caution!
Always use clean, fresh unleaded petrol (RON95).
Purchase fuel in quantities that can be used within
30 days. Never mix oil with petrol. Do not fill into
the base of neck to allow for fuel expansion. Do not
overfill the fuel tank. To prevent engine damage the
engine is shipped without oil or petrol. The engine
must be filled with the correct grade of oil and
petrol before starting the engine.
Clean the area around the fuel tank cap (10)before
removing it. Remove the warning tag, check the fuel
level. Refill the tank if the fuel level is low. Refuel
carefully to avoid overfilling or spilling fuel. There
should be no fuel in the filler neck. Clean up any
overflow or splashes of petrol before starting the
engine. Tighten the filler cap after filling, finger tight on.
8.7 SETTING THE CUTTING HEIGHT –
FIG. 12
Caution!
Adjust the cutting height only when the engine is
switched off the spark plug boot has been pulled.
The cutting height is centrally adjusted with the
height adjusting handle (17). Different cutting
heights can be selected from position 1 to position
7. The cutting height range is from 25mm to 75mm.
Pull the adjusting handle out and select the desired
cutting height. The handle snaps Into the desired
position.
FIG. 11
(10)
FIG. 12
(17)

– 15 –
9. OPERATING THE LAWN MOWER
9.1 START UP OPERATION –
FIGS. 13 - 15
Firstly, check the machine and add fuel and
lubricating oil.
Push the priming bulb(9)fully 2 – 3 times. Take
the pull cord starter and maintain it against the
upper handle. To start engine only the engine
operation lever (1) needs to be closed, pull on the
recoil starter handle (8)until you can feel
resistance and then pull harshly.
9.2 MOWING
Warning!
Never open the rear flap when the grass collection
bag has been detached (to be emptied) and the
engine is still running. The rotating blade can
cause serious injuries!
Never run with the mower and take care when
mowing uneven or rough ground. Mow across
slopes, never up and down. Be careful when
changing the direction of the mower on a slope. Do
not mow excessively steep slopes. The best result
will be achieved if the grass is dry. Wet grass will tend
to clog the blade and the grass collection system.
Grass grows at different rates at different time of the
year. Never use the lowest cutting height for the
first cut of the season or in drought conditions. Only
about one third of the grass height should be cut.
When mowing with mulching, to ensure that the cut
grass can be scattered efficiently, do not cut high
or wet grass. When you have been cutting for
several minutes, stop the mower, and clean the
blade and the deck.
For both models, press the drive lever (2),
the clutch will close and the lawn mower will start
to move with the engine running. To stop the
moving lawn mower, simply release the drive lever
(2) in plenty of time. To stop the engine from
running, simply release the engine operation lever
(1).
FIG. 13
(9)
FIG. 14
FIG. 15
(1)
(2)
(8)

– 16 –
12 hours of use 24 hours of use 36 hours of use
Air filter Clean Clean Replace
Spark plug Check Clean Replace
Engine oil Check Replace Check
10. MAINTENANCE
10.1 MAINTENANCE – FIGS. 16 – 21
Regular inspection and cleaning reduces the necessity for maintenance operations and will keep
your mower in good working condition.
The motor must be correctly ventilated during operation. Avoid blocking the air inlets and vacuum
the ventilation slots regularly.
FIG. 17
FIG. 16
FIG. 18
FIG. 19
The engine oil should be changed after the first
8 hours.
How to service the air filter
Soiled air filters reduce the engine output by supply
too little air to the carburettor. If the air contains a
lot of dust, the air filter should be checked more
frequently.
Warning!
Never run the engine without the air filter element
installed.
Remove the outside cover. Be careful to prevent
dirt and debris from falling into the air filter
assembly.
Separate the air filter from the air filter housing.
Inspect the air filter. Clean dirty air filter with warm
water and mild soap. Allow it to dry thoroughly
before re-installation
Install the air filter assembly onto the carburettor
and secure with screw.
Note: Do not use pressurised air or solvents to
clean the filter. Pressurised air can damage the
filter and solvents will dissolve the filter.

– 17 –
Replacing the blade
For safety reasons you should only ever have your
blade sharpened, balanced and mounted by an
authorised service workshop. For optimum results
it is recommended that the blade should be
inspected once a year.
Warning!
Before you remove the grass collection bag,
stop the engine and wait until the blade stops
completely. You will need garden gloves (not
provided) and a spanner wrench (not provided) to
remove the blade. Always handle the blade with
care, sharp edges could cause injury. Renew your
metal blade after 50 hours mowing or 2 years,
whichever is sooner, regardless of condition. If the
blade is cracked or damaged replace it with a
new one.
Note: Don’t invert the mower. Tip it slightly towards
the oil filler pipe and reach under the deck.
Maintain the sharpness of the blade when cutting
grass. If the blade has worn excessively and
become pitted and blunt, it should be replaced or
sharpened. The sharpness of the blade will affect
the performance of the lawnmower.
Hold the blade and unscrew the blade bolt counter-
clockwise, using a spanner wrench. Remove the
washer and the blade.
Fit the new or re-sharpened blade by putting it on
the two studs on the blade flan and then replacing
the washer and bolts. Make sure the blade is
correctly located, and then firmly tighten the bolt.
Do not over tighten. The up turn of the blade must
project into the motor compartment.
Cleaning a flooded engine
Note: If the engine won’t start after you have
operated the starter several times, the engine may
be flooded with excess fuel. Use following
procedure to clear and start a flooded engine.
Release the engine start/stop lever to stop engine.
When cool, remove the spark plug, dry it, and then
reinstall it.
To clean it, use a wire brush.
Note: Install the spark plug carefully by hand to
avoid cross-threading. After the plug is seated
tighten 1/8 to 1/4 turn with socket spanner of spark
plug to compress the washer.
FIG. 20
FIG. 21

– 18 –
11. TROUBLESHOOTING
11.1 TROUBLESHOOTING GUIDE
Problem Possible Cause Remedy
Engine does not start. Spark plug is defective.
Cutting blade is worn or
damaged.
Fuel tank is empty.
Engine may be flooded.
Replace spark plug.
Replace it by contacting
Draper or service agent.
Refill with fuel.
Remove plug and dry.
Machine vibrates in use. Screws are loose.
Blade fasteners are loose.
Blade is unbalanced.
Check screws.
Check blade fasteners.
Replace blade.
Engine runs unsteadily. Air filter is soiled.
Spark plug is soiled.
Clean the air filter.
Clean the spark plug.
Uneven mowing results. Blade is blunt.
Cutting height is too low.
Re-sharpen or replace
the blade.
Set higher.
Mower does not pick up
grass cuttings.
Blade is worn.
Grass bag is full or clogged.
Cutting height is right.
The grass is wet.
The discharge channel/
housing is blocked.
The underside of the deck
is clogged.
Replace the blade.
Empty the grass bag.
Correct the cutting height.
Allow the grass to dry.
Clean the discharge
channel/ housing.
Clean the underside of
the deck.

– 19 –
12. EXPLANATION OF SYMBOLS
12.1 EXPLANATION OF SYMBOLS
Read the instruction manual.
Warning!
Wear suitable eye/face protection.
Warning!
Keep bystanders away.
Warning!
Risk of danger to wildlife.
Warning!
Remove plug from power supply
before maintenance.
Warning!
Keep supply cord away from
cutting blade.
Danger!
Beware of sharp blades.
Danger!
Risk of flying debris.
Danger!
Risk of electrocution.
Class II construction
(Double insulated).
WEEE – Waste Electrical &
Electronic Equipment.
Do not dispose of Waste Electrical & Electronic
Equipment in with domestic rubbish.
Continuous A-Weighted Sound
Pressure Level.
13. DISPOSAL
13.1 DISPOSAL
– At the end of the machine’s working life, or when it can no longer be repaired, ensure that it is
disposed of according to national regulations.
– Contact your local authority for details of collection schemes in your area.
In all circumstances:
• Do not dispose of power tools with domestic waste.
• Do not incinerate.
• Do not dispose of WEEE* as unsorted municipal waste.
* Waste Electrical & Electronic Equipment.
98
dB

CONTACTS
YOUR DRAPER STOCKIST
Draper Tools Limited, Hursley Road,
Chandler’s Ford, Eastleigh, Hampshire. SO53 1YF. U.K.
Help line: (023) 8049 4344
Sales desk: (023) 8049 4333
Internet: drapertools.com
E-mail: [email protected]
General enquiries: (023) 8026 6355
Service/Warranty Repair Agent:
For aftersales servicing or warranty repairs, please contact the
Draper Tools help line for details of an agent in your local area.
©Published by Draper Tools Limited.
No part of this publication may be reproduced, stored in a retrieval system or transmitted in any form or by any means,
electronic, mechanical photocopying, recording or otherwise without prior permission in writing from Draper Tools Ltd.
RDJB1120
This manual suits for next models
3
Table of contents
Other Draper Lawn Mower manuals

Draper
Draper 66171 User manual

Draper
Draper LMP570 User manual

Draper
Draper GLM1600/400 User manual

Draper
Draper LMP400PD User manual

Draper
Draper LMP463 User manual

Draper
Draper 58567 User manual

Draper
Draper HM1300 User manual

Draper
Draper 08673 User manual

Draper
Draper ME1030G User manual

Draper
Draper LM900 User manual

Draper
Draper LM24 Firmware update

Draper
Draper 08673 User manual

Draper
Draper LMP480 Firmware update

Draper
Draper LMP566 User manual

Draper
Draper LMP464A User manual

Draper
Draper LMP400 User manual

Draper
Draper 56102 User manual

Draper
Draper LM900 User manual

Draper
Draper HM1100B User manual

Draper
Draper LM12 User manual