DxO One User manual


DxO ONE - User Guide - Copyright © DxO Labs 1999-2015 - All rights reserved
Table of Contents
Introduction 1 ...........................................................................................................................................
Welcome 1 ........................................................................................................................................
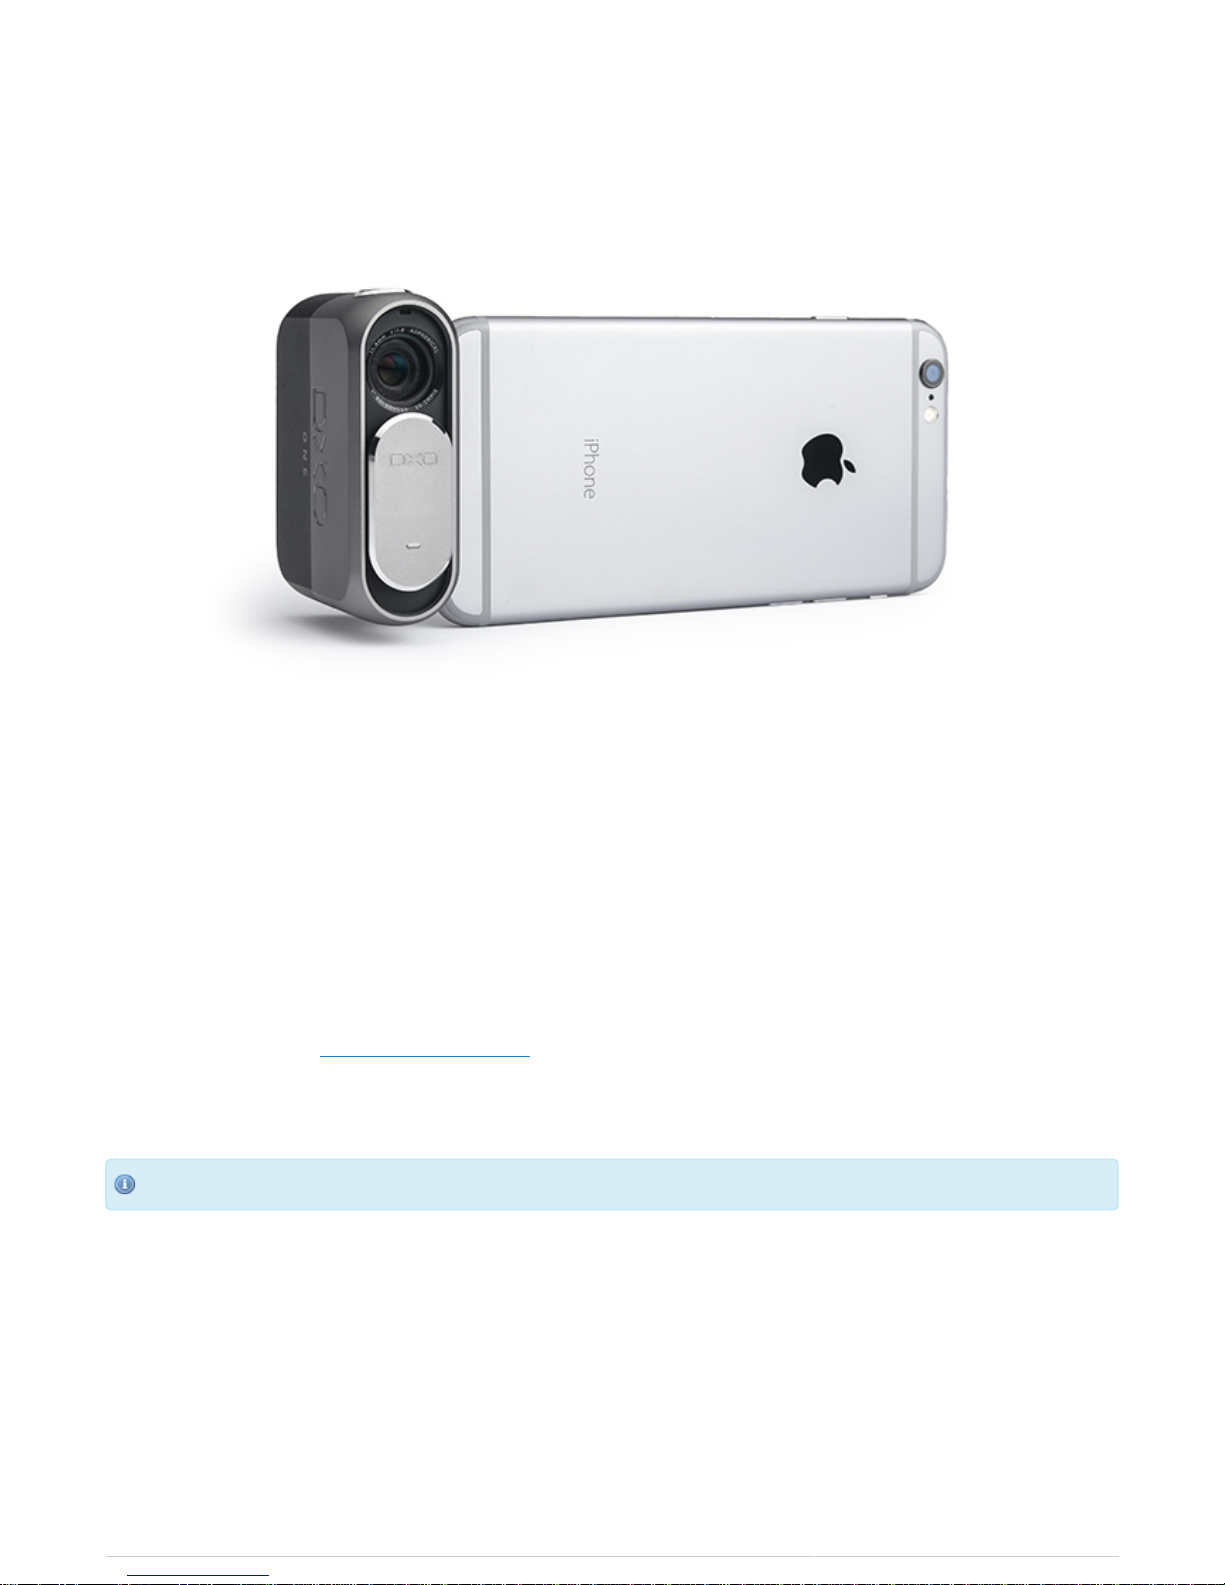
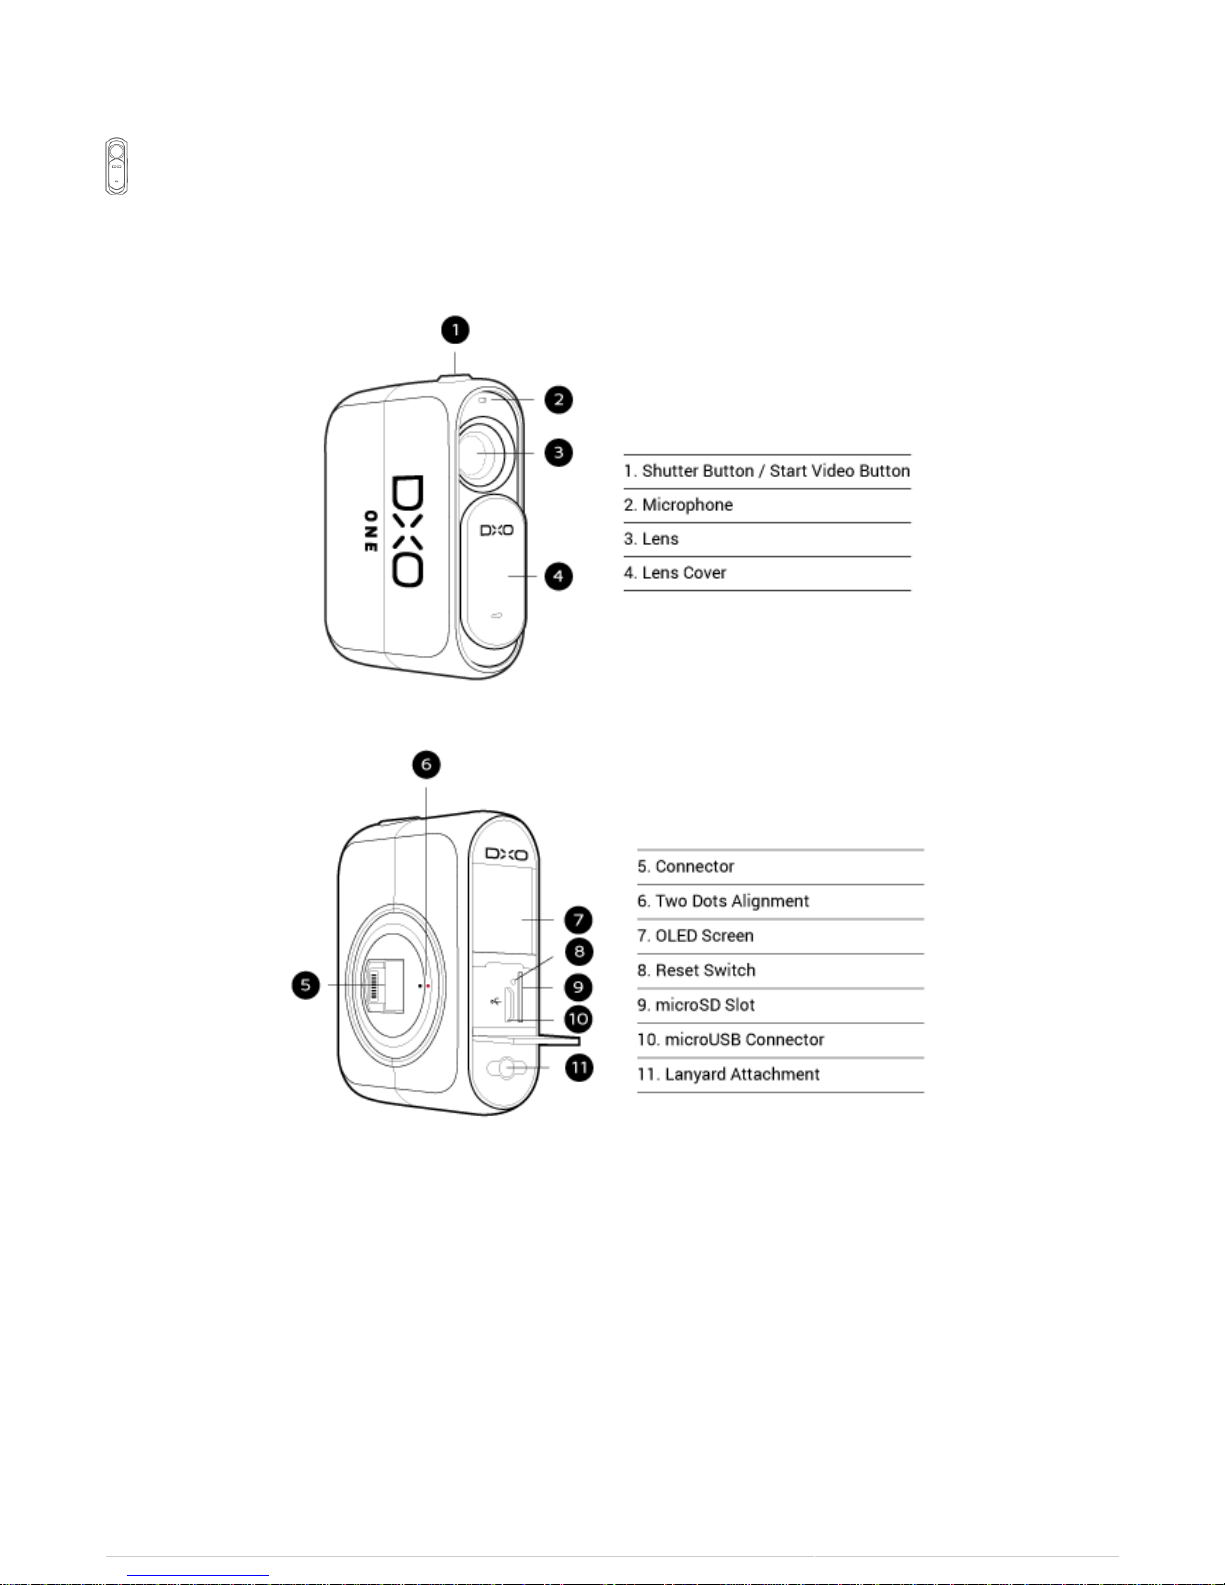
DxO ONE at a glance 2 ......................................................................................................................
What's in the box 3 ...........................................................................................................................
Quick start 4 .....................................................................................................................................
When finished shooting 7 ..................................................................................................................
Conserving battery power 9 ..............................................................................................................
Safety precautions 11 .......................................................................................................................
Certifications 12 ................................................................................................................................
Getting Started 14 ...................................................................................................................................
Inserting the microSD card 14 ..........................................................................................................
Holding the camera 16 ......................................................................................................................
Make sure the battery is charged 18 ................................................................................................
Using your DxO ONE with your iPhone 21 .........................................................................................
Processing your images with DxO Connect 25 ..................................................................................
Formatting the microSD Card 27 ......................................................................................................
Connecting and disconnecting the camera 29 .........................................................................................
Turning the camera On and Off 29 ....................................................................................................
Opening the DxO ONE connector 30 .................................................................................................
Connecting the camera to the iPhone 31 ..........................................................................................
Closing the DxO ONE connector 32 ...................................................................................................
Launching the DxO ONE iOS application 34 ......................................................................................
OLED status screen 36 .............................................................................................................................
Icons displayed during operation 36 .................................................................................................
Connected capture modes 40 ..................................................................................................................
DxO ONE App at a glance 40 ............................................................................................................
Taking a picture 41 ...........................................................................................................................
Changing the capture mode 46 .........................................................................................................
Using scene modes 48 ......................................................................................................................
Using the advanced modes 51 ..........................................................................................................
Video mode 61 ..................................................................................................................................
Activating flash 66 ............................................................................................................................
Activating timer mode 67 ..................................................................................................................
Selfie mode 68 ..................................................................................................................................
Super RAW 70 ...................................................................................................................................
MicroSD card error messages 71 ......................................................................................................
Stand-alone Capture modes 73 ................................................................................................................
Select mode 73 .................................................................................................................................
Taking a picture 75 ...........................................................................................................................
Recording a video 77 ........................................................................................................................
Browsing and Sharing 79 .........................................................................................................................
Single photo review 79 .....................................................................................................................
Video review 82 ................................................................................................................................
Deleting photos in single image view 84 ...........................................................................................
Favorite photos 86 ............................................................................................................................
Gallery view 87 .................................................................................................................................
Using Multi-selection mode 90 ..........................................................................................................

DxO ONE - User Guide - Copyright © DxO Labs 1999-2015 - All rights reserved
Sharing your photos 93 .....................................................................................................................
Saving images stored on the microSD card to your iPhone 97 .........................................................
Printing your photos 99 .....................................................................................................................
Manage settings 100 ................................................................................................................................
Capture settings 100 .........................................................................................................................
Application Settings 104 ...................................................................................................................
Index and Assistance 106 ........................................................................................................................
Optional accessories 106 ..................................................................................................................
Firmware Updates 107 ......................................................................................................................
DxO ONE Warranty Card 110 ...................................................................................................................

DxO ONE - User Guide - Copyright © DxO Labs 1999-2015 - All rights reserved 1
Introduction
Welcome to DxO ONE
You are part of a world of people who really care about great images. Your camera was designed in Paris and Sa
n Francisco by a team of top image scientists and engineers. It leverages DxO’s world-
renowned image processing capabilities to produce professional quality photographs that are seamlessly transfe
rred to your iPhone and iPad so you can instantly share them with friends, family and followers.
In this user documentation, we’ll introduce you to the DxO ONE camera, the companion iOS app that controls
the camera when connected to your iPhone or iPad, and DxO Connect, the complementary desktop software
that enables you to make your best photos even better.
If there's a topic or question that isn't covered here, please reach out to us. Our DxO Customer Support team is
always ready to help at http://support.dxo.com/.
Be sure to capture (and share) your best moments, wherever the DxO ONE takes you.
We’ll use iPhone to refer to both iPhone and iPad going forward.

DxO ONE - User Guide - Copyright © DxO Labs 1999-2015 - All rights reserved 2
Introduction
DxO ONE at a glance
We recommend you quickly review the few, but important parts of your DxO ONE to help you get started.
DxO ONE key features
World’s smallest 1” sensor camera – well under 3” (7.6 cm) tall and weighing less than an iPhone 6.
●
High quality, six-element aspherical lens with a maximum aperture of f/1.8.
●
Direct connection to iPhone or iPad via an innovative Lightning connector that swivels +/- 60 degrees.
●
Rechargeable lithium-ion battery and microSD card slot to ensure the camera will never impact your iPhone
●
talk time or storage space.
Seamless integration with Apple iOS to provide access to the Photos app and 3rd-party editing tools.
●
Instantly share DxO ONE images through your iPhone to Facebook, Twitter, Instagram and more.
●
DxO’s proprietary SuperRAW™ format provides noise-free images in extreme low light environments.
●
Tether the DxO ONE to your Mac or PC to let DxO Connect software automatically render an even higher
●
quality photo from your DxO ONE RAW images.

DxO ONE - User Guide - Copyright © DxO Labs 1999-2015 - All rights reserved 3
Introduction
What's in the box
Before use, make sure the following items are included in the package of your DxO ONE. If anything is missing,
please contact your retailer.
DxO ONE Camera
●
Supplied USB Cord and Wall Charger Plug
●
Cleaning Cloth
●
Getting Started booklet
●
Memory card is not included.

DxO ONE - User Guide - Copyright © DxO Labs 1999-2015 - All rights reserved 4
Introduction
Quick start
1. Insert a UHS-1 U3 microSD card (not included)
2. Slide the lens cover down to power on the DxO ONE. You’re ready to capture detailed photos and
dynamic videos with the ONE in stand-alone mode.
3. Slide the lens cover further down to open the integrated Lightning Connector.

DxO ONE - User Guide - Copyright © DxO Labs 1999-2015 - All rights reserved 5
4. You’re now ready to attach the ONE to your iPhone.
When first connected, you will be prompted to access and install the
When first connected, you will be prompted to access and install the DxO ONE app
DxO ONE app for iOS, which is
for iOS, which is
available from the App Store as a free download.
5. You are now ready to control every aspect of your DxO ONE camera via the iOS app.

DxO ONE - User Guide - Copyright © DxO Labs 1999-2015 - All rights reserved 6

DxO ONE - User Guide - Copyright © DxO Labs 1999-2015 - All rights reserved 7
Introduction
When finished shooting
1. Before detaching the DxO ONE camera from your iPhone, align the connector with the dots on the
circular hub. The black dot should align with the red dot.
2. You can now detach the camera from your iPhone by pulling the two devices apart (do not fold the
phone onto the camera to release).
3. To close the connector, slide and hold the lens cover all the way down while gently pushing the
connector flat (recessed in the circular hub).

DxO ONE - User Guide - Copyright © DxO Labs 1999-2015 - All rights reserved 8
You should not have to force the connector down. If it won’t recess, check again to make sure you’ve
aligned the dots on the circular hub, and try again.
4. Slide the lens cover closed to power off the camera.

DxO ONE - User Guide - Copyright © DxO Labs 1999-2015 - All rights reserved 9
Introduction
Conserving battery power
To conserve the battery power of both your DxO ONE camera and your iPhone, it is recommended that you
power DxO ONE down when not actively taking photos or shooting video.
1. To sleep the ONE, with the camera still attached to your iPhone, slide the lens cover closed to power
off the ONE camera.
You may also put your iPhone to sleep by pressing the power button, to conserve the battery of your
phone.
phone.
2. To wake the ONE, slide the lens cover open to power up the camera.
3. If your iPhone has gone to sleep, press the home button and unlock your iPhone, or simply use

DxO ONE - User Guide - Copyright © DxO Labs 1999-2015 - All rights reserved 10
Touch ID if you have this feature.
To conserve the battery power of both your DxO ONE camera and your iPhone, it is recommended that
you power DxO ONE down when not actively taking photos or video.
4. For brief periods in between actively taking photos, your DxO ONE will automatically switch to Power
Saving mode.
5. To wake your DxO ONE from Power Saving mode, simply tap the iPhone display, or press the physical
shutter half way.

DxO ONE - User Guide - Copyright © DxO Labs 1999-2015 - All rights reserved 11
Introduction
Safety precautions
Before you use your DxO ONE camera, it is important that you read this safety information and the
user guide found on the DxO website:
user guide found on the DxO website: support.dxo.com
support.dxo.com. Retain this safety information for future
. Retain this safety information for future
reference.
reference.
Precautions carrying, using, and cleaning your DxO ONE
Built-in battery: The DxO ONE lithium-ion battery cannot be replaced. Don’t attempt to access or replace the
●
built-in lithium-ion battery: you may damage it, which could cause overheating and injury. Be sure to comply
with local regulations when disposing of the DxO ONE camera; do not dispose of it as household waste.
Water damage: The DxO ONE camera is not waterproof and should not be used in wet conditions or
●
underwater. Avoid contact with water, dust, sand or salt. These could cause a malfunction. Wipe the camera
to dry off any rain or water drops. If your DXO ONE camera comes in contact with liquids, this may cause a
short circuit, a fire, or an electric shock.
If the DxO ONE connector gets wet, do not plug it into your iPhone® or iPad®; this would damage both
●
your camera and your iPhone or iPad.
If your iPhone or iPad port is wet or dirty, do not attach your DxO ONE camera.
●
Do not handle the power adapter with wet hands. This can cause an electric shock.
●
USB cable and power adapter: Use the USB cable and power adapter included with your DxO ONE camera.
●
Use of a non-DxO power adapter may pose a risk of fire or serious harm to you or your DxO ONE camera.
Using a damaged cable or power adapter can cause fire, electric shock, injury, or damage to DxO ONE
camera. Do not attempt to disassemble the USB cable or power adapter, as it may cause personal injury.
Camera cleaning: Do not clean the camera with organic solvents such as thinner, alcohol, and benzene. Use
●
the included lens cloth to remove dust accumulated on the lens.
Operating environment: Use the camera at ambient temperatures between 0°C (32°F) and 40°C (104°F).
●
Environmental conditions: Do not leave the camera in excessive heat such as in a car in direct light. High
●
temperatures can cause the camera to malfunction.
Repairs: Do not attempt to disassemble or make any repairs to your DxO ONE camera. The device contains
●
small parts that may be a choking hazard or otherwise cause bodily injury.
Driving: Do not operate your DxO ONE camera while you are driving a vehicle. Such use may be illegal, and
●
may place you and others at greater risk of an accident causing serious injury, death, or property damage.
Disposal: Do not dispose of your DxO ONE camera in a fire. This may cause an explosion or result in serious
●
bodily injury, death or damage to property.
Using DxO ONE with other Devices: Only use your DxO ONE camera with approved and supported devices.
●
Use of DxO ONE with non approved or unsupported devices may cause damage to your DxO ONE camera
and to the other device.

DxO ONE - User Guide - Copyright © DxO Labs 1999-2015 - All rights reserved 12
Introduction
Certifications
This device complies with Part 15 of the FCC Rules. Operation is subject to the following two conditions:
(1) this device may not cause harmful interference, and (2) this device must accept any interference
received, including interference that may cause undesired operation.
Caution: changes / modifications to this product which are not approved by DxO could void the user’s authority
to operate the product.
Note: This equipment has been tested and found to comply with the limits for a Class B digital device, pursuant
to part 15 of the FCC Rules. These limits are designed to provide reasonable protection against harmful
interference in a residential installation. This equipment generates, uses and can radiate radio frequency energy
and, if not installed and used in accordance with the instructions, may cause harmful interference to radio
communications. However, there is no guarantee that interference will not occur in a particular installation. If
this equipment does cause harmful interference to radio or television reception, which can be determined by
turning the equipment off and on, the user is encouraged to try to correct the interference by one or more of the
following measures:
Reorient or relocate the receiving antenna.
●
Increase the separation between the equipment and receiver.
●
Connect the equipment into an outlet on a circuit different from that to which the receiver is connected.
●
Consult the dealer or an experienced radio/TV technician for help.
●
This device is designed and manufactured not to exceed the emission limits for exposure to radio frequency (RF)
energy set by the Federal Communications Commission for an uncontrolled environment.
CE RF Exposure Compliance - This device meets the EU requirements (1999/519/EC) and the
International Commission on Non-Ionizing Radiation Protection (ICNIRP) on the limitation of exposure of
the general public to electromagnetic fields by way of health protection.
This Class B digital apparatus complies with CAN ICES-3 (B)/NMB-3(B).
This device complies with Industry Canada license-exempt RSS standard(s). Operation is subject to the following
two conditions:
this device may not cause interference, and
●
this device must accept any interference, including interference that may cause undesired operation of the
●
device.
The device could automatically discontinue transmission in case of absence of information to transmit, or
operational failure. Note that this is not intended to prohibit transmission of control or signaling information or
the use of repetitive codes where required by the technology.
The device for operation in the band 5150–5250 MHz is only for indoor use to reduce the potential for
●
harmful interference to co-channel mobile satellite systems;
The maximum antenna gain permitted for devices in the bands 5250–5350 MHz and 5470–5725 MHz shall
●
comply with the e.i.r.p. limit; and

DxO ONE - User Guide - Copyright © DxO Labs 1999-2015 - All rights reserved 13
The maximum antenna gain permitted for devices in the band 5725–5825 MHz shall comply with the e.i.r.p.
●
limits specified for pointto- point and non point-to-point operation as appropriate.
In addition, high-power radars are allocated as primary users (i.e. priority users) of the bands 5250–5350 MHz
and 5650–5850 MHz and that these radars could cause interference and/or damage to LE-LAN devices.
The radiated output power of the Wireless Device is below the Industry Canada (IC) radio frequency exposure
limits. The Wireless Device should be used in such a manner such that the potential for human contact during
normal operation is minimized.
The WEEE symbol on the product and its packaging (crossed out waste bin) indicates that this product
must not be disposed of with your other household waste. Instead, it is your responsibility to dispose of
your waste equipment by handing it over to a designated collection point for the recycling of waste
electrical and electronic equipment. The separate collection and recycling of your waste equipment at the time
of disposal will help conserve natural resources and ensure that it is recycled in a manner that protects human
health and the environment. For more information about where you can drop off your waste for recycling, please
contact your local authority, or where you purchased your product.
“Made for iPhone” and “Made for iPad” mean that an electronic accessory has been designed to connect
specifically to iPhone or iPad, respectively, and has been certified by the developer to meet Apple performance
standards. Apple is not responsible for the operation of this device or its compliance with safety and regulatory
standards. Please note that the use of this accessory with iPhone or iPad may affect wireless performance.
Only use DxO ONE with the specific models of iPhone and iPad that are identified in your user manual.
iPad and iPhone are trademarks of Apple Inc., registered in the U.S. and other countries. iPad Air and iPad mini
are trademarks of Apple Inc.
Hereby, DxO declares that this camera is in compliance with the essential requirements and other relevant
provisions of Directive 1999/5/EC.

DxO ONE - User Guide - Copyright © DxO Labs 1999-2015 - All rights reserved 14
Getting Started
Inserting the UHS-1 U3 microSD
card™
The microSD™ card slot is located behind the door on the back of the DxO ONE device. You’ll find both the
microSD™ card slot and the microUSB connector under this door.
Check and make sure that microSD™ card is inserted before using your DxO ONE, as it will not operate
without a microSD™ card.
1. Open the door by lightly pulling on the latch door.
2. Insert the microSD™ card into the microSD™ card slot with the connector pads facing forward
toward the Lightning connector side of the camera, and press down on it to insert it. The card will click
firmly into place.

DxO ONE - User Guide - Copyright © DxO Labs 1999-2015 - All rights reserved 15
3. To remove the SD card, simply press down on it and it will pop up for removal.
Use caution to keep the card aligned while inserting or removing the card. Do not force the microSD
card into the slot. If excessive force is required, it is most likely not positioned correctly.

DxO ONE - User Guide - Copyright © DxO Labs 1999-2015 - All rights reserved 16
Getting started
Holding the camera
The DxO ONE camera has two operating modes, Stand-alone mode and Connected mode, and can be used
to take still and video images in both modes.
Stand-Alone Mode
Your DxO ONE is a fully functioning miniature camera, even when not connected to your iPhone. Press the
shutter button on top of the ONE to take photos or record videos in stand-alone mode.
The DxO ONE does not have a built-in viewfinder, and you will not be able to preview your images, or
review them until you connect the camera to your iPhone or computer. The camera operates only in
auto mode only when used in Stand-alone mode.
Connected Mode
When the DxO One is attached to your iPhone, you will be able to access all of the shooting modes of the
camera, and use the attached iPhone LCD screen as your viewfinder for previewing and reviewing images and
video.
Attach the DxO ONE to the lightning connection on your iPhone so that the lens of the camera faces away from
you and the LCD of the phone faces toward you. You can use the ONE in either landscape or portrait orientation.

DxO ONE - User Guide - Copyright © DxO Labs 1999-2015 - All rights reserved 17
Connected Selfie Mode
You’ll also be able to use the DxO ONE in Selfie Mode when it is connected to your iPhone.
Connect the DxO ONE to the lightning connection with the lens of the camera facing toward you.1.
The camera will now be in your left hand, and the shutter button at the top.2.
You may use either the physical shutter button, or the soft shutter button on the display to trigger a selfie.3.
Other manuals for One
3
Table of contents
Other DxO Digital Camera manuals