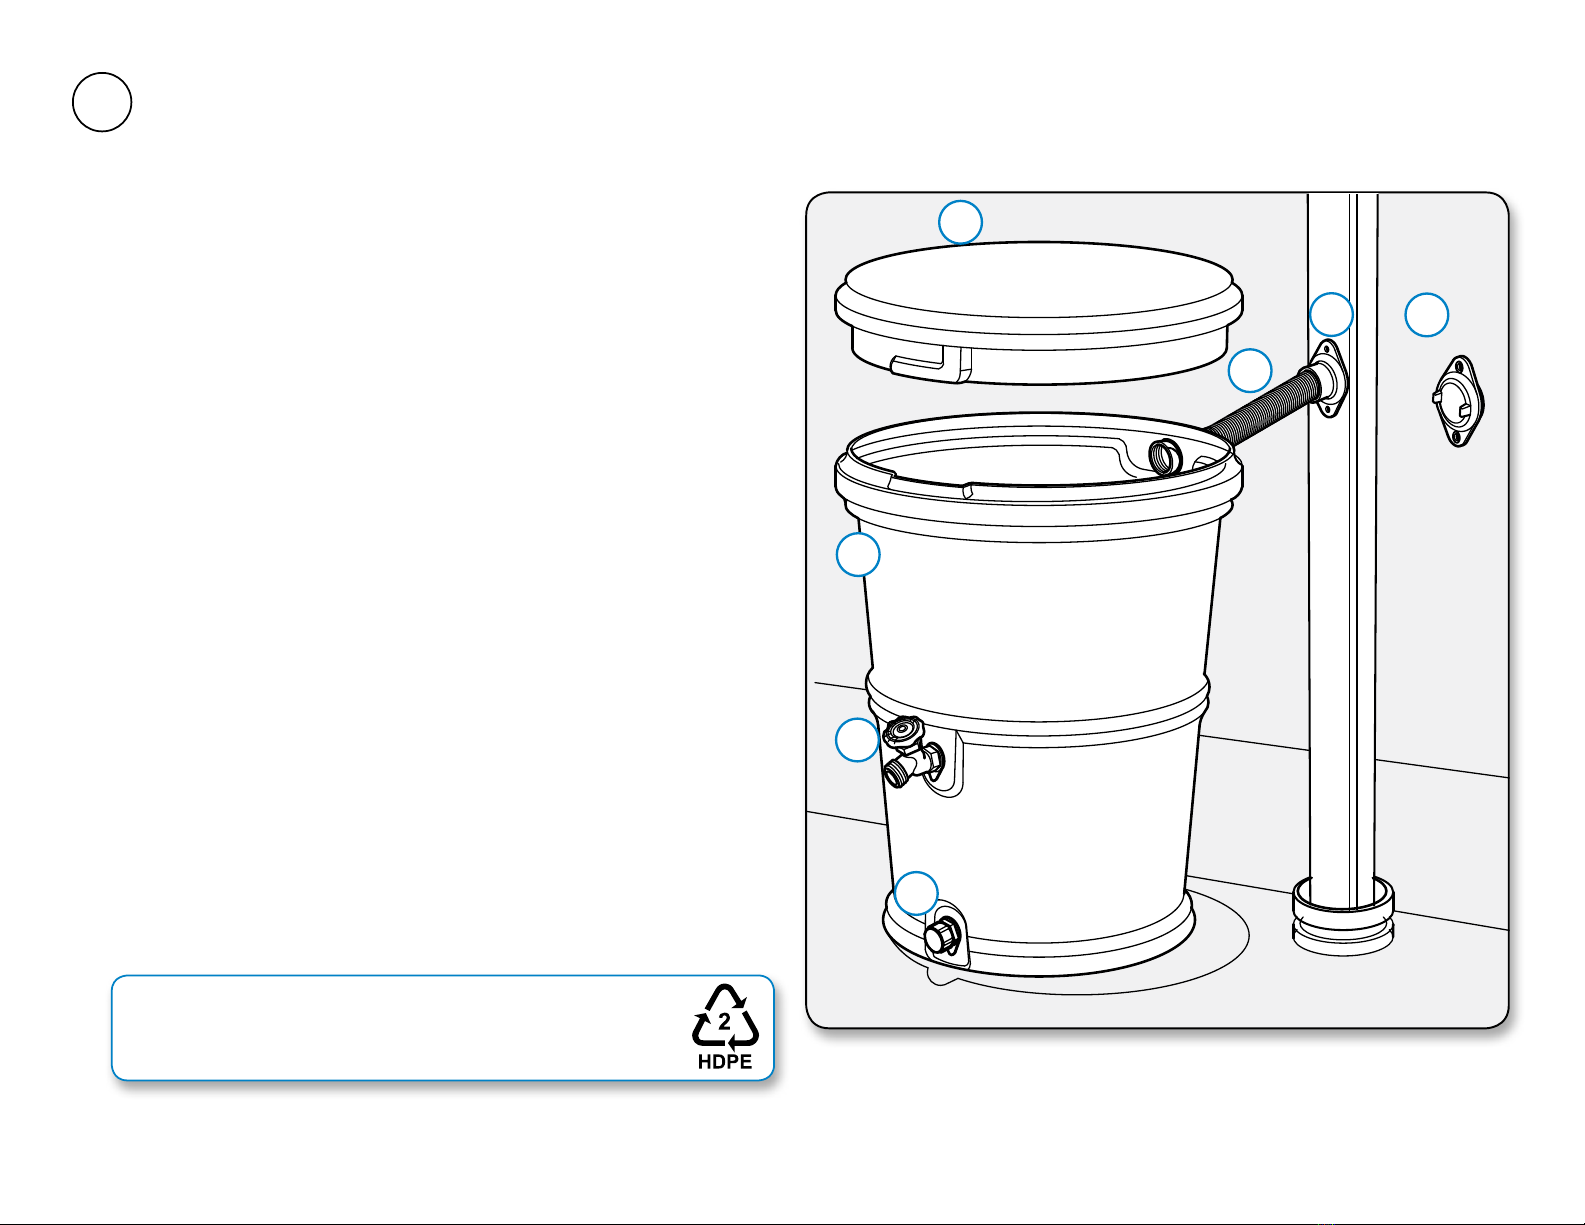
Installbottomdrain.1.
Insertsmallgasketintodrainholenearbottomofbarrel.a.
Threaddraincapontothedrainpost,b. making sure the cap is on
the larger-threaded side.
Threadtheassemblyintothedrainholegasketuntilthehexcollarc.
istightagainstthegasket.
To prevent damage to the seal, do not over-tighten.
Installthespigot.2.
Insertsecondsmallgasketintospigotholeatmid-heightona.
thebarrel.
Threadspigotintothegasketuntilthespigotistightenedandb.
positionedwiththewateroutletpointingdown.
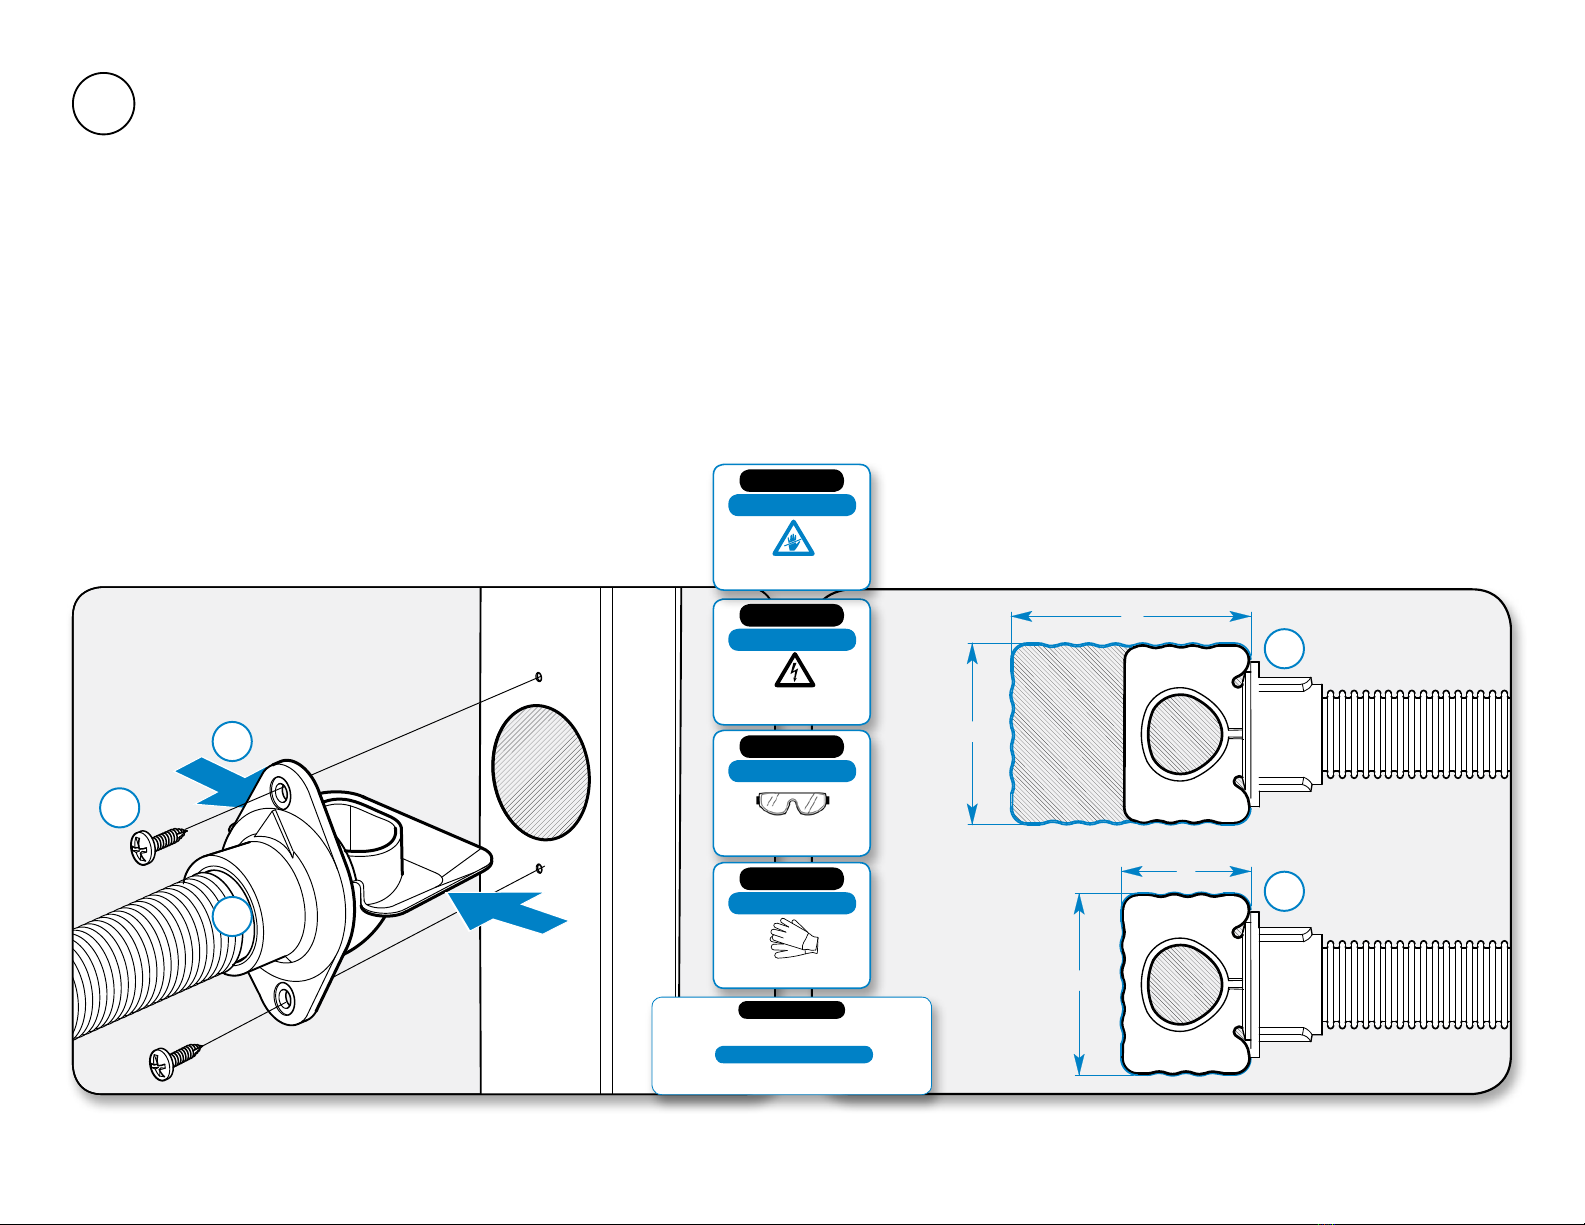
Installthewaterinlet.3.
Inserttheinletintothellholebelowtherimonthebacksideofa.
thebarrel.
Pushtheinletinuntilitsitsatagainstthebarrel.b.
Instalacióndeldrenajeinferior.1.
a. Inserteunapequeñajuntadentrodeloriciodedrenajeubicado
cercadelaparteinferiordeltanque.
b. Enroquelatapadedrenajeenlasalidadedrenajeyasegúresede
quelatapaestécolocadaenellateralroscadomásamplio.
c. Enrosqueelensambleenlajuntadeloriciodedrenaje,hastaqueel
collarínhexagonalquedeajustadocontralajunta.
Para evitar que el sello se dañe, no lo ajuste demasiado.
Instalacióndelgrifo.2.
a. Insertelasegundajuntapequeñadentroeloriciodelgrifoubicado
enelpuntomediodeltanque.
b. Enrosqueelgrifodentrodelajuntahastaquequedeajustadoycolo-
cadoconlasalidadeaguahaciaabajo.
Instalacióndelaentradadeagua.3.
a. Insertelaentradadeaguadentrodeloriciodellenadoubicadode-
bajodelbordedelapartetraseradeltanque.
b. Empujelaentradadeaguahastaqueseapoyebiencontraeltanque.
Assembling the Barrel Instalación del tanque
4
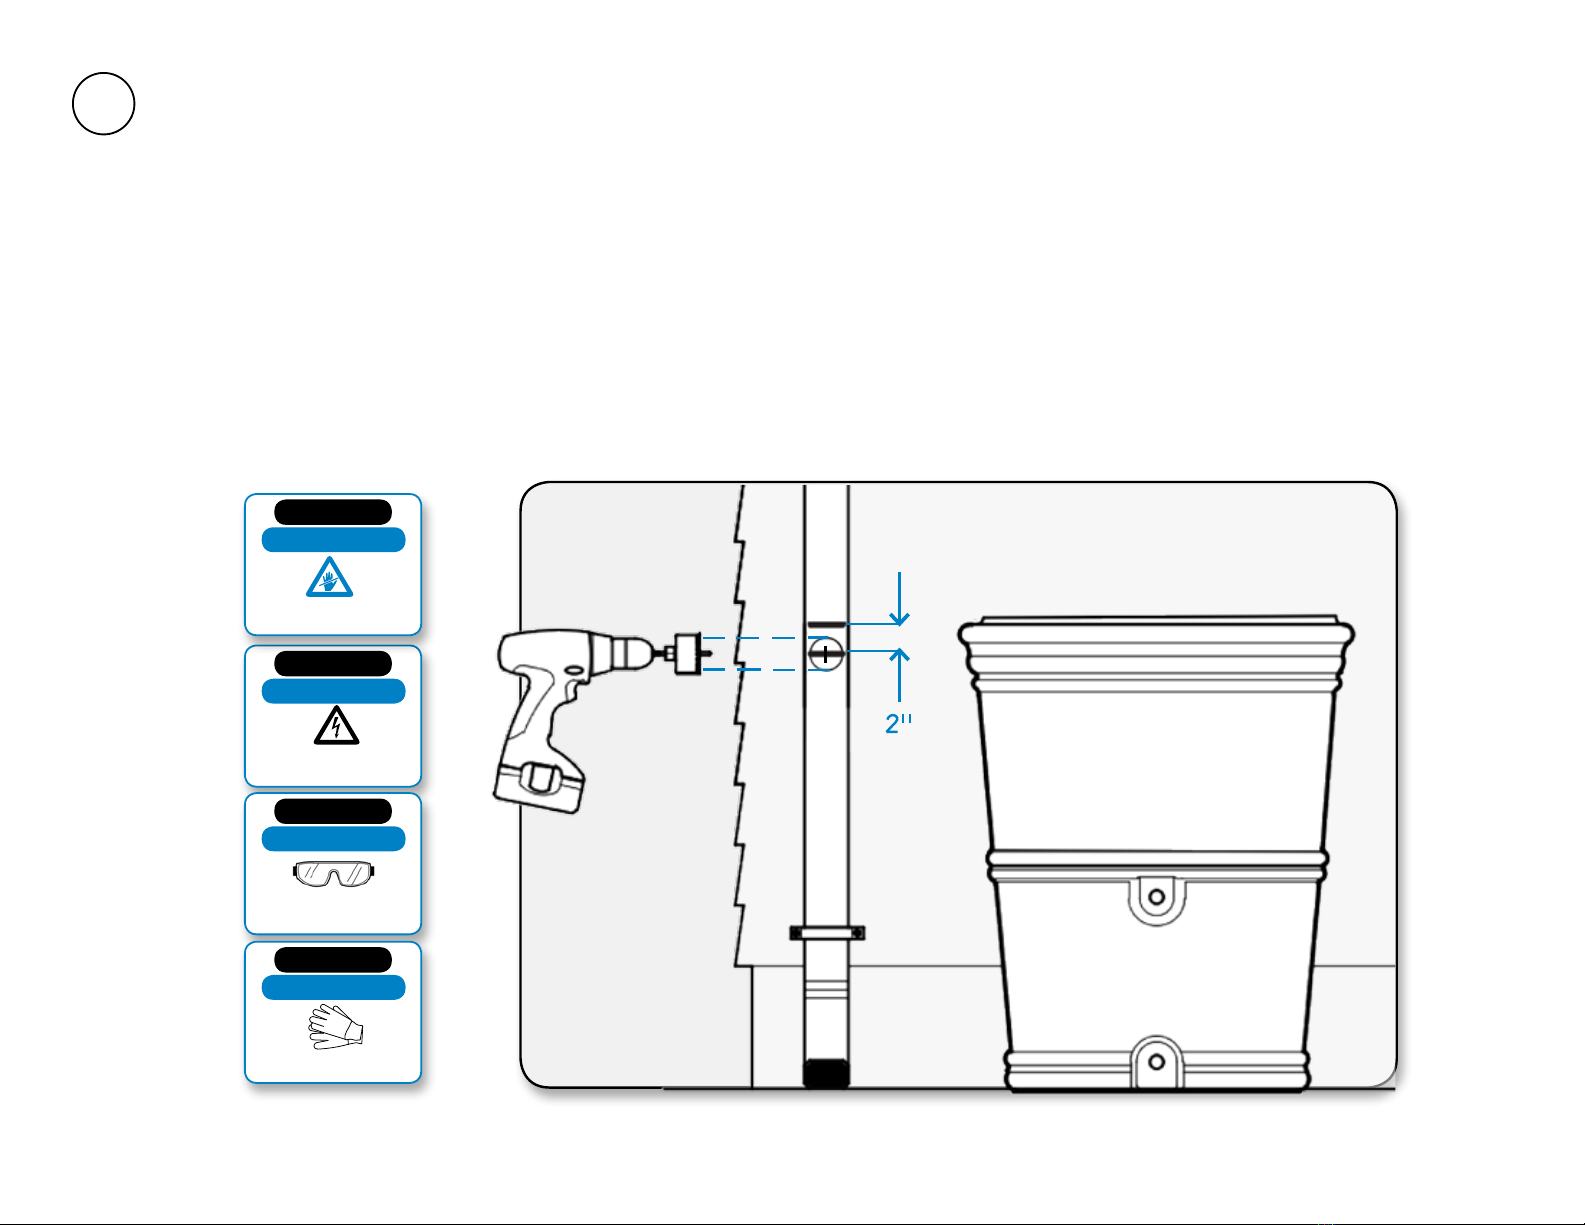
TIP
Soapy water on the hose cuff and
rubber seal reduces friction
and makes insertion easier.
Consejo - Agua y jabón en la rosca
de la manguera y en el sello de
goma reduce la fricción y hace mas
fécil el acoplamiento.
CONSEJO