Easylife EL2776 User manual

4-in-1 Cordless
Rechargeable Shaver
INSTRUCTION MANUAL
Model No. EL2776
Please read carefully before use and keep for future reference
Support Line: 0303 031 0777
For more innovative products from Easylife please visit:
www.easylifegroup.com
everyday solutions
™
Est. 1992
Imported and distributed by Easylife Group Ltd, London NW1 0JP
Support Line: 0303 031 0777
For more innovative products from Easylife please visit:
www.easylifegroup.com
IN2773 © 2017 Easylife Group Ltd
everyday solutions
™
Est. 1992
TECHNICAL SPECIFICATION
Measurements: 55x55x165mm
Cable Length: 1.5m
Battery: NI-MH 600mAh
Input: 3V 150mAh
MEDICAL WARNING
• Consult your dental professional before you use the toothbrush attachment
of this product if you have had oral or gum surgery in the previous 2
months.
• Contact your dental professional if excessive bleeding occurs after using
the toothbrush attachment of this product or bleeding continues to occur
after 1 week of use.
• If you have a pacemaker or other implanted device contact your physician
or the device manufacturer prior to use.
• This device has been tested and is compliant with safety standards for
electromagnetic devices.
• Consult your physician prior to using this device if you have medical
concerns.
Gen us

Support Line: 0303 031 0777
For more innovative products from Easylife please visit:
www.easylifegroup.com
everyday solutions
™
Est. 1992
1. Shaving Unit
2. Main Unit
3. On/Off Button
4. Charge/Battery Indicator
5. Charging Pedestal /Cradle
6. Hair Clippers
7. Toothbrush Connector
8. Toothbrush Heads
9. Blade Oil
10. Nose Trimmer With Protection Cap
11. Cleaning Brush
12. Mains Adaptor
Pack Contents: Important:
Read this user manual carefully before you use the shaver and keep this manual
for future reference.
Danger
Keep the mains adapter (12) away from water.
Warning
Do not cut off the adapter to replace it with another plug.
These appliances are not intended for use by persons with reduced physical,
sensory or mental capabilities, or lack of experience and knowledge, unless
they have been given supervision or instruction concerning use of these
appliances by a person responsible for their safety.
Children should be supervised to ensure that they do not play with this product
and included accessories.
Be careful with hot water when you clean the shaving heads. Always check if
the water is not too hot, to prevent your hands from getting burnt.
Caution
• Never immerse charger in water or rinse entire device under the tap.
• The appliances and accessories are not dishwasher-proof.
• Always place and use the appliances on a surface that is fluid-resistant.
• Use, charge and store the shaver at a temperature between 5oC and 35oC.
• Only use the accessories supplied with this shaver or that have been
specifically developed for this shaver.
• Do not use the appliances and accessories if they are damaged.
• If the adapter or any of the other accessories are damaged, only replace
them with an approved accessory.
• Only use the Beard trimmer to trim facial hair (beard, moustache and
sideburns). Do not use it to trim hair below the neckline.
• Do not use included attachments with other devices.
1
2
3
4
5
7
6
8
9
10
11
12

Support Line: 0303 031 0777
For more innovative products from Easylife please visit:
www.easylifegroup.com
everyday solutions
™
Est. 1992
The Display
• Battery symbol: A blue light indicates the
unit is working correctly when the device
is switched on.
• Lock symbol: When charging, a red light
behind the lock symbol will illuminate.
Charging
• Insert the small plug into the socket on
the bottom of the shaver, then plug the
adapter in the mains socket. When the
shaver is charging, the ‘lock symbol’
should light up red.
• Fully charging takes approximatly 5 hours
for approximatly 35 minutes of use.
• To prevent over charging, please make
sure you unplug the shaver after 5 hours.
• Alternativley, you can charge via the
charging pedestal. Insert the small plug
into the socket at the back of the charging
pedestal. Plug the adapter into a mains
socket. Gently put the shaver into the slot
on the pedestal with the shaver display
facing outwards. The display shows that
the shaver is charging when the ‘lock
symbol’ glows red.
Using Different Attachments:
With interchangeable heads, simply pull off the shaver head and replace with
either the nose trimmer, beard trimmer or toothbrush by simply aligning and
slotting into place.
1. Pull the shaving unit straight off the main unit.
Note: Do not twist the shaving unit when removing
it from the main unit.
2. Insert the lug of the trimmer or toothbrush connector or
nose trimmer into the slot in the top of the shaver Then press
down to attach it to the shaver body (‘click’).
3. Press the on/off button to switch on.

Support Line: 0303 031 0777
For more innovative products from Easylife please visit:
www.easylifegroup.com
everyday solutions
™
Est. 1992
Shaving
Skin adaptation period
Your first shaves may not bring you the result you
expect and your skin
may even become slightly irritated. This is normal.
Your skin and beard need
time to adapt to any new shaving system.
We advise you to shave regularly (at least 3 times a week) for a period of
3 weeks to allow your skin to adapt to the new shaver. During this period,
use your new electric shaver exclusively and do not use other shaving
methods. If you use different shaving methods, it is more difficult for your
skin to adapt to the new shaving system.
1. Press the on/off button once to switch on the shaver.
2. Move the shaving heads over your skin in circular movements.
3. Do not make straight movements.
4. Press the on/off button once to switch off the shaver.
Wet shaving
You can also use this shaver on a wet face with shaving foam or shaving gel.
To shave with shaving foam or shaving gel, follow the steps below:
1. Apply some water to your skin.
2. Apply shaving foam or shaving gel to your skin.
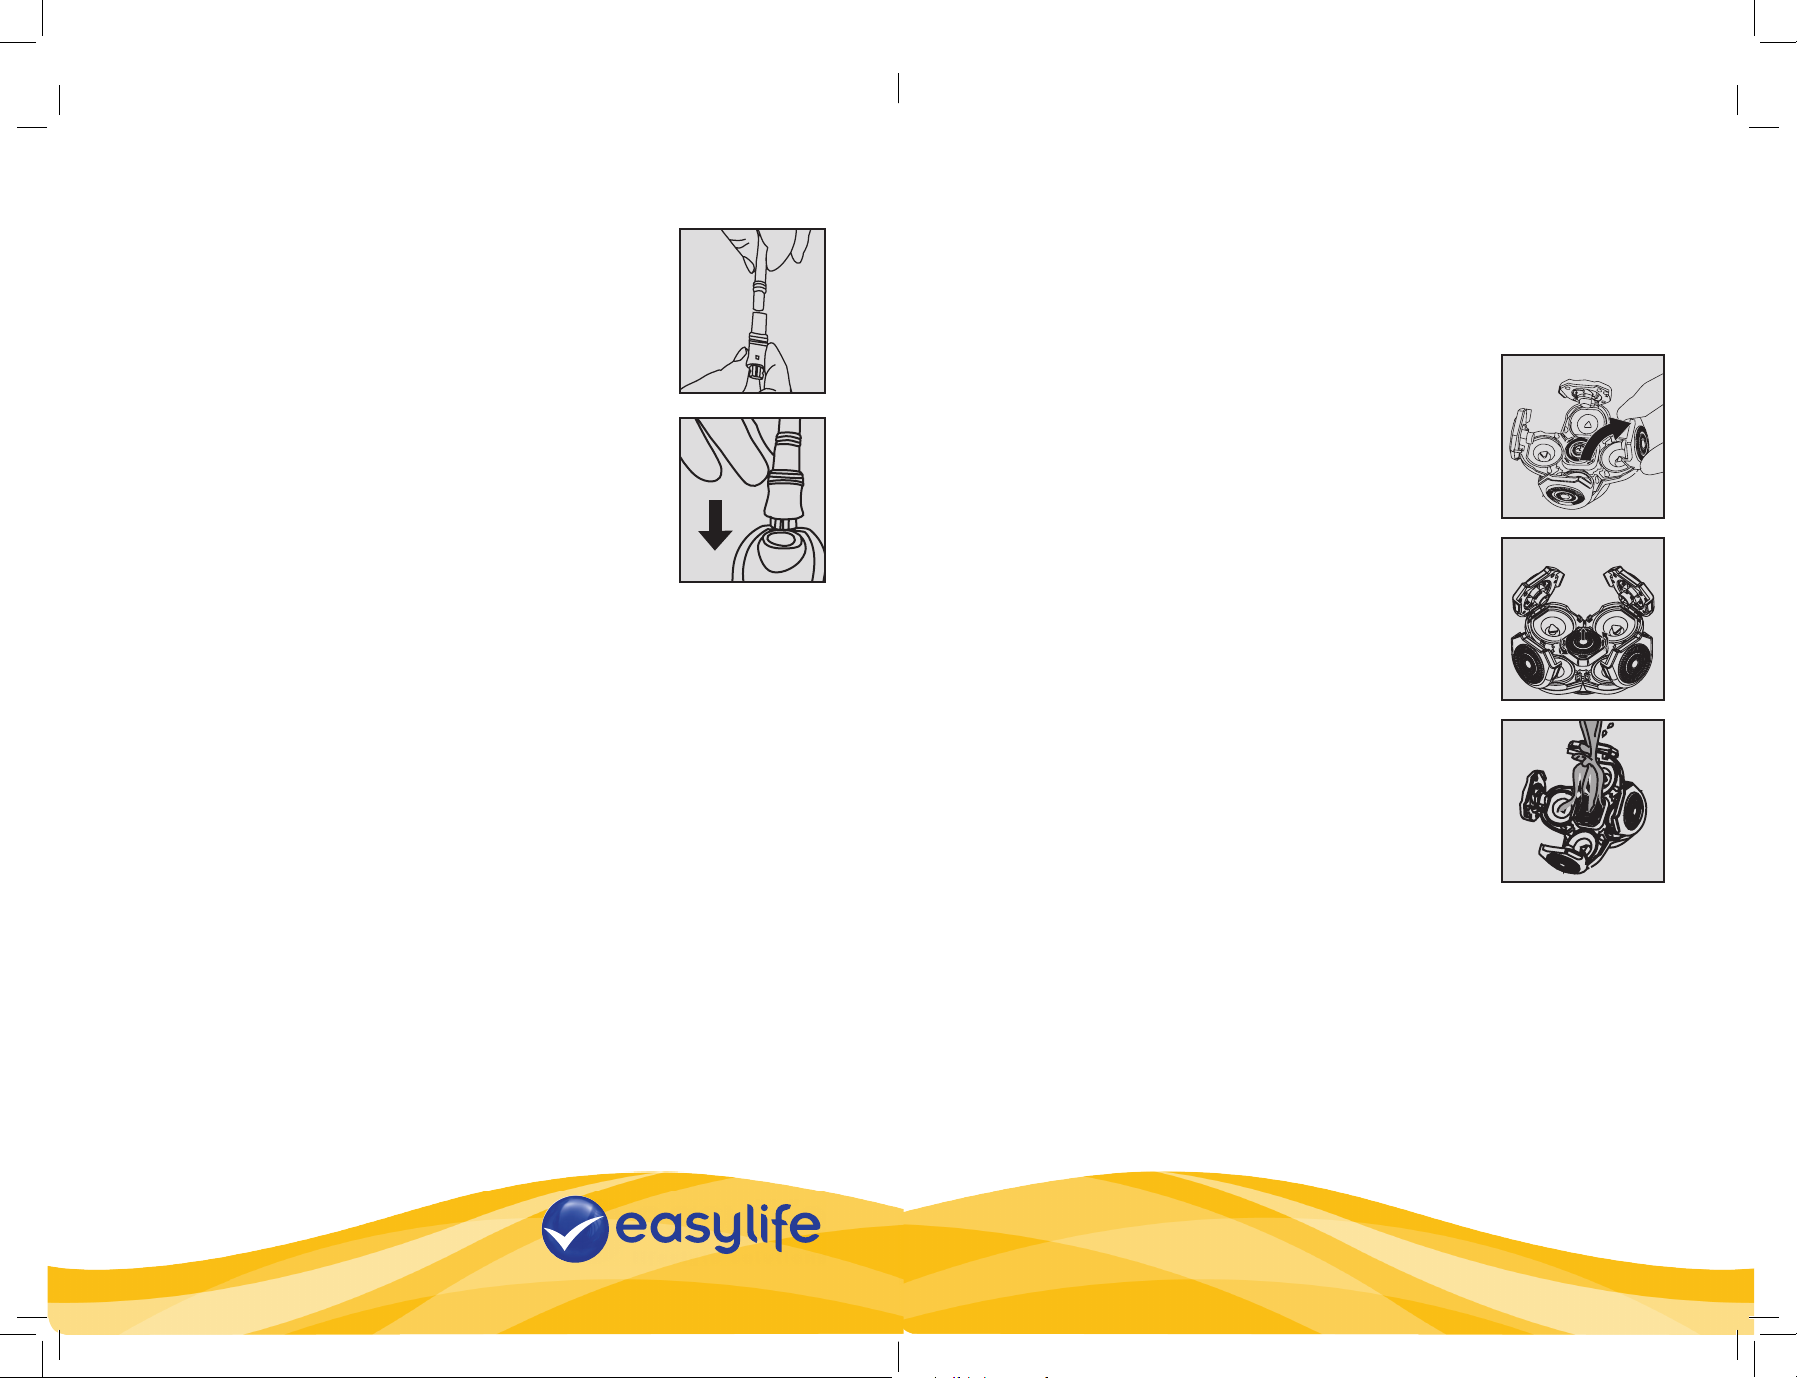
3. Rinse the shaving head under the tap to ensure that the shaving unit glides
smoothly over your skin. DO NOT PUT THE BODY OF THE SHAVER
UNDER THE TAP.
4. Press the on/off button once to switch on the shaver.
5. Move the shaving unit over your skin in circular movements.
Note: Rinse the shaver head under the tap regularly to ensure that it
continues to glide smoothly over your skin. DO NOT PUT THE BODY OF
THE SHAVER UNDER THE TAP
6. Dry your face and thoroughly clean the shaver after use (see ‘Cleaning and
Maintenance’ section, pg. 11).
Note: Make sure you rinse all foam or shaving gel off the shaver.
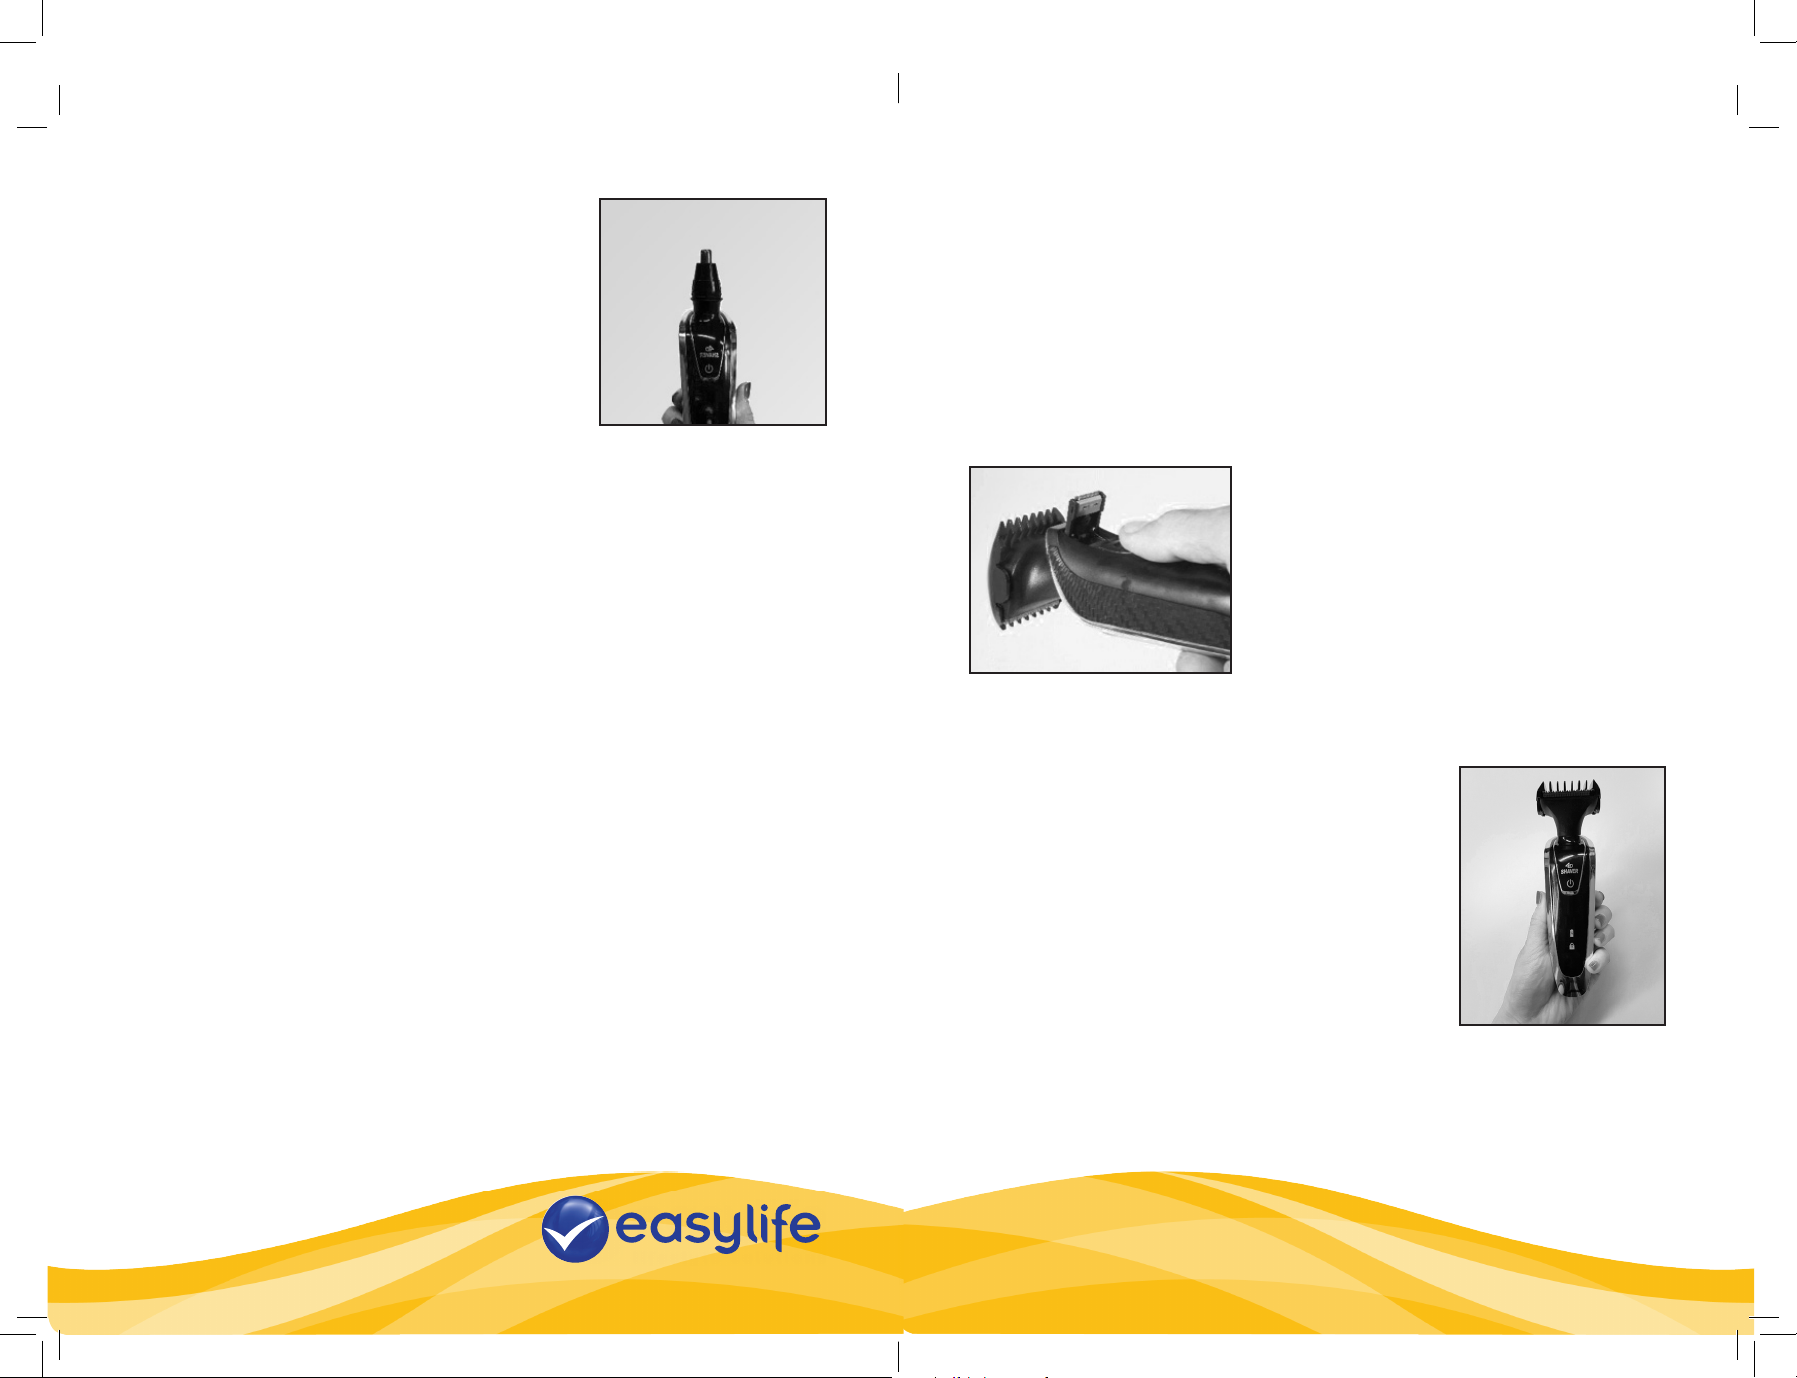
Hair Trimming
Trimming the corner and the temple
After shaving if you would like to trim the
corners or temples, you can use the little
trimmer at the back side of the shaver.
• Make sure the shaver is off
• To open, simply slide the button on the back
of the main unit down and the trimmer will pop
out.
• To close, press the cover of the trimmer back
into the slot until you hear a click.
Hair Clippers
You can use the trimmer to groom your sideburns and
moustache.
Do not use it to trim hair below the neckline.
The trimmer comes with a comb guide when you
receive it. You can use the hair clippers either with the
guide or without.

Support Line: 0303 031 0777
For more innovative products from Easylife please visit:
www.easylifegroup.com
everyday solutions
™
Est. 1992
Hair Clipper
Before trimming, comb your hair as per hair
growth direction.
Comb guide has two length guides,
3mm and 6mm.
Please note the number indicated is the length of
hair that will remain.
Gently push a corner of the comb to remove and the marking is on the back
side of the comb guide.
1. Chose the desired length and put the comb back to the trimmer until it
clips securely.
2. Press the on/off button to start trimming.
3. Place the flat base of the Trimmer /comb guide against the skin.
4. Slowly slide the Trimmer Guide and Blades through hair. Repeat from
different directions as necessary.
5. Repeat the same when using the trimmer without the comb guide.
6mm
3mm
Nose and Ear Hair Trimming
1. Make sure the nose or ear is clean.
2. Insert the tip of the outer blade into your nostril or
aural cavity. Insert it slowly so as not to injure your
nostril or aural cavity.
3. Cut the nose hair and ear hair by moving the
appliance.
4. Move the trimmer slowly so as not to injure your
nostril or aural cavity.
5. Cut only the nostril hair around the entrance using the
tip (approx. 5mm) of the outer blade (metallic part).
6. Some trimmings may remain inside your nostril or aural cavity.
After cutting, remove them using a tissue or cloth. The outer blade surface
may get a little warm during use, but performance will not be affected.

Support Line: 0303 031 0777
For more innovative products from Easylife please visit:
www.easylifegroup.com
everyday solutions
™
Est. 1992
Cleaning and Maintenance
• Always ensure the shaver is unplugged and switched off before cleaning.
Clean the shaver:
• Pull open the shaving heads one by one (Fig. 1).
• Rotate and pull open the centre head last (Fig. 2).
• Tip any collected hair into a waste receptacle.
• Use the provided cleaning brush to remove any hair or
residue inside the accessory.
• Wash only the shaver head, not the whole body, with
water (Fig. 3).
• Leave the shaving heads open to dry completely.
Nose/Ear Hair Trimmer and Hair Clippers:
• Clean the blades with the cleaning brush and tap water.
Main Unit
• Only use a soft damp cloth to clean the main unit of the shaver and never
immerse the whole unit in liquids.
Lubricating
• Using the supplied blade oil, lubricate the trimmer blades and shaver heads
with a small drop of oil once every 6 months or when blades do not
move freely.
Using the Toothbrush
1. Make sure the shaver is off before attaching the
toothbrush and adapter.
2. Insert the toothbrush into the toothbrush adapter.
3. Then firmly press the brush and adapter into the main unit
until it clicks into place.
Brushing
1. Wet the bristles and apply a small amount of toothpaste.
2. Place the toothbrush bristles against the teeth at a slight angle towards
the gum line.
3. Press the power on/off button to turn on.
4. Gently move the brush head slowly across the teeth in a small back and
forth motion so the longer bristles reach between your teeth. Continue this
motion throughout your brushing cycle.
5. After you have completed the brushing cycle, you can spend additional
time brushing the chewing surfaces of your teeth and areas where staining
occurs. You may also brush your tongue, with the toothbrush turned on or
off, as you prefer.
Fig. 1
Fig. 2
Fig. 3
Table of contents