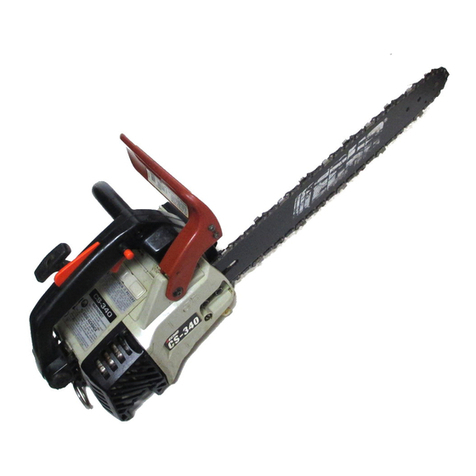
Echo CS-330MX4 User manual

2
RULES FOR SAFE OPERATION
A. Kickback Safety Precautions for Chain Saw Users
B. Other Safety Precautions
1. Donotoperateachainsawwithone hand!Se-
rious injury to the operator, helpers, bystand-
ers,or anycombinationofthesepersons may
resultfromone-handedoperation.Achainsaw
isintended fortwo-handeduse.
2. Do not operate a chain saw when you are fa-
tigued.
3. Usesafetyfootwear;snug-fittingclothing;pro-
tectivegloves;andeye,hearingandheadpro-
tectiondevices. Wearprotective haircovering
tocontainlonghair.
4. Usecautionwhenhandlingfuel.Movethechain
sawatleast3m(10 feet)fromthe fuelingpoint
beforestarting theengine.
5. Donotallowotherpersonstobenearthechain
sawwhenstartingorcuttingwiththechainsaw.
Keepbystandersand animals outof the work
area.
6. Donotstart cuttinguntil youhaveaclearwork
area,securefooting,andaplannedretreatpath
fromthe fallingtree.
Copyright©2007 ByEcho,Incorporated
All Rights Reserved.
WARNING!
KICKBACKmay occurwhen thenoseortipofthe
guide bar touches an object, or when the wood
closesin andpinchesthe sawchain inthecut.
Tip contact in some cases may cause a lightning
fastreverse REACTION,Kickingtheguidebar up
andbacktowards theoperator.Pinching thesaw
chainalong thetopoftheguide barmay pushthe
guide bar rapidly back towards the operator. Ei-
therofthese reactionsmaycauseyoutolosecon-
trol of the saw which could result in serious per-
sonalinjury.
The Kick Guard ®device is not installed on the
guide bar when you purchase your ECHO chain
saw.TheKickGuard®canbeusedinamajorityof
cuttingoperations,andisespeciallyrecommended
forbeginners,homeowners,orchainsawnovices.
Mostcuttingoperationscanbeaccomplishedwith
theKickGuard®in place.
Donotrelyexclusivelyuponthesafetydevicesbuilt
intoyoursaw.Asachainsawuser,youshouldtake
several steps to keep your cutting jobs free from
accidentor injury.
1. With a basic understanding of kickback, you
canreduceoreliminatetheelementofsurprise.
Suddensurprise contributestoaccidents.
2.Keep a good firm grip on the saw with both
hands, the right hand on the rear handle, and
theleft handon thefront handle,when theen-
gineisrunning.Useafirmgripwiththumbsand
fingersencirclingthechainsawhandles.Afirm
grip will help you reduce kickback and main-
taincontrolofthe saw.Don’t’letgo.
3. Make sure that the area in which you are cut-
ting is free from obstructions. Do not let the
noseof theguide barcontactalog,branch,or
anyotherobstruction whichcould behitwhile
youare operatingthesaw.
4. Cutathigh enginespeeds.
5. Donotoverreachorcutaboveshoulderheight.
6. Follow manufacturer’s sharpening and main-
tenanceinstructions forthesawchain.
7. Onlyusereplacement barsandchains, orthe
equivalent,specifiedbythemanufacturer.


3
WARNING
Usingimproper replacementcomponentsor removingsafety devicesmay result in serious orfatalinjury.
7. Keepallpartsof yourbodyawayfromthesaw
chainwhentheengineis running.
8. Before you start the engine, make sure that
thesaw chainis notcontactinganything.
9. Carrythechain sawwiththe enginestopped,
the guide bar and saw chain to the rear, and
themufflerawayfromyourbody.
10.Donotoperate achainsaw thatisdamaged,
improperly adjusted, or not completely and
securely assembled. Be sure that the saw
chain stops moving when the throttle control
trigger is released.
11. Shutofftheenginebeforesettingthechain saw
down.
12.Useextremecaution whencuttingsmall size
brushand saplingsbecause slendermaterial
may catch the saw chain and be whipped to-
wardyou orpullyouoffbalance.
13.When cutting a limb that is under tension, be
alert for spring back so that you will not be
struck when the tension in the wood fibers is
released.
14.Keep thehandles dry,clean,and freeofoil or
fuelmixture.
15.Operatethechain sawonlyin well-ventilated
areas.
16.Do not operate a chain saw in a tree unless
youhavebeen specificallytrained todoso.
17.Allchainsawservice,otherthantheitemslisted
intheInstructionManualmaintenanceinstruc-
tions,shouldbeperformedbycompetentchain
saw service personnel. (For example, if im-
proper tools are used to remove the flywheel
or if an improper tool is used to hold the fly-
wheelinordertoremove theclutch,structural
damagetotheflywheelcouldoccurandcould
subsequentlycausethe flywheeltoburst.)
18.When transporting your chain saw, use the
appropriate guide bar scabbard.
19.SparkarrestormufflersapprovedtoSAEStan-
dard J335b are Standard on ECHO Chain
saws to reduce the possibility of forest fires.
Do not operate the chain saw with a loose or
defectivemuffler.Do notremovethe sparkar-
restorscreen.
WARNING
•Duringoperation,themufflerorcatalyticmufflerandsurroundingcoverbecomehot.
•Neversuspendthesawonalanyardwiththeenginerunning.
•Alwaysuse thesaw fromtheright-handsideofyourbody –NEVER from theleft side.
•Alwayswearpropersafetyclothingtoprotectyourlowerbodyfromsharpsawchainandhot
muffler.
•Alwayskeepexhaustareaclearofflammabledebrisduringtransportationorwhenstoring,
otherwiseseriouspropertydamageorpersonalinjurymayresult.
WARNING
Movingparts can amputatefingers or causesevere injuries. Keep hands, clothing andloose objects awayfrom
allopenings.
•ALWAYS stop engine, disconnect spark plug, and make sure all moving parts have come to a complete stop
beforeremovingobstructions,clearingdebris,orservicingunit.
•DO NOT startor operate unitunless all guards and protectivecovers are properly assembled tounit.
•NEVER reachinto anyopening while theengine isrunning. Moving partsmay not bevisible throughopenings.

4
CONTENTS Page
Rulesfor SafeOperation..................................................................................................2
TechnicalData .................................................................................................................5
Emission Data .................................................................................................................6
Description ......................................................................................................................6
Nomenclatureof Parts......................................................................................................7
PreparationforUse..........................................................................................................8
Fueland Lubricant..........................................................................................................10
Operation.......................................................................................................................12
-StartingCold Engine ....................................................................................................12
-StartingWarmEngine ..................................................................................................13
-Stopping ......................................................................................................................13
CuttingInstructions .........................................................................................................14
Maintenanceand Care...................................................................................................17
Chain and Guide Bar Combinations...............................................................................22
SettingtheSaw Chain....................................................................................................23
Troubleshooting..............................................................................................................24
Storage..........................................................................................................................24
Correct Use of Chain Brake ...........................................................................................26
ServicingInformation......................................................................................................28
INTERNATIONALSYMBOLS
S
Carburetor adjustment
- Idle speed
Carburetor adjustment
- High speed mixture
Wear eyes, ears and head
protection
Carburetor adjustment
- Low speed mixture
Gasoline and oil mixture
Symbol form/shape Symbol description/application Symbol form/shape Symbol description/application
Chain oiler adjustmentChain brake operation
Chain oil pump
Chain oil fill
Emergency stop
Choke control “Cold Start”
position (choke closed)
STOP
Read and understand
Operator's Manual.
Finger Sever

5
TECHNICAL DATA
* Technical data subject to change without notice.
ledoM 4XM033-SC
noisnemiDHxWxL
mm412x742x772
hcni4.8x7.9x9.01
thgieW
yrd,daehrewoPgk)bl9.7(6.3
rabediugdnaniahctu
ohtiW
enignE
epyT rednilycelgnis,ekorts-owt,delooc-riA
tnemecalpsiD).ni.uc989.1(6.23
roterubraC
noitingI
gulP
krapS
retratS
noissimsnartrewoP
epytmgarhpaiD
metsysIDC:otengamleehwylF
paG).ni620.(mm560.-Y8-MPBKGN
retratslioceR
hctulclagufirtneccitamotuA
leuF
oitarerutxiMdnelBrewoPohcEhtiwoitar1:05
MT
.lioekorts-2
,lohoclalyhtemgniniatnocleufesutonoD.dedaelnuenatco98
.EBTM%51rolohoclalyhte%01nahterom
yticapaCknaTlm).zolf.S.U5.01(013
liO
niahcdnaraB )liorotomro(lioniahcdnarabOHCE
yticapaCknaTlm).zolf.S.U8.9(092
n
oitacirbuL pmupliocitamotuaelbatsujdA
rabediuG
niahcwaS
dradnatS .ni41
lanoitpO .ni61,21
dradnatS
serutaef
eldn
aHpoT
draugdnahtnorF
ecivednoitarbiv-itnA
tuokcollortnocelttorhT
rehctacniahC
relffumcitylatacrotserrakrapS
MPRenignE
eldI008,2-004,2
tnemegagnEhctulC006,4-000,4
)TOW(elttorhTnepOediW000,41-000,31
kcabkciK
ytefaS
seru
taeF
raBediuGkciKwoLdrauGelbuoD
niahCwaSkniLdrauGkciKwoL
reveLekarBniahC/drauGdnaHtnorF
ekarBniahC
drauGkciK

6
DESCRIPTION
TheECHOproductyoupurchasedhasbeenfactorypre-assembledforyourconvenience.Duetopackagingrestrictions,
guide bar and saw chain installation and other assembly may be necessary.
Afteropening thecarton, checkfordamage. Immediately notifyyour retaileror ECHODealer ofdamaged or missing
parts. Use the contents list to check for missing parts.
CONTENTS
1 - PowerHead
1 - GuideBar
1 - KickGuard
1 - Hex Head Bolt
1 - Hex Nut
1 - SawChain
1 - InstructionManual
1 - SafetyManual
1 - WarrantyRegistrationCard
1 - LimitedWarranty Statement
1 - T-Wrench
1 - Echo Power Blend X TM 2-stroke oil sample
EMISSIONDATA
An Emission Control Label is located on the
engine. (Thisis an EXAMPLEONLY, informationon
labelvariesbyengineFAMILY).
PRODUCT EMISSION DURABILITY
The 300 hour emission durability compliance period is the time span selected by the manufacturer certify-
ing the engine emissions output meets applicable California and/or U.S. EPA emissions regulations,
providedthatapprovedmaintenanceproceduresarefollowedaslistedintheMaintenanceSectionofthis
manual.
X7503243100 X750010720
06/07
WARNING
Readrules forsafeoperationand instructionscarefully.ECHO providesanInstruction
Manualand a Safety Manual.Both must be read and understood for proper and safe
operation.
Chain Saw
Instruction Manual
MODELS : CS-330 MX4
EMISSION CONTROL
EPA Phase 2 / C.A.R.B. TIER III
The emission control system for the engine is EM/
TWC(EngineModificationand3-wayCatalyst)andfor
the fuel tank the Control System is EVAP (Evaporative
Emissions).Evaporativeemissionmay be applicableto
Californiamodelsonly.
IMPORTANTENGINEINFORMATION
ENGINEFAMILY: 7EXHS.0334KB DISPLACEMENT: 32.6CC
EMISSIONCOMPLIANCEPERIOD : 300HRS.
THISENGINE MEETS U.S. EPA PH2EXH AND 2007 AND
LATERCALIFORNIAEXHAND EVAP EMISSION REGULA-
TIONS FOR S.O.R.E. REFER TO OWNER'S MANUAL FOR
MAINTENANCESPECIFICATIONSANDADJUSTMENTS.

7
1. Handguard
(Chainbrakeactuatinglever)
2. Ignition/ChokeLever
3. Throttlecontroltrigger
4. Throttlecontrollockout
5. Aircleanercover
6. Pull starter
7. Fronthandle
8. Oil tank cap
9. Fuel tank cap
10. Saw chain
11. Guidebar
12. Sprocketguard
13. Catalyticmuffler
14. Spark Plug
15. Rear(Top)Handle
NOMENCLATURE OF PARTS
10
11
12
13
14
P/NX503008690
P/N89019130131
P/NX5240001710
P/N89022839131
P/N89016006361
15
12
34
5
6
7
8
9
CS-330MX4
P/NX524001970
P/NX524001980
P/NX503008690
P/NX505002060

8
P/N89019130131P/NX503008690
P/N89022839131
REPLACEMENT BARANDCHAIN
Note:There may be other replacement
components for achieving
kickback protection. For details,
please refer to the chain and bar
combination sheetshownin the
instruction manual.
P/NX524001710
GUIDE BAR*CHAIN*
PARTNO. TYPE LINKS
12” 12AOED3745 OREGON 91VG 45
14” 14AOED3752 OREGON 91VG 52
16” 16AOED3757 OREGON 91VG 57
P/N 89016006361
P/NX505002060
P/NX524001980 P/NX524001970
P/NX503008690
KICK GUARD® TO BAR INSTRUCTIONS
For saws with Kick Guard®P/N 2894901 and symmetri-
cal or asymmetrical low-kick type guide bars.
1. Install bolt (A) in rear hole (B) of Kick Guard®and
throughfront hole(C)in guidebar.
2. IMPORTANT:Dimple inKick Guard®(D) mustengage
recess in guide bar (E).
3. Tighten nut (F) and bolt (A) until snug. Make certain Kick
Guard®isflushagainst guide bar.
PREPARATION FOR USE
* Ifa decal cannotbe read, a new onecan be ordered
fromyourECHOdealer.

9
H
G
J
GUIDE BAR AND SAW CHAIN-INSTALL/
REMOVE
WARNING
SawChainissharp!Alwaysweargloveswhenhandling
assembly, otherwise serious personal injury may result.
1. Movechain brakelever (G) fullyrearward tounlock chain
brake.
IMPORTANT
Alwaysloosen guide barnuts before turningchain
tensionadjuster,otherwise clutch coverand tensioner will
bedamaged.
2. Removetwo guidebar nuts(H). Turn tensionadjustment
screw (J) counterclockwise 2 to 3 turns if bar and chain
areinstalled.
3. Pushclutch cover(K) forward, pullrear of cover out
slightly, then remove.
4. Removeguide barand saw chainif necessary.
NOTE:See“MAINTENANCEAND CARE”instructions
forguide bar, sprocket, andsaw chain maintenance.
5. Mount guide bar (L) on studs, and slide toward sprocket
to make saw chain installation easier. Install saw chain
(M)over clutch andplace around sprocketand guide
bar as shown, with cutters on top of guide bar facing
forward.
6. Align holes of clutch cover (K) with guide bar studs, and
tensionerpin (N) withlower guide bar adjuster hole.
Install cover, then press and hold rear of cover to fully
seat. Tighten guide bar nuts finger tight.
K
7. Turnsawoverandcheckbrakeband(O)forcorrect
position around clutch drum (P). If brake band is not in
placearounddrum,removeclutchcover,makesure
brake is released, and reinstall.
DANGER
Never operate saw if chain brake does not function
properly, otherwise saw damage and serious
personal injury could result. See “Testing the
Brake” instructions.
8. Adjust saw chain tension, as instructed in “Adjustment,
ChainTension”
P
ML
N
O

10
ADJUSTMENT, CHAIN TENSION
IMPORTANT
Alwaysloosen guide barnuts before turningchain
tensionadjuster,otherwise clutch cover and tensioner
willbe damaged.
1. Removeairfiltercoverandsparkpluglead.
2. Loosentwoguidebar nuts(H).
3. Hold the bar nose up, and turn the adjuster screw (J)
clockwise until the chain touches the bottom of the
bar.
4. Tightenboth guidebar nuts with bar noseheld up.
IMPORTANT!
Tighten guide bar nuts to 90 – 110 kgf/cm (80 – 95 in.
lbs.) DO NOT over-tighten nuts. Damage to saw
may result.
5. Pull the saw chain around the guide bar by hand.
Reduce chain tension, if you feel tight spots.
NOTE
Allchainsrequirefrequentadjustments.
6. Keep chain properly tensioned at all times.
7. Replacespark plugleadandairfiltercover.
HJ
FUEL AND LUBRICANT
WARNING
Movingparts can amputatefingers or causesevere injuries. Keep hands, clothing andloose objects awayfrom all
openings. Always stop engine, disconnect spark plug, and make sure all moving parts have come to a complete
stopbefore removingobstructions, clearingdebris, or servicingunit.
NOTICE: Use of unmixed, improperly mixed, or fuel older than 90 days, (stale fuel), may cause hard starting, poor
performance,orsevereenginedamageandvoidtheproductwarranty.ReadandfollowinstructionsintheStorage
section of this manual.
FUEL STATEMENT
WARNING
Alternativefuels,such asE-20(20% ethanol),E-85(85% ethanol)orany fuels notmeetingECHO requirementsare
NOTapprovedforuseinECHO2-strokegasolineengines. Useofalternativefuelsmaycauseperformanceprob-
lems,lossof power, overheating,fuelvapor lock,andunintendedmachine operation,including,butnot limitedto,
improperclutchengagement. Alternative fuelsmayalso cause prematuredeteriorationof fuellines,gaskets,
carburetorsandotherenginecomponents.

11
Gasoline - Use 89 Octane [R+M/2] (mid grade or higher) gasoline known to be good quality. Gasoline may contain up to
10%Ethanol(grain alcohol) or15%MTBE(methyl tertiary-butylether).Gasolinecontaining methanol(woodalcohol)is
NOTapproved.
Two Stroke Oil - A two-stroke engine oil meeting ISO-L-EGD (ISO/CD 13738) and J.A.S.O. FC/FD Standards must be
used.Echo brandpremium Power BlendXTM Universal 2-StrokeOil meetsthesestandards. Engineproblems dueto
inadequatelubrication causedby failureto usean ISO-L-EGD(ISO/CD 13738)and J.A.S.O.FC/FD certified oil,such as
EchopremiumPower BlendXTM, willvoidthe two-strokeenginewarranty. (Emission related partsonly arecovered for
two years, regardless of two-stroke oil used, per the statement listed in the Emission Defect Warranty Explanation.)
IMPORTANT
Echo premium Power Blend XTM Universal 2-Stroke Oil may be mixed at 50:1 ratio for application in all Echo engines
sold in the past regardless of ratio specified in those manuals.
Handling Fuel
WARNING
Fuel is VERY flammable. Use extreme care when mixing, storing or handling or serious personal injury may result.
• Useanapprovedfuelcontainer.
• DONOTsmokenearfuel.
• DONOT allowflames orsparks near fuel.
• Fuel tanks/cans may be under pressure. Always loosen fuel caps slowly allowing pressure to equalize.
• NEVERrefuelaunitwhentheengineisHOTorRUNNING!
• DONOT fillfuel tanks indoors. ALWAYS fillfuel tanksoutdoors overbare ground.
• DO NOT overfill fuel tank. Wipe up spills immediately.
• Securelytighten fuel tank cap andclose fuelcontainer after refueling.
• Inspect for fuel leakage. If fuel leakage is found, do not start or operate unit until leakage is repaired.
• Moveatleast 3m(10ft.) from refuelinglocationbefore startingtheengine.
MixingInstructions
1. Fillanapprovedfuelcontainerwithhalfoftherequired
amountofgasoline.
2. Add the proper amount of 2-stroke oil to gasoline.
3. Close container and shake to mix oil with gasoline.
4. Add remaining gasoline, close fuel container, and remix.
IMPORTANT
Spilledfuel is aleading cause ofhydrocarbon emis-
sions. Some states may require the use of automatic
fuelshut-offcontainerstoreducefuelspillage.
Afteruse
• DO NOT store a unit with fuel in its tank. Leaks can occur.
Returnunusedfueltoanapprovedfuelstoragecontainer.
Storage - Fuel storage laws vary by locality. Contact your
localgovernment forthe lawsaffecting yourarea. Asa
precaution,storefuelinanapproved,airtightcontainer.Store
inawell-ventilated,unoccupiedbuilding,awayfromsparks
andflames.
Fuel Mix Chart
50:1
).S.U()CIRTEM(
SAGLIOSAGLIO
.laG.zo.lFretiL.cc
1
2
5
6.2
2.5
8.21
4
8
02
08
061
004
IMPORTANT
Stored fuel ages. Do not mix more fuel than
you expect to use in thirty (30) days, ninety
(90) days when a fuel stabilizer is added.
IMPORTANT
Storedtwo-stroke fuelmay separate. AL-
WAYSshakefuelcontainerthoroughlybefore
each use.

12
CHAIN LUBRICANT
Properlubrication ofthe chainwhile inoperation reducesfriction
between the chain and the guide bar to a minimum and assures
alonger service life.
• Use bar and chain oil of high quality for this purpose.
• Donot useused or reclaimedoil toavoid variousoiler
problems.
• Use ECHO bar and chain oil.
• When ECHO bar and chain oil is not available:
Use motor oil, etc.
• Usebar andchain oil of the followinggrades:
SAE NO. 30 ..... in summer
SAE NO. 10 ..... in winter or when cutting resinous trees.
• Whenrefueling, alsorefill chain oil.
FUELTANK OILTANK
TANKINDICATION
STARTING COLD ENGINE
WARNING
Makesurebarandchainarenottouchinganythingwhenstarting
the saw.
1. Movechainbrakelever(E)fullyforwardto lock chain brake
beforestarting.
2. Fill the fuel tank with fuel. Do not over fill.
3. Fill the chain oil tank with lubricant. Do not over fill.
4. Moveignition/chokelever(A)forwardto“closechoke”( )
position.
5. Lay unit on a flat, clear area and keep bar and chain clear of
all obstacles. Hold top handle with one hand, and depress
throttle trigger lockout (C), but do not depress throttle trigger
(D).
6. Pull starter handle (F) several times until engine starts, or first
starting sound is heard. (7 pulls maximum)
7. Moveignition/choke lever backto “run” (I ) position(B). (Do
not move to “Stop” position [G].) If necessary, start the
engine.
NOTE
If engine does not start after 3 pulls with choke in “run” ( I )
position, repeat cold start instructions 4-6.
OPERATION A
C
D
EC
F
IMPORTANT
This saw features a combination ignition/choke switch that
automatically sets the throttle speed to fast idle for quick
starting. Do not squeeze trigger during cold starts until
after unit has started, or fast idle and choke settings will
be released, and engine may not start.
B
C

13
G
E
C
8. After engine starts, wait 5 seconds then depress and release
throttletrigger (D). Allowunit to warmup at idlefor several
minutes.
NOTE
Do not pull starter rope out to the maximum possible position.
Do not allow recoil handle to snap back against the casing.
STARTING WARM ENGINE
1. Ensure that there is fuel and chain oil in the tanks.
2. Movechainbrakelever(E)fullyforwardto lock chain brake
beforestarting.
3. Lay unit on a flat, clear area and keep bar and chain clear of all
obstacles.Holdtophandle withone hand, anddepress throttle
trigger lockout, but do not depress throttle trigger.
4. Moveignition/chokelever(A)forwardto“Run”position(I).
5. Pullstarterhandle.
NOTE
If engine does not start after 5 pulls, use cold start procedure.
A
C
E
RUNNING
WARNING
Thesawchainshouldnotmoveatidle,otherwiseseriouspersonal
injury may result.
NOTE
Ifsaw chainmoves,adjust carburetoraccording to“Carburetor
Adjustment” instructions in this manual, or see your dealer.
• After engine starts, allow it to return to idle and warm up before
using.
• Movechainbrakeleverfullyrearwardtounlockchainbrake.
• Press throttle control lockout then gradually squeeze throttle
triggertoincreaseenginespeed.
• Sawchainstartsmovingwhentheenginereachesapproximately
4200rpm.
• Ensureproperaccelerationandlubricationofchainandbar.
• Do not run the engine at high speed unnecessarily.
• Be sure that saw chain stops moving when throttle trigger is
released.
A
D

14
A
E
D
STOPPING
1. Releasethrottletrigger(D)andmovelever(A)rearwardtoSTOP
(O)position.
2. Movechain brakelever (E) fullyforward tolock chainbrake.
NOTE
Ifengine doesnotstop, moveignition/choke leverforward to
choke position ( ) to stop engine. Return the unit to your
authorizedECHO dealer to check and repair stopswitch before
startingthe engineagain.
WARNING
Read the ECHO “CHAIN SAW SAFETY MANUAL” included
with your chain saw for additional cutting and safety instruc-
tions. Failure to obey all instructions may result in serious or
fatalinjuries.
In all circumstances the operation of the chain saw is a one-
man job. It is difficult at times to take care for your own safety,
so don’t assume the responsibility for a helper as well.After
youhave learned thebasic techniques ofusing thesaw, your
best aid will be your own good common sense...
The accepted way to hold the saw is to stand to the left of the
sawwith yourleft hand onthe fronthandlebar andyour right
handon the rearhandle so youcan operate thethrottle trigger
withyour rightindex finger.
Before attempting to fell a tree, cut some small logs or limbs.
Becomethoroughly familiar with the controlsand there-
sponses of the saw.
Start the engine, see that it is running properly. Squeeze the
trigger to open the throttle wide open and start the cut. If the
chainis properlysharpened, the cutting should berelatively
effortless. It is not necessary to press down hard to make the
saw cut. Pushing the saw too hard will slow the engine and
cutting will actually be more difficult.
NOTE
Somematerial mayadversely affectthe housings of your
ECHOchain saw.
(Example:PalmTreeAcid,fertilizer,etc.)Toavoid housing
deterioration,carefully removeallpacked sawdust around
clutchand guide bar areaand wash withwater.Coat metal
parts with light oil.
CUTTING INSTRUCTIONS
GENERAL

15
WARNING
Donot letthe tip ofthe bartouch anythingwhile the engine is
running.At cuttingspeed thechain ismoving ata highrate of
speed. Should the tip contact a limb or log while the chain is
moving,thetipwill bepushedupwardwith considerable force.
This is known as kickback.Avoid it!
WARNING
A falling tree can seriously damage anything it may hit - a
car, ahouse,a fence,apower line,oranother tree.There are
ways to make a tree fall where you want it, so first decide
wherethat is!
Beforecutting, clearthearea aroundthe tree.You willneed good
footing while working and you should be able to work the saw
withouthitting any obstacles.Next, selectapath ofretreat. When
the tree begins to fall you should retreat away from the direction
offall at a45 degreeangleand atleast3m fromthe trunk toavoid
the trunk kicking back over the stump.
Begin the cut on the side to which the tree is to fall. Cut a notch
about 1/3 of the way into the tree as shown. The position of this
notch is important since the tree will try to fall “into” the notch.
The felling cut is made on the side opposite the notch and at a
level about 2” above the bottom of the notch. Do not try to cut
throughto thenotch with thefelling cut.The remaining wood be-
tween the notch cut and felling cut (about 2”) will act as a hinge
when the tree falls, guiding it in the desired direction. When the
treestarts tofall, killthe engine, placethe sawon theground and
make your retreat quickly.
To fell big trees with a diameter exceeding twice the bar length,
startthenotching cutsfromone sideanddraw thesawthrough to
the other side of the notch. Start the back cut on one side of the
tree, pivoting the saw through to form the desired hinge on that
side.
Thenremovethe sawforthesecond cut.Insertthesaw inthefirst
cut, very carefully so as not to cause kickback. The final cut is
made by drawing the saw forward in the cut to reach the hinge.
FELLING A TREE
Fellingcut
Kickback
2”
45°
2”
DIRECTION
OFFALL
Direction of fall Hinge
First cut
Notch
Second cut
One-third tree
diameter

16
LIMBING Limbing a fallen tree is much the same as bucking. Never
limb on the tree that you are standing. When limbing, cau-
tion is the word. Be careful of the tip touching other limbs.
Always use both hands.
Don’tcutwith thesaw overhead orthe barina verticalposi-
tion. If the saw should kick back you may not have good
enoughcontrol toprevent possibleinjury.
Bucking is the sawing of a log or fallen tree into smaller
pieces. There are a few basic rules which apply to all
buckingoperations.
Keep both hands on the handles at all times.
Support logs if possible.
When cutting on a slope or hillside, always stand uphill.
Keep in mind that the wood is heavy and that it will bend
andpinch thesaw ifimproperly supported.
The trunk will weaken at the point where you make the cut
unlessthe treeislying onperfectly flatground orsupported
asshown.
Ifyou makethe cutwith thetree on theground, don’tlet the
saw’s chain dig into the earth; it is harmful for the saw, and
youstandagood chanceofbeing struck byflying debris.To
cutthetrunk,use the buckingandtwo-cutsequenceshown.
The first cut should be no deeper than one-third the trunk
diameter.
BUCKING
Uphillposition
FINISHCUT
FIRSTCUT Board or flat stones

17
WARNING
KICKBACK IS DANGEROUS
Kickback is generated when the rotation of the chain is
arrestedfor somereason. Themost dangerous effect of
this action occurs when the nose of the bar contacts
anotherobject, thechain ismomentarily stopped and all
theenergyoftheenginethrowsthebarupwardsandback-
wardstowardsthe operator.
The chain saw industry and government agencies have
attempted to prescribe various safety devices, but the
best protection is to avoid kickback.
Comply with the Safety Precautions as listed on page 2
and 3 of this manual.
KICKBACK
• Improper thrust cutting.
• When the bar nose hits another tree, etc.
MAINTENANCE AND CARE
WARNING
Movingparts can amputatefingers or causesevere injuries. Keep hands, clothing andloose objects awayfrom all
openings. Always stop engine, disconnect spark plug, and make sure all moving parts have come to a complete
stopbefore removingobstructions, clearingdebris, or servicingunit.
YourECHOunitis designed to provide manyhoursoftroublefreeservice.Regularscheduledmaintenancewillhelpyour
unit achieve that goal. If you are unsure or are not equipped with the necessary tools, you may want to take your unit to
anECHOServiceDealerformaintenance. TohelpyoudecidewhetheryouwanttoDO-IT-YOURSELForhavethe
ECHO Dealer do it, each maintenance task has been graded. If the task is not listed see your Echo dealer for repairs.
SKILL LEVELS
Level 1= Easy to do. Most required tools come with unit.
Level 2= Moderatedifficulty. Somespecialized tools may be required.
Level 3= Experiencerequired.Specializedtoolsarerequired.ECHOrecommends
thattheunit bereturnedto yourECHOdealer forservicing.
ECHO offers REPOWERTM Maintenance Kits and Parts to make your maintenance job easier. Just below each task
headingare listedthe various partnumbers requiredfor thattask. See yourECHO dealerfor theseparts.

18
/TNENOPMOC
METSYS
ECNANETNIAM
ERUDECORP
D'QER
LLIKS
LEVEL
ROYLIAD
EROFEB
ESU
YREVE
LEUFER
3
SHTNOM
09RO
SRUOH
6
SHTNOM
072RO
SRUOH
YLRAEY
006
SRUOH
serudecorPecnanetniaMrelaeDohcEdednemmoceR
troPtsuahxErednilyCnobraceD/naelC/tcepsnI 3C/I
serudecorPecnan
etniaMflesruoY-tI-oD
retliFriAecalpeR/naelC/tcepsnI 1C/I*R
reliOcitamotuAtsujdA/tcepsnI 1I
reniartSliOecalpeR/
tcepsnI 1*R/I
skael,metsySleuFecalpeR/tcepsnI 1)1(I*)1(R/I
reniartSleuFecalpeR/tcepsnI 1I*R
seloHliO&raBediuGnae
lC/tcepsnI 1C/I
tekcorpSecalpeR/tcepsnI 2*R/I
gulPkrapSecalpeR/naelC/tcepsnI 2C/I*R
metsySgnilooCnaelC/tcepsnI 2C/I
rotserrAkrapSrelffuMecalpeR/naelC/tcepsnI 2*R/I
epoRretratSlioceRecalpeR/tcepsnI 1*R/I
stloB/stuN/swercSe
calpeR/nethgiT/tcepsnI 1*R/I
SEDOCRETTELERUDECORPECNANETNIAM NAELC=C,ECALPER=R,TCEPSNI=I:
-ETONTNATROPMI deriuqerfoycneuqerfehtenimretedlliwecneirepxeruoydnaesulaut
cA.mumixameranwohsslavretniemiT
.ecnanetniam
:SETONERUDECORPECNANETNIAM
)1( .ytirgetninoissimeniatniamotecnanetniamralugereriuqerTONODsknatleufevitaropavewoL
*..noitcepsnignir
udraewroegamadfognidnifehtnodesaberaecalperotsnoitadnemmocerllA
MAINTENANCE INTERVALS
AIR FILTER
1. Close choke (Cold Start Position [ ]). This prevents dirt from
enteringthecarburetorthroatwhentheairfilterisremoved.
Brushaccumulateddirtfromaircleanerarea.
2.Removeairfiltercover.Brushdirtfrominsidecover.
3.Removeairfilterand lightlybrushdebrisfromfilter.Replace filter
ifit is damaged, fuelsoaked, very dirty,or deformed.
4. Installairfiltercover.
AUTOMATIC OILER
• Thedischargevolumeoftheautomaticoilerisadjustedto6to7cc/
min(@ 7000 rpm) priorto shipment fromthe factory.
• Always check oil discharge when in use.
• Turnadjustingscrew(D)counter-clockwisetoincreaseoilvolume,
clockwiseto decrease oil volume.
D

19
B
A
C
OIL STRAINER
• Checkperiodically.
1. Do not allow dust to enter oil tank.
2. Cloggedoil strainerwill affect thenormal lubricatingsystem
3. Using a wire bent into the shape of a hook, pull strainer out
throughoil portand inspect strainer.
4. If the strainer is dirty, clean with suitable cleaning fluid.
5. If the inside of the oil tank is dirty, rinse with suitable cleaning
fluid.
FUEL STRAINER
1. Do not allow dust to enter fuel tank.
2. Cloggedstrainer willcause difficulty in starting engineor
abnormalitiesinengineperformance.
3. Using a wire bent into the shape of a hook, pull strainer out
throughgas port, andinspect strainer.
4. If the strainer is dirty, clean with suitable cleaning fluid.
5. If the inside of the tank is dirty, rinse with suitable cleaning
fluid.
GUIDE BARS AND OIL HOLES
• Followinstructionsfor“Guide Bar andSawChain–Install/Re-
move”.
• Cleanaftereachuse
- Cleanthegrooves(A)oftheguidebarwithasmallscrewdriver.
- Clean oil holes (B) with a wire.
NOTE:SymmetricalshapedGuideBarsshouldbeinverted
each time the chain is removed to extend guide bar life.
SPROCKET
• Adamagedsprocket(C)willcauseprematuredamageorwearof
sawchain.
• Cleansprocket, clutchand barmount areabefore installationof
bar.
• Checksprocketwhenyouinstallnewchain.Whenouterdiameter
of sprocket is worn 0.5mm (.020”) or more, replace it.
IMPORTANT
Sometreesapandresinsarecorrosive.Thoroughlywashtheguide
barandsprocketareasaftereachuse,thencoatmetalpartswith
light oil.
Worn : 0.5 mm
C

20
SPARK PLUG
• Checkperiodically.
IMPORTANT
Useonly NGKBPM-8Y spark plug(BPMR-8Y inCanada) otherwise
severeenginedamagemayoccur.
1. Removeaircleanercover.
2. Removesparkplugleadandsparkplug.
3. Gap = 0.65 mm (0.026 in)
4. Replace if electrode is worn, or if the insulator is fouled by oil or other
deposits
5. Torque = 150 – 170 kg/cm (130 – 150 in. lb.)
IMPORTANT
Donotover-torque
COOLING SYSTEM CLEANING
NOTE
See“GuideBarandSawChain-Install/RemoveInstructionsfor
sprocketguardremoval/replacementinstructions.
Muffler Side
1. Removeairfiltercoverandremovesparkpluglead.
2. Removetwoguidebarnutsandremovesprocketguard.
3. Removethreemufflercoverscrewsandremovemufflercover.
4. Usinga stiff bristlecleaning brush (donot use a metalbrush), remove
debrisfromcylinderfinsinmufflerarea.
5. Assemblecomponentsinreverseorder
Starter Side
1. Removeairfiltercoverandremovesparkpluglead.
2. Removeplasticpluginsidehandlemount(D),andremoveside
handlemountingscrew.
3. Removefourstartercoverscrewsandremovestartercover.
4. Usinga stiff bristlecleaning brush (donot use a metalbrush), remove
debrisfromflywheeland ignition coil area.
5. Assemblecomponentsinreverseorder.
D
MUFFLER SPARK ARRESTOR
IMPORTANT
Carbondeposits inmuffler willcause adrop in engine output and
overheating. Sparkarrestorscreen mustbechecked periodically.
1. Removeairfiltercoverandremovesparkpluglead.
2. Removetwoguidebarnutsandremovesprocketguard.
3. Removethreemufflercoverscrewsandremovemufflercover.
4. Removesparkarrestorscreencover,gaskets,andscreenfrom
mufflerbody.
5. Cleancarbondepositsfrommufflercomponents.
NOTE
When cleaning carbon deposit, be careful not to damage the catalytic
elementinsidemuffler.
6. Replace screen if it is cracked, plugged, or has holes burned
through.
7. Assemblecomponentsinreverseorder.
Other manuals for CS-330MX4
1
Table of contents
Other Echo Chainsaw manuals

Echo
Echo CS-500VL User manual

Echo
Echo CS-310 User manual

Echo
Echo CS-2511TES User manual

Echo
Echo CS-4400 User manual

Echo
Echo CS-600 User manual

Echo
Echo CS-6701(CE) Instruction Manual

Echo
Echo CS-352 User manual

Echo
Echo CS-310ES Mounting instructions

Echo
Echo CCS-58V User manual

Echo
Echo CS-2511T User manual

Echo
Echo CS-3000 TYPE 1E User manual

Echo
Echo Instruction Manual User manual

Echo
Echo CS-400 - SERIAL NUMBER... Instruction Manual

Echo
Echo CS-370 User manual

Echo
Echo CS-500P User manual

Echo
Echo CS-370F User manual

Echo
Echo CS-440EVL Operating and installation instructions

Echo
Echo CS-5500 User manual

Echo
Echo CS-7310PW User manual

Echo
Echo CS-355T User manual