ED ON AIR Javolo User manual

Owner’s Manual
Tavolo
Owner’s Manual
Tavolo
PLEASE READ FIRST BEFORE RETURNING
Please call us for assistance at 1-619-449-2392
Our Customer Care Department is available:
Monday - Friday 8:30am to 5:30pm PST (11:30am to 8:30pm EST)
If you have any questions regarding assembly, parts, or operation,
please visit our website at www.berninifountains.com. You will nd instructional videos
on how to assemble and operate your Fountain and will keep you up to date on our
newest products. You can also email us here with any questions you may have.
This product comes with a one year limited warranty against materials and workmanship.
Please review the list of accessories included with your Fountain on the next page.
Please note, images of parts are not to scale with one another.

Contents
Step 1: Base, Fountain Platter and Water Pump
Step 2: Battery Installation
Connecting the Battery
Inserting Battery Compartment Door
Removing The Battery Compartment Door
Step 3: Setting Up Your Fountain
Fill Your Fountain
Operating Your Fountain
Dancing Water Feature Installation
Dancing Water Features and Their Spray Patterns
Troubleshooting and Maintenance
Cold Water Storage
Recharging the Battery
Cleaning the Water Pump’s Parts
Water Pump Air Filters
Water Pump Impeller
Priming the Water Pump
Water Pump Connection
Cleaning Your Fountain
1
3
4
5
5
7
8
9
10
10
11
12
12
13
13
13
14
15
15
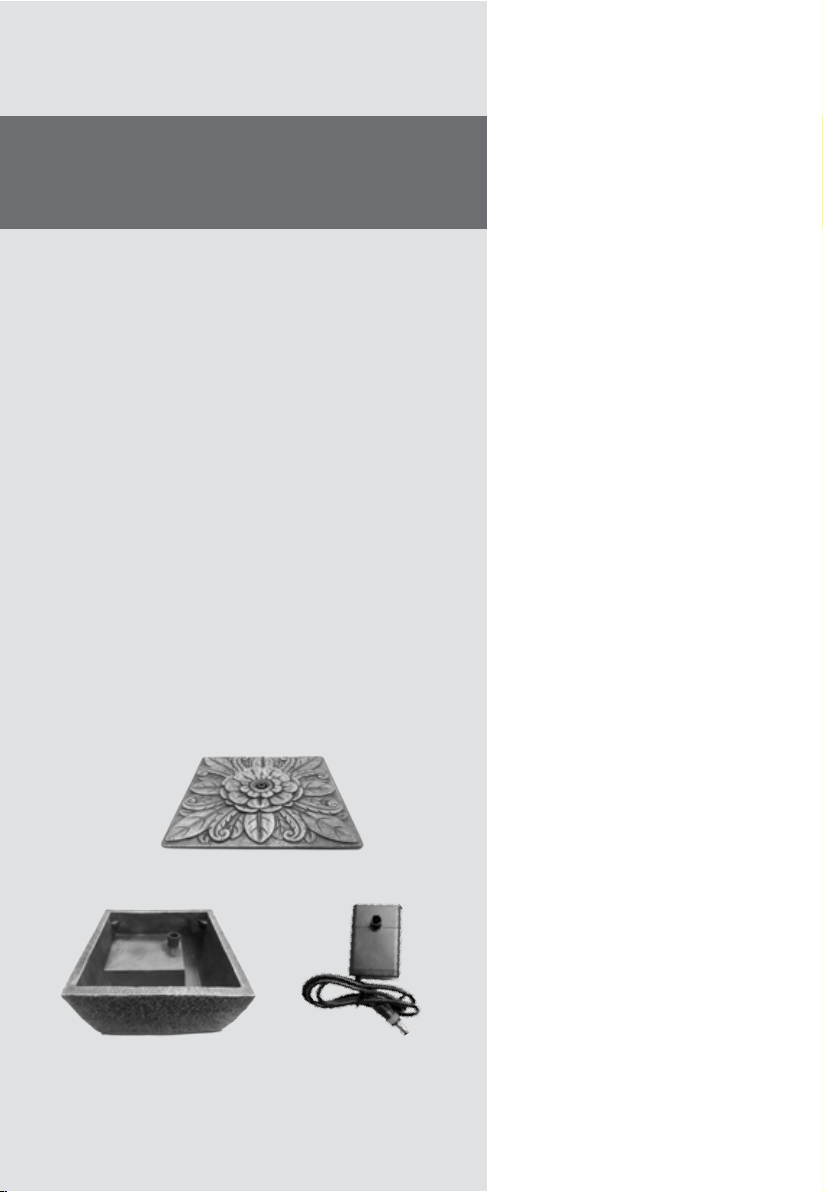
Parts For Your Fountain:
Garden Fountain Assembly
Battery Compartment Door
Fountain Platter

Rechargeable Battery
Battery Charger
Water Pump
(already connected to the tube inside
of Fountain Bowl)
Dancing Water
Attachments

1
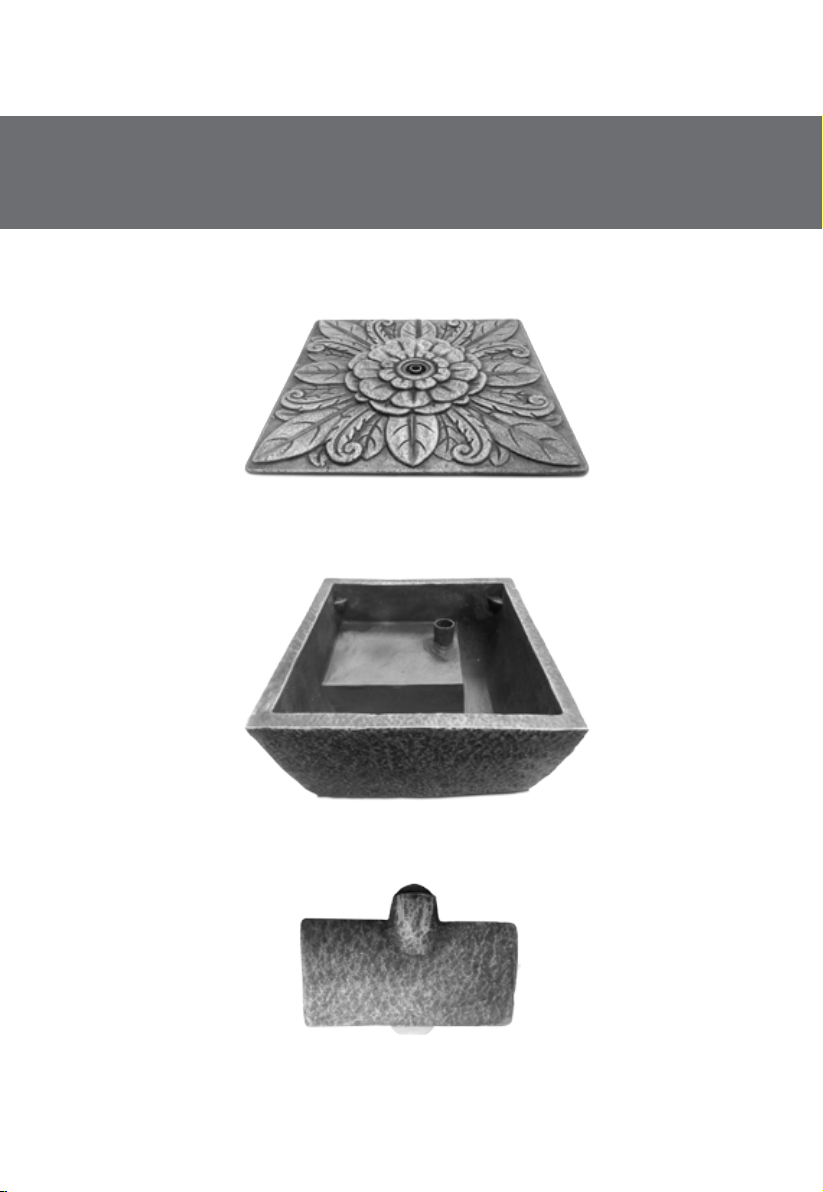
Base, Fountain
Platter and
Water Pump
You will need:
Water Pump
Step 1:
Fountain Platter
Base

2
Step 1: Rest the Fountain Platter
on the notches in the Fountain
Base as shown in the picture
above. Connect the rubber hose
on the bottom side of the Fountain
Platter onto the nipple on the outlet
side of the water pump.
Step 2: Set the Fountain Platter
down onto the Fountain Base.
Note: After the fountain platter has been con-
nected to the water pump tube and when setting
the Fountain Platter onto the fountain base ensure
that the water pump sits at on the bottom of the
base as shown in the image above. This will help
prevent air from entering pump.
Remember! If you ever need help, you can contact our customer care at:
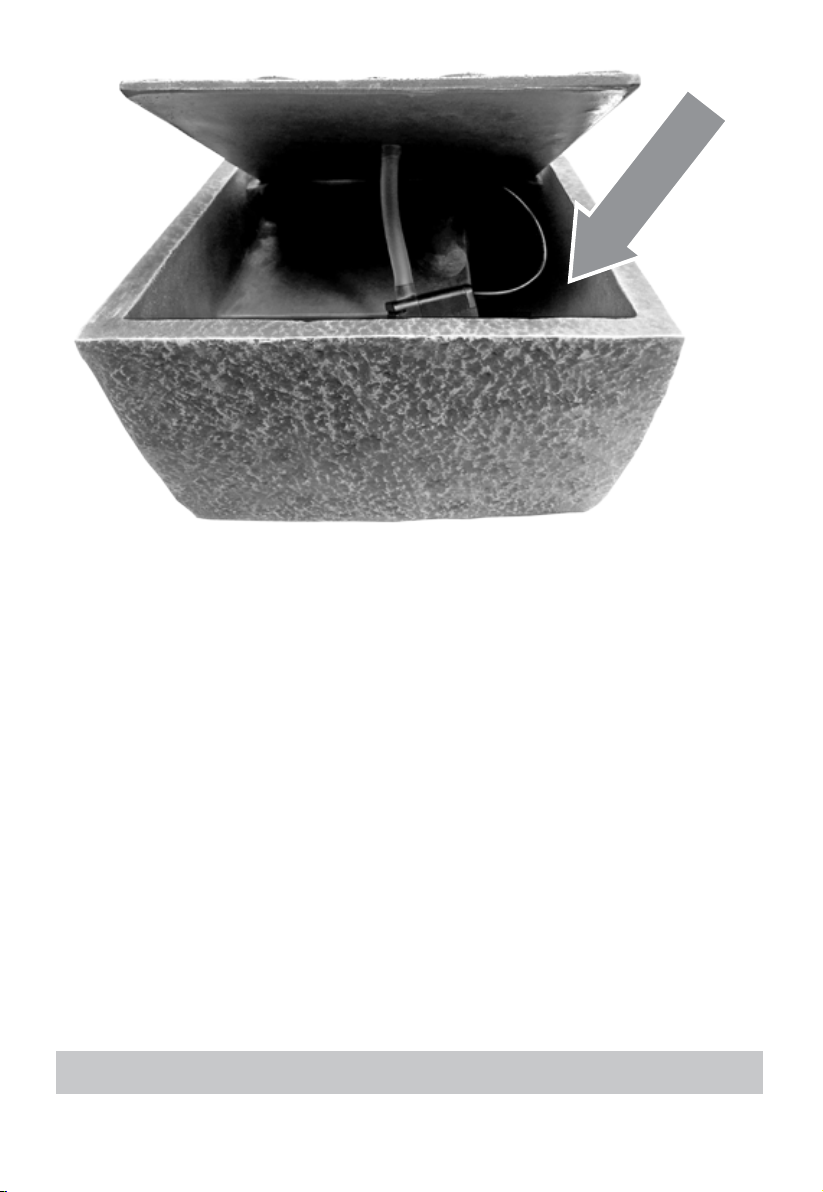
The water pump has been installed at the factory. Ensure that there is about 6 to
7 inches of slack in the cord between the water pump and the rubber plug so the
pump will sit on the bottom of the Fountain Base and will be covered by water
when the Fountain is assembled, lled with water in later steps.
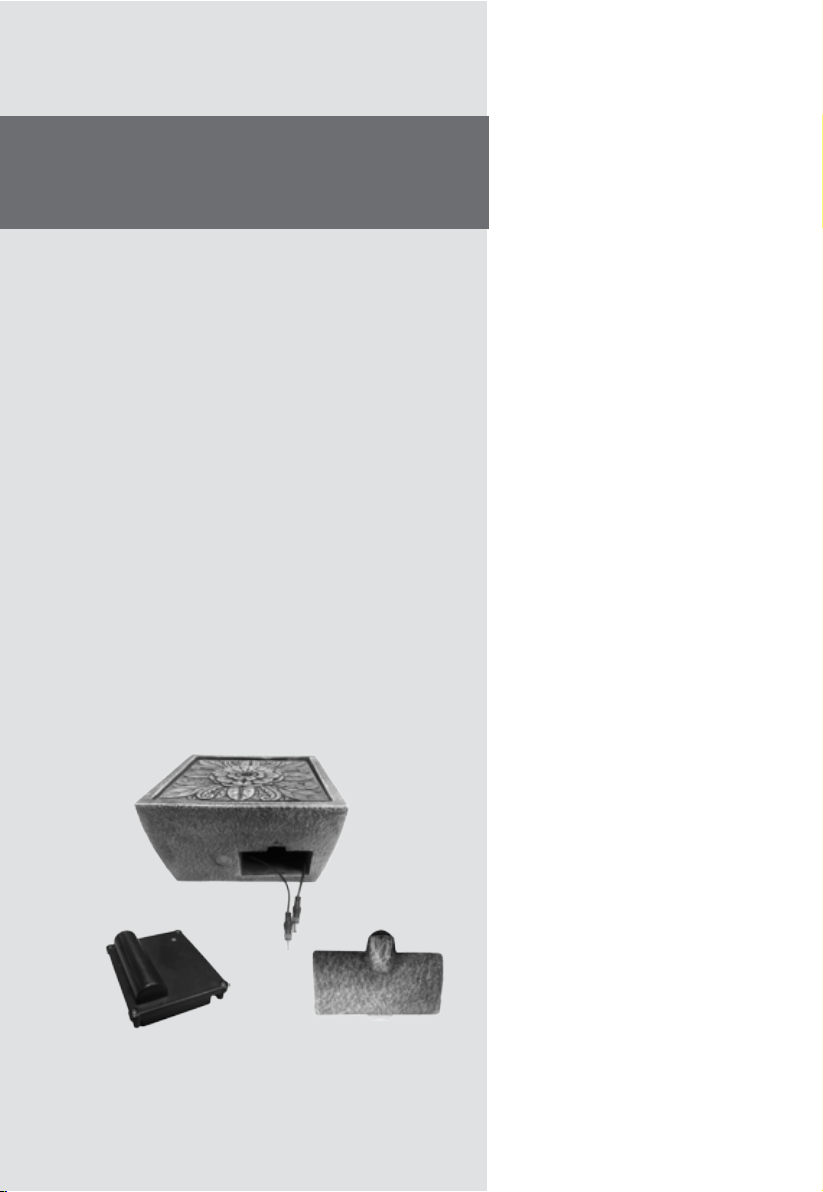
Fountain Water Pump and Platter
At this point, your Fountain should look like the image
above. Go to the next page to continue setting
up your new Fountain.
In the next step, you will install the
Square Fountain Platter onto the
Fountain Base and connect the
water pump.
3
Fountain
Assembled
Step 2:
Battery
Installation
Rechargeable
Battery
Battery
Compartment
Door
You will need:
4
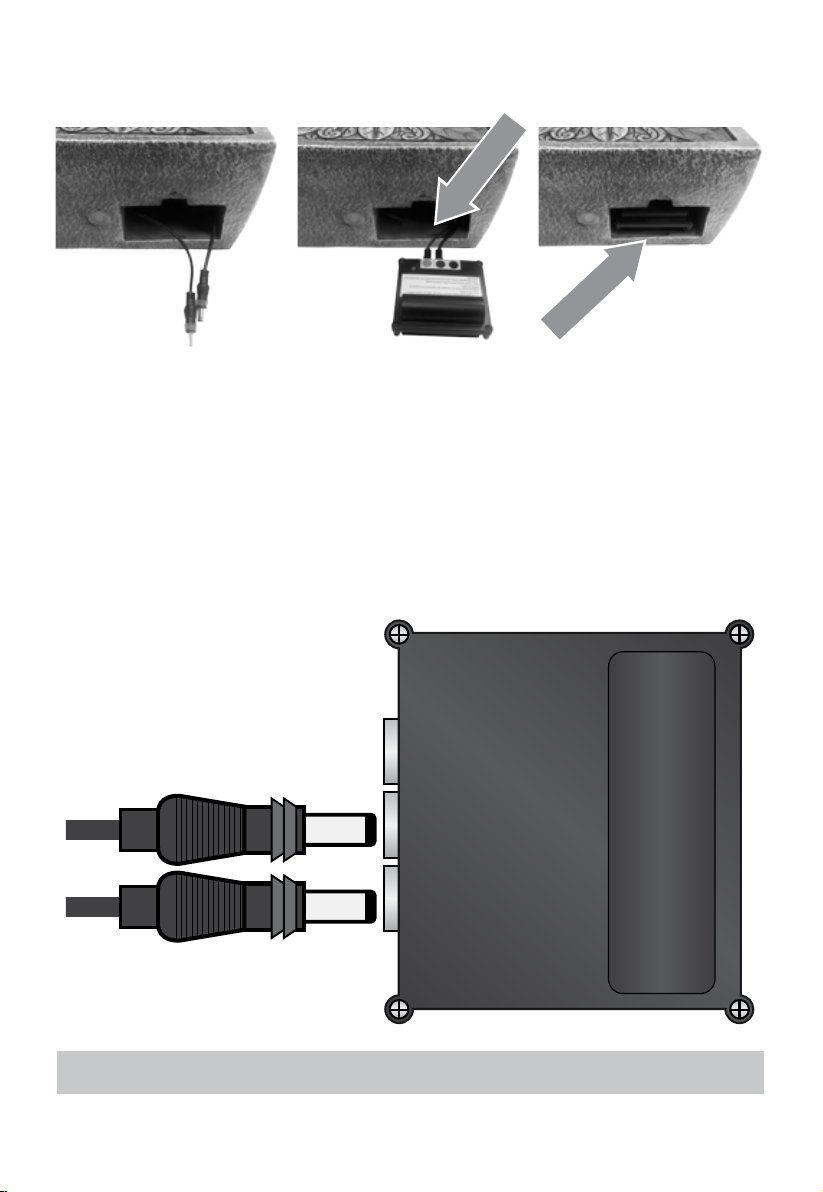
Connecting The Battery
Step 2: Connect the color
coded cords to their corre-
sponding receptacles labeled
on the battery.
NOTE: Use the diagram below
for more help on connecting
the battery
Step 3: Place the battery
inside of the compartment as
shown in the picture.
Step 1: In the open battery
compartment you will see two
cords that you must connect
to the battery to use your
Fountain.
If you do not see the two
cables inside the battery
compartment, you may need
to reach back and gently pull
them out until they are outside
the battery compartment.
RED
GREEN
BLACK
Remember! If you ever need help, you can contact our customer care at:
Black W/Green Rubber Ring:
Water Pump
Black W/Red Rubber Ring:
Button
5
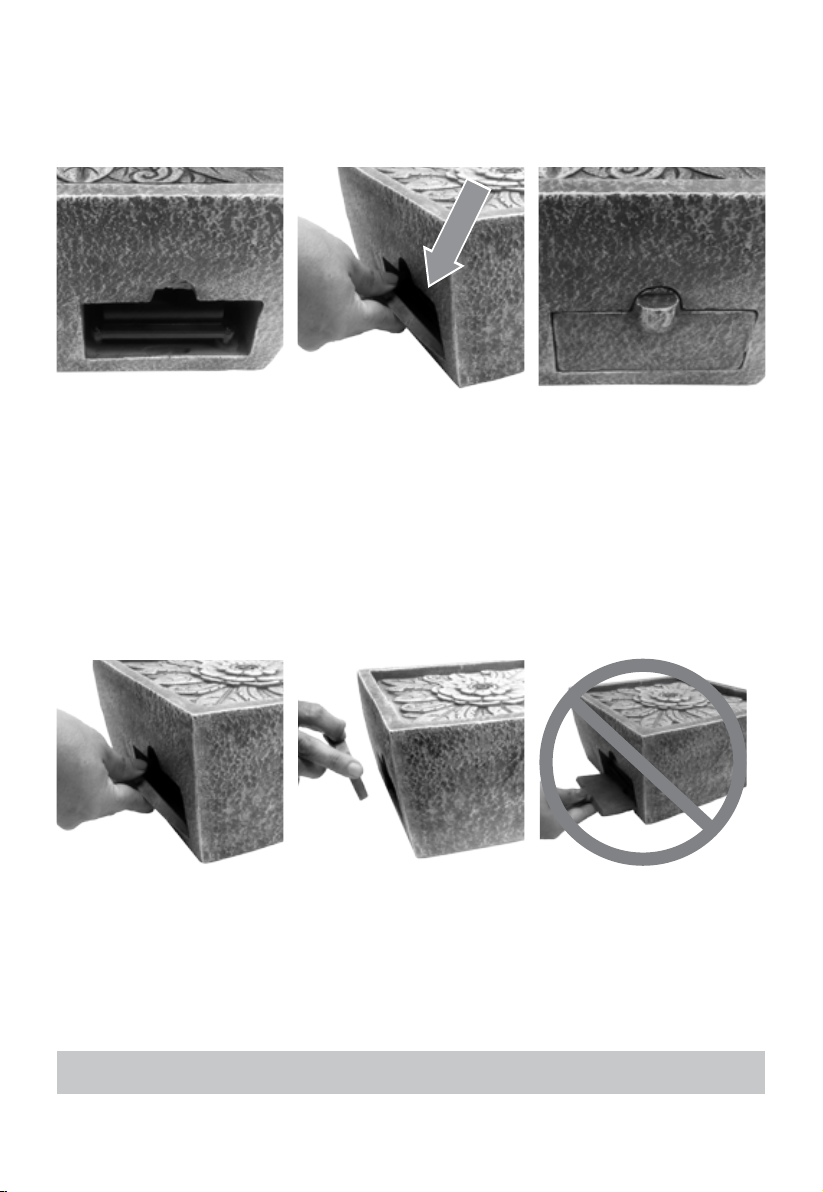
Step 1: Ensure any wires are
not hanging outside of Fountain
base and impede the closure
of the battery cover.
Step 2: Ensure the tab on
the bottom of the battery door
is lined up with the slot in the
bottom of the Fountain battery
door opening.
NOTE: The battery door has a
strong magnet on the top that
holds the battery door in place.
Step 3: Once the door is in
place battery door will be ush
with Fountain base.
Inserting Battery Compartment Door
After you have connected the cables inside your Fountain to the rechargeable battery, you should
then place the battery compartment door on the base of the Fountain.
Remember! If you ever need help, you can contact our customer care at:
Step 1: Carefully disconnect
the battery compartment
door from the base by gently
pulling outward from the top.
Step 2: Then, pull the
battery compartment door
up and out to remove from
the base.
DO NOT OVEREXTEND THE
BATTERY COMPARTMENT
DOOR BY PULLING DOWN!
This may cause damage to
your new Fountain.
Removing The Battery Compartment Door

6
Remember! If you ever need help, you can contact our customer care at:
At this point, your Fountain should look like the image
above. Go to the next page to continue setting
up your new Fountain.

7
Garden Fountain Assembly
Water to ll
your Fountain
Setting Up
Your Fountain
Step 3 :
You will need:
8
Fill Your Fountain
Fill the Fountain Bowl with water until the water is about 1 inch (2.54 centimeters) from
the notches that the Fountain Platter sits on.
After you have lled your Fountain, grab both sides of the Garden Fountain Assembly and
quickly shake your Fountain for ten seconds. This is to dislodge any air bubbles that may
be caught in your water pump. Press the B button once to turn your Fountain on. Water
should be owing from the top of your Fountain. If water is not owing, press and hold
the button until pump stops to turn your Fountain o, and repeat the step above.
IF YOUR FOUNTAIN IS MAKING A LOUD NOISE, DON’T PANIC!
This just means that there are air bubbles stuck in the water pump. Your pump will not
be harmed, and you can easily x this issue. You can try priming the Fountain again by
repeating the steps above, however, if the problem still persists, you can nd the solution
on page 14.
Remember! If you ever need help, you can contact our customer care at:

9
Operating Your Fountain
The on-board control panel is located on the side of the Fountain. See the diagram
below to see how the all-new on-board controls work for your Fountain.
To Program Time
1. When the system is OFF, press the button
ONCE to turn system on for one hour.
2. When the system is OFF, press the button
TWICE to turn system on for two hours.
3. When the system is OFF, press the button
THREE TIMES to turn system on for three
hours.
4. When the system is OFF, press the button
FOUR TIMES to turn system on for Four
hours.
5. When the system is ON, press and hold
the button for 3 seconds to shut o pump.
Remember! If you ever need help, you can contact our customer care at:
You can now try your Fountain to see if everything is work-
ing correctly! Turn your Fountain on and if you see water
owing from the outlet. If water is not owing, try priming
the water pump, instructions are on page 14.

10
Dancing Water Feature Installation
Dancing Water Features and Their Spray Patterns
Step 1: Attach any of the Danc-
ing Water Features to the water
outlet in the center of the top
compass tier.
Pirouette
(Outdoor Use)
Umbrella Spray
(Indoor Use)
Multi Spray
(Outdoor Use)
Warning: Dancing Water Attachments may cause
water to splash slightly around your fountain. If using
attachments, be sure to place your fountain accordingly.
Remember! If you ever need help, you can contact our customer care at:

11
Troubleshooting &
Maintenence
12
12
13
13
13
14
15
15
Cold Storage
Recharging the Battery
Cleaning the Water Pump’s Parts
Water Pump Air Filers
Water pump impeller
Priming the Water Pump
Water Pump Connection
Cleaning your Fountain
12
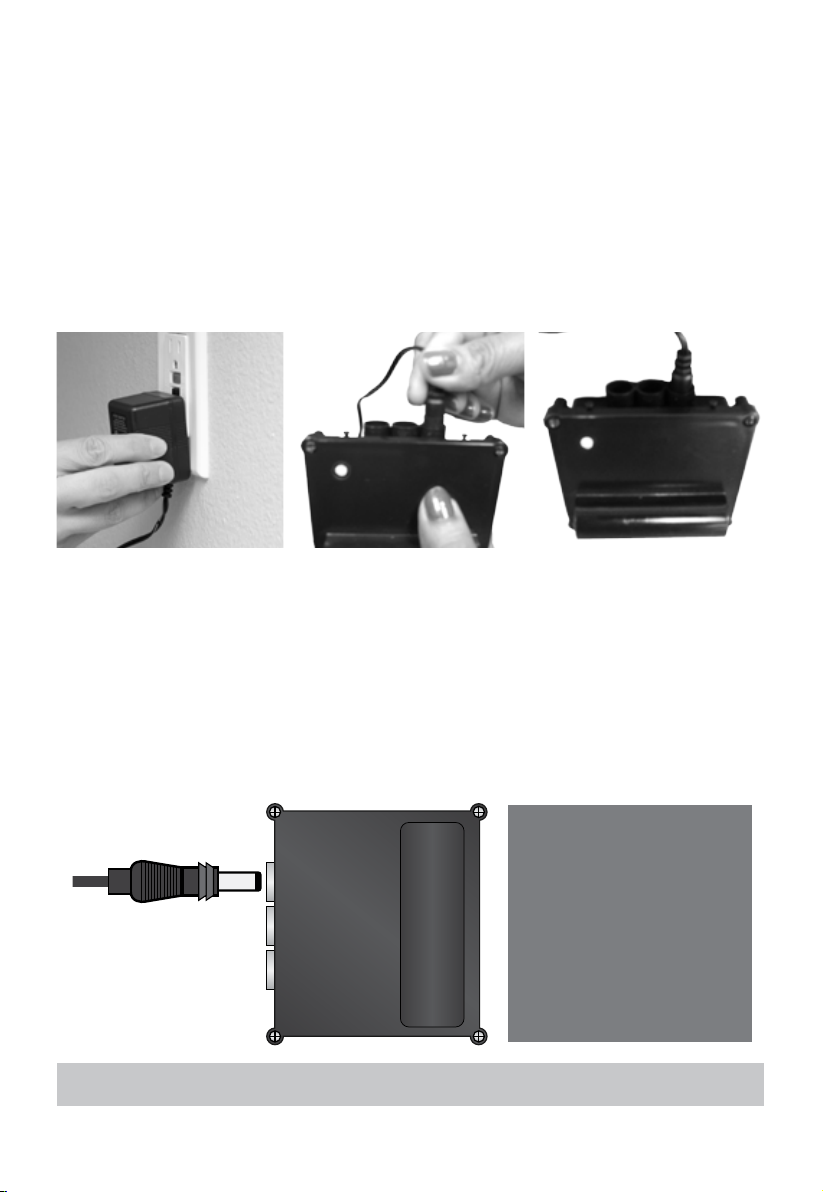
Recharging The Battery
After about 40 hours of run time, it may be time to charge the battery for your Bernini Fountain.
NOTE: Begin by disconnect-
ing and then removing the
battery from the base of your
Fountain.
Step 1: Plug the battery char-
ger into an electrical wall outlet.
Step 2: Remove the rubber
protective stopper inside of the
charging receptacle.
Then plug the cord running
from the battery charger to the
black labeled receptacle on the
rechargeable battery. While the
battery is charging, the light next
to the charger receptacle will
blink.
Step 3: Charge the battery for 12-
14 hours. When the battery is fully
charged, the light will stop blinking
and the light will be solid. At this
point, you can remove the battery
from the charger and plug the
battery into your Fountain.
RED
GREEN
BLACK
Connect the black
cord of the charger
to the black labeled
receptacle. Unplug
cords from battery
before charging.
Troubleshooting and Maintenance
Cold Storage
Drain the water from Fountain prior to the rst freeze of the season. Clean and dry the Fountain of
all water (page15). Remove the rechargeable battery and the water pump and bring it indoors. Be
sure to store the battery upright. (Now is a great time to clean the pump to remove any debris that
may have accumulated throughout the year. See page 13) Store in a warm dry area.
Remember! If you ever need help, you can contact our customer care at:
13
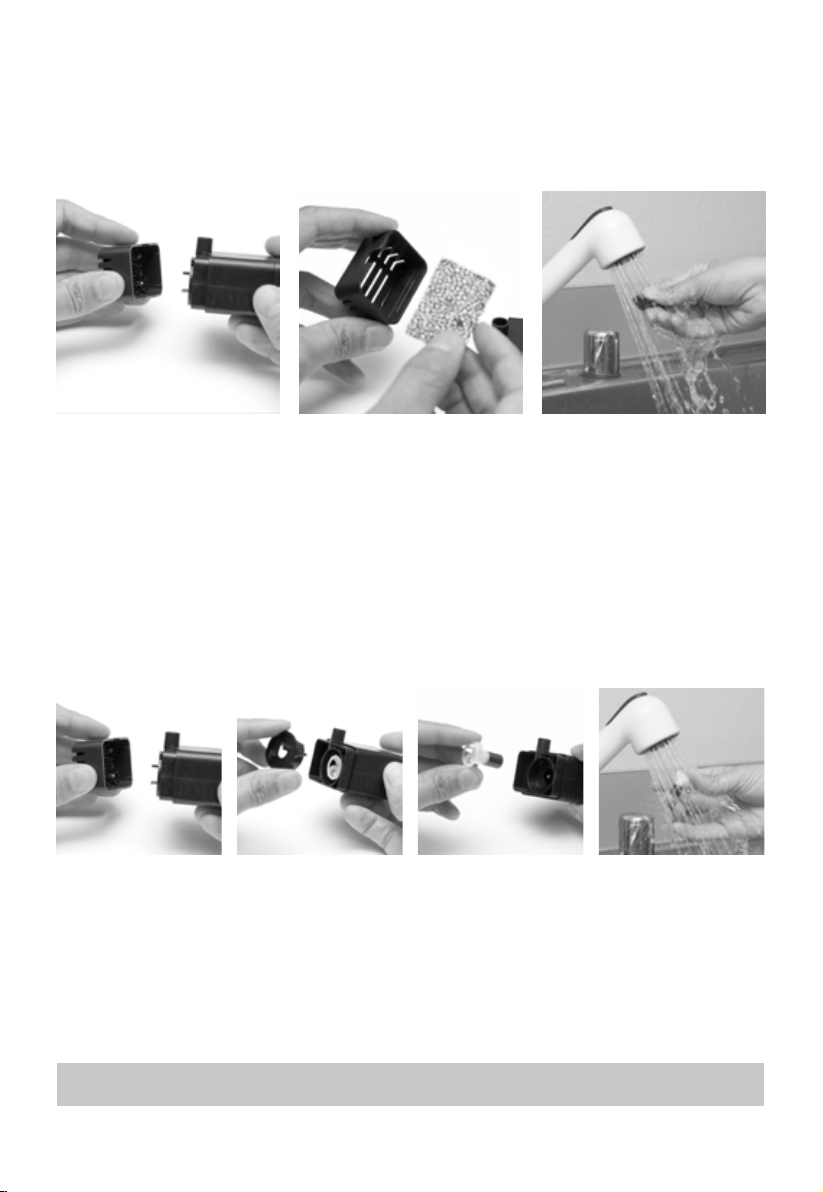
Cleaning the Water Pump’s Parts
Water Pump Air Filters
After about six weeks of usage, you may want to clean the water pump’s lter and impeller to keep
your Fountain in tip-top shape.
Water Pump Impeller
The impeller inside of the water pump is what pushes water up through your Fountain, allowing you
to enjoy the soothing sounds and wonderful sights of your Fountain. After long periods of usage,
this part will need to be cleaned to make sure your Fountain runs optimally.
Remove the front of
the water pump by
grabbing the sides of
the front panel and pull
it o the unit.
Remove the impeller
chamber cover. This is
tightly tted on to the
impeller chamber, but
will come o.
Remove the impeller
from its chamber.
Rinse the impeller until
all debris has been
removed. Then replace
the impeller in the im-
peller chamber, put the
impeller chamber back
on and then replace
the pump’s front panel.
Remove the front of the water
pump by grabbing the sides
of the front panel and pull it
o the unit.
Pull the water pump lter from
the front panel.
Wash the lters under run-
ning water until debris has
been removed. Then replace
the lters and pump’s front
cover.
Remember! If you ever need help, you can contact our customer care at:

14
Step 1: Submerge the water
pump into the water inside
the Fountain Bowl and lightly
shake the pump underwater to
release air bubbles inside the
vents on the water pump.
Step 2: Turn the Fountain
on and you should see water
owing from the pump. Let
the pump run for about ten
seconds and then turn your
Fountain o.
Step 3: Reconnect the water
pump to the feeder tube con-
nected to the Fountain Platter
and set down the Fountain
Platter onto the four built-in
ledges.
Remember! If you ever need help, you can contact our customer care at:
Is your Fountain making a loud noise or
do you not see water owing?
Try priming the water pump.
If you nd the water pump is running, but water is not owing from your Fountain, or
you hear a loud grinding noise coming from your Fountain, not to worry, you can try
priming the water pump:
Begin by turning your Fountain o. Firmly grasp onto the two
sides of the large bowl. Agitate the water by quickly shaking the
Fountain back and forth for about ve seconds. Stabilize your
Fountain and press the C Button to turn
your Fountain On.
If the problem still persists, repeat previous step 2 - 3 times.
This helps dislodge any air bubbles in your pump that may be
causing the problem.
If the problem still persists, try the method below:
Lift the Fountain Platter. You can now rest the Compass Tier on its side.
Now detach the water pump from the feeder tube inside the Compass Tier.
When removing the water pump, use caution when pulling the pump from the feeder
tube. Pinch the bottom of the feeder tube close to the pump with one hand and then
pull the water pump from the feeder tube with your other hand.
Table of contents
Popular Outdoor Fountain manuals by other brands

Garden Treasures
Garden Treasures F41075CA quick start guide

HoMedics
HoMedics ENVIRA SCAPE BELIEF Instruction manual and warranty information

Kelkay
Kelkay Easy Fountain Brick and Bowl Spills 45054L instructions

Blue Thumb
Blue Thumb Triple Stone Fountain installation manual

Elkay
Elkay 4410FR-FTN owner's manual

Elkay
Elkay FLEXI-GUARD EIOA4 1E Series Installation, care & use manual

Angelo Decor
Angelo Decor Farmstead AD99002 quick start guide

Britex
Britex DSRR installation guide

Urban
Urban SU600 Installation, operation and maintenance instructions

Campania International
Campania International Rittenhouse Fountain installation manual

BLOTZ
BLOTZ B20-ST-112 quick start guide

Gentworks
Gentworks GW-362 quick start guide


