manuals.online logo
Brands
  1. Home
  2. •
  3. Brands
  4. •
  5. Eden
  6. •
  7. Garden House
  8. •
  9. Eden 6 Series User manual

Eden 6 Series User manual

1
www.edenglasshouses.co.nz
www.edenglasshouses.com.au
New Zealand: 0508 333 654
Australia: 1800 316 654
2
What you need to know: Front
•Door track
•Track support arm
•Door posts
•Door panels
•Front sill
•Triangle
•Slopes
•X member
•Verticals
•Base
Ridge bar
slots in here
Gutter slots
in here
3
What you need to know: Back
•Triangle
•Bracing
•Side/rear sill
•Base
•Verticals
•Slopes
•X member
•Gussets
Ridge bar
slots in here
Gutter slots
in here
4
What you need to know: Middle
•
Side
glazing
bar
Side
bracing
Gutter
Side sill
5
Instructions overview:
1. Assemble 2 sides, back, front.
2. Put those four sides together. Keep braces and gussets
finger-tight only at this point.
3. Attach the roof and ridge.
4. Attach the roof ventilator
5. Move the whole structure into final position
6. Assemble the door
7. Glaze door while unattached to main structure.
8. Attach the glazed door.
9. If you have a shade kit, attach the aluminium brackets
(but obviously not the shade cloth yet).
10. Identify the position for the anchor legs and, if necessary,
dig holes for them.
11. Attach anchor legs.
12. Ensure the glasshouse is square and level.
13. Glaze all the lower level glass panels.
14. Attach the louvre on the back at this point (now it has
something to sit on) using preloaded bolts.
15. Glaze the louvre.
16. Glaze all the middle level glass panels.
17. Glaze all the roof panels.
18. Glaze front and rear small upper panels.
19. Tighten all bolts up.
20. Re-square and level and, if necessary, concrete in.
6
•
The Eden Model shown has the base included if you have alternative options chosen then refer to page 36.
All 6 series have the same assembly procedures, variations are in
the length, and the number of side & roof bars.
PLEASE READ RIGHT THROUGH BEFORE ASSEMBLY. SOME PRELOADING OF BOLTS IS REQUIRED
Note:
All bolts are standard 10mm
size.
Do not fully tighten all bolts
until the glasshouse has been
glazed. This is to allow for
movement of the frame if the
base is not completely level or
square.
7
Contents
Page
6 & 7 Front & Rear views
9-11 Wall Assembly
12-15 Rear Wall
16-18 Front Wall
19 & 20 Joining Extensions
21 & 22 Attaching sections together
23 & 24 Ridge Bar and Roof Bars
25 & 26 Louvre Assembly and Fitting
27-29 Roof Vent
30-33 Door Assembly
34 & 35 Door Fitting
36 Anchoring Glasshouse
37 End Caps
38 Alternative Base options
38 & 39 Glazing Layout & Instructions
8
You are now embarking on your journey to build your Eden
glasshouse! If the ride gets rough, don’t hesitate to contact us at
[email protected]. You will build the sides, back and front
separately and then join them together afterwards. Please start by
opening the box marked ‘middle’.
Good luck!
9
For ease of assembly, lay up with the bolt holes / tracks top side (like the internal view).
Note: the 6’4’ model
does not have any
side braces
Side Wall Assembly
The model shown here has the Eden
base kit attached. If you did not
purchase this, secure your side sills to
a concrete or wooden sleeper. (see
page 35 for base ideas)
Note:
All bolts are standard 10mm size.
Do not fully tighten all bolts until the
glasshouse has been glazed. This is
to allow for movement of the frame
if the base is not completely level or
square.
10
Parts needed:
•Gutter
•Side glazing bar (1490mm)
•Bracing angle (1598mm)
•Side sills
•Base
•Nuts and bolts
11
This view shows (A) excludes view
from the end with slot
View (B) bringing the base and
sill together, attaching the side
Glazing bar
View (C) shows the end
of the base/sill with the
slot, for joining on the
front and rear.
12
Insert an extra bolt /nut
in the two centre bars to
attach the louvre.
Rear Wall Assembly
13
View from outside
of glasshouse
14
Parts needed:
•Verticals (1490mm)
•Slopes (1197mm)
•Bracing angle (1563mm)
•Side sills (1835mm)
•Base (1835mm)
•6’ triangle
•Glazing bar (1990mm)
You will notice that the gussets, slopes, and verticals all have
either blue, red, green, or yellow dots on them. These dots
show what side of the glasshouse the verticals and slopes are
on.
These fit together as shown on the picture on the page above
Looking at the glasshouse from the outside:
BLUE: Left side, front wall
RED: Right side, front wall
GREEN: Left side, rear wall
YELLOW: Right side, rear wall
•Rear X member (648mm)
•6’ gusset
•Nuts and bolts
15
Insert an extra bolt /nut in the two centre bars to attach the louvre.
NB: Ensure the corners bars are fitted correctly, the flat edge goes to the sill, the lug (with a hole top & bottom) faces externally.
16
Add an extra bolt in the door posts
to attach the braces. Plus an extra
bolt to later attach the Door Catch
17
•6’ gussets
•Front sill (1835mm)
•Base (1835mm)
•Threshold
•Nuts and bolts
•Support bracket for door
track
•X member (648mm)
Parts needed:
•Verticals (1490mm)
•Slopes (1197mm)
•Door track
•Track support arm (478mm)
•6’ triangle
•Door posts (2095mm)
•Bracing angle (1563mm)
•Door brace (604mm)
To make it easier for you, we have put red or blue dots
on the verticals and slopes in the front box. When
assembling these, makes sure the dots match up (see
page 12).
18
NB: Ensure Wool Pile is inserted
before attaching the Door Post and
Cross Bar
Attaching the
threshold, three
small screws are
supplied in bag
with loose items
19
20
Please Note:
GLASS SIZING: where the extension
joins onto the first frame, the glass
width is 635mm
If adding to an existing glasshouse,
remove the centre sill & base once the
extension is attached
This view is from inside looking at the ridge
bar joining at the extension end, see how the
ridge now sits on top of the corner section.

Other manuals for 6 Series

1

Popular Garden House manuals by other brands

Grosfillex ABRI DECO H7 Assembly instructions

Grosfillex

Grosfillex ABRI DECO H7 Assembly instructions

Kiehn-Holz KH 34-007 manual

Kiehn-Holz

Kiehn-Holz KH 34-007 manual

Feider Machines FAJ700A owner's manual

Feider Machines

Feider Machines FAJ700A owner's manual

OLT SpaceSaver SS124-SLIDER-CEDAR-AK Assembly manual

OLT

OLT SpaceSaver SS124-SLIDER-CEDAR-AK Assembly manual

Lemeks Palmako FR28-3834-1 Assembly, installation and maintenance manual

Lemeks

Lemeks Palmako FR28-3834-1 Assembly, installation and maintenance manual
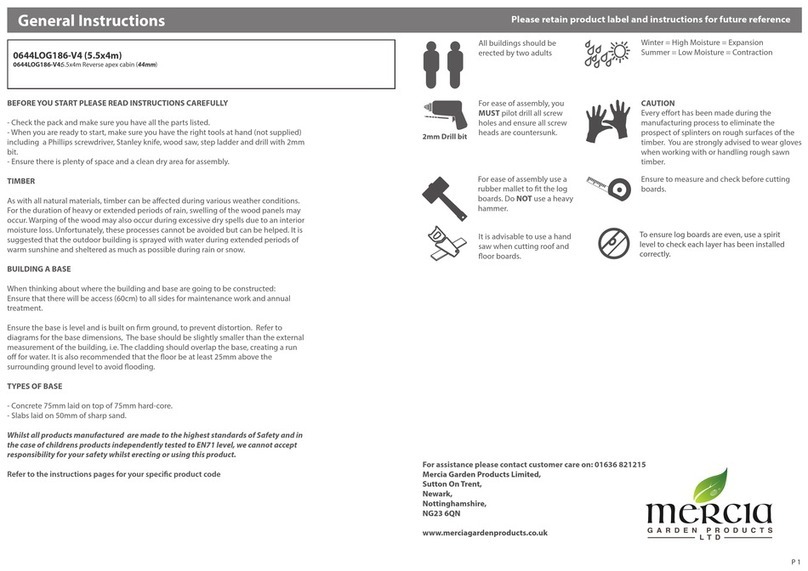
Reynolds Building Systems BEST BARNS Northwood Deluxe Assembly Book

Reynolds Building Systems

Reynolds Building Systems BEST BARNS Northwood Deluxe Assembly Book

GARDIVAL VERSAILLES 250 manual

GARDIVAL

GARDIVAL VERSAILLES 250 manual

Holz-Blech AIDA 40 manual

Holz-Blech

Holz-Blech AIDA 40 manual

Keter MANOR 6x5DD Assembly instructions

Keter

Keter MANOR 6x5DD Assembly instructions

Gazebo penguin W1209 1/2-12 SAND Assembly instructions

Gazebo penguin

Gazebo penguin W1209 1/2-12 SAND Assembly instructions

Luoman Lillevilla 321 Assembly and Maintenance

Luoman

Luoman Lillevilla 321 Assembly and Maintenance

Kiehn-Holz KH 44-029 manual

Kiehn-Holz

Kiehn-Holz KH 44-029 manual

Best Barns Arlington II Assembly Book

Best Barns

Best Barns Arlington II Assembly Book

Palmako PM44-5839 installation manual

Palmako

Palmako PM44-5839 installation manual

Décor et Jardin 78457SX33 Assembly Notice

Décor et Jardin

Décor et Jardin 78457SX33 Assembly Notice

Mercia Garden Products 03DTSHCR0909GD4TW-V2 manual

Mercia Garden Products

Mercia Garden Products 03DTSHCR0909GD4TW-V2 manual

Palmako EL19-3929 installation manual

Palmako

Palmako EL19-3929 installation manual

Décor et Jardin 53113S000 Assembly Notice

Décor et Jardin

Décor et Jardin 53113S000 Assembly Notice

manuals.online logo
manuals.online logoBrands
  • About & Mission
  • Contact us
  • Privacy Policy
  • Terms and Conditions

Copyright 2025 Manuals.Online. All Rights Reserved.