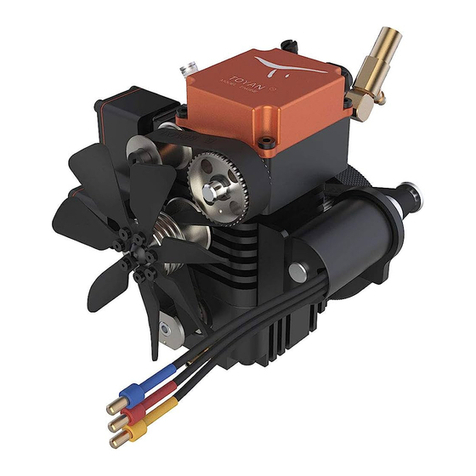
EdgeEndo EDGE APEX HP User manual

Please read this manual before operating

1
1 Product introduction
1.1 Product description
1.2 Model and specification
Features:
b)Cordless portable endo motor with combined length determination.
c)360 degrees rotation of contra angle.
d)Adopt real-time feedback technology and dynamic torque control,
EDGEAPEX HP Endodontic Motor
1.3 Device parts and accessories
1.4 Indications for Use
The device is composed of charging base, motor handpiece & contra
EDGEAPEX HP Endodontic Motor is cordless endodontic treatment
motorized handpiece with root canal measurement capability. It can be
used for preparation and enlargement of root canals, or measuring the
canal length. And it can be used to enlarge the canals while monitoring
the position of the file tip inside the canal.
angle. Additional accessories included in the box are: measuring wire,
silicon cover (x2), spray nozzle, o-rings (x2), disposable sleeves (1
pack).
Contents
1 Product introduction.............................................................................. 1
2 Installation ............................................................................................ 5
3 Function and operation of product .................................................... 1 2
4 Operation instruction ......................................................................... 1 5
5 Troubleshooting .................................................................................. 2 9
6 Cleaning, Disinfection and Sterilization............................................. 2 9
7 Storage, maintenance and transportation ........................................... 3 8
8 Environmental protection ................................................................... 3 9
9 After service ....................................................................................... 3 9
10 European authorized representative.................................................. 3 9
11 Symbol instruction ........................................................................... 3 9
12 Statement .......................................................................................... 4 0
13 EMC-Declaration of conformity....................................................... 4 0
14 Apex Locator Troubleshooting ......................................................... 4 4
EDGEAPEX HP is mainly used in Endodontic treatment. It is a
cordless endo motor with root canal measurement capability. It can be
used as a endo motor for preparation and enlargement of root canals,
or device for measuring canal length. It can be used to enlarge the canals
while monitoring the position of the file tip inside the canal.

EDGEAPEX HP
2 3
1.5 Intended Use
1.5.1 The device can be used for preparation and enlargement of root
canals, or device for measuring canal length.
1.5.2 The device must be operated only in hospitals and clinics by
1.5.3 CAUTION: Federal (US) law restricts this device to sale by or
on the order of a licensed professional.
1.6 Contraindication
a) Doctors with a pacemaker are forbidden to use this device.
b) This device may not be used on patients with cardiac pacemakers
(or other electrical equipment) or those warned not to use small
appliances (such as Electric razors, hair dryers, etc.).
c) This device may not be used on hemophilia patients.
d) Use with caution in patients with heart disease, pregnant women
and young children.
1.7 Warnings
1.7.1 Please carefully read this Instruction Manual before first
operation.
1.7.2 This device should be operated by professional and qualified
1.7.3 Do not directly or indirectly place this device near heat source.
Operate and store this device in a suitable environment.
1.7.4 This device requires special precautions re ga rding
electromagnetic compatibility (EMC) and must be in strict accordance
with the EMC information for installation and use. Do not use this
equipment especially in the vicinity of fluorescent lamps, radio
transmitting devices, remote control devices, handheld and mobile high-
frequency communication devices.
1.7.5 Please use the original contra angle. Otherwise the device will
be unusable or cause adverse consequences.
1.7.6 Please do not make any changes to the device. Any changes
may violate safety regulations, causing harm to the patient. The
manufacturer will not be liable for any device changes made without the
manufacturer's consent.
1.7.7 Please use the original power adapter. Other power adapters
will result in damage to the lithium battery and control circuit.

1.7.8 The motor handpiece cannot be autoclaved. Use disinfectant of
neutral pH value or ethyl alcohol to wipe its surface.
1.7.9 Do not press the push cover of contra angle before the contra
angle stops rotating. Otherwise the contra angle will be broken.
4 5
1.7.10 Do not remove the contra angle before the motor handpiece
stops rotating. Otherwise the contra angle and the gear inside motor
handpiece will be broken.
1.7.11 Please confirm that the file is properly installed and locked in
place before starting the motor handpiece.
1.7.12 Please set torque and speed as per the recommended
1.7.13 Error in replacing lithium batteries can lead to unacceptable
risks, so use the original lithium battery and replace the lithium battery
according to the correct steps in the instructions.
1.7.14 Please remove the battery if the motor handpiece is not likely
to be used for some time.
1.7.15 Wireless charging will generate heat, and the surface
temperature of charging base and motor handpiece will rise. It is
recommended not to come in contact with the motor handpiece and
charging base during wireless charging for more than 10 seconds.
1.8.1 Type of operation mode: Continuous operating device
1.8 Device safety classification
1.8.2 Type of protection against electric shock: Class II equipment
with internal power supply
1.8.3 Degree of protection against electric shock: B type applied part
1.8.4 Degree of protection against harmful ingress of water: Ordinary
equipment (IPX0)
1.8.5 Degree of safety application in the presence of a flammable
anesthetic mixture with air, oxygen, or nitrous oxide: Equipment cannot
be used in the presence of a flammable anesthetic mixture with air,
oxygen, or nitrous oxide.
1.8.7 The contact duration of applied part: 1 to 10 minutes.
1.8.6 Applied part: contra angle, lip hook,file clip,touch probe.
1.8.8 The temperature of the surface of applied part may reach
46.6℃.
1.9.1 Battery
1.9 Primary technical specifications
Lithium battery in motor handpiece: 3.7V /2000mAh
1.9.2 Power adapter (Model: ADS-6AM-06N 05050/
UE08WCP-050100SPA)
Input: ~100V-240V 50Hz/60Hz, 0.4A Max
Output: 5V 1A
1.9.3 Torque range: 0.4Ncm-5.0Ncm(4mNm ~ 50mNm)
1.9.4 Speed range: 100rpm~2500rpm
1.9.5 Wireless charging
Frequency range: 112-205KHz
Maximum RF output power of the product: 9.46dBuA/m@3m
1.10 Environment parameters
1.10.1 Environment temperature: +5℃ ~ +40℃
1.10.2 Relative humidity: 30% ~ 75%
1.10.3 Atmospheric pressure: 70kPa ~ 106kPa
2 Installation
2.1 Basic accessories of product
Motor handpiece Contra angle
Charging base Nozzle
Protective silicon cover
Power adapter

6 7
Measuring wire File clip
Lip hook Touch probe
Disposable insulation sleeves
2.2 Display Screens
2.2.1 Display Screens for 5 Operation Modes and Standby
2.2.1.1 EAL Mode
This mode is for canal measurement. The motor handpiece does not
run in this mode.
2.2.1.2 CW Mode
The motor handpiece rotates forward 360º, clockwise direction.
2.2.1.3 CCW Mode
The motor handpiece rotates counterclockwise direction only. This
mode is used to inject calcium hydroxide and other medicant. When this
mode is being used, a double-beep sounds continuously.
2.2.1.4 SGP Mode
Safety Glide Path Mode
F: Forward angle, R: Reverse angle
The rotation angle is adjustable, but the forward angle must be equal
to the reverse angle.
2.2.1.5 ATR Mode
ATR: Adaptive Torque Reverse function.
Normal continuous forward rotation, when the load of the file is
greater than the set torque limit, the file will start to rotate forward &
reverse alternately at the set angle.
2.2.2 Torque Display
This appears when the motor is running. Meter shows the torque load
2.2.3 Canal Measurement Display
This appears when a file is inside the canal and the lip hook is in
contact with the patient mouth. Bars in meter show the location of the
be enlarged.
Set speed
Set torque
Real time torque

8 9
The meter numbers 1.0, 2.0, 3.0 and digital numbers 00-16 do not
represent the actual length from the apical foramen. It simply indicates
the file progression towards the apex. The digital numbers -1 and -2
indicate that the file has reached the apex foramen. Subtract 0.5-1mm
used to estimate the canal’s working length.
2.3 Instructions for contra angle
2.3.1 The contra angle adopts precision gear transmission, and the
transmission ratio is 6:1.
2.3.2 Before the first use and after treatments, please clean and
disinfect contra angle with disinfectant of neutral PH value. After
disinfection, lubricate it with specific cleaning oil. Finally, sterilize
it under high temperature and high pressure (134℃, 2.0bar~2.3bar
(0.20MPa~0.23MPa)).
2.3.3 The contra angle can only be used together with this device.
Otherwise the contra angle will be damaged.
2.4 Installation and removal of contra angle.
2.4.1 Installation
Align any locating pin of the contra-angle with the positioning slot
on the motor handpiece and push the contra-angle horizontally. The three
locating pins on the contra-angle are inserted into the three positioning
holes on the motor handpiece. A “click” sound indicates that the
installation is in place. The contra-angle can be rotated 360° freely.
The contra-angle is free to rotate, adapting to the root canal of
different positions, and it is convenient to watch the screen when
operating.
2.4.2 Removal
Pull out the contra angle horizontally when the motor handpiece has
stopped running.
Warnings:
the motor handpiece.
has been properly installed.
head.
Hold down the push button on the contra angle and insert the file.
positioning slot
locating pin

10 11
and slips into place. Release the button to lock the file into the contra
angle.
Warnings:
huck
of contra angle.
Please use files with shanks that meet the ISO standard. (ISO
standard: Ø2.334 – 2.350 mm)
Warnings:
stopped.
Removing files without holding the push button will damage the
chuck of contra angle.
2.6 Canal measurement functional connection
This is not required if the canal measurement function will not be
used.
Connect the measuring wire to the motor handpiece. Line up the
measuring wire plug with the notch on the back of the motor and push it
all the way in.
Connect the file clip plug into the socket (black) on the measuring
wire. Connect the lip hook to the socket (white) on the measuring wire.
Warnings:
Connect the lip hook to the socket (white) on the measuring wire.
Otherwise, the function of root canal preparation and root canal length
measurement cannot be used together.
File clip
Black
White
Lip hook

12 13
e. Preset program selection
Long press Setting button “P” to enter preset program during standby
button “P” to entry enter file number selection, press Adjusting button
f. Handpiece functions setting
and press Main button to enter handpiece functions setting, press Setting
button “P” to cycle through settings, press Adjusting button “+”/“-” to
3.2 Screen display
Standby interface
a. Customized program sequence
number 0-9, in total 10 programs.
b. Battery consumption
c. Set speed
d. Set torque
e. Operation mode
Working interface
a. Set speed
b. Set torque
c. Real time torque
d. Torque display scale
Canal measurement mode interface
b. EAL: Electronic apex locator
2.7 Installation and removal of disposable isolation sleeves
2.7.1 Installation
denaelcsieceipdnahehtretfadnaeceipdnahehtfoesuhcaeerofeB
noitalosiehtekaT.eveelsnoitalosielbasopsidanotup,detcefnisiddna
otnieveelsnoitalosiehttresnineht,xobeveelsnoitalosiehtfotuoeveels
ehtllatsnidna,eceipdnahehtfodnenihtehtmorfeceipdnahrotomeht
isolation sleeve until there is no obvious wrinkle.
ecafrusehttcefnisiddnanaelc,tahtretfA.ecafruseceipdnahehtdnuora
noitcefnisiddnagninaelcrof3.6retpahCotrefeR.eceipdnahehtfo
procedures.
2.7.2 Removing
sleeve from the thin end of the handpiece.
Warning: Isolation sleeves are not reusable
3 Function and operation of product
a. Turn power on
Press Main button to turn on motor handpiece.
motor handpiece.
c. Customized program change
Press Adjusting button “+”/“-” during standby sate.
d. Parameter setting
Press Setting button “P” to cycle through parameters, press Adjusting
button “+”/“-” to change them, then press Main button or wait 5 seconds

14 15
Canal measurement state interface
a. Canal length indicator bar
b. Indication number
Digital numbers 00-16 do not
represent the actual length from the
apical foramen. It simply indicates
apex. Number “00” indicates that
foramen.
c. Apical foramen.
Apical reference point setting
interface
b. Apical foramen
c. Digital “02” meter reading, very
near physiological apical foramen.
CW Clockwise rotation, forward ration
CCW
Counter clockwise rotation, reverse rotation
hydroxide and other solutions
SGP Safety Glide Path Mode
ATR
Adaptive torque reverse
ATR mode starts reciprocating motion when the
set torque is reached; when torque reduces to
normal value, the motor will rotate clockwise.
Forward Angle
Reverse Angle
EAL
Electronic apex locator
In this mode, the device will work like a stand-
alone apex locator.
AP Apical foramen.
Apical Action point.
Flash Bar Position apical action is triggered.
Auto Start is inserted in the canal.
Auto Stop is taken out of the canal.
Apical Slow Down approaches the apex. Activated in CW and CCW
operation mode when selected.
Operation Mode
5 operation modes for canal shaping and
measurement.
Such as CW, CCW, SGP, ATR and EAL.
Speed File rotation speed.
Torque
(Torque Limit /
Trigger Torque)
For CW and CCW modes, the torque value
(Torque Limit) that triggers reverse rotation. For
ATR mode, the torque value (Trigger Torque)
that triggers ATR action.
4 Operation instruction
4.1.1 Starting and stopping of motor handpiece
and then the motor handpiece will enter Standby interface. The interface
displays is as follows:
Standby interface
b) Under Standby interface, press Main button, and then the motor
handpiece will enter Working interface. The interface displays is as
follows:
Working interface

16 17
c) Press the Main button again, and then the motor handpiece returns
to Standby interface.
d) Hold down the Setting button “P”, then press Main button to turn
automatically shut down after 3 minutes without any button-pressing
operation. The motor handpiece will also automatically shut down when
put on charge.
4.2 Selecting customized program sequence number
The motor handpiece has 10 memory programs(M0-M9) and 5 preset
programs, press Adjusting button “+”/“-” to change customized program
sequence number during standby state.
M0-M9 is a memory program for canal shaping and measurement,
every memory program has its own parameters such as Operation mode,
speed and torque, all these parameters can be changed.
4.3 Parameter setting
Before starting of motor handpiece, please
check the operation mode is correct.
make sure all the parameters are correct before
starting of motor handpiece, otherwise there is
It has 5 operation modes for canal shaping
and measurement: CW, CCW, SGP, ATR and
the explanations of these modes.)
Press Setting button “P” once during standby
state, press Adjusting button “+”/“-” to select
correct Operation mode.
CCW mode is used to inject calcium hydroxide
and other medicant. When this mode is being
used, a double-beep sounds continuously,
used for indicating counter clockwise rotation
happening.
Repeatedly press Setting button “P” to check that all the next level
parameters of this operation mode are correct, press Adjusting button
“+”/“-” to make changes if not.
The speed setting can be adjusted from 100 rpm
to 2500 rpm.
Press Adjusting button “+”/“-” to increase or
decrease speed. Long press to fast increase or
fast decrease speed.
In ATR mode, speeds of 100~500rpm are
available.
In SGP mode, speeds of 100~500rpm are
available.
The torque setting can be adjusted from 0.4Ncm
to 5.0Ncm.
Press Adjusting button “+”/“-” to increase or
decrease torque. Long press to fast increase or
fast decrease torque.
In ATR mode, Trigger Torques of 0.4Ncm~
4.0Ncm are available.
In SGP mode, torques of 2.0Ncm~5.0Ncm are
available.
tip reaches the point inside the canal determined
by the Flash Bar setting.
the reference point, the motor will response
according to setting. It can be Reverse , Stop
and OFF.
P ress Adjusting button “+”/“-” to change.
as usual even if it reaches the reference point.
Stop: automatic rotation stop when reference
will rotate again.
Reverse: automatically reverses rotation when
pull upward a little bit, the rotation direction
will change back again.

18 19
inserted into the canal and the canal length
indicator bar lights up more than 2 bars.
P ress Adjusting button “+”/“-” to change.
into the canal. The Main button is used to start
and stop the motor handpiece.
ON: Motor starts automatically.
taken out of the canal and the canal length
indicator bar lights up less than 2 bars before the
Press Adjusting button “+”/“-” to change.
of the canal. The Main button is used to start
and stop the motor handpiece.
ON: Motor stops automatically.
This is the reference point where various apical
actions are triggered.
Press Adjusting button “+”/“-” to select
tip is located very near the physiological apical
foramen.
to AP (Apex) on the meter.
tip approaches the reference point.
P ress Adjusting button “+”/“-” to change.
OFF: Disable Apical Slow Down function.
ON: Rotation automatically slows down as the
Forward Angle .In the SGP mode, the Forward
Angles of 20°~400° are available.
In the ATR mode, the Forward Angle of
60°~400° are available.
Reverse Angle .In the SGP mode, the Reverse
Angles of 20°~400° are available.
In ATR mode, the reverse Angle cannot be
greater than the forward Angle.
4.4 Preset program selection
system.
Press Adjusting button “+”/“-” to switch to
preset program(M0-M9, preset program 1-5 ),
the interface will show as left.
Long press Setting button “P” to enter preset
program during standby state, the interface will
show as left.
system.

20 21
The parameters of the presets can also be
If you want to change back to default setting,
long press Setting button “P” to enter preset
program during standby state, select a preset
setting will be reloaded. The preset program can
the motor handpiece and powering back on.
Changing the preset program default setting is
breakage.
4.5 Handpiece functions setting
and press Main button to enter handpiece function settings, press Setting
button “P” to cycle through settings, press Adjusting button “+”/“-” to
the Setting button “P” and press Main button to
enter handpiece function settings, the software
version number will appear on the display
screen.
After 3 seconds of displaying the version
number on the screen, the "Auto Power OFF"
can be changed, press Adjusting button “+”/“-
” to adjust, then press the "Main" button to
handpiece if no buttons are pressed. It can be set
from 3 to 30 minutes in 1 minute increments.
Press Setting button “P” again, the “Auto
Standby Scr” can be changed, press Adjusting
button “+”/“-” to adjust, then press to "Main"
This is the automatic return to standby display
of motor handpiece when no buttons are
pressed. It can be set from 3 to 30 seconds in 1
second increments.
Press Setting button “P” again, the "Dominant
Hand" can be changed, press Adjusting button
“+”/“-” to adjust, then press to “Main” button to
set.
Press Setting button “P”again, the “Calibration”
can be changed, press Adjusting button “+”/“-”
to select “ON”, then press "Main" button for
calibration. Before calibrating, make sure the
original contra angle is installed, and do not
it is calibrated without original contra angle or
if there is any load on contra angle chuck, and
After replacement of contra angle, the contra
angle should be calibrated before use.
Press Setting button “P”again, the "Beeper
Volume" can be changed ,press Adjusting button
“+”/“-” to adjust, then press to "Main" button to
The"Beeper Volume"can be set from 0-3.
Vol.0: Mute.
Press Setting button “P” again, the "Restore
Defaults" can be changed, press Adjusting
button “+”/“-” to select “ON”, then press to
"Main" button to restore defaults.
4.6 Protective function of automatic reverse
During operation, if the load value exceeds the preset torque value,

22 23
preset torque value again.
Cautions:
1. Protective function of automatic reverse is ONLY suitable for CW
mode.
2. This function is not available for CCW mode, ATR mode.
3. When the motor handpiece battery indicator indicates a low battery
to reach the torque value limit, therefore, the auto-reverse function will
not work properly. Please charge it in time.
4. If the motor handpiece is under load all the time, the machine may
stop automatically as a result of overheat protection. If it happens, turn
4.7 Motor operation
Please set operation mode, torque and speed as per the recommended
Motor alone mode
When using in motor alone mode,
the torque bar will show on the
screen.
(more information about torque
bar, please see chapter 3.2 Screen
display )
Motor combined with canal
measurement function mode
When using motor combined with
canal measurement function, the
measuring wire must be connected
with motor handpiece by USB
socket, and white socket connects
with patient’s lip by lip hook, keep
the black socket idle.
The canal length indicator bar
will show on the screen (more
information about canal length
indicator bar, please see chapter 3.2
Screen display)
Set parameters of automatic
functions as needed, such as Apical
Action, Auto Start, etc(more
information about automatic
functions, please see chapter 4.3
Parameter setting).
Connection testing
It is strongly recommended to
check the connection testing
every time before use. Touch
contra angle and check that all the
bars on the meter on the screen
light up, and the motor should be
reversed continuously, otherwise,
the measuring wire or contra angle
should be replaced.
Load value is lower
than preset torque value
Clockwise rotation
Load value is higher than
preset torque value
Couterclockwise rotation
Load value is lower than
preset torque value again
Clockwise rotation

24 25
4.8 Canal measurement operation
When using in standalone apex locator
mode, we suggest putting the motor
handpiece on the charging base to get
better visual angle.
Press Setting button “P” once during
standby state, press Adjusting button
“+”/“-” to select EAL Operation mode,
the explanations of Operation modes.)
The measuring wire must be connected
with motor handpiece by USB socket,
white socket connects with patient’s lip
by lip hook, and black socket connect
The canal length indicator bar will show
on the screen(more information about
canal length indicator bar, please see
chapter 3. 2 Screen display).
your thumb in the direction shown by
the arrow. Clip the holder onto the metal
the button.
Connection testing
It is strongly recommended to test the
connection every time before use. Clip
the holder onto lip hook and check that
all the bars on the meter on the screen
light up, otherwise, the measuring wire
Root canals not suitable for canal measurement
Accurate measurement cannot be obtained for the root canal conditions
shown below.
Root canal with a large apical foramen.
Root canal that has an exceptionally
large apical foramen due to a lesion
or incomplete development cannot be
accurately measured. The results may
show shorter measurement than the
actual length.
the opening.
of the root canal and contacts the
gums, this will result in electrical
leakage and an accurate measurement
cannot be obtained. Wait for bleeding
to stop completely. Clean the inside
and opening of the canal throughly to
get rid of all blood, and then make a
measurement.
Root canal with a chemical solution
An accurate measurement cannot be
obtained if some chemical solution is
In this case, clean the canal and its
opening.
It is important to get rid of any solution

26 27
Broken crown.
If the crown is broken and a section
of the gingival tissue intrudes into the
cavity surrounding the canal opening,
contact between the gingival tissue and
and an accurate measurement cannot be
obtained. In this case, build up the tooth
with a suitable material to insulate the
gingival tissue.
Fractured tooth.
Leakage through a branch canal
Fractured tooth will cause electrical
leakage and an accurate measurement
cannot be obtained.
A branch canal will also cause electrical
leakage.
percha.
The gutta-percha must be completely
removed to eliminate its insulating
the apical foramen and then put a little
saline in the canal, but do not let it
Crown or metal prosthesis touching
gingival tissue.
Accurate measurement cannot be
prosthesis that is touching gingival
tissue. In this case, widen the opening at
not touch the metal prosthesis before
taking a measurement.
Extremely dry canal.
If the canal is extremely dry, the meter
may not move until it is quite close to
the apex. In this case, try moistening the
canal with saline.
radiography.
Sometimes the reading of apex locator and the X-ray image will not
correspond. This does not mean that the apex locator is not working
properly or that the X-ray exposure is a failure. An X-ray image might not
show the apex correctly depending on the angle of the X-ray beam, and
the location of the apex might seem to be other than it really is.
The actual apex for the canal is not the
same as that for the anatomical apex.
There are frequently cases where the
apical foramen is located up towards the
crown. In these cases, an X-ray might
apexeven though it has actually reached
the apical foramen.
4.9 Battery Charging
The motor handpiece has built-in rechargeable lithium battery.
When charging the battery, leave approximately 10cm around the
charging base for easy access to inlet and the power cord.
Insert the power adapter plug into the charging base power socket
and confirm that they are correctly connected. Then insert the motor
handpiece into the charging base (the motor handpiece needs to be
correctly aligned with the charging base in the same direction for
charging). When the blue indicator on the charging base flashes, it is
charging. When the motor handpiece is fully charged, the blue indicator
on the charging base is always on.
After charging, please unplug the power adapter.
4.10 Replacing Battery
Replace the battery if it seems to be running out of power sooner than
it should. Please use the original lithium battery.

28 29
b) Use tweezers etc. to open the rubber cover and then remove the
screw.
c) Remove the battery cover.
d) Remove the old battery and disconnect the connector.
e) Connect the new battery and put it in the motor handpiece.
f) Replace the cover and its screw.
It is recommended to contact local distributors or manufacturer to
replace the battery.
4.11 Oiling of contra angle
Only the original oil injection nozzle can be used for oiling of
contra angle. The contra angle needs to be lubricated after cleaning and
disinfection, but before sterilization.
1. Firstly, screw the injecting nozzle into jet of oil bottle. (Around 1
to 3 circles)
2. Next, plug the nozzle into the end part of contra angle, and then
part.
3. Place the contra-angle upright for 30 minutes for leftover oil to
Warnings
Cautions
safely hold the contra angle while lubricating.
b: Please use the appropriate nozzle suitable for handpiece
lubrication.
5 Troubleshooting
Failure Possible cause Solutions
The motor handpiece
does not rotate.
Motor is onEALmode,
EAL mode is only for
canal measurement.
Change to CW, CCW,
SGP or ATR mode.
There is continuous
beep sounds after
starting the motor
handpiece.
The continuous beep
sound is indicating that
the motor handpiece is
under CCW mode.
Stop the motor
handpiece and change
the operating mode to
CW Mode.
Contra angle
calibration failure
Calibration failure
caused by strong
resistance of contra
angle
Clean the contra angle,
and recalibrate after oil
injection.
The time of endurance
becomes shorter after
charging.
Battery capacity
becomes smaller.
Please contact
local distributor or
manufacturer.
No sound Beeper Volume set to 0.
Vol.0: Mute.
Set Beeper Volume to
1,2,3.
The continuously
the root canal.
setting.
Too high load torque of
Choose CCW Mode,
start the motor
handpiece, and take the
6 Cleaning, Disinfection and Sterilization
6.1 Foreword
For hygiene and sanitary safety purposes, the contra-angle, the lip
be cleaned, disinfected and sterilized before each usage to prevent any
6.2 General recommendations
6.2.1 Use only a disinfecting solution which is approved for its
efficacy (VAH/DGHM-listing, CE marking, FDA and Health Canada
approval) and in accordance with the DFU of the disinfecting solution
manufacturer.
6.2.2 Do not place the contra-angle in a disinfectant solution or in an
ultrasonic bath.

30 31
Do not use chloride detergent materials.
6.2.3 Do not use bleach or chloride disinfectant materials.
6.2.4 For your own safety, please wear personal protective equipment
(gloves, glasses, mask).
6.2.5 The user is responsible for the sterility of the product for the
dirty instruments where applicable after sterility.
6.2.6 The water quality has to be convenient to the local regulations
especially for the last rinsing step or when using a washer-disinfector.
6.2.7 To sterilize the endodontic files, refer to the manufacturer's
instructions for use.
6.2.8 The contra-angle needs to be lubricated after cleaning and
disinfection, but before sterilization.
6.3 Cleaning and disinfection steps for the motor handpiece, the
AC adapter and the base.
Before and after each use, all the objects that were in contact with
infectious agents should be cleaned using towels impregnated with
a disinfecting and detergent solution (a bactericidal, fungicidal and
aldehyde free solution) approved by VAH/DGHM-listing, CE marking,
FDA and Health Canada.
Warning: Do not sterilize the motor handpiece, the AC adapter
and the base.
6.3.1 Pre-Op processing
Before each use, the handpiece, charger, and base must be cleaned
Warning: The handpiece, charger, and base cannot be
cleaned and disinfected with automatic equipment. Manual cleaning and
disinfection is required.
6.3.1.1 Manual cleaning steps:
1. Take out the handpiece, charger, and base on the workbench.
2. Wet the soft cloth completely with distilled water or deionized
water, and then wipe all the surfaces of the components such as the
handpiece, charger, base, etc. until the surface of the component is not
stained.
3. Wipe the surface of the component with a dry soft nap-free cloth.
4. Repeat the above steps at least 3 times.
Note:
a)Use distilled water or deionized water for cleaning at room
temperature.
6.3.1.2 Manual disinfection steps:
1. Soak the dry soft cloth with 75% alcohol.
2. Wipe all surfaces of headpiece, charger, base and other components
with a wet soft cloth for at least 3 minutes.
3. Wipe the surface of the component with a dry soft nap-free cloth.
Note:
a) The cleaning and disinfection must be performed within 10min
before use.
b) The disinfectant used must be used immediately, no foaming is
allowed.
c) In addition to 75% alcohol, you can use non-residue disinfectants
such as Cavicide, but you must respect the concentration, temperature
and time specified by the disinfectant manufacturer.
d) After cleaning and disinfecting the handpiece, you must install a
disposable isolation sleeve before use.
6.3.2 Post-Op processing
After each use, clean and disinfect the handpiece, charger, and base
Tools: Nap-free soft cloth, tray
1. Remove the contra-angle from the handpiece, place it in a clean
tray, and then remove the disposable isolation sleeve from the handpiece.
2. Soak the nap-free soft cloth with distilled water or deionized water,
and then wipe all the surfaces of the components such as the handpiece,
charger, base, etc. until the surface of the component is not stained.
3. Wet the dry soft cloth with 75% alcohol, and then wipe all surfaces
of the handpiece, charger, base and other components for 3 minutes.
4. Put the handpiece, charger, base and other components back into
the clean storage area.
Note:
a) The cleaning and disinfection must be performed within 10min
before use.
b) The disinfectant used must be used immediately, no foaming is
allowed.
c) In addition to 75% alcohol, you can use non-residue disinfectants
such as Cavicide, but you must respect the concentration,temperature
and time specified by the disinfectant manufacturer.

32 33
6.4 The cleaning, disinfection and sterilization of contra-angle,lip
Unless otherwise stated, they will be hereinafter referred to as
“products”.
Warnings:
The use of strong detergent and disinfectant (alkaline pH>9 or acid
pH <5) will reduce the life span of products. And in such cases, the
manufacturer takes no responsibility.
The products may not be exposed to temperature above 138℃.
Processing limit
The products have been designed for a large number of sterilization
cycles. The materials used in manufacture were selected accordingly.
However with every renewed preparation for use, thermal and chemical
stresses will result in ageing of the products. The maximum number of
sterilizations for products is 250 times.
6.4.1 Initial processing
6.4.1.1 Processing principles
It is only possible to carry out effective sterilization after the
part of your responsibility for the sterility of products during use, only
sufficiently validated equipment and product-specific procedures are
used for cleaning/disinfection and sterilization, and that the validated
parameters are adhered to during every cycle.
Please also observe the applicable legal requirements in your country
as well as the hygiene regulations of the hospital or clinic, especially
with regard to the additional requirements for the inactivation of prions.
6.4.1.2Post-operative treatment
The post-operative treatment must be carried out immediately, no
later than 30 minutes after the completion of the operation. The steps are
as follows:
1. Remove the products from the base, and rinse away the dirt on the
surface of handpiece with purewater (or distilled water/deionized water);
2. Dry the products with a clean, soft cloth and place it in a clean tray.
Notes:
a) The water used here must be pure water, distilled water or
deionized water.
6.4.2 Preparation before cleaning
Steps:
Tools: tray, soft brush, clean and dry soft cloth.
wire from the handpiece in sequence, and then put them into a clean tray;
3. Use a clean soft brush to carefully brush lip hook, file
clip,protective silicon cover,touch probe, head and back cover of the
contra-angle until the dirt on surface is not visible. Then use soft cloth to
dry the products and put them into a clean tray. The cleaning agent can
be pure water, distilled water or deionized water.
Disassembling steps
b) When removing the protective silicon cover, pull it straight out
slowly.
c) When inserting and removing the contra-angle, turn thehandpiece
6.4.3 Cleaning
The cleaning should be performed no later than 24 hours after the
operation.
The cleaning can be divided into automated cleaning and manual
cleaning. Automated cleaning is preferred if conditions permit.
6.4.3.1Automated cleaning
•The cleaning device is proved to be valid by CE certification in
accordance with EN ISO 15883.
of the product.

34 35
• The cleaning procedure is suitable for the product, and the irrigating
It is recommended to use a washer-disinfector in accordance with
disinfection section in the next section "Disinfection".
Notes:
a) The cleaning agent does not have to be pure water.It can be
distilled water, deionized water or multi-enzyme. But please ensure that
the selected cleaning agent is compatible with the product.
b) In washing stage, the water temperature should not exceed 45 °C,
c) After cleaning, the chemical residue should be less than 10mg / L.
6.4.4 Disinfection
Disinfection must be performed no later than 2 hours after the
cleaning phase. Automated disinfection is preferred if conditions permit.
6.4.4.1Automated disinfection-Washer-disinfector
accordance with EN ISO 15883.
·Use high temperature disinfection function. The temperature does
not exceed 134 ° C, and the disinfection under the temperature cannot
exceed 20 minutes.
·The disinfection cycle is in accordance with the disinfection cycle in
EN ISO 15883.
Cleaning and disinfecting steps by using Washer-disinfector
1. Carefully place the product into the disinfection basket. Fixation
of product is needed only when the product is able to move in the device.
The products are not allowed to contact each other.
2. Use a suitable rinsing adaptor, and connect the internal water lines
to the rinsing connection of the washer-disinfector.
3. Start the program.
disinfector, inspect (refer to section "Inspection and Maintenance") and
package (refer to chapter "Packaging"). Dry the product repeatedly if
necessary (refer to section "Drying").
Notes:
a) Before use, you must carefully read the operating instructions
provided by the equipment manufacturer to familiarize yourself with the
disinfection process and precautions.
b) With this equipment, cleaning, disinfection and drying will be
carried out together.
c) Cleaning: (c1) The cleaning procedure should be suitable for the
product to be treated. The flushing period should be sufficient (5-10
minutes). Pre-wash for 3 minutes, wash for another 5 minutes, and rinse
it for twice with each rinse lasting for 1 minute. (c2) In the washing
stage, the water temperature should not exceed 45 °C, otherwise the
can be pure water, distilled water, deionized water or multi-enzyme
solution, etc., and only freshly prepared solutions can be used. (c4)
During the use of cleaner, the concentration and time provided by
manufacturer shall be obeyed. The used cleaner is neodisher MediZym
(Dr. Weigert).
d) Disinfection:
For disinfection, the temperature is 93 ° C, the time is 5 min, and
A0>3000
e) Only distilled or deionized water with a small amount of
microorganisms (<10 cfu/ml) can be used for all rinsing steps.
(For example, pure water that is in accordance with the European
Pharmacopoeia or the United States Pharmacopoeia).
f) After cleaning, the chemical residue should be less than 10mg / L.
h) Regularly repair and inspect the disinfector.
6.4.5 Drying
If your cleaning and disinfection process does not have an automatic
drying function, dry it after cleaning and disinfection.
Methods:
product against the white paper (white cloth), and then dry the product
with filtered dry compressed air (maximum pressure 3 bar). When no
further liquid is sprayed onto the white paper (white cloth), the product
drying is completed.
2. It can also be dried directly in a medical drying cabinet (or oven).
The recommended drying temperature is 80℃~120℃ and the time
should be 15~40 minutes.
Notes:
a) The drying of product must be performed in a clean place.
b) The drying temperature should not exceed 138 °C;
c) The equipment used should be inspected and maintained regularly.

36 37
6.4.6 Inspection and maintenance
6.4.6.1 Inspection
In this chapter, we only check the appearance of the product.
1. Check the product. If there is still visible stain on the product after
cleaning/disinfection, the entire cleaning/disinfection process must be
repeated.
2. Check the product. If it is obviously damaged, smashed, detached,
corroded or bent, it must be scrapped and not allowed to continue to be
used.
3. Check the product. If the accessories are found to be damaged,
please replace them before use. And the new accessories for replacement
must be cleaned, disinfected and dried.
4. If the service time (number of times) of the product reaches the
6.4.6.2 Maintenance
Sterilizable Oil lubrication shall be applied to dried contra angle.
The nozzle of cleaning lubricant is to be aligned with the air intake
hole at the end of the contra angle to inject oil for 1-2 seconds.
6.4.7 Packaging
Install the disinfected and dried product and quickly package it in a
medical sterilization bag (FDA cleared wrap or pouch).
Notes:
a) The package used conforms to ISO 11607;
b) It can withstand high temperature of 138 °C and has sufficient
steam permeability;
c) The packaging environment and related tools must be cleaned
regularly to ensure cleanliness and prevent the introduction of
contaminants;
6.4.8 Sterilization
Use only the following steam sterilization procedures (fractional pre-
vacuum procedure*) for sterilization, and other sterilization procedures
are prohibited:
to EN 285 to comply with EN ISO 17665 or is cleared by FDA;
The validated sterilization cycle is one (1) fraction cycle, three (3)
consecutive half cycle and one (1) full cycle. The parameters are provid-
ed in the table below.
.
Notes:
are allowed to be sterilized;
b) Before using the sterilizer for sterilization, read the Instruction
Manual provided by the equipment manufacturer and follow the
instructions.
c) Do not use hot air sterilization and radiation sterilization as this
may result in damage to the product;
d) Please use the recommended sterilization procedures for
sterilization. It is not recommended to sterilize with other sterilization
procedures such as ethylene oxide, formaldehyde and low temperature
plasma sterilization. The manufacturer assumes no responsibility for the
procedures that have not been recommended. If you use the sterilization
procedures that have not been recommended, please adhere to related
* Fractional pre-vacuum procedure = steam sterilization with
repetitive pre-vacuum.The procedure used here is to perform steam
sterilization through three pre-vacuums.
6.4.9 Storage
1.Store in a clean, dry, ventilated, non-corrosive atmosphere with a
relative humidity of 10% to 93%, an atmospheric pressure of 70KPa to
106KPa, and a temperature of -20 °C to +55 °C;
2. After sterilization,the product should be packaged in a medical
sterilization bag or a clean sealing container, and stored in a special
storage cabinet. The storage time should not exceed 7 days. If it is
exceeded, it should be reprocessed before use.
Mode Vacuum Temperature Cycle Exposure Time Drying Time
PreVac - 80 kPa (132-134) °C
Fraction 30 seconds 20 minutes
Half 1 2 minutes 20 minutes
Half 2 2 minutes 20 minutes
Half 3 2 minutes 20 minutes
Full 4 minutes 20 minutes
This manual suits for next models
1
Table of contents


