Edlund Company S-11 User manual
M128
1
SERVICE MANUAL- M128
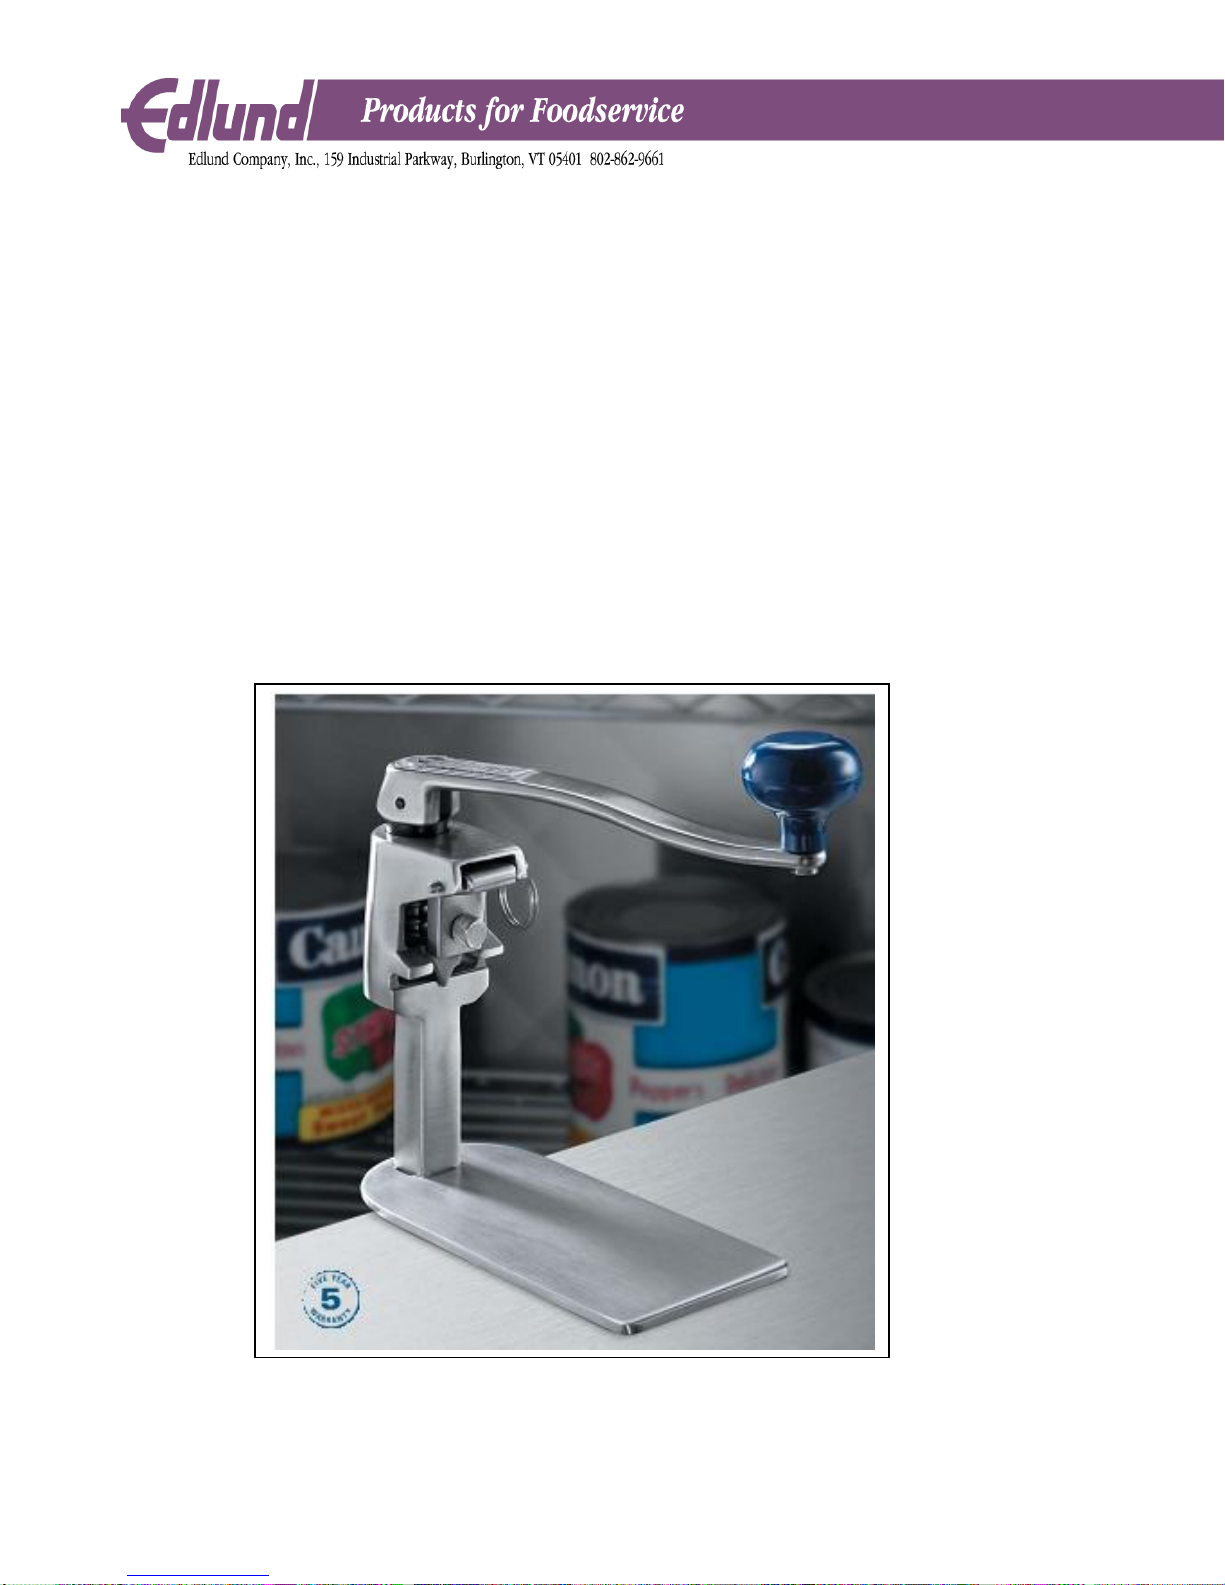
MODEL #S-11 MANUAL CAN OPENER

M128
2
Model S-11 Can Opener Assembly Procedure
The Model S-11 can opener will be assembled according to the following procedure:
I. Model S-11 Handle and Arbor Assembly (A942) (Fig. 1 and Fig. 2)
Insert arbor (A050) into slot at end of handle assembly (A943). Align holes and secure by pressing knurled pin (P026) flush
with side of handle assembly.
II. Model S-11 Knife holder Assembly (A941) Fig. #1 and Fig. #2
Slide the S-11 "O" seal (R085) over the knife retaining screw (S276) until the seal is against the knurled screw head. Place
the knife (K032) against the front of the tang of the knife holder, H063, align the holes and secure in place using the knife
retaining screw (S276). End of knife must slide under the slot at the top of the tang.
III. Model S-11 Main Assembly Fig. 1 and Fig. 2
Place the spring (S275) down inside top hole in the slide bar assembly (A941/A941L). Place the spool (S274) on top of the
spring and slide the gear (G030) into the gear slot of the slide bar. Slide the arbor of the handle and arbor assembly (A942)
down through the spool and the spring and thread gear onto the end of the arbor by retaining the gear and turning the handle
and arbor assembly clockwise when viewed from the top of the handle.
Lift the handle and slide the ears of the knife holder assembly (A946) into space between the flanges of the spool. Align the
hole in the knife holder with the holes in the slide bar and secure using pull pin (P169).
Inspect using test instructions EC1067A.
IV. Can Opener Maintenance
1. Knife Replacement Procedure -The knife (K032) must be checked periodically to make sure that there aren’t any nicks
or visible wear on the edge. When a nick or groove can be felt with the fingernail, the knife should be reversed to use the
unused edge or it should be replaced.
To reverse the knife, raise the handle and remove the pull pin (P169). Remove the knife holder assembly (A946). Remove
the knife retaining screw (S276) and turn the knife over and retain with the knife retaining screw. Place knife holder
assembly back into slot in spool, align holes and insert pin (P169). The can opener is now ready for operation.
"O" seal should be replaced each time the knife is replaced. A new seal is included with each knife.
2. Gear Replacement Procedure - Gear should be replaced when it will no longer turn a can or the gear starts to remove
metal from the bead of the can. To remove the gear, place a soft screw or nail on the right side of the gear between the gear
and the edge of the gear slot, to hold the gear, and turn handle and arbor assembly counter clockwise. Remove gear and
clear gear slot of all food and can residue.
Place the new gear (G030) into the gear slot with stamped words "Edlund Up" toward top of slide bar. Slide arbor down
through the spool and spring and thread gear onto the end of the arbor by retaining the gear and turning the handle and arbor
clockwise looking down onto handle.
3. Spool Replacement - If knife doesn't rotate far enough away from the drive gear to allow the knife to penetrate the can
lid when the can opener is used, then the spool may need to be replaced.
To replace the spool, raise the handle and remove the knife holder assembly as in knife replacement procedure. Remove the
handle and arbor assembly as in the tear replacement procedure, replace the worn spool with a new one and reassemble the
can opener.
If there is any questions about proper operation of this can opener, inspect using test instruction EC1067A.

M128
3
Model #S-11 NSF Certified Manual Can Opener Care and Maintenance Procedures
The Edlund Model S-11 NSF certified manual can opener, holding patent #, must receive proper care and maintenance in order to
function properly and to prevent unsafe conditions over the life of the product or the life of any of its components. To obtain the
maximum life of the product, follow the care and maintenance procedures below:
Cleaning Procedure: The can opener should be cleaned daily or after each extended use. The S-11 is manufactured almost
entirely of cast stainless steel and is dishwasher safe for easy cleaning. Follow the procedures below:
A. Raise the can opener handle; remove the stainless steel pull pin and the knife holder assembly. Remove all food and can
particles from the knife holder, knife, drive gear and knife stop assembly using the stainless steel cleaning brush, Edlund Model #
ST-93. Regular use of this tool will make dishwashing or cleaning the unit easier.
B. Remove the knife from the knife holder by unscrewing the knurled screw. Clean as necessary to remove any food residue from
the knife, knife holder or knurled screw using soap and water. Clean the can opener slide bar and handle assembly using the
stainless steel brush. All parts may be placed in a dishwasher or pot sink for final cleaning.
The drive gear should be disassembled from the can opener weekly and the parts thoroughly cleaned using the cleaning brush.
These parts should then be placed in the dishwasher or pot sink for a final wash cycle.
C. If product buildup becomes too heavily caked for easy cleaning, use the following procedure. If a dishwasher is not available,
remove the knife from the knife holder and wash as in step “B”. Dry thoroughly using a cloth or paper towel. Place the can opener
in the base and remove the drive gear by placing a nail, flathead screw driver or soft metal object in the right hand space between
the gear and the edge of the gear cavity to prevent gear rotation. Unscrew the handle and arbor assembly from the drive gear by
turning the handle counter-clockwise until the handle and arbor are free. Remove the gear spring, spool and handle and arbor
assembly from the can opener housing and clean off all food and can particles from all parts using the cleaning brush. Wash all
the parts using soap and water and thoroughly dry by using a cloth or paper towel.
Reassemble the can opener by placing slide bar in the base; place the gear in the gear slot with the word “up” toward the top of the
can opener. Insert the spring and spool into the spring cavity and insert the handle and arbor assembly through the spool and
spring and into the threaded hole of the drive gear. Tighten by placing a nail or soft metal object in the left hand space between the
drive gear and the edge of the gear slot. Turn the handle and arbor assembly clockwise until the assembly is tight. Place the knife
on the knife holder and align the hole in the knife holder with the threaded hole in the knife. Insert the knurled screw through the
hole in the knife holder and tighten the knurled screw.
Lift the handle of the handle and arbor assembly and insert the knife holder assembly into the can opener and into the space in the
spool. Align the hole in the knife holder with the holes in the can opener housing and insert the pull pin. The can opener is now
ready for operation.
D. The base assembly should be removed at least weekly from the worktable by unscrewing the clamp if it is a clamp base or the
three screws and wing nuts if it is a screw-on base and cleaned using the cleaning brush. Wash with soap and water or in the
dishwasher and thoroughly dry. Reassemble to the worktable by tightening the clamp or the three screws and wing nuts.
ii. Maintenance Procedure Periodically perform maintenance as follows:
A. Check for wear of the shear blade or knife by running a fingernail over the cutting edge to make sure a sharp groove has not
formed. A groove in the blade can cause metal slivers. If a groove is found turn the knife over to use the unused cutting edge or
replace the blade with a new one. This check can be done each time the can opener is cleaned.
B. The drive gear should be inspected for wear monthly by first opening a dent free #10 can with the opener. Inspect the can bead
to see if the lines left by the drive gear are narrow and evenly spaced or if they are wide. Wide grooves indicate that the gear is
slipping and removing metal from the can bead. If the gear is removing metal from the can bead or “milling,” inspect the gear for
wear.
If the teeth are dull, replace the drive gear using the procedure listed in Section 1C.
If the gear teeth appear to be sharp, check the bearing hole of the bushing located below the drive gear by turning the opener
upside down and determining if the hole is elongated. If the hole is elongated, remove the drive gear using the method previously
described and drive out the bronze bushing and replace this bushing. Reassemble the opener for use, using the method previously
described.
C. To prevent premature wear of the bronze-bushing place a small amount of non-sticking vegetable oil into the bushing each time
the can opener is cleaned.
D. The can opener and base should be inspected weekly for any excessive wear to the base slot or any part of the can opener. If
any excessive wear affects the operation of the can opener, replace those parts or assemblies.
Please note: The Edlund Model S-11 can opener holds two patents and is designed to provide many years of trouble free use. All
S-11 parts are repairable and replaceable. We are so confident in this product that we offer a full 5-year warranty against
manufacturing defects.

M128
4
Model S-11 Can Opener
Trouble Shooting Guide
Problem Cause Correction
I. Can opener will not
turn can. 1. Drive gear is worn. 1. Replace gear (G030).
2. Drive gear needs cleaning. 2. Clean drive gear (G030) and gear slot using
cleaning tool (ST-93).
3. Bushing (B173) in slide bar or
arbor (A050) is worn allowing
gear to move out of contact with
the can bead.
3. Inspect arbor and bushing and replace as
necessary.
II. Knife will not lift far
enough from gear to
pierce can when handle is
lifted.
1. Worn spool (B274). 1. Replace spool.
III. Metal slivers found in
food product. 1. Nick or groove worn on
cutting edge of knife (K032).
2. Worn drive gear (G030).
3. Sharp edge on knife stop.
1. Reverse knife or replace if it has been reversed
already.
2. Replace drive gear.
3. Round edge using file or replace slide bar.
IV. Can opener keeps
withdrawing from the can
during can opening
operations.
1. Worn or loose slide bar.
2. Can opener used in base or
preparation table that doesn't
have two-degree angle on bar
holder.
1. Replace base.
2. Replace base or repair hole in preparation table
to include two-degree angle to bar holder.

M128
5

M128
6
S-11 CAN OPENER
PART # U/M DESCRIPTION
A050 EA. ARBOR, S-11
A941 EA. WELDMENT & ASSEMBLY, S-11 HEAD TUBE
A941L EA. WELDMENT & ASSEMBLY, S-11 LONG HEAD TUBE
A942 EA. ASSEMBLY, S-11 HANDLE/ARBOR
A943 EA. WELDMENT, S-11 HANDLE/KNOB
A944C EA. ASSEMBLY, S-11 CLAMP BASE
A944H EA. ASSEMBLY, HARDWARE PKG., S-11 BASE
A945 EA. WELDMENT, #1 TO S-11 SOCKET
A946 EA. ASSEMBLY, S-11 KNIFEHOLDER
A949SP EA. WELDMENT, S-11 BASE
B173 EA. BEARING, S-11 .50DX.313IDX.56
G030SP PKG. GEAR, S-11 SINGLE PACK
H063 EA. HOLDER, S-11 KNIFE, FINISHED
K032SP PKG. KNIFE, S-11 SINGLE PACK
L048 EA. LABEL, S-11 PATENT #5052110
L049 EA. LABEL, NSF REGULAR LISTING MARK
L050 EA. LABEL, S-11 NSF WALL
N040 EA. NUT, 1/4-20 WING, S/S
P026 EA. PIN, S-11 KNURL
P169 EA. PIN, S-11 KNIFEHOLDER PULL
R085 EA. RING, S-11 0, BLACK 70 DURO #009
S022 EA. SCREW, 1/4-20 X 3 FH SLOTTED, S/S
S274 EA. SPOOL, S-11
S275 EA. SPRING, S-11
S276 EA. SCREW, S-11 KNURL
W015 EA. WASHER, ¼” S/S FLAT
Other Edlund Company Can Opener manuals


