Efficient Networks SpeedStream 007-0826-001 User manual

For more information about Efficient Networks or our products, please visit our website
www.efficient.com
©2003 Efficient Networks, Inc. All rights reser ved. Efficient Networks, its logos, and SpeedStream
are registered and unregistered trademarks of Efficient Networks, Inc. All other brand names and
trademarks are held by their respective companies. Efficient Networks reserves the right to make
changes to product specifications at any time without notice.
TroubleshootinConfi ure the Gateway
Step
Step 3
Common PC Confi uration Procedures
Step
Step 4
Corporate Headquarters
4849 Alpha Road
Dallas, Texas 75244
1+972-852-1000 PHONE
1+972-852-1001 FAX
info@efficient.com EMAIL
Wireless Gateway
Quick-Start Guide
SpeedStream®
Pa t #007-0826-001
Power
Link
Activity
Ethernet 1 2 3 4 5 DSL USB 802.11 Status
If your P has not been connected to a broadband modem or other network device, you will need to perform
the PC configuration procedure below. Remember to restart each P when finished.
1. Start your web browser. In the Address box, enter the following: HTTP://speedstream
2. Press Enter. The SpeedStream Simple Setup Wizard will launch.
3. When prompted, enter the Internet connection information provided by your Internet Service Provider.
4. At the end of the Setup Wizard, you will be given the option to either connect to the Internet or further
configure the optional settings of the gateway.
5. If additional configuration is desired, select the icon for the service or option you wish to configure: the
gateway’s firewall and security settings, User Profiles and content filtering, or home network options.
For non-standard configurations or troubleshooting procedures, consult the User Guide on D-ROM.
Using the Wireless onnection
The SpeedStream Gateway is configured to work seamlessly with other SpeedStream wireless products right
out of the box. You may need to reconfigure some wireless settings to ensure that all settings match
between wireless devices if you are:
a) Also using another manufacturer’s wireless products
OR
b) Adding the SpeedStream gateway to an existing wireless network
NO E: Mismatched wireless settings will prevent successful wireless network connections between devices.
Default Wireless Interface Settings:
SSID: SpeedSt eam
hannel: 11
WEP: Disabled
NOTE: WEP is disabled by default fo ease of installation. Fo added secu ity, it is ecommended that you enable WEP
on all wi eless devices.
P onfiguration
In order to setup the SpeedStream DSL Gateway your P must first be configured to obtain an IP address
from a DH P server. Follow the procedure below:
Note: he following procedures cover configuration of a PC running Windows®95, 98, 98SE or Me®.
Please refer to the User Guide on the CD-ROM for help configuring other operating systems.
1. Right-click the Network Neighborhood icon on the desktop.
2. Select Properties from the menu.
3. Select the Configuration tab.
4. Identify the TCP/IP -> network card entry. If this entry is not present,
ensure both your network adapter and the T P/IP protocol are installed properly.
5. Highlight the TCP/IP -> network card entry.
6. lick the Properties button.
7. Ensure that Obtain an IP address automatically is selected.
8. Select the DNS Configuration tab and ensure that Disable DNS is selected.
9. lick the OK button to close the dialog. Then lick the OK button again to save changes
and exit Network Properties.
10. Restart your P , even if no changes were made.
11. Proceed to the Internet Access section of this quide to complete configuration.
Internet Access
Next, make sure your P will use the SpeedStream®DSL Gateway (and not Dial-Up Networking) when con-
necting to the Internet. Follow the below procedure:
1. Select Start -> Settings -> Control Panel - and double click on the Internet Options icon.
2. Select the Connections tab.
3. Select Setup.
4. Select “I want to set up my Internet connection manually, or I want to connect through a Local
Area Network (LAN).”
5. lick Next.
6. Select “I connect through a Local Area Network (LAN).”
7. lick Next.
8. Ensure that all checkboxes on the “Local Area Network Internet Configuration” screen are
unchecked.
9. Follow the remaining prompts and when complete, click Finish.
10. If prompted, reboot your P .
ongratulations! You have completed the installation of your SpeedStream®
DSL Gateway.
POWER On (Green) – Power On. Note: When powering up LED will be RED until self-test is complete.
Off – Power Off.
Ethernet For each Ethernet numbered LAN port on the back of the ateway, there are 2 LEDs: (1, 2, 3, 4, 5)
Link
•On – Corresponding numbered LAN port is active.
•Off – No active connection on the corresponding LAN port.
Activity
•Off – No data being transmitted or received via the corresponding numbered LAN port.
•Flashing – Data is being transmitted or received via the corresponding numbered LAN port.
DSL For the DSL connection, there are 2 LEDs:
Link
•On – DSL connection is active.
•Off – No active DSL connection.
Activity
•Off – No data being transmitted or received via the DSL connection.
•Flashing – Data is being transmitted or received via the DSL connection.
USB For the USB port, there are 2 LEDs:
Link
•On – USB connection to PC is active.
•Off – No active USB connection to PC detected.
Activity
•Off – No data being transmitted or received via the USB port.
•Flashing – Data is being transmitted or received via the USB port.
802.11 For the 802.11 wireless connection, there are 2 LEDs:
Link
• On – Wireless connection is active.
• Off – No active wireless connection detected.
Activity
• Off – No data being transmitted or received via the wireless connection.
• Flashing – Data is being transmitted or received via the wireless connection.
STATUS Reserved for future functionality

DSL 10BASE-T USB PWR-
Before you begin: Install Line Filters
Step
Step 1
Verify that the following items came with your DSL kit:
23
1
1
2Choose an Installation Method
Step
Step
Line filter(s)
P I Ethernet adapter Wall-mount
line filter
2
3
2
3
1
Two-to-one
adapter(s)
Ethernet Installation Method
Option A:
3
USB Installation Method
Option B:
Documentation Software D-ROM
SpeedStream
Wireless DSL Gateway
RJ-11
DSL cable
Power supply
SpeedStream®
Safety and Certifications
xxxx
SpeedStream®
Safety andCertifications
xxxx
SpeedStream
®
Safety andCertifications
SpeedStream®
RJ-45
Straight-through
Ethernet cable
USB cable
Power Supply
RJ-11 DSL cable
Internet onnection
Internet onnection
w/two-to-one adapter
Hub
Optional:
Use Crossover (Xover) cable
when connectin to a hub or
switch without an “Uplink” port
Ethernet onnection
to computer RJ-45
Strai ht-throu h
Ethernet cable
RJ-11 DSL cable
Internet onnection
Internet onnection
w/two-to-one adapter
3
4
4a
Power Supply
5
1
USB onnection
to computer
2
Devices such as fax machines, caller ID boxes, or phones that share the same phone line as your DSL
account require a line filter, which prevents noise from disrupting the DSL signal on the phone line. Filters can
be in the form of a stand-alone line filter or a wall mount filter. A filter can also be plugged into a two-to-one
adapter if your SpeedStream DSL gateway will share the same phone jack with another device.
Stand-alone Line Filter
For each device that shares the DSL phone line:
1. Unplug the device’s co d f om the phone jack.
2. Plug the filte into the phone jack.
3. Plug the phone co d (o othe device co d)
into the filte .
Wall Mount Filter
For a wall mount phone, install a wall mount filter:
1. Remove the phone.
2. Connect the wall mount filte to the
wall plate.
3. Reconnect the phone.
Two-to-One Adapter
If your SpeedStream DSL gateway and another
device will share the same phone jack, install
a two-to-one adapter:
1. Plug adapte into the phone jack.
2. Plug a line filte into one of the sockets of
the two-to-one adapte . The othe socket will
be used to connect the DSL cable.
3. Plug the telephone (o othe device) co d into the line filte .
If you are using the USB port to install the gateway, you will need to provide your D-ROM drive letter
during software installation. To find the drive letter, double-click the
MMyy CCoommppuutteerr
icon on your desktop.
Look for the D icon and note the letter next to it. This letter is your D-ROM drive letter.
Your service provider may include a wall-mount filter, two-to-one adapter(s), line filter(s), and an
Ethernet adapter in your DSL kit. If you received any of these items, follow the instructions provided in
this guide for basic installation. If you need further assistance installing these items, please contact
your service provider.
The SpeedStream®DSL gateway may be connected to either an existing USB port or an Ethernet port. If you
choose to attach the SpeedStream®gateway via the Ethernet interface, it is only necessary to complete
the steps in Option A. Otherwise, proceed directly to Option B for USB installation.
Install Ethernet Adapter
You will need to install an Ethernet adapter if your computer does not already have one installed.
Refer to your Ethernet adapter manufacturer’s documentation for complete installation instructions.
onnect the SpeedStream DSL Gateway
1. Connect the st aight-th ough Ethe net cable to the Ethe net po t on the gateway.
2. Connect the othe end of the st aight-th ough Ethe net cable to the Ethe net po t on you compute .
3. Plug the DSL cable into the DSL po t on the gateway.
4. Plug the othe end of the DSL cable into the phone jack.
4a. If using a two-to-one adapte , plug the cable into the open socket of you two-to-one adapte .
5. Plug the powe adapte into the powe outlet and gateway.
You have completed the installation of your SpeedStream®hardware; there is no gateway software installa-
tion required when using the Ethernet connection method. Proceed to Step 3 to configure your gateway and
connect to the internet.
Software Installation
Before installing the software, make sure your P is equipped with the following:
• Windows®98, Windows®98 Second Edition (SE), Windows®2000 Professional,
Windows®Millennium Edition (Me), or Windows® XP
• 32 MB RAM
• Pentium-compatible 166 MHz processor or faster processor
• 12 MB available hard disk space
1. Inse t the SpeedSt eam®Installation CD into you CD-ROM d ive.
2. Click the Start button on the Windows®taskba .
3. Select Run f om the Start menu.
4. Type “e:\setup.exe”whe e “e”ep esents you CD-ROM d ive.
Note: your CD-ROM drive letter may not be “e.”
5. Click the OK button.
6. The softwa e installation p og am will sta t. Follow the on-sc een di ections to complete the softwa e
installation. When p ompted to attach the gateway, please efe to the inst uctions below.
onnect the SpeedStream DSL Gateway
1. Connect the USB Cable to the USB po t at the ea of the gateway.
2. Connect the othe end to the USB po t on you compute .
3. Plug the DSL cable into the DSL po t on the gateway.
4. Plug the othe end of the cable into the phone jack.
4a. If using a two-to-one adapte , plug the cable into the open socket of you two-to-one adapte .
5. Plug the powe adapte into the powe outlet and gateway.
6. Powe on the compute .
You have completed the installation of your SpeedStream®DSL hardware. Proceed to Step 3 to configure
your gateway and connect to the internet.

For more information about Efficient Networks or our products, please visit our website
www.efficient.com
©2003 Efficient Networks, Inc. All rights reser ved. Efficient Networks, its logos, and SpeedStream
are registered and unregistered trademarks of Efficient Networks, Inc. All other brand names and
trademarks are held by their respective companies. Efficient Networks reserves the right to make
changes to product specifications at any time without notice.
TroubleshootinConfi ure the Gateway
Step
Step 3
Common PC Confi uration Procedures
Step
Step 4
Corporate Headquarters
4849 Alpha Road
Dallas, Texas 75244
1+972-852-1000 PHONE
1+972-852-1001 FAX
info@efficient.com EMAIL
Wireless Gateway
Quick-Start Guide
SpeedStream®
Pa t #007-0826-001
Power
Link
Activity
Ethernet 1 2 3 4 5 DSL USB 802.11 Status
If your P has not been connected to a broadband modem or other network device, you will need to perform
the PC configuration procedure below. Remember to restart each P when finished.
1. Start your web browser. In the Address box, enter the following: HTTP://speedstream
2. Press Enter. The SpeedStream Simple Setup Wizard will launch.
3. When prompted, enter the Internet connection information provided by your Internet Service Provider.
4. At the end of the Setup Wizard, you will be given the option to either connect to the Internet or further
configure the optional settings of the gateway.
5. If additional configuration is desired, select the icon for the service or option you wish to configure: the
gateway’s firewall and security settings, User Profiles and content filtering, or home network options.
For non-standard configurations or troubleshooting procedures, consult the User Guide on D-ROM.
Using the Wireless onnection
The SpeedStream Gateway is configured to work seamlessly with other SpeedStream wireless products right
out of the box. You may need to reconfigure some wireless settings to ensure that all settings match
between wireless devices if you are:
a) Also using another manufacturer’s wireless products
OR
b) Adding the SpeedStream gateway to an existing wireless network
NO E: Mismatched wireless settings will prevent successful wireless network connections between devices.
Default Wireless Interface Settings:
SSID: SpeedSt eam
hannel: 11
WEP: Disabled
NOTE: WEP is disabled by default fo ease of installation. Fo added secu ity, it is ecommended that you enable WEP
on all wi eless devices.
P onfiguration
In order to setup the SpeedStream DSL Gateway your P must first be configured to obtain an IP address
from a DH P server. Follow the procedure below:
Note: he following procedures cover configuration of a PC running Windows®95, 98, 98SE or Me®.
Please refer to the User Guide on the CD-ROM for help configuring other operating systems.
1. Right-click the Network Neighborhood icon on the desktop.
2. Select Properties from the menu.
3. Select the Configuration tab.
4. Identify the TCP/IP -> network card entry. If this entry is not present,
ensure both your network adapter and the T P/IP protocol are installed properly.
5. Highlight the TCP/IP -> network card entry.
6. lick the Properties button.
7. Ensure that Obtain an IP address automatically is selected.
8. Select the DNS Configuration tab and ensure that Disable DNS is selected.
9. lick the OK button to close the dialog. Then lick the OK button again to save changes
and exit Network Properties.
10. Restart your P , even if no changes were made.
11. Proceed to the Internet Access section of this quide to complete configuration.
Internet Access
Next, make sure your P will use the SpeedStream®DSL Gateway (and not Dial-Up Networking) when con-
necting to the Internet. Follow the below procedure:
1. Select Start -> Settings -> Control Panel - and double click on the Internet Options icon.
2. Select the Connections tab.
3. Select Setup.
4. Select “I want to set up my Internet connection manually, or I want to connect through a Local
Area Network (LAN).”
5. lick Next.
6. Select “I connect through a Local Area Network (LAN).”
7. lick Next.
8. Ensure that all checkboxes on the “Local Area Network Internet Configuration” screen are
unchecked.
9. Follow the remaining prompts and when complete, click Finish.
10. If prompted, reboot your P .
ongratulations! You have completed the installation of your SpeedStream®
DSL Gateway.
POWER On (Green) – Power On. Note: When powering up LED will be RED until self-test is complete.
Off – Power Off.
Ethernet For each Ethernet numbered LAN port on the back of the ateway, there are 2 LEDs: (1, 2, 3, 4, 5)
Link
•On – Corresponding numbered LAN port is active.
•Off – No active connection on the corresponding LAN port.
Activity
•Off – No data being transmitted or received via the corresponding numbered LAN port.
•Flashing – Data is being transmitted or received via the corresponding numbered LAN port.
DSL For the DSL connection, there are 2 LEDs:
Link
•On – DSL connection is active.
•Off – No active DSL connection.
Activity
•Off – No data being transmitted or received via the DSL connection.
•Flashing – Data is being transmitted or received via the DSL connection.
USB For the USB port, there are 2 LEDs:
Link
•On – USB connection to PC is active.
•Off – No active USB connection to PC detected.
Activity
•Off – No data being transmitted or received via the USB port.
•Flashing – Data is being transmitted or received via the USB port.
802.11 For the 802.11 wireless connection, there are 2 LEDs:
Link
• On – Wireless connection is active.
• Off – No active wireless connection detected.
Activity
• Off – No data being transmitted or received via the wireless connection.
• Flashing – Data is being transmitted or received via the wireless connection.
STATUS Reserved for future functionality
Table of contents
Popular Wireless Router manuals by other brands
GL Technologies
GL Technologies GL.iNet Slate GL-AR750S-Ext Getting started
Verizon
Verizon Ellipsis Jetpack MHS900L user guide
NetComm
NetComm HS1200N user manual
Sunsea AIoT
Sunsea AIoT SIMcom R7600E-H quick start guide
Asus
Asus RT-AC53U user guide
SMC Sierra Monitor
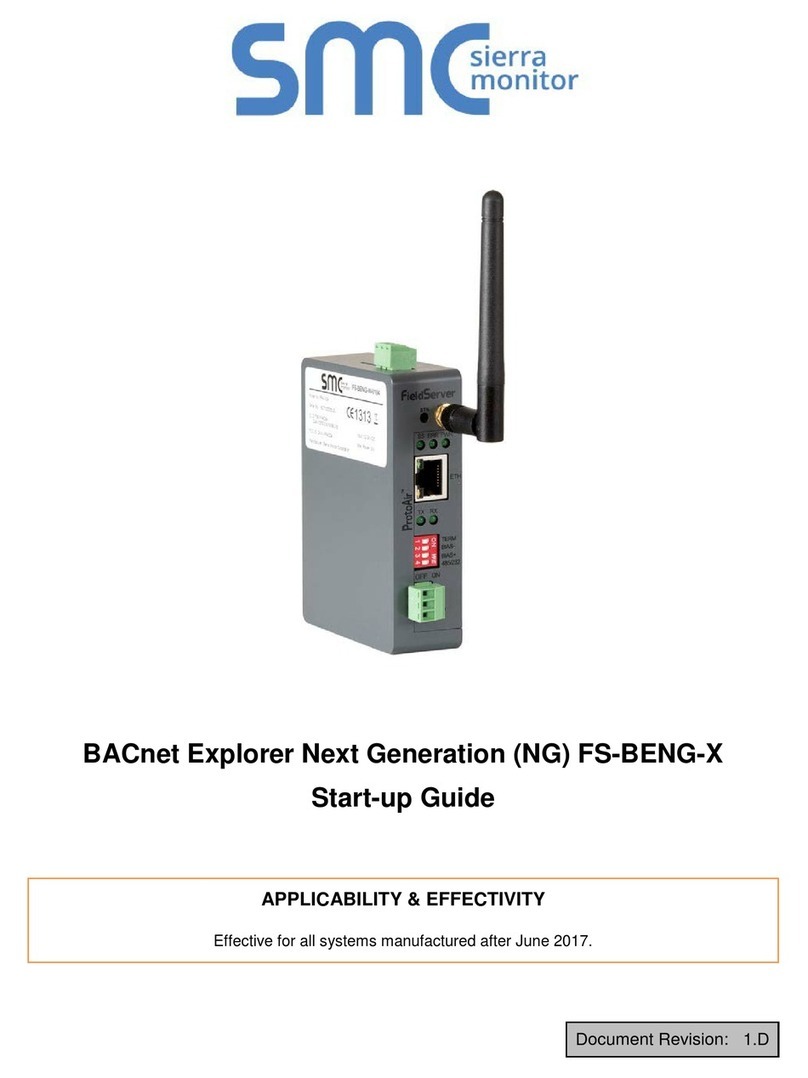
SMC Sierra Monitor FS-BENG Series Startup guide
