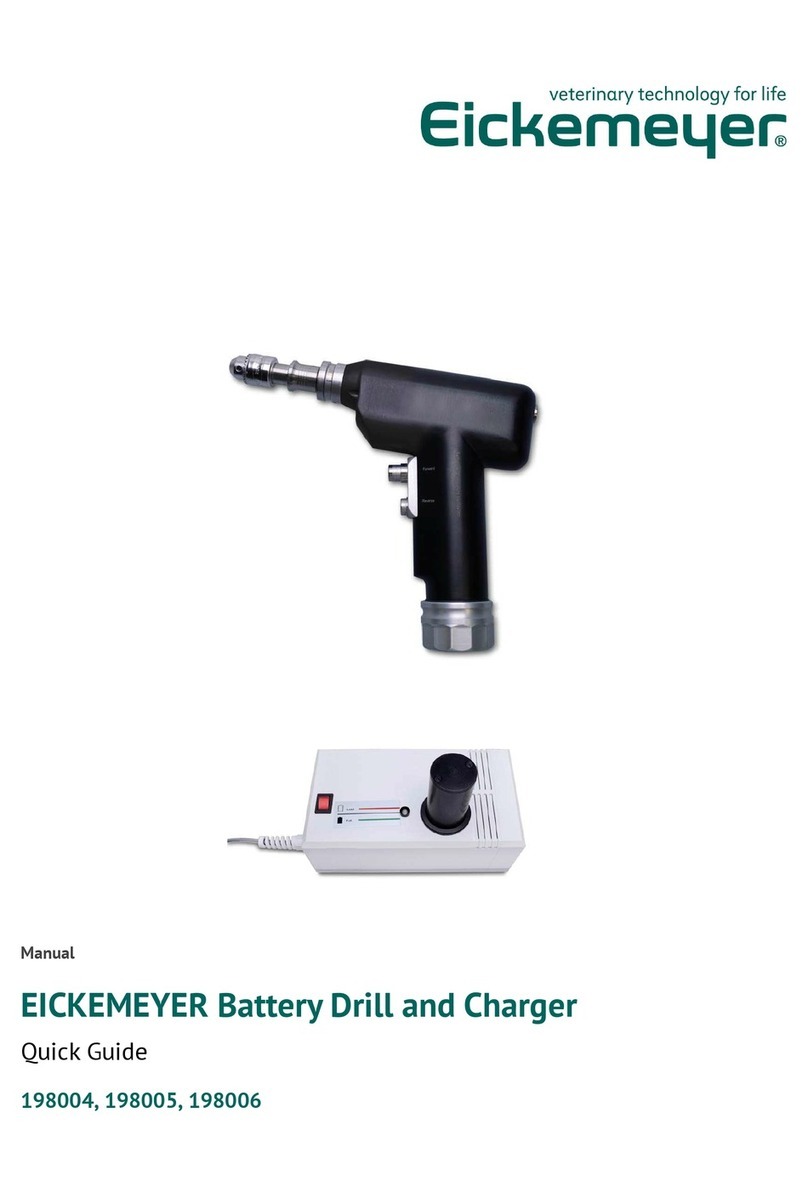
Eickemeyer ORTHOVET PRO User manual

USER MANUAL
ORTHOVET PRO
BATTERY POWERED DRILL SYSTEM
Item no. 195000
TELEPHONE +49 7461 96 580 0
www.eickemeyer.com
USER MANUALUSER MANUAL
Item no. 195000Item no. 195000

2
USER MANUAL ORTHOVET PRO BATTERY POWERED DRILL SYSTEM
T +49 7461 96 580 0 | F +49 7461 96 580 90 | export@eickemeyer.com | www.eickemeyer.com

3
USER MANUAL ORTHOVET PRO BATTERY POWERED DRILL SYSTEM
T +49 7461 96 580 0 | F +49 7461 96 580 90 | export@eickemeyer.com | www.eickemeyer.com
CONTENT
1. Introduction .............................................................................................................................. 4
General Information ..............................................................................................................................4
2. OrthoVet PRO .......................................................................................................................... 6
Handpiece .................................................................................................................................................6
Use...............................................................................................................................................................7
3. Attachments / Chucks............................................................................................................... 9
General Information ..............................................................................................................................9
Jacobs Chuck ......................................................................................................................................... 11
Quick Chuck for KIRSCHNER-Wires............................................................................................... 12
Oscillating Saw-Chuck....................................................................................................................... 12
AO-Quick Chuck .................................................................................................................................. 15
4. Care and Maintenance ..........................................................................................................15
Preparation Prior to Cleaning ......................................................................................................... 15
Manual Cleaning Instruction........................................................................................................... 16
Lubrication..............................................................................................................................................17
Sterilisation .......................................................................................................................................... 21
Function Control ................................................................................................................................. 22
Packaging, Sterilization and Storage............................................................................................ 22
Repairs and Technical Service......................................................................................................... 23
Disposal ................................................................................................................................................. 23
5. Troubleshooting .....................................................................................................................24
6. System Specifi cations ...........................................................................................................25
Environmental Conditions................................................................................................................ 25
Technical Data OrthoVet PRO........................................................................................................................................................25
Duty Cycles / Intermittent Operation ............................................................................................ 25
7. Ordering Information............................................................................................................. 26
Warning!
This description alone does not provide suffi cient background for the direct use of the product. Instruction in
handling this product is highly recommended.

4
USER MANUAL ORTHOVET PRO BATTERY POWERED DRILL SYSTEM
T +49 7461 96 580 0 | F +49 7461 96 580 90 | export@eickemeyer.com | www.eickemeyer.com
1. INTRODUCTION
General Information
The OrthoVet PRO Battery Powered Drill System consists of:
• Handpiece, cannulated
• Jacobs Chuck
• Quick Chuck for KIRSCHNER-Wires, cannulated
• AO-Quick Chuck
• Oscillating Saw-Chuck
Accessories
• Charging station
• Batteries
• Funnel for handpiece
• Show case for transportation
• Container
• Sterilisation Tray
Intended Use
The OrthoVet PRO is a battery-driven power tool for use in veterinary osteosynthesis involving surgical procedures such as
drilling, burring, reaming, pin and wire placement, cutting of bone and hard tissue in small animals.
The keyless coupling (also used for saw blades) enables the exchange of different attachments in just a few seconds. Operation
of the OrthoVet PRO is possible in clockwise and counterclockwise direction as well as in oscillation cutting operation with
the saw attachment.
Safety Instructions
The surgeon has to assess whether the machine is suitable for the respective surgery on the basis of the performance
limitations of the machine, the ancillary equipment and the cutting tool with respect to bone strength /anatomical situation
as well as the handling of the machine, the attachment and the cutting tool. Furthermore, the
contraindications for the
implant must be taken into account. Please read the corresponding “surgical techniques” of the used implant system.
The OrthoVet
PRO
is only to be used for patient treatment after careful consultation of the instructions for use. It is
recommended that an alternative system is available to use during application,as technical problems can never be completely
ruled out.
The OrthoVet PRO is designed for use by physicians and trained medical personnel.
Do not use any component if damage is apparent.
Do not use any component if the packaging is damaged.
Do not use this equipment in the presence of oxygen, nitrous oxide or a mixture consisting of fl ammable anesthetics and air.
To ensure the proper operation of the tool, only use EICKEMEYER® original accessories.
Before the fi rst and every subsequent use, power tools and their accessories / attachments have to run through the complete
reprocessing procedure. Protective covers and foils must be fully removed before sterilization.
For the tool to function properly, EICKEMEYER® recommends cleaning and servicing it after each use in accordance with the
process recommended in the chapter “Care and Maintenance”. Compliance with these specifi cations can considerably extend
the service life of the tool. Only use EICKEMEYER® oil / oil spray, (item no. 563706) to lubricate the tool.
Effi ciently working cutting tools are the basis for successful surgery. Therefore, it is mandatory to check used cutting tools

5
USER MANUAL ORTHOVET PRO BATTERY POWERED DRILL SYSTEM
T +49 7461 96 580 0 | F +49 7461 96 580 90 | export@eickemeyer.com | www.eickemeyer.com
after every use for wear and /or damage and to replace them if necessary. We recommend using new EICKEMEYER® cutting
tools for every surgery. Cutting tools must be cooled with irrigation liquid to prevent heat necrosis. The user of the product is
responsible for proper use of the equipment during surgery. If the OrthoVet PRO System is used in conjunction with an
implant system, make sure to consult the corresponding “Technique Guide”.
The manufacturer shall assume no responsibility for damage resulting from improper operation, neglected or unauthorized
maintenance of the tool.
Precautions
• To avoid injuries, the locking mechanism of the tool has to be activated before every manipulation and before placing
the tool back down, i.e. the mode switch has to be in “S = STOP” position.
• The handpiece may only be operated with a fully charged battery. To do this, ensure that the battery is charged in good time.
EICKEMEYER®
recommend that the battery is replaced into the charger immediately after surgery.
• The batteries may never be sterilized, washed or dipped. Sterilization would destroy the battery with possible secondary
damage.
• Should the machine drop on the fl oor and have visible defects, do not use it anymore and send it to the EICKEMEYER®
service center.
Accessories / Scope of Delivery
The OrthoVet PRO Battery Drill System consists of a handpiece, one battery loading station two batteries and a range of
attachments and accessories designed for the system.
Special auxiliaries such as cleaning brushes (Item no. 195011) and oil are available for cleaning and servicing the system.
No oils from other manufacturers must be used. Only lubricate the power tool and the attachments when clean.
EICKEMEYER® recommends the use of the specifi cally designed EICKEMEYER® OrthoVet PRO Sterilisation Tray (Item no.
195087) and Container-System (Item no. 185555) to sterilize and store the system.
The following components are essential to ensure proper operation:
• Handpiece (Item no. 195001)
• Battery charging station (Item no. 195006)
• Battery (Item no. 195007)
• Funnel for handpiece (Item no. 195008)
• At least one attachment/ chuck of the system (Item no. 195002, 195003, 195004 or 195005)
Please refer to the end of these Instructions for Use for an overview of the components of the system.
Storage and Transport
Please use the original packaging / show case (Item no. 195010) for dispatch and transport. If this is no longer available,
please contact your EICKEMEYER® offi ce.
Warranty
The warranty for the tools and accessories does not cover damage of any kind resulting from improper use, damaged seals or
improper storage and transport. EICKEMEYER® does not accept liability for damage resulting from repairs or maintenance
carried out by unauthorized sites.

6
USER MANUAL ORTHOVET PRO BATTERY POWERED DRILL SYSTEM
T +49 7461 96 580 0 | F +49 7461 96 580 90 | export@eickemeyer.com | www.eickemeyer.com
2. ORTHOVET PRO
Handpiece
The handpiece (Item no. 195001) of the OrthoVet PRO drill is cannulated.
1 Attachment coupling
2 Switching pin for direction change FORWARD / STOP / REVERSE
3 Trigger for speed regulation
4 Cover lid Battery closed when the battery is inserted
5 Release ring for attachment
6 Release slide for battery housing
7 F = FORWARD
8 S = STOP
9 R = REVERSE
1 5
3
4
6
7
8
9
2
Figure 1 Figure 2

7
USER MANUAL ORTHOVET PRO BATTERY POWERED DRILL SYSTEM
T +49 7461 96 580 0 | F +49 7461 96 580 90 | export@eickemeyer.com | www.eickemeyer.com
Use
Before initial use, brand-new tools and accessories must under go the entire reprocessing process and the batteries should
be charged.
Inserting the Battery in the Battery Casing
To ensure sterility, the battery is inserted into the battery casing by two people, one of whom is wearing sterile garments.
1. The person with the sterile garments holds the sterile battery casing. If the casing is not opened, the same person
presses the central button to unlock (Fig. 3) and the housing cover with slide (Fig. 4) in arrow direction
(Fig.6)
and opens the lid. In doing so, fold the lid outwards with the locking mechanism.
Figure 3 Figure 5 Figure 6Figure 4
2. The person wearing the sterile garments places the sterile funnel (Item no. 195008) on the battery casing (Fig. 7) and
checks if it is seated correctly (Fig. 8). The sterile cover ensures that the unsterile battery does not contact the outside of
the sterile casing.
Figure 7 Figure 8
3. The person not wearing sterile garments carefully guides the unsterile battery through the sterile funnel
(itemno.95008),
(Fig. 8). The orientation of the battery is correct when the battery is inserted into the corresponding
profi le in the handpiece (Fig.9). The same person presses it completely into the battery casing to ensure a correct seat
(Fig. 10). This person may not contact the outside of the battery casing.
Figure 10Figure 9

8
USER MANUAL ORTHOVET PRO BATTERY POWERED DRILL SYSTEM
T +49 7461 96 580 0 | F +49 7461 96 580 90 | export@eickemeyer.com | www.eickemeyer.com
4. The person not wearing sterile garments grasps the sterile cover funnel (Item no. 195008) and removes it from the battery
casing (Fig. 11).
Figure 11
5. The person wearing the sterile garments closes the casing lid from the outside without touching the battery or the inside
of the casing
(Fig. 12 + 13). After the cover has been closed, the person wearing the sterile clothing pushes the slider in
the direction until the lid locks with a click.
Figure 12 Figure 13
Precautions
Normally, one battery is suffi cient for one surgery. For safety, two batteries should be kept ready ensuring fast intraoperative
changing of batteries under sterile conditions if necessary.
Charging
Only charge the batteries in the OrthoVet PRO charging station (Item no. 195006).
Always fully charge batteries before use in the OR.
The battery is fully charged as soon as the indicator lamp on the socket plug has changed from BLUE to GREEN.
Storing
When not in use, always store the battery in the OrthoVet PRO charging station and switch it on. This prevents the battery
from being discharged and keeps it ready for use with full charge. Never load batteries in another charging station.This would
damage the batteries.
Make sure that stored batteries are stored separately and do not store with materials that can conduct electricity to prevent
short circuits. This could damage the battery and cause burns due to heat.
Use
Use the battery only as intended. Use only batteries approved for this device. Only insert the battery into the handpiece
immediately before using the OrthoVet PRO System.This saves energy. Due to the longer battery life an intraoperative battery
change is usually unnecessary. Do not drop batteries or apply force to the batteries. This would destroy the battery and cause
possible additional damage. Never use damaged or faulty batteries; they can damage the power tool.
Additional Information
Do not expose batteries to heat or fi re. Avoid storage in direct sunlight. Keep the charger and the batteries clean and in a cool
and dry place. Danger of fi re, explosion and burns. Do not disassemble, crush, heat to over 60 °C / 140 °F or burn.

9
USER MANUAL ORTHOVET PRO BATTERY POWERED DRILL SYSTEM
T +49 7461 96 580 0 | F +49 7461 96 580 90 | export@eickemeyer.com | www.eickemeyer.com
Notes
For more information, see the “Care and Maintenance” section on page 15.
Please read the guidelines for the transport of Lithium-ion battery (Li-ion), for the return transport to the EICKEMEYER®
Service Center.
3. ATTACHMENTS/ CHUCKS
General Information
The OrthoVet PRO System offers a broad range of attachments.
Mounting the Attachments
Figure 14
195003
195005195002 195004
Insert the attachment into the attachment coupling (Fig. 14). If the positioning pins do not lock into place right away, twist
the attachment a bit to the right or left until it locks into the correct position. Check if the attachment is seated correctly by
gently pulling on it.

10
USER MANUAL ORTHOVET PRO BATTERY POWERED DRILL SYSTEM
T +49 7461 96 580 0 | F +49 7461 96 580 90 | export@eickemeyer.com | www.eickemeyer.com
Removing the Attachments
Figure 15
Turn the rotary ring with grooves clockwise on the handpiece and pull the attachment out from the coupling (Fig.15).
Precautions
• To prevent injury, the power tool must be switched to “S = STOP” with the safety system during each manipulation.
• Only use original attachments and tools from EICKEMEYER®. Damage that arises from using attachments and tools made
by other manufacturers is not covered by the warranty.
• If the instrument is not needed during the operation, lay down the handpiece to make sure it is stable and cannot tip over.
To mount or remove attachments and cutting tools, always place the drive unit in an upright position on the sterile table.
Item no. Description Maximum Speed Torque
195002
Jacobs Chuck with key, cannulated
, clamping rangeØ0.6 – 2.5mm 0 – 1,200 rpm ≥ 3.0 NM
195003 Quick Chuck for KIRSCHNER-wires,
cannulated
, clamping range Ø 0.6 – 2.6mm 0 – 1,200 rpm ≥ 3.0 NM
195004 AO-Quick Chuck 0 – 1,200 rpm –
195005 Oscillating Saw-Chuck 0 – 16,000 rpm ≥ 3.0 NM

11
USER MANUAL ORTHOVET PRO BATTERY POWERED DRILL SYSTEM
T +49 7461 96 580 0 | F +49 7461 96 580 90 | export@eickemeyer.com | www.eickemeyer.com
Jacobs Chuck
For tools with round shaft (Item no. 195002).
Inserting and Removing Tools
Inserting tools:
Open the jaws of the Chuck using the appropriate key (Item no. 195084) or by hand. Insert the shaft of the tool into the open
drill chuck and close it by twisting the chuck. Make sure that the shaft lies central to the three jaws. Tighten the drill chuck
with the key. Make sure that the teeth of the key engage correctly in the toothed rim of the chuck.
Removing tools:
Open the Chuck with the key and remove the tool.
Open the Chuck with the key and remove the tool.
Figure 16
Precautions
• Check the cutting tool for wear and/or damage after each use and replace if necessary.
• To ensure good fi xation of the tools, make sure the toothed rims on the drill chuck and key are not worn.
• During reaming procedure, high torque values must be provided by the power tool to the reaming head to allow effi cient
bone removal. In cases where the reaming head suddenly is blocked, these high torque values can be transferred onto the
user’s hand, wrist and / or the patient’s body.
In order to prevent injuries it therefore is essential that:
• The power tool is held in an ergonomical position with a fi rm grip.
• If the reamer / drill head blocks, release the speed trigger immediately.
• Use the Jacobs Chuck with Reverse motion only with tools that are approved for such use. Otherwise, the tool may break
with subsequent damage.

12
USER MANUAL ORTHOVET PRO BATTERY POWERED DRILL SYSTEM
T +49 7461 96 580 0 | F +49 7461 96 580 90 | export@eickemeyer.com | www.eickemeyer.com
Quick Chuck for KIRSCHNER-Wires
KIRSCHNER-Wires of any length with a diameter of 0.6 – 2.6 mm can be used with the Quick Chuck for KIRSCHNER-Wires
(Item no. 195003).
1. Apply a slight amount of pressure to insert the KIRSCHNER-Wire from the front into the cannulation (Fig. 17, no. 1).
The wire is held automatically.
2. Adjust the working length by pulling on the wire.
3. To affi x the wire, pull the tension lever (Fig. 17, no. 2) against the tool with your little fi nger and ring fi nger. Only pull the
tension lever against the tool as much as necessary. The clamping force can be varied by pulling and releasing the
clamping lever.
4. Insert the wire into the bone. Apply the clamping force as long as the wire is advanced.
5. To adjust the grip on the wire, reduce the clamping force and move the tool to the desired length. Reclamp the wire by
pulling on the tension lever.
2
1
1
Figure 17
Oscillating Saw-Chuck
For saw blades with AESCULAP Connection (Item no. 195005).
Figure 18

13
USER MANUAL ORTHOVET PRO BATTERY POWERED DRILL SYSTEM
T +49 7461 96 580 0 | F +49 7461 96 580 90 | export@eickemeyer.com | www.eickemeyer.com
Positioning the Saw Attachment
The attachment can be connected in two different positions (180° / 360°). The handpiece should be in: “S = STOP”-position.
Insert the saw attachment into the handpiece and rotate the attachment in the desired position (Fig. 19 and Fig. 20).
Figure 19 Figure 20
Assembly and Disassembly of the Tools
Insert the tool /saw blade in the front of the attachment while pressing the locking knob down. Insert the saw blade in such
a way that the perforated holes in the saw blade fi t in the pins of the holder. Release the locking knob.
Figure 21
Precaution
To prevent injury, always grip the saw attachment with the inserted saw blade from the direction of the machine.

14
USER MANUAL ORTHOVET PRO BATTERY POWERED DRILL SYSTEM
T +49 7461 96 580 0 | F +49 7461 96 580 90 | export@eickemeyer.com | www.eickemeyer.com
Change Saw Blade
1. Set the handpiece in “S = STOP”-position.
2. Press down the locking knob continuously.
3. Lift and remove the saw blade.
4. Use a slight amount of pressure to insert the new saw blade and turn it to one of the 5 desired position.
5. Place your thumb on the saw blade coupling to hold the saw blade. Insert the saw blade in such a way that the perforated
holes in the saw blade fi t in the pins of the holder. Release the locking knob.
6. Unlock the power tool.
Positioning the Saw Blade
The saw blade can be adjusted in the desired position vertically and horizontally at an angle of 45° (see the earlier sections
“Positioning the saw attachment” and “Changing the saw blade” (Fig. 22).
Figure 22
Using the Oscillating Saw Attachment
The saw blade must already be oscillating when the saw is applied to the bone. Do not apply strong pressure to the saw blade
as this will delay the cutting process and the saw teeth will catch in the bone. Optimal saw performance is achieved by
moving the power tool slightly back and forth in the plane of the saw blade so that the blade oscillates beyond the bone on
both sides. Very precise cuts can be made when the saw blade is guided steadily. Imprecise cuts arise due to used blades,
excess pressure or jamming the saw blade.

15
USER MANUAL ORTHOVET PRO BATTERY POWERED DRILL SYSTEM
T +49 7461 96 580 0 | F +49 7461 96 580 90 | export@eickemeyer.com | www.eickemeyer.com
AO-Quick Chuck
For tools with AO-coupling (Item no. 195004).
Assembly and Disassembly Tool
To connect the tool, pull the coupling sleeve back and then introduce the tool while rotating slightly.
To disconnect, push the coupling sleeve of the attachment back and remove the tool (Fig. 23a + 23b).
Figure 23bFigure 23a
4. CARE AND MAINTENANCE
Preparation Prior to Cleaning
Disassembly
Disassemble device if applicable. Remove all instruments and attachments from the handpiece and remove battery from
casing of the handpiece.
Batteries and Charge Station
To clean the batteries and the charger, wipe them off with a clean, soft and lint-free cloth dampened with disinfectant or
deionized water.
Warning!
Do not use solvents to disinfect the batteries. Battery poles must not contact water or solvents: danger of short
circuiting!

16
USER MANUAL ORTHOVET PRO BATTERY POWERED DRILL SYSTEM
T +49 7461 96 580 0 | F +49 7461 96 580 90 | export@eickemeyer.com | www.eickemeyer.com
Manual Cleaning Instruction
1. Remove debris
Use a sponge, soft lint-free cloth or soft-
bristled brush to assist in removing visible soiling while moving trigger, sleeves,
switches and other moving parts several times. The cleaning brush (Item no. 195011) shown below should be used to
clean handpiece and attachments
.
Figure 24
Precautions
• Never immerse the handpiece, lid or attachments in aqueous solutions or in an ultrasonic bath as this could decrease
the service life of the system. The poles in the handpiece must not come into contact with water or solvents: Risk of
short circuit!
• Under no circumstances should the handpiece and the adapter be placed in an immersion bath or in water.Inadvertently
liquid that has penetrated must be removed immediately.
• Do not use pointed objects for cleaning.
2. Disinfection – spray and wipe off
Spray and wipe the device using a neutral pH enzymatic solution for a minimum of 2 minutes.
Follow the enzymatic detergent manufacturer’s directions for correct temperature, water quality (i.e. pH, hardness) and
concentration / dilution.
3. Clean with Detergent
Clean the device manually under running warm water using an enzymatic cleaner or detergent for a minimum of 5minutes.
Manipulate all moving parts under running water. Use a soft-bristled brush and/ or soft lint-free cloth to remove all visible
soil and debris. Follow the enzymatic cleaner or detergent manufacturer’s instructions for use for correct temperature,
water quality and concentration / dilution.
4. After disinfection
Rinse the surface under running water. It is important to ensure that the handpiece and the attachments are at an angle
to prevent water from entering the coupling lugs.
ATTENTION: The cover of the battery housing of the handpiece must be closed so that the poles in the handpiece do not
get caught liquid in contact.
5. Final Rinse with De-Ionized / Purifi ed Water
Final rinse with de-ionized or purifi ed water for a minimum of 2 minutes.
6. Dry
Dry device using a soft lint-free cloth or clean compressed air.

17
USER MANUAL ORTHOVET PRO BATTERY POWERED DRILL SYSTEM
T +49 7461 96 580 0 | F +49 7461 96 580 90 | export@eickemeyer.com | www.eickemeyer.com
7. Automated Cleaning
Step Duration (minimum) Cleaning instructions
Rinse 2 minutes Cold tap water
Pre-wash 1 minute Warm water (≥ 40°C), use detergent
Cleaning 2 minutes Warm water (≥ 45°C), use detergent
Rinse 5 minutes Rinse with de-ionized (DI) or purifi ed water (PURW)
Thermal disinfection 5 minutes Hot de-ionized (DI) water, ≥ 93°C
Dry 40 minutes ≥ 90°C
8. Inspect the Device
Remove all the devices from the Sterilisation Tray. Inspect the cannulations, coupling sleeves, etc. for visible soil. If
necessary, repeat the manual pre-clean / automated cleaning cycle. Confi rm that all parts are completely dry. Mechanical
cleaning / disinfection is an additional stress for power equipment, especially for seals and bearings. Therefore, systems
must be properly lubricated and regularly sent to be serviced (at least once per year).
Lubrication
The power tool and attachments should be regularly lubricated to ensure a long service life and smooth operation. It is
recommended that the accessible moving parts of the handpiece, the battery casing and attachments are lubricated with
1drop of special oil / oil spray, (Item no. 563706) distribute the oil by moving the components. Wipe off the excess oil with a
cloth.
Lubricating the Handpiece (Fig. 25)
• Lubricate the trigger shafts and then press the trigger several times.
• Lubricate the attachment release buttons and then press the buttons several times.
• Lubricate the mode selector switch and then move it several times.
• Lubricate the attachment coupling.
Figure 25

18
USER MANUAL ORTHOVET PRO BATTERY POWERED DRILL SYSTEM
T +49 7461 96 580 0 | F +49 7461 96 580 90 | export@eickemeyer.com | www.eickemeyer.com
Lubricating the Battery Casing (Fig. 26 and 27)
• Place oil on the seal of the cover and then evenly distribute the oil on the seal.
• Lubricate the lock and hinges, then actuate it several times.
• Lubricate the battery casing release buttons from both the outside and inside and then press the buttons several times.
Figure 26 Figure 27
Attachments / Chucks
Lubricate all moving parts of all the attachments.
Jacobs Chuck (Item no. 195002)
Lubricate the jaws and toothed rim.
Figure 28

19
USER MANUAL ORTHOVET PRO BATTERY POWERED DRILL SYSTEM
T +49 7461 96 580 0 | F +49 7461 96 580 90 | export@eickemeyer.com | www.eickemeyer.com
Quick Coupling for KIRSCHNER-Wires (Item no. 195003)
Lubricate the tension lever and clamping mechanism.
Hold the Quick Coupling up and add one drop of oil into the attachment hole (Fig. 31) and on the holder of the lever
(Fig.29+30). Move the tension lever several times.
Figure 29 Figure 30 Figure 31
AO-Quick Chuck (Item No. 195004)
Figure 32 Figure 33

20
USER MANUAL ORTHOVET PRO BATTERY POWERED DRILL SYSTEM
T +49 7461 96 580 0 | F +49 7461 96 580 90 | export@eickemeyer.com | www.eickemeyer.com
Oscillating Saw Attachment (Item No. 195005)
Lubricate the locking mechanism and the saw blade coupling.
Open and close the locking mechanism several times, (Fig. 34 + 35).
Figure 34 Figure 35
Precautions
• To ensure a long service life and reduce repairs the power tool and all attachments must be lubricated after each use.
• Only lubricate the power tool and attachments when clean.
This manual suits for next models
1
Table of contents
Other Eickemeyer Drill manuals
