Eink SD1452-NCB User manual

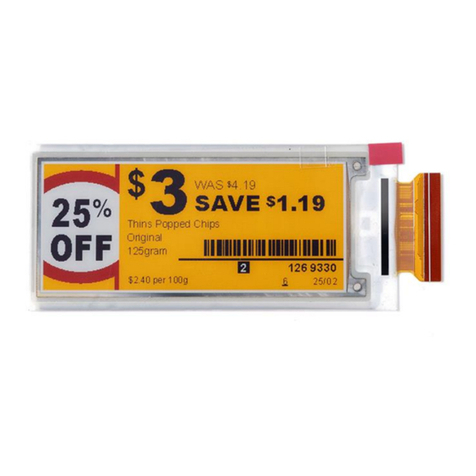
13.3" Kaleido ePaper Display
(SD1452-NCB)

Table of Contents
Firmware Update SOP .............................................................................1
1. Hardware Guide .........................................................................1
Hardware Requirements....................................................................... 1
Hardware Installation ........................................................................... 1
2. Software Guide...........................................................................2
Software Requirements........................................................................ 2
Firmware Update by Application Software .......................................... 2
ePaper Display Update SOP.....................................................................6
Introduction ...............................................................................6
Package Contents.................................................................................. 6
Hardware Guide .........................................................................8
Hardware Requirements....................................................................... 8
Demo Kit Hardware Description........................................................... 9
Hardware Installation ......................................................................... 10
3. Software Guide.........................................................................13
Software Requirements...................................................................... 13
E Ink APPLICATION Display mode Introduction.................................. 13
Display selected image to EPD............................................................ 14
Slide Show Function ........................................................................... 17
4. Troubleshooting .......................................................................20
5. Contact Information .................................................................20
6. Legal Information .....................................................................20

1
Firmware Update SOP
1. Hardware Guide
Hardware Requirements
The firmware update requirements included the CONCERTO driving board, micro-USB
cable and Windows PC/NB.
Hardware Installation
Refer to following figure to setup CONCERTO driving board and connect it to your PC/NB:
AConnect the micro-USB cable to CONCERTO driving board
BConnect the micro-USB cable to PC/NB USB port

2
2. Software Guide
Software Requirements
Application software ITE_TCon_DemoAP_v2.6.0exe required.
Firmware required: Load the corresponding bin file of ePaper display.
Put the firmware with application software in the same folder.
Firmware Update by Application Software
Press icon to open application software.
Click “connect” button to make sure the software has connected to physical drive.

3
Click “Refresh” and choose the firmware (bin file) option which you need to load:
Click “Upgrade” to load the firmware (bin file) to CONCERTO driving board.

4
Firmware (bin file) upgrade successful, click “OK” button.
Click “OK” button to close the application software.

5
Pull out the micro-USB cable, firmware update finished.

6
ePaper Display Update SOP
Introduction
E Ink’s CONCERTO demo kit is intended to highlight the features and benefits of the 13.3”
Kaleido ePaper display (EPD) display. This is an E Ink Kaleido™ 3 technology display
module. It contains a TFT substrate, e-paper, front light and color components and has
an active area of 13.3 inches. This module is capable of displaying images from 2-16 gray
levels (1-4 bits), depending on the display controller and the associated wave file it uses.
The front light can reduce light scatter to create more vivid images.
Included in the CONCERTO demo kit is CONCERTO driving board, micro-USB cable,
transfer boards, transfer cables and jumpers.
Package Contents
This demo kit contains the following:
CONCERTO Driving board
Micro-USB cable
Transfer board for touch
Transfer board for front light
6 pins cable
4 pins cable
Jumper
FPC adapter
FL adapter
CONCERTO Driving board
Micro-USB cable

7
Transfer board for touch
Transfer board for front light
6 pins cable
4 pins cable
Jumper
FPC adapter
FL adapter

8
Specification
Item
Specification
TCON
IT8951 DX
TCON Solution
Hardware TCON
LED Driving IC
LM3532
LED Driving Solution
I2C I/F control
E Ink Display Panel
13.3” Kaleido 3 Outdoor
Dimension (WxHxD mm)
285.80(W)*213.65(H)*1.98(D)
Shape
Rectangular
Resolution
1600 (H)×1200 (V)
Input
5Vdc (USB), power on when connected to PC
2. Hardware Guide
Hardware Requirements
CONCERTO Driving Board Demo Kits
Micro USB cable
Windows PC/NB

9
Table 1 Minimum PC Requirements
CPU
Pentium III 800 MHz or later
RAM
128MB or greater
Required Software
Windows 7 or newer
Interface
USB port
Demo Kit Hardware Description
The demo kit includes a CONCERTO driving board. The CONCERTO driving board
(connector 2 or connector 402) and E Ink ePaper display (EPD) panel are connected via
a corresponding FPC adapter. The demo kit is included the touch (connector J7) and front
light (connector J13) function. The micro USB port on the demo kit supplies power and
data to the ITE board and E Ink panel. Users can easily demo the touch, front light and
image update function on the touch screen of ePaper display. Furthermore, using the E
Ink PC application, users can send customized image data to the board or update settings.
CONCERTO driving board function

10
Hardware Installation
aConnect SD1452-NCB EPD to FPC adapter.
bConnect front light FPC to FL adapter. , Pin1 to Pin1

11
cConnect FPC adapter to CONCERTO driving board.
dConnect FL adapter to touch transfer board J8, Pin1 to Pin1. 6 pins cable connects
touch transfer board J9, Pin1 to Pin1.

12
e6 pins cable connects to CONCERTO J13 connector, Pin1 to Pin1.
fConnect micro USB cable to CONCERTO CN1 and PC/NB USB port.

13
3. Software Guide
Software Requirements
Application software ITE_TCon_DemoAP_v2.6.0exe required.
E Ink APPLICATION Display mode Introduction
What is a Waveform?
A predefined sequence of voltages applied to the E Ink material to switch it from one
gray tone to another gray tone.
Paired to display by production lot, display size, and waveform type.
Standard waveforms ensure proper product performance and reliability.
The waveform contains the following WF modes:
MODE 0 ─ INIT
Initialize is used to completely clear the display, if it's left in an unknown state (i.e.
if the previous image has been lost by a re-boot)
MODE 1 ─ WGCC2
Wide temperature Grayscale Clear, 2 Levels. It can update any changed gray tone
pixel to black or white only. It only updates changed pixels.
MODE 2 ─ GCC16
Grayscale Clear, 16 Levels. A “more flashy” waveform used for 16 level grayscale
images. This provides the best image appearance. All the pixels are updated or cleared.

14
Display selected image to EPD
Procedures are as following:
Run “ITE_TCon_DemoAP_v2.6.0exe” software
Click “Connect” button to make sure the software has connected to physical
drive(Figure 3-2-a)
Figure 3-2-a

15
Display EPD operation by USB interface contains the following steps:
Initial the SD1452-NCB EPD and CONCERTO driving board. (Figure 3-2-b)
Set the “Start Mode” and “End Mode” to “mode 0”.
Check “EnClrWhite” item.
Click “Display” icon, SD1452-NCB EPD initial to white pattern.
Figure 3-2-b
Load images and display on the SD1452-NCB EPD.
Set the “Start Mode” and “End Mode” to “mode 2”, check “AutoSet” Item to auto
set the resolution (Figure 3-2-c)
Figure 3-2-c

16
Click “Open File..” to open a file browser to select an image. (Figure 3-2-d, Figure 3-
2-e)
Figure 3-2-d
Figure 3-2-e

17
Display selected image to EPD (Figure 3-2-f)
Figure 3-2-f
Slide Show Function
Select the display image.
Named the folder “SlideShowImages” that including the pictures you what to display, it
needs to be in the same folder with the “ITE_Tcon_DemoAP_v2.6.0exe”
For example: “SlideShowImages” contains 4 pictures:
Picture 1 Picture 2 Picture 3 Picture 4

18
Connect to the CONCERTO driving board. (Figure 3-2-g)
Figure 3-2-g
The AP is connecting to the CONCERTO driving board successfully.
Slide Show display (Not Repeat) (Figure 3-2-h)
Operating Steps:
(1) Select “Display Mode”.
(2) Choose “SlideShow” option.
(3) Press “Start” button.
Figure 3-2-h
Table of contents
Other Eink Monitor manuals
Popular Monitor manuals by other brands
Gorgy Timing
Gorgy Timing RS232 user manual
Samsung
Samsung SyncMaster 900SL Plus Owner's instructions
HP
HP L1940T user guide
Hansol
Hansol 19Inch (Viewable size 18 ) High Resolution Color Monitor... user manual
CODEL
CODEL TunnelTech 602 Operation and maintenance manual
AOC
AOC Envision H2276WDL Service manual
