Eink AB1024-EGA User manual

5.65”E Ink Gallery Palette ™
4000 ePaper Display AB1024-
EGA

i
Table of Contents
Firmware Update SOP .............................................................................1
1Hardware Guide .........................................................................1
(1) Hardware Requirements....................................................................... 1
(2) Hardware Installation ........................................................................... 1
2Software Guide...........................................................................3
(1) Software Requirements........................................................................ 3
(2) Firmware Update by Application Software .......................................... 3
ePaper Display Update SOP.....................................................................5
1Introduction ...............................................................................5
(1) Package Contents.................................................................................. 6
2Hardware Guide .........................................................................7
(1) Hardware Requirements....................................................................... 7
(2) Demo Kit Hardware Description........................................................... 8
(3) Hardware Installation ........................................................................... 9
3Software Guide.........................................................................12
(1) Demo Kit Connection.......................................................................... 12
(2) Update Initial Data.............................................................................. 12
(3) Uploading Image................................................................................. 13
4Troubleshooting .......................................................................14
5Contact Information .................................................................14
6Legal Information .....................................................................14

1
Firmware Update SOP
1Hardware Guide
(1) Hardware Requirements
Buy a set of MSP-EXP430G2
You will get following stuffs in the package
MSP-EXP430G2
(2) Hardware Installation
The programmer need the jump line as the picture below
Connect to MSP430 and HULK MCU board

2
Please connect the Dupont line from J3 (VCC pin) of MSP430 LaunchPad to J1's 2nd
pin of HULK
Please connect the Dupont line from J3 (TEST pin) of MSP430 LaunchPad to J1's 8th
pin of HULK
Please connect the Dupont line from J3 (RST pin) of MSP430 LaunchPad to J1's 11th
pin of HULK
Please connect the Dupont line from J6 (GND pin) of MSP430 LaunchPad to J1's 9th
pin of HULK
Please pay attention! It must remove the HULK's adapter board when updating Firmware.
When you update Firmware, please confirm if the D2(power indicator) or D2(power
indicator) and D1(data indicator) of HULK are lighted.
It can update Firmware when indicators are lighted.
If the indicators are not lighted, please confirm the connect again.
Refer to following figure to setup MSP-EXP430G2 and connect it to your PC
Connect to PC

3
2Software Guide
(1) Software Requirements
Refer the guideline in following FET-Pro430 Lite website to download and setup driver
of MSP-EXP430G2
https://www.elprotronic.com/pages/downloads
Refer to following figure to connect MSP-EXP430G2 with your PC and HULK together.
Connect to PC
(2) Firmware Update by Application Software
Press drop-down menu "Microcontroller Type" to select a MCU model MSP430F5502
Please check "Port USB Automatic" to select 4-wires

4
Press "Open code file" button to select a firmware file (.txt)
Press "AUTO PROG" button to update the firmware into MCU
Show the Pass is firmware update ok.

5
ePaper Display Update SOP
1Introduction
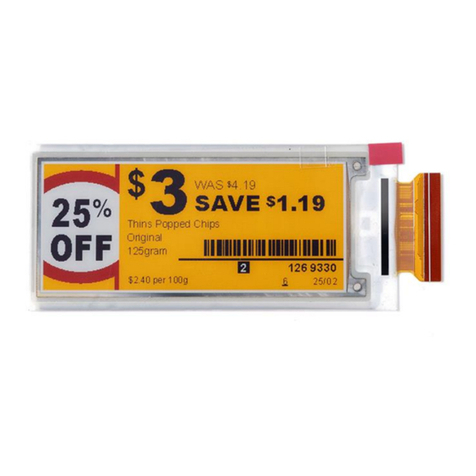
HULK - demo kit, with 5.65" E Ink Gallery Palette ™ 4000 e-Paper display(EPD) –AB1024-
EGA, allows E Ink clients to access hardware and software for evaluation. This kit
demonstrates as a turnkey solution for those who are interested in designing with E Ink
displays. Hardware and software design support is available from E Ink directly.
5.65" E Ink Gallery Palette ™ 4000 display panel is suitable for various applications, e.g.
tag application.
The low power consumption of the AB1024-EGA is ideal for applications such as
electronic shelf labels and indicators.
An All-in-one IC is embedded in the EPD, it include source/gate driver, TCON (Timing
controller), PMIC(power management IC) and Temp. sensor. It allows users to rapidly
design systems by using E Ink displays.
The kit allows E Ink clients to experience loading and viewing custom images on 5.65" E
Ink Gallery Palette ™ 4000 EPD. The use of MCU board to drive an E Ink EPD is
demonstrated with the kit.
IAR Integrated Development Environment (IDE) is adopted to write, download, and
debug an application.

6
(1) Package Contents
This demo kit contains the following:
E Ink demo kit: MCU driving board and E Ink display adapter
5.65" E Ink Gallery Palette ™ 4000 EPD
Mini USB cable
Demo Kit Contents
Specification
Item
Specification
TCON
MSP430
TCON Solution
Hardware TCON
E Ink Display Panel
Dimension (W × H × D, unit: mm)
99.5(W) × 125.4(H) × 1.18(D)
Shape
Rectangular
Resolution
600(H) × 448(V)
Controller Board
Input
5Vdc (USB), power on when connected to PC
5.65" E Ink Gallery Palette ™4000 EPD
MCU board and display adapter
Mini USB cable

7
2Hardware Guide
(1) Hardware Requirements
MCU board and display adapter
EPD panel
Mini USB cable
Windows PC
Minimum PC Requirements
CPU
Pentium III 800 MHz or later
RAM
128MB or greater
Required Software
Windows XP
Interface
USB port

8
(2) Demo Kit Hardware Description
The HULK 5.65" E Ink Gallery Palette ™ 4000 demo Kit includes an MCU board and an E
Ink display adapter board. The MCU board and E Ink display adapter board are connected
via a 16 pin header. The mini USB port on the demo kit supplies data and power to the
MCU board and E Ink panel. Using the E Ink PC application, users can send image data to
the board or update settings.
Demo Kit
There are two LEDs on the MCU board, LED 1 and LED 2. LED 1 indicates the board is
powered. LED 2 is used as a multi-purpose function light
MCU Board for Demo Kit
When LED2 is light on, EPD can’t accept any command

9
Four push button switches are also on the MCU board. The table below provides a short
description of the functions for each button.
Description of button functions
Button
Function
SW1
Reset
SW2
Display NEXT image
SW3
Display White image
SW4
Display PREVIOUS image
SW5
Slideshow
(3) Hardware Installation
The HULK 5.65" E Ink Gallery Palette ™ 4000 demo kit is connected to a PC via a mini USB
cable. The PC requires a USB driver to be installed on the PC.
This driver has been tested on Windows 7 64-bit
Connect one end of the mini-USB cable to the HULK 5.65" E Ink Gallery Palette ™ 4000
demo kit and other end to a USB port on a PC.

10
Open Device Manager on the computer. A new device called MSP430-USB Example
should be in the list. If this is the first time setting up the hardware, installation of the
device driver is required.
To install the device driver for MSP430-USB Example, double click on the device to bring
up the device Window. Click on "Update Driver" and select the file "HULK-USB-Driver.inf".
This driver has been tested on Windows 7 64-bits

11
To verify the installation of the driver was successful, a new device called Virtual COM
Port (CDC) should be present under COM LPT.

12
3Software Guide
(1) Demo Kit Connection
Open Flash_Burner_for_N-Color 5.65.exe.
If connection is correct, the COM port number will show up.
Select the COM port and press "Connect"
If connection is incorrect, the COM port will show COM1~COM6 (Please check driver for the
EVK)
(2) Update Initial Data
Select "Initial Data"
Press "Load file" to select an Initial file (.eink) that you want to use for the EPD.
Press "Write data" to update Initial file into the kit
After Initial Data are updated, you should press "disconnect" and un-plug/ plug Mini USB to
restart the kit.

13
(3) Uploading Image
Press "Load_Image" to select a image
Select "image 1" ~ "image 6" to decide display sequence
Press "Write_Image" to update image into the kit
E Ink suggests that images are in format for Black, Blue, Green, Orange, Red, Yellow, White.
After all image are updated, you should press "disconnect" and un-plug/plug Mini USB to
restart the kit.

14
4Troubleshooting
Below lists commonly asked questions.
Num
Name
Description
1
HULK N-Color 5.65" demo kit is
not detected by the PC
Cause: USB cable is damaged
Solution: Replace the USB cable
2
Demo kit connection fails
Cause: Progress bar is not completed
Solution: Disconnect the demo kit from Mini USB
and restart Flash_Burner_for_N-Color 5.65.exe
5Contact Information
For more information, please visit
http://www.eink.com
For sales office addresses, please visit
http://www.eink.com/contact_sales.html
6Legal Information
Definitions
The document is a draft version only. The content is still under internal review and
subject to formal approval which may result in modifications or additions. E Ink does
not give any representations or warranties as to the accuracy or completeness of
information included herein and shall have no liability for the consequences of use of
such information.
Right to make changes
E Ink reserves the right to make changes to information published in this document,
including without limitation specifications and product descriptions, at any time and
without notice.
Suitability for use
Products described in this document are intended for development purposes only and
comes without any warranty. E Ink accepts no liability for inclusion and/or use of E Ink
products in commercial products or applications and therefore such inclusion and/or use

15
is at the customer’s own risk. In no event shall E Ink be liable for any direct, indirect,
incidental, special, exemplary, or consequential damages (including, but not limited to,
procurement of substitute goods or services; loss of use, data, or profits; or business
interruption) however caused and on any theory of liability, arising in any way out of the
use of the software.
Applications
Applications that are described herein for any of these products are for illustrative
purposes only. E Ink makes no representation or warranty that such applications will be
suitable for the specified use without further testing or modification.
No offer to sell or license
Nothing in this document may be interpreted or construed as an offer to sell products
that is open for acceptance or the grant, conveyance or implication of any license under
any copyrights, patents or other industrial or intellectual property rights.
Trademarks
Notice: All referenced brands, product names, service names, and trademarks are the
property of their respective owners.
Table of contents
Other Eink Monitor manuals

