EIT Bactiscan User manual

TM
Rechargeable Bacteria and
Biolm Detection Lamp
USER MANUAL

Normal View
Item looks clean and normal
under white light or standard UV
Bactiscan™ View
Clearly reveals contamination
TM
Index
Page 3 Parts
Page 4 Charging
Page 5 Operating the Bactiscan™
Important warnings
Page 6 Camera Guide
Page 13 Mounting the charging base
Page 14 Specication
Page 15 Safe disposal of waste electrical products
Warranty terms
Thank you for purchasing the
EIT Bactiscan™ rechargeable bacteria
and biolm detection lamp, our
latest innovation offering an
all-in-one solution that combining a
high performance lamp in a single
lightweight, IP65 rated compact unit.
Important: Please read these instructions
carefully to ensure the safe and effective
use of this product.
With Bactiscan’s™ unique wave alternating UV
system, Bactiscan™ enables food processors to
immediately isolate Biolms, mould and bacteria
such as salmonella and E.coli and many other
contaminants are easily located and identied with
Bactiscan™ which makes the remediation job much
faster and therefore more cost effective.
These contaminants are often undetectable using
other methods such as white light and UV lamps.
With Bactiscan™ you can light up the entire surface
and get an immediate result, so within seconds you
can pick things up that would take hours with any
other method.
Handheld bacteria and
biolm detection system
Environmentally friendly wave altering UV to quickly
identify areas harbouring bacterial contaminants
such as E.coli, listeria and salmonella which are often
missed under standard white light or UV lamp.

Parts
1Lens
2On/Off Button
3Adjustable stand
4Charging base
5DC charger
4
2
1
3
5
3

Charging
1Slide the Bactiscan™ inside the charging base,
push until it slots in the back and connects with
the charging ports.
2Connect the charger lead into the input socket at
the back of the charging base.
3Plug the charger into a suitable socket outlet.
Turn switch on. The indicator on the charger will
illuminate red when charging and green when
fully charged.
4To release the Bactiscan™ from the charging
base, hold and pull the release levers towards
you, use your thumb to push the Bactiscan™
away from the charging slot as shown in picture.
5Once the Bactiscan™ is released slide the lamp
out of the charging base.
The Bactiscan™ unit is ready to be used.
Bactiscan uses smart battery technology.
When the battery is fully charged the battery
will fall into sleep mode and will maintain
a full charge via trickle charge. It is safe to
leave Bactiscan™ plugged in whilst in its
cradle.
Please note: The battery will reach
optimum performance after 5 complete
discharge/charge cycles.
4

Operating the Bactiscan™
Bactiscan™ illuminates a surface via 4 separate UV lights. These lights are UV-A type and are safe for short
use. It is always recommended that the user wear eye protection (not supplied) when operating Bactiscan™.
To switch ON, simply hold the grey button and the Bactiscan™ will turn on.
To turn the lamp OFF, release the grey button.
Bactiscan is available in two formats,
Bactiscan™ and BactiscanPRO™
BactiscanPRO™ utilises still photography and video capture to record contaminant clusters on a surface.
These les are uploaded to internal Quality System and will form the basis of a documented Corrective Action.
BactiscanPRO™ is tted with AKASO V50 4K/30fps and 20MP image action camera to capture every detail
of your audit. Built in Wi-Fi allows you to connect the camera to your phone or tablet, simply download the
AKASO GO app.
CAUTION
Modications not expressly approved by EIT International may void the users authority to operate the
equipment. The removal of any panels or components, or to open the sealed Bactiscan casing will render
the equipment damaged and will void any Warranty in place (see Page 7 – Warranty) . Damaged Bactiscan
unit through the malice of any third party will render the equipment written-off and the user will be liable
for all costs associated for repair or replacement of the unit.
UV Light Bulbs
Bactiscan™ and BactiscanPRO™ utilise UV-A and UV-B light bulbs which are uorescent tubes with a
dark blue or purple lter to remove other parts of the spectrum and leave just UV light.
UV (ultraviolet) light bulbs are often referred to as black light bulbs, or BLB (blacklight blue) bulbs. UV
lights feature small wavelengths that are measured in nanometres (nm). Nanometres often affect the UV
light bulb, with the bulb emitting either UVA, UVB or UVC UV radiation. None of these bulbs can penetrate
human skin and are safe to use.
EIT consider the health and safety of our customers to be of the utmost importance and as a matter of
good practice we suggest that users wear protective eyewear when operating Bactiscan™ and Bactiscan
PRO™ equipment.
5

Bactiscan Pro – Camera Guide
Contents
Getting Started 7
MICROSD CARDS 8
To Power On: 8
To Power Off: 8
SWITCHING MODE 8
To Switch Mode: 8
To Exit Mode: 8
TURNING ON / OFF Wi-Fi 8
To turn on Wi-Fi 8
To turn off Wi-Fi 8
SET DATE AND TIME 8
Camera Modes 9
Video Mode 9
PHOTO MODE 9
Playback Mode 9
Setting Mode 9
Connecting to the APP 10
Viewing your Content 11
VIEWING VIDEOS AND PHOTOS ON YOUR V50 PRO 11
Deleting Videos and Photos form your Camera 11
Downloading Content 12
OFFLOADING YOUR CONTENT TO A COMPUTER 12
OFFLOADING YOUR CONTENT TO SMARTPHONE 12
6

Getting Started
7

MICROSD CARDS
Use brand name memory cards that meet these requirements:
• microSD, microSDHC, or microSDXC
• Class 10 or UHS-III rating
• Capacity up to 64GB (FAT32)
Note:
1 Please format the microSD card rst in this camera before using. To keep your microSD card in good
condition, reformat it on a regular basis. Reformatting erases all of your content, so be sure to ofoad your
photos and videos rst.
2 FAT32 format microSD card stops recording when the storage of each le is over 4GB and starts to record
again on a new le. POWERING ON + OFF
To Power On:
Press and hold the Mode button for three seconds. The camera beeps while the camera status light is on.
When information appears on the LCD display or the camera status screen, your camera is on.
To Power Off:
Press and hold the Mode button for three seconds. The camera beeps while the camera status light is off.
SWITCHING MODE
To Switch Mode:
Turn on the camera, tap Mode Shift icon or press Mode button to switch mode.
To Exit Mode:
Press Mode button to exit mode.
TURNING ON / OFF Wi-Fi
To turn on Wi-Fi
Turn on camera, swipe down from the top of the screen with your nger or tap shortcut key to access to
menu. Then tap Wi-Fi icon to turn on Wi-Fi. You can also enter General Setting to turn on Wi-Fi.
To turn off Wi-Fi
Press and hold Shutter button for 5 seconds to turn off Wi-Fi.
SET TIME AND DATE
Tap right hand arrow. Go to Setup. Go to General. Scroll down to Date & Time. Adjust Date and tap Done.
Adjust Time and tap Done.
8

Camera Modes
There are 4 modes:
Video, Photo, Playback and Setting.
Video Mode
Video Mode is the default mode when you turn on
the camera. In Video Mode, press Shutter button,
the camera starts recording video. Press Shutter
button to stop recording video.
PHOTO MODE
Press Mode button once to switch to Photo Mode
after you turn on camera. In Photo Mode, press
Shutter button, the camera takes a photo.
Playback Mode
Press Mode button twice to switch to Playback
Mode.
Setting Mode
Press Mode button three times to switch to Setting
Mode.
9
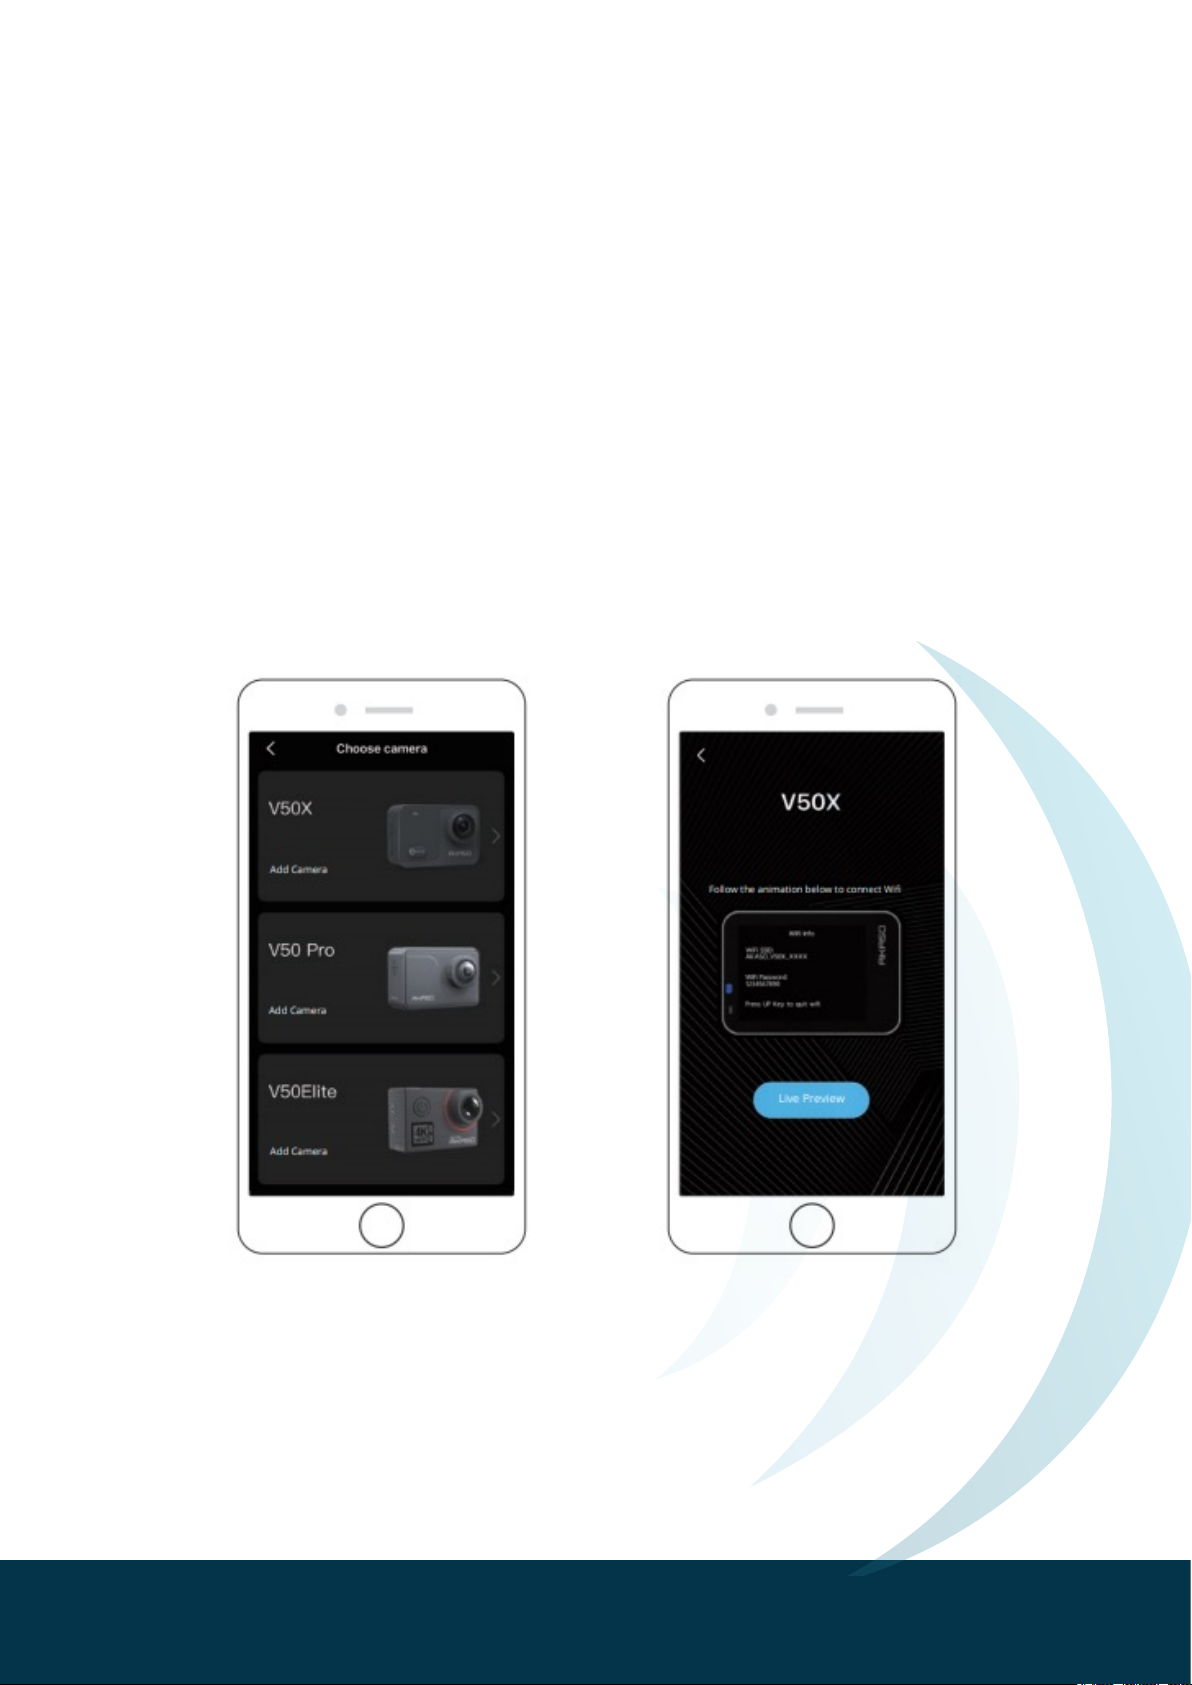
Connecting to the APP
Please download and install the AKASO GO app on the App Store or Google Play rst. The AKASO
GO app lets you control your camera remotely using a smartphone or tablet. Features include camera
control, live preview, playback, download and settings.
1Turn on the camera, press the Up button to turn on the Wi-Fi. The Wi-Fi name and password are shown on
the camera screen.
2 Connect the Wi-Fi “V50 PRO” and enter the password on your smartphone WLAN setting.
3 Open the AKASO GO app, tap “+” icon on the upper right corner. Add “V50 Pro” and click the “Live
Preview”.
4 Your camera will be connected with the AKASO GO app
10
This manual suits for next models
1
Table of contents


