ekomos AYOUND ECO-O2 User manual

For the proper use of the product, the damage of hazards and the degree of
damage caused by improper use are classied as follows:
Thank you for purchasing the AYOUND Eco-o2 LED Lantern.
This product is a lighting xture that has been developed for the lighting
of tents, tarps, PC works, or indoor mood lamps. Please read and fully
understand this manual to safely and properly use this product.
Please keep this manual in a safe place for future reference.
Symbol Precautions Scope
DANGER
This symbol denotes a potential hazard that will result in serious injury or death.
WARNING This symbol denotes a potential hazard that could result in serious injury
or death in some cases.
CAUTION
This symbol denotes a hazard that could result in injury or damage of the main
part and other parts.
EKOMOS Inc., Hanyang University Start-up Incubator Center,
55, Hanyangdaehak-ro, Sangnok-gu, Ansan-si,
Tel. +82-31-400-3936 Fax. 0303-3443-8390
Keep it out of reach of infants and children.
Be careful for infants and children not to mistake it as a toy.
(Ingestion of parts may lead to injury.)
Do not insert metals into the connector part or the connector terminal.
(Doing so may cause overheating, re, or electric shock.)
Do not disassemble or modify it.Never disassemble or modify it.
(Doing so may cause electric shock.)
Do not replace the batteries or touch the connector part with wet hands.
(Doing so may cause overheating, re, or electric shock.)
Close supervision of a guardian or an adult is advised to prevent children from
using the product. (It may cause an injury or electric shock to children when they
use the product without supervision of adults.)
Maintain the product regularly so that it will be clean and ready for next use.
Carefully wipe out dirt with a wet cloth.
Wipe out the external terminal with a dry cotton swab or cloth.
If the main part is wet, completely dry it rst with a soft cloth before storage. If water gets
into the USB connector or the main part, immediately stop using the product, and contact our
customer service center.
If the product will be stored and will not be used for a long time, turn off the BT button and
the CHARGE button. (Check for the function indicator lamp.)
We double-check the quality of our products to make sure that they are safe to use. However,
if a purchased product does not work properly, contact us or the store where you made your
transaction. In case of manufacturing defects, it will be repaired free of charge or replaced.
For other cases, it will be repaired at reasonable prices, so please bear with us. Please be
aware that it would not be repaired or replaced for the following cases:
A fall or a shock causes an accumulation of damages on the main part and, thus, unexpected
malfunctions during use.
Be careful not to apply excessive force or shock to the main part.
1. Life cycle by damages due to the aging of materials
2. Malfunction due to modication and poor handling
3. Malfunction due to prohibited handling as described on the manual
4. Malfunction due to unexpected accidents
5. Product malfunction due to other manufacturing defects
6. Malfunction due to pollution or rust
7. Malfunction due to disassembly
8. Malfunction due to part deformation and damage because of a fall or other shocks
9. Malfunction due to the change of parts because of abrasion
10. Malfunction due to the use of the product with the products of other companies
The lantern does
not turn on
The batteries are
discharged.
Check the residual quantity of the batteries,
and recharge the device.
The terminal is dirty.
If the terminal that gets into contact with the
batteries is dirty, clean the product with a dry
cloth.
The product is
out of order.
Immediately stop using the product, and contact
our customer service center.
Others
Do not swing the main part while using it.
(The main part may y into unexpected places and cause accidents.)
Do not use the main part in wet places. Do not pour water on it.
(Doing so may cause electric shock or malfunction.)
Make sure to prepare a spare light source and batteries in the places where the
light of lanten plays a key role.
Do not use it beyond the recommended usage temperature.
(
Doing so may cause a leak of the battery liquid or heating of the batteries, or re.
)
Do not use it in places with high temperature such as those nearby ammable
substances or heaters.
(Doing so may cause overheating and re due to disconnection or short circuit.)
When using external power, do not use in places with dripping water.
(Doing so may cause overheating, re, or electric shock.)
Connect this product only to the power source designated as a rated external
source (DC5C 2A). (Doing otherwise may cause overheating or re.)
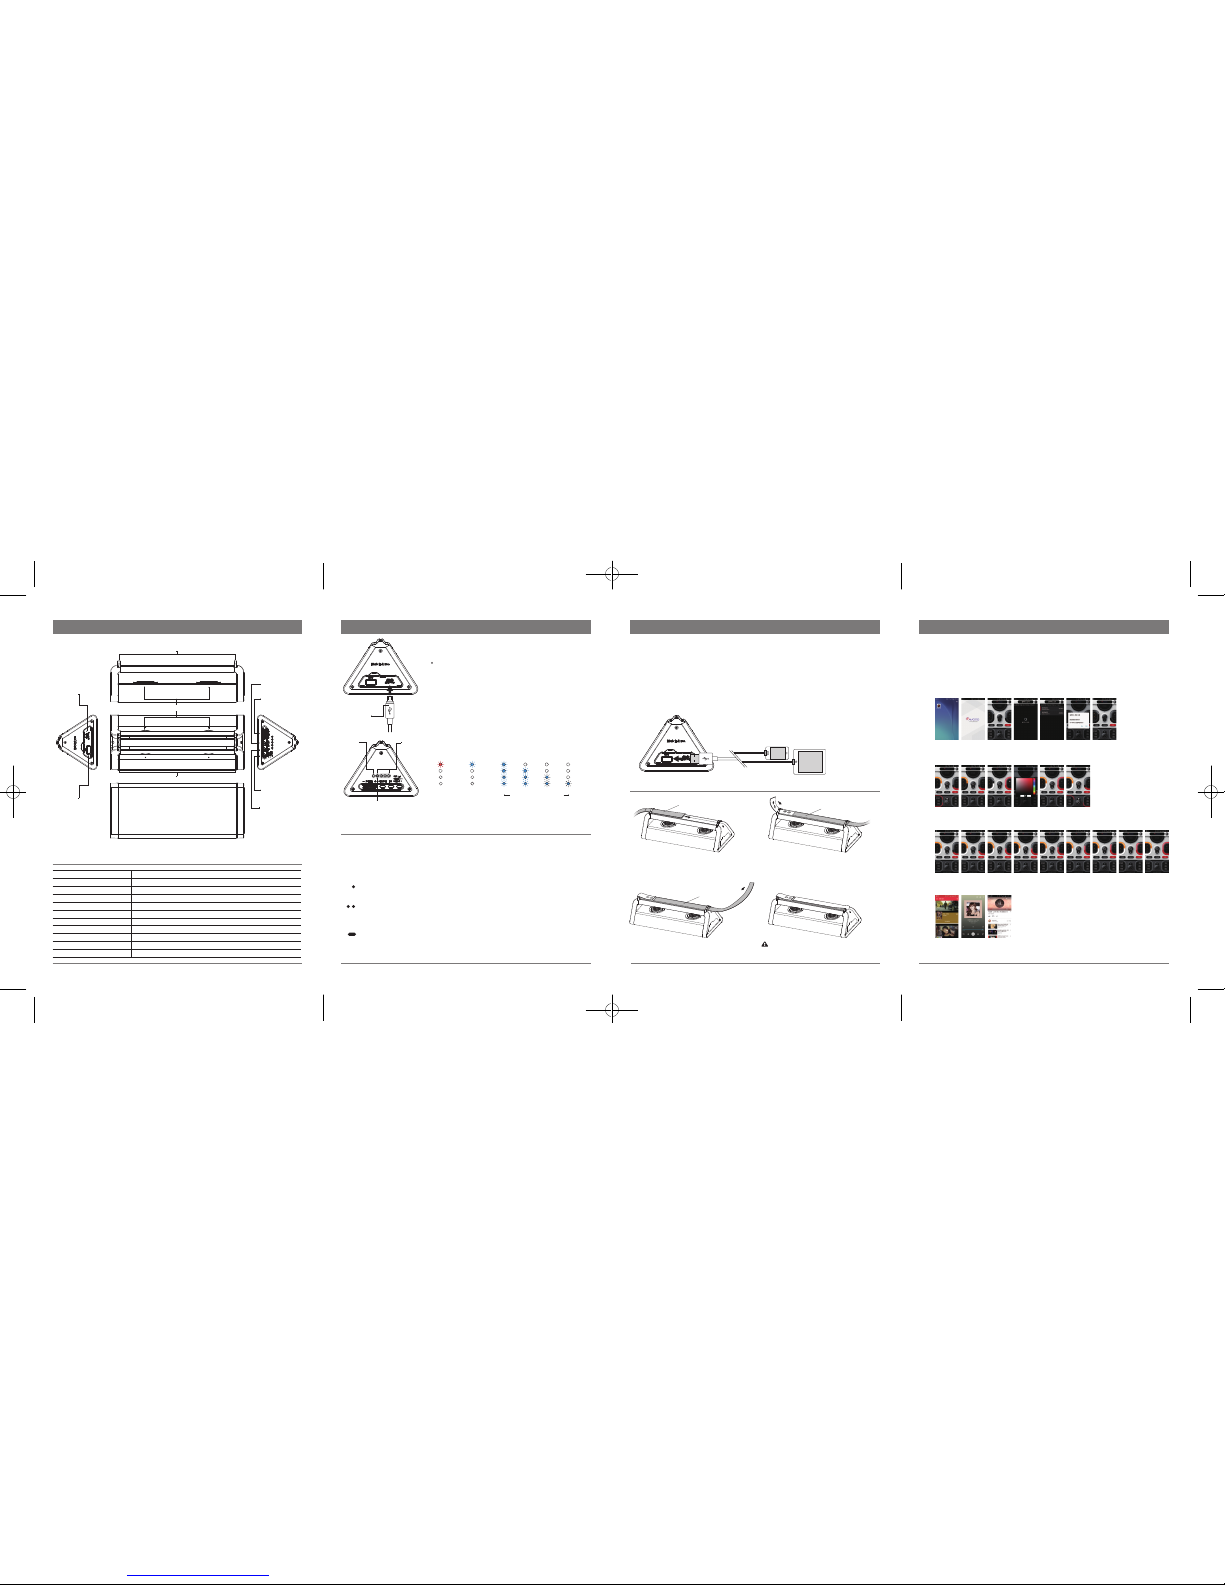
(External USB Device Charging) (for Android)
Speaker
Strap hook
Strap hook
Charging (Micro USB)
External charging
terminal (OUT) Bluetooth on/off
Battery level
Timer, SOS button
Charging
indicator (1)
Charging function indicator 95% 25%50%75%
Function status
indicator (1) Check the charging amount. (4)
External device
charging button
Micro 5-Pin
Power and
brightness control
Product name ECO-O2
LED color temperature Daylight color / Lightbulb color / Support RGB color
Audio (rated output) 7W × 2 (8Ω), Stereo
Brightness (lumen) 1500Lm ~75Lm
Use time 3~30 hr
Size 239 × 99 × 65mm
Product weight 680g
Battery capacity 10,400mAh (5,200mAh, 2S2P)
Charging time 10hrs
INPUT (charging and power) DC 5V 2A
OUTPUT (external device charging) DC 5V 1.5A
LED Lantern Function
(Turning on/off the lights, battery level check, sleep timer, SOS ash function)
설치방법
Battery
leve lindicator
lamp
Charging
indicator
lamp
Function indicator lamp
Charging function indicator
Pass the strap side with Velcro through into a hole of the
lantern hook as shown in the picture.
3. Attach the button and strap that passed through both
holes of hooks as shown in the image.
Pull Velcro that passed through a hole of the hook in the
picture No.1 to the end and pass it through the hole of
hook in the opposite side.
When applying the Velcro strap differently from
the installation guide, it may cause malfunction due to
detachment of the main part.
1
3
2
4
1. Connect Bluetooth
Download AYOUND Eco-o2 from the Android smartphone market, and run it.
The green LED will turn on when pressing the BT button for 3 s.
This is the preparation stage to connecting to the application.
Connect Android and AYOUND Eco-o2 to the Bluetooth after the app is run.
When the device and AYOUND Eco-o2 are connected, a connection message such as in the
image below will be shown.
1. Plug the the USB terminal of the device (smartphone, table PC, MP3) to the USB OUT port as
shown in the picture below and press CHARGE button once to start charging.
You can use the device as the charging begins, and when the charging is completed, the charging
will stop automatically.)
2. When the charging is completed, remove the USB terminal from the USB Out port and press
CHARGE button once to turn off the external output power. (The external output power will be
completely cut off.)
The charging time may vary depending on the battery capacity of the product and external device
and the external environment.
2. Select Mode
Set a desired mode for the user, as shown in the image below.
3. Control Brightness
You can control brightness from levels 1 to 9, as shown in the image below.
4. Support for Audio Media Bluetooth Audios
It supports various media platforms such as Media Player, Audio Player, YouTube, etc.
5. Press the BT button for 3 s to turn off the device.
(The function indicator lamp will icker in red.)
You can check the battery level by pressing the battery status
indicator button.
Disable Function: Press the on/off dial button for 2–3 s to cancel the sleep timer and SOS functions.
Two protection circuits for overcharge protection are built in the product.
Velcro Velcro
Velcro
LED light
1. Plug the charging adaptor (USB cable) into the Micro USB port
of the main part, as shown in the picture.
To protect the product from being damaged, turn off the power of the product,
start the car, and then connect the USB cable while charging it in the car.
2. The external device starts charging after connecting the device
and pressing the CHARGE button once. (The function indicator
lamp will be indicated as red.)
3. The red light turns to green when charging is completed, and
the charging amount will be indicated in four levels, as shown
in the picture.
1. On/Off Dial: Press the on/off dial for 2–3 s to turn on the lights, as shown in the picture. After
turning on the lights, it becomes brighter by turning the dial upward and becomes darker by
turning the dial in the opposite direction. Whenever pressing the on/off dial shortly, the color
and lighting quantity of the LED will change.
2. Function Button
Battery level check: The battery level is displayed in LED quantity of four levels by pressing
the function button while the power is on.
Sleep timer function: The lights will automatically be turned on 5 min after pressing the
button twice while the power is on. Three of the battery levels icker when the sleep timer
is in operation. (It will be set from 5 to 20 min when controlling an application.)
SOS Flash Function: The LED light–emitting part will flicker at regular intervals when
pressing the function button for 2 s while the power is on.

FCC 15C Statement
: This device complies with part 15 of the FCC Rules. Operation is subject to the following two conditions:
(1) This device may not cause harmful interference, and
(2) This device must accept any interference received, including interference that may cause undesired operation.
Caution: Any changes or modifications to the equipment not expressly approved by the party responsible for
compliance could void user’s authority to operate the equipment.
This appliance and its antenna must not be co-located or operation in conjunction with any other antenna or transmitter.
A minimum separation distance of 20 ㎝must be maintained between the antenna and the person for this appliance to satisfy the RF exposure
requirements.


